How to Draw a Window Washer (Easy Step by Step)
Learn how to draw a friendly window washer with easy step-by-step instructions. This guide teaches you to construct the drawing from simple round shapes, ovals, and rectangles, perfect for beginners.
- Construct your window washer drawing using round shapes, ovals, and rectangles.
- Begin by sketching the window washer's round head and apron.
- Follow simple, step-by-step instructions designed for beginners.
This post contains affiliate links. As an Amazon Associate I earn from qualifying purchases.
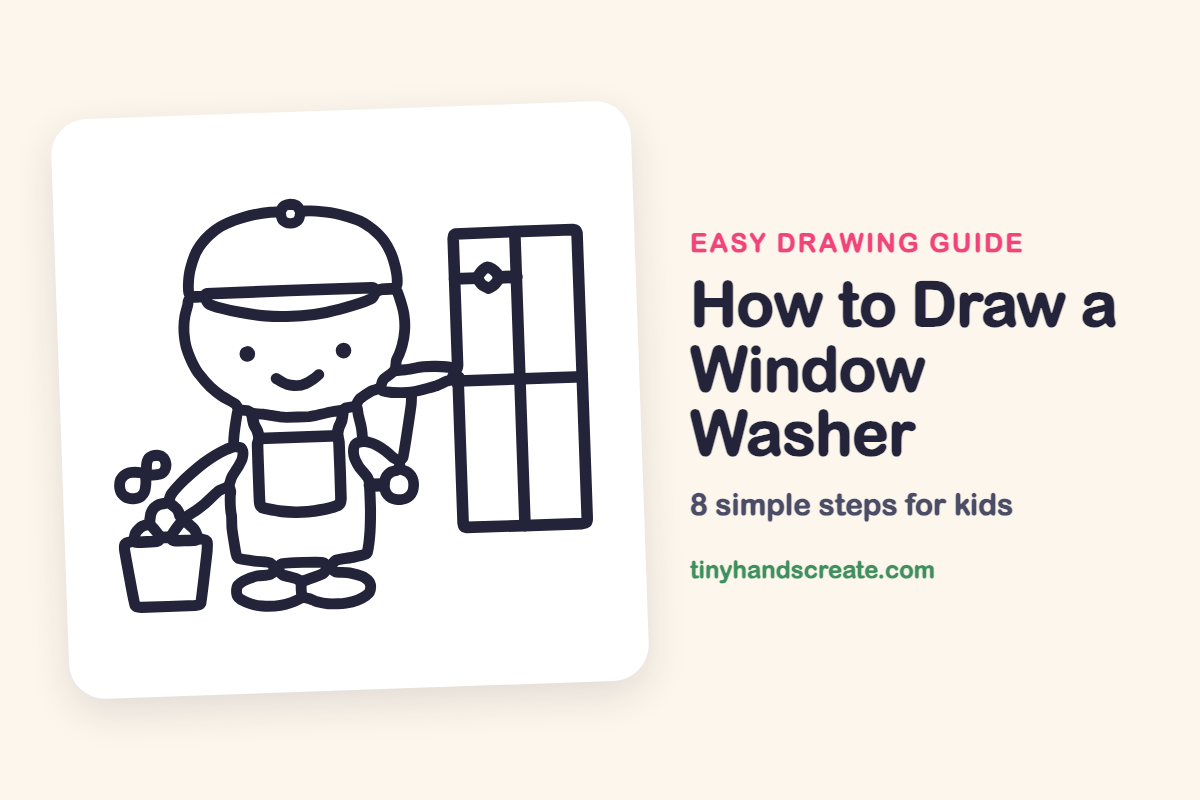
A window washer is a friendly helper with a squeegee, a bucket of soapy water, and a big window to clean. This drawing is built from round shapes, ovals, and rectangles, so it is a great one for beginners. Once you can draw the round head and the apron, the rest is just a few simple shapes.
- Easy
- 15 minutes
- 8 steps
You need: paper, a pencil, an eraser, and crayons or markers for coloring.
Start drawing

In this article (7 sections)
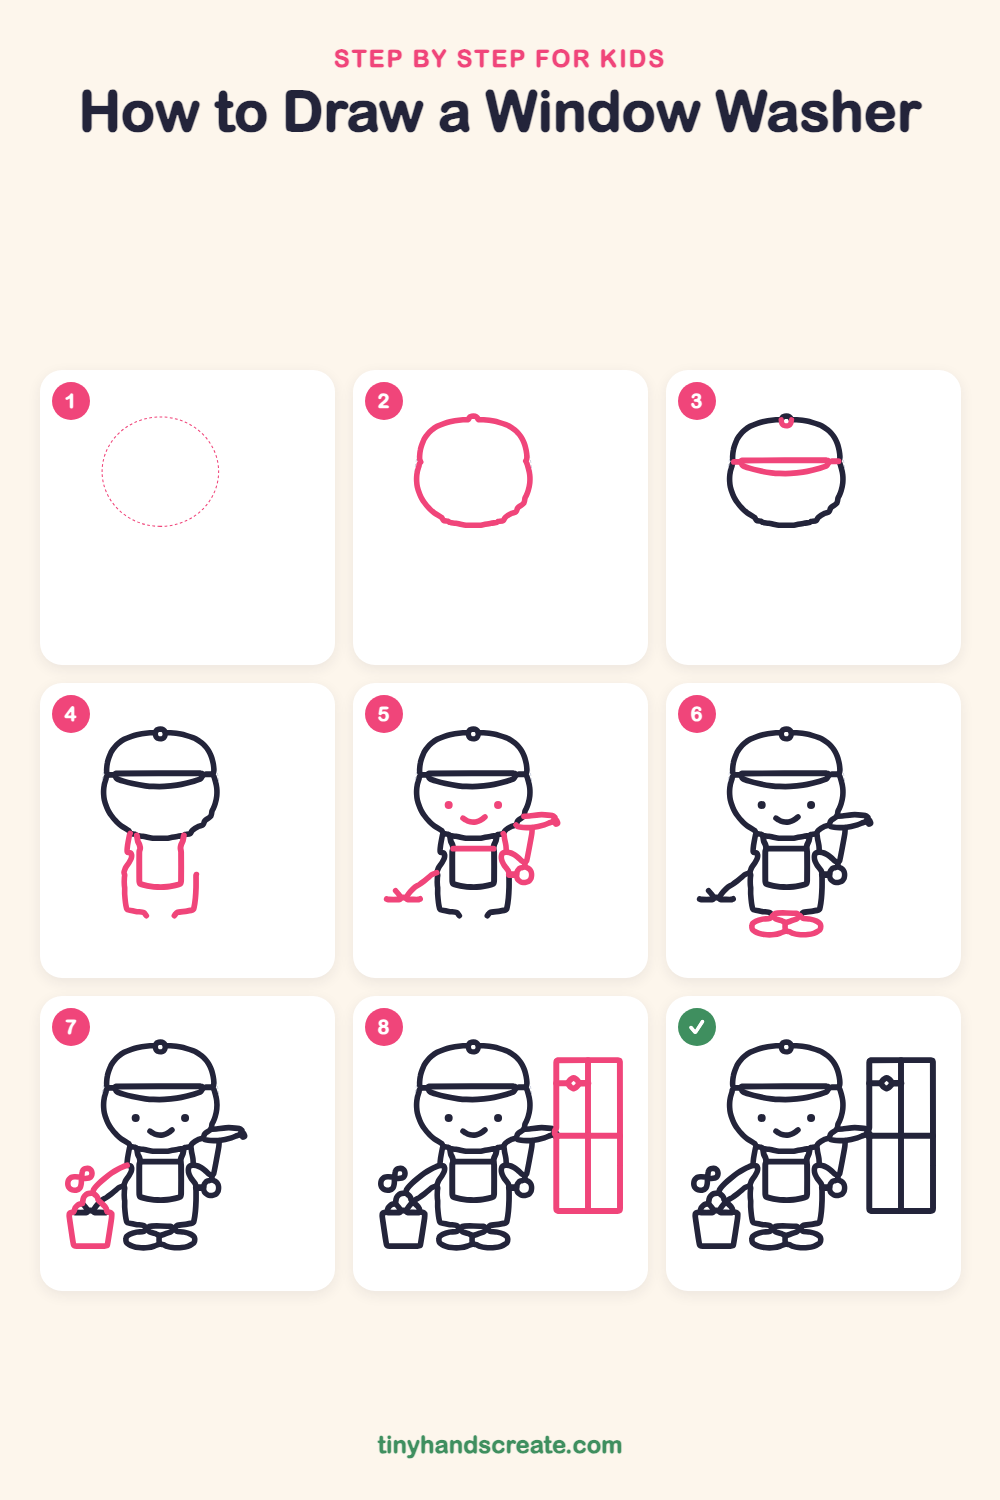
How to draw a window washer step by step
How to Draw a Window Washer · tinyhandscreate.com
Step 1: Guide shapes
Lightly sketch this oval. It only shows where the big parts go, so press softly. You will erase it at the end.
Step 2: Round head outline
Draw a big round shape for the head, a little wider than it is tall, with a tiny bump at the top. Make it nice and smooth.
Step 3: Cap brim and button
Draw a straight line across the head for the bottom of the cap, then a curved smile-shaped line just under it for the brim. Add a tiny circle on the very top of the head for the cap button.
Step 4: Body and apron
Under the head, draw a rounded U shape for the apron, with a short line going up on each side. Then draw two wavy lines down from the sides for the body and legs.
Step 5: Face, arms and squeegee
Add two little dots for eyes and a happy curved smile. Draw a short line across the top of the apron, then an arm on the right that ends in a small circle for the hand, holding a long handle with a flat squeegee at the top. On the left, draw a long arm that reaches down to the ground.
Step 6: Two oval shoes
Draw two ovals side by side at the bottom of the legs for shoes. Let them touch in the middle.
Step 7: Bucket and bubbles
Draw a bucket that is wider at the top and narrower at the bottom, down on the left. Then add a few small loops and circles above it for soap bubbles, with the left arm reaching into the bucket.
Step 8: The window and latch
On the right, draw a tall rectangle for the window, with a line down the middle and a line across it to make four panes. Add a tiny diamond latch on the upper left pane.
All done!
Erase the guide shapes, go over your lines, then color it in.
Finished your window washer? Keep the pencils out and learn how to draw a rock climber or how to draw a lacrosse player next.
Tips for drawing a window washer
- Draw the head first and keep it big, then add the cap line and the curved brim across it.
- The arms are the trickiest part. Take your time and draw each one as a long, skinny shape that bends a little, then add a small circle for the hand.
- Use a ruler or the edge of a book for the window. Straight lines make the four panes look neat.
Free window washer coloring page
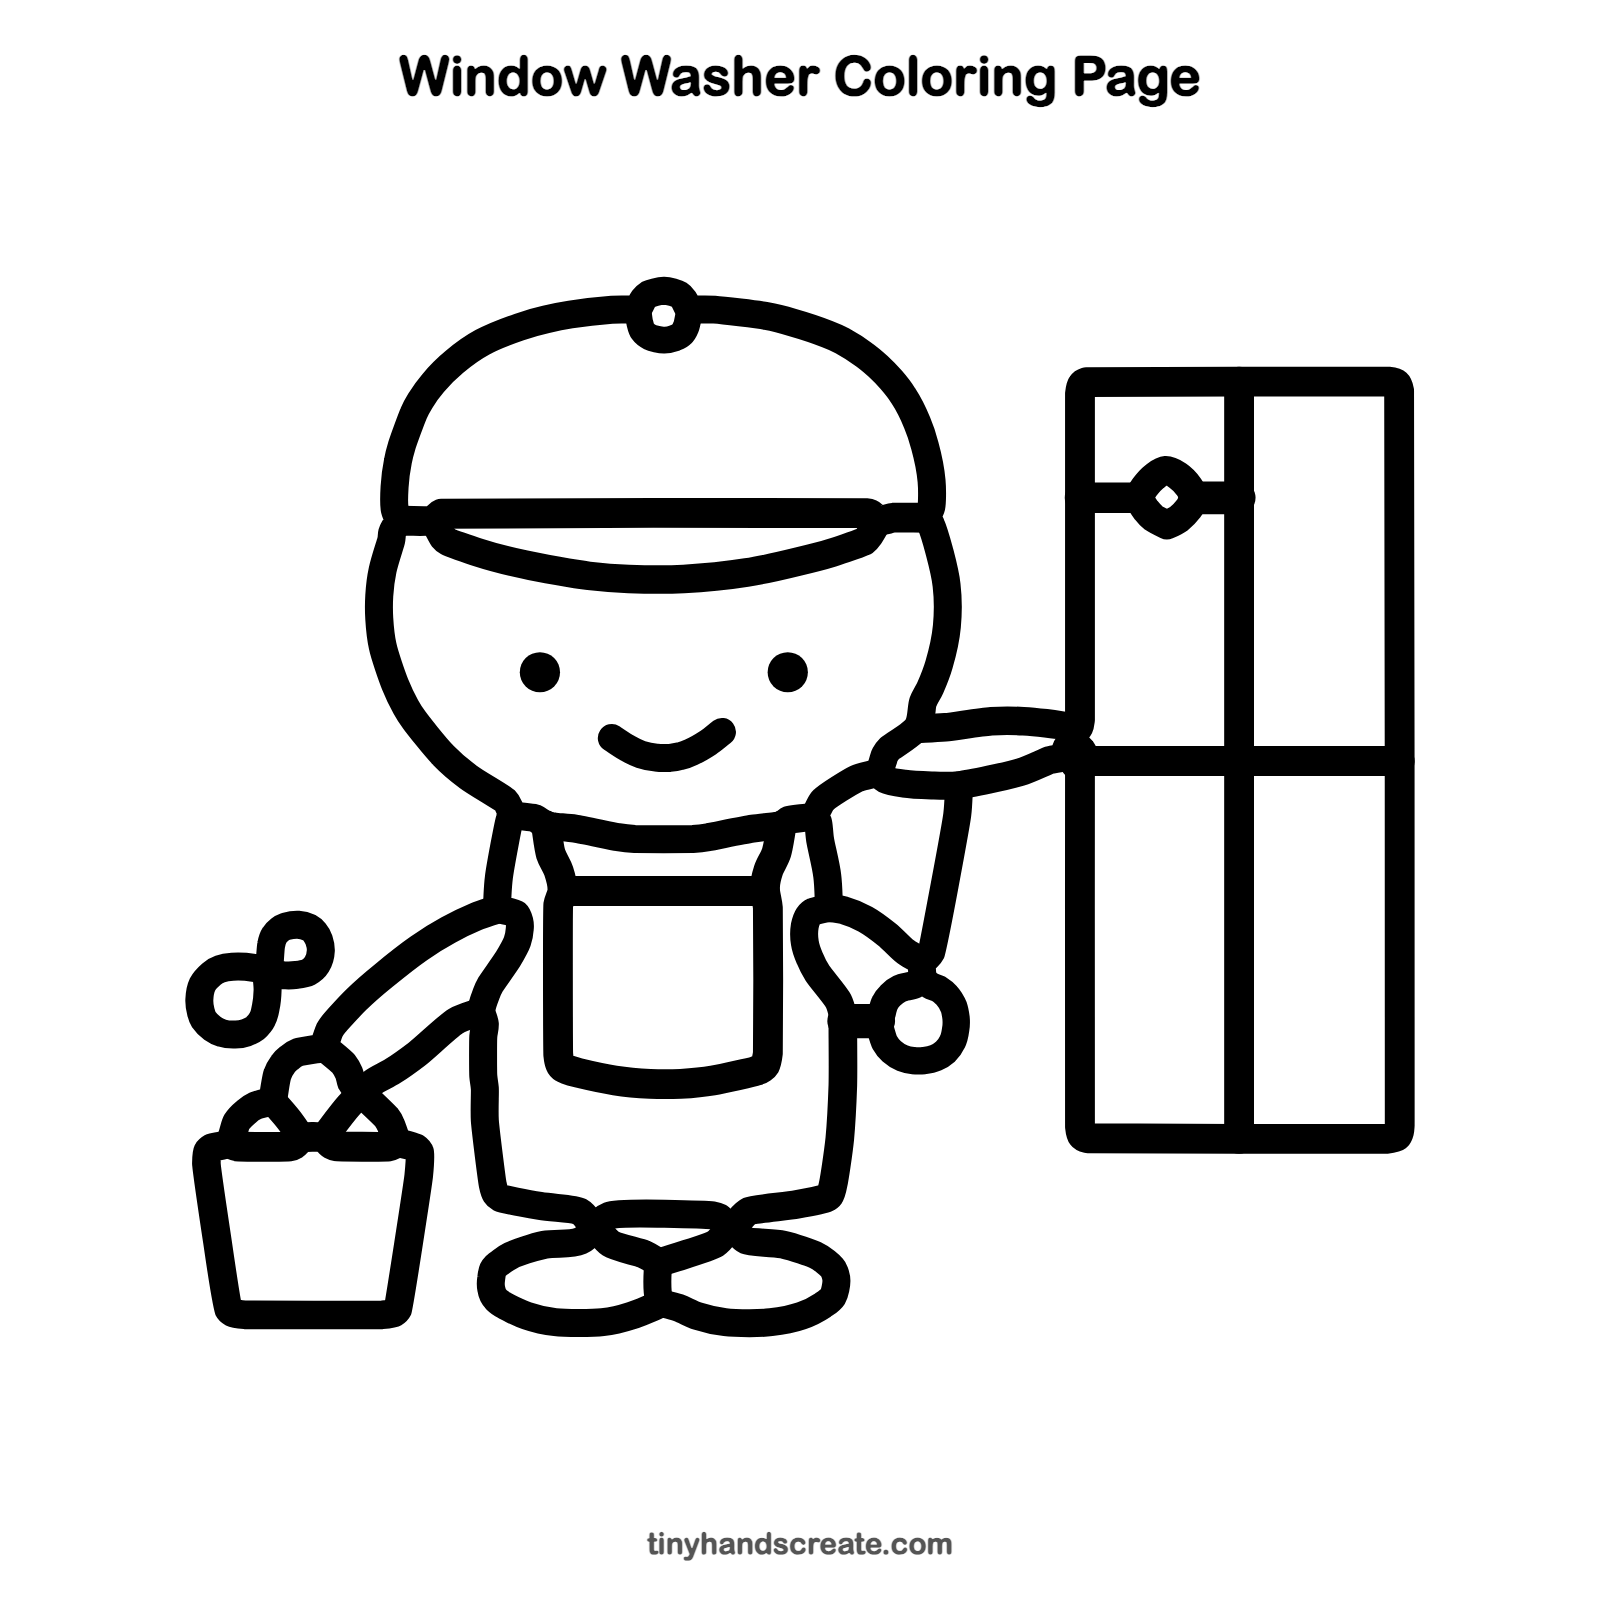
Want to go straight to coloring? Open this window washer coloring page at full size and print it. It is the same drawing you just learned, with clean lines ready for crayons or markers.
How to color your window washer drawing
Try a bright blue cap and apron, a yellow bucket, and pale blue glass in the window. For a creative twist, color the soap bubbles in rainbow colors.
Window washer fun fact for kids
A squeegee is a tool with a rubber blade on a handle. Window washers use it to pull soapy water off the glass in one smooth stroke.
Questions about drawing a window washer
What shapes do I need to draw a window washer?
You need a round shape for the head, ovals for the shoes, and a rectangle for the window. The apron is a rounded U shape and the bucket is wider at the top than at the bottom.
How do I make my window washer look cuter?
Make the head extra big and keep the eyes small and far apart, with a wide smile. Adding a few bubbles near the bucket makes the scene feel cheerful.
How do I draw the squeegee?
Draw a long thin line for the handle, starting at the hand, and finish it with a flat oval at the top for the blade. Keep the blade next to the window so it looks like it is cleaning.