How to Draw a Roller Skater (Easy Step by Step)
This post contains affiliate links. As an Amazon Associate I earn from qualifying purchases.
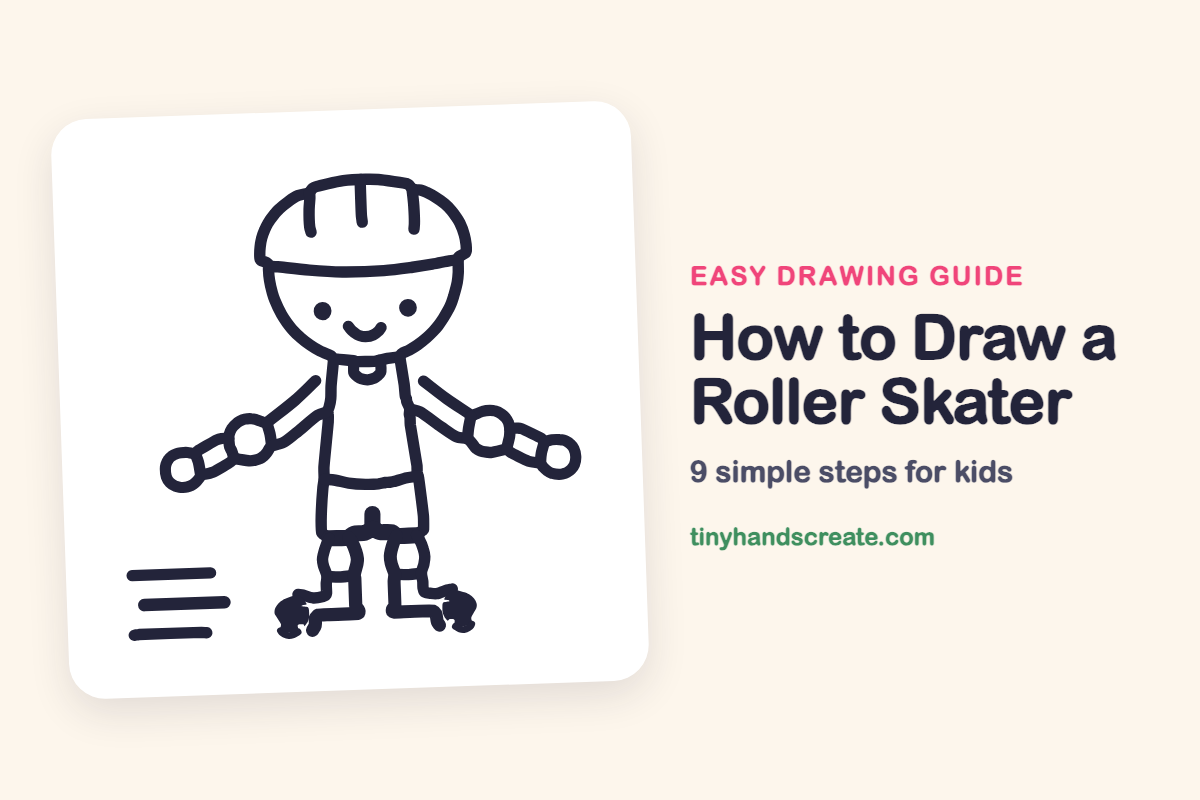
A roller skater is a fun drawing because the character looks ready to roll right off the page. It is built from simple shapes: a circle for the head, little circles for the elbow pads and wrist guards, and a tall body shape. Start with the big head and body and add the small pieces last.
- Medium
- 15 minutes
- 9 steps
You need: paper, a pencil, an eraser, and crayons or markers for coloring.
Start drawing
In this article (7 sections)
How to draw a roller skater step by step
How to Draw a Roller Skater · tinyhandscreate.com
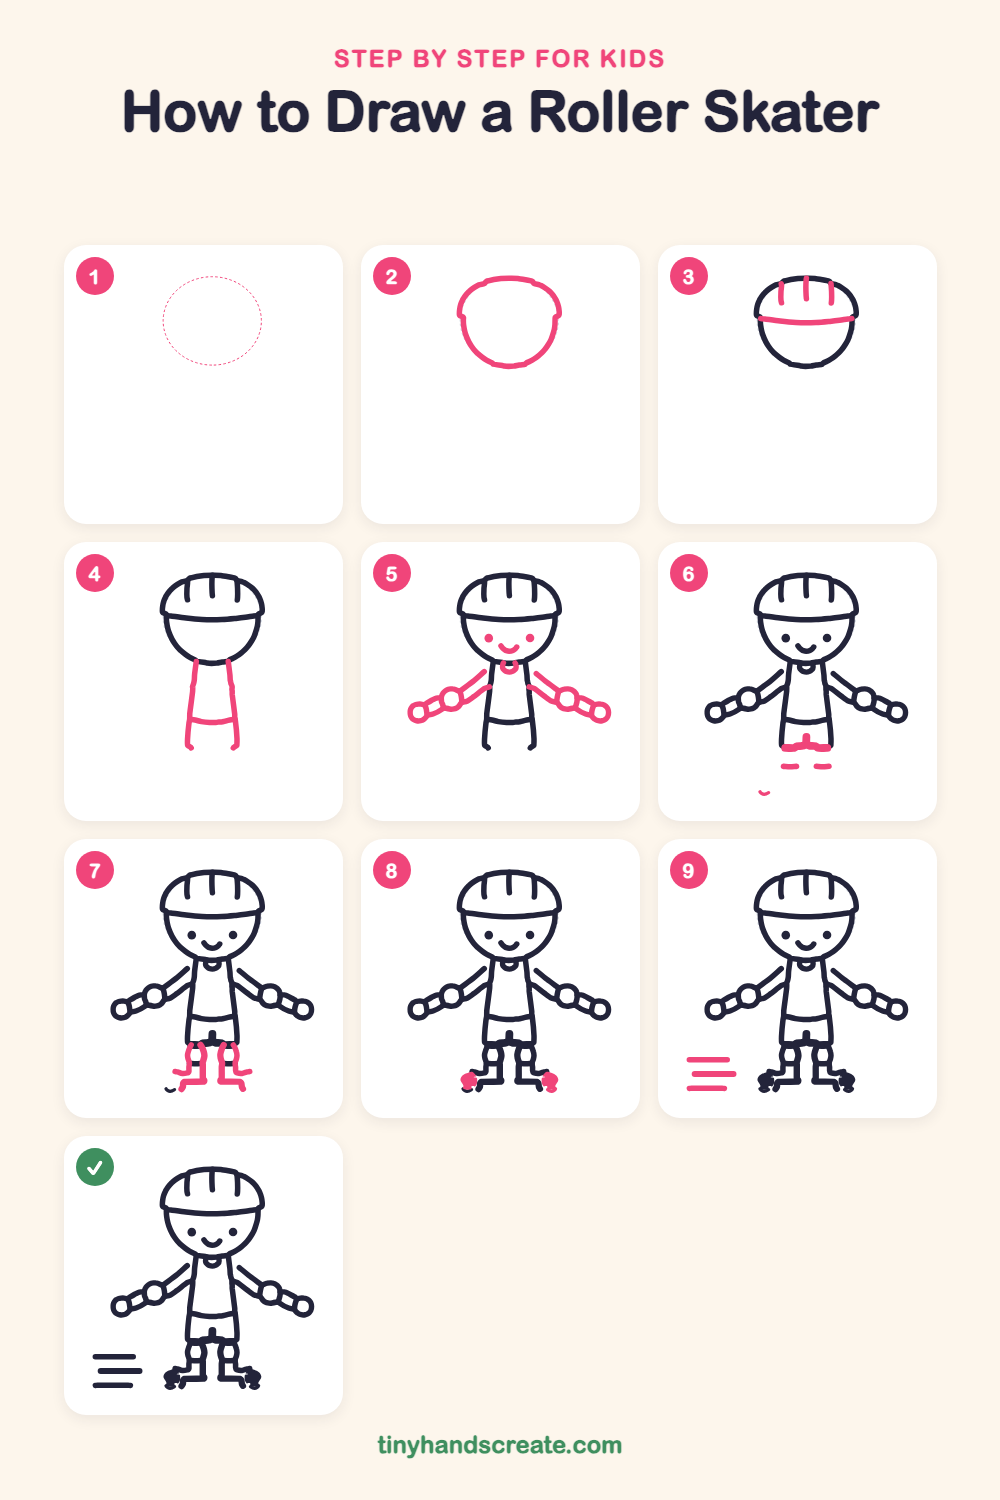
Step 1: Guide shapes
Lightly sketch this oval. It only shows where the big parts go, so press softly. You will erase it at the end.
Step 2: The round head
Draw a big circle for the head. Make the top a little flatter and wider than the bottom, like a dome.
Step 3: Helmet band and vents
Draw a gently curved line across the head, just below the top, for the helmet strap. Then add three short lines going up from the strap into the dome for the helmet vents.
Step 4: The body
Under the head, draw two straight lines going down that spread out a little, like a tall rectangle with no top or bottom. Add a short curved line across near the bottom for the waistband.
Step 5: Face, neckline and arms
Add two dots for eyes and a curved smile on the face, and a tiny curved neckline just under the chin. Then draw a slanted arm out from each shoulder, with a circle partway along for the elbow pad and a circle at the end for the wrist guard.
Step 6: The shorts
Draw a short line across the bottom of the body with a small bump in the middle between the legs. Then add one short dash below it on each side for the bottoms of the shorts.
Step 7: Legs, pads and boots
Draw two short legs going down from the shorts, with a rounded knee pad around the top of each one. At the bottom of each leg, draw a boot that bends out to the side like a flat foot.
Step 8: Skate wheels
At the outer end of each boot, draw a small bunch of little circles for the skate wheels.
Step 9: Speed lines
To the left of the skater, draw three straight lines, one above the other. They show how fast the skater is rolling.
All done!
Erase the guide shapes, go over your lines, then color it in.
Finished your roller skater? Keep the pencils out and learn how to draw a gondola or how to draw a mail truck next.
Tips for drawing a roller skater
- Draw the helmet strap as a gentle curve, not a straight line. It makes the head look round.
- The elbow pads and wrist guards are the trickiest parts, so draw each one as a small circle on the arm line.
- Keep the wheels small and close together at the end of each boot. Add them last.
Free roller skater coloring page
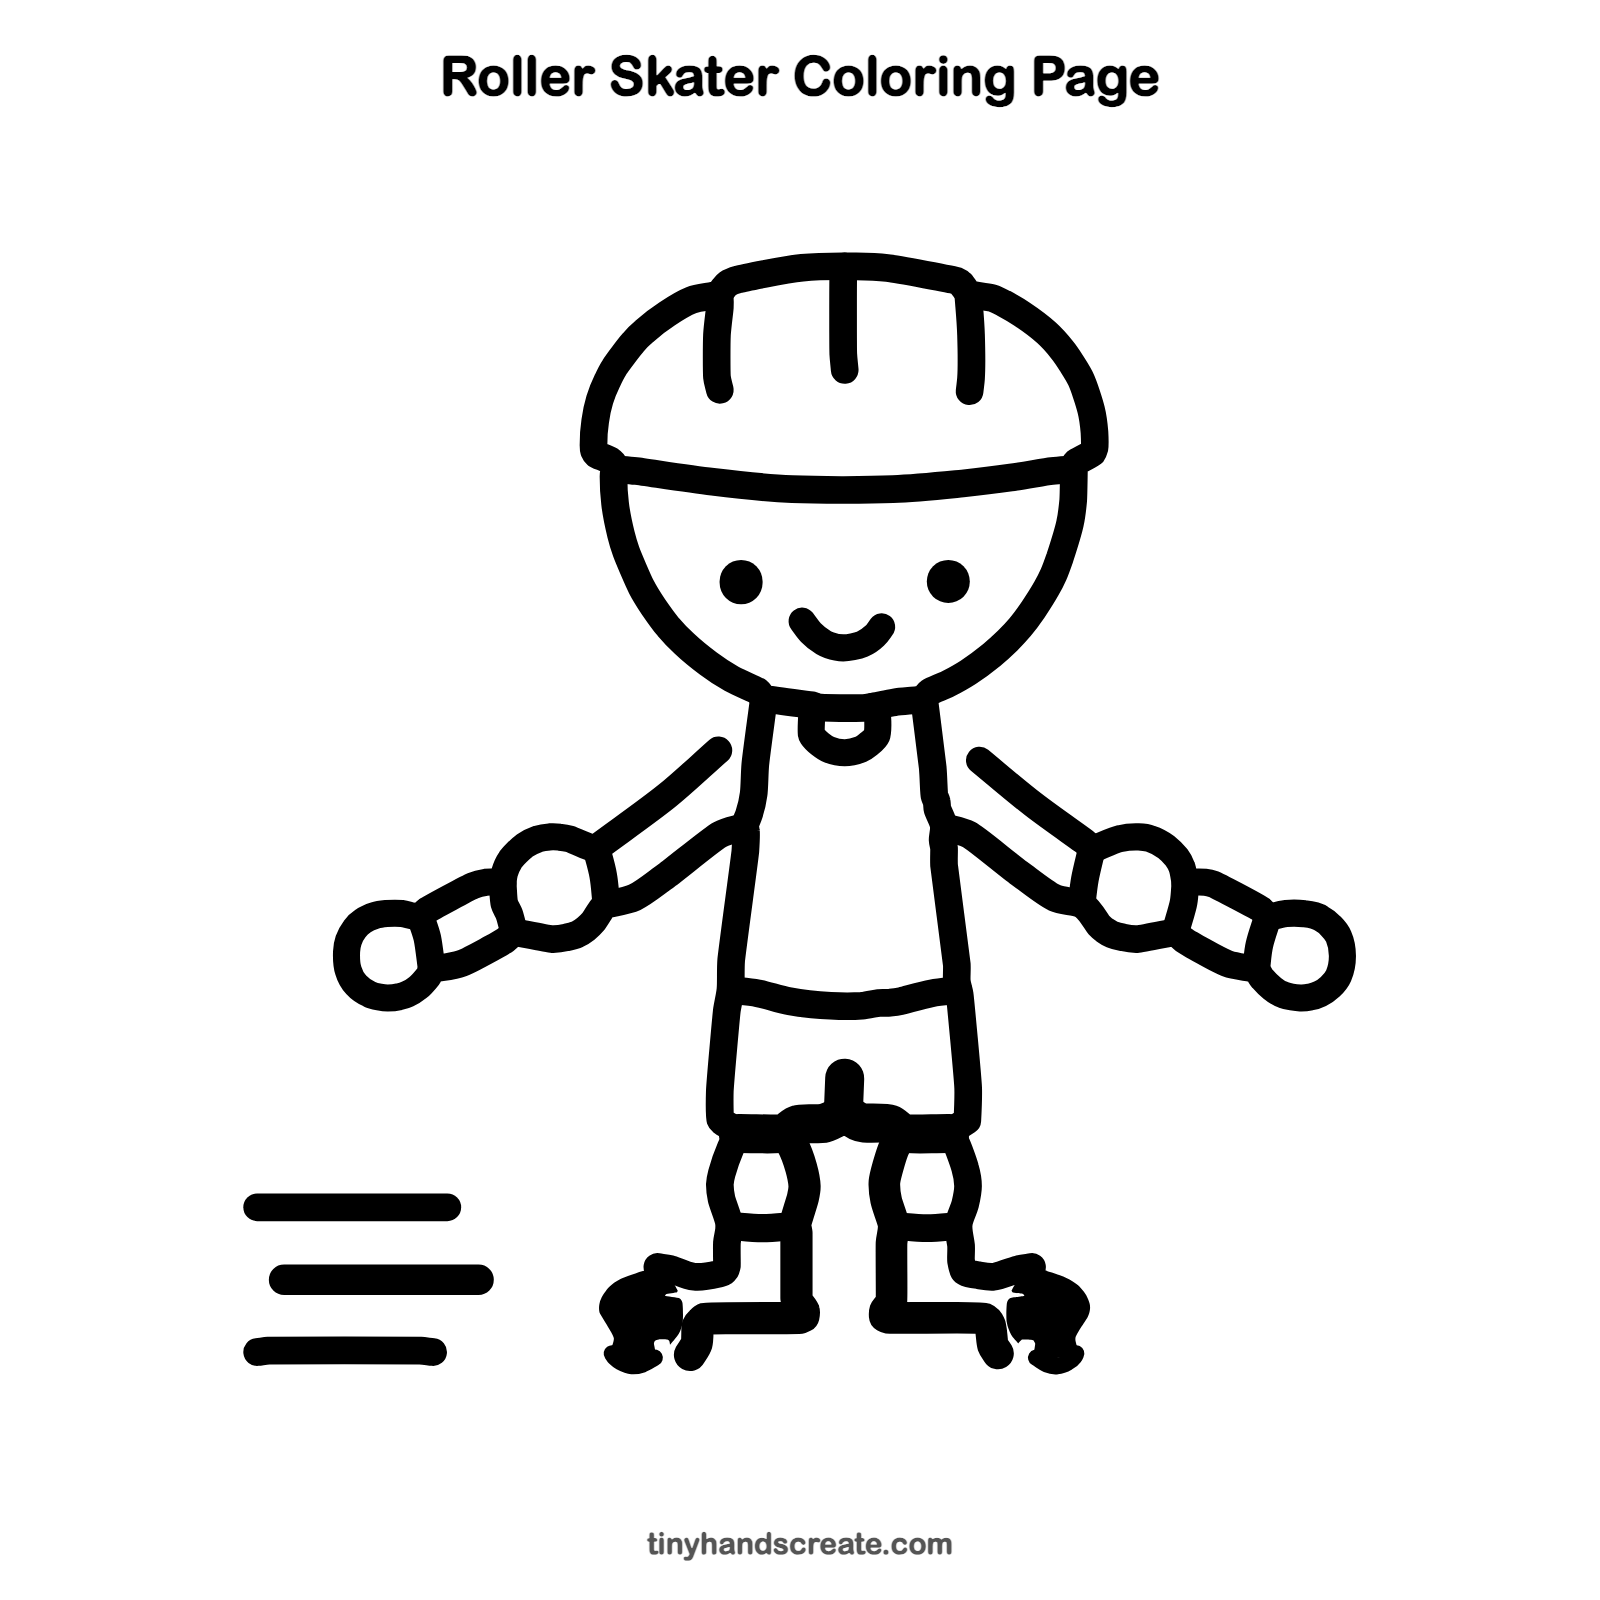
Want to go straight to coloring? Open this roller skater coloring page at full size and print it. It is the same drawing you just learned, with clean lines ready for crayons or markers.
How to color your roller skater drawing
Try a bright red helmet with matching pads, and a blue top. For a creative twist, color the speed lines in rainbow stripes.
Roller skater fun fact for kids
In 1863, James Plimpton of New York invented the quad roller skate, which has two wheels at the front and two at the back.
Questions about drawing a roller skater
What shapes do I need to draw a roller skater?
You need a circle for the head and small circles for the elbow pads, wrist guards and wheels. You also need a tall body shape and a few curved lines for the helmet strap and shorts.
How do I make my roller skater look like it is moving?
Add the three speed lines next to the skater. You can also make the lines a little longer or add more of them.
How do I draw the wheels?
Draw a small bunch of little circles at the outer end of each boot, and keep them about the same size.