How to Draw a School Desk (Easy Step by Step)
This post contains affiliate links. As an Amazon Associate I earn from qualifying purchases.
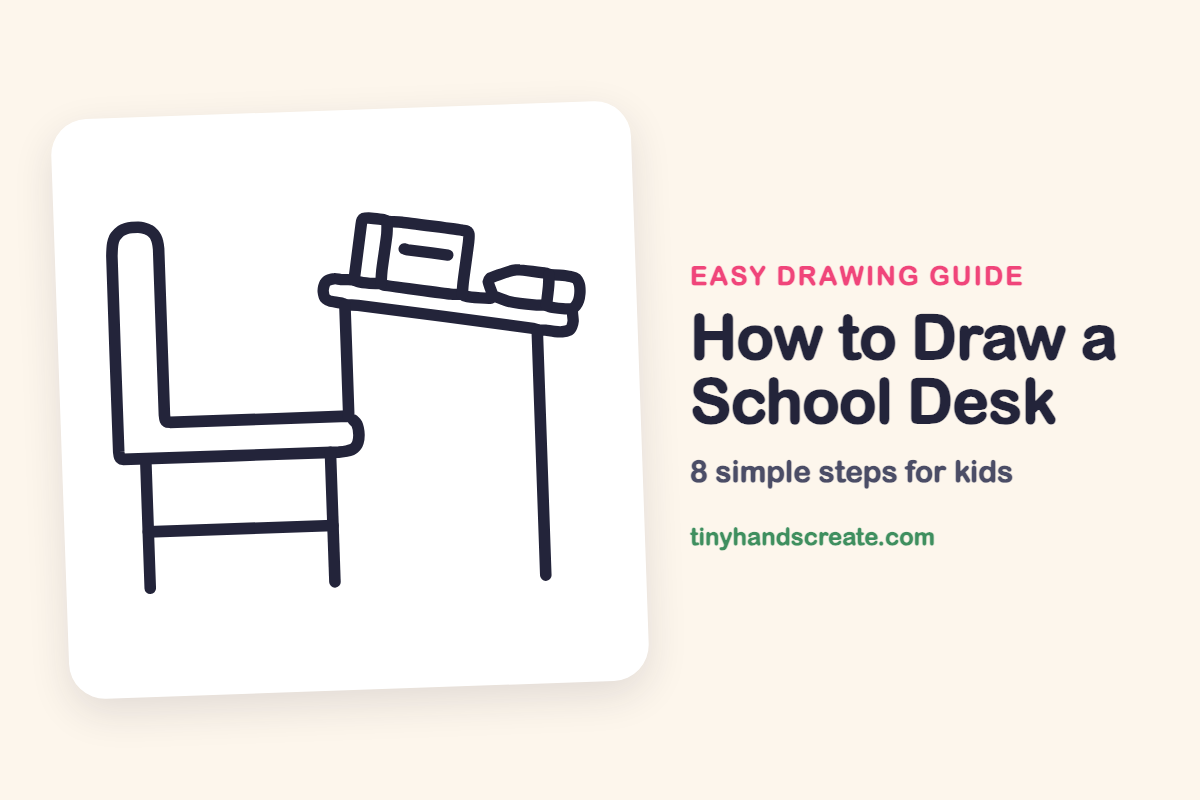
A school desk is a fun first drawing because it is made almost entirely of straight lines and a few rounded corners. You will build a chair from a long L shape, add a thin tilted desktop with a pencil on it, and finish with a book that sits on top.
- Easy
- 10 minutes
- 8 steps
You need: paper, a pencil, an eraser, and crayons or markers for coloring.
Start drawing
In this article (7 sections)
How to draw a school desk step by step
How to Draw a School Desk · tinyhandscreate.com
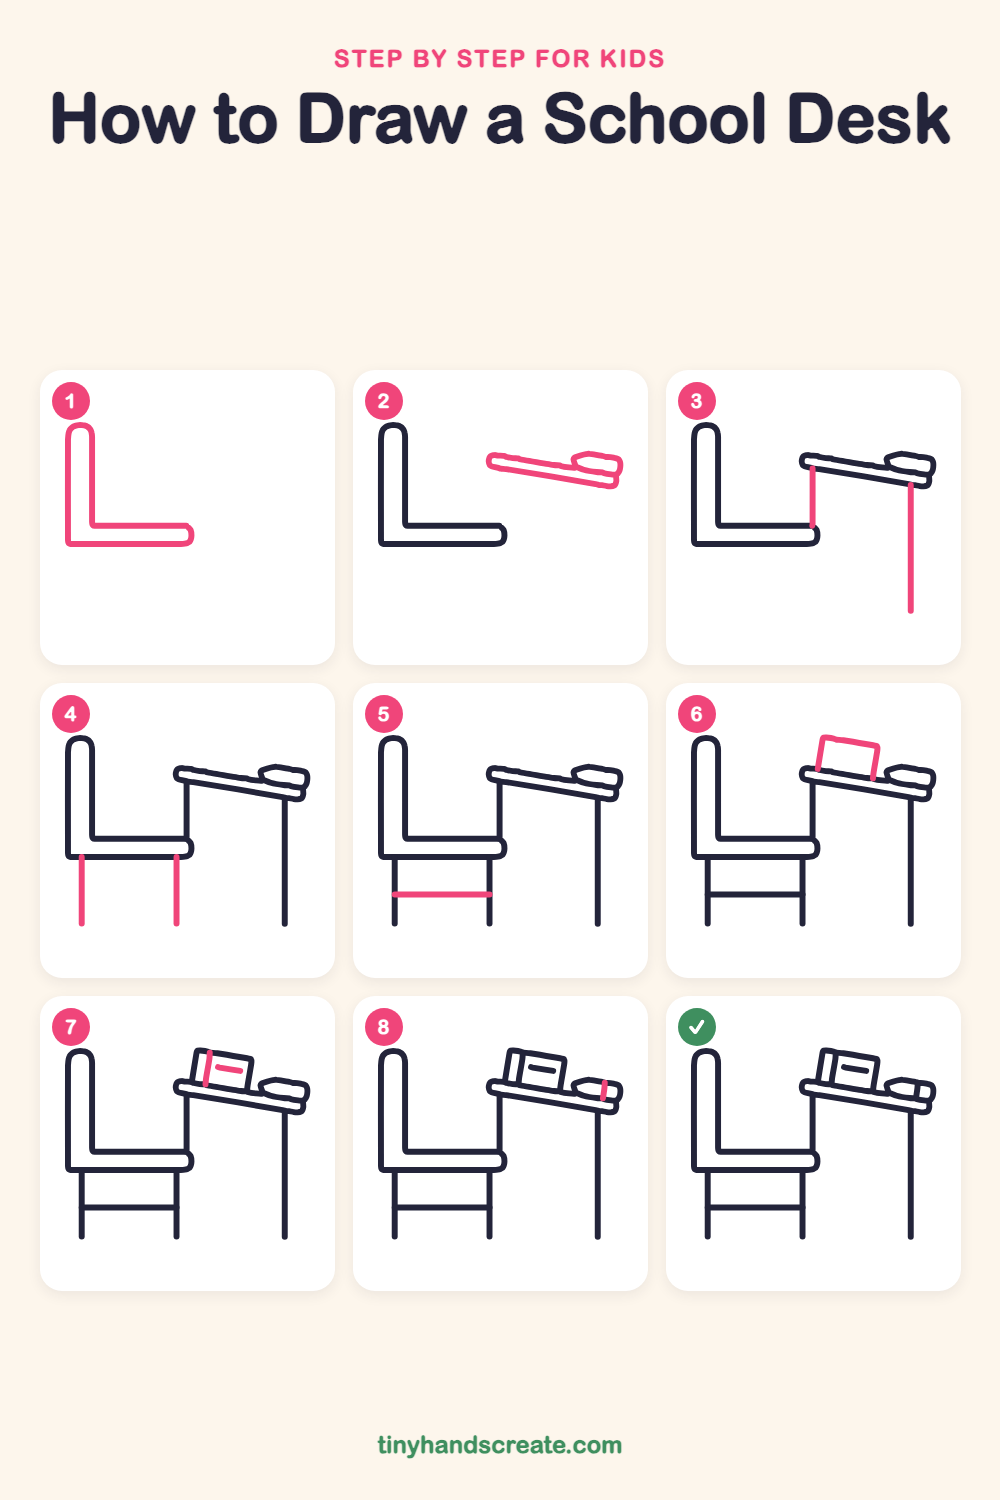
Step 1: The chair seat and back
Start with a tall rounded rectangle for the chair back on the left. At the bottom, turn the line to the right and draw a long flat seat with a rounded end, so the whole chair looks like a big letter L.
Step 2: The desktop and pencil
On the right, draw a long, thin rectangle that tilts down a little to the right for the top of the desk. Near its right end, add a small pencil shape with a pointed tip lying on the desktop.
Step 3: The desk legs
Draw a short straight line going down from the left end of the desktop to the chair seat. Then draw one tall straight line down from the right end of the desktop to the floor.
Step 4: The chair legs
Under the chair seat, draw two straight lines going down toward the floor, one near the back and one near the front. Make them the same length so the chair stands up straight.
Step 5: The chair bar
Draw one straight line across between the two chair legs, about halfway down. It holds the legs together.
Step 6: The book
Sit a rectangle on the left part of the desktop, tilted to match the desk. Make it a little wider than it is tall, like a book lying on the desk.
Step 7: Book spine and title
Draw a short straight line down the left side of the book, close to its edge, for the spine. Then add a small flat line in the middle of the cover for the title.
Step 8: The pencil band
On the pencil at the right end of the desktop, add one tiny line across the pencil near its right end to show the band where the eraser begins.
All done!
Go over your lines with a marker, then color it in.
Finished your school desk? Keep the pencils out and learn how to draw a paintbrush or how to draw a pencil case next.
Tips for drawing a school desk
- Draw the chair as one smooth L-shaped line without lifting your pencil. The rounded corner at the top and the rounded end of the seat make it look soft and comfy.
- Tilt the desktop just a little, going down toward the right. Then tilt the book the same way so it looks like it sits on the desk.
- Use a ruler or the edge of a piece of paper to guide the legs. Make the two chair legs the same length and stop them at the same line on the floor.
Free school desk coloring page
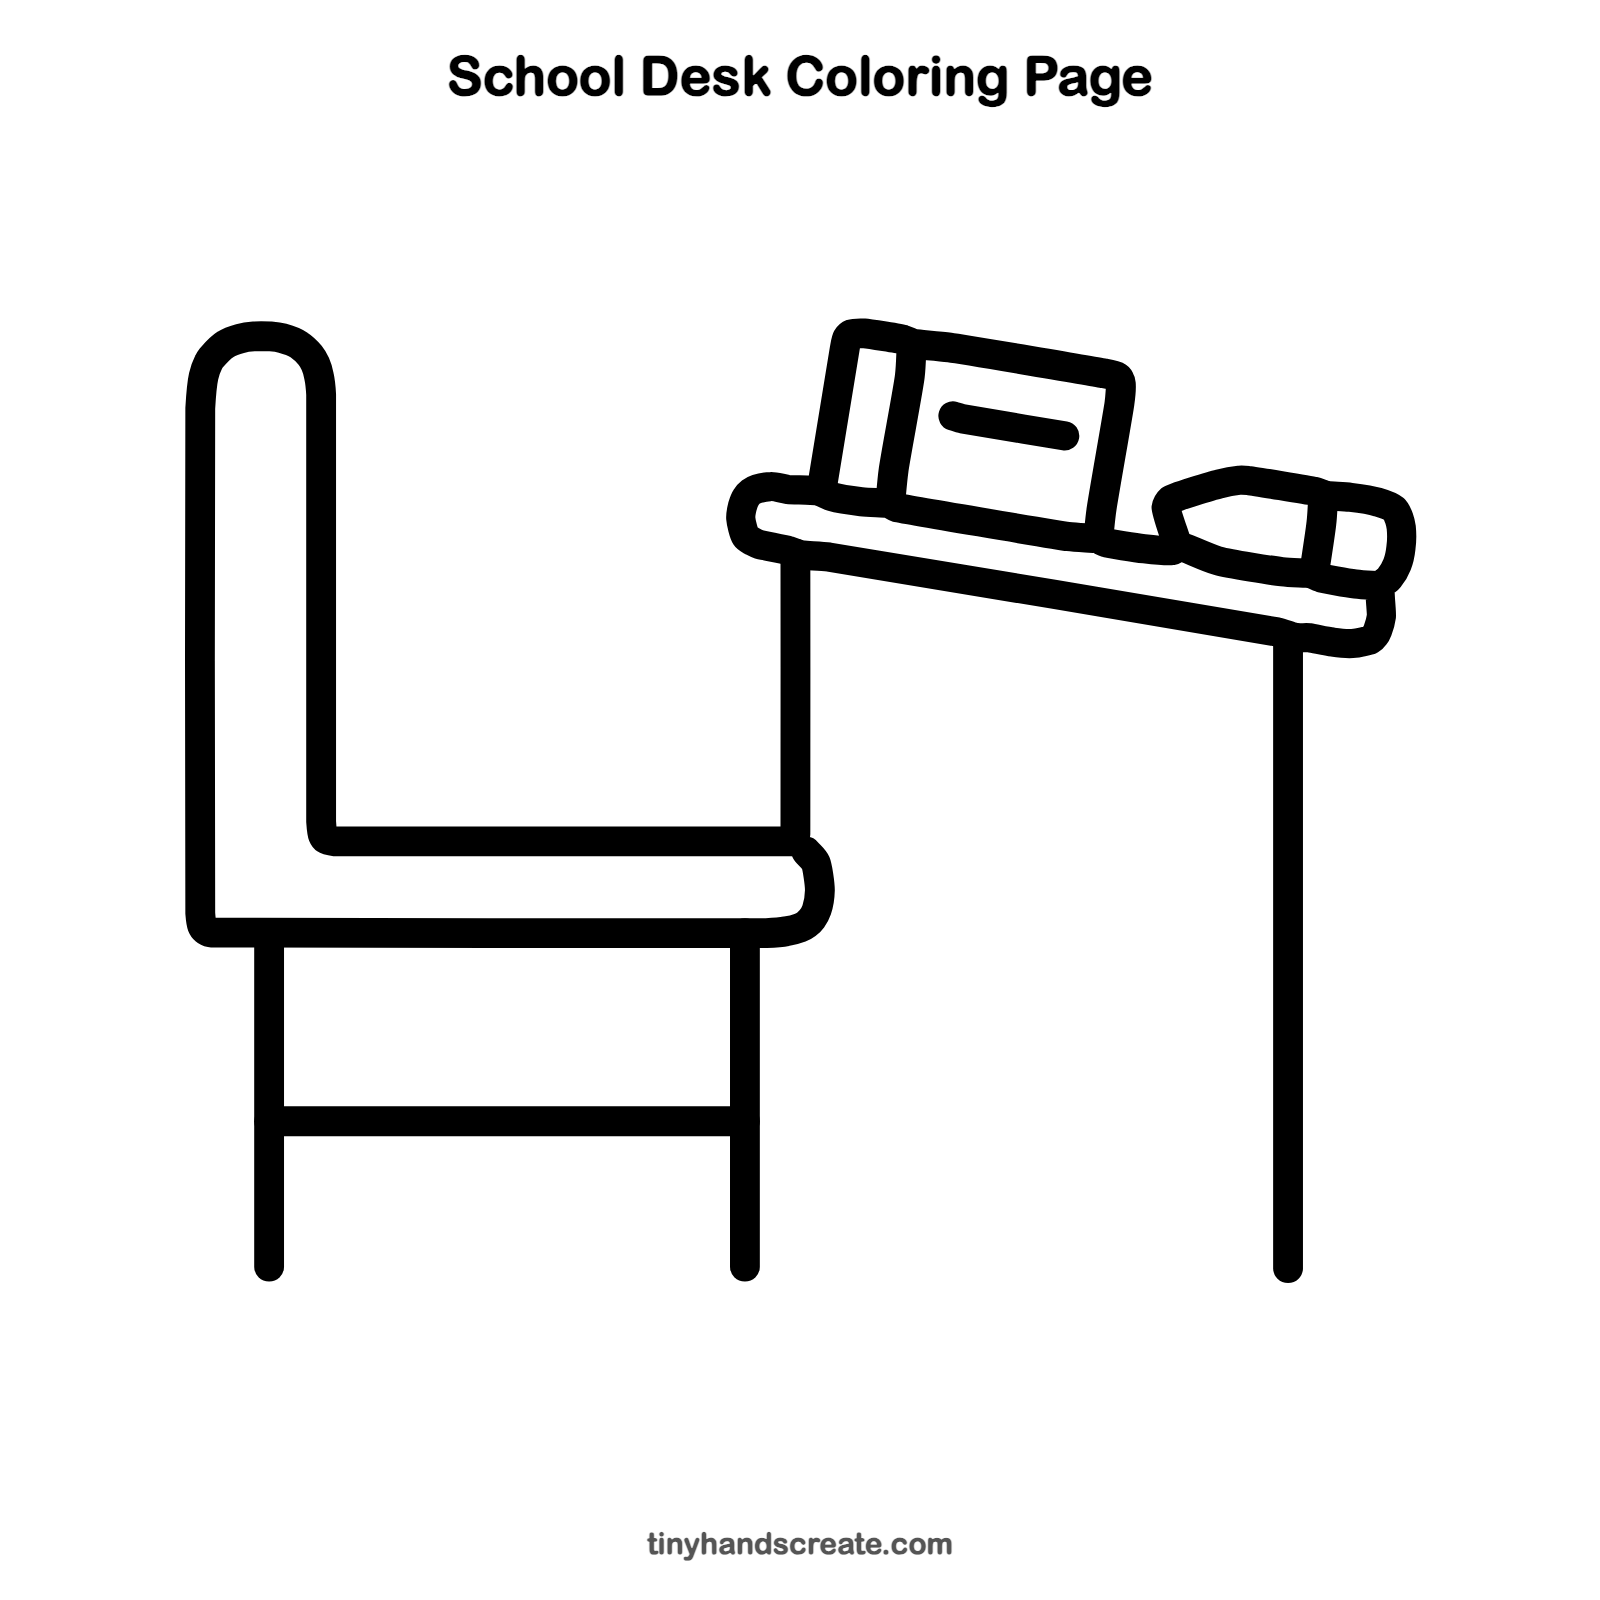
Want to go straight to coloring? Open this school desk coloring page at full size and print it. It is the same drawing you just learned, with clean lines ready for crayons or markers.
How to color your school desk drawing
Try warm wood brown for the desktop, bright blue for the chair, and a red or green cover for the book. Color the pencil yellow and the little band at its end pink.
School desk fun fact for kids
In 1858, an American inventor named Hymen Lipman received a United States patent for a pencil with a small eraser attached to one end.
Questions about drawing a school desk
What shapes do I need to draw a school desk?
You need rectangles and straight lines. The chair is a long L shape, the desktop is a thin rectangle, and the legs are simple lines.
How do I make my school desk look like it is sitting on the floor?
Stop all the legs at the same line near the bottom of your paper. A light line on the floor under them will help them look steady.
How can I make my school desk drawing more fun?
Add things to the desk, like more books, a pencil case, or an apple for the teacher. You can also color the book cover and the pencil in your favorite colors.