How to Draw a Roller Coaster (Easy Step by Step)
Learn how to draw a roller coaster with easy step-by-step instructions. You'll use simple shapes like curves, straight lines, and circles to create hills, loops, and supports for a fun drawing.
- Build your roller coaster using curves and straight lines.
- Start your drawing with a tall hill.
- Form the loop with a big circle.
- Add crossed lines for the coaster's supports.
- Draw little cars with riders for a realistic touch.
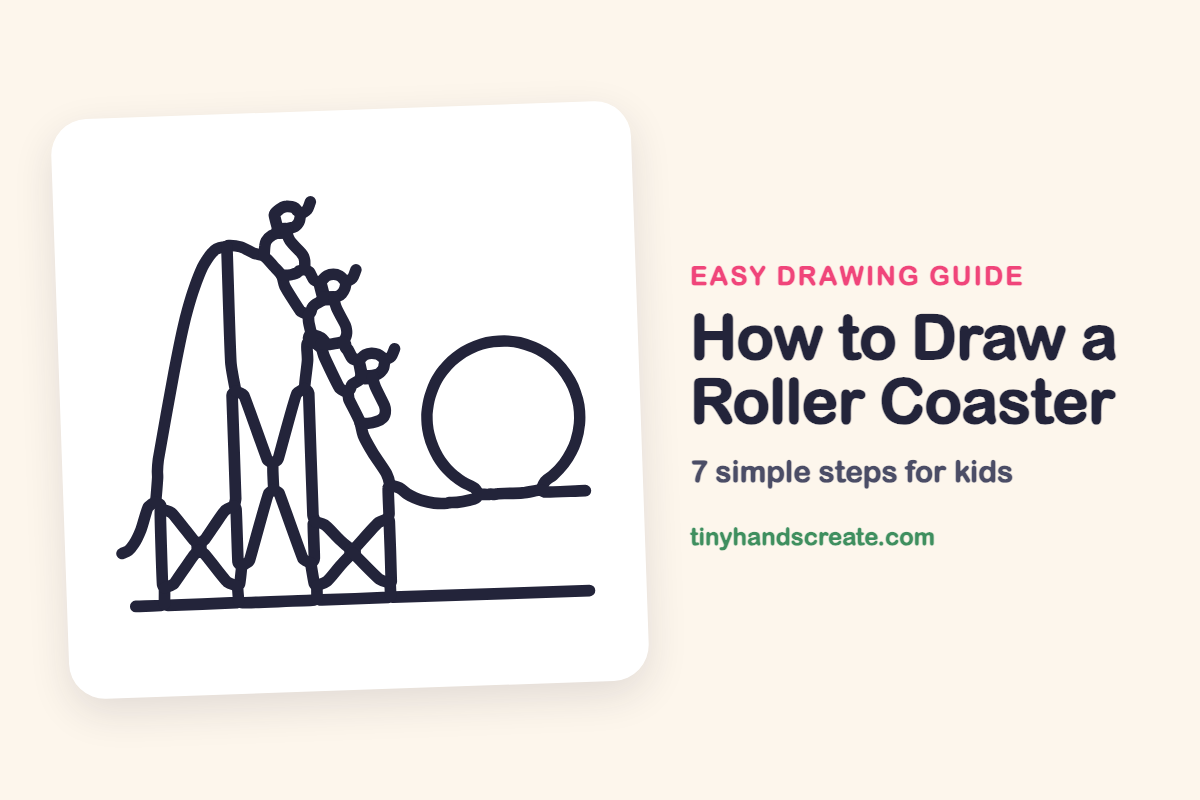
A roller coaster is a fun one to draw because it is mostly curves and straight lines. You will build it from a tall hill, a big circle for the loop, and some crossed lines for the supports. The little cars with their riders make it feel like a real ride.
- Medium
- 15 minutes
- 7 steps
You need: paper, a pencil, an eraser, and crayons or markers for coloring.
Start drawing
In this article (7 sections)
How to draw a roller coaster step by step
How to Draw a Roller Coaster · tinyhandscreate.com
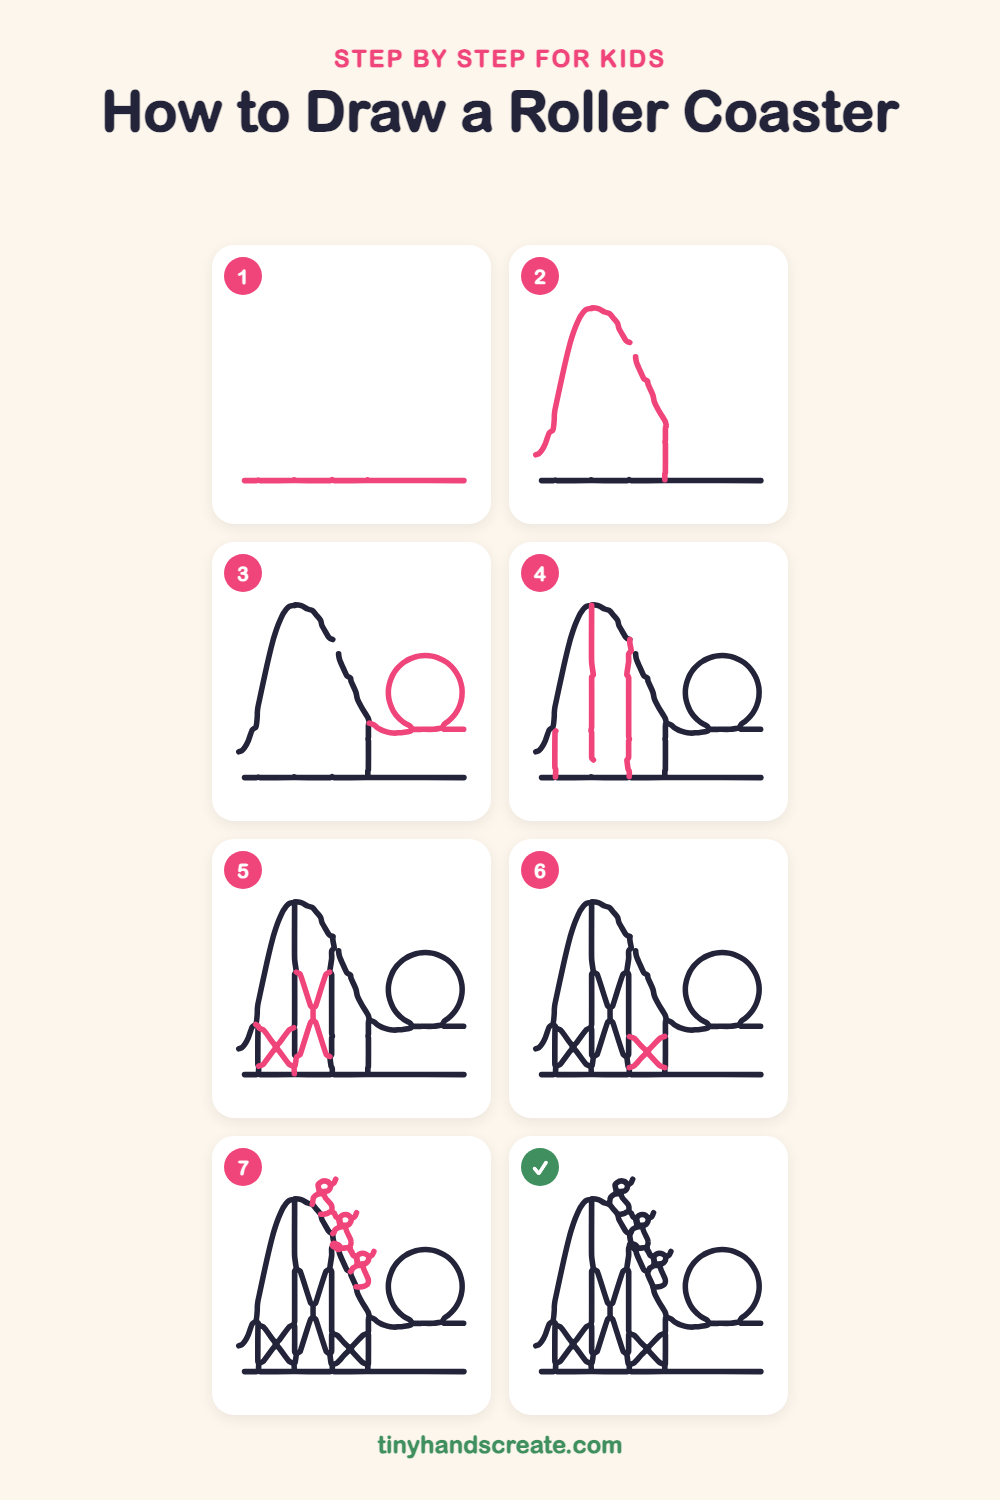
Step 1: The ground line
Draw one long, straight line across the bottom of your paper. This is the ground that the whole roller coaster stands on.
Step 2: Hill track and first post
Start on the left with a little curl, then sweep up in a tall rounded hill. Curve over the top and slide down the other side in a long slope, then draw a straight line from the end of the slope down to the ground.
Step 3: Loop and flat track
Where the slope meets the post, draw a gentle wavy line that runs to the right. Sit a big circle on top of that line for the loop, then continue the line out to the right for the flat track.
Step 4: Tall support posts
Draw three straight lines going down toward the ground: a short one under the little curl on the left, a tall one from the top of the hill, and one from the middle of the slope.
Step 5: Cross braces on the left
Draw two X shapes made of slanted lines. Make a small one low down between the two left posts, and a tall, narrow one between the next two posts.
Step 6: Cross brace on the right
Between the last two posts, draw one more X made of two slanted lines. Its ends reach the posts and the ground.
Step 7: Cars and riders
Along the slope, draw three little rounded cars in a row, like short bean shapes tilting downhill. Add a tiny loop for a head and a small squiggle for an arm on each rider.
All done!
Go over your lines with a marker, then color it in.
Finished your roller coaster? Keep the pencils out and learn how to draw a rocket or how to draw a shooting star next.
Tips for drawing a roller coaster
- Draw the big hill in one smooth, slow stroke. If the line wobbles, that is fine, because real tracks bend too.
- Make the loop circle first with light pencil and then trace it. Let the flat track touch the bottom of the circle so it looks connected.
- For the X braces, draw one slanted line first and then cross it with the other. Keep both lines touching the posts so the supports look sturdy.
Free roller coaster coloring page
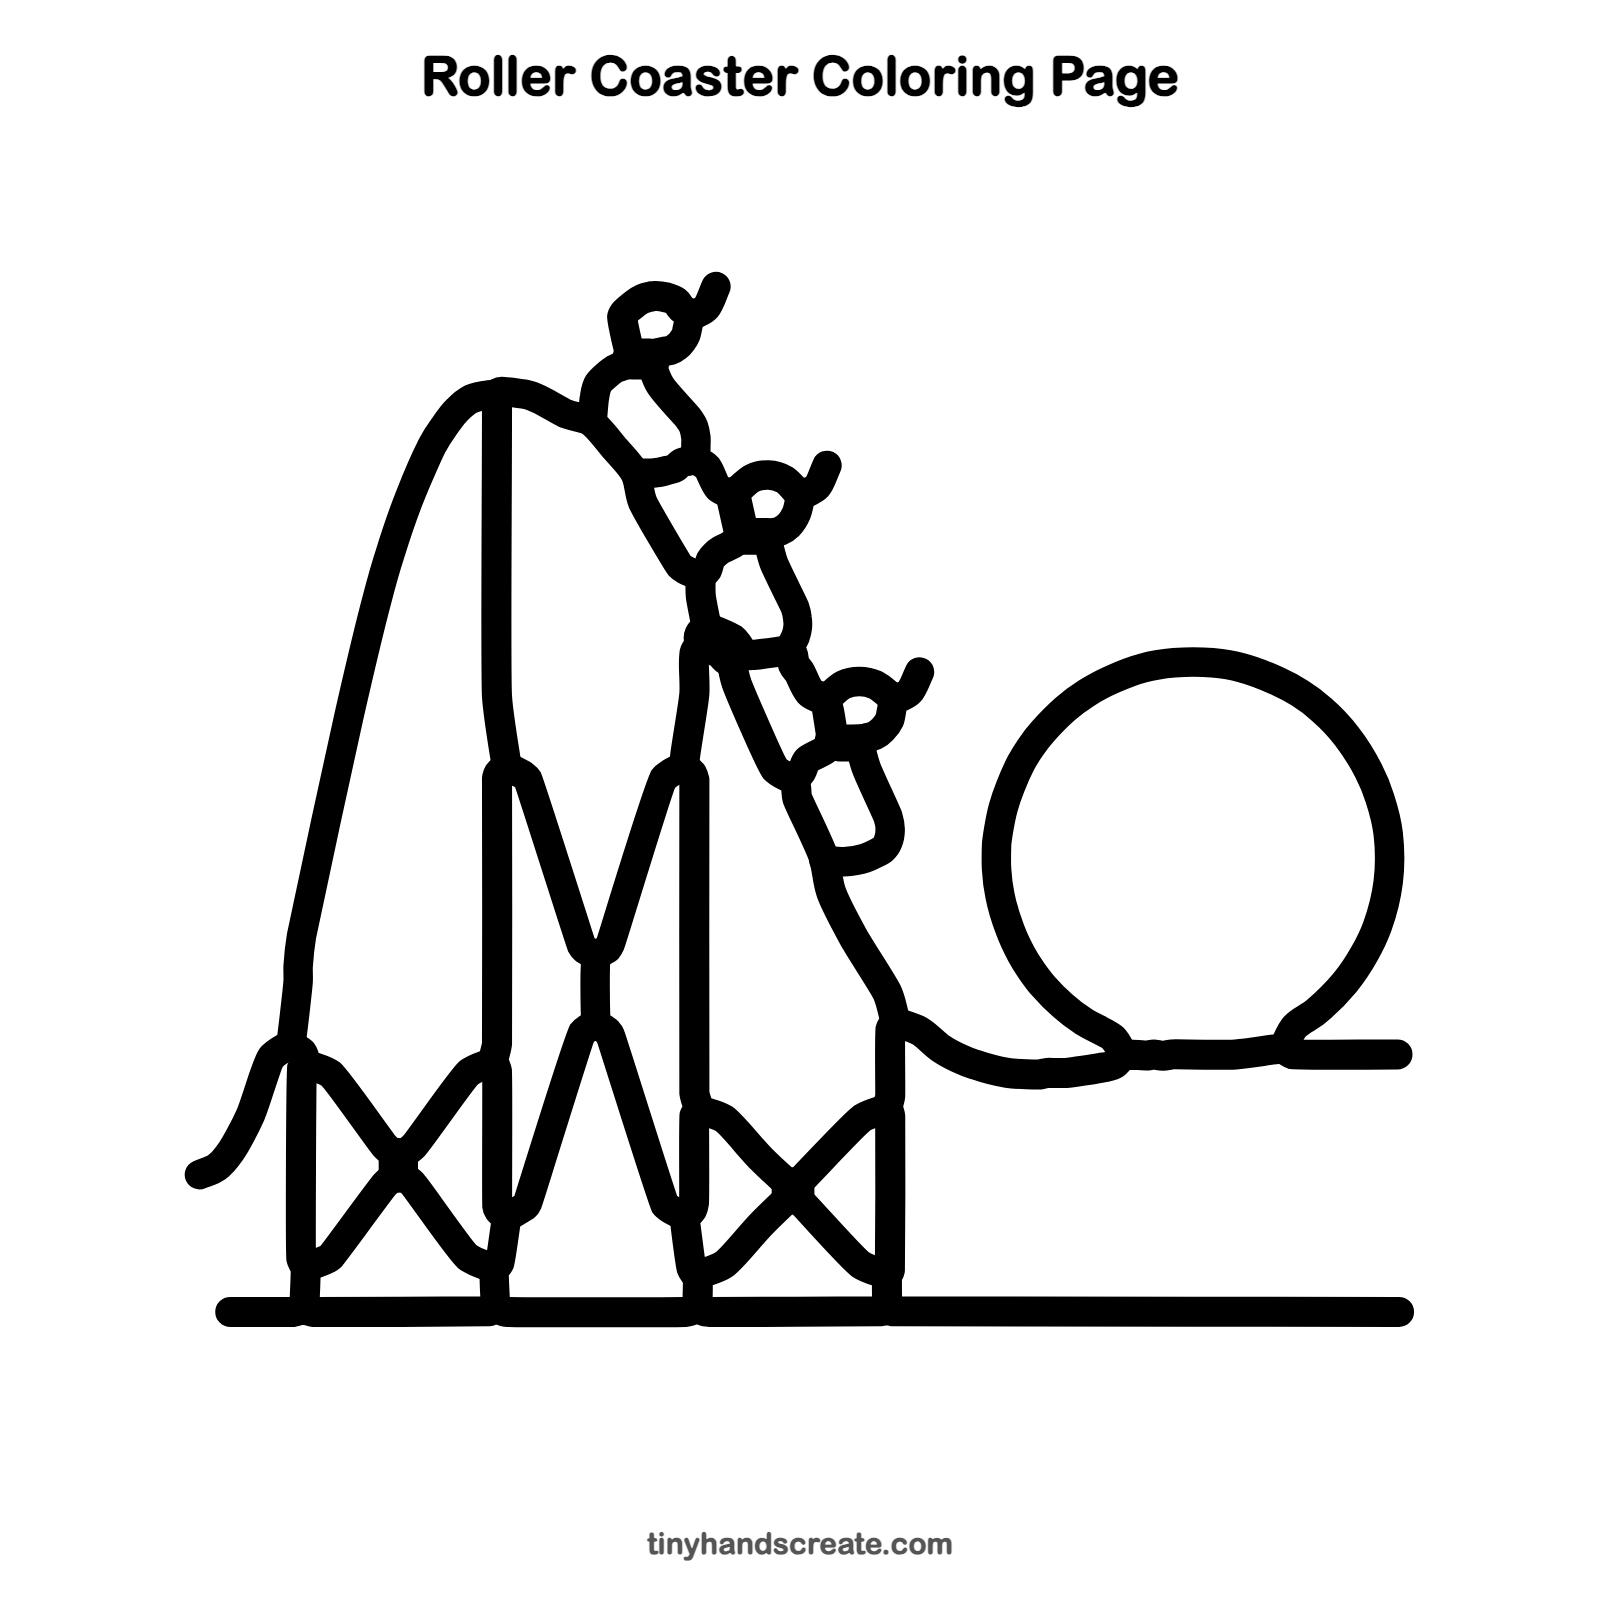
Want to go straight to coloring? Open this roller coaster coloring page at full size and print it. It is the same drawing you just learned, with clean lines ready for crayons or markers.
How to color your roller coaster drawing
Try a bright red track with blue supports and a yellow sky behind it. For a creative twist, give each rider a different colored shirt and make the loop rainbow striped.
Roller coaster fun fact for kids
The first roller coasters grew out of ice slides in Russia hundreds of years ago, where people rode sleds down steep hills of ice.
Questions about drawing a roller coaster
What shapes do I need to draw a roller coaster?
You need a big curved hill, a circle for the loop, straight lines for the posts, and X shapes for the braces. Small bean shapes and tiny loops make the cars and riders.
How do I draw a roller coaster loop?
Draw a large circle on top of the track, then continue the flat track out to the right. Practice the circle lightly in pencil so you can fix it before you go over it.
How do I make my roller coaster look more exciting?
Add more cars down the slope and draw a taller hill. You can also add more X braces between the posts to make the supports look strong.