How to Draw a Christmas Frog (Easy Step by Step)
This post contains affiliate links. As an Amazon Associate I earn from qualifying purchases.
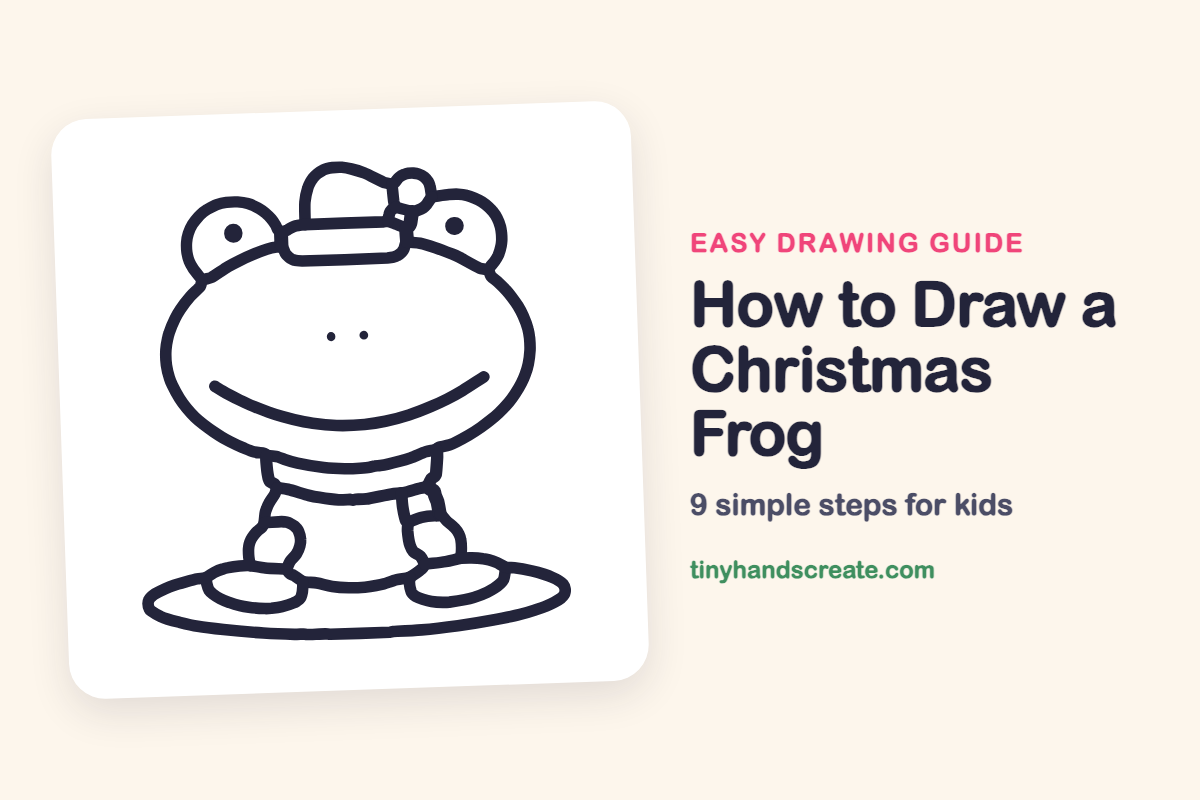
This Christmas frog is a big, happy character with a floppy holiday hat and a wide smile. It is built from simple shapes: a large oval head, two round eyes, a rounded rectangle for the hat band, and a tummy sitting on a flat oval lily pad.
- Easy
- 15 minutes
- 9 steps
You need: paper, a pencil, an eraser, and crayons or markers for coloring.
Start drawing
In this article (7 sections)
How to draw a Christmas frog step by step
How to Draw a Christmas Frog · tinyhandscreate.com
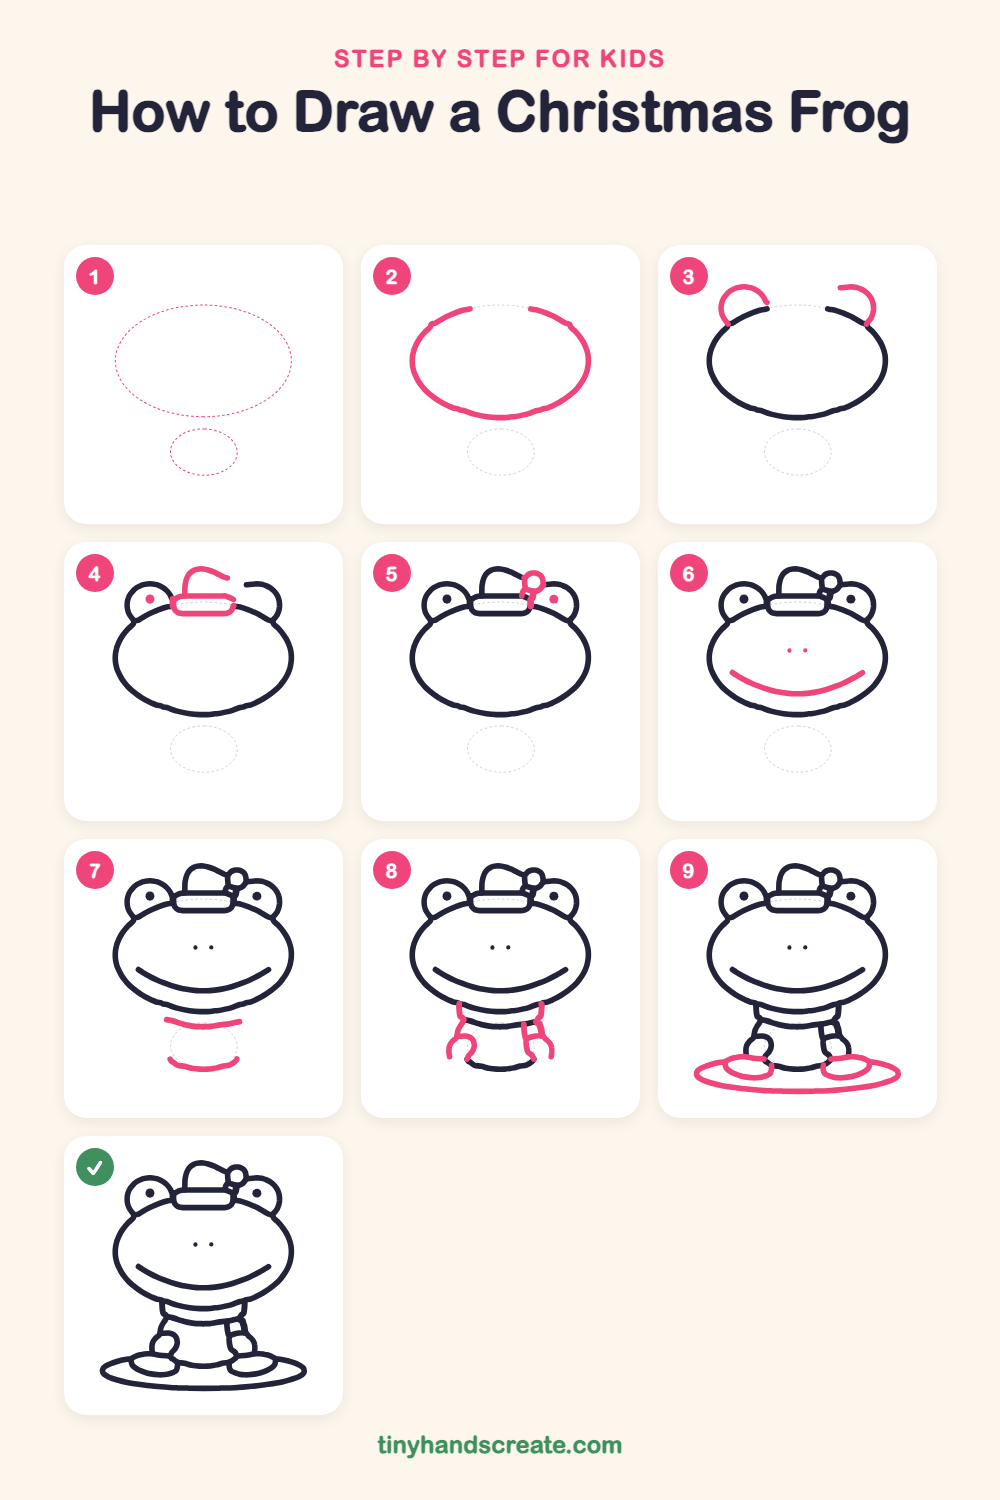
Step 1: Guide shapes
Lightly sketch these 2 ovals. They only show where the big parts go, so press softly. You will erase them at the end.
Step 2: The big head
Draw a big wide oval in the middle of the page, a little wider than it is tall. This is the frog's head and the biggest part of the drawing.
Step 3: Two eye outlines
On each upper corner of the head, draw a small round curve that sits on the oval and pokes up like a bump. Leave the insides empty for now.
Step 4: Hat and left pupil
Between the eyes, draw a long rounded rectangle lying flat on top of the head for the hat band. Draw a soft bump rising from the band and curving over to the right like a floppy hat. Then add a small dot in the left eye for the pupil.
Step 5: Pom-pom and right pupil
At the tip of the hat, draw a small circle for the fluffy pom-pom, with a tiny line joining it to the hat. Then add a small dot in the right eye for the pupil.
Step 6: Smile and nostrils
Draw a big happy curved smile across the lower half of the head. Then add two tiny dots above it, near the middle, for the nostrils.
Step 7: Collar and tummy bottom
Just under the head, draw a short curved line for the collar. Below it, draw a curved line like a shallow bowl for the bottom of the tummy.
Step 8: Arms and hands
Draw a bendy arm down each side below the collar. On one side finish with a round hand. On the other side draw a sleeve with a little stripe near the cuff.
Step 9: Feet and lily pad
At the bottom of the tummy, draw two wide oval feet pointing outward. Finish with a big flat oval underneath for the lily pad the frog sits on.
All done!
Erase the guide shapes, go over your lines, then color it in.
Finished your Christmas frog? Keep the pencils out and learn how to draw a Christmas axolotl or how to draw a Christmas elephant next.
Tips for drawing a Christmas frog
- Sketch the head oval lightly first. It is the biggest shape, and everything else is placed around it, so take your time getting it wide and round.
- The hat band is a rounded rectangle that sits on top of the head. Draw it flat and level, then add the floppy hat bump above it, so the hat looks like it is sitting on the frog.
- Draw the collar right under the head, then the arms down each side. Draw the feet last, wide and pointing outward, so the frog looks like it is sitting on the lily pad.
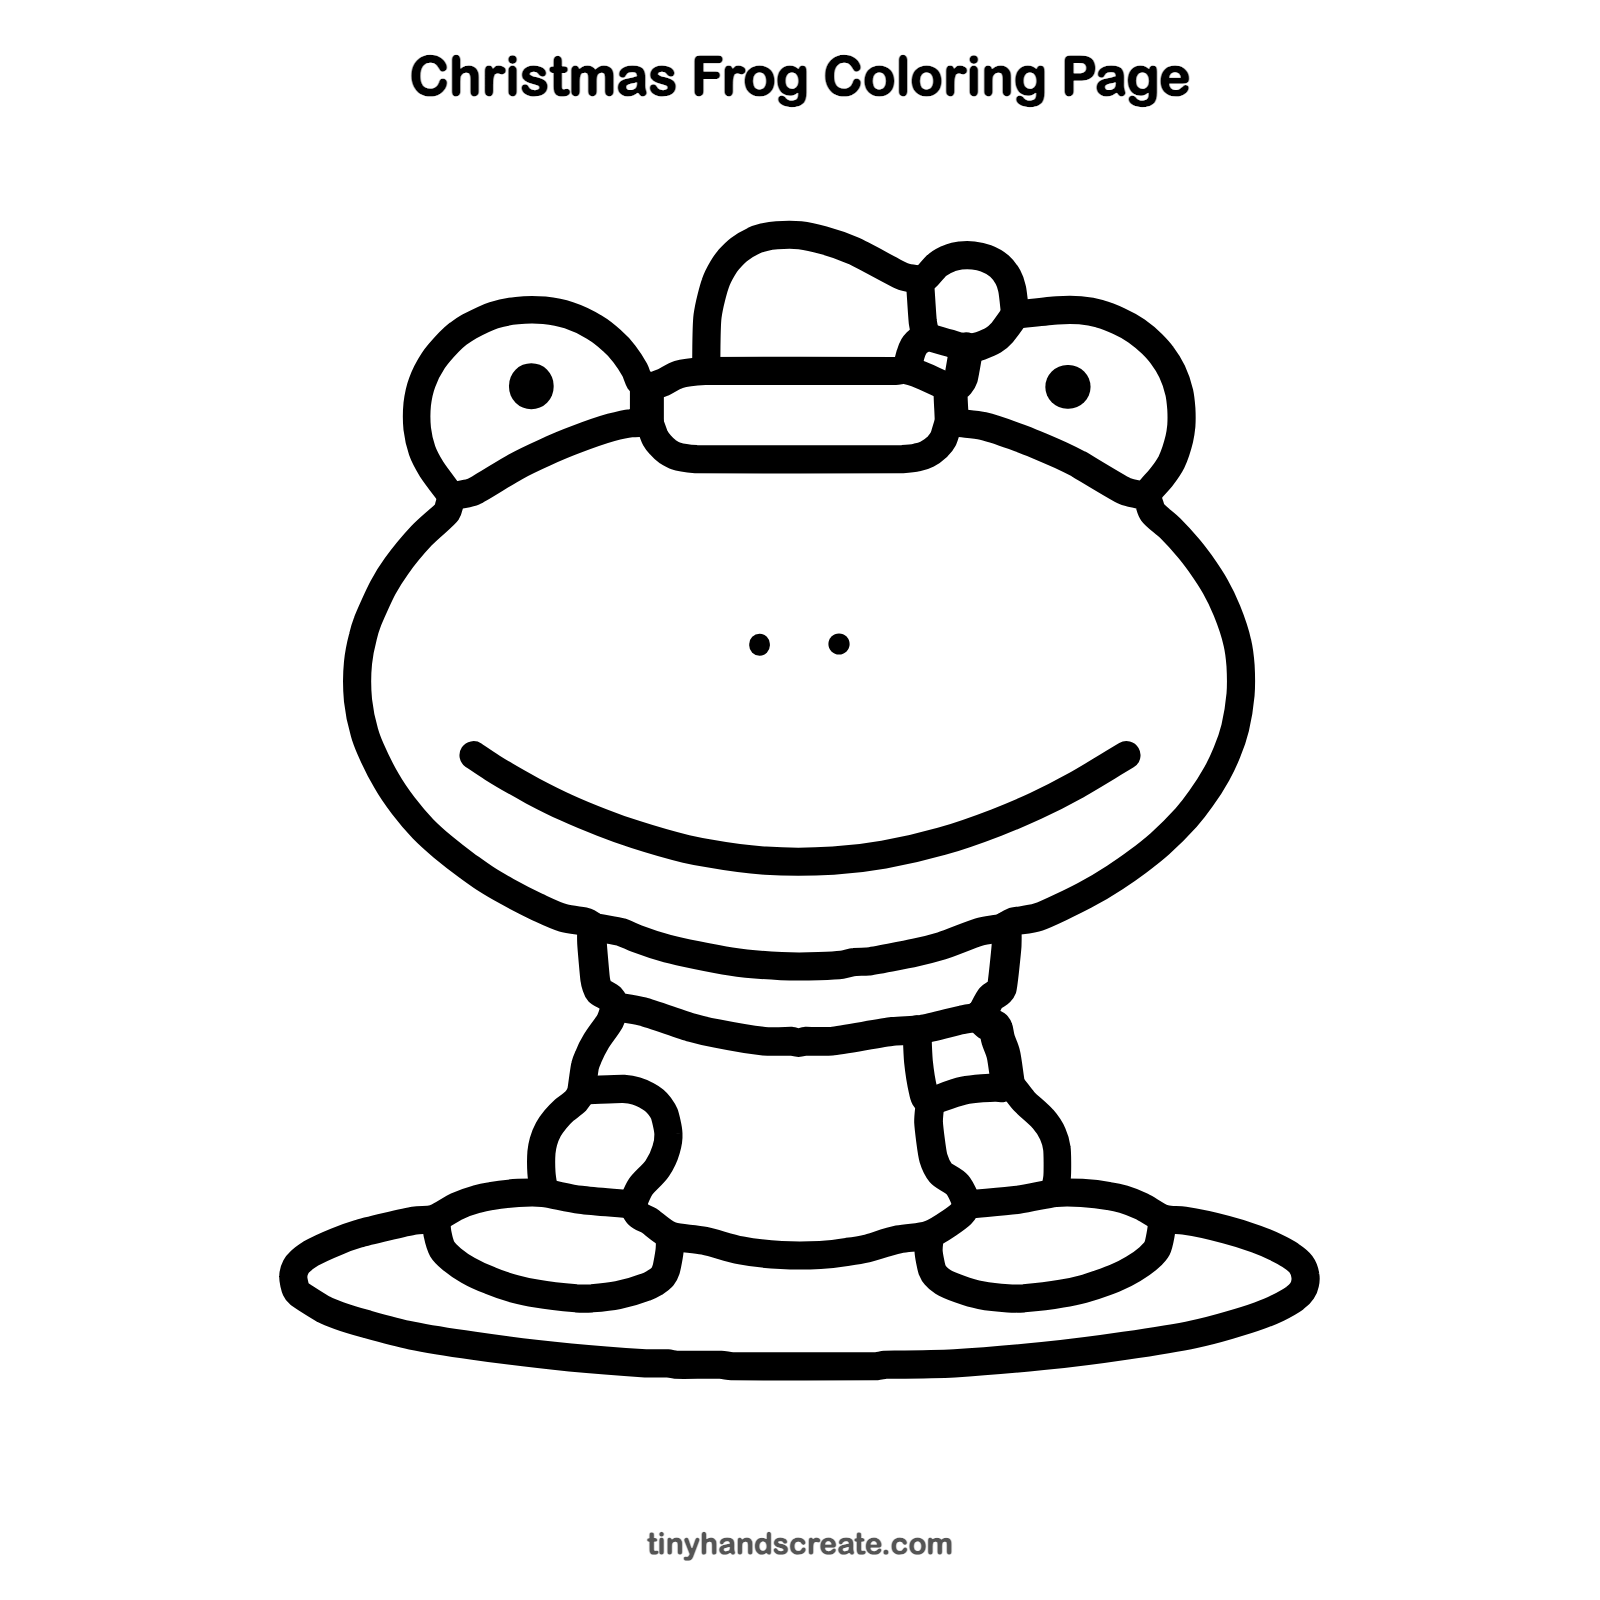
Free Christmas frog coloring page
Want to go straight to coloring? Open this Christmas frog coloring page at full size and print it. It is the same drawing you just learned, with clean lines ready for crayons or markers.
How to color your Christmas frog drawing
Try bright green for the frog, red and white for the hat and pom-pom, and a darker green for the lily pad. For a creative twist, add snowflakes in the background or color the sleeve like a candy cane.
Christmas frog fun fact for kids
Frogs use their eyes to help them swallow. When a frog blinks, its eyeballs sink down into its head and help push food down its throat.
Questions about drawing a Christmas frog
What shapes do I need to draw a Christmas frog?
You need a big oval for the head, two small round curves for the eyes, a rounded rectangle and a bump for the hat, a small circle for the pom-pom, and two ovals for the feet. A big flat oval makes the lily pad.
How do I make my frog look cuter?
Keep the eyes round and set them wide apart, and make the smile big and curved. A fluffy pom-pom on the hat adds extra charm.
How do I draw the frog's hat so it stays on?
Draw the hat band flat across the top of the head first. Then add the floppy bump above it, so the hat looks like it is sitting snugly.