How to Draw a Christmas Axolotl (Easy Step by Step)
This post contains affiliate links. As an Amazon Associate I earn from qualifying purchases.
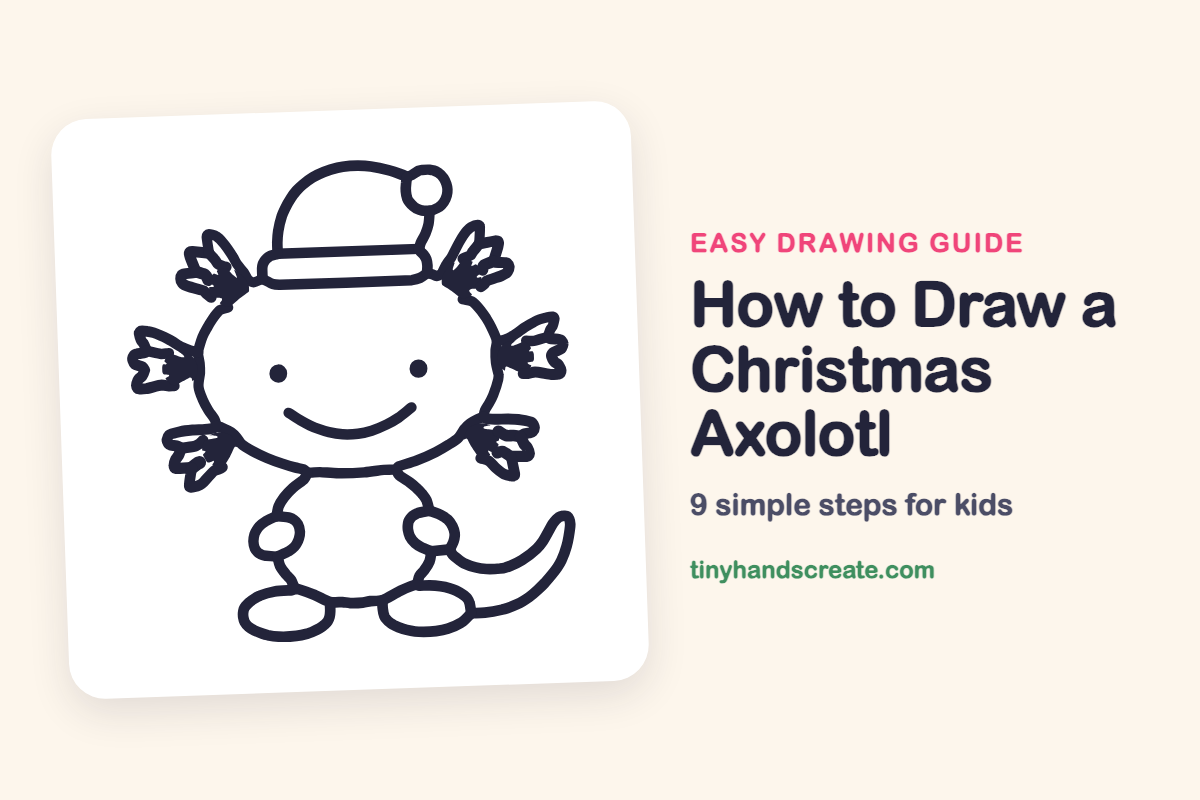
A Christmas axolotl is a cute mix of a smiling face and a Santa hat, and it is easy to draw because most of it is made of ovals and simple curves. You will build it from one big oval for the head, a rounded body with two small hands, two flat ovals for feet, a curly tail, and lots of small pointy leaf shapes for the feathery gills.
- Medium
- 15 minutes
- 9 steps
You need: paper, a pencil, an eraser, and crayons or markers for coloring.
Start drawing
In this article (7 sections)
How to draw a Christmas axolotl step by step
How to Draw a Christmas Axolotl · tinyhandscreate.com
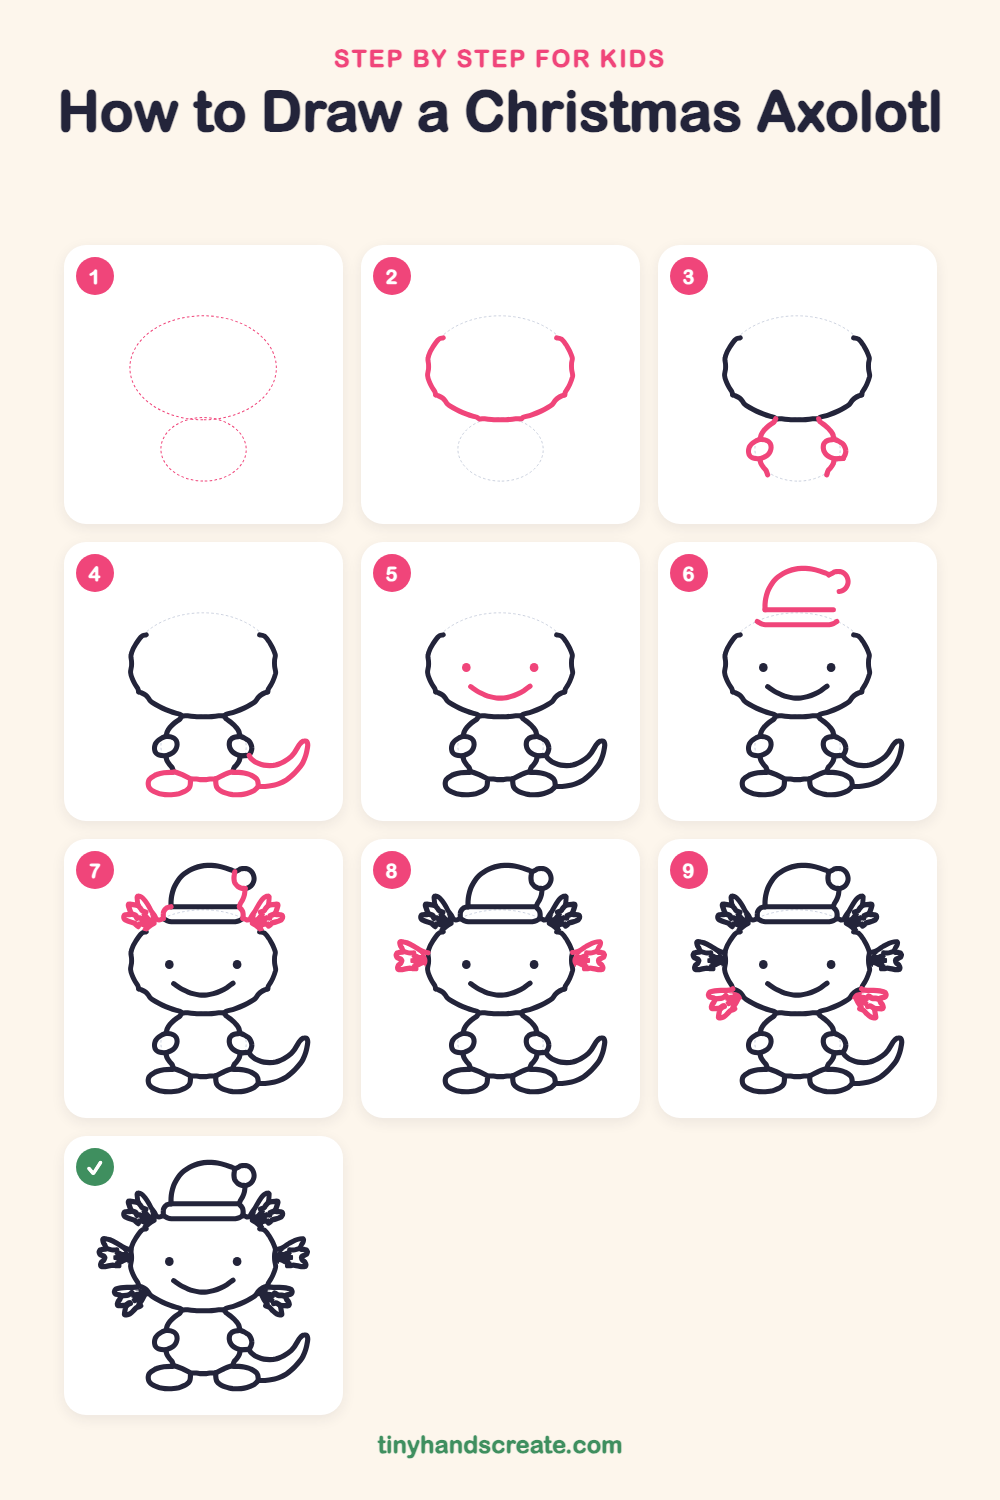
Step 1: Guide shapes
Lightly sketch these 2 ovals. They only show where the big parts go, so press softly. You will erase them at the end.
Step 2: The big head
Draw a wide oval for the head, a little wider than it is tall. Leave a small gap at the top where the hat will go.
Step 3: Body and hands
Under the chin, draw two curved lines that bend down and out to make a round tummy. On each side, add a small oval for a hand.
Step 4: Feet and tail
Draw two flat ovals at the bottom for the feet, side by side. Then draw a long, curvy tail that starts at the right side of the body and curls up at the tip.
Step 5: Eyes and smile
Add two round dots for the eyes, spaced wide apart on the face. Draw a curved smile below them, like a gentle bowl.
Step 6: Santa hat
Draw a dome shape on top of the head with a little curl at its right side. Then draw a long, flat band along the bottom of the dome where it sits on the head.
Step 7: Pom-pom and top gills
Draw a small circle for the pom-pom and a short curve joining it to the hat. Then draw a bunch of pointy leaf shapes on each side of the hat, fanning up and out from the head.
Step 8: Side gills
Halfway down each side of the head, draw a bunch of pointy leaf shapes that fan out sideways from one spot. Try to make both sides match.
Step 9: Lower gills
Near the bottom of each cheek, add one more bunch of leaf shapes pointing out and a little down. Now your axolotl has all its gills.
All done!
Erase the guide shapes, go over your lines, then color it in.
Finished your Christmas axolotl? Keep the pencils out and learn how to draw a Christmas elephant or how to draw a Christmas giraffe next.
Tips for drawing a Christmas axolotl
- The gills are the trickiest part. Draw each bunch as three or four skinny leaf shapes that all start from the same spot on the head.
- Draw one side of the gills first, then count the leaves and copy the same number on the other side so they match.
- Draw the head oval nice and wide, and leave a gap at the top, so the hat sits snugly on the head and does not float.
Free Christmas axolotl coloring page
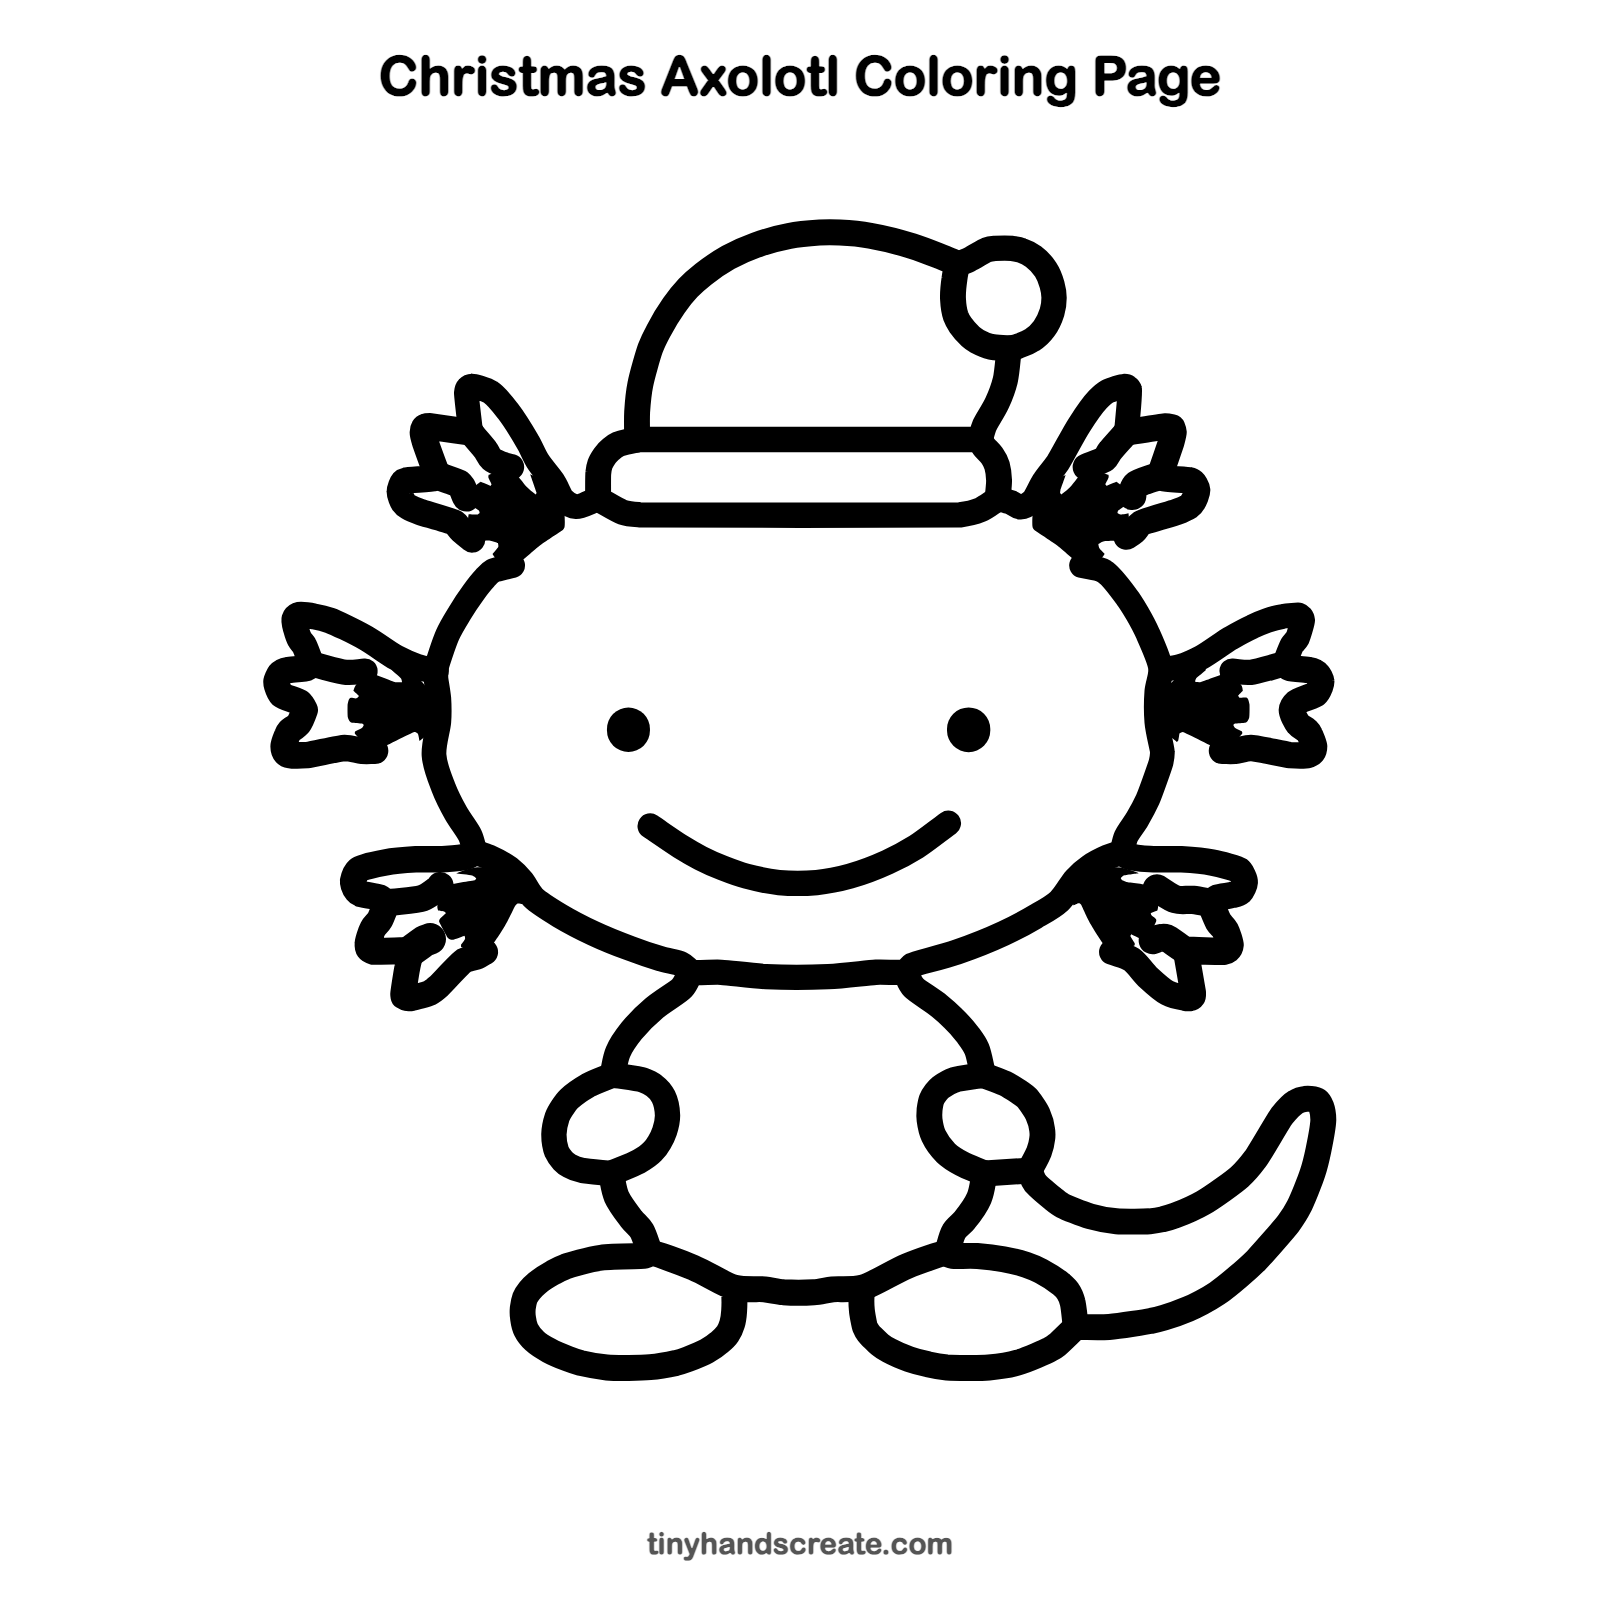
Want to go straight to coloring? Open this Christmas axolotl coloring page at full size and print it. It is the same drawing you just learned, with clean lines ready for crayons or markers.
How to color your Christmas axolotl drawing
Soft pink for the body and a bright red hat with a white pom-pom and band look very festive, and you can make the gills a slightly darker pink. For a creative twist, add snowflakes in the background.
Christmas axolotl fun fact for kids
Axolotls are real salamanders from Mexico that live their whole lives in water, and they can regrow lost legs and tails. The feathery parts on the sides of their heads are gills that they use to breathe.
Questions about drawing a Christmas axolotl
What shapes do I need to draw a Christmas axolotl?
You need a big oval for the head, a rounded shape for the body, two small ovals for the hands, two flat ovals for the feet, and a dome and a flat band for the hat. The gills are skinny leaf shapes and the tail is one long curve.
How do I make my axolotl look cuter?
Place the eyes wide apart and draw a big, curvy smile. Making the head larger than the body also makes it look extra sweet.
How do I draw axolotl gills?
Start with one pointy leaf shape, then add two or three more beside it so they fan out like a small feather. Make three bunches on each side of the head: one by the hat, one at the side, and one near the cheek.