How to Draw Jack and Jill (Easy Step by Step)
This post contains affiliate links. As an Amazon Associate I earn from qualifying purchases.
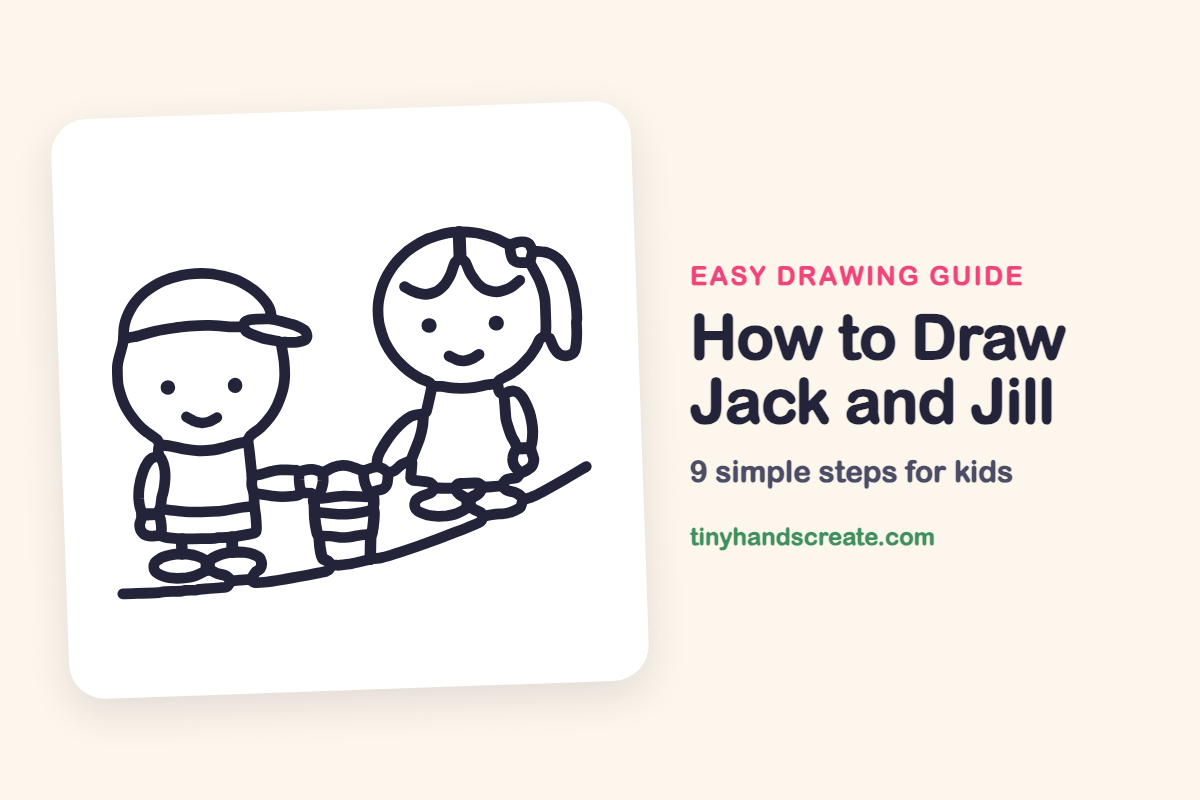
Jack and Jill are two friends heading up a hill with a pail, and the whole drawing is made from circles, ovals and simple boxes. The big round heads and tiny dot eyes make them look sweet and simple. It is a great drawing for practicing how shapes fit together.
- Medium
- 15 minutes
- 9 steps
You need: paper, a pencil, an eraser, and crayons or markers for coloring.
Start drawing
In this article (7 sections)
How to draw Jack and Jill step by step
How to Draw Jack and Jill · tinyhandscreate.com
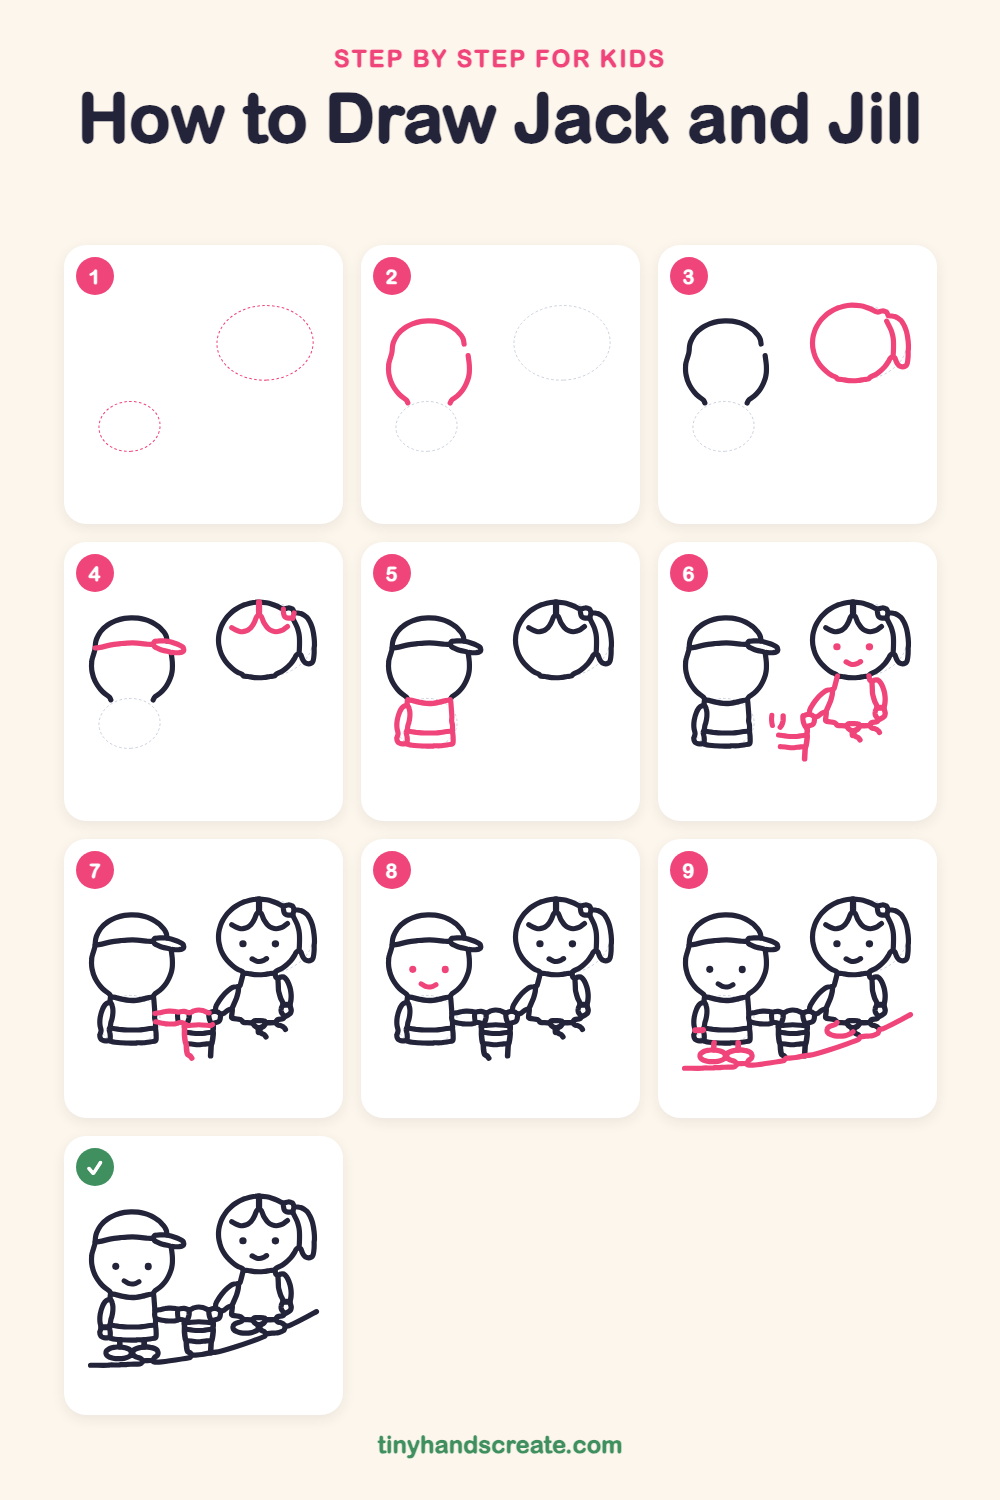
Step 1: Guide shapes
Lightly sketch these 2 ovals. They only show where the big parts go, so press softly. You will erase them at the end.
Step 2: Jack's head
Draw a big rounded head shape on the left side of the page. Leave a small gap at the top right and leave the bottom open for his neck.
Step 3: Jill's head
On the right, draw a big circle for Jill's head, a little higher than Jack's. Add a long loop hanging down from the right side for her ponytail.
Step 4: Cap and hair
Give Jack a cap with a curved line across his forehead and a flat oval brim sticking out to the right. Then draw Jill's hair part, two curvy bangs and a tiny bow on her ponytail.
Step 5: Jack's shirt
Under Jack's head, draw a box for his shirt with a line across near the bottom. Add a long curved arm shape on the left side of the box.
Step 6: Jill's face and dress
Give Jill two small dots for eyes and a little curved smile. Under her head, draw a dress that gets wider at the bottom, with a long arm on each side. Her arm on the left reaches toward the pail.
Step 7: The pail
Between the children, draw the top rim of the pail with a handle across it, and the two short sides going down. Jack's arm and Jill's arm both reach the handle.
Step 8: Jack's face
Give Jack two small dots for eyes and a curved smile between them. Make them match Jill's happy face.
Step 9: Shoes and the hill
Draw two flat ovals at the bottom of each child for shoes. Finish with one long curved line under everything for the hill they are climbing.
All done!
Erase the guide shapes, go over your lines, then color it in.
Finished your Jack and Jill? Keep the pencils out and learn how to draw Little Miss Muffet or how to draw the old woman who lived in a shoe next.
Tips for drawing Jack and Jill
- Draw Jack's head first and Jill's second, so you can place her a little higher and keep room for both of them on the page.
- Leave a space between the children for the pail. Draw its rim and handle so both arms can reach it.
- Use the same curved smile and dot eyes for both faces. Keep the dots the same size and they will look like a matching pair.
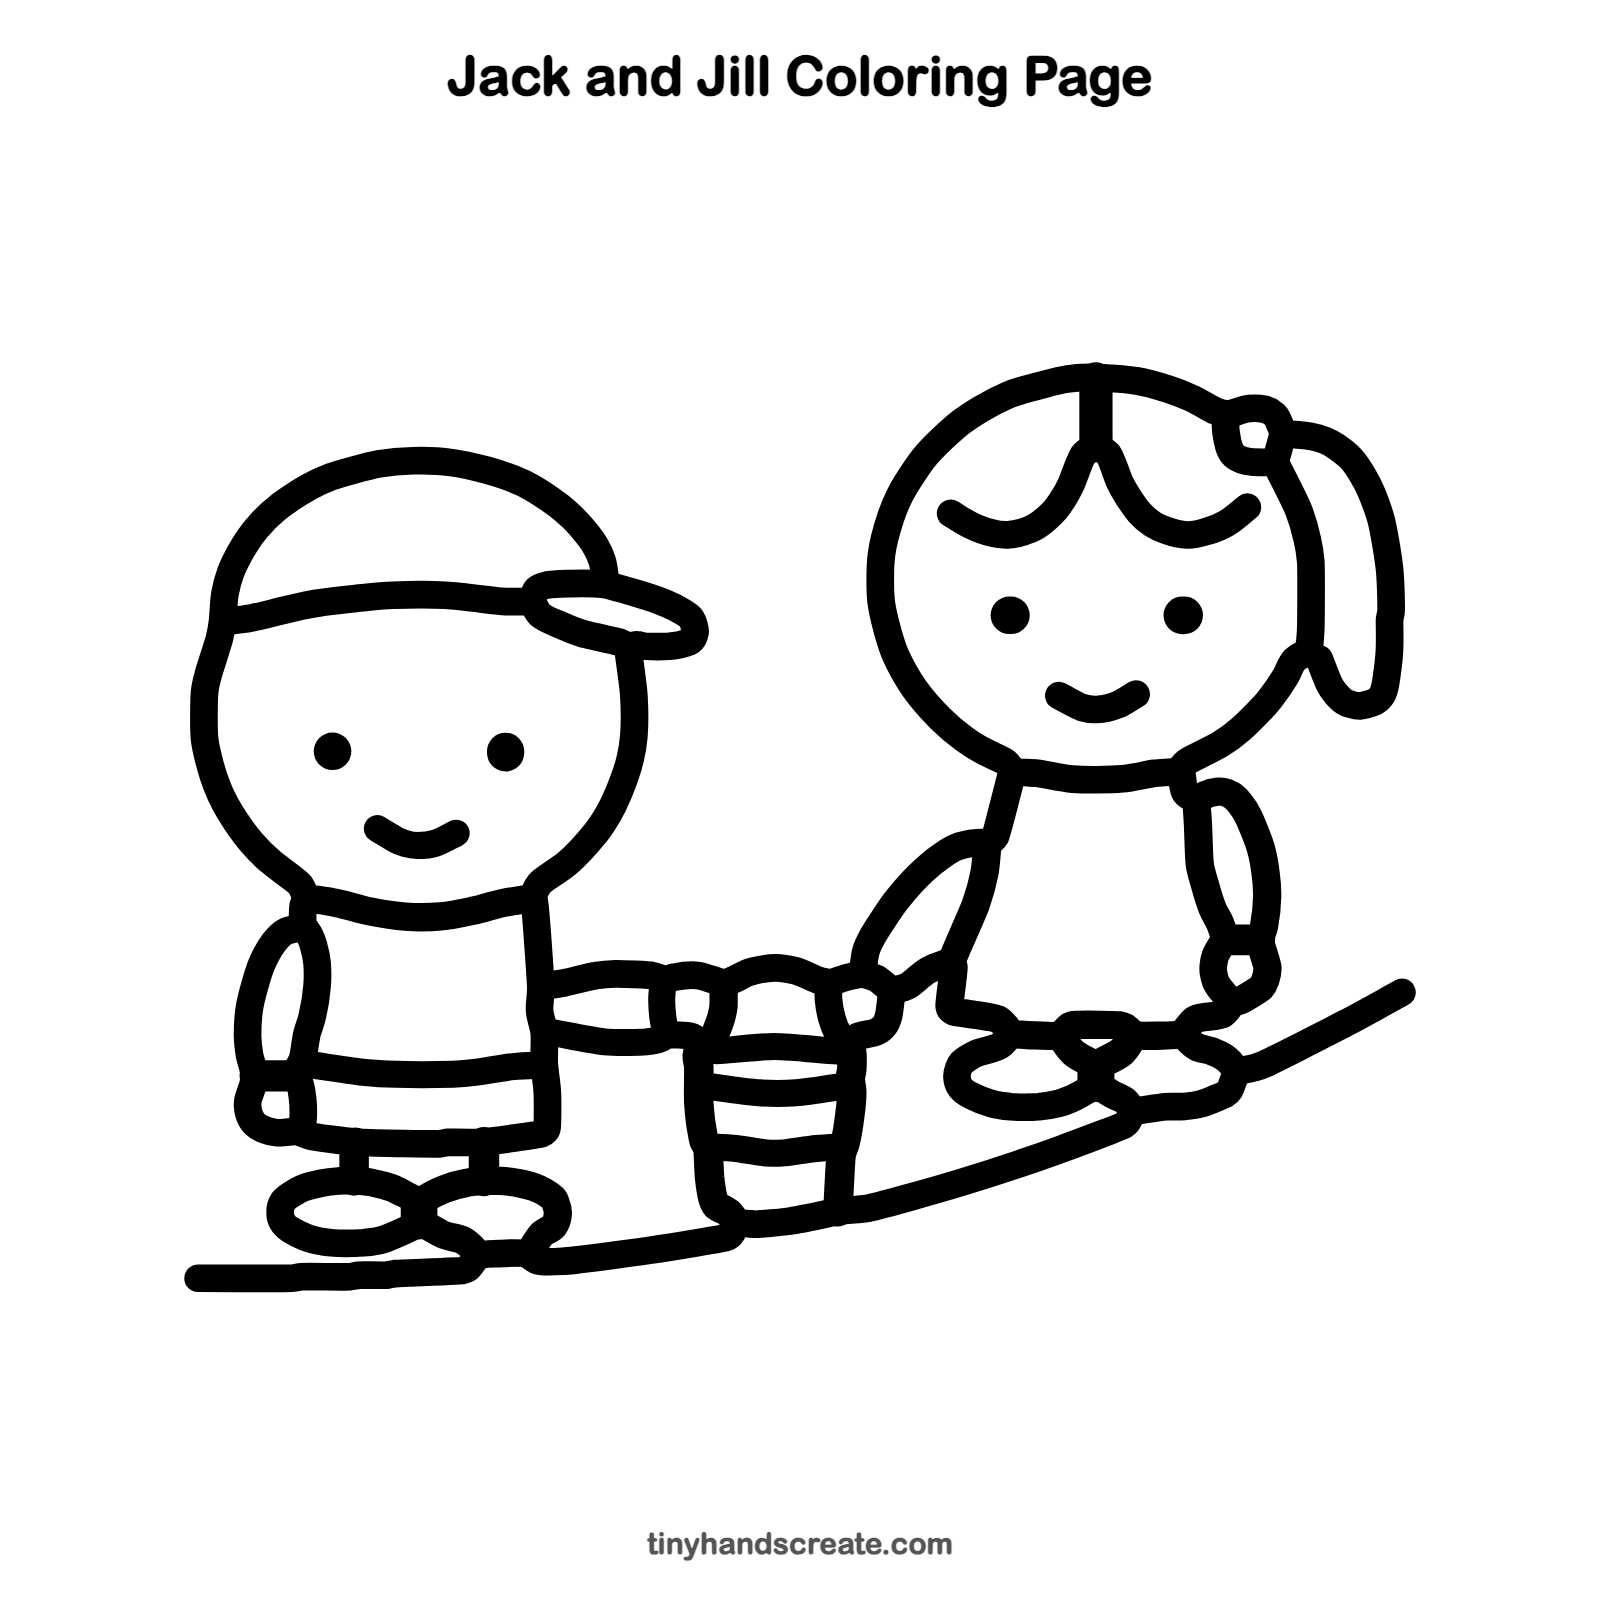
Free Jack and Jill coloring page
Want to go straight to coloring? Open this Jack and Jill coloring page at full size and print it. It is the same drawing you just learned, with clean lines ready for crayons or markers.
How to color your Jack and Jill drawing
Try a red cap for Jack, a yellow dress for Jill, and a blue pail, with a green hill underneath. For a twist, color the hill in rainbow stripes.
Jack and Jill fun fact for kids
Jack and Jill is an English nursery rhyme that has been printed in books for more than 250 years.
Questions about drawing Jack and Jill
What shapes do I need to draw Jack and Jill?
You need two big round shapes for the heads, a box for Jack's shirt and a wider shape for Jill's dress. Small ovals make the cap brim, the shoes and the arms.
How do I make Jack and Jill look cuter?
Make the heads big and the bodies small. Put the eyes low on the face with a wide space between them, and add a small round smile.
How do I draw the pail so it looks right?
Start with the rim and handle between the children, then draw two short sides going down. Let both arms reach the handle so it looks like they carry it together.