How to Draw a Capybara in Summer (Easy Step by Step)
Discover how to draw a cute summer capybara, complete with sunglasses and a watermelon slice, by breaking it down into simple shapes like a round head and bean-shaped body.
- Begin your capybara drawing with a round head and a chubby bean-shaped body.
- Incorporate fun summer details like sunglasses and a watermelon slice.
- Use a half-circle shape to easily draw the watermelon fruit.
This post contains affiliate links. As an Amazon Associate I earn from qualifying purchases.
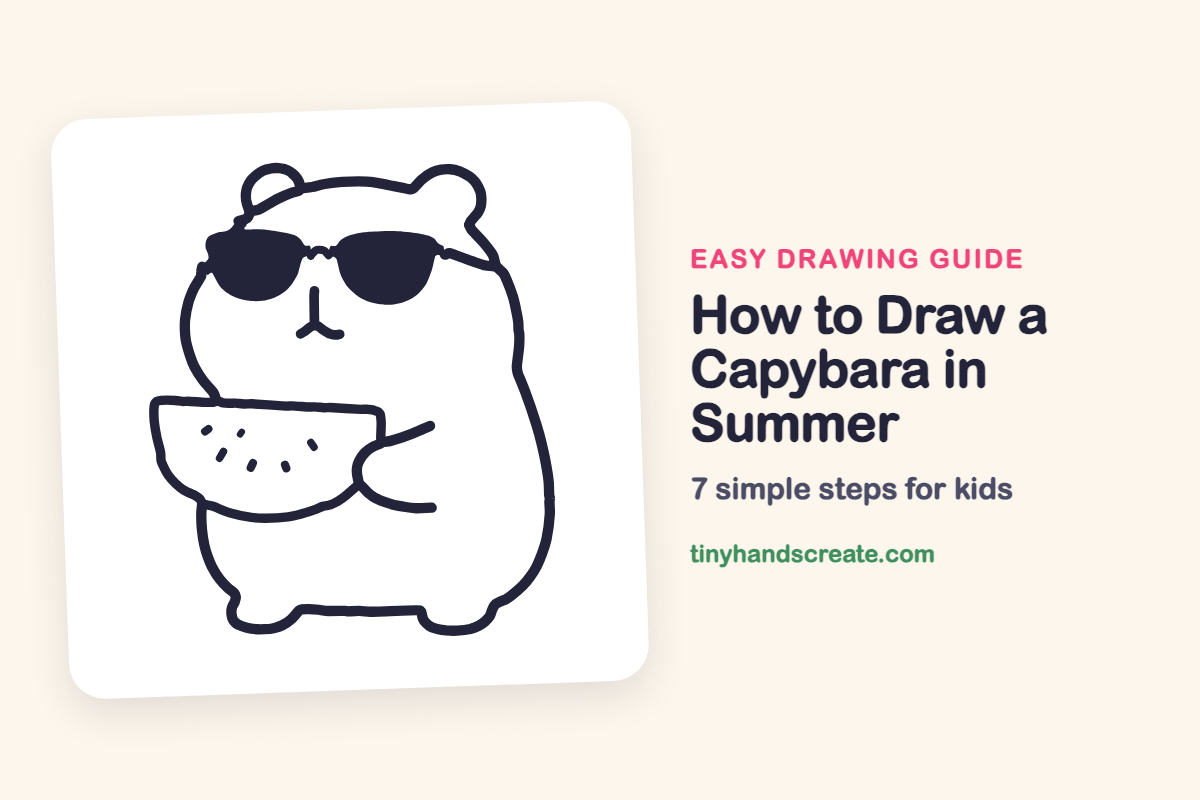
A capybara wearing sunglasses and holding a slice of watermelon is a cute way to draw summer. It is built from simple shapes: a round head with two small ears, a chubby bean-shaped body, and a half circle for the fruit. Once the big shapes are down, the fun little details come easily.
- Easy
- 12 minutes
- 7 steps
You need: paper, a pencil, an eraser, and crayons or markers for coloring.
Start drawing


In this article (7 sections)
How to draw a capybara in summer step by step
How to Draw a Capybara in Summer · tinyhandscreate.com
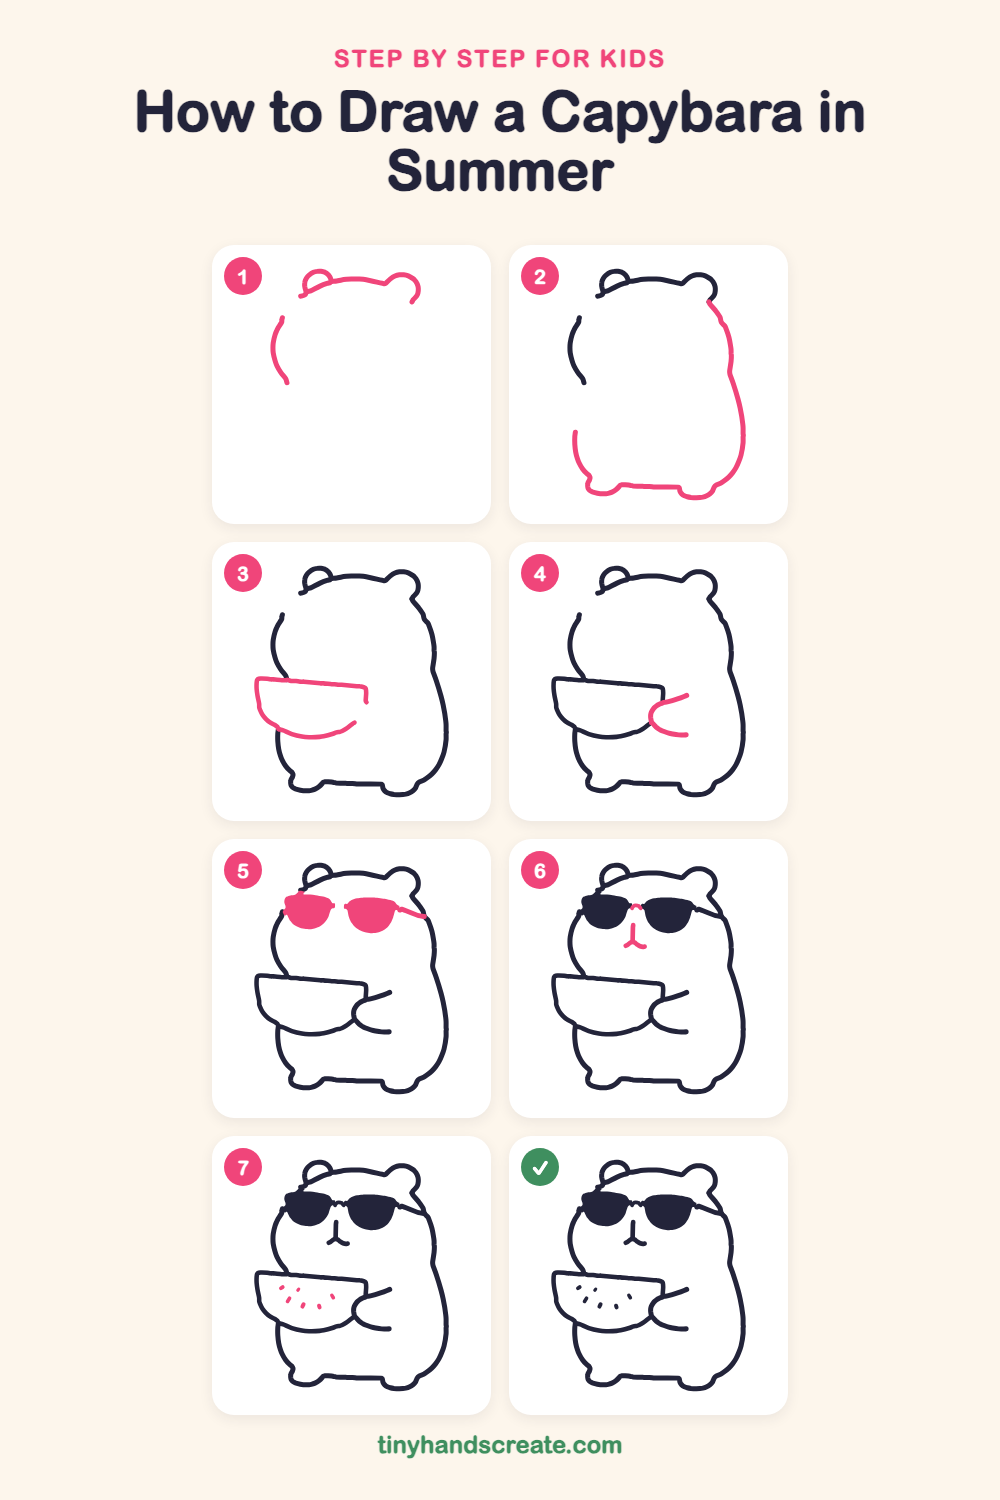
Step 1: Head top and ears
Draw the curved top of the head, starting at the left ear and ending at the right ear. Add a small half-circle ear on the top left and another on the top right, then draw a short curved line on the left side of the face.
Step 2: The chubby body
Start at the right ear and draw a long, soft curve down the right side of the body. Finish with a flat bottom and two little bumps for the feet, and add a short curve going down the left side.
Step 3: The watermelon slice
On the left, draw a flat line for the top of the slice. Then draw a big curved smile shape under it, like a half circle, to make the juicy fruit.
Step 4: The little paw
On the right side of the watermelon, draw a short line that bends around like a letter C. Add a second short line below it to make a paw holding the slice.
Step 5: Cool sunglasses
Draw two big rounded lenses across the face, flat on top and curved at the bottom. Join them with a tiny bridge, then add a short arm line going toward the side of the head.
Step 6: Nose and mouth
Under the sunglasses, draw a tiny curve for the nose. Then draw a short line going down with a small curve to each side, like the letter Y.
Step 7: Watermelon seeds
Add a few small seeds inside the watermelon slice, in a curved row near the top. Make them tiny dashes and tilt them a little so they look scattered.
All done!
Go over your lines with a marker, then color it in.
Finished your capybara in summer? Keep the pencils out and learn how to draw a fox or how to draw a hedgehog next.
Tips for drawing a capybara in summer
- Draw the head and body with light, loose lines first, so the chubby shape is easy to get right.
- The watermelon is the trickiest part. Start with the flat top line, then curve the bottom like a smile, and let it overlap the body.
- Draw the sunglasses after the head so you can place them evenly. Keep both lenses about the same size and at the same height.
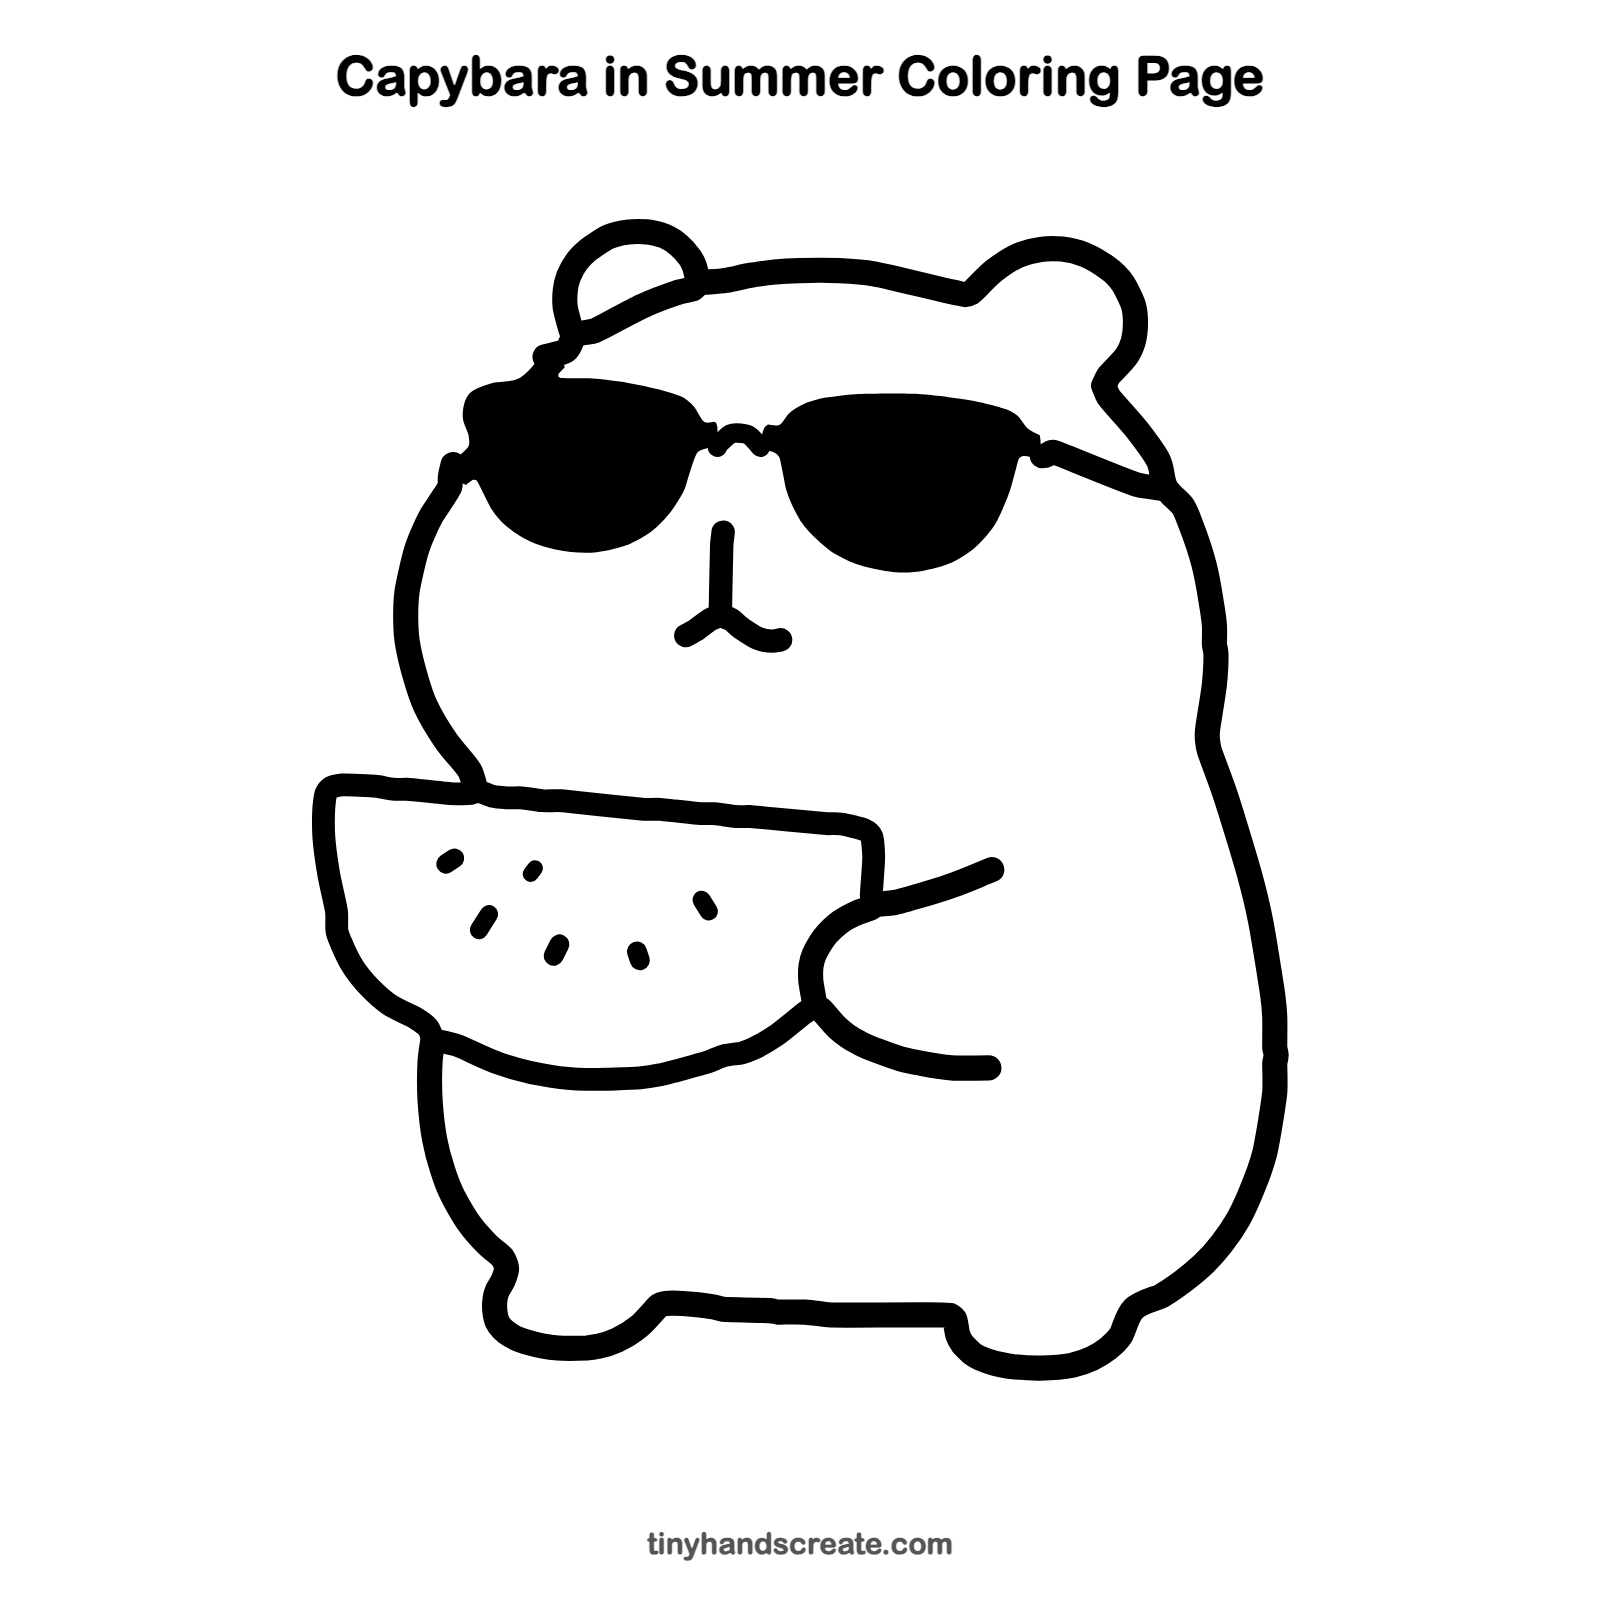
Free capybara in summer coloring page
Want to go straight to coloring? Open this capybara in summer coloring page at full size and print it. It is the same drawing you just learned, with clean lines ready for crayons or markers.
How to color your capybara in summer drawing
Try warm brown for the capybara, red and green for the watermelon, and dark gray or black for the sunglasses. For a creative twist, add a splash pool or a sunny sky in the background.
Capybara in summer fun fact for kids
Capybaras are the largest rodents in the world, and they love water. They are great swimmers and can even stay under water for several minutes.
Questions about drawing a capybara in summer
What shapes do I need to draw a capybara?
You only need a rounded shape for the head, a bean shape for the body, two small half circles for the ears, and a tiny Y shape for the nose and mouth.
How do I make my capybara look cuter?
Make the head extra round and the body extra chubby. Keep the nose and mouth small and low on the face, and add sunglasses for a cool, happy look.
How do I draw the watermelon slice?
Start with a flat line for the top, then draw a curved smile shape underneath. Add a few tiny seeds near the top edge to finish the fruit.