How to Draw a Wishing Well (Easy Step by Step)
A wishing well is a cozy, storybook thing to draw, and it is built from simple shapes. You will use curved lines for the stone wall, a cone-shaped roof, straight posts and bars, and a small bucket. Two little flowers beside it make the scene feel like a garden.
- Medium
- 20 minutes
- 10 steps
You need: paper, a pencil, an eraser, and crayons or markers for coloring.
Start drawingIn this article (7 sections)
How to draw a wishing well step by step
How to Draw a Wishing Well · tinyhandscreate.com
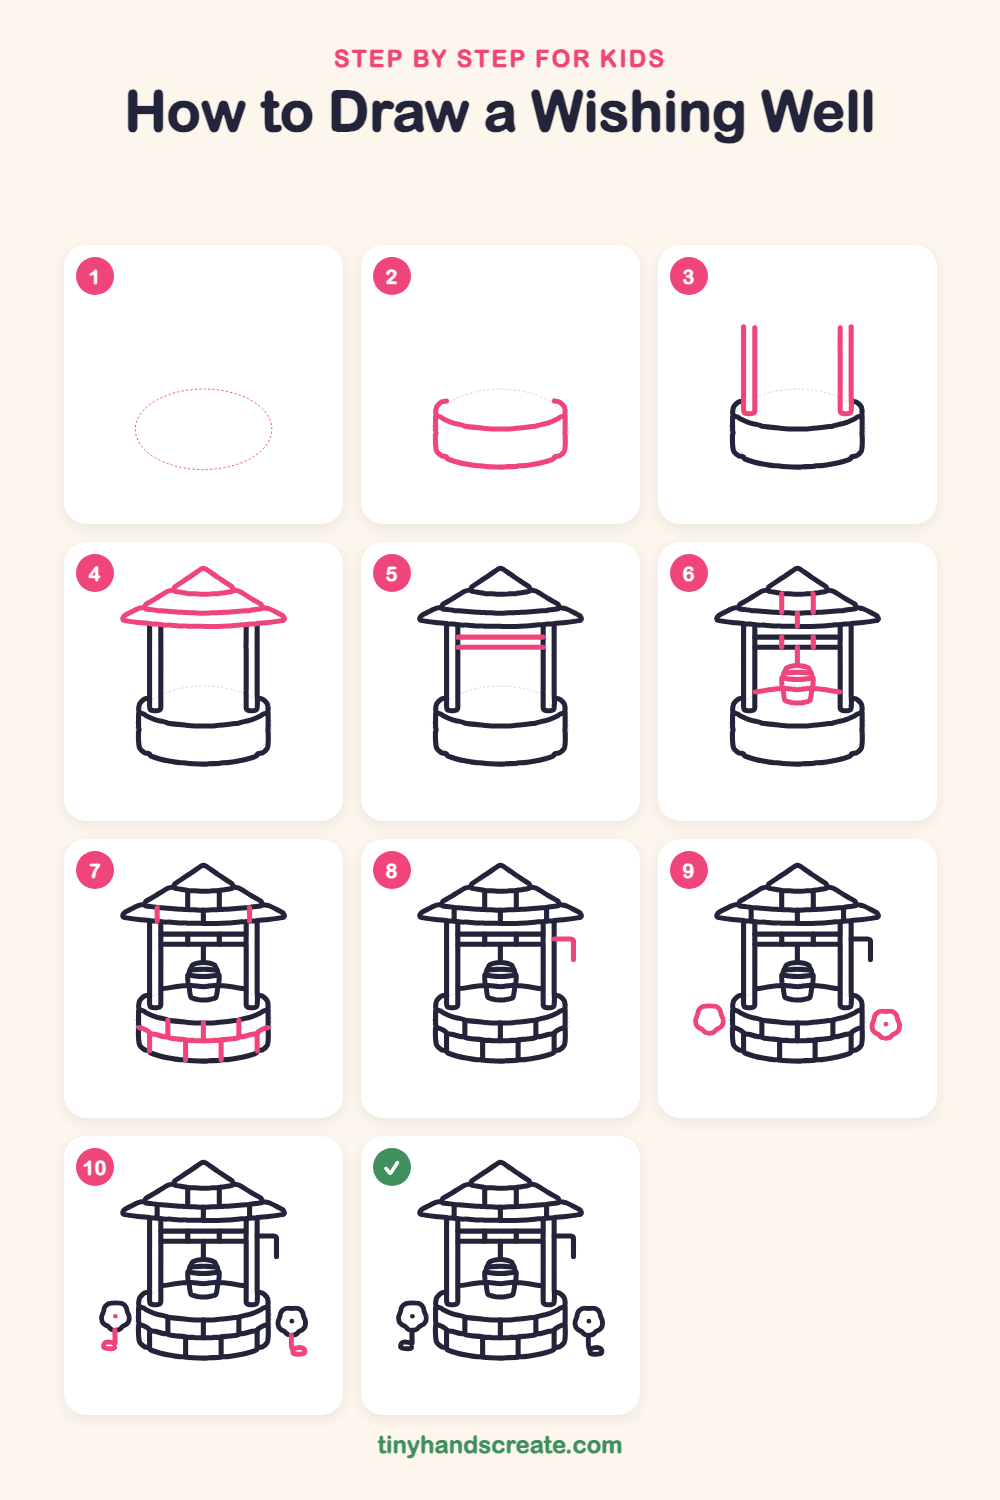
Step 1: Guide shapes
Lightly sketch this oval. It only shows where the big parts go, so press softly. You will erase it at the end.
Step 2: The round well wall
Draw a short curved line for the front of the top edge, like a gentle smile. Then draw a side line straight down from each end and join them at the bottom with another curve.
Step 3: The two posts
Draw two tall, thin posts standing on the left side of the well and two on the right side. Each post is two straight lines side by side, and the bottoms sit on the top edge of the well.
Step 4: The pointy roof
Start with a little peak at the top and draw two sloping lines that spread out wide, like a hat. Close the bottom with a long, gently curved line across the posts, then add a smaller curved line inside, near the top.
Step 5: Two crossbeams
Draw two short, straight bars side by side between the left posts and the right posts, near the top under the roof.
Step 6: Bucket and rope
Draw a short rope hanging down from the middle of the beams, then a small bucket that is wider at the top than at the bottom, with a curved line or two across it. Add a curved line on the well edge behind the bucket, and a few short up-and-down lines on the roof and beams.
Step 7: Stone bricks
Draw a curved line across the well wall near the top. Add short up-and-down lines above and below it to make bricks. Draw a short line under each end of the roof, beside the posts.
Step 8: The crank handle
On the right side, draw a short line sticking out from the post. Then turn it downward, like the letter L, to make a handle.
Step 9: Two flower heads
Draw a wobbly circle like a little cloud on each side of the well, near the bottom. Add a small dot in the middle of the flower on the right.
Step 10: Stems and leaves
Draw a short line down from each flower for a stem. At the bottom of each stem, add a small curl to the side for a leaf, and a dot in the middle of the left flower.
All done!
Erase the guide shapes, go over your lines, then color it in.
Finished your wishing well? Keep the pencils out and learn how to draw a unicorn or how to draw a dragon next.
Tips for drawing a wishing well
- Draw the front of the well wall as a wide, gentle curve. If it looks too deep, flatten the curve a little so it looks like you are seeing the well from slightly above.
- The roof is the trickiest part. Draw the center peak first, then draw both sloping sides at the same angle so they match.
- Make the posts the same height by starting both pairs at the same level on the well before you stretch them up toward the roof.
Free wishing well coloring page
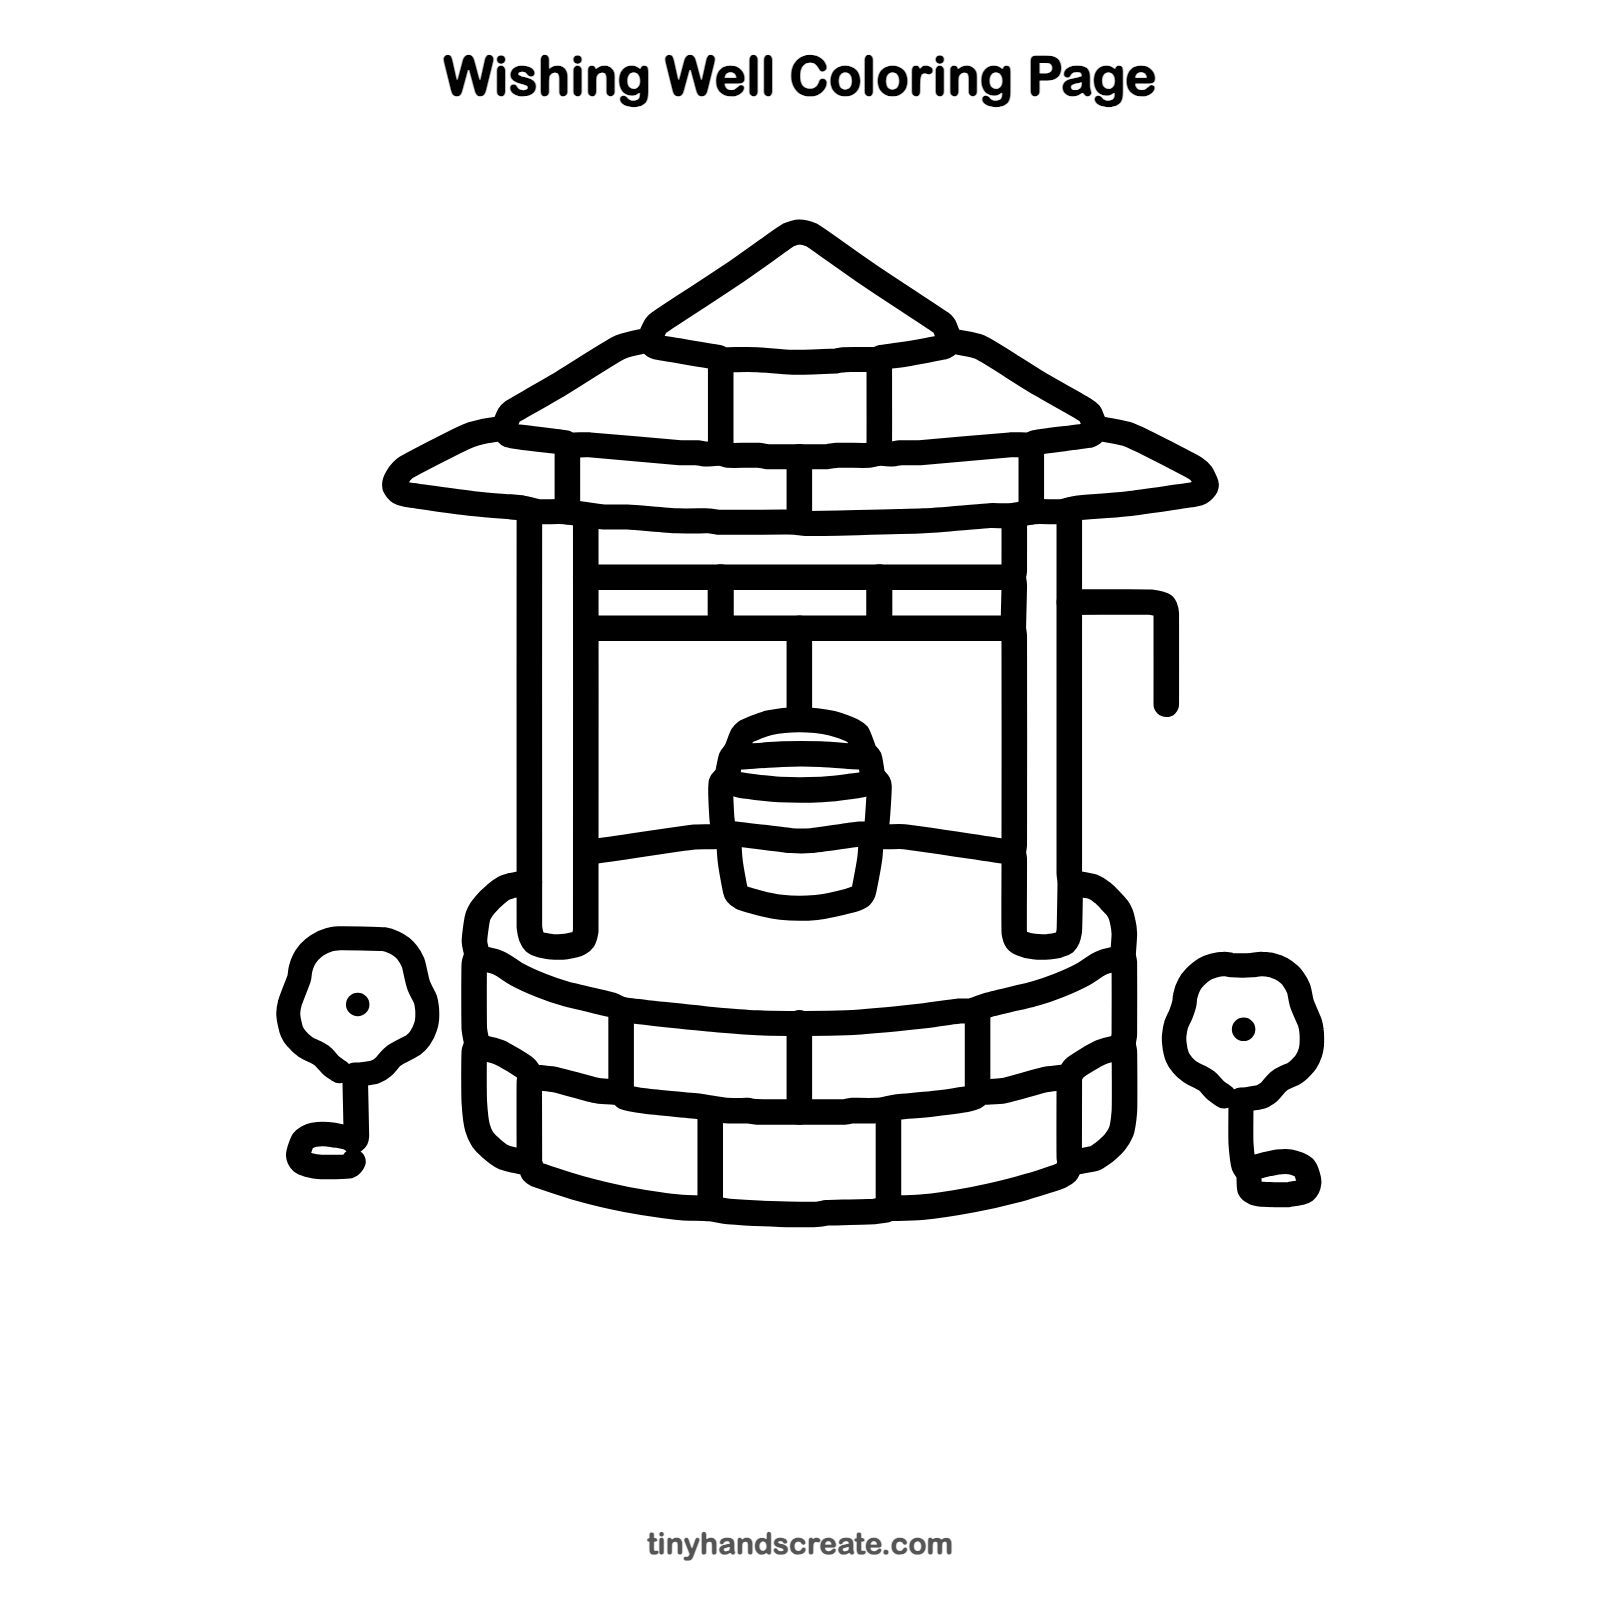
Want to go straight to coloring? Open this wishing well coloring page at full size and print it. It is the same drawing you just learned, with clean lines ready for crayons or markers.
How to color your wishing well drawing
Try gray and tan stones, a red or brown roof, and a silver or brown bucket. For a creative twist, give each flower a different color, or add sparkles floating above the well.
Wishing well fun fact for kids
Many people toss coins into wells and fountains to make a wish, a tradition that goes back many centuries.
Questions about drawing a wishing well
What shapes do I need to draw a wishing well?
You need curved lines for the round wall, thin rectangles for the posts, a cone shape for the roof, short bars for the beams, and a bucket that is wider at the top. Wobbly circles make the flowers.
How do I make the stone wall look like bricks?
Draw a curved line across the wall, then add short up-and-down lines above and below it. Try to keep the lines in the top row between the lines in the bottom row, so the bricks look staggered.
How do I draw the bucket so it looks right?
Draw a small shape that is wider at the top than at the bottom, like a flower pot. Add a curved line or two across it, and hang it from a short rope.