How to Draw a Sprig of Mint Leaves (Easy Step by Step)
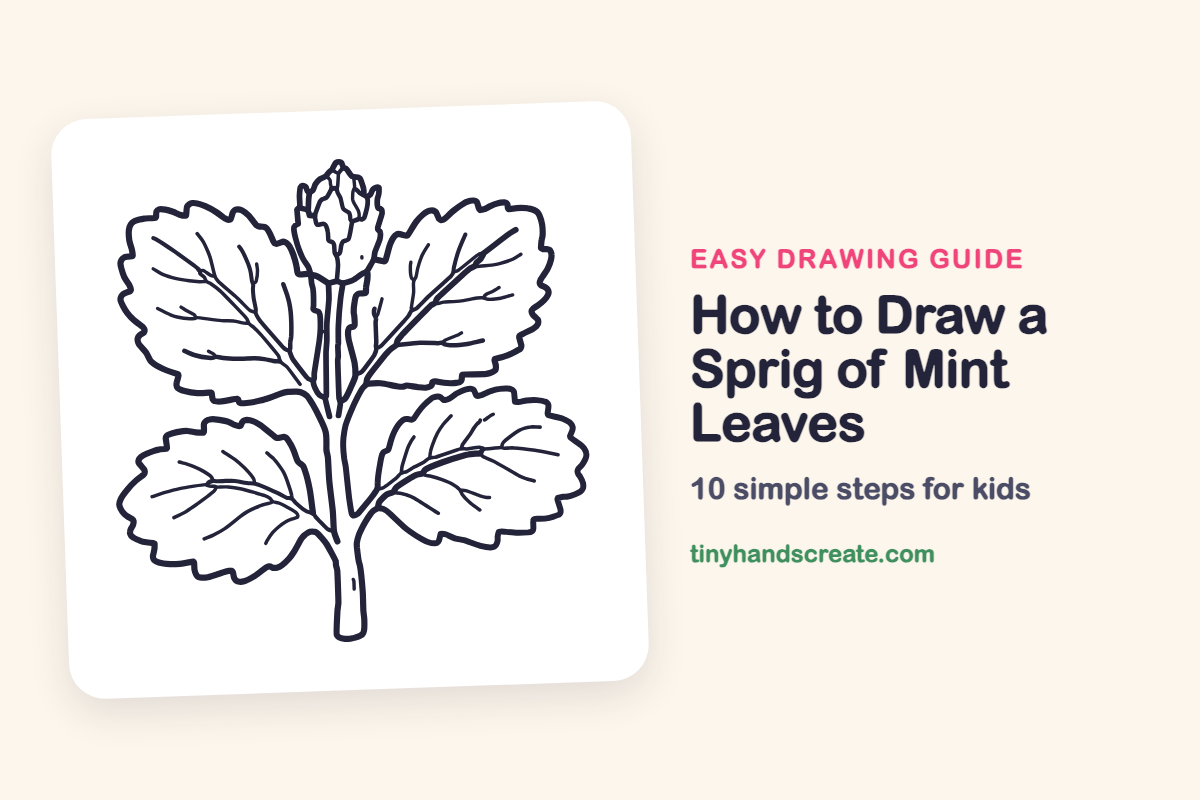
This article teaches you how to easily draw a sprig of mint leaves using simple shapes. You'll learn to create a short stem, a pointed bud, and wide rounded leaves with bumpy edges, adding thin curved lines for realistic veins.
- Start your mint drawing with simple shapes for the stem, bud, and leaves.
- Draw wide, rounded leaves and give them bumpy edges for a natural look.
- Include a pointed bud that resembles a tiny tulip at the top of your sprig.
- Add thin, curved lines to the leaves to create realistic and detailed veins.
This post contains affiliate links. As an Amazon Associate I earn from qualifying purchases.
A sprig of mint is a fun first plant to draw because it is mostly big rounded leaves with bumpy edges. You only need simple shapes: a short stem, a pointed bud like a tiny tulip, and wide rounded leaves. Thin curved lines for the veins make it look real.
- Medium
- 20 minutes
- 10 steps
You need: paper, a pencil, an eraser, and crayons or markers for coloring.
Start drawing
In this article (7 sections)
How to draw a sprig of mint leaves step by step
How to Draw a Sprig of Mint Leaves · tinyhandscreate.com
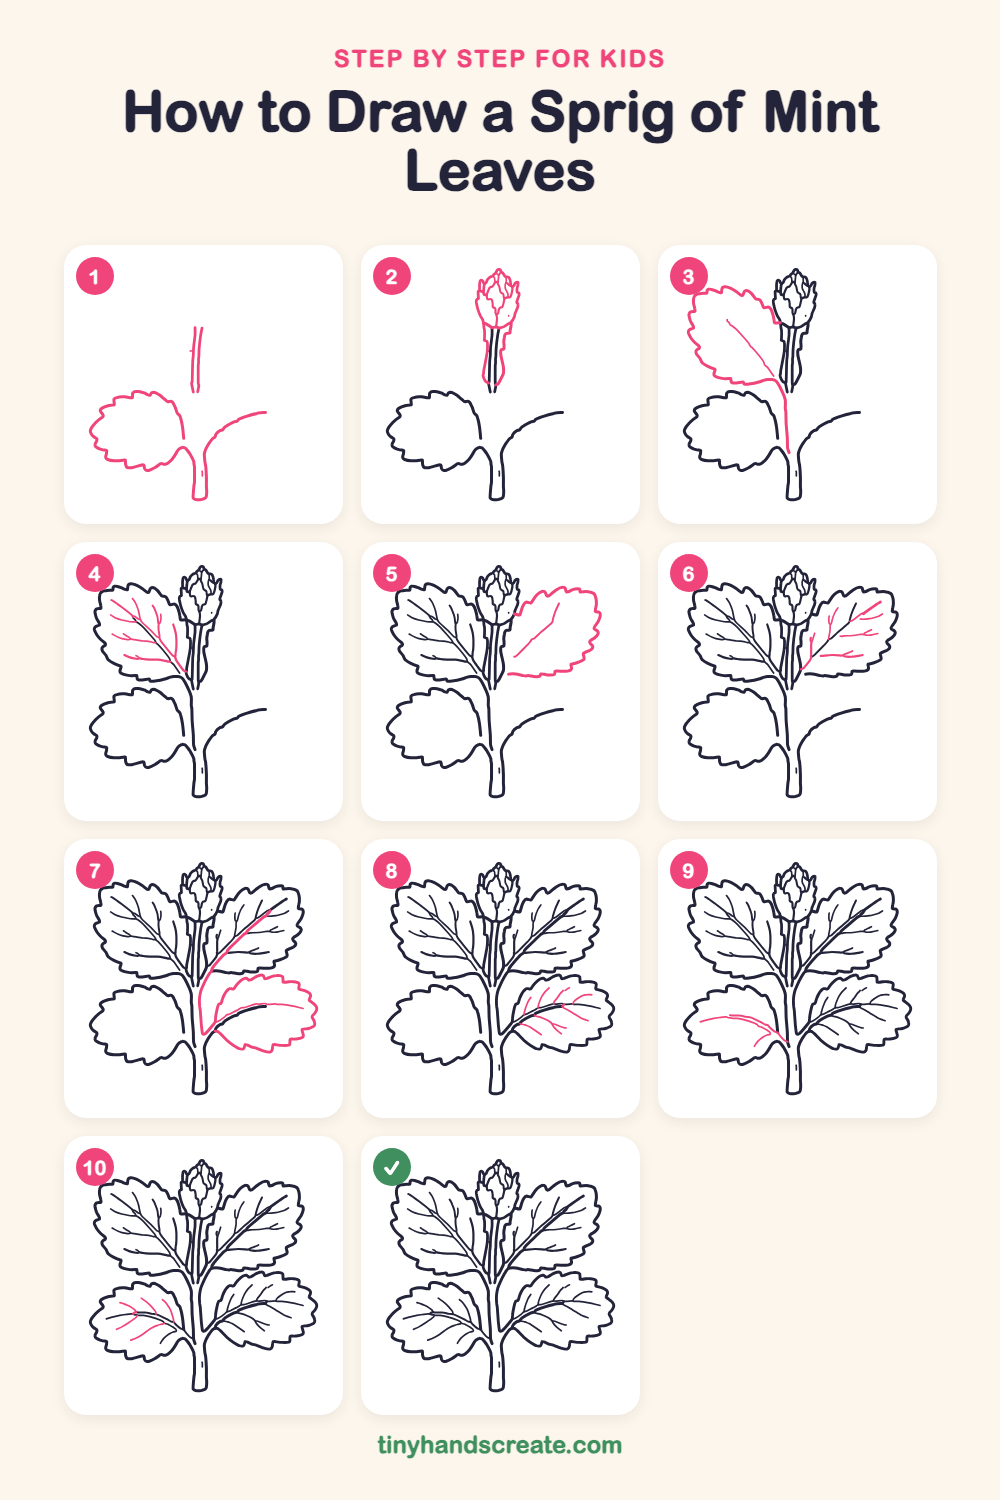
Step 1: Stem and lower leaf
Draw a short stem at the bottom, then a bumpy, zigzag leaf outline on its left. Add a curved line sweeping out to the right from the stem, and a short double line floating above.
Step 2: The flower bud
Near the top, draw a small pointed bud, like a tiny tulip, with curved lines inside for the layers. Draw two close lines going down from it for a short stem.
Step 3: Top left leaf
Draw a big rounded leaf on the left with a bumpy, zigzag edge, like a wavy heart. Add a curved line inside it, then draw a long line from the leaf down to the bottom of the stem.
Step 4: Top left veins
Draw thin curved lines branching off the middle line, like fish bones. Keep them gently bending toward the leaf edge.
Step 5: Top right leaf
Draw another big bumpy-edged leaf on the right side of the bud. Add a short curved line inside it, pointing toward the leaf tip.
Step 6: Top right veins
Add small curved lines branching off the middle line, just like on the other leaf. Make some longer and some short.
Step 7: Lower right leaf
Draw a long curved line from the right leaf down to the stem. Then draw a wide leaf with a wavy, zigzag edge pointing right, and add a curved line down its middle.
Step 8: Lower right veins
Draw short curved lines branching from the middle line, some up and some down. Little forks near the edge look great.
Step 9: Lower left middle line
The lower left leaf is already outlined, so draw one long, gently curved line across it. Start near the stem and end near the leaf tip.
Step 10: Lower left veins
Finish with thin curved lines branching off the middle line, up and down, so the leaf looks crinkly and fresh.
All done!
Go over your lines with a marker, then color it in.
Finished your sprig of mint leaves? Keep the pencils out and learn how to draw a mushroom or how to draw a sunflower next.
Tips for drawing a sprig of mint leaves
- Make each leaf a wide rounded shape, then give the edge a bumpy zigzag so the leaf keeps a nice shape.
- Draw the middle line of each leaf first. Then add the side veins, curving them toward the tip like fish bones.
- The bud is the trickiest part. Draw a small pointed teardrop first, then add a few curved lines inside it.
Free sprig of mint leaves coloring page
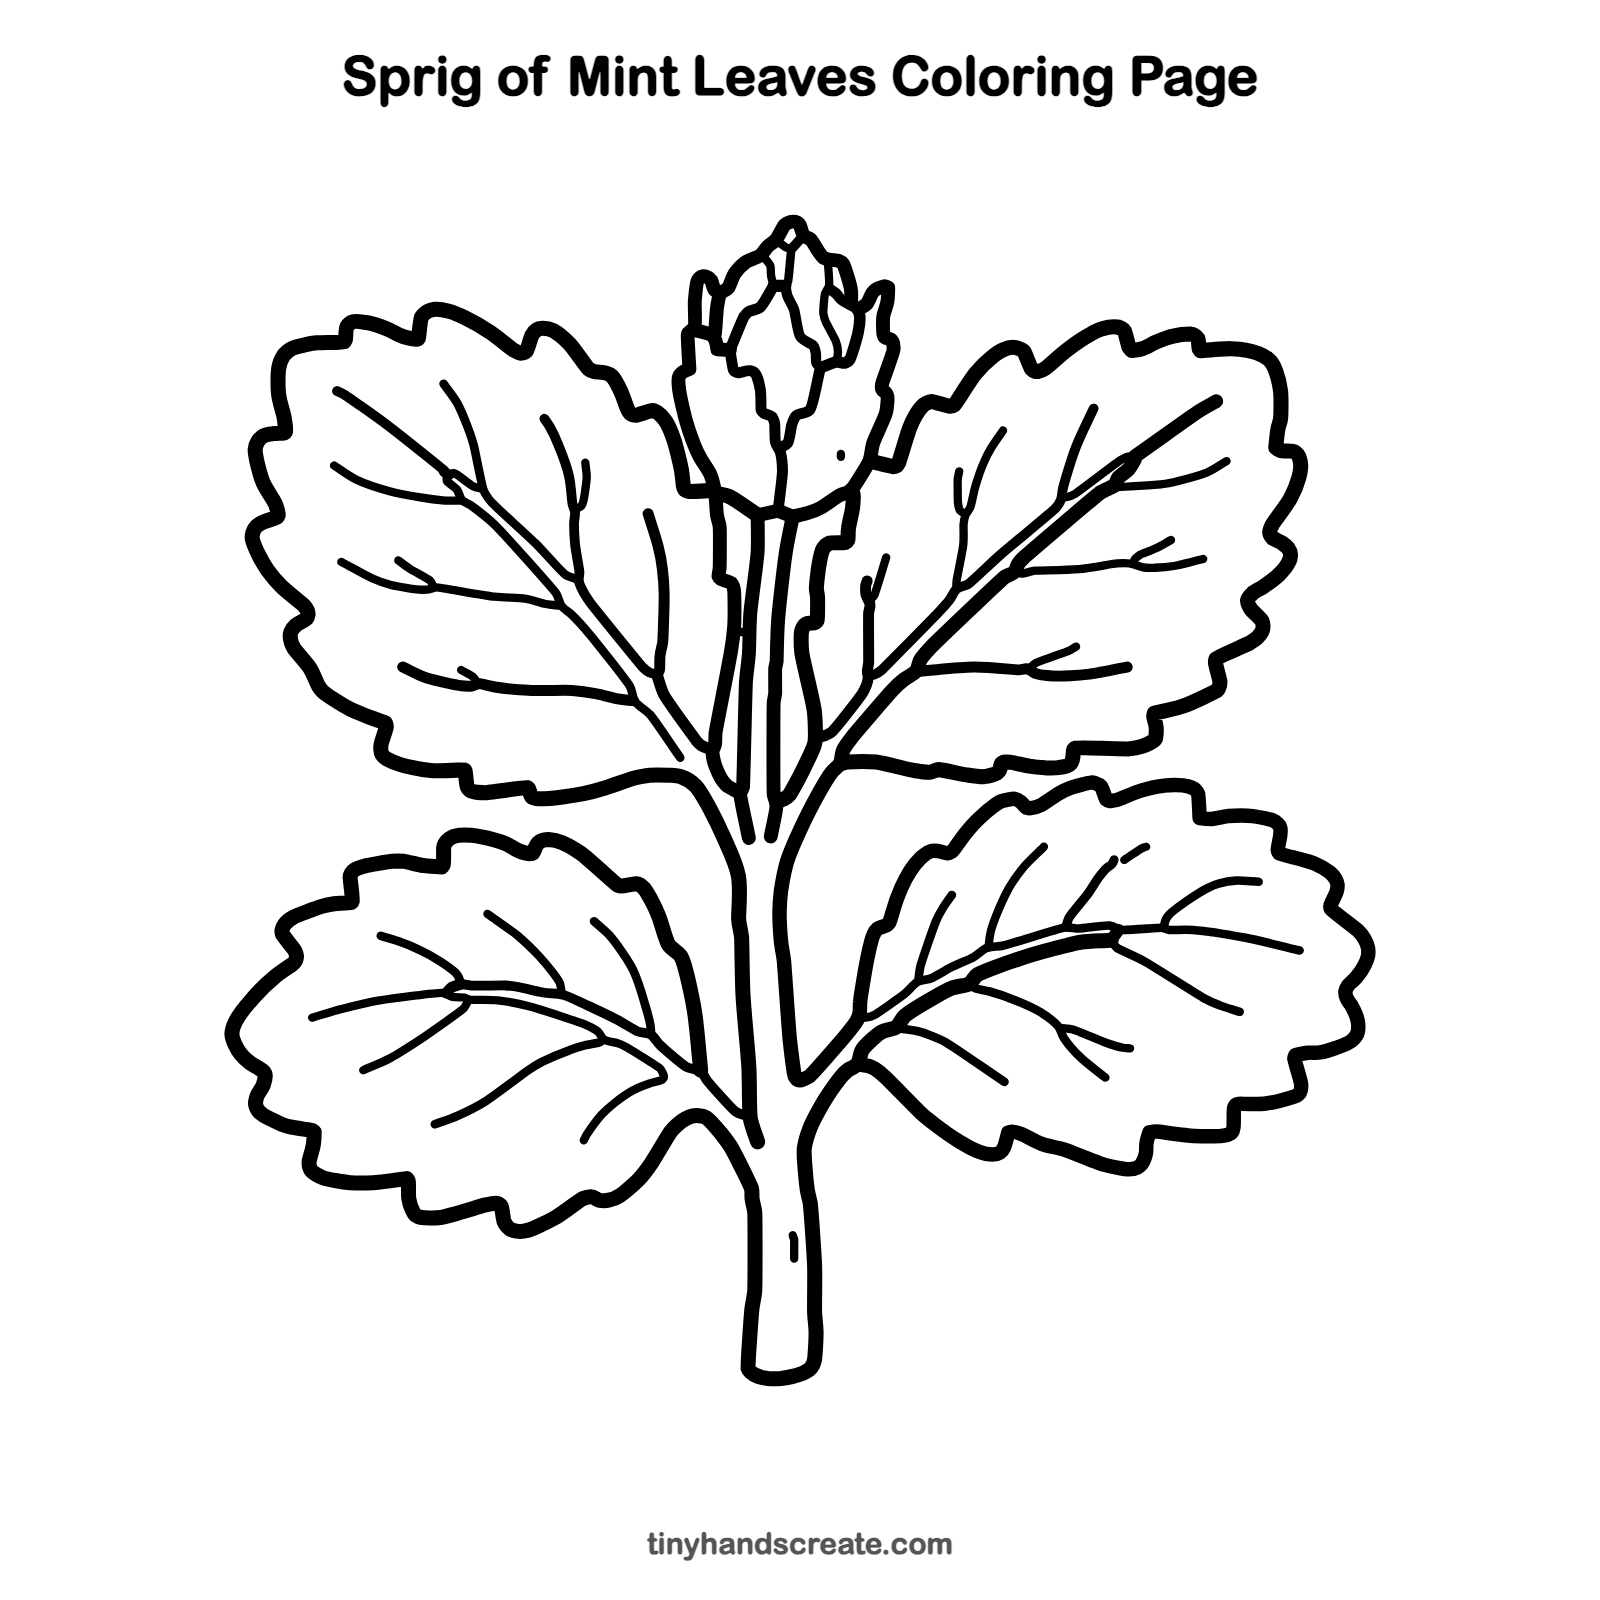
Want to go straight to coloring? Open this sprig of mint leaves coloring page at full size and print it. It is the same drawing you just learned, with clean lines ready for crayons or markers.
How to color your sprig of mint leaves drawing
Use several greens, light on the new leaves and darker on the older ones, with a pale green bud. For a twist, color it as a rainbow mint sprig, with a different shade on every leaf.
Sprig of mint leaves fun fact for kids
Mint stems are square, so you can feel four flat sides if you roll one between your fingers. Mint plants also spread fast through runners under the soil, so gardeners often grow them in pots.
Questions about drawing a sprig of mint leaves
What shapes do I need to draw mint leaves?
Use wide rounded shapes for the leaves, a short stem, and a pointed bud like a tiny tulip. Add a zigzag edge and thin curved lines for the veins.
How do I make the mint leaves look bumpy?
Draw the edge as a row of little pointy waves instead of a smooth line. Make the bumps different sizes so it looks natural.
How do I make my mint sprig look more real?
Add side veins that curve toward the leaf tip, and let each leaf point a slightly different way. Shading some leaves darker also helps.