How to Draw a Kingfisher (Easy Step by Step)
This post contains affiliate links. As an Amazon Associate I earn from qualifying purchases.
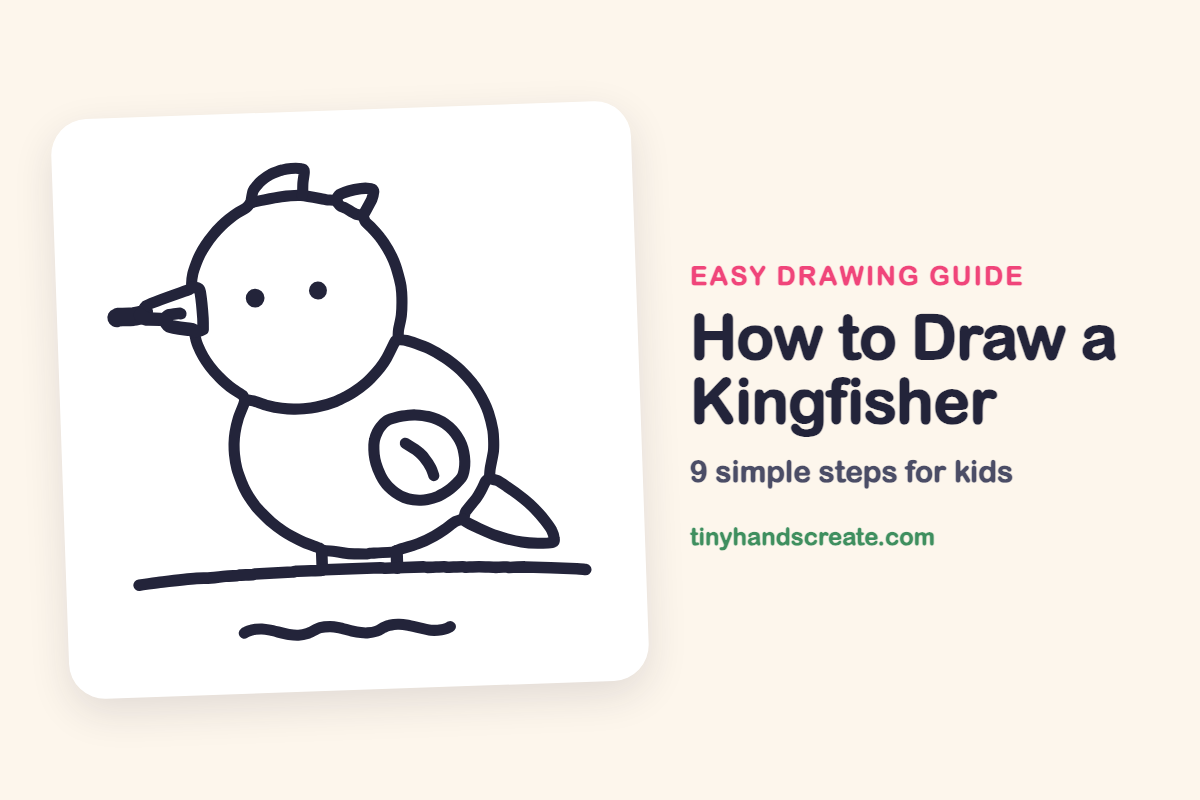
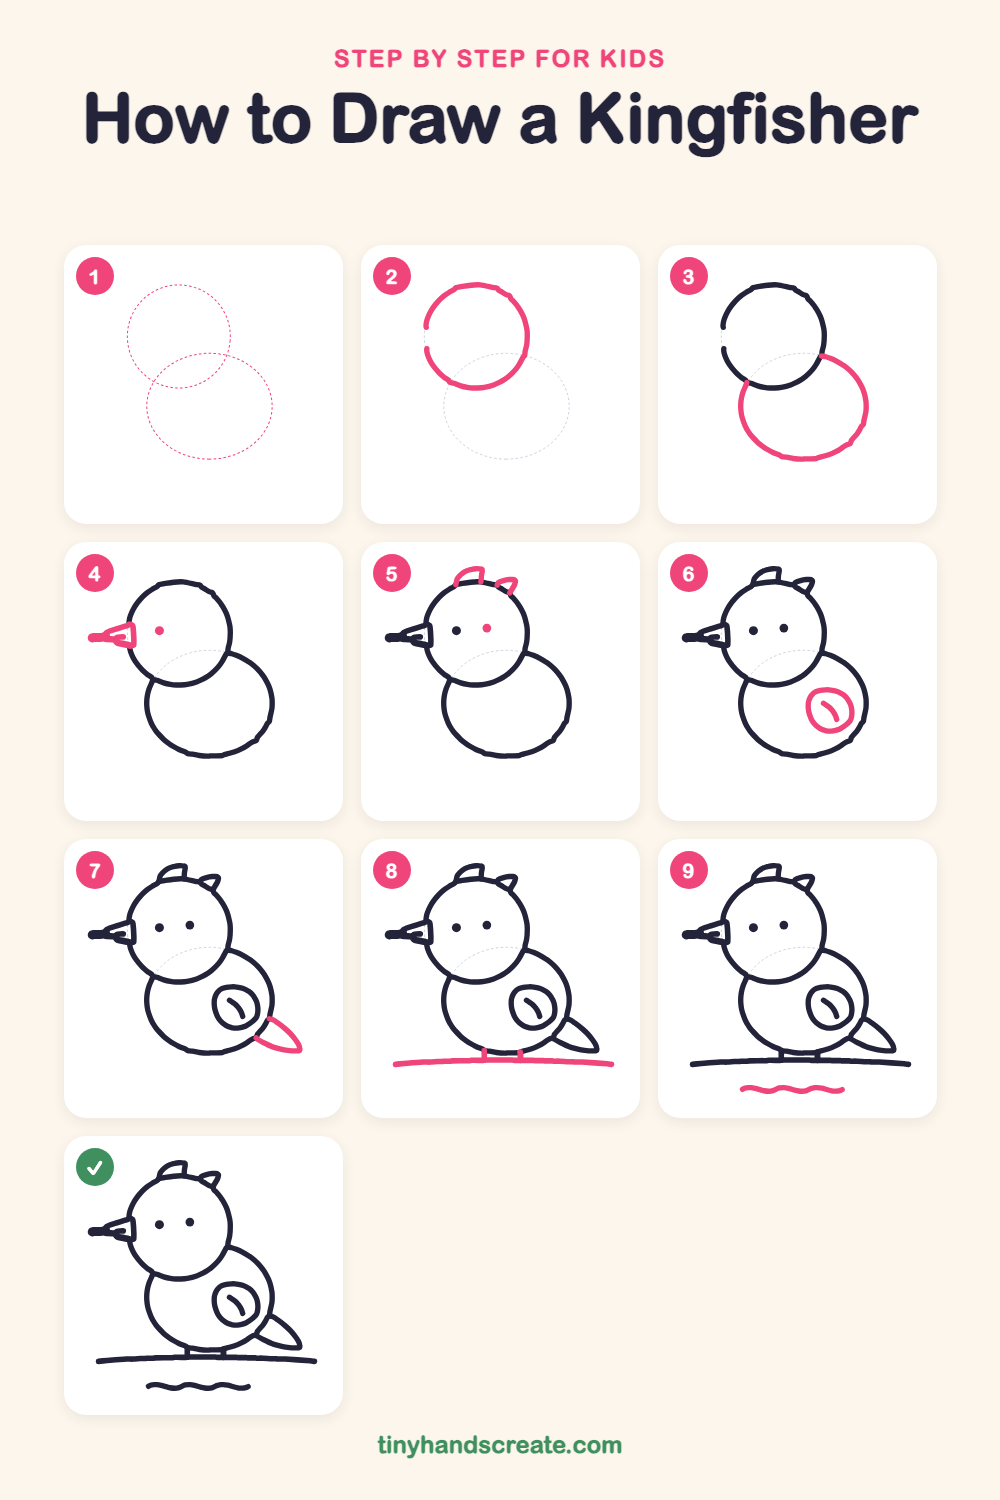
This little kingfisher sits on a branch above the water, watching for a fish. It is built from simple shapes: a circle for the head, an oval for the body, a small triangle for the beak, and two leaf shapes for the wing and tail. It is a great first bird for new artists.
- Easy
- 12 minutes
- 9 steps
You need: paper, a pencil, an eraser, and crayons or markers for coloring.
Start drawing

In this article (7 sections)
How to draw a kingfisher step by step
How to Draw a Kingfisher · tinyhandscreate.com
Step 1: Guide shapes
Lightly sketch these 2 ovals. They only show where the big parts go, so press softly. You will erase them at the end.
Step 2: The round head
Draw a big circle for the head, a little left of the middle of your paper. Make it nice and round, like a ball.
Step 3: The plump body
Draw a big oval under the head for the body. Start and end the oval where it meets the head circle so the body looks tucked behind the head.
Step 4: Beak and first eye
On the left side of the head, draw a small pointy triangle sticking out for the beak, with a short line inside it. Then add one small dot above and to the right of the beak for an eye.
Step 5: Tufts and second eye
Draw two little pointy tufts on top of the head, one on each side of the top. Then add a second small dot beside the first one to make a pair of eyes.
Step 6: The wing
On the right side of the body, draw a rounded leaf shape like a teardrop for the wing. Add a short curved line inside it for a feather.
Step 7: The tail
At the lower right of the body, draw a pointed leaf shape sticking out and down for the tail. Start and end its lines where they touch the body.
Step 8: Legs and branch
Draw two short straight lines coming down from the bottom of the body for legs. Then draw a long, gently curved line across the bottom for the branch the bird sits on.
Step 9: Water ripples
Below the branch, draw a short wavy line with a few gentle bumps to show water.
All done!
Erase the guide shapes, go over your lines, then color it in.
Finished your kingfisher? Keep the pencils out and learn how to draw a dodo or how to draw a kiwi bird next.
Tips for drawing a kingfisher
- Draw the head circle first and the body oval second, letting the body tuck behind the head. This makes the two shapes look connected.
- The beak is the trickiest part. Start at the point on the far left, then draw one line up and one line down to the head so it makes a small triangle.
- Keep the two leg lines short and straight so they reach the branch. Draw the legs and branch together so you can see exactly where the feet should land.
Free kingfisher coloring page
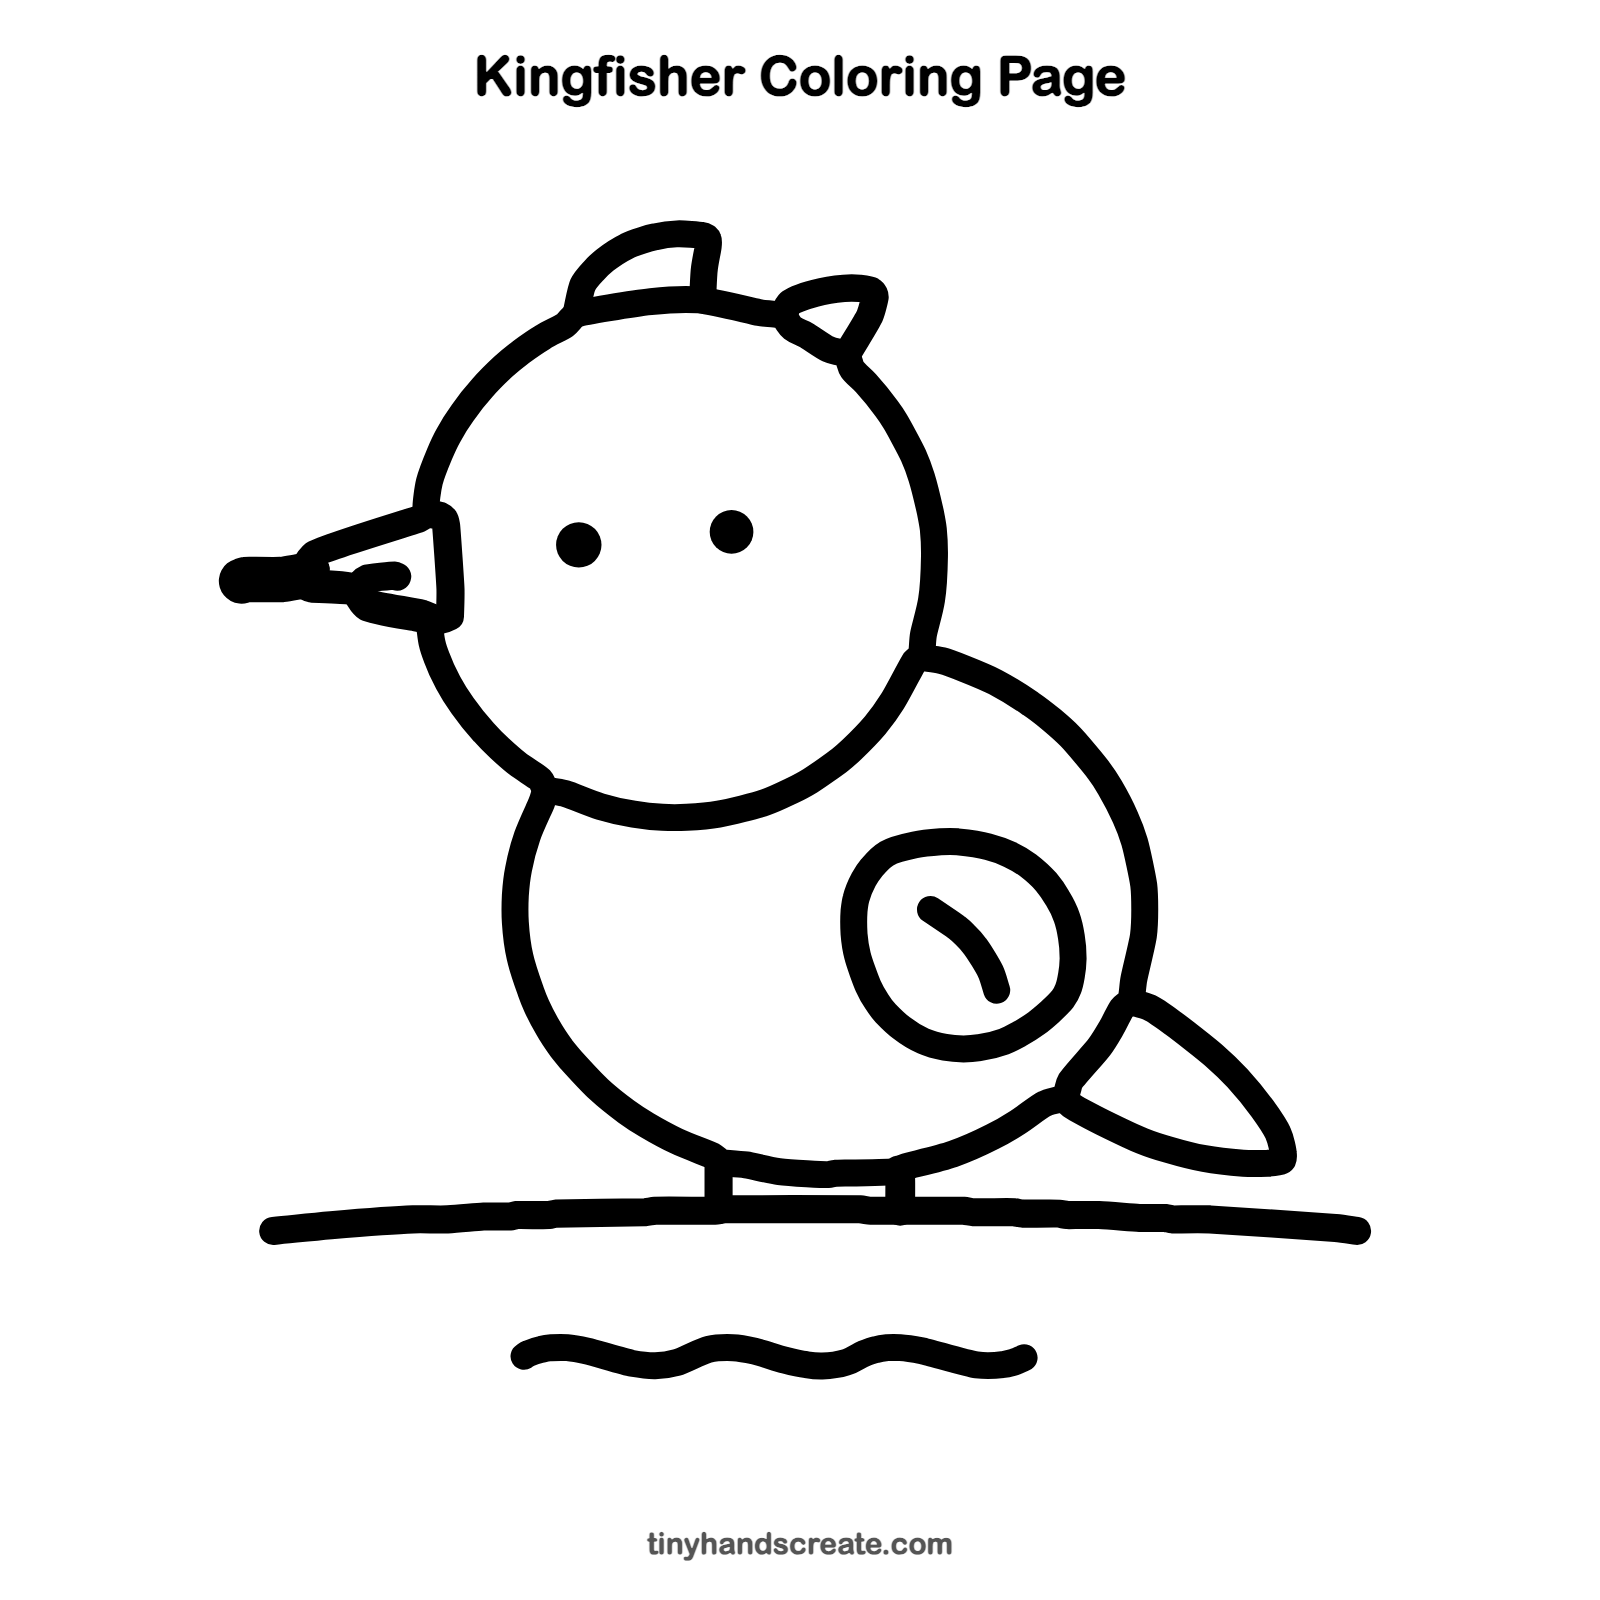
Want to go straight to coloring? Open this kingfisher coloring page at full size and print it. It is the same drawing you just learned, with clean lines ready for crayons or markers.
How to color your kingfisher drawing
Try bright blue on the head, wing, and tail with an orange belly and a dark beak, which is how many real kingfishers look. For a creative twist, color the water ripples in rainbow stripes.
Kingfisher fun fact for kids
Many kingfishers dive headfirst into the water to catch small fish.
Questions about drawing a kingfisher
What shapes do I need to draw a kingfisher?
You need a circle for the head, an oval for the body, a small triangle for the beak, and two leaf shapes for the wing and tail. The branch and water are just curved and wavy lines.
How do I make my kingfisher look cuter?
Make the head extra round and the eyes small dots. A round, plump body and a small beak also make the bird look sweet.
How long does it take to draw a kingfisher?
Most kids finish this drawing in about 10 to 15 minutes. Take your time with the circles and the beak, and coloring it in will take a little longer.