Halloween Crafts for Kids: 20 Non-Scary Projects for Preschoolers and Toddlers
You'll discover 20 non-scary Halloween craft ideas perfect for preschoolers and toddlers, focusing on cute, fall-themed projects that are developmentally appropriate and easy to make with common household supplies.
- Prioritize "cute, not creepy" crafts to avoid fear in kids under 5.
- Choose projects that use simple skills like gluing, tearing, and dabbing.
- Utilize common household items and basic craft supplies you likely already own.
- Watch for signs your child might find a craft or decoration too scary.
Last October, I pulled up a “Halloween crafts for toddlers” Pinterest board expecting pom-pom pumpkins and got a full-page spread of dripping blood fonts, a “realistic severed finger” cookie tutorial, and a paper mache skull with LED eyes. My daughter was two. She still screamed at the vacuum cleaner. There was no version of that skull entering our house.
What I actually wanted — and what I suspect you want if you clicked on this — was Halloween that felt like fall, not like a horror movie set. Pumpkins with faces that smile instead of leer. Ghosts that look more like clouds than corpses. Spiders made of pom-poms that your 20-month-old can hold without anyone having nightmares about them later. That’s the entire filter for every project below: if a three-year-old would ask “is that scary?” and the answer is even a maybe, it didn’t make the list.
These 20 projects use paper, pom-poms, paper plates, egg cartons, and stuff you probably already have in a kitchen drawer. Most take under 30 minutes. All of them are built around what preschool and toddler hands can actually do — gluing, tearing, dabbing, stamping — instead of what a Pinterest photographer’s hands can do. Grab some orange and black construction paper and let’s get into it.
Why “Cute, Not Creepy” Actually Matters at This Age
This isn’t just a squeamish parenting preference — it lines up with where preschoolers are developmentally. Most kids under 5 are still sorting out what’s real and what’s pretend, which is exactly why a “friendly” ghost made of a paper plate reads as silly to a 4-year-old, while a photorealistic skeleton mask can trigger genuine fear that shows up as nightmares or a sudden refusal to go in their own bedroom. Toddlers in particular have almost no ability to self-soothe around an image that startles them — they don’t yet have the “it’s just decoration” reasoning skill that even a 6-year-old is starting to build.
The good news is that “non-scary” doesn’t mean “less fun.” Cute Halloween crafts still deliver the parts kids actually love about the holiday: orange and black colors, pumpkins, bats, spiders, a little bit of pretend-spooky language (“ooooh, a friendly ghost!”), and the anticipation of trick-or-treating. You’re not watering down Halloween — you’re translating it into a dialect a 2- to 5-year-old can enjoy without the 3am wake-up call.
A few quick signs a craft (or decoration, or costume) might be too much for your specific kid:
- They ask a lot of “is that real?” questions about it
- They want to leave the room, or stop wanting to go into a room where it’s displayed
- They bring it up again later, unprompted, in a worried tone
- They start avoiding something unrelated (the basement, the dark, a Halloween store window) right after seeing it
If none of that is happening, you’re in safe territory. Every project below is designed to stay there.
What You Need: The Halloween Craft Supply Stash
You don’t need a dedicated craft closet for this. Here’s the entire shopping list for all 20 projects — most families already own half of it.
| Category | Items |
|---|---|
| Paper | Orange, black, white, purple, and green construction paper; white paper plates; paper lunch bags |
| Sticky stuff | Washable glue sticks, white school glue, glue dots (great for toddlers — less mess than liquid glue) |
| Pom-poms & fuzzy bits | Black, orange, white, and purple pom-poms in assorted sizes; cotton balls; pipe cleaners in black and orange |
| Googly eyes | A big bag of assorted sizes — you will use more than you think |
| Paint | Washable tempera in orange, black, white, and purple; paper plates for palettes; wide brushes and sponges for little hands |
| Household recycling | Egg cartons, toilet paper tubes, paper towel tubes, small cardboard boxes, mason jar lids |
| Extras | Black yarn or string, cotton balls (for ghost fluff and spider webs), white cardstock, orange cardstock, a hole punch |
Nothing here is scary-looking on its own, which is part of the point — even the raw materials feel like a craft box, not a horror prop shop. If you’re already stocked up on general craft supplies from other seasonal projects, like the stash you’d use for fall leaf crafts, you likely have 80% of this on hand already.
Paper Plate & Paper Crafts (Ages 2-5)
Paper plates are the unsung hero of toddler Halloween crafts — they’re sturdy, pre-cut into a circle (no scissors needed for younger kids), and hold up to heavy paint and glue without falling apart. Here are five projects built entirely around them and basic paper.
1. Paper Plate Ghost. Paint a paper plate white (or skip painting and use a white plate as-is for a faster version), let it dry, then glue on two black construction paper circles for eyes and a small black oval for a “surprised” mouth. Cut the bottom edge into soft, rounded waves instead of jagged points to keep it friendly rather than tattered. Toddlers can do the gluing step solo; preschoolers can paint the plate themselves.
2. Paper Plate Pumpkin Face. Paint a plate orange, add a green pipe-cleaner stem taped to the back, and let your child glue on a triangle nose and a big, goofy smiling mouth cut from black paper. Skip the classic jagged jack-o’-lantern teeth — a simple curved smile keeps this squarely in “cute” territory even for the youngest crafters.
3. Paper Bag Bat. Flatten a brown or black paper lunch bag, fold it in half, and cut a simple bat silhouette (round head, two curved wings) — preschoolers can trace a template you draw, toddlers can rip paper into rough bat shapes with your guidance. Add two googly eyes and small white triangle fangs (tiny and rounded, not pointy) for a bat that looks more “sleepy cartoon” than “vampire.”
4. Torn-Paper Pumpkin Patch. Give your toddler a stack of orange paper scraps and a sheet of blue or purple construction paper. Let them tear the orange paper into small pieces (great fine-motor practice) and glue them down into rough pumpkin shapes. This is a true process-art project — there’s no “right” way it should look, which makes it perfect for kids who get frustrated by crafts with a specific end goal in mind, similar to the philosophy behind process art activities for toddlers.
5. Accordion-Fold Paper Ghosts. Fold a strip of white paper accordion-style, then let your child pull it open slightly and glue on a face — the folds create a 3D, huggable-looking ghost that stands up on its own on a shelf or windowsill. This one works especially well as a small-batch project since it doesn’t require much paper per ghost, making it easy to send a few home from a playdate or preschool class.
Pom-Pom & Cotton Ball Crafts (Ages 18 months-5 years)
Pom-poms are about as toddler-safe as craft supplies get (assuming you’re using the larger sizes and supervising closely with anyone still mouthing objects), and they add instant texture and cuteness to anything they touch.
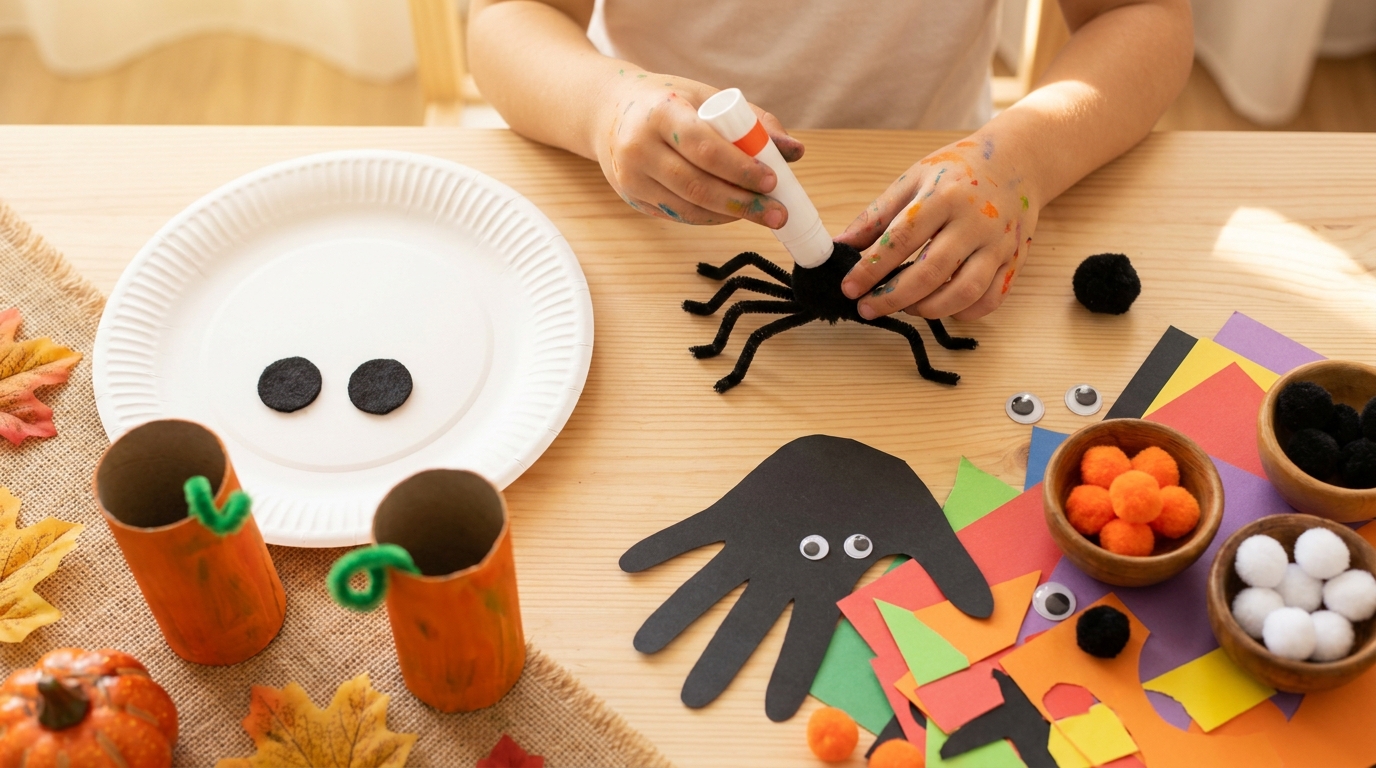
6. Pom-Pom Spider. Glue four black pipe cleaners, bent into legs, to the bottom of a large black pom-pom, then add two googly eyes on top. Because it’s soft and round rather than angular, this spider reads as “friendly cartoon bug” rather than anything crawly-scary — genuinely one of the cutest crafts on this whole list, and simple enough for a 2-year-old to assemble with help holding the pipe cleaners in place while you glue.
7. Cotton Ball Ghost. Draw a simple ghost outline on white or light gray cardstock, then let your child glue cotton balls inside the lines to fill it in. The fluffy texture makes this feel more like a cloud than a spirit, and the stretching-and-dabbing motion of pulling cotton balls apart is great fine-motor work for toddlers.
8. Pom-Pom Pumpkin Patch Painting. Dip orange pom-poms in orange paint (clip a clothespin to each one so little fingers stay clean) and dab them onto paper to create a whole patch of pumpkins, then add green pipe-cleaner stems once dry. This is a fantastic first-painting-tool project for toddlers who aren’t ready to hold a brush with control yet.
9. Candy Corn Pom-Pom Sort. Not a craft exactly, but a Halloween-themed fine motor and color-sorting activity: fill a muffin tin or egg carton with yellow, orange, and white pom-poms and have your toddler sort them by color, or glue them in stripes onto a paper triangle to build a giant candy corn piece of art. It pairs beautifully with an existing sensory bin setup if you want to extend the play beyond the glue-and-paper stage.
10. Mummy Pom-Pom Jar. Wrap a small mason jar or plastic jar in strips of white tissue paper or gauze-like fabric, leaving a gap for two googly eyes, then drop orange or black pom-poms inside for a “trick-or-treat” candy jar that’s more silly than spooky. Great as a functional craft — kids can actually use it to hold their own Halloween treats afterward.
Handprint & Footprint Crafts (Ages 1-5)
Handprint crafts are a genre unto themselves in toddler circles, and Halloween gives you a fun excuse to make a few keepsakes.
11. Handprint Bat. Paint your child’s palm and fingers black, press it onto paper with fingers spread wide (the fingers become the wing ridges), let it dry, then add googly eyes and a small orange triangle beak-nose to the rounded part of the palm print. These make sweet, low-key spooky wall art or cards for grandparents.
12. Footprint Ghost. Paint the sole of your child’s foot white and press it onto black or purple paper — the footprint shape naturally looks like a rounded ghost body. Add a face once it’s dry. This is one of the easiest “cute Halloween keepsake” crafts for babies and young toddlers who can’t yet hold a brush or glue stick themselves.
13. Handprint Spider Web. Paint your child’s hand white or silver and press it onto black paper with fingers spread — the print itself looks like a loose web shape. Once dry, use a white paint pen or crayon to connect a few extra web lines between the “strands,” then glue on one small black pom-pom spider in a corner.
14. Fingerprint Pumpkin Patch. Dip fingertips in orange paint and stamp a row of small dots across a sheet of paper, then use a thin black marker to add stems and one curvy vine line connecting them all — a whole pumpkin patch built entirely from fingerprints. This is an easy one to scale up for a group of kids at a Halloween playdate since it needs almost no setup or cleanup per child.
Recycled & Household-Item Crafts (Ages 3-6)
Halloween crafts don’t need to cost anything if you raid the recycling bin first. If your family already does zero-cost seasonal crafting the way we cover in recycling bin crafts for St. Patrick’s Day, this section will feel familiar — same principle, Halloween colors.
15. Toilet Paper Tube Ghost. Wrap a toilet paper tube in white paper or paint it white, add a black marker face, and glue on a small strip of white tissue paper trailing from the bottom for a “floaty” tail. These stand up on their own, so kids love lining up a whole row of them like a tiny ghost parade.
16. Egg Carton Bats. Cut two cups from an egg carton, paint them black, and glue them together at the rims with a pom-pom or googly-eyed ball sandwiched in between as the head — the carton cups become rounded, friendly bat wings instead of the usual sharp-pointed kind. This one takes a bit more assembly help from an adult but preschoolers can do all the painting and gluing.
17. Cardboard Tube Pumpkins. Cut a paper towel tube into 2-inch rings, paint them orange, and stand them up in a cluster glued to a paper base with a green pipe cleaner stem poking out the top of the tallest one. If your kids already love building with cardboard scraps the way we describe in cardboard box crafts for kids, this is a natural next project — same “trash to treasure” mindset, seasonal twist.
18. Milk Jug or Yogurt Cup Jack-o’-Lantern. Wash out a small plastic yogurt cup or milk jug, paint it orange, and let your child draw (not carve — no knives needed) a simple smiling face with a black permanent marker. Because there’s no carving involved, even a 2-year-old can “make a jack-o’-lantern” fully independently, and it’s reusable as a little treat-holder or pencil cup afterward.
Pumpkin Crafts That Aren’t Jack-o’-Lanterns
Every family does at least one real pumpkin this time of year, but not every pumpkin activity needs a knife or a mess of stringy pumpkin guts. These are pumpkin-adjacent projects that skip the carving step entirely.
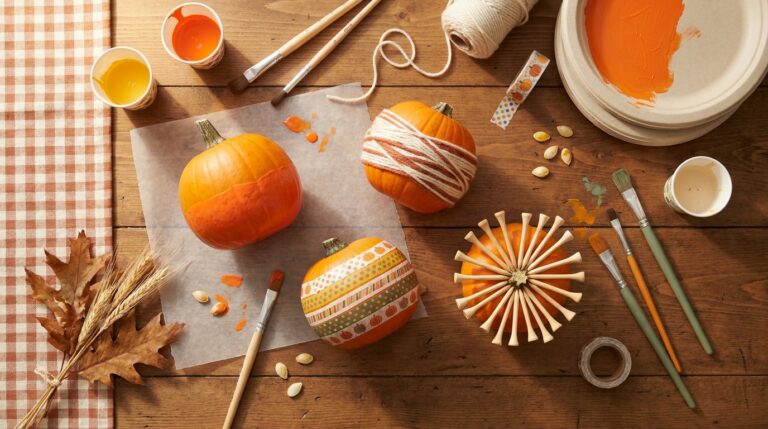
19. No-Carve Yarn-Wrapped Pumpkin. Take a small real pumpkin (or a foam craft pumpkin for a mess-free version) and let your child wrap it in orange, white, and black yarn, securing the ends with a dab of glue or tape. It’s a satisfying fine-motor task — winding, wrapping, adjusting — and it results in a pumpkin that looks intentionally crafted rather than carved. This pairs nicely with loose-parts-style play if you set out a tray of yarn colors, buttons, and pom-poms and let your toddler decide how to decorate.
20. Painted Pumpkin Faces (Dot Markers or Fingers). Give your child a small real or foam pumpkin, some washable paint, and either dot markers or their own fingers, and let them paint a face directly onto the pumpkin’s surface — no cutting, no seeds, no sharp tools. Suggest a “silly” or “smiling” face rather than a scary one, but honestly, most toddlers left to their own devices paint something closer to abstract polka dots than a face anyway, and that’s a genuinely fine outcome. If you want a slightly more structured version, tape a paper template of eyes/nose/mouth to the pumpkin first as a guide for where to paint.
Making It Toddler-Friendly (Under 3): What to Change
A craft that works for a 4-year-old often needs a few tweaks to work for an 18-month-old. Here’s the quick-reference version:
| Instead of… | Try… |
|---|---|
| Liquid glue in a bottle | Glue sticks or glue dots — far less mess, no spills |
| Scissors | Pre-cut shapes, or let them tear paper instead |
| Small pom-poms or googly eyes | Large sizes only, and stay within arm’s reach the whole time (choking hazard for anyone still mouthing objects) |
| A finished-product goal | Let go of the outcome entirely — for toddlers, gluing and dabbing is the activity |
| One long craft session | Break it into two 5-minute sessions instead of one 15-minute one |
If your toddler loses interest three minutes in, that’s not a failed craft — that’s a completely normal toddler attention span. Save the half-finished project, come back to it after a snack, or just call it done. Nobody’s grading this.
For a broader toolkit of low-mess options beyond just Halloween, our guide to mess-free art activities for toddlers is worth bookmarking for the rest of the year too.
Setting Up a No-Stress Craft Station
A few small setup choices make a huge difference in how smoothly any of these projects go with young kids:
- Cover the table with a cheap plastic tablecloth or an old shower curtain — it turns “oh no, paint on the table” into a non-issue.
- Pre-portion supplies into small bowls or muffin tins instead of leaving full glue bottles and paint jars within toddler reach. Less spillage, less “why is the whole bottle empty” moment.
- Have a designated dry towel at the table, not just paper towels — toddlers wipe hands on themselves regardless, so a towel draped on their lap catches most of it.
- Do painting projects in play clothes or a smock, and don’t stress about the rest. Washable paint earns its name.
- Let one craft finish before introducing the next. Laying out all 20 projects’ worth of supplies at once is a recipe for overwhelm (for you and them). Pick two or three per session.
Turning These Into a Full Halloween Craft Session or Party
If you’re hosting a small Halloween playdate or a preschool class party, you don’t need all 20 projects — pick three that cover different skills so every kid, regardless of age or fine-motor stage, has something they can succeed at:
- One painting/dabbing project (fingerprint pumpkins or pom-pom painting) for the youngest kids
- One gluing/assembly project (pom-pom spider or paper plate ghost) for the middle group
- One open-ended process art project (torn-paper pumpkin patch) that has no “wrong” way to do it, so nobody feels behind
Set each craft up at its own station with pre-portioned supplies, and let kids rotate at their own pace rather than doing all three in lockstep. If you want a decision-making shortcut for matching activities to your specific child’s age and interests beyond just this list, our activity finder quiz can help narrow things down further.
Frequently Asked Questions
What age is appropriate for Halloween crafts?
Most of the projects on this list work starting around 18 months to 2 years old, as long as an adult is handling any small parts (googly eyes, small pom-poms) and supervising closely. Simplified versions — handprint/footprint crafts, dot-marker painting, torn paper — work even for younger toddlers. True independent crafting with scissors and detailed assembly is more realistic starting around age 4.
How do I keep Halloween crafts from being too scary for young kids?
Stick to rounded shapes instead of jagged ones, smiling or neutral expressions instead of angry or menacing ones, and soft materials like pom-poms and cotton balls instead of anything sharp-looking. Watch your child’s reaction as you introduce each craft — if they seem hesitant or start asking “is that real,” swap it out for a simpler, cuter version, like a rounded felt-tip ghost face instead of a jagged one.
What household items work best for last-minute Halloween crafts?
Paper plates, toilet paper and paper towel tubes, egg cartons, and yogurt cups are the most versatile — all of them are already roughly the right shape for a ghost, bat, or pumpkin with minimal cutting. Pair them with black and orange construction paper, googly eyes, and washable paint or markers and you can put together most of the projects on this list without a store run.
How do I clean pom-pom or paint mess off carpet and clothes?
For washable tempera paint, act while it’s still wet: blot (don’t rub) with a damp cloth, then run the item through a normal wash cycle. For dried paint on carpet, a mix of dish soap and warm water worked in with a soft brush usually lifts it. Glue dots and glue sticks are worth using instead of liquid glue specifically because they sidestep most of this problem in the first place.
Can toddlers use real pumpkins for crafts, or should I use fake ones?
Real mini pumpkins work fine for no-carve projects like yarn-wrapping or painting a face on the surface, and they’re a nice sensory experience (bumpy stem, smooth or ridged skin). If you want something reusable year after year, or you’re worried about a real pumpkin getting squished by an enthusiastic toddler, a foam craft pumpkin from a craft store is a sturdier stand-in that takes paint just as well.
How long do these crafts take to make?
Most individual projects take 10-20 minutes of active crafting time, though drying time for paint or glue can add another 20-30 minutes before you can add final details like googly eyes. Plan for two toddler-length sessions (5-10 minutes each) rather than one long sitting if you’re working with a child under 3.
What’s a good first Halloween craft for a child who’s never done crafts before?
The footprint ghost or fingerprint pumpkin patch are the gentlest entry points — they require no tool control at all beyond letting an adult paint their hand or foot and press it to paper, and the payoff (a recognizable shape) is immediate and satisfying even for a first-timer.
A Halloween That’s All Treat, No Trick
None of these 20 projects require a trip to a specialty store, a steady hand with an X-Acto knife, or a tolerance for anything genuinely spooky — just paper, glue, pom-poms, and whatever’s already sitting in your recycling bin. Pick two or three that match wherever your kid is right now, let the process matter more than the finished product, and you’ll end up with a fridge covered in ghosts, pumpkins, and spiders that are exactly as cute as October is supposed to be.