No-Carve Pumpkin Decorating Ideas for Last-Minute Halloween
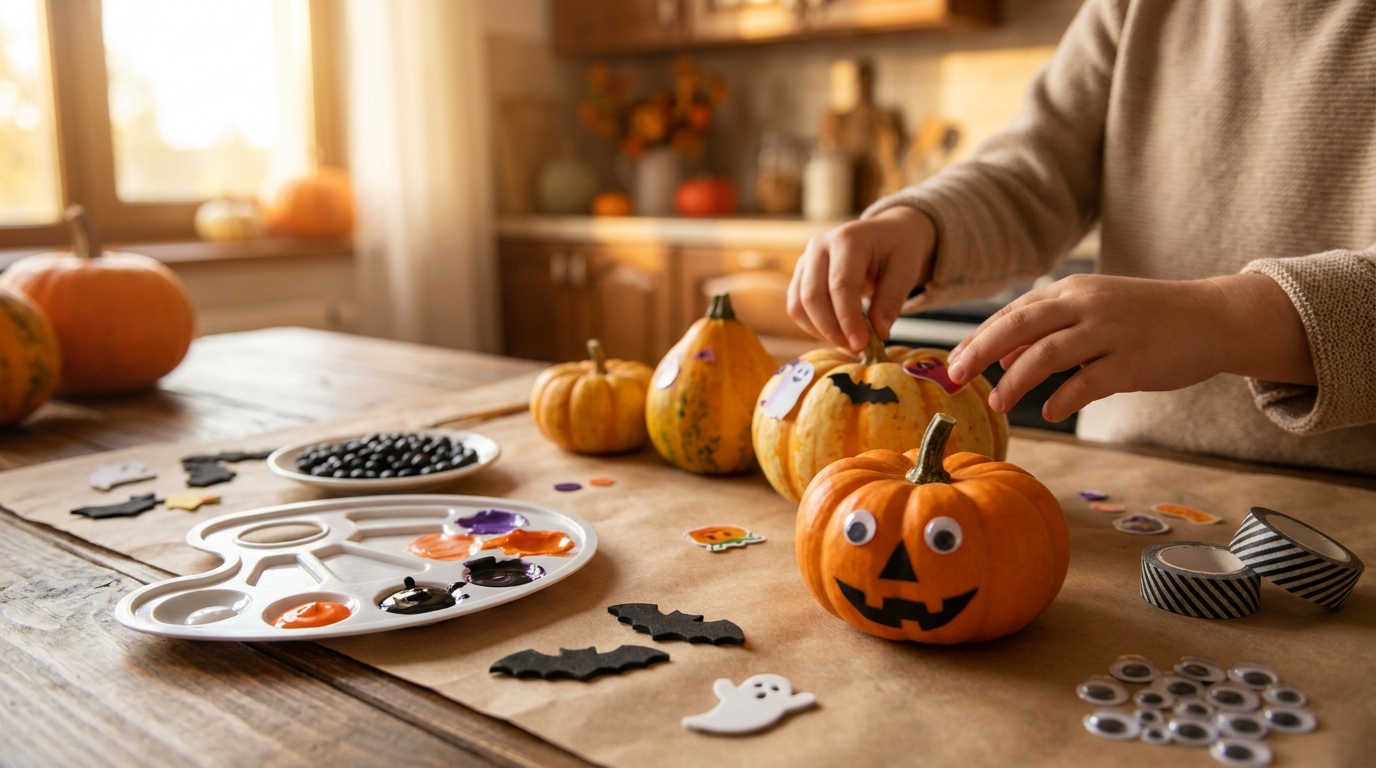
It was 7:40 p.m. on October 30th, and I was holding a pumpkin with no plan. My four-year-old asked if she could help carve it. Young kids shouldn’t use carving knives, so we grabbed stickers and washi tape instead. Twenty minutes later she had a lopsided, grinning pumpkin that she was prouder of than anything I’ve ever carved.
No-carve decorating is often the better option, even when you have time. There are no seeds to scoop and no collapsing face by Halloween morning. This page covers no-carve methods for ages 2-6, with age guides, mess ratings, safety notes and a 15-minute plan for tonight. The free No-Carve Pumpkin Decorating Kit is just below if you want a printable to go with it.
Mess ratings: None means no wipe-down, Low means a damp paper towel does it, and Medium means a tablecloth down with soap and water ready. If everyone’s already in costume, stick to None and Low.
In this article (15 sections)
- No-Carve Pumpkin Plan for Tonight (About 15 Minutes)
- Why Skip the Knife This Year (Even If You Usually Carve)
- Supplies You Probably Already Have
- No-Carve Pumpkin Painting for Toddlers and Preschoolers
- Sticker Pumpkins for Toddlers and Preschoolers (No Cleanup)
- Easy Washi Tape Pumpkin Faces for Kids
- Pantry-Item Pumpkins for Ages 4 and Up
- Yarn-Wrapped Pumpkins
- Felt Face Pumpkins
- Chalkboard and Dry-Erase Pumpkins
- Paper Pumpkins When You Have No Pumpkin
- Which Method for Which Age
- If Something Goes Wrong: Quick Fixes
- Frequently Asked Questions
- Which No-Carve Idea to Pick Tonight
No-Carve Pumpkin Plan for Tonight (About 15 Minutes)
If trick-or-treating starts soon and you have no pumpkin decor, start here. This is the fastest route, using supplies most homes already have.
- One clean, dry pumpkin.
- Painter’s tape or washi tape.
- Big stickers, the larger the better.
- Optional: googly eyes, for ages 5 and up, or stuck on by an adult.
- Tape a face. (5 min) Wipe the pumpkin with a dry cloth so the tape grips. Tear painter’s tape or washi tape into rough triangles and a zigzag mouth, and let your child press them on. No cutting needed.
- Add eyes. (2 min) Big round stickers make the easiest eyes at any age. Sit right beside any 2 or 3-year-old while they stick. Googly eyes are small parts, so ages 5 and up press them on with you watching, and an adult sticks them on for a 4-year-old.
- Fill the gaps with stickers. (5-10 min) Let your child put stickers anywhere there’s blank space.
- Set it on the porch. Turn the face toward the street and let your kid pick the spot.
Total time is about 15 minutes. Cleanup is tossing the tape scraps and sticker backing. Bin the backing straight away so no toddler chews it. The methods below give you more options if you have longer.
Why Skip the Knife This Year (Even If You Usually Carve)
I still carve some years, but carving needs time and adult hands, so little kids mostly watch. No-carve flips that:
- Zero prep time. No newspaper to spread and no seeds to scoop.
- Kids do the decorating. They aren’t just watching you.
- It usually lasts longer. A carved pumpkin often goes soft in about 3-5 days, sooner in warm weather. An uncut one can often last a few weeks in cool, dry weather if the skin is unbroken.
Supplies You Probably Already Have
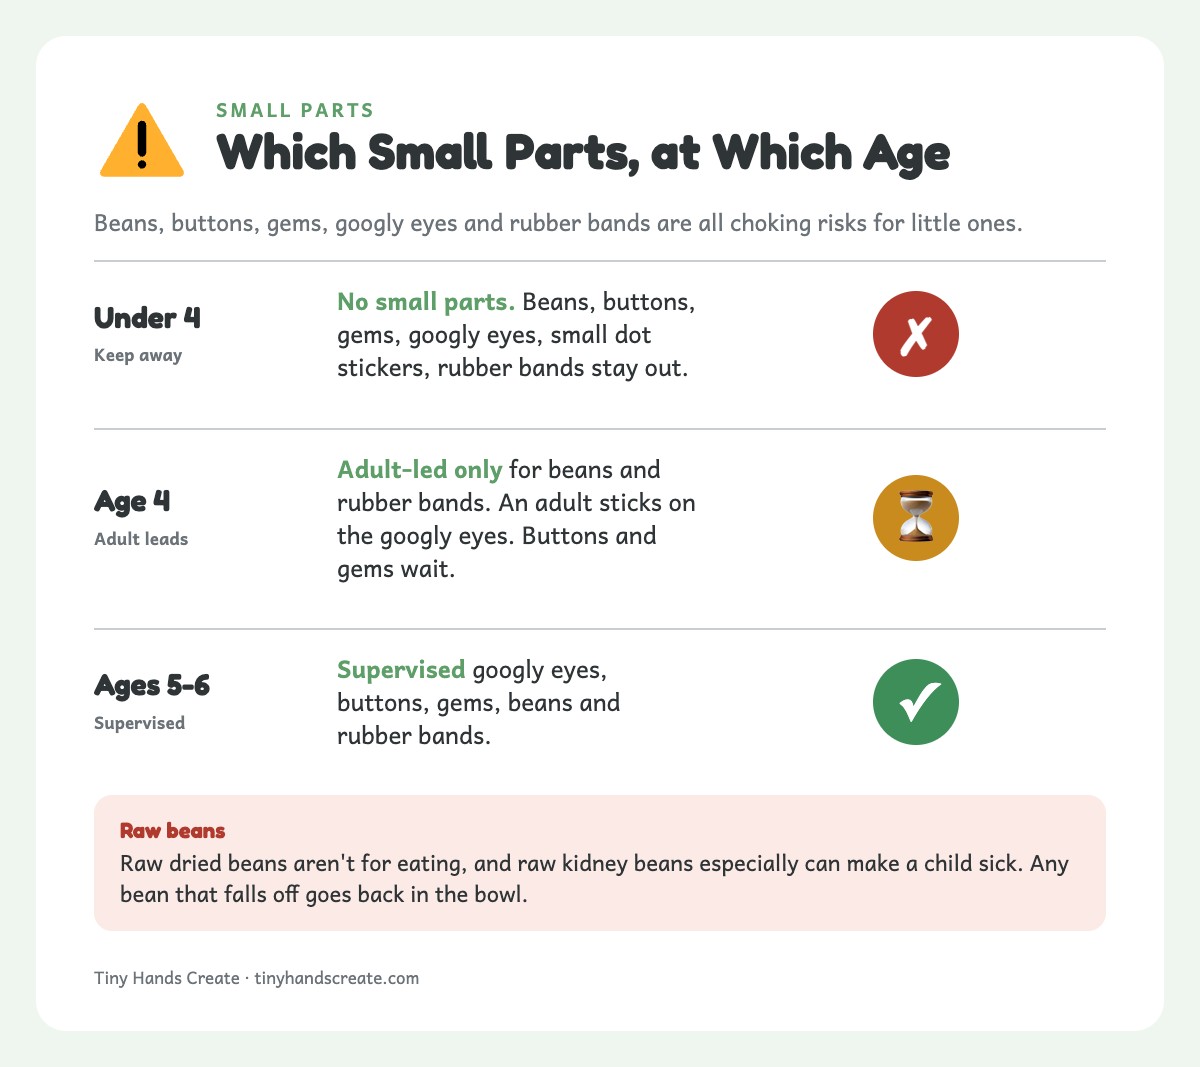
Before you drive anywhere, grab these five. They cover tonight’s plan and most of the ideas below.
- A clean, dry pumpkin.
- Washi tape or painter’s tape.
- Big stickers.
- Washable tempera paint.
- A sponge or foam brush.
The table is the full reference for everything else, with a mess rating and an age range for each supply.
| Supply | Likely already in your house? | Mess Rating | Best for ages |
|---|---|---|---|
| Washable tempera paint | Yes, if you’ve done any craft this year | Medium | 2-6 |
| Acrylic craft paint labeled non-toxic | Maybe | Medium | 4-6, brushed on, supervised |
| Paintbrushes / sponges | Yes | Low | 2-6 |
| Washi tape or masking tape | Yes | None | 2-6 |
| Large stickers, about 2 inches across or bigger | Often yes | None | 2-6 (adult right beside ages 2-3) |
| Small dot stickers | Often yes | None | 4-6 |
| Googly eyes | Maybe from past crafts | None | 5-6, supervised (an adult sticks them on at 4; not under 4) |
| Small foam pieces | Maybe from past crafts | None | 4-6, supervised |
| Dried beans, rice, lentils | Yes | Low | 5-6, supervised (adult-led at 4 with large beans only; not under 4) |
| Buttons | Maybe, in a sewing kit or junk drawer | None | 5-6, supervised |
| Yarn or ribbon scraps | Maybe | None | 3-6 |
| Rubber bands | Yes | None | 5-6, supervised (adult-led at 4; not under 4) |
| Washable or paint markers labeled non-toxic | Yes | Low | 4-6 |
| School glue, tacky craft glue or double-sided tape | Often yes | Medium | 3-6 (optional hot glue is adults only) |
| Brush-on chalkboard paint or dry-erase paint | Probably not — buy | Medium | 4-6 (an adult paints it on) |
| Adhesive gems / rhinestone stickers | Probably not — buy | None | 5-6, supervised |
Safety firstSmall parts are a choking risk. Keep small dot stickers, beans, rice, lentils, buttons, gems, googly eyes, small foam pieces and rubber bands away from any child under 4, and from pets. Buttons, gems and googly eyes wait until age 5, and at 4 an adult sticks the eyes on. Raw dried beans aren’t for eating, and raw kidney beans especially can make a child sick. Stickers of any size can end up in a mouth, so ages 2-3 use them only with an adult right beside them. If a sticker or its backing goes in a mouth, take it out and stop.
Good to knowDecorated pumpkins are for display, not eating. Don’t cook them or feed them to animals. When yours goes soft or moldy, pull off the tape, stickers, yarn and glued pieces and put those in the trash. A plain pumpkin can go in the compost. A painted, glued or sealed one goes in the trash.
If you only have paint, tape and stickers, that’s enough for four or five of the ideas below. You don’t need the store-run items to have a great pumpkin tonight.
No-Carve Pumpkin Painting for Toddlers and Preschoolers
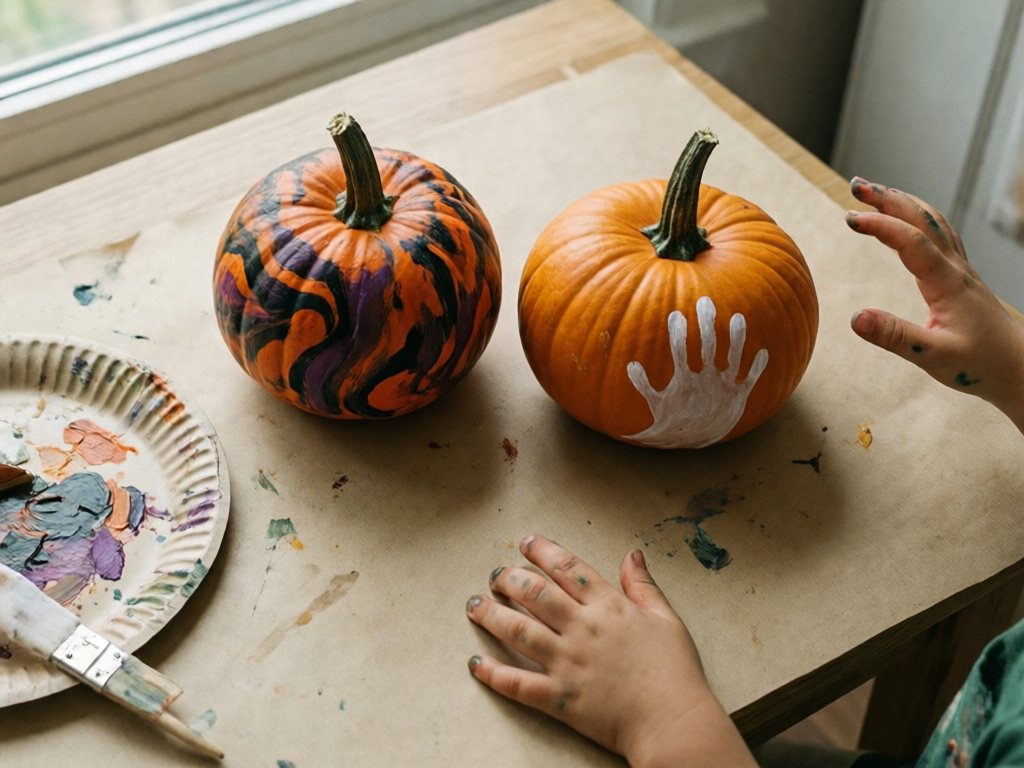
Paint is the most forgiving no-carve option, and there’s a version for every age from 2 to 6.
Toddlers (2-3)
Skip the brush entirely. Pour a few blobs of non-toxic washable tempera onto a paper plate and let them use palms and fingers directly on the pumpkin. Handprints work well here. A small print can pass for a ghost, cat or spider, and you end up with a keepsake.
Preschoolers (4-5)
Give them a brush and let them go fully abstract. A pumpkin painted in swirls of orange, black and purple with no theme is still a great porch pumpkin. For more structure, tape off simple stripes with painter’s tape before they paint. Peel the tape at a low angle once the paint is touch-dry, for clean stripes.
6-year-olds
They can handle real designs. Try a jack-o’-lantern face painted on instead of carved, or a galaxy pumpkin with white paint splatters over dark purple. A candy corn pumpkin in bands of yellow, orange and white also works well.
TipUse non-toxic washable tempera for toddlers’ hands and wash hands afterward. Acrylic is for supervised kids ages 4-6 only. Check that the bottle is labeled non-toxic, brush it on and keep it off skin.
Good to knowDrying times: paint is touch-dry in about 20-30 minutes. Fully dry takes several hours to overnight for washable tempera and 24 hours for acrylic. Wait for fully dry before taping over paint or setting the pumpkin outside. Dried acrylic copes with damp weather better than tempera, but it isn’t waterproof, so keep painted pumpkins under cover.
A few painting tips that save you cleanup time:
- Washable paint runs in rain and acrylic only resists it, so a covered porch is the safest spot. Clear sealant is an optional adult-only step. Spray it outdoors, away from children, following the directions on the can, and let it dry fully before kids touch the pumpkin.
- Let a base coat get touch-dry before adding details, or the colors will muddy together. If you’re out of time tonight, embrace the muddy blend. It still looks intentional from porch distance.
- A cheap foam brush gives toddlers more control than a bristle brush and holds more paint per dip, meaning fewer trips back to the paint plate.
If you want more structured painting techniques beyond pumpkins, our watercolor painting guide has age-by-age brush control tips that translate well here too.
Sticker Pumpkins for Toddlers and Preschoolers (No Cleanup)
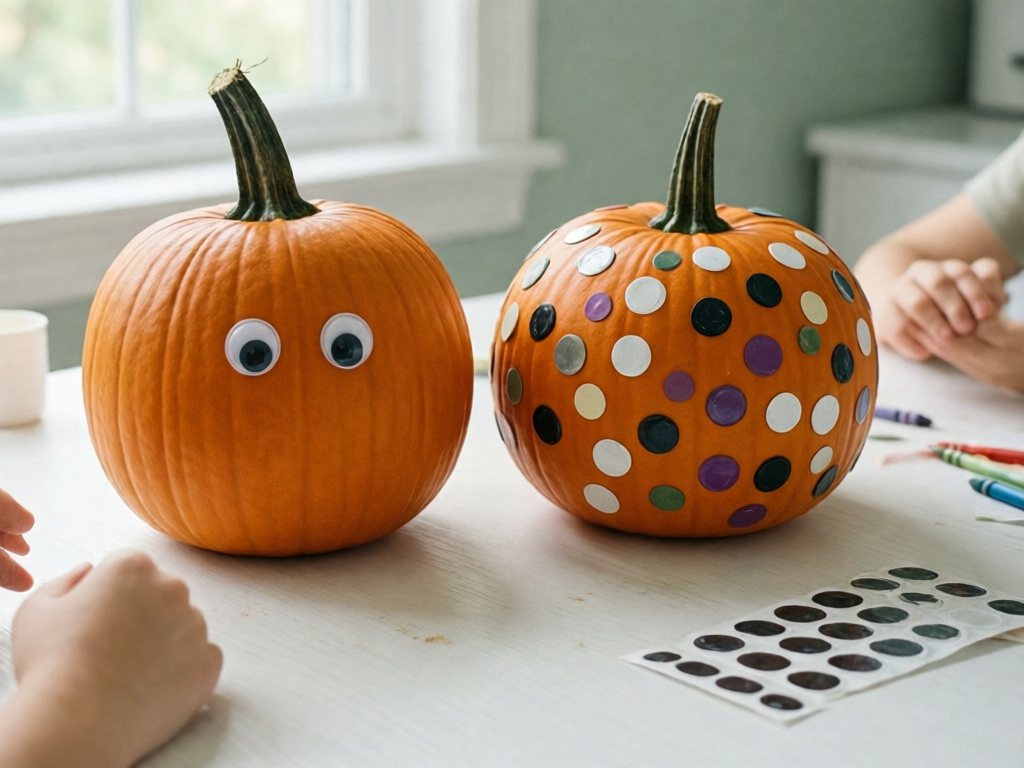
Sticker pumpkins are the true zero-cleanup option. There’s no paint to end up on a witch hat.
Dot stickers (the kind sold as garage-sale price labels or for bingo cards) are the fastest option for ages 4 and up. You get a whole pumpkin of polka dots in under ten minutes, with no glue and no drying time. Younger kids can get their dot fix on paper with our Do-a-Dot printables for toddlers.
For a 2 or 3-year-old, peeling and placing stickers is fine-motor practice, so random stickers all over is the activity. Hand over the biggest stickers you have, since they’re easier to peel, and sit right beside your child the whole time.
Toddlers mouth things, and a bigger sticker is not a safer one. If a sticker or its backing goes in a mouth, take it out and call the session done. Bin the backing sheets as you go. Our sticker activities for toddlers post has more ideas for this age.
For kids 4 and up, foam stickers shaped like bats, ghosts and spiders create a scene rather than a pattern. Small foam shapes stay with ages 4 and up, supervised.
Two googly eyes in the middle turn a plain pumpkin into a character in about a minute. They’re small parts, so ages 5-6 press them on with you watching. At 4, an adult sticks them on.
Buy-if-needed: Adhesive gem stickers make this look fancier, and they catch porch light at night. They’re small parts, so use them with ages 5-6 under supervision.
Easy Washi Tape Pumpkin Faces for Kids
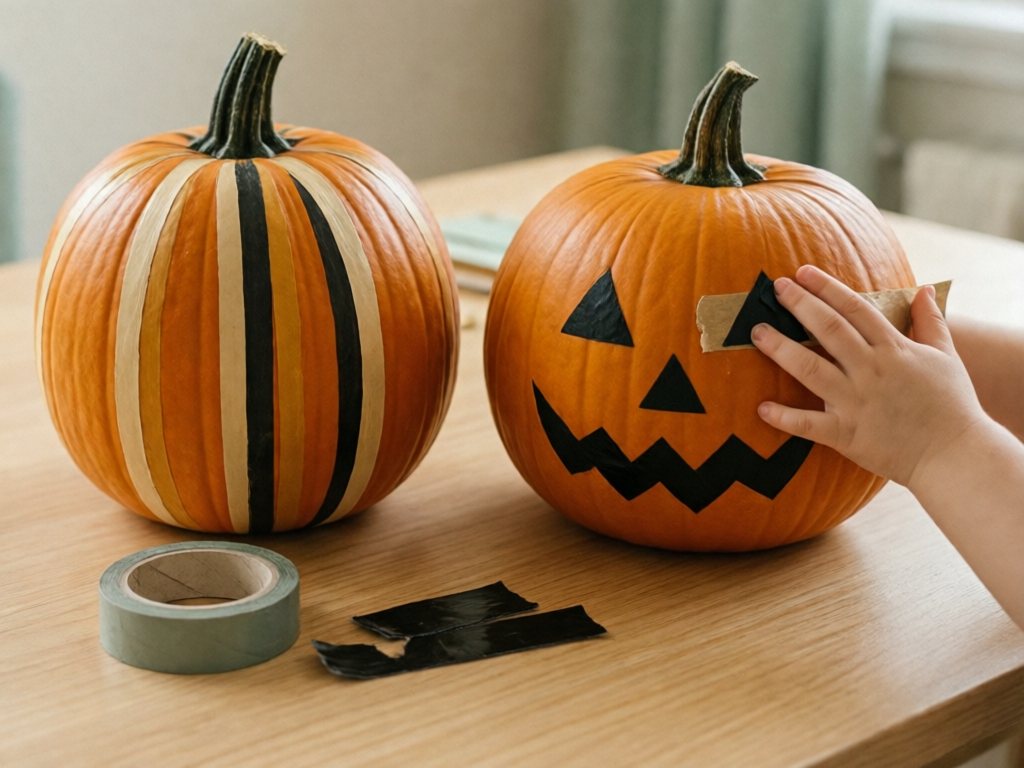
Tape is already in your junk drawer, it’s mess-free, and it’s mostly removable if a kid decides halfway through that they hate the design. It sticks best on a clean, dry pumpkin, so wipe off dust and damp patches with a dry cloth first.
The simplest version is stripes. Run strips of washi tape down the pumpkin’s ridges, alternating colors or patterns, for a candy-corn or circus-tent look. Three-year-olds can tear tape with a little help and press it on. Adults should pre-cut any shapes.
For a face, your child only places pre-cut shapes, like stickers. That keeps scissors and knives out of their hands.
- Pre-cut the shapes. An adult cuts triangles for the eyes and nose and a zigzag mouth from painter’s tape or black craft tape.
- Press them on. Your child arranges the pieces into a jack-o’-lantern face on a clean, dry pumpkin.
- Rearrange freely. Tape peels up and goes back down, so they can move pieces until they like the face.
- Peel later. Pull the tape off slowly at a low angle, especially over paint, so it doesn’t lift the paint.
Washi tape also works over a painted pumpkin, adding a graphic pattern on a solid color base. Wait until the paint is fully dry first. The drying times are in the painting section above.
Paint tonight and add tape tomorrow evening, once the paint is fully dry. That makes a handy two-session project when bedtime is closing in. Tape can still lift washable tempera, so press lightly and peel slowly.
Pantry-Item Pumpkins for Ages 4 and Up
This category needs zero shopping and gives you textured, one-of-a-kind results.
Safety firstBeans, buttons and rubber bands are small parts. Keep them away from children under 4, younger siblings and pets. Raw dried beans aren’t for eating, and raw kidney beans especially can make a child sick, so any bean that falls off goes straight back in the bowl. Rubber bands can snap into eyes, so never pull or flick them. Hot glue is optional and adult-only, with kids kept away from the glue gun, its cord and cooling glue.
Bean and lentil mosaics
For ages 5-6, supervised. Brush school glue onto a section of the pumpkin. Press dried beans, lentils or rice into the glue to make stripes, a spiral or a simple mosaic face. It’s slow work, so stay at the table.
At 4, this is adult-led only. Sit beside your child, hand over a few beans at a time and use the largest beans you have, not lentils or rice. Skip it for children under 4.
Raw dried beans aren’t for eating, kidney beans especially. Keep the bowl on the table and put any bean that falls off straight back in it.
Button faces
For ages 5-6, supervised. Arrange buttons of different sizes for eyes, nose and a mouth. Stick them on with tacky craft glue or double-sided tape, or use school glue with extra drying time. Hot glue is an optional adult-only shortcut. Two big buttons for eyes and a row of small ones in a curved smile make a good first face.
Sponge-stamp dots
An adult cuts a clean kitchen sponge in half, so each piece is still a good handful. Your child dips a piece into washable tempera on a paper plate and stamps dots, stripes or a simple face. This is the Medium-mess idea in this group, so put the tablecloth down first.
Rubber band pumpkins
Stretch a dozen rubber bands of different widths around the pumpkin, vertically or in a crisscross. There’s no cutting or adhesive, and kids can rearrange them until they like the look. It takes under five minutes.
Ages 5-6 can do it with supervision. For 4-year-olds it’s adult-led only, and it’s not for under 4. Bands can snap, so never pull or flick them toward the face.
| Pantry method | Time needed | Dries/sets? | Reusable pumpkin after? |
|---|---|---|---|
| Bean mosaic | 20-30 min | Yes, needs 1-2 hrs | No (glue residue) |
| Button face | 10-15 min | Yes, if glued | No (glue residue) |
| Sponge stamping | 10-15 min | Yes, touch-dry in 20-30 min | No (paint) |
| Rubber bands | 3-5 min | No, instant | Yes — just remove bands |
Want to use up the leftover beans and rice? Our sensory bins guide has fill ideas that reuse the same pantry stash. The same small-parts rules apply, so keep bean and rice bins away from children under 4 and stay at the table.
Yarn-Wrapped Pumpkins
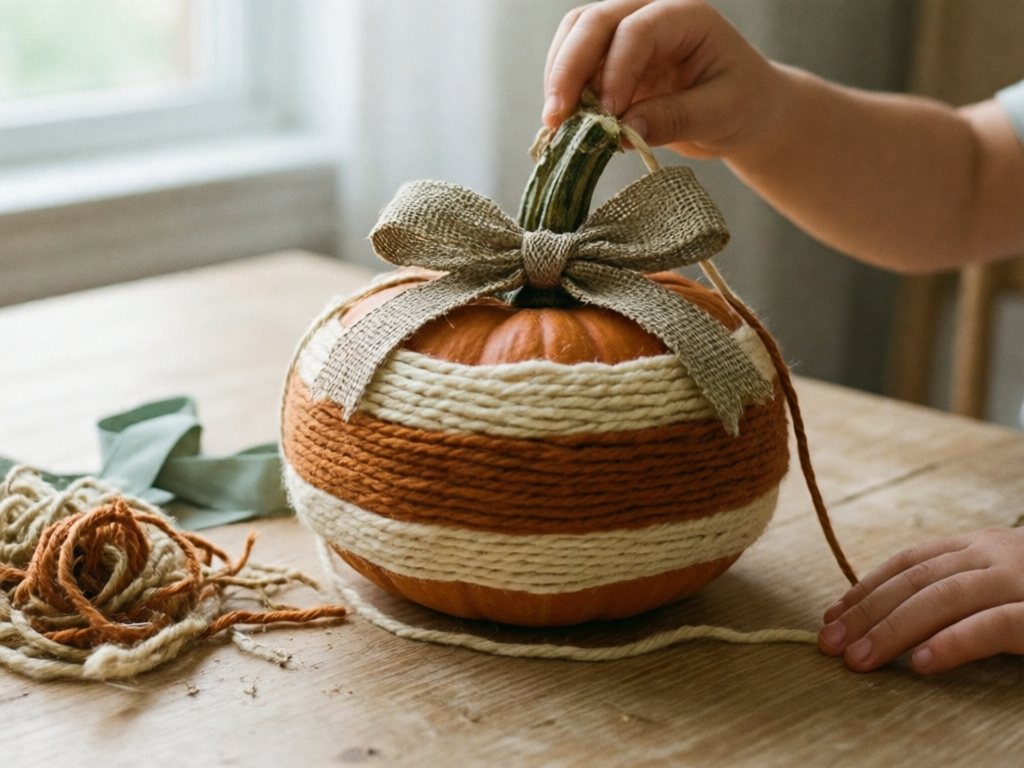
Wrap yarn, ribbon or fabric scraps around the stem or in bands around the body. Secure the ends with double-sided tape or a dab of tacky craft glue, or just tuck them under the wrapped yarn. Hot glue is an optional adult-only alternative.
This one skips paint and gives a cozy, textured look, great if your style leans neutral or farmhouse. It also carries into a Thanksgiving tablescape, since orange-and-cream yarn doesn’t scream “Halloween.”
For younger kids, precut lengths of yarn and let them practice wrapping and tucking. It’s good fine-motor practice. It’s similar to the wrapping in our friendship bracelet guide, just scaled up to pumpkin size.
Felt Face Pumpkins
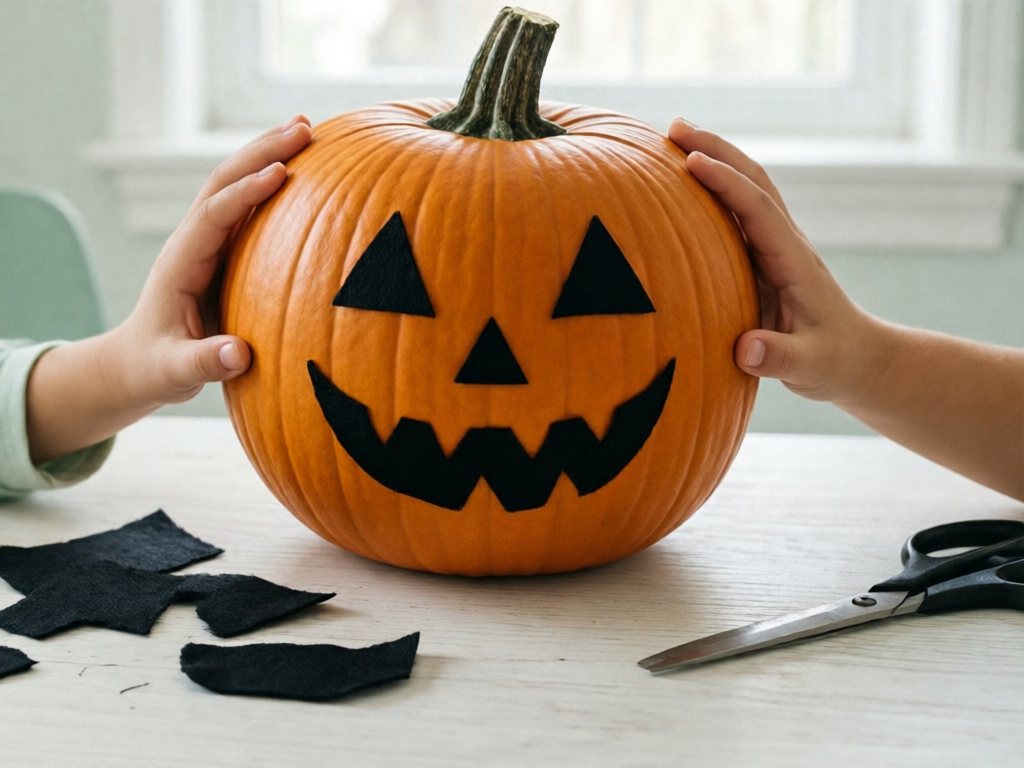
Cut simple felt shapes, like triangles for eyes and a jagged rectangle for a mouth. Arrange them on the pumpkin with no adhesive. Felt clings to a bumpy surface for short-term display, especially on a freshly picked pumpkin. For anything more permanent, a dot of glue on the back of each felt piece does the trick.
If your kids already love the projects in our no-sew felt crafts post, this will feel familiar, just bigger and orange.
Chalkboard and Dry-Erase Pumpkins
Lots of 4 and 5-year-olds change their minds mid-project. Brush chalkboard or dry-erase paint onto the pumpkin, or just one flat side, ahead of time. You’ll need to buy it, and it dries overnight, so it isn’t a same-night option. Once dry, your kid can draw a new face every day with chalk or a dry-erase marker and wipe it clean whenever they like.
Buy-if-needed: Brush-on chalkboard paint is the kid-friendly default. A chalkboard paint marker works for small details.
TipUse two thin coats and let them dry overnight. Test a marker on a spot at the back first, since dry-erase paint can be unreliable on pumpkin skin. Chalk smudges in damp weather, so keep this one indoors.
This is a “plan a few days ahead” idea, not a tonight one. It keeps kids busy for days.
Paper Pumpkins When You Have No Pumpkin
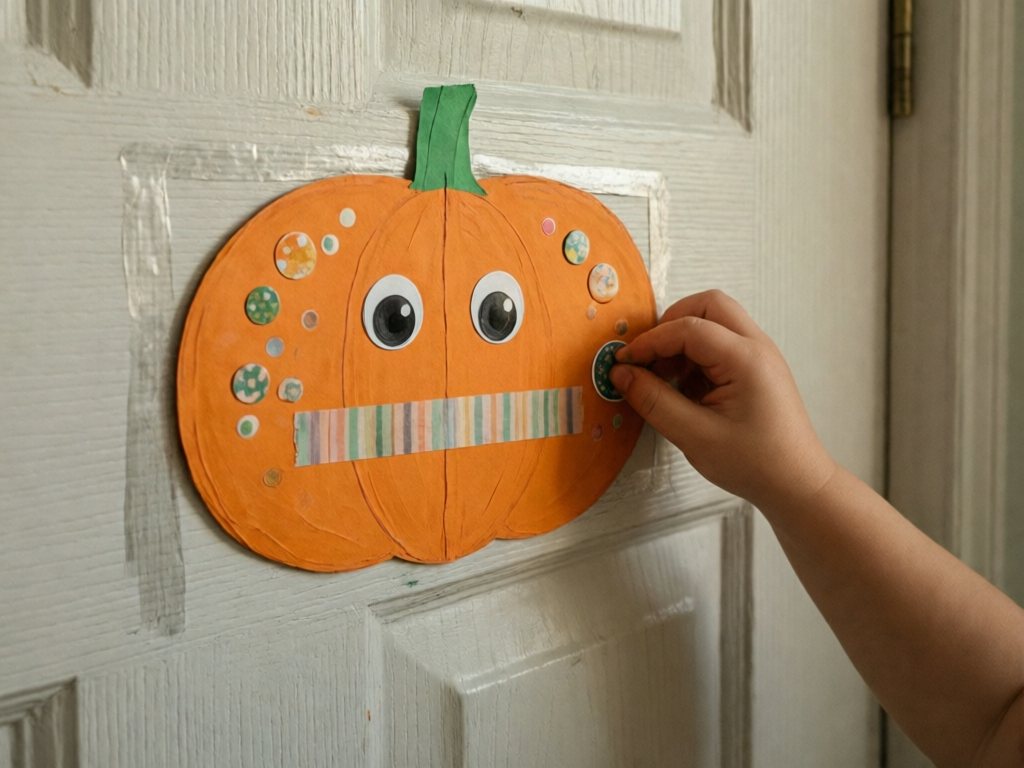
If it’s late, the stores are out of pumpkins, or you don’t want to brave the crowds, paper pumpkins solve the problem. Cut an orange circle or oval from construction paper or a paper plate. Let your child decorate it with paint, stickers, tape or whatever’s on hand.
It’s not a “real” pumpkin, but a 2 or 3-year-old won’t care. You can tape it to the front door in the time it would take to drive to a store.
Our pumpkin crafts roundup has several paper and mixed-media pumpkin projects. Bookmark it for next year, even if tonight calls for the real thing.
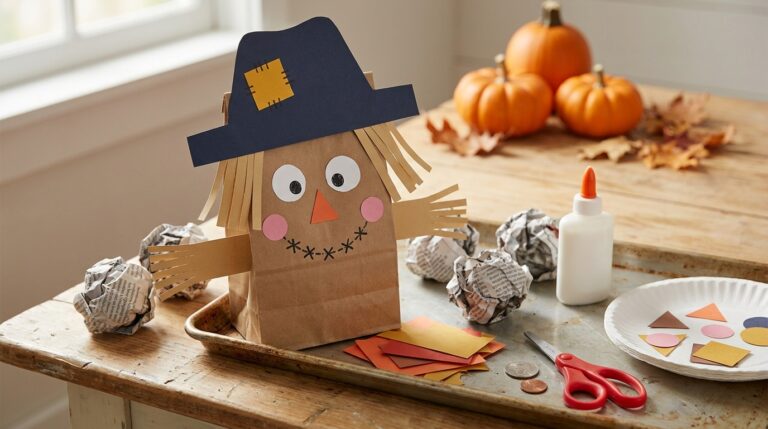
Our paper bag scarecrow craft for preschoolers is another fall project that needs no pumpkin at all.
Which Method for Which Age
With kids from toddler to 6, or just very different attention spans, you don’t need everyone on the same pumpkin. Give each kid their own small pumpkin, matched to what they can manage. A mini decorative gourd works too.
| Age | Best method | Adult job | Skip |
|---|---|---|---|
| 2-3 | Big stickers or washable handprint paint. | Sit right beside them. Wash hands after. | All small parts, including small dot stickers. |
| 4-5 | Washi tape face or sponge stamping. At 5, a small bean mosaic. | Pre-cut tape shapes. Cut the sponge. At 4, stick on googly eyes and lead any bean work. | Hot glue. Buttons and gems at age 4. Handling googly eyes at age 4. Beans and rubber bands at age 4 unless an adult leads. |
| 6 | Full painted design, or paint plus tape and stickers. | Handle any hot glue. Supervise small parts. | Unsupervised beans, buttons, gems, googly eyes or rubber bands. |
This also solves the classic sibling conflict where the toddler “helps” with the big kid’s careful design and smears it. Separate pumpkins and separate methods let everyone succeed, and everyone still sits at the same table together.
If your house has this age gap for crafts in general, read our process art for toddlers post. It explains why one activity with different expectations by age works better than one identical project.
If Something Goes Wrong: Quick Fixes
Pumpkin skin is waxy, ribbed and often dusty, so things don’t always stick the first time. Here’s what to try before anyone melts down.
| Problem | Likely cause | Quick fix |
|---|---|---|
| Tape won’t stick. | Dust or damp on the skin. | Wipe with a dry cloth. Use shorter pieces and press them down between the ridges. |
| Stickers peel off. | Deep ridges or waxy skin. | Press from the center out. Back stubborn ones with a dab of glue stick or double-sided tape. |
| Paint beads up. | Waxy, shiny skin. | Wash the pumpkin with a little dish soap, rinse and dry it fully. For brushed paint only, a tiny drop of dish soap in the paint can help it grip, so test it on the back first. Leave handprint paint plain. |
| Felt falls off. | Felt only clings for a short while on its own. | Add a dot of school glue or double-sided tape to the back of each piece. |
| Tape lifts the paint. | The paint wasn’t fully dry. | Stop peeling and let it dry fully. Peel slowly at a low angle, then dab paint on the bare patch. |
| Paint runs in rain. | Washable paint got wet. | Move the pumpkin under cover and blot the drips. Touch it up once it’s dry. |
Frequently Asked Questions
How long do no-carve pumpkins last compared to carved ones?
Usually much longer. A carved pumpkin often goes soft in about 3-5 days, while an uncut one can often last a few weeks in cool, dry weather if the skin is unbroken. Keep it out of direct rain and extreme heat. Mold or soft spots mean it’s done. Take the decorations off, then compost a plain pumpkin or bin a painted one.
What’s the best no-carve method for a 2-year-old specifically?
Handprint painting with non-toxic washable tempera, or big stickers with you sitting right beside them. Wash hands afterward, since toddlers mouth their hands, and take any sticker or backing out of their mouth. Keep beans and other small items out of the session. Keep it under 10 minutes and call whatever they make finished.
Can I do this with a fake or plastic pumpkin instead of a real one?
Yes. Paint, stickers and washi tape all work on plastic pumpkins, and you can wipe one down and reuse it next year. Skip glued bean or rice mosaics, which hold better on a real pumpkin’s textured skin.
My pumpkin has a flat or oddly shaped side — does that ruin any of these ideas?
No. A flat side is often the easiest surface to decorate, because tape and stickers have less curve to fight. Turn the flattest part forward for the face or pattern, and put the bumpy side at the back.
What if my kid wants a carved look without an actual knife?
Use black craft tape, painter’s tape or precut black cardstock shapes. An adult cuts triangle eyes, a triangle nose and a jagged mouth, and your child presses them onto the pumpkin. From a few feet away it reads like a carved face.
Do painted pumpkins survive rain on an outdoor porch?
Not reliably. Washable tempera streaks or washes off. Acrylic that has dried for 24 hours resists damp better, but it isn’t waterproof. On a covered porch or in dry weather, either works. Clear sealant is an optional adult-only step. Spray it outdoors, away from children, following the label directions, and let it dry fully before kids touch the pumpkin.
How do I stop toddlers from just eating the dried beans or small decorating pieces?
Skip small choking-hazard items (beans, buttons, small gems, googly eyes, small dot stickers) entirely for kids under 4, and keep them away from younger siblings too. Stick to tape, washable paint and big stickers with an adult right beside them. For 5 and 6-year-olds who understand that craft supplies aren’t snacks, close supervision is usually enough. At 4, an adult leads any bean work and sticks on the googly eyes, and buttons and gems wait until 5. Raw dried beans aren’t for eating, kidney beans especially, so do bean or button mosaics at a table with an adult present, not as an independent activity.
Which No-Carve Idea to Pick Tonight
Tonight, pick tape and stickers for the youngest kids and paint for the older ones. Save bean mosaics and chalkboard pumpkins for the weekend. Twenty minutes and one pumpkin your kid decorated is plenty for tonight. Go raid the junk drawer.