Paper Bag Scarecrow Craft for Preschoolers (Step-by-Step)
This post contains affiliate links. As an Amazon Associate I earn from qualifying purchases.
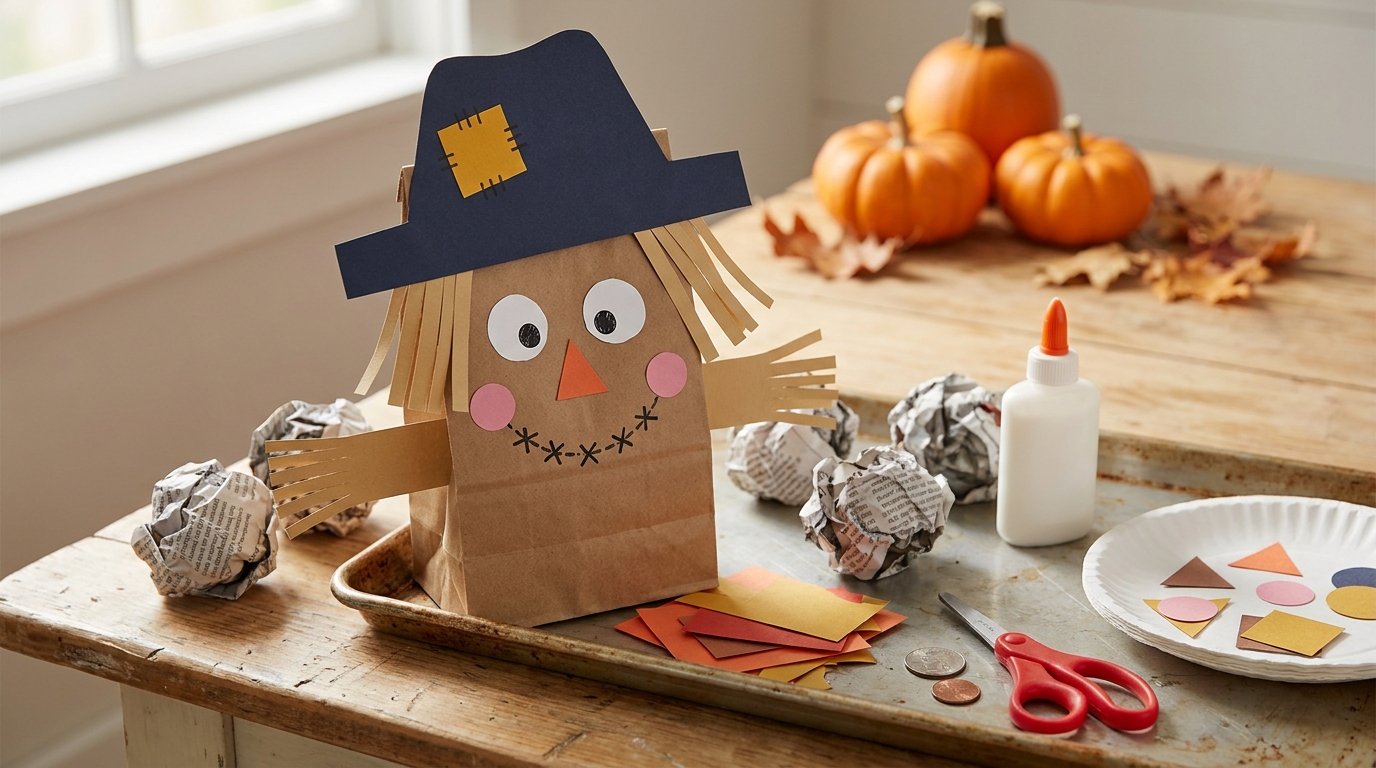
My first scarecrow with a preschooler used hay, burlap, and a hot glue gun I had no business handing over. The hay ended up in the couch, and my four-year-old asked whether scarecrows are supposed to itch. The version that worked used one brown lunch bag from the kitchen drawer. It doesn’t itch or shed, school glue grabs its kraft paper, and the flat bottom lets the scarecrow stand on its own.
This page covers the supplies, exact cut sizes and placements for every face piece, and three stuffing options ranked by mess. You’ll also find step-by-step directions with tweaks for ages 3, 4, and 5. Expect moderate confetti and zero itching.
Free printable · 6 pages
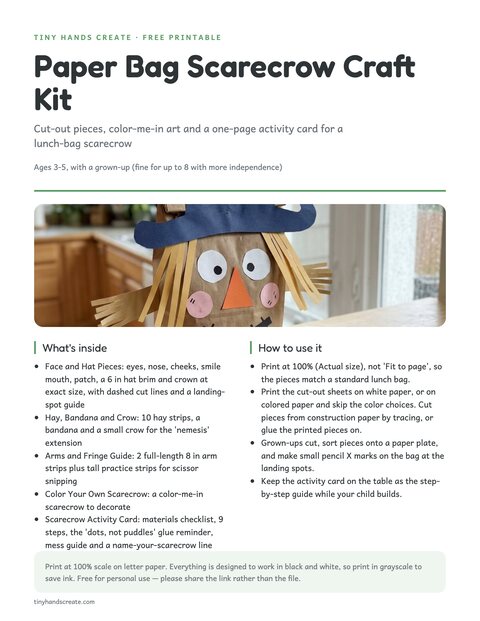
Paper Bag Scarecrow Craft Kit
Exact-size cut-out face, hat, hay strips, full-length fringed arms, bandana and crow templates, a full-page scarecrow to color in, and an activity card with a materials checklist, 9 short steps, the dots-not-puddles glue rule, a stuffing mess guide and a name-your-scarecrow line.
Free. Your download link appears right here. You'll also join the Daily Printable Drop. Unsubscribe anytime. Privacy
In this article (9 sections)
- What You Need (Supply Checklist)
- Scarecrow Face Chart: Cut Sizes and Placements
- Three Stuffing Options, Ranked by Mess Level
- Step-by-Step: Building the Scarecrow
- Adjusting the Craft for Ages 3, 4, and 5
- When Things Go Sideways: Quick Fixes
- Ways to Make a Second (or Fifth) Scarecrow
- Frequently Asked Questions
- Final Tips
What You Need (Supply Checklist)
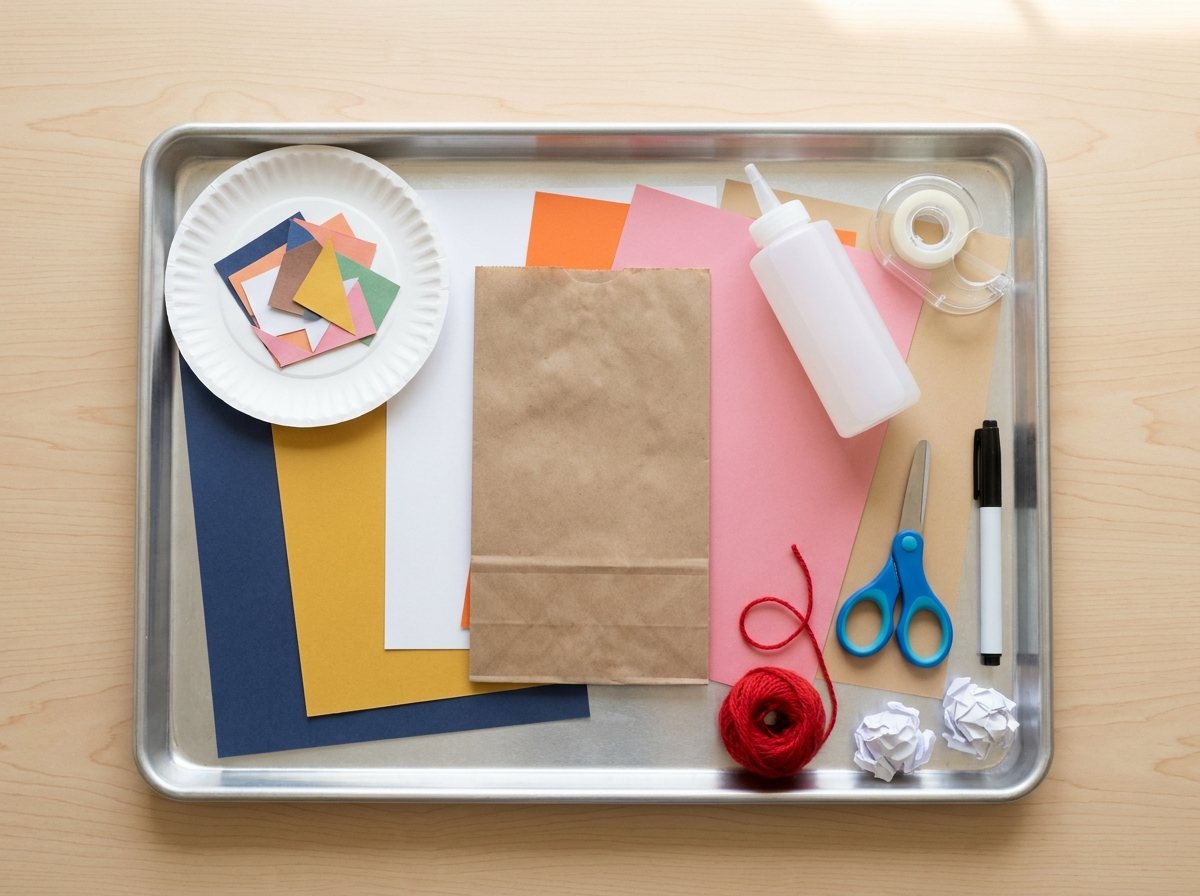
Nearly all of this is already in a junk drawer or school-supply bin. One set makes one scarecrow, so multiply for siblings.
Per scarecrow
- 1 brown paper lunch bag with a flat, folded bottom. Buy plain kraft bags; glue slides right off waxy or grease-resistant ones.
- Stuffing: 6 to 8 sheets of newspaper or scrap paper. Alternatives are ranked below.
- Construction paper: white, orange, and red or pink for the face, plus tan or yellow for the hay and arms. For the hat, pick a dark color (black, navy, or forest green) and a bold color for the patch.
- White school glue or tacky glue. A glue stick works as backup but can struggle on textured kraft.
- Clear tape, which does more work than the glue in this craft.
- Blunt-tip, child-size scissors, used only on paper and only with an adult nearby.
- Black washable marker for pupils and stitch marks.
- Short piece of yarn for a hat tie (optional, adult-only step).
For the grown-up
- Pencil and ruler, or a quarter and a penny (see the face chart below).
- A rimmed baking sheet, box lid, or tray to work on. Don’t skip it: it catches scraps and glue drips, and cleanup becomes one tip into the trash.
- A paper plate for sorting pieces and a “scrap bowl” for trimmings.
- Wipes or a damp cloth.
Optional extras
- Large googly eyes, for ages 4 and up only (see the safety note below).
- Stickers, felt scraps, or a paper sunflower for the hat.
- Raffia or craft straw, best for age 5 and up (see the stuffing ranking).
- A second, smaller bag to make a “baby scarecrow” sidekick.
Safety firstChildren should not put paper, glue, or craft pieces in their mouths. Under age 4, use paper eyes and skip loose small bits. For ages 4 to 5, use only large googly eyes that an adult glues on. An adult ties the yarn, which is for the scarecrow only and never goes on or around a child. Stay close while scissors are out. The ages here are guides, not guarantees: mouthing habits vary, so go by what you see in your own child.
Scarecrow Face Chart: Cut Sizes and Placements
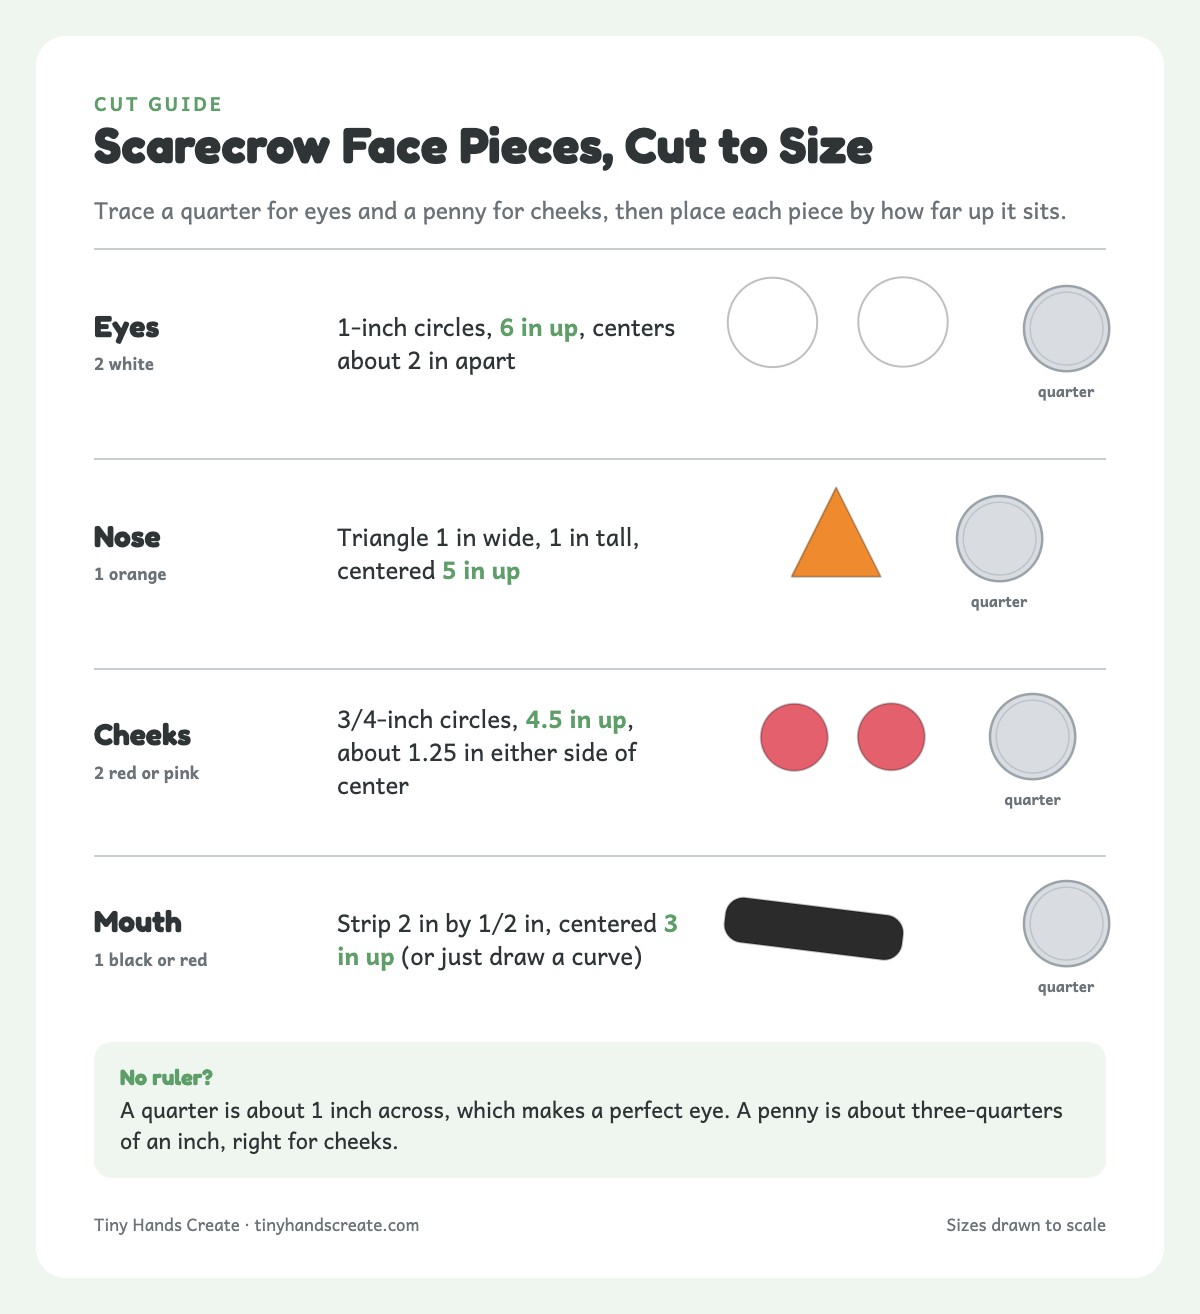
Every piece is listed with its size and placement, so you can trace and cut without guessing. Measurements assume a standard lunch bag, roughly 5 to 6 inches wide and 10 to 11 inches tall. For a different bag, keep the order and stretch or shrink the gaps.
TipNo ruler? Use coins. A quarter is about 1 inch across, which makes a perfect eye. A penny is about three-quarters of an inch, which is right for cheeks. Trace, cut, done.
Good to knowAll placements are measured up from the bottom edge of the bag while it lies flat, before the top is folded down. Check them against your real bag. Use the side with no glued seam as the front, since the seam runs up the back of most lunch bags.
| Piece | Shape and size | Paper | Qty | Where it goes | Who cuts |
|---|---|---|---|---|---|
| Eyes | 1-inch circles (trace a quarter) | White | 2 | 6 in up, centers about 2 in apart | Grown-up, or a confident 5-year-old. |
| Pupils | Marker dots about the size of a pea | Black marker | 2 | Center of each eye | Kid draws them. |
| Nose | Triangle, 1 in wide at the base, 1 in tall | Orange | 1 | Centered, 5 in up | Grown-up. |
| Cheeks | 3/4-inch circles (trace a penny) | Red or pink | 2 | 4.5 in up, about 1.25 in either side of center | Grown-up. |
| Mouth | Strip, 2 in by 1/2 in (or just draw a curve) | Black or red | 1 | Centered, 3 in up | Grown-up, or skip and draw. |
| Stitch marks | Short dashes across the mouth and on one cheek | Black marker | 3 to 6 | On the mouth and cheeks | Kid draws them. |
| Hay strips | 1/2 in by 4 in | Tan or yellow | 8 to 10 (4 to 5 per side) | Taped at each side at 7.5 in up, hanging beside the face | Grown-up, or a 5-year-old. |
| Hat brim | Strip, 7 to 8 in by 1.5 in (wider than the bag, so it overhangs) | Dark color | 1 | Bottom edge at 7.5 in up | Grown-up. |
| Hat crown | Rectangle, 4 in by 3 in | Same as brim | 1 | Sits on top of the brim, overlapping by 1/2 in | Grown-up. |
| Hat patch | 1-inch square | Bold color | 1 | Middle of the crown | Kid or grown-up. |
| Arms (optional) | Strips, 1.5 in by 8 in | Tan or plaid | 2 | Taped to the back at 4 in up | Grown-up cuts; kid snips fringe. |
| Bandana (optional) | 3-inch square, folded corner to corner | Red or blue | 1 | Long edge about 2.25 in up, point aimed at the bottom | Grown-up. |
The face doesn’t have to be symmetrical, and it usually isn’t. A crooked mouth reads as mischievous, and a nose glued upside down reads as a very confident carrot. If your preschooler would rather draw the whole face on the bag, that’s a valid scarecrow too.
Three Stuffing Options, Ranked by Mess Level
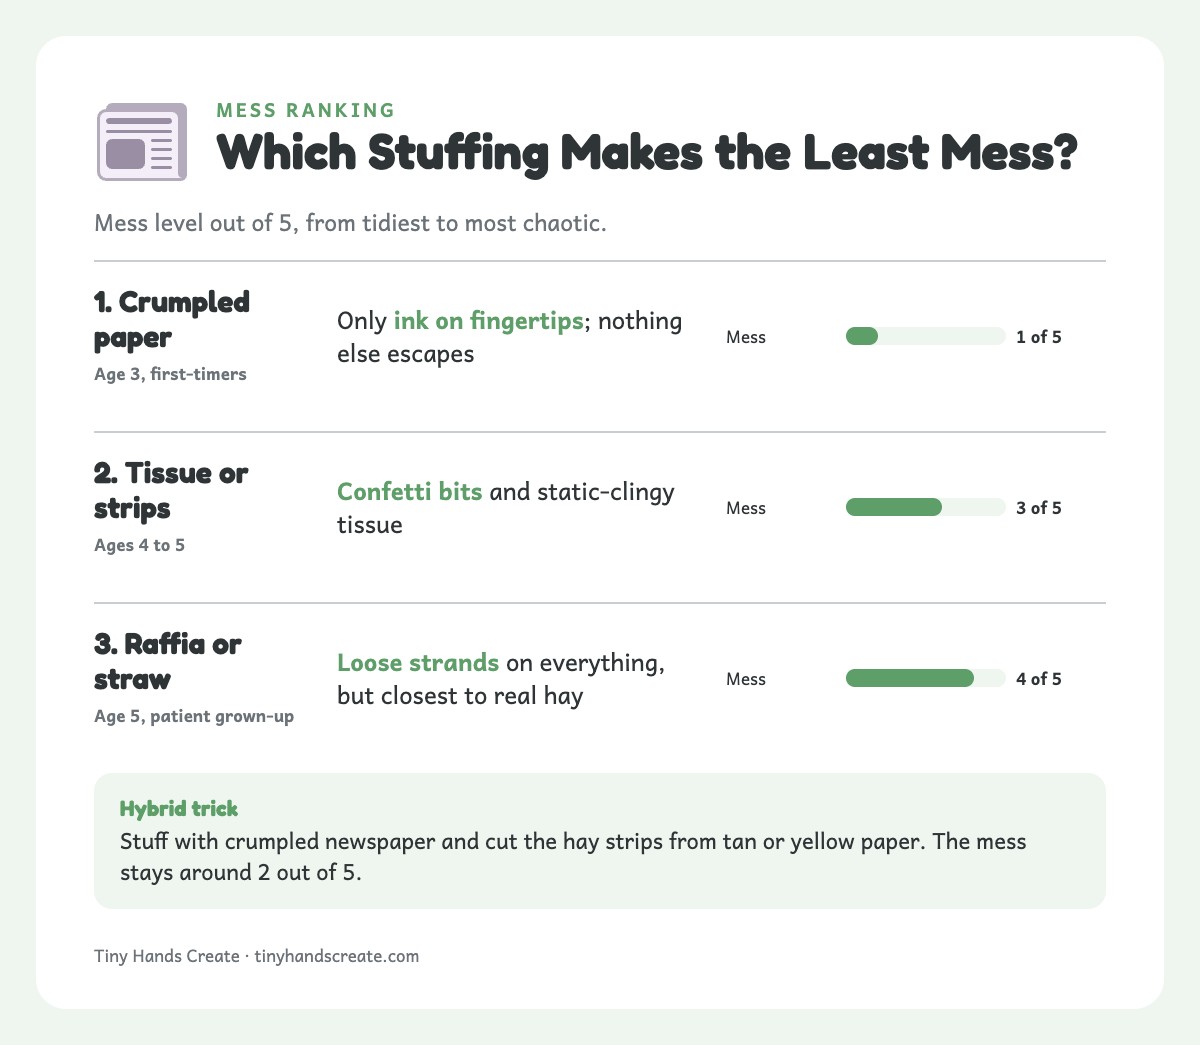
The stuffing is where a scarecrow craft either stays cute or takes over your floor. Here are three options, ranked from tidiest to most chaotic.
| Rank | Stuffing | Mess level | What escapes | Looks like | Best for |
|---|---|---|---|---|---|
| 1 | Crumpled newspaper or scrap paper | 1 of 5 (tidiest) | Ink on fingertips; nothing else | Lumpy, sturdy, “stuffed” | Age 3, classrooms, first-timers. |
| 2 | Tissue paper or shredded paper strips | 3 of 5 | Confetti bits, static-clingy tissue | Fluffy, colorful | Ages 4 to 5, and kids who want a pretty one. |
| 3 | Raffia or craft straw | 4 of 5 | Loose strands on everything | Closest to “real” hay | Age 5 with a patient grown-up. |
Rank 1: Crumpled newspaper or scrap paper (mess level 1 of 5)
This is my default, and the one I recommend for first-timers. Newspaper, junk mail, old worksheets, and printer paper headed for recycling all work. Your preschooler crumples each sheet into a fist-size ball, and the loud crinkling is a feature, not a bug.
Only a little ink escapes, and a wipe handles that. Crumpled paper holds its shape, so the scarecrow stays plump, stands up without fuss, and survives being carried around under one arm.
Rank 2: Tissue paper or paper strips (mess level 3 of 5)
Scrunched tissue paper in fall colors (orange, yellow, rust) makes a softer, fluffier scarecrow. Confetti-cut strips from a paper shredder work too; just skip anything with personal information on it.
The catch is that tissue and shredded bits are light and static-prone. They stick to sleeves and turn up under the couch two days later, so do the stuffing over the tray. Got leftover tissue? These tissue paper crafts for kids will use it up.
Rank 3: Raffia or craft straw (mess level 4 of 5)
Raffia looks the most like hay, and it sheds constantly. Strands poke through seams, cling to socks, and wander into other rooms. I save it for patient five-year-olds who love the “real” look. For younger kids, it’s usually more frustration than it’s worth.
If you use it, cut strands to 3 to 4 inches, stay at the table the whole time, and stuff over the tray. Throw out loose bits at cleanup, and count on a five-minute sweep afterward.
What about real hay?
I’d skip it with this age group. Real straw and hay throw off dust, can trigger allergies, and have stiff stems that poke through paper and small fingers. If your child insists, tape a small pinch (five or six stems) at the sides of the face in place of the paper hay strips, and stuff the bag with newspaper. You get the real-farm look without the real-farm cleanup.
Safety firstChildren with asthma or hay allergies should skip real hay entirely, and stems should stay away from faces. Never stuff the bag with rice, dry beans, popcorn kernels, or anything else small and hard. If the bag tears, those are choking hazards.
The hybrid trick
My favorite way to get the look without the mess: stuff the bag with crumpled newspaper and cut the hay strips from tan or yellow construction paper. Kids 5 and up can swap in a small handful of short raffia at the sides. The scarecrow looks like straw is poking out from under its hat, and the mess stays around 2 out of 5.
Step-by-Step: Building the Scarecrow
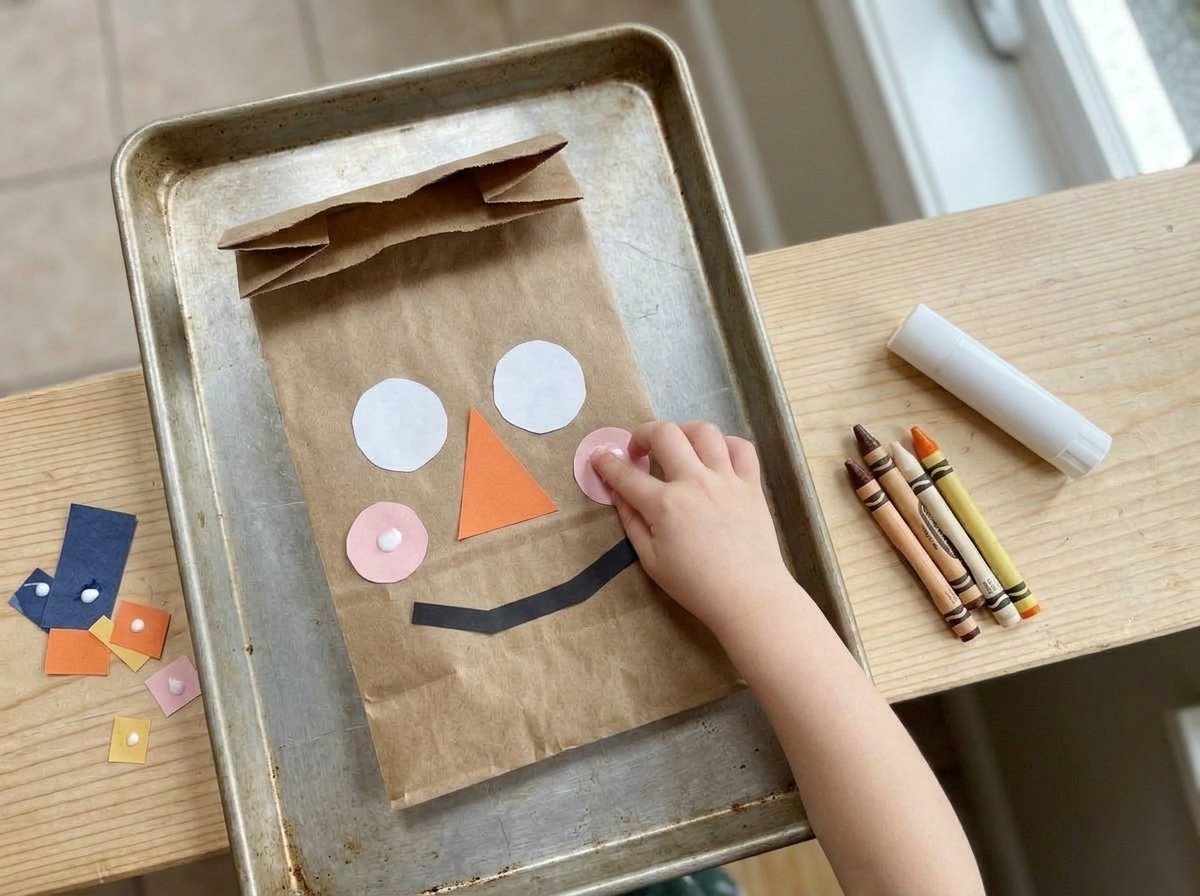
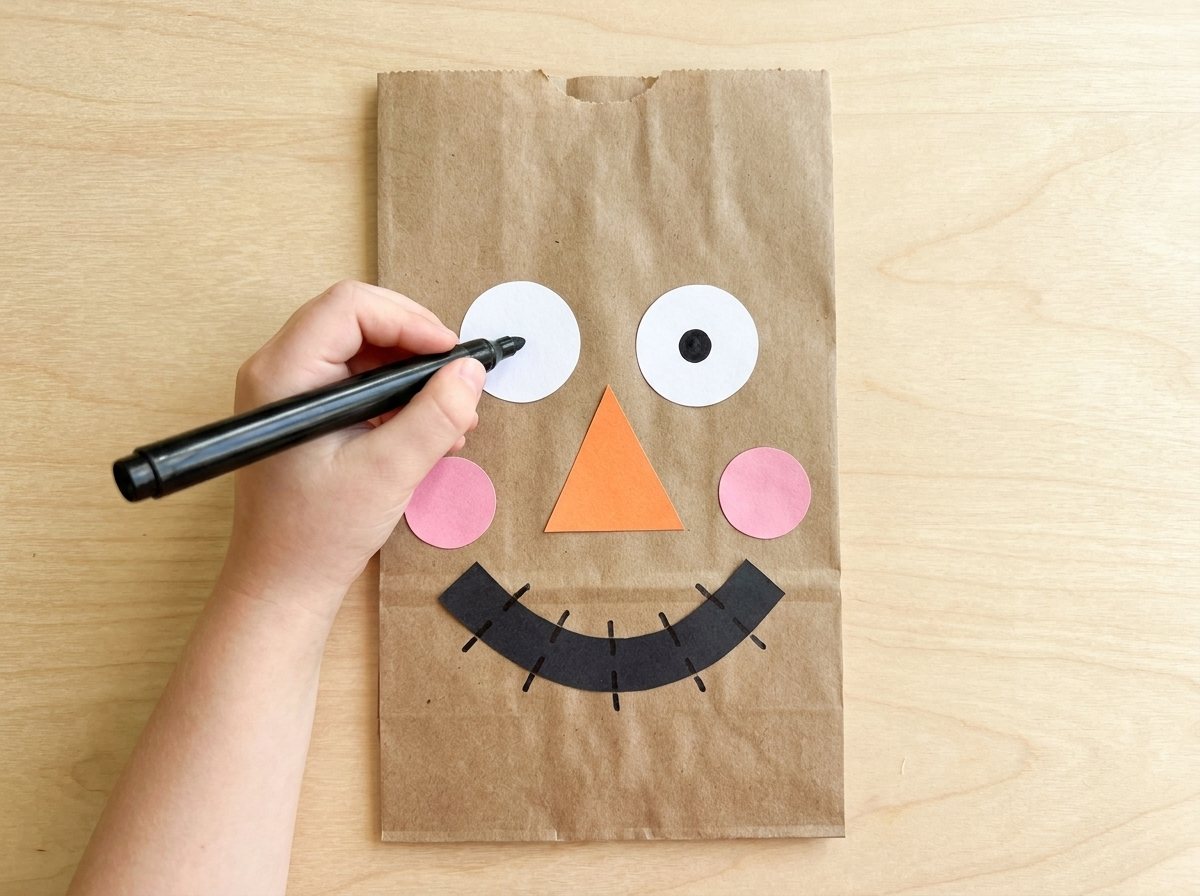
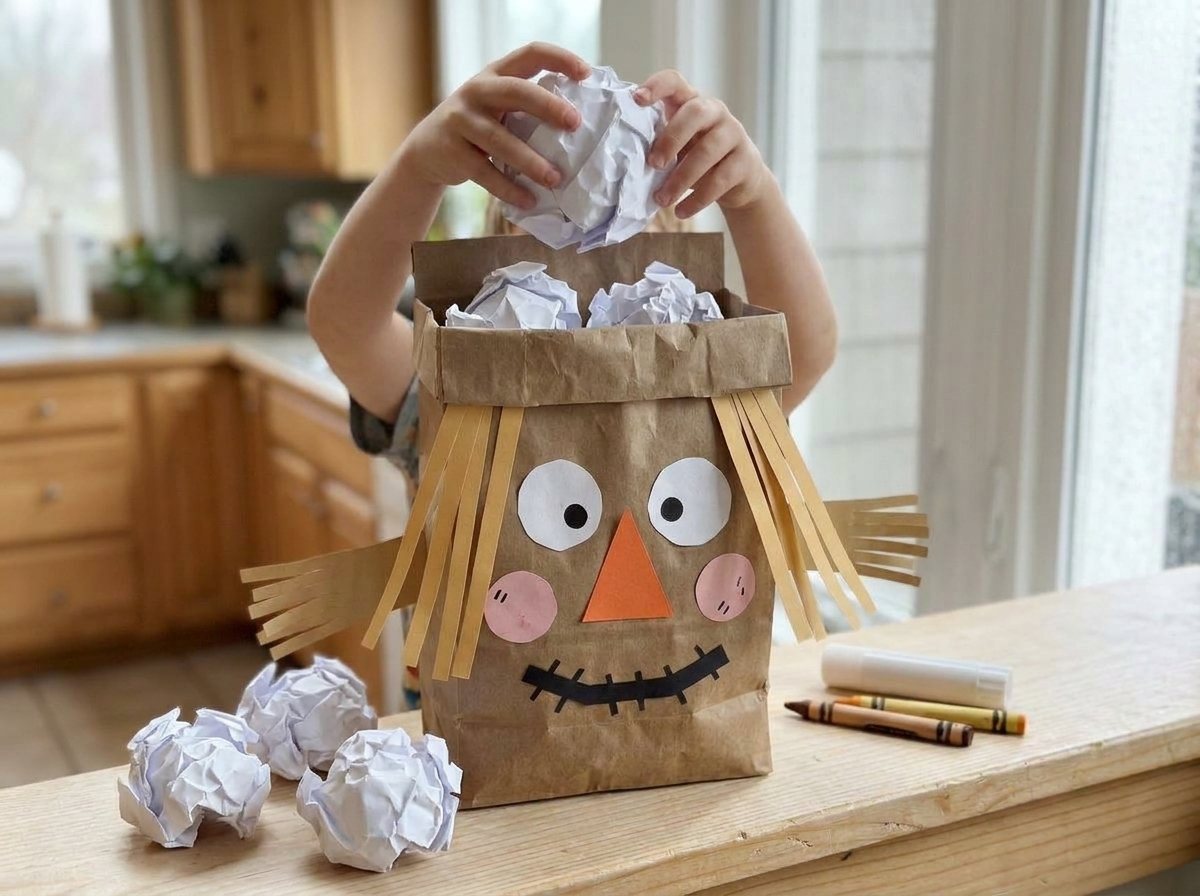
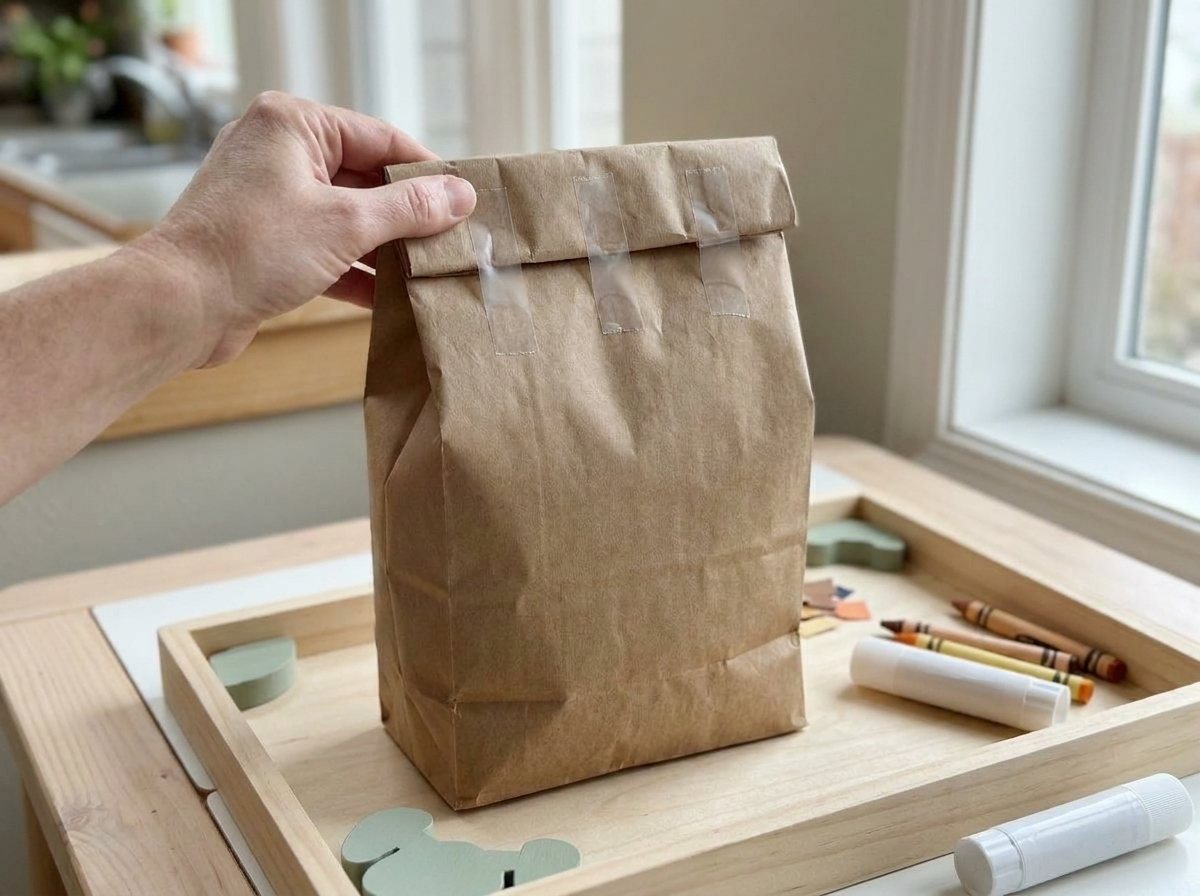
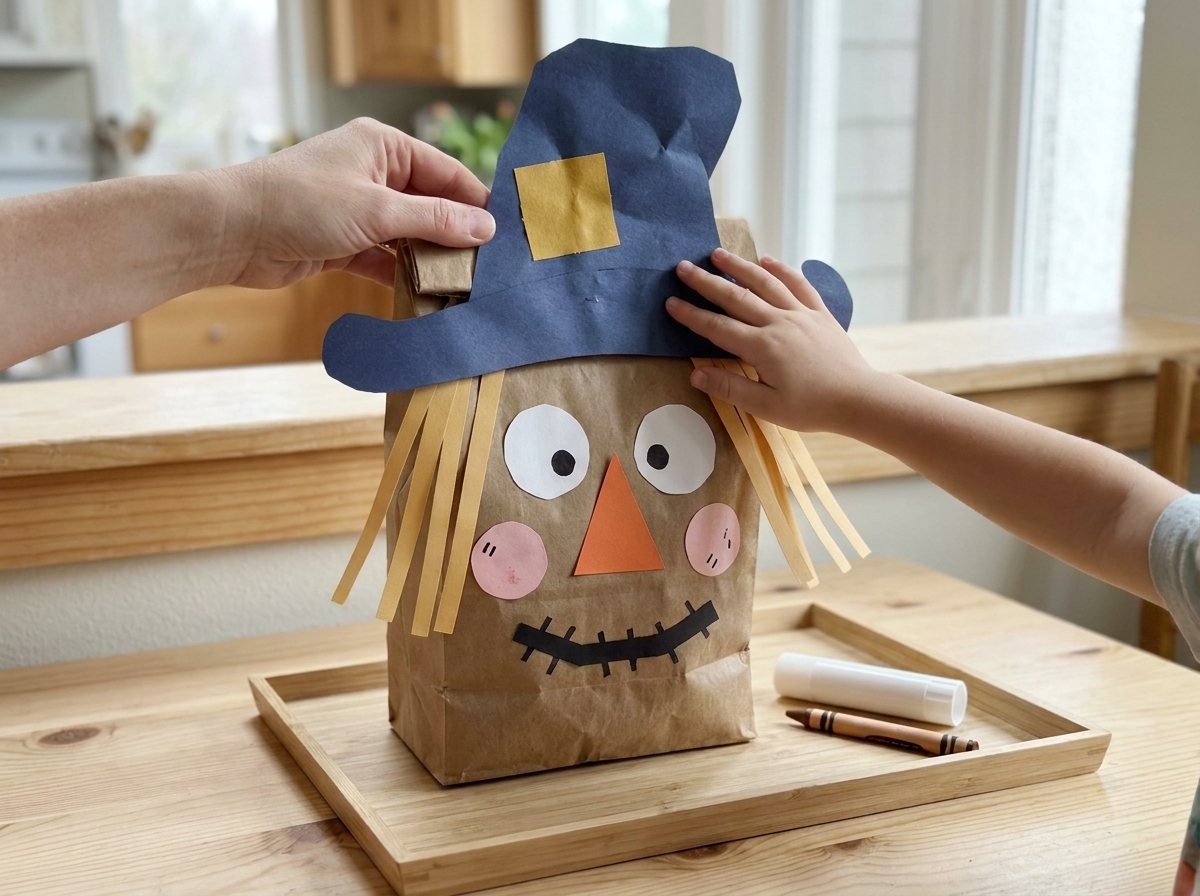
Here’s the time budget for one scarecrow: about 30 minutes of kid time plus 10 minutes of grown-up prep.
| Stage | Who | Time |
|---|---|---|
| Cut pieces and set up the station | Grown-up | About 10 min. |
| Glue the face and draw the details | Kid | 8 to 10 min. |
| Crumple and stuff | Kid | About 5 min. |
| Fold and tape the top, add hay strips | Together | About 5 min. |
| Build and place the hat | Kid, with help | 5 to 7 min. |
| Arms, fringe snipping, finishing touches | Kid | About 5 min. |
Before your preschooler sits down (grown-up only)
- Cover the table and put down the tray. Do this first, before glue is anywhere near the situation.
- Cut and sort the pieces. Cut everything from the face chart above and sort it onto a paper plate, face pieces on one side and hat pieces on the other. The “parts plate” keeps small pieces from wandering off and gives a 3-year-old a manageable menu instead of a pile.
- Mark landing spots. For younger kids, use a pencil to make tiny X marks on the bag front where the eyes, nose, cheeks, and mouth go. Measure up from the bottom edge, using the face chart. Older kids can eyeball it.
- Set out 6 to 8 sheets of newspaper. Don’t crumple them yet. That’s the good part, and it belongs to the kid.
Step 1: Lay the bag flat and add a glue shield
Lay the bag flat on the tray, seamless side up, with the open end at the top. Fold one sheet of newspaper and slide it inside so it lies flat between the front and back panels. This “glue shield” stops any glue that soaks through from gluing the front to the back, which is the kind of setback that ends a craft session.
Step 2: Glue the face, one feature at a time
Show your preschooler the “dots, not puddles” rule: three pea-sized glue dots on the back of each piece, or on the bag at its landing spot. Press the piece down and count to five out loud together. That count is the whole trick, since it gives the glue time to grab.
The order I use: eyes first (they make the face feel alive and buy you enthusiasm), then the nose, then cheeks, then the mouth. Wandering off the X marks is fine. A crooked scarecrow has more personality.
If you’re using a glue stick with a 3-year-old, back it up with a small loop of tape behind each piece. Kraft paper is textured, and glue sticks don’t always hold on the first try.
Step 3: Draw the pupils and stitch marks
Hand over the black marker. Pupils go on the white eyes, and small “X” or dash stitches go on the mouth and cheeks, because scarecrows are patched together. It’s a small job, but it’s the moment the face starts looking back at them.
Where the pupils sit sets the mood. Looking up seems suspicious of crows, looking sideways seems up to something, and dead center looks startled.
Step 4: Crumple, stuff, and pop the bottom flat
Now for the noisy part. Have your preschooler crumple each newspaper sheet into a ball about the size of their fist.
Meanwhile, pop the bag open and press the bottom flat into a rectangle. That flat base is what lets the scarecrow stand up later. Skip this and you’ll be leaning it against a lamp. Leave the glue shield inside; it just becomes more stuffing.
Drop the paper balls into the bag until it’s filled to about 2 inches below the top. Fluffy, not packed. Cramming the bag makes the front bulge, pushes glued pieces off, and makes the top hard to fold. If you’ve picked tissue or raffia, follow the same rule and stuff loosely.
Step 5: Fold and tape the top
Fold the top edge of the bag down 1 inch, then fold it down again another inch. This part is a grown-up job at age 3, though a 4-year-old can hold the fold in place while you tape. Put three strips of tape across the back to hold the fold shut.
Don’t worry about how it looks on the front. The hat is about to cover it.
Step 6: Add the hay
Take 4 or 5 hay strips for each side. Tape or glue the top ends of the strips to the sides of the bag, about 7.5 inches up from the bottom, so they hang down beside the face. A small piece of tape is enough, because the hat brim is going to cover it.
If you’re using trimmed raffia or a few real hay stems, they go here instead of the paper strips.
Step 7: Build the hat and put it on
Glue the crown onto the brim, overlapping by half an inch. Glue the patch on the crown. Then press the hat onto the front of the bag, with the bottom edge of the brim about 7.5 inches up. The brim covers the fold and the taped tops of the hay strips. The crown can stick up above the top of the bag, which gives it a floppy, hat-like look.
Use a few glue dots plus two tape loops behind the brim, and hold it for a count of ten. The brim overhangs the sides a little on purpose, since scarecrow hats always look a size too big.
Step 8: Arms and finishing touches
Cut a few 1-inch snips into both ends of each arm strip to make fringe, or let your preschooler do the snipping. Fringing is excellent scissor practice, because they’re only making short, straight cuts and not following a shape. For more of it, try these cutting practice sheets. Tape the arms to the back of the bag, about 4 inches up, so they stick out to the sides in a scarecrow pose.
If you’re adding the bandana, glue the folded triangle just under the mouth with its point aimed at the bottom of the bag. Name the scarecrow, because they always need names.
Step 9: The lift test
Pick up the scarecrow by the base (not the head) and tilt it gently. If nothing slides, it can go on display right away. Handle it gently at first, and let it dry several hours or overnight before rough play. If the hat flops, add a strip of tape behind the brim. Nobody needs to know.
Cleanup in five minutes
Tip the tray into the scrap bowl and then into the trash or recycling. Wipe glue fingers with a damp cloth. If newsprint left gray smudges, soap and water handle it. If you went with tissue or raffia, keep a hand vacuum nearby and do a quick pass on the floor around the chair.
Adjusting the Craft for Ages 3, 4, and 5
A three-year-old and a five-year-old can make the same scarecrow and do completely different jobs. Here’s how I split the work.
| Age | What they can do on their own | What you handle | Good to know |
|---|---|---|---|
| 3 | Crumple paper, press pieces onto glue dots you put down, draw pupils and stitches, and stuff the bag. | Cutting, most gluing, and folding and taping the top. | Do the face and stuffing now and save the hat for later. Twenty minutes is a good stopping point. |
| 4 | Glue their own dots, match pieces to the landing spots, snip fringe with help, and help with taping. | Cutting the shapes and folding the top. | Let them choose the hat and patch colors, which gives them a real design decision. |
| 5 | Trace with the quarter and penny, cut their own shapes, and place pieces without landing spots. | Folding and taping the top. | Ask for a name and a backstory. Try a second bag for a full-body scarecrow. |
If you have a toddler under 3 tagging along
This craft isn’t designed for under-3s, but a toddler can join in with one job: crumpling newspaper, which they’ll do with total commitment. Sit right beside them and skip the glue, scissors, and small pieces. If paper goes in their mouth, that’s the end of their turn.
If your preschooler runs out of steam
That’s normal. Stop after the face and stuffing, set the bag on a shelf, and do the hat and arms the next day. The bag holds its shape overnight, and the second session feels like a fresh start.
What your preschooler is practicing
Crumpling, pressing pieces flat, drawing tiny pupils, and snipping fringe all build hand strength and control. For more of that, try these fine motor activities for toddlers. The face chart also sneaks in position words like above, below, beside, and between. “Put the nose between the eyes” is a preschool lesson disguised as decoration.
While you build, ask what the scarecrow guards, what it does when it rains, and whether it’s grumpy or friendly today. A worried face can open an easy chat about feelings, and a silly one usually starts a giggle fit.
When Things Go Sideways: Quick Fixes
Even a forgiving craft has bad moments. Here are the ones I’ve actually hit.
| Problem | Likely cause | Fix |
|---|---|---|
| Pieces slide off or curl up | Too much glue (puddles), or a glue stick on textured kraft. | Switch to pea-sized dots and press for five seconds. Add a tape loop behind the piece. |
| Scarecrow won’t stand | Base wasn’t pressed flat, or the bag is underfilled. | Reopen the bottom into a rectangle. Drop in a few extra paper balls before folding the top. |
| Bag tore while stuffing | Bag got creased, or a paper ball had a sharp corner. | Patch the tear from the inside with tape, and crumple the paper more loosely. |
| Front bulges and pieces pop off | Bag is overstuffed. | Pull out a few paper balls. Fluffy, not packed. |
| Raffia keeps poking out the corners | Loose strands caught in the seams. | Trim the strands shorter, tuck them in, and tape the corners. |
| Glue soaked through the bag | Puddles of glue, and no shield inside. | Slide a fresh newspaper shield inside and let it dry flat. Wrinkles look scarecrow-y anyway. |
| Hat keeps flopping | Not enough tape at the brim. | Add a strip of tape behind the brim and one on the crown. |
| Your kid wants glitter | It’s October, and glitter feels mandatory. | Use glitter glue or pre-glittered paper on the hat patch. I skip loose glitter with younger preschoolers, since it’s hard to keep out of eyes and mouths. |
Ways to Make a Second (or Fifth) Scarecrow
Once the first one is done, someone will ask for another. Here are ways to change it up without starting from scratch:
The scarecrow family. Use different bag sizes: a small snack-size bag for a “baby scarecrow,” a standard lunch bag for the main one, and a big grocery bag for a “grown-up” scarecrow. Line them up on a shelf and let your preschooler decide who’s related to whom.
The scarecrow puppet. Skip the stuffing entirely for a zero-mess version. Keep the bag flat, slide a hand inside, and use the folded bottom flap as the head. Put the eyes and nose on the flap and the mouth just below it. Three-year-olds love puppets, and the puppet show is where scarecrows come to life.
The leaf-patch scarecrow. Swap the paper patch on the hat for a leaf collage. If your preschooler comes home from a walk with pockets full of leaves, the fall leaf crafts for preschoolers post has more ways to put them to work.
A full-body scarecrow. Stuff a second bag as the body and glue a construction-paper shirt on it. Tape the scarecrow head on top, then add a paper belt, patched pants, and paper boots. This is a good five-year-old project.
The autumn craft table. Pair the scarecrow with other low-mess fall projects on the same afternoon.
- Acorn crafts for toddlers: real acorns and caps are small and hard. Paper or felt acorns are the safer pick for preschoolers, and if you do use real ones, supervise closely.
- No-carve pumpkin decorating ideas: stand the scarecrow next to your pumpkins.
- Handprint turkey craft for toddlers: a natural next step when November arrives.
- Farm animal bingo cards: scarecrows guard farms, so a round of farm bingo makes a calm follow-up.
The crow. Every scarecrow needs a nemesis. Make a small black paper crow, and give it a rolled loop of painter’s tape on its back or a small folded cardstock stand. Then let your preschooler stage dramatic standoffs on the windowsill.
Frequently Asked Questions
What age is this scarecrow craft best for?
It’s designed for ages 3 to 5. Three-year-olds can do the crumpling, pressing, and marker work while you handle cutting and taping. Four-year-olds can glue and place most pieces themselves, and five-year-olds can trace and cut their own shapes. Toddlers under three shouldn’t do the craft itself, but they can crumple newspaper with an adult right beside them. Skip glue, scissors, and small pieces.
Can we use real hay or straw?
A pinch of stems at the sides of the face is fine for most kids, but never as stuffing, and not at all for kids with asthma or hay allergies. The “What about real hay?” part of the stuffing section covers the details.
Are googly eyes safe for preschoolers?
Under age 4, use paper eyes; the face chart uses them for that reason. For ages 4 to 5, use only large googly eyes, glue them on yourself, and pick up any that fall off. If your child still mouths objects, stick with paper eyes whatever their age.
How do I run this with a group, a classroom, or a playdate?
Do all the cutting ahead of time and put each child’s pieces on their own paper plate, so nobody waits on scissors. Set up stations: a glue-and-face station, a crumple-and-stuff station, and a hat-and-arms station, and rotate small groups through. Each scarecrow takes about 30 minutes of kid time, so plan a 45-minute window for a small group. Label the bottom of each bag with the child’s name before anyone starts.
How long does the scarecrow take to dry, and will it hold up?
Pieces grab within minutes, so you can display it gently as soon as you finish. Let it dry several hours or overnight before rough play. It’s sturdy enough for a shelf, a windowsill, or a puppet show, and kept indoors and dry, it will last the season.
Can we do this without scissors?
Yes. Tear the paper instead of cutting it. Torn edges give the scarecrow a ragged, patched-together look that suits it perfectly. Have your preschooler tear the hay strips and the shapes for the face, and skip fringing the arms or tear the ends instead. It’s a good option for kids who are still working up to scissors, and for anyone who just wants a scarecrow made of scraps.
Final Tips
- Cut every piece before your preschooler sits down.
- Glue in dots, not puddles, and count to five.
- Stuff it fluffy, not packed.
- Stop when interest fades. The hat can wait until tomorrow.
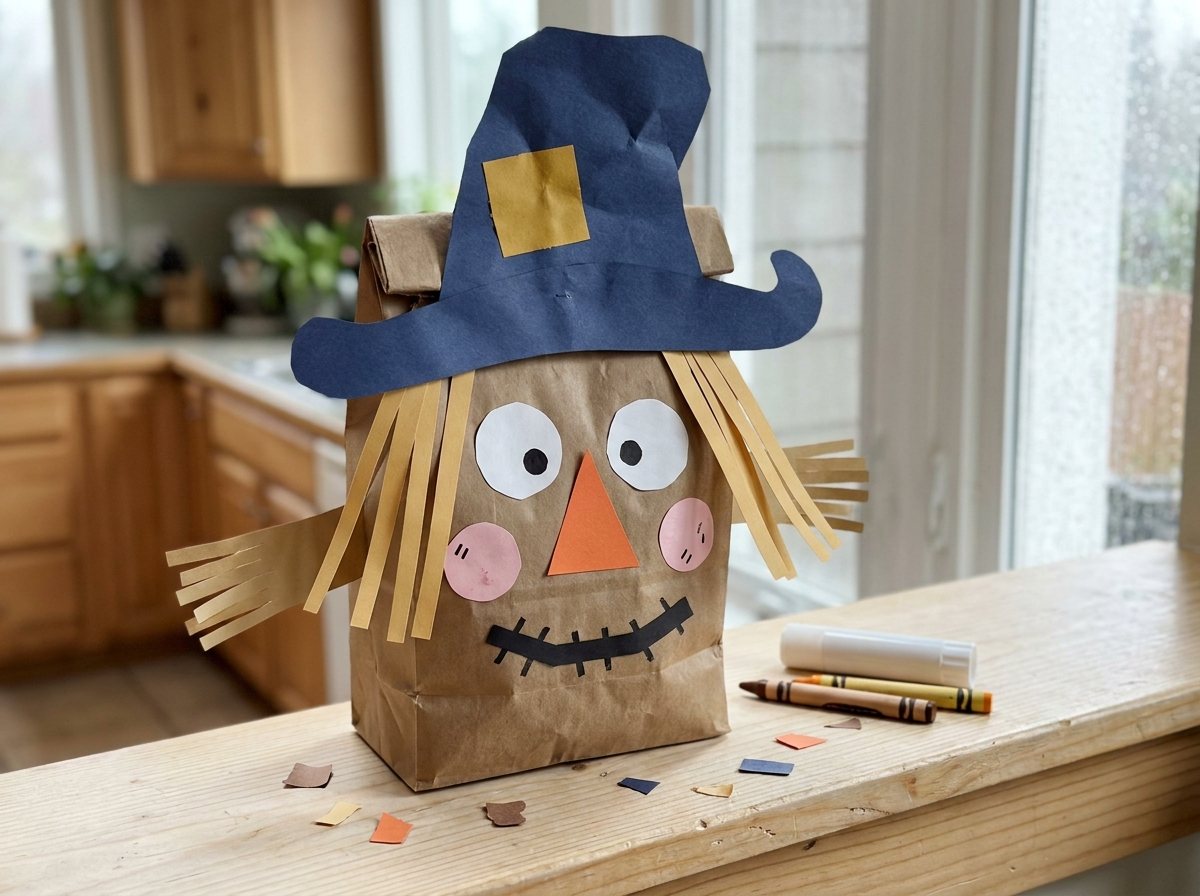
All it takes is one brown bag, a pile of scrap paper, and about half an hour. Yours will probably have a crooked hat, a nose in a strange place, and a face that looks alarmed. That’s the right scarecrow. Put it on the windowsill, give it a name, and let it guard your kitchen from crows for the rest of the season.