Kitchen Science Experiments for Kids: 15 Easy Volcano and Chemical Reaction Projects
Discover 15 easy kitchen science experiments for kids using common household items like baking soda and vinegar. You'll find projects like volcanoes and chemical reactions, perfect for entertaining without special kits.
- Your kitchen already holds most supplies for 15 easy science experiments.
- Discover 15 kid-tested projects like volcanoes and chemical reactions.
- Contain mess by using trays, or doing fizz/dye projects outdoors/in the tub.
- Pre-portion ingredients like vinegar to prevent chaotic dumping.
Last Tuesday it was 97 degrees by 10 a.m., the pool was closed for “chemical maintenance” (the irony was not lost on me), and I had three kids under eight standing in my kitchen with that specific look — the one that says entertain me or I will start narrating my own boredom out loud. I grabbed the baking soda, a bottle of vinegar that was two days from being tossed, and a cookie sheet, and forty-five minutes later nobody had asked for a screen once. We’d made three separate “volcanoes,” dyed a cup of milk into a tie-dye swirl, and turned red cabbage into a mood ring for household liquids.
That afternoon is basically the whole premise of this post. You do not need a $40 science kit from the toy aisle, a trip to the craft store, or a chemistry degree to run legitimately impressive experiments with your kids. Your pantry, your fridge, and your recycling bin already have almost everything you need. What follows are 15 of our most-repeated, kid-tested, minimal-shopping-required kitchen science projects, organized so you can pick one for a rainy Tuesday or run all fifteen as a full “science camp” week.
A quick note on ages: most of these work for kids as young as 3 with heavy adult involvement, and become genuinely independent for kids 7 and up. I’ve flagged age ranges and mess levels throughout so you can pick projects that match your kid’s attention span and your tolerance for cleanup.
What You Actually Need (And What You Don’t)
Before we get into specific projects, here’s the full supply list for everything in this post. If you have a fairly normal kitchen, you probably own 90% of this already.
| Category | Items | Where It’s Used |
|---|---|---|
| Acids | White vinegar, lemon juice, buttermilk | Volcanoes, invisible ink, cabbage chemistry |
| Bases | Baking soda, dish soap | Volcanoes, milk magic, fizzy potions |
| Color | Liquid food coloring, red cabbage | Nearly everything |
| Fizz boosters | Hydrogen peroxide (3%), active dry yeast, citric acid or lemon juice concentrate | Elephant toothpaste, bath bombs |
| Containers | Small bowls, a cookie sheet or tray, mason jars, plastic cups, a plastic bin or the bathtub for messier ones | All projects |
| Tools | Measuring spoons, a whisk or fork, dropper or pipette (a clean saline bottle works), dish soap for cleanup | All projects |
| Safety | Old towel or a vinyl tablecloth, safety goggles (optional but kids love them), an apron or old t-shirt | Anything with peroxide or dye |
Things you do not need: borax, washing soda, alka-seltzer (though it’s a fun swap), a lab coat, or anything mail-ordered. If a “kitchen science” post tells you to buy a specialty ingredient, it’s not really a kitchen science post — it’s a shopping list. Everything here is genuinely stuff you can start in the next ten minutes.
One ingredient worth calling out specifically: citric acid. It’s the powder that makes bath bombs fizz, and it’s sold in the canning aisle of most grocery stores (it’s used for pickling and preserving) for about $6 a bag that will last you a year of experiments. If you can’t find it, lemon juice concentrate is a fine substitute in a pinch, though the fizz is less dramatic.
Ground Rules for Kitchen Science Days
I run these experiments often enough that I’ve developed a few non-negotiable habits. Steal them.
- Tray everything. A cookie sheet, a large plastic tray, or even the bottom of a cardboard box turns “the kitchen table is now permanently sticky” into “wipe the tray, we’re done.” This is the single highest-leverage mess-prevention move you can make.
- Outside or bathtub for anything with dye plus fizz. Baking soda volcanoes with food coloring will find your grout. If it’s warm out, take volcano and bath-bomb projects to the driveway or patio table. If not, the bathtub is a built-in containment unit with a drain.
- Pre-portion the vinegar and baking soda into cups before you start. The number one thing that turns a science experiment into a chaotic dumping contest is handing a preschooler an open vinegar bottle. Measure it out ahead of time into small cups they can pour themselves — same excitement, way more control.
- Let the reaction fail once. If you over-explain the “right” way before they try it, you rob them of the actual scientific process — hypothesize, test, observe, adjust. Let the first eruption fizzle out weird. That’s the interesting part.
- Talk about why, not just wow. A one-sentence explanation (“the vinegar is an acid and the baking soda is a base, and when they meet they make a gas — that’s the bubbles!”) sticks with kids far better than you’d expect, and it’s the difference between an activity and an actual first chemistry lesson.
If your kid is the type who also loves open-ended, no-instructions material play, these same pantry ingredients pair really well with a rotating DIY sensory bin setup between science days — dry rice or beans for scooping and pouring practice on the days you don’t want any liquids out at all.
Volcano Central: Three Baking-Soda Eruptions to Try
The baking soda volcano is the crown jewel of kitchen science for a reason — it’s dramatic, it’s fast (under two minutes from setup to eruption), and the “recipe” is genuinely just two ingredients. Here are three versions, from classic to advanced.
The chemistry, briefly: baking soda (sodium bicarbonate) is a base. Vinegar (acetic acid) is, obviously, an acid. When they combine, they produce carbon dioxide gas — that’s the foam and bubbling. Add dish soap and the CO2 gets trapped in soap bubbles instead of escaping instantly, which is what makes the eruption thicker and longer-lasting instead of a quick fizzle.
1. The Classic Papier-Mâché Volcano
This is the one everyone pictures, and it’s a great weekend project if you want to combine crafting and science into one afternoon.
- Build a cone around an empty water bottle using crumpled newspaper and masking tape, leaving the bottle opening exposed at the top.
- Cover it in a layer of papier-mâché (flour + water paste + newspaper strips) and let it dry overnight — this is a good pairing day with any recycling-bin craft project you’ve already got going.
- Paint it once dry (brown, grey, or let your kid go wild with color — geological accuracy is optional).
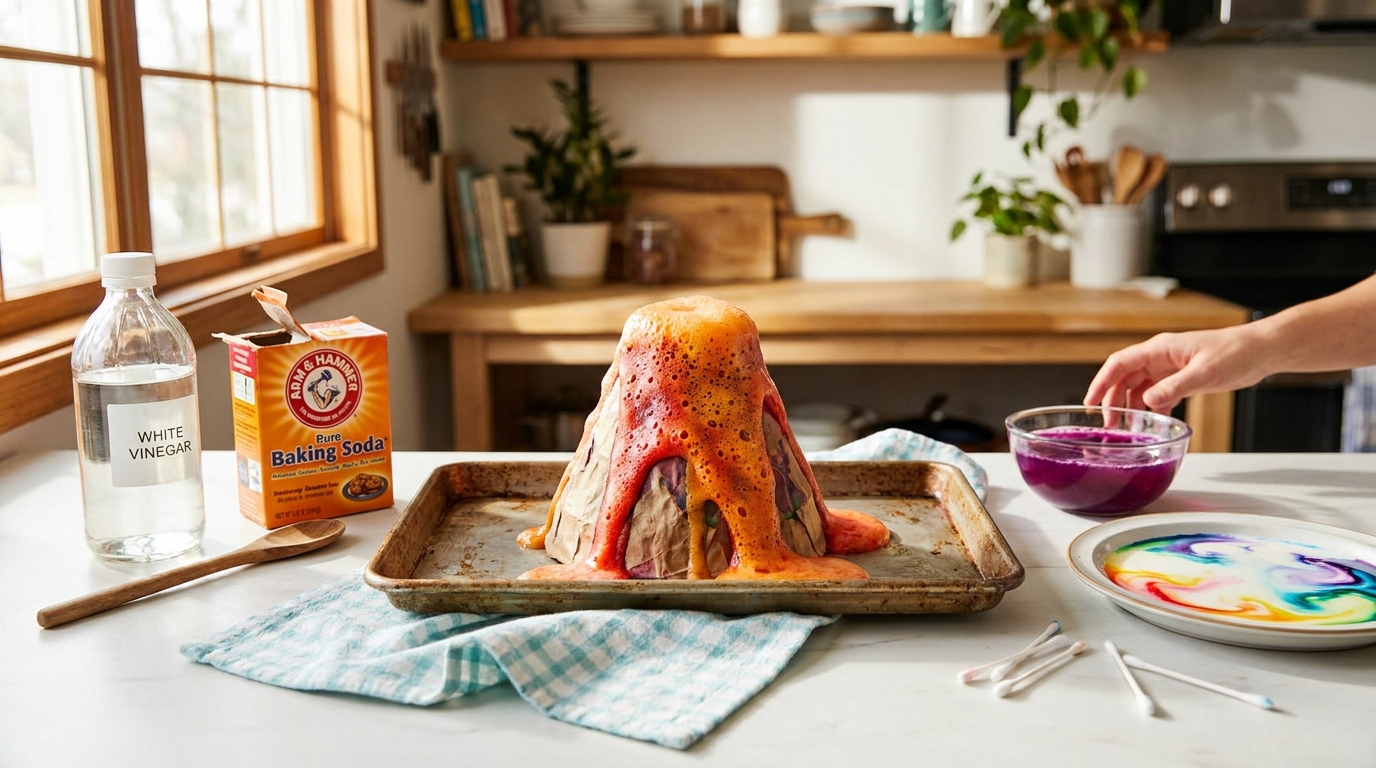
- To erupt: add 2 tablespoons of baking soda into the bottle opening, a few drops of red and orange food coloring, a squirt of dish soap, then pour in ¼ cup of vinegar and step back.
Age range: 5+ for the eruption, 6+ to help build. Mess level: Medium (contained if you keep it on a tray).
2. The Tabletop Mini Volcano (No Sculpting Required)
For toddlers or for days when you want the eruption without the two-day build.
- Set a small plastic cup in the center of a tray or baking dish.
- Pile play sand, dirt, or even just a mound of paper towels around the cup to disguise it as a “mountain” (optional — skip entirely for a very fast version).
- Add 3 tablespoons of baking soda and a drop of dish soap directly into the cup.
- Let your child pour in vinegar (tinted with food coloring ahead of time) using a small pitcher or measuring cup.
This version takes under five minutes start to finish, which makes it the one I reach for when I need a science activity right now with zero prep, or as a five-minute icebreaker before a bigger activity like watercolor painting.
Age range: 3+. Mess level: Low to medium.
3. The Rainbow Layered Eruption
This is the version that gets the biggest reaction from kids who’ve already “done” the classic volcano and want something new.
- Set out 4-5 small cups, each with 2 tablespoons of baking soda and a different color of food coloring mixed in (mix the color into the dry baking soda with a spoon — it’ll clump slightly, that’s fine).
- Line the cups around the base of your volcano or directly on the tray.
- Pour a small splash of vinegar onto each cup in sequence rather than all at once, so kids see the reactions overlap and blend colors in real time rather than one flat “explosion.”
Age range: 4+. Mess level: Medium-high — this one is genuinely best done outside.
Red Cabbage Chemistry: Turn Your Kitchen into a Color-Changing Lab
If the volcano is the flashy showpiece, red cabbage indicator is the project that actually teaches the most science per minute of prep. It’s also one of the few “real lab” experiments you can run entirely from produce drawer contents.
4. Making Red Cabbage Indicator Juice
- Chop about 2 cups of red cabbage and put it in a heat-safe bowl.
- Pour 2 cups of boiling water over it (adult-only step) and let it sit for 10-15 minutes until the water turns a deep purple.
- Strain out the cabbage — you’re left with purple “indicator juice.” Let it cool before kids handle it.
This juice contains a pigment called anthocyanin that changes color depending on whether it touches an acid or a base, which sets up the next two projects.
5. Acid or Base? Testing Household Liquids
Pour a small amount of cooled cabbage juice into 5-6 clear cups. Have your child add a spoonful of a different household liquid to each one and predict the color before it happens.
| Liquid Tested | Result | Acid or Base? |
|---|---|---|
| Lemon juice | Bright pink/red | Acid |
| Vinegar | Pink | Acid |
| Baking soda + water | Blue-green | Base |
| Dish soap | Blue-green to yellow | Base |
| Plain tap water | Stays purple | Neutral |
| Milk | Slight pink tint | Mildly acidic |
This turns into a genuinely fun science-fair-style worksheet moment — have your child sketch or record each result before revealing the color, then compare hypothesis to outcome.
Age range: 5+ (reading and predicting makes this best for kids who are already writing a little). Mess level: Low, as long as juice stays in cups.
6. The Color-Changing Fizzy Potion
Combine the cabbage indicator with the volcano chemistry for a two-step reveal: pour purple cabbage juice into a clear cup, then stir in a spoonful of baking soda (it’ll turn blue-green), then pour in a splash of vinegar and watch it fizz back toward pink in real time. It’s a full acid-base-acid color cycle in one cup, and it’s genuinely one of the most “whoa” moments in this whole list for the amount of effort involved.
Age range: 5+. Mess level: Low-medium.
Fizz, Foam, and Bubbles
This trio ramps up the drama without needing anything you don’t already own.
7. Elephant Toothpaste
The famous one. Adult supervision required for the peroxide step, but the actual mixing is safe for kids to do with guidance.
- In a plastic bottle (a 16-20 oz water bottle works great), add ½ cup of 3% hydrogen peroxide, a squirt of dish soap, and a few drops of food coloring. Swirl gently.
- In a separate small cup, dissolve 1 tablespoon of active dry yeast into 3 tablespoons of warm water and stir for about 30 seconds.
- Pour the yeast mixture into the bottle (adult does the pour, or supervises closely) and stand back — it foams up fast and keeps going for a minute or more.
The chemistry: yeast contains an enzyme (catalase) that rapidly breaks down hydrogen peroxide into water and oxygen gas. The dish soap traps that oxygen into a huge column of foam. It’s warm to the touch afterward, which is a great moment to talk about the reaction releasing heat (an exothermic reaction, if you want the vocabulary word).
Age range: 6+ with an adult handling the peroxide. Mess level: High — outside or in a tray inside a plastic bin, always.
8. Fizzy Bath Bomb “Dinosaur Eggs”
- Mix 1 cup baking soda with ½ cup citric acid in a bowl.
- Slowly spritz the mixture with water from a spray bottle (just a few spritzes at a time) while a kid mixes with their hands, until it holds together like damp sand.
- Press a small toy dinosaur or animal figure into the center of a golf-ball-sized clump, then pack more mixture around it into an egg shape. Let dry for 2-3 hours (or overnight for a firmer set).
- To “hatch” the egg: drop it into a bowl or the bathtub and watch it fizz apart as it dissolves.
This one doubles as a slow-burn activity — the drying step means it naturally spans “make it in the morning, hatch it before bath time,” which is genuinely useful for stretching a rainy day across several hours instead of burning through your whole activity list in twenty minutes.
Age range: 4+ for mixing and molding, any age for the “hatching” reveal. Mess level: Medium (dry, contained mess during mixing).
9. The Baggie Explosion
This one needs to happen outside or over a sink, no exceptions.
- Fill a sandwich-sized ziplock bag with ¼ cup vinegar.
- Wrap 2 tablespoons of baking soda in a small square of tissue paper and twist the ends closed.
- Quickly drop the tissue packet into the bag and zip it shut, then set it down and step back immediately — the bag will inflate and pop within about 10-20 seconds.
Age range: 6+ (the timing and “step back fast” instruction needs a kid who can follow a quick direction). Mess level: Medium, but self-contained until it pops — do this one outdoors or in the sink.
Milk, Soap, and Surface Tension Tricks
Not a chemical reaction in the acid-base sense, but this pair belongs in any kitchen science lineup because the visual payoff is enormous for the effort involved, and it teaches a genuinely different scientific concept: surface tension and fat molecules.
10. Dancing Rainbow Milk
- Pour whole milk into a shallow dish or pie plate, just enough to cover the bottom (about ¼ inch deep).
- Add a few drops of different food colorings around the surface, spaced apart.
- Dip a cotton swab in dish soap, then touch it to the center of the milk — don’t stir, just touch and hold for a second.
The colors burst outward and swirl in real time. The dish soap breaks the surface tension and reacts with the fat in the milk, sending it racing across the surface, dragging the color with it. Skim milk barely reacts at all, which makes a great side-by-side comparison if you want to turn it into an actual experiment with a variable.
Age range: 3+. Mess level: Low if kept in the dish (milk doesn’t stain like dye alone would, but it does get sticky — wipe promptly).
11. Magic Milk Fireworks in a Jar
The same principle, scaled up: fill a tall clear jar or vase with milk, drop food coloring in from above so it sinks and pools, then add a small squirt of dish soap and watch the color explode upward and outward through the jar like a firework in slow motion. It’s more visually dramatic than the flat-dish version and makes a great slow-motion video if your kid wants to film it.
Age range: 3+. Mess level: Low-medium (glass jar means more breakage risk with younger kids — use plastic if you’re working with toddlers).
Fruit, Metal, and Slow Reactions to Watch Overnight
These two are less about instant fireworks and more about patience — a genuinely different (and valuable) kind of science lesson: some reactions take hours, not seconds.
12. The Naked (Bouncy) Egg
- Place a raw egg in a jar and cover it completely with white vinegar.
- Leave it undisturbed for 24-48 hours. You’ll see bubbles forming on the shell almost immediately — that’s the vinegar dissolving the calcium carbonate shell and releasing carbon dioxide.
- After 24-48 hours, gently rinse the egg. The shell is completely gone, leaving just the membrane — the egg is translucent, rubbery, and will actually bounce slightly from a short drop (very short — it will still break if dropped from height).
This is a fantastic two-day project: set it up on day one with almost zero effort, then have a genuine “reveal” moment on day two or three. Great pairing with journaling — have your child predict what will happen and check back each day to record changes.
Age range: 5+ for setup, all ages for the reveal. Mess level: Very low.
13. The Shiny Penny Bath
- Fill a small bowl with ¼ cup vinegar and a teaspoon of salt, and drop in a handful of dull, tarnished pennies.
- Let them sit for 5 minutes, then swish them around.
The acidic salt-vinegar solution dissolves the copper oxide (the dull layer) off the surface, and pennies come out noticeably shinier within minutes — a fast reaction to pair with the slow-burn egg project so kids get both a fast and slow example of chemistry in the same session. For an extra step, leave one penny out of the solution, dry, on a paper towel overnight and compare how it re-tarnishes (oxidizes) versus a rinsed, dried one.
Age range: 5+ (small coins are a choking hazard for kids who still mouth objects — supervise closely with toddlers or skip this one for that age group). Mess level: Very low.
Invisible Ink and One Bonus Outdoor Fizz Project
Two last ones to round out the fifteen — a quieter, more mysterious project and a big messy outdoor finale.
14. Baking Soda Invisible Ink
- Mix 2 tablespoons baking soda with 2 tablespoons water.
- Dip a cotton swab or thin paintbrush in the mixture and “write” a secret message on white paper. Let it dry completely (it’ll be invisible once dry).
- To reveal: paint over the paper with grape juice concentrate or diluted red cabbage indicator juice (from project #4) using a wide brush or sponge. The baking soda residue is a base, so it reacts with the acidic juice and changes color right where the message is, revealing it in a totally different shade than the surrounding paper.
This is a nice alternative to the classic lemon-juice-plus-heat-lamp invisible ink, since it doesn’t involve a heat source at all — just a color reaction, which makes it safe for younger kids to fully run themselves start to finish.
Age range: 5+ (needs writing/drawing control). Mess level: Low.
15. Fizzy Sidewalk Chalk Paint
A great one to end on if the weather’s decent — takes the volcano reaction outdoors and turns it into art.
- Mix ½ cup baking soda with a few tablespoons of water and food coloring until it’s a thick, paintable paste. Make several colors in muffin tins or small cups.
- Let your child paint designs on the driveway or sidewalk with a paintbrush and let it dry slightly (10 minutes or so).
- Fill a spray bottle with vinegar and let them spray their painted designs — each color fizzes and bubbles on contact, and the reaction eats slightly into the chalk texture as it dries, leaving a neat crackled finish.
This is a perfect capstone project for a “science week” because it combines nearly everything covered above — the acid-base fizz, the visual drama, color mixing — into an outdoor art format, and it’s an easy one to let a group of kids run semi-independently once they’ve seen the reaction demonstrated once. It also plays nicely as a companion activity if you’re already doing balloon science experiments outside that same afternoon — both are big-space, big-mess projects that are much easier on a driveway than a kitchen floor.
Age range: 4+. Mess level: High, but it’s outside and hoses off the driveway in one pass.
Troubleshooting: When the Reaction Doesn’t Do Much
Every parent who’s run these has had at least one flat, disappointing fizzle. Here’s what’s usually going on.
| Problem | Likely Cause | Fix |
|---|---|---|
| Volcano barely bubbles | Vinegar too diluted, or baking soda is old/stale | Use full-strength white vinegar; test baking soda by dropping a pinch in vinegar first — it should fizz instantly |
| Elephant toothpaste doesn’t foam | Peroxide is old (it breaks down over time even unopened) or yeast wasn’t fully dissolved | Use peroxide within a few months of opening; make sure yeast sits in warm (not hot) water a full 30 seconds before pouring |
| Cabbage juice barely changes color | Juice wasn’t concentrated enough | Use less water relative to cabbage, or let it steep longer |
| Bath bombs crumble instead of holding shape | Mixture too dry | Add water one spritz at a time — it should hold together like wet sand, not be soupy |
| Milk doesn’t “dance” | Used skim or low-fat milk | Whole milk or half-and-half works dramatically better — fat content is the whole mechanism |
Frequently Asked Questions
What’s the actual chemistry behind a baking soda volcano?
Baking soda is a base (sodium bicarbonate) and vinegar is an acid (acetic acid). When they mix, they undergo an acid-base reaction that produces carbon dioxide gas, water, and sodium acetate. The CO2 gas is what creates all the bubbling and foaming — adding dish soap traps that gas in bubbles for a longer, thicker eruption instead of a quick fizzle.
Are these experiments safe for toddlers, or is there a minimum age?
Most of the vinegar-and-baking-soda projects (the mini volcano, dancing milk, sidewalk chalk paint) are safe for kids as young as 3 with an adult present, since the ingredients are non-toxic pantry staples. Save the hydrogen peroxide-based elephant toothpaste and anything involving small objects like pennies for kids 5 and up, and always supervise closely regardless of age.
Is hydrogen peroxide safe to use around kids?
Standard 3% hydrogen peroxide (the brown-bottle kind sold as a household antiseptic) is safe for the elephant toothpaste experiment when an adult handles the pouring and mixing. Avoid the higher-concentration “food grade” or salon versions, which can cause skin and eye irritation. Keep it away from eyes, wash hands after, and don’t let kids drink or taste any experiment liquid, even the “safe” ones.
How do I keep these experiments from destroying my kitchen?
Tray everything — a cookie sheet or large plastic bin turns spills into a two-second wipe-down instead of a floor project. Pre-measure vinegar and baking soda into small cups before handing them to kids so there’s no open-bottle chaos, and move anything involving food coloring plus fizzing (volcanoes, baggie explosions, bath bombs) outside or into the bathtub whenever weather allows.
Can I reuse the same baking soda and vinegar for multiple experiments in one day?
Yes, buy vinegar in the larger jug size (it’s cheap, usually $3-4 for 64 oz) and a big box of baking soda rather than small containers — you’ll go through more than you expect once kids realize they can keep triggering reactions. Nothing here needs to be discarded after one use except the actual reacted mixture itself.
What’s the best “wow factor” experiment if I only have time for one?
Elephant toothpaste (#7) gets the biggest reaction from kids 6 and up because of the sheer volume and speed of foam, while the color-changing fizzy potion (#6) is the best single option for younger kids since it combines color, sound, and movement in one cup with almost no prep or safety concerns.
My kid wants to know why the naked egg experiment takes so long. How do I explain it?
The vinegar is slowly dissolving the calcium carbonate that makes up the eggshell, releasing tiny bubbles of carbon dioxide gas as it works — that’s why you see bubbles on the shell right away even though the shell itself takes 24-48 hours to fully disappear. It’s a great chance to talk about how some chemical reactions happen instantly (like the volcano) while others happen slowly over time, which is a genuinely useful science concept on its own.
Give Yourself Permission to Half-Plan This
You don’t need to run all fifteen of these in one week, and you definitely don’t need Pinterest-perfect results on the first try. Pick one, keep a towel nearby, and let your kid make the mess bigger than you’d planned — that’s usually the moment they remember. If you’re not sure which project fits your kid’s age and energy level today, our activity finder quiz can help you match one to their mood in under a minute. Now go raid the pantry.