Spring Break Activity Countdown: 5 Days of Screen-Free Projects for Kids at Home
Get a 5-day screen-free spring break plan with easy activities using common supplies. You'll learn to implement a 'loose plan' to keep kids engaged and avoid screen overload without over-scheduling.
- Implement a 'loose plan' with daily anchor activities for a successful break.
- Focus on screen-free projects to engage your kids' hands and imaginations.
- Utilize common household items for activities; a minimal shopping list is provided.
- Use daily themes to help you prep materials the night before.
- Avoid over-scheduling; allow free time around planned activities.
Spring break is one of those things that sounds wonderful in theory and then arrives like a runaway train. One minute you’re counting down the days, excited for a slower pace and some quality time. The next minute it’s 9:47 a.m. on day one, both kids are already arguing, someone’s asking for a snack they just had, and someone else is inching toward the iPad with the practiced nonchalance of a person who thinks they’re being subtle.
You want a good spring break. They want a good spring break. But “just seeing how it goes” tends to go one specific direction: screens, snacks, and a low-grade crankiness that comes from too much passive entertainment and not enough doing.
Here’s what I’ve learned after doing this a few times: you don’t need a packed schedule. You don’t need to book experiences or spend money. You need a loose plan — something structured enough that you know what the day looks like, flexible enough that it doesn’t feel like school. A plan that gives kids things to DO with their hands and their imaginations, so the hours actually fill up instead of draining slowly into device time.
This is that plan. Five days, two to three activities per day, all screen-free, all achievable with basic supplies you likely already have. Each day has a loose theme, which helps you think ahead and gather simple materials the night before. None of this requires you to be a craft expert or a Pinterest mom — I’m going to give you real instructions, real timing estimates, and honest notes about what works for different ages.
Let’s get into it.
Why a Loose Plan Beats Winging It (But Also Beats Over-Scheduling)
Let me explain what I mean by “loose plan,” because I think it’s the key to a good spring break.
Winging it sounds liberating in theory. In practice, with kids at home all day, it usually means you’re constantly reacting — to boredom, to requests, to conflict — instead of getting ahead of any of it. By mid-morning you’ve already used up your patience bandwidth negotiating screentime and snacks, and the rest of the day is uphill.
Over-scheduling sounds responsible in theory. In practice, it means you’re rushing from activity to activity, stressed about timing, and your kids are too — they never get the chance to settle into anything or let their imaginations wander.
The sweet spot is a daily anchor: one or two activities you’ve genuinely planned and prepped, with materials ready and instructions in your head. Around that anchor, kids have free time. Outdoor time. Time to build Lego or play pretend or do whatever they want. The anchor gives the day shape; the free time gives it breath.
Each day in this plan has that shape. I’ll tell you what to prep the night before, what materials you need, how long activities take, and how to adapt for different ages. The rest of the day is yours to fill however suits your family.
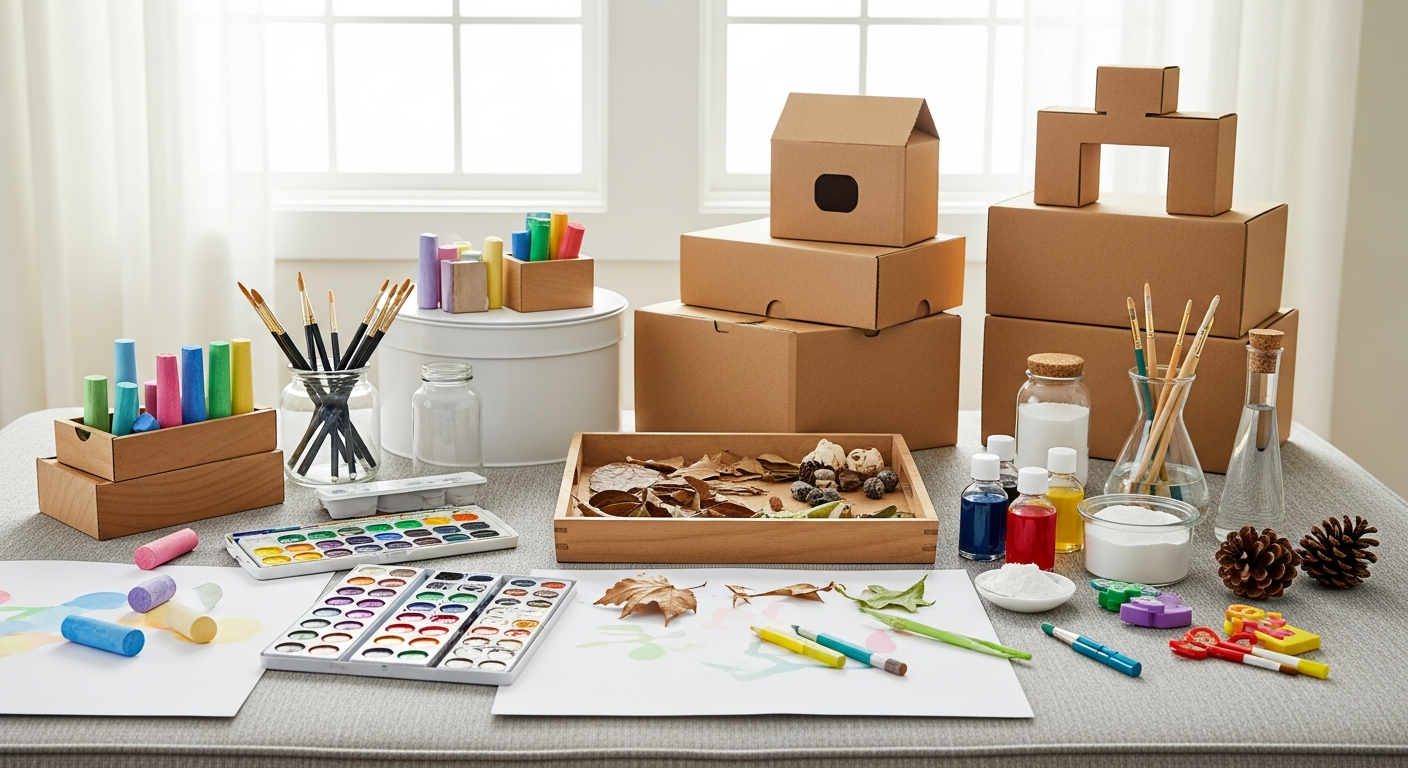
Spring Break Supply Checklist
Before the week starts, scan your house for these basics. Most homes have the majority of these already.
| Category | Items |
|---|---|
| Paper & Cardboard | Construction paper, cardboard boxes, cardboard tubes |
| Paint | Washable tempera in primary colors, white, black |
| Glue | White school glue, glue sticks |
| Scissors | Child-safe scissors for kids, regular for adults |
| Drawing | Crayons, markers, colored pencils |
| Nature | Will gather during activities — leaves, sticks, rocks |
| Kitchen | Baking soda, vinegar, dish soap, food coloring, milk, cornstarch |
| Outdoor | Sidewalk chalk, buckets or containers |
| Extras | Tape (masking and clear), string or yarn, aluminum foil |
Shopping list (only if you don’t already have these):
- Sidewalk chalk
- Food coloring (basic 4-pack)
- Baking soda and white vinegar if running low
- Whole milk (for one science activity)
- Dish soap
That’s it. This is a low-cost week.
Daily Overview at a Glance
| Day | Theme | Activities | Mess Level | Best For |
|---|---|---|---|---|
| Day 1 | Nature Crafts | Pinecone Bird Feeder, Seed Mosaic | Low–Medium | Ages 3–9 |
| Day 2 | Kitchen Science | Volcano Eruption, Rainbow Milk | Medium | Ages 2–9 |
| Day 3 | Cardboard Building | Big Build Challenge | Low | Ages 4–9 |
| Day 4 | Rainy Day Process Art | Marble Painting, Watercolor Resist | Medium | Ages 2–9 |
| Day 5 | Outdoor Art | Sidewalk Chalk Murals, Leaf Prints | Low–Medium | Ages 2–9 |
Day 1: Nature Crafts — Slow Down and Notice Things
Theme: We’re using what the natural world gives us — seeds, sticks, pinecones, leaves — to make things that are beautiful and useful.
Prep the night before: Go outside or check your yard for pinecones (or grab them from a park on your walk). Pull out peanut butter or sunflower butter (nut-free alternative), birdseed if you have it, and string. Find a tray or container for the seed mosaic.
Morning anchor activity (30–45 minutes): Pinecone Bird Feeder
Afternoon anchor activity (20–30 minutes): Seed and Nature Mosaic
Activity 1A: Pinecone Bird Feeder
This is a classic for a reason. It’s satisfying in a tactile, sensory way, it results in something real that actually does something in the world (feeds birds), and children from ages 3 to 9 can participate at different levels of independence.
Materials:
- 1–2 pinecones per child (the bigger and more open, the better)
- Peanut butter or sunflower seed butter (for nut-free versions)
- Birdseed (or a mix: rolled oats, sunflower seeds, millet — anything birds like)
- String or twine
- A tray or plate for rolling
- Butter knife or craft stick for spreading
Instructions:
- Tie a piece of string (about 12 inches) around the top of each pinecone, leaving a long loop for hanging. Tie it tightly — nothing is more heartbreaking than a bird feeder that falls before the birds come.
- Using a butter knife or craft stick, spread a generous layer of peanut butter or sunflower butter over the pinecone. Get it into the gaps and crevices — that’s where the seeds will stick.
- Pour birdseed onto a tray or plate. Roll the peanut-butter-coated pinecone through the seeds, pressing gently so the seeds embed in the butter. Turn and roll until well coated.
- Hang the finished bird feeder from a tree branch or porch railing. Low enough that kids can see it from inside; not so low that squirrels will immediately claim it.
- Watch. Wait. Birds may come the same day if you’re quiet and lucky, but sometimes it takes a day or two. This patience-building is part of the activity.
For toddlers (2–3): The spreading is wonderful sensory work — let them go to town with the butter knife. Rolling in birdseed is endlessly satisfying. Skip the tying and hang the feeder for them.
For preschoolers (3–5): They can do almost all of this with light guidance. Practice tying the string knot — it’s good fine motor work.
For school-age (5–9): Give them full ownership. They can tie knots, spread carefully to coat the whole surface, and even look up which birds are common in your area to predict who’ll visit.
Mess level: Low-Medium. The peanut butter is sticky but containable. Do it on the porch or over a garbage bag.
Activity 1B: Seed and Nature Mosaic
Mosaics are meditative in the best way — repetitive, focused, and the result looks like real art. Using natural materials makes this extra special.
Materials:
- A piece of cardboard (from any box)
- White school glue
- Assorted seeds: dried beans, lentils, rice, birdseed, sunflower seeds, corn, pumpkin seeds
- Optional extras from outside: small pebbles, dried flower petals, leaves, small sticks
- Markers or pencil for drawing a simple outline first
Instructions:
- If your child wants to work from a shape: draw a simple outline on the cardboard first. Shamrock, butterfly, sun, house, their initial — something with clear interior space to fill.
- If your child prefers to work freely, skip the outline entirely.
- Pour your seeds and natural materials into small bowls or sections of an egg carton for easy sorting and access.
- Apply glue to a section of the cardboard and press seeds into the glue. Work section by section to avoid the glue drying before seeds are placed.
- Fill the shape or fill the whole board — either approach is valid.
- Set aside to dry flat for at least an hour. Once dry, the seeds are very secure.
Tips: Younger kids tend to prefer working in patches of one color/material; older kids like to create detailed patterns. Don’t push for precision — a beautifully messy all-over mosaic is just as lovely as a careful pattern.
Mess level: Low. Seeds roll, but they’re easy to sweep up.
Age range: All ages — even 18-month-olds enjoy placing objects into glue, though they’ll need supervision to keep seeds out of mouths.
Day 1 extension ideas: Take a nature walk specifically to look for interesting materials (pinecones, seed pods, interesting rocks, feathers). Bring a bag. Talk about what you find. This pairs beautifully with the outdoor nature activities for kids ideas on this site if you want to make the whole day about exploring outside.
Day 2: Kitchen Science — Things That Bubble, Fizz, and Swirl
Theme: Kitchen science day is always a crowd-pleaser because it feels like you’re doing something you’re not supposed to do — making messes on purpose, combining things that react dramatically, and calling it educational.
Prep the night before: Make sure you have baking soda, white vinegar, dish soap, whole milk, and food coloring. Pull out containers, trays, and anything you don’t mind getting a little messy.
Morning anchor activity (30–45 minutes): Volcano Eruption Station
Afternoon anchor activity (20 minutes): Rainbow Milk
Activity 2A: Volcano Eruption Station
The classic baking soda and vinegar reaction never gets old. The key is setting it up as a real experiment — not just one eruption, but a station where kids can experiment with variables. How much baking soda? How much vinegar? What does dish soap add? What about food coloring?
Materials:
- Baking soda (at least half a box — you’ll use more than you expect)
- White vinegar (a 32 oz bottle is plenty)
- Dish soap
- Food coloring
- Small cups, bowls, or containers (one per child works; more is better)
- Plastic tray, baking sheet, or just do this outside
- Spoons and droppers if you have them (turkey baster, medicine dropper, even a straw to drip with)
- Optional: build a volcano shape from playdough or aluminum foil around a cup to add theater
Instructions:
- Set up the station: put 2–3 tablespoons of baking soda in each container. Have the vinegar in a pitcher or cup that’s easy to pour or drip from.
- Optional volcano theater: mold playdough or aluminum foil into a mountain shape around a small plastic cup. The cup holds the baking soda; the mountain is pure drama.
- Let kids add food coloring drops to their baking soda.
- Add a squirt of dish soap into the baking soda — this makes the foam much more voluminous and exciting.
- Pour or drip vinegar in. Watch it erupt.
- The experiment part: now ask questions. What happens if you add MORE vinegar? Does it keep going? What if you add more baking soda? What if you add a different color? Let them try things rather than telling them what will happen.
- Optional extension: add citric acid (from a grocery store baking aisle) to the mix. The reaction is stronger and the foam is more spectacular. Worth picking up if you see it.
Conversation prompts:
- “What do you notice about the fizzing? What’s it made of?” (Carbon dioxide bubbles!)
- “Does the dish soap make a difference? Why do you think that is?”
- “What do you think would happen if we added hot water instead of cold?”
For toddlers (2–3): They’ll mostly just want to pour and watch. Have a dedicated “baby volcano” that’s just for them so they feel included. Closely supervised because vinegar and baking soda aren’t harmful but vinegar in eyes stings. Do this outside or with a smock.
For preschoolers (3–5): Give them a dropper or spoon so they can control the amounts carefully. Let them predict what will happen before each addition.
For school-age (5–9): Frame it as real science: hypothesis, experiment, observation, conclusion. Can they figure out the ratio of baking soda to vinegar that gives the longest reaction? Can they make the biggest foam volcano?
Mess level: Medium. Plan for spills. Outside or on a covered table is ideal. It cleans up fast.
Activity 2B: Rainbow Milk
This is one of those activities that’s genuinely beautiful and seems almost magical, which makes it perfect for afternoon when everyone is a bit worn out.
Materials:
- Whole milk (2% works; skim doesn’t work well)
- Food coloring in at least 3–4 colors
- Dish soap
- A shallow dish or plate with a rim (a pie plate or the lid of a pot works great)
- Cotton swabs or droppers
Instructions:
- Pour whole milk into the shallow dish — you want about a centimeter deep. Let it settle and go still.
- Add drops of food coloring around the dish — don’t mix. Dot the colors in different spots: a drop of red here, a drop of blue there, yellow in the middle.
- Dip a cotton swab in dish soap. Touch the soapy swab tip to the center of the milk.
- Watch: the colors will explode outward in swirling, flowing patterns. The effect usually lasts 20–30 seconds of active movement before slowing.
- Repeat by touching the swab to different spots in the milk. Each touch starts new movement.
Why does it work? Dish soap is a surfactant — it breaks the surface tension of the milk and causes the fat molecules to rapidly move away from the soap. The food coloring just makes this movement visible. You can explain this to older kids as a simple conversation; for little ones, just let it be magic.
Extension: What happens if you use a different liquid — water instead of milk? (The effect is much weaker, which shows it’s the fat in milk doing the work.) What if you use cream? (More dramatic!)
For toddlers: Mostly observation. They’ll want to put their fingers in — and that’s okay, it won’t hurt them. The mixing that results is its own satisfying sensory experience.
For preschoolers: Let them add their own food coloring drops and touch the swab themselves. Ask them to predict where the colors will go.
For school-age: Encourage them to photograph or draw what they see. Can they make specific patterns? Can they recreate the same pattern twice?
Mess level: Low. Milk and food coloring, easily contained in the dish.
Day 2 extension ideas: If the kids are obsessed with the science experiments, look at our balloon science experiments for kids for more activities in the same vein — kids who love the volcano will love the static electricity and air pressure experiments there.
Day 3: Cardboard Building Challenge
Theme: Today is engineering day. We’re building big things from cardboard, and the only rule is there are no rules about what to build.
Prep the night before: Collect every cardboard box in your house. Amazon boxes, cereal boxes, toilet rolls, egg cartons, shoeboxes — put them all in a pile in one room. Add tape (masking tape is easier for kids than clear tape), scissors, and markers. That’s it.
Anchor activity (1–2 hours): The Big Build Challenge
This day has only one main activity, but it can genuinely fill hours. The secret is framing it as a challenge with just enough structure to spark ideas.
Activity 3A: The Big Build Challenge
Materials:
- All your cardboard boxes (the more variety in size, the better)
- Masking tape (at least one big roll — you’ll use more than you think)
- Scissors
- Markers for decorating
- Optional: paint for finishing touches
How to set it up:
Pour or pile all the cardboard in the middle of the room. Tell kids: “Today we have a building challenge. You can make ANYTHING you want. You can work together or separately.” Then offer three prompts — they pick one, or they can ignore all three and do their own thing:
- The Castle Challenge: Can you build a castle big enough to put a stuffed animal inside?
- The Town Challenge: Can you build a whole cardboard town — houses, a shop, a road?
- The Robot Challenge: Can you build a robot that a person could wear?
Then step back. Seriously — step back. The temptation to help is strong, especially when something collapses or isn’t working. Offer tape or hold something while they tape it, but let them solve the design problems. Collapsing is part of the process. Rebuilding is half the fun.
For toddlers (2–3): Give them a small collection of boxes and show them how to stack. Toddlers will stack, knock over, crawl into, and sit in boxes — this is exactly right. Don’t expect construction; expect exploration.
For preschoolers (3–5): They’ll make something identifiable to them even if it looks abstract to you. Ask questions: “Tell me about what you’re building.” Their process is the whole point.
For school-age (5–9): These kids can tackle genuinely ambitious projects. A castle with a working drawbridge (tape and string). A puppet theater. A spaceship. Give them the challenge and trust them. If they get stuck, ask “What’s the problem? What have you tried?” rather than solving it for them.
The decoration phase: After the main structure is done, offer markers and paint for decorating. Windows, brick patterns, control panels, faces — this extends engagement another 30–45 minutes and gives the slower-moving kids time to finish their builds before the group moves to decoration.
Mess level: Low (unless they paint — that adds a smock situation). Mostly cardboard scraps on the floor.
Time: Can genuinely go 1.5 to 2+ hours. One of the longest-engagement activities on this list.
For more ideas along these lines, our post on cardboard box crafts for kids has a deep dive into cardboard construction activities with even more project ideas for different ages.
Activity 3B: Afternoon — Cardboard Marble Run (Optional Extension)
If the building challenge wrapped up early or you have particularly energetic builders, marble runs are a perfect follow-up.
Materials:
- Toilet paper rolls and paper towel rolls
- Cardboard strips cut from boxes
- Tape
- A marble, small ball, or even a dried bean to roll
Instructions:
Tape cardboard tubes and strips to a wall, slightly angled downward, so that a marble placed at the top will roll from section to section down to the floor. The challenge is making it go as far as possible without falling off, or making it travel in a specific path.
This is a classic STEM activity that requires genuine problem-solving. Each time the marble falls off or stops, kids have to diagnose why and fix it. Expect multiple iterations. Expect triumph. It’s worth the tape on the wall.
Day 4: Rainy Day Process Art
Theme: Today is about making art without worrying about what it looks like — which is harder than it sounds for older kids who’ve started to get self-conscious about their drawing abilities. We’re choosing techniques where the process itself creates the beauty.
Prep the night before: Set up a dedicated art space with protection on the table. Gather paint, paper, marbles or small balls, tape, crayons, and watercolors if you have them.
For more on why process art matters — especially for toddlers and preschoolers — check out our guide to process art for toddlers, which covers the research behind letting go of the “product” and trusting the process.
Morning anchor activity (30–45 minutes): Marble Painting
Afternoon anchor activity (30–40 minutes): Crayon Resist Watercolor
Activity 4A: Marble Painting
Marble painting is a beautiful example of process art: the movements of the marble create the pattern, and every single result is unique. You genuinely cannot predict what you’ll get, which is exciting.
Materials:
- Paper cut to fit inside a box lid or baking tray with sides
- Paint in several colors (tempera or any washable paint)
- Marbles, small balls, or large beads
- A box with sides — a shoebox lid is perfect; a baking tray with a rim works too
- Spoons for dropping paint blobs
Instructions:
- Place your paper in the bottom of the tray or box lid.
- Drop blobs of paint — 3–5 colors — directly onto the paper. Keep the amounts small; a pea-sized blob per color is enough.
- Place 2–3 marbles in the box.
- Tilt, shake, and roll the box side to side, forward and back. Watch the marbles roll through the paint and drag it across the paper, creating lines, swirls, and patterns.
- Keep going until you’re happy with the result, or start fresh with new paper for a second try.
- Lift the paper out carefully (it’ll be wet) and set flat to dry.
Tips: Metallic or glitter paint adds extra drama if you have any. Black paper backgrounds make the colors pop. Mixing too many colors in one go can muddy the result — fewer colors often gives more striking results.
Variation — box marble painting: For older kids, use a larger box (like a cardboard shipping box) and bigger paint blobs. Multiple marbles. Tilt the whole box dramatically. This works as a group activity if you have multiple kids working together.
For toddlers: You’ll want to hold the box with them, guiding the tilting motions together. The movement and anticipation of where the marble will go is the sensory highlight.
For preschoolers: They can handle the tilting themselves once they get the hang of the idea. Let them choose their paint colors.
For school-age: Challenge them: can they make a specific pattern? Can they control where the marble goes? (Spoiler: not really, and that’s the point — sometimes accepting what emerges is its own skill.)
Mess level: Medium if paint spills outside the tray. Work on a covered table.
Activity 4B: Crayon Resist Watercolor
This one always produces a “wow” moment when the watercolor wash reveals the hidden crayon drawing underneath. It works because wax crayons repel water-based paint — the crayons “resist” the watercolor.
Materials:
- White cardstock or thick white paper (regular printer paper works in a pinch but the result is less vivid)
- White crayon or light-colored crayons
- Watercolor paints or very watered-down tempera
- Paintbrush
- Pencil (optional, for initial planning)
Instructions:
- Using a WHITE crayon, draw a picture or pattern on the white paper. Encourage kids to press hard — the wax needs to really coat the paper. Since white on white is nearly invisible, this feels like magic-in-waiting. Designs that work wonderfully: stars, hearts, swirls, waves, rainbows, animals, words.
- Alternatively, use colored crayons to draw a picture, pressing firmly. The colors you can see will all resist the paint.
- Paint over the entire paper with a wash of watercolor. Watch the hidden drawing appear as the paint slides away from the waxy areas.
- The water and paint will pool in the uncrayoned areas, creating depth and color variation. Let dry flat.
Multi-color variation: Instead of one wash color, use multiple colors for a rainbow wash across the paper. This is especially striking if the hidden drawing is a simple outline of something.
Surprise pictures variation: Have a parent do the hidden crayon drawing, then give it to the child to “reveal” with the paint. Write a secret message, draw their name, or make a picture of their pet. They paint and discover it. Kids love this.
For toddlers: Toddlers may not fully grasp the concept but will love the painting regardless. Help them make the hidden marks first, then let them paint freely.
For preschoolers: Once they understand that the crayon is “hiding” under the paint, they’ll go all-in on making elaborate hidden pictures. Allow multiple attempts.
For school-age: They can do the full process independently and will want to create intentional, detailed artwork. Give them the “white crayon message” challenge: write a message in white crayon, trade with a sibling, reveal.
Mess level: Medium. Watercolor is washable but the tray situation can get drippy.
Day 4 extension ideas: Rainy days are also excellent for calm, focus-based activities. If the art energy has wound down by afternoon, our guide to calm-down activities for kids has a collection of quiet, sensory-calming activities that are perfect for the afternoon slump.
Day 5: Outdoor Art Day
Theme: We’re taking everything outside. Spring air, natural surfaces, and the freedom of working big — this is the day for the most expansive, exuberant art of the week.
Prep the night before: Check the weather. Have a backup rainy-day plan (move the art inside: paper instead of sidewalk, trays for leaf printing). Gather leaves from outside — a variety of sizes and shapes. Set out the sidewalk chalk.
Morning anchor activity (45–60 minutes): Giant Sidewalk Chalk Mural
Afternoon anchor activity (30–40 minutes): Leaf Printing
Activity 5A: Giant Sidewalk Chalk Mural
The key word here is “giant.” Not little individual drawings, but one collaborative enormous mural that uses your whole driveway or sidewalk section. Scale changes everything about this activity.
Materials:
- Sidewalk chalk in as many colors as possible
- A driveway, sidewalk, or any flat paved outdoor surface
- Optional: spray bottles with water for blending chalk
- Optional: large paintbrushes and water for “painting” with chalk
The mural concept:
Before you start, decide on a theme together. Some classics:
- The Underwater World: Ocean floor across the whole driveway, with fish, seaweed, treasure chests, submarines. Divide zones: “this corner is the coral reef, this area is open ocean.”
- Our Town: Houses, roads, a park, a school, a shop — a whole neighborhood laid out like a map.
- The Rainbow World: Every section of the driveway is a different color, with everything in that zone drawn in that color.
- The Life-Size Body Trace: Lie down on the pavement, trace each other, then decorate the outlines. Add clothes, hairstyles, what’s in your imaginary pocket.
The life-size body trace is particularly beloved by kids because they get to see themselves at actual scale. Trace, then fill in. Draw your outfit for the day, or invent a superhero costume. Add your favorite food floating around you. Make your dream bedroom inside your outline.
Chalk techniques to try:
- Blending: Draw two colors side by side, wet a finger or sponge, and blend at the edges.
- Chalk painting: Dip a brush in water, then draw it through chalk to paint with the pigment.
- Texture rubbings: Hold chalk sideways and rub over a textured surface (a drainage grate, a rough patch of concrete) for interesting texture effects.
- Spray bottle smearing: Spray lightly with water over finished chalk drawing to create a soft, blurred watercolor effect.
Mess level: Low. It’s outdoors and washes away with rain or a hose.
For all ages: This is one of the most genuinely cross-age activities on this list. Toddlers can scribble alongside older kids working on detailed drawings. No one’s work interferes with anyone else’s because there’s so much space.
Activity 5B: Leaf Printing
Leaf printing produces artwork that looks genuinely lovely — the veins and edge details of leaves create organic, natural patterns that are beautiful whether you’re 3 or 30.
Materials:
- Fresh leaves in variety of shapes and sizes (gather that morning for best flexibility)
- Washable paint in several colors
- Paper — white, cardstock if possible
- Foam brush or regular paintbrush
- A flat surface to paint on (a tray, a piece of cardboard)
- Optional: paper for rolling (a rolling pin makes crisp prints)
Instructions:
- Lay a leaf flat on your painting surface with the vein side UP. This side has more texture and makes better prints.
- Using a foam brush, paint the vein side of the leaf with a thin, even coat of paint. Don’t glob it on — a thin coat gives the best impression.
- Carefully pick up the painted leaf and place it paint-side down on your paper.
- Place a piece of scrap paper over the leaf and press firmly all over — pay attention to the edges and the central vein. Press with your whole hand, not just fingers.
- Carefully peel back the leaf to reveal the print.
- Repeat with different leaves and different colors, layering and overlapping for a lush, botanical effect.
Design ideas:
- Tree scene: Use branch-shaped sticks as trunks, leaf prints as the leafy canopy
- Wrapping paper: Cover a whole sheet in overlapping leaf prints; it’s genuinely beautiful as gift wrapping
- Nature journal page: Arrange prints with the original leaf beside each one, write the type of leaf (oak, maple, etc.) if you know it
- Rainbow gradient: Do the same leaf print in each rainbow color in a row
For toddlers: The painting of the leaf is sensory and satisfying. The pressing is a great proprioceptive activity — push HARD. Results will be imperfect and beautiful.
For preschoolers: They’ll want to do the whole thing themselves. Let them pick the leaves, choose the colors, and decide the arrangement.
For school-age: Challenge them to make a set of leaves that tells a story, or to create a botanical illustration style with realistic colors. Some kids this age start to get genuinely particular about the quality of their prints — that’s fine, it’s artistic standards developing.
Mess level: Low-Medium. Paint brushes need rinsing; paint washes off hands easily. Do it outside and it barely registers.
Day 5 closing activity — The Spring Break Gallery:
At the end of Day 5, gather everything your kids made during the week. Every leaf print, every marble painting, every cardboard structure that survived. Do a mini gallery walk: lay it all out or hang it up. Let each kid tell you one thing they’re proud of. Take photos. This closing ritual gives the week a sense of completion and meaning — it tells kids their work mattered enough to be seen and celebrated.
Adapting for Mixed Ages
If you have kids spanning a big age range — say a toddler and a seven-year-old — spring break activities can actually work better than they do during the school year, when the age gap feels bigger. Here’s how to think about it:
Give each child their version of the same activity. For marble painting, toddlers tilt the box, school-age kids work on larger paper with more marbles and more intentional color choices. Same activity, different execution. They can be at the same table without anyone being bored or frustrated.
Assign the older child a “helper” role selectively. This works for about 20% of activities — too much and the older child resents it; at the right moments it makes them feel important and competent. Good helper roles: demonstrating a technique, being the “official paint mixer,” running the materials supply station.
Accept parallel play. Your four-year-old and your eight-year-old don’t need to be doing identical things every moment of every activity. They can be side by side, each doing their version, occasionally interacting. That’s fine. Parallel play isn’t failure to engage — it’s kids working at their own level.
Build in baby/toddler-specific time. If you have a baby or very young toddler, plan one short activity during their nap that’s just for the older kids — something that needs focus and concentration, like the marble run or the crayon resist activity. This gives older kids time where they don’t have to compete for attention or work around a little one.
For more on how to run activities across wide age ranges, check out the activity finder quiz which can help you pinpoint what kinds of activities suit each of your specific kids.
Bonus Day Ideas (If Spring Break Is Longer)
Spring break varies by region and school — if yours is longer than five days, here are fast-setup additions:
Bonus Day A: Homemade Playdough + Invitation to Create
Make a batch (or two) of homemade playdough in the morning. Set it out with natural materials — sticks, seeds, pebbles, dried pasta — and let kids build freely. An “invitation to create” is simply a thoughtfully arranged set of materials with no instructions. Kids usually dive in and build elaborate scenes. Find a full playdough recipe and more open-ended play ideas in our loose parts play ideas post.
Bonus Day B: Puppet Theater
Use the cardboard-building skills from Day 3 to build a puppet theater (a large box with a window cut in the front), then make puppets from paper bags, socks, or toilet rolls. Write a simple script, practice, perform. This can easily fill a full day across the building, puppet-making, and performance phases.
Bonus Day C: Nature Scavenger Hunt + Documentation
Go outside with a list of things to find (something rough, something smooth, something that was once alive, something that smells interesting, something that’s been changed by weather). Photograph or draw findings. Back at home, make a nature journal page documenting the walk. This pairs wonderfully with the outdoor nature activities for kids guide if you want a more structured framework for your outdoor exploration.
Crafty Mama
Crafty Mama is a former elementary art teacher turned stay-at-home parent who believes every child is creative — they just need the right invitation. She develops age-appropriate activities, crafts, and projects that spark imagination while keeping mess (and parent stress) to a minimum.
Frequently Asked Questions
My kids say they’re bored in the first ten minutes of every activity. How do I handle this?
First, consider whether the setup is truly inviting — did you pull out all the materials? Did you start doing it yourself so they could see someone engaged? Kids often say “I’m bored” as a reflex or because they’re unused to waiting for engagement to develop. Give it a few more minutes and a gentle nudge: “I’m making my volcano — do you want to make yours?” is often enough. If they’re genuinely resistant to a particular activity, don’t fight it. Move to another one. Not every activity lands with every kid.
How do I manage the screen time conversation during spring break without constant battles?
Set the expectation before the week starts, not in the moment when they’re already on the device. Something like: “This week we’re doing activities together in the morning. Screen time is in the afternoon after quiet time.” A predictable structure removes the negotiation because the answer is always “after the morning activity.” Also — and this sounds counterintuitive — if you allow some screen time in a guilt-free window, kids tend to transition off it more easily because they know it’ll be available later.
What if I only have one child and these activities feel weird for solo play?
Most of these activities are entirely fine solo. The science experiments are arguably better solo — one set of observations, no competing for the dropper. Building challenges work very well for only children who have total creative control. For activities that do benefit from a collaborator (the cardboard mural, puppet shows), consider whether there’s a neighbor kid who might want to come over for a morning, or whether you’re willing to sit down and participate yourself. You doing the activity alongside them, even for 15 minutes before handing off, often kickstarts independent play.
My child is particularly messy and I’m already exhausted. Are any of these lower-mess?
Yes. The seed mosaic, cardboard building challenge, and sidewalk chalk are all very manageable mess-wise. Marble painting can be nearly mess-free if you use a tray with high sides. The science experiments are water-and-soap based and clean up easily. The key universal trick: limit paint amounts. Give a tiny amount on a plate rather than a bottle they can pour freely, and mess stays proportionate.
What do I do when one child is engaged and the other isn’t, and the disengaged one is disrupting the engaged one?
This is the perennial challenge of different-age kids. The quickest fix is giving the disengaged child a specific job that’s slightly separate: “Your job is to make more leaf prints over here.” Or: “Can you be in charge of rinsing the brushes when everyone needs clean water?” Physical separation with a defined role almost always works better than trying to re-engage them in the main activity they’ve rejected.
Do I need to do every day’s activities? What if we just do two days’ worth?
Absolutely not. This is a menu, not a requirement. Two days of anchor activities is better than zero, and zero is fine too if life intervenes. The goal isn’t to check every box — it’s to have a few moments of genuine engaged time together. Even one activity that goes really well is a good spring break.
My kids are different ages — 3 and 7 — and I’m worried the younger one will ruin the older one’s projects.
This is a very real concern and it’s worth addressing directly with your older child before the week: “I want both of you to make things you’re proud of. Your job is to work in your zone, and their job is to work in their zone.” Spatial separation during build-heavy activities (Day 3 especially) helps enormously. If you can, set up two separate tables. And build in some activities that are genuinely done together (the sidewalk chalk mural especially has plenty of space for everyone) alongside activities where each child works on their own piece.
You Don’t Have to Do It All
Parenting over spring break is a marathon, not a sprint, and the week usually has a few moments of connection and many moments of everyone just coexisting. Both are fine.
The activities in this guide are here so that when you need a plan, you have one. When you need something to point to when a kid says “there’s nothing to do,” you have a starting point. When you want to make a memory, you have materials and a method.
But please don’t stress about doing all five days perfectly. Do two of them really well. Do one of them imperfectly but finish. Make the bird feeder and watch for birds. Build a cardboard box castle that collapses once and gets rebuilt. Come inside from the chalk-covered driveway with stained knees and call it a good day.
Because it is. A good spring break isn’t measured in activities completed — it’s measured in times your kid looked up at you and was genuinely having fun. This plan is designed to give you more of those moments. The rest takes care of itself.