Balloon Science Experiments for Kids: 10 Mind-Blowing Activities Using Just Balloons
Discover 10 mind-blowing balloon science experiments for kids aged 3-8, complete with crucial safety rules, age-specific tips, and clear explanations of the science behind each activity.
- An adult must handle all balloons and popped pieces for kids under 8 for safety.
- Explore 10 experiments like static hair, rocket zip line, or a balloon-powered car.
- Download a free printable PDF with experiment cards, safety rules, and a lab notebook.
- Each experiment includes age-specific tips and explains the science in plain words.
This post contains affiliate links. As an Amazon Associate I earn from qualifying purchases.
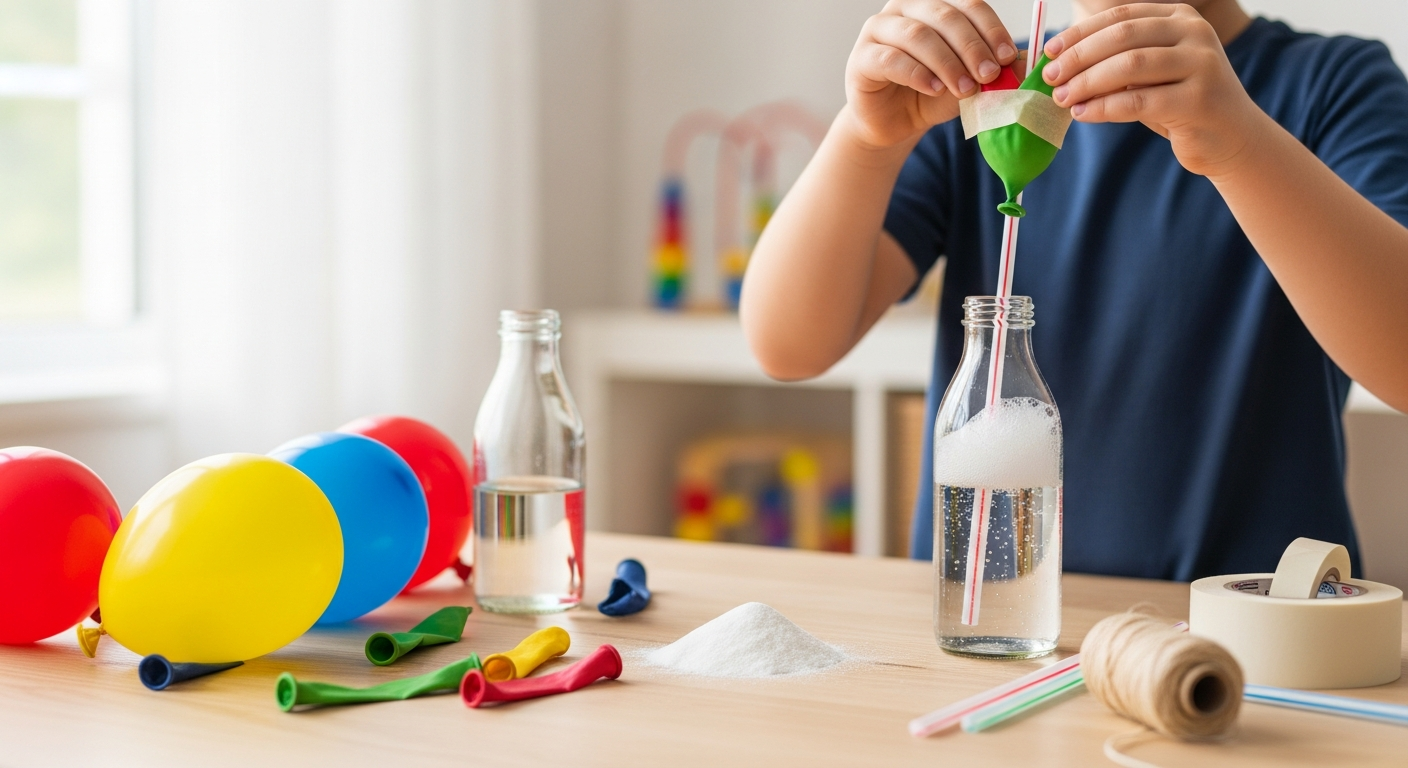
Here are ten balloon science experiments for kids 3-8, from static hair to a balloon-powered car. An adult handles every balloon, the steps are short, and each experiment explains the science in plain words. Start with the comparison table, read the safety rules right under it, then pick one.
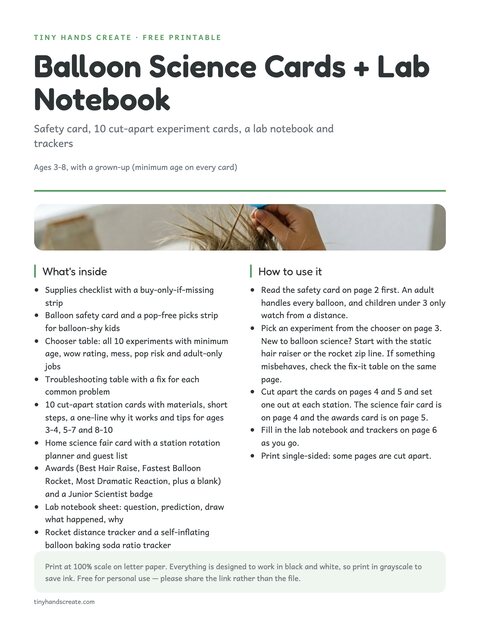
Free printable · 6 pages
Balloon Science Experiment Cards + Lab Notebook
A supplies checklist and balloon safety card, an experiment chooser and fix-it table, ten cut-apart station cards with short steps and age-by-age tips, a science fair station card, an awards and Junior Scientist card, and a lab notebook sheet with rocket and baking soda trackers.
Free. Your download link appears right here. You'll also join the Daily Printable Drop. Unsubscribe anytime. Privacy
In this article (15 sections)
- Which Balloon Experiment Should You Try First?
- Balloon Safety Rules for Young Kids
- 1. Static Electricity Balloon Experiment (Hair Raiser)
- 2. Balloon Rocket Zip Line (Newton’s Third Law)
- 3. Baking Soda and Vinegar Balloon Experiment (Self-Inflating Balloon)
- 4. Balloon and Skewer Trick (Adult Demo)
- 5. Balloon in a Bottle Experiment (Air Pressure)
- 6. Balloon Hovercraft (Reduced Friction)
- 7. Sound Wave Balloon Drum (Dancing Salt)
- 8. Balloon-Powered Car (Newton’s Third Law Again)
- 9. Water Balloon Magnifying Glass (Refraction)
- 10. Water Balloon vs. Flame (Optional, Adult Demo Only)
- Run It Like a Science Fair
- Frequently Asked Questions
- Let the Experiments Begin
Which Balloon Experiment Should You Try First?
New to balloon science? Start with the static hair raiser or the rocket zip line. Both suit a 3-year-old and need almost no setup. The table shows the minimum age, time, mess and adult jobs for all ten.
| Experiment | Minimum age | Time | Mess | Adult-only steps | Teaches |
|---|---|---|---|---|---|
| Static Electricity Hair Raiser | 3 | 10 min | Low | Inflating | Static charge |
| Balloon Rocket Zip Line | 3 | 15 min | Low | Inflating, string setup, release | Action and reaction |
| Self-Inflating Balloon | 4 | 15 min | Medium | Pouring, fitting balloon | Gas from a reaction |
| Balloon and Skewer Trick | 5 (watch only) | 10 min | Low | All of it | Polymers |
| Balloon in a Bottle | 4 | 10 min | Low | Inflating, making the hole | Air pressure |
| Balloon Hovercraft | 4 (adult builds) | 20 min plus glue drying | Low | Gluing, inflating, fitting the balloon | Friction |
| Sound Wave Balloon Drum | 4 | 15 min | Low | Cutting, taping | Sound vibrations |
| Balloon-Powered Car | 5 | 30 min | Low | Wheel holes, inflating, release | Engineering |
| Water Balloon Magnifying Glass | 4 | 10 min | Medium | Filling, tying | Light bending |
| Water Balloon vs. Flame (optional) | Adult demo only; watchers 8+ | 10 min | Low | All of it | Heat absorption |
Most experiments work on the first try. The skewer trick and the balloon car take practice, so keep spare balloons handy for you and out of reach for the kids.
Balloon Safety Rules for Young Kids
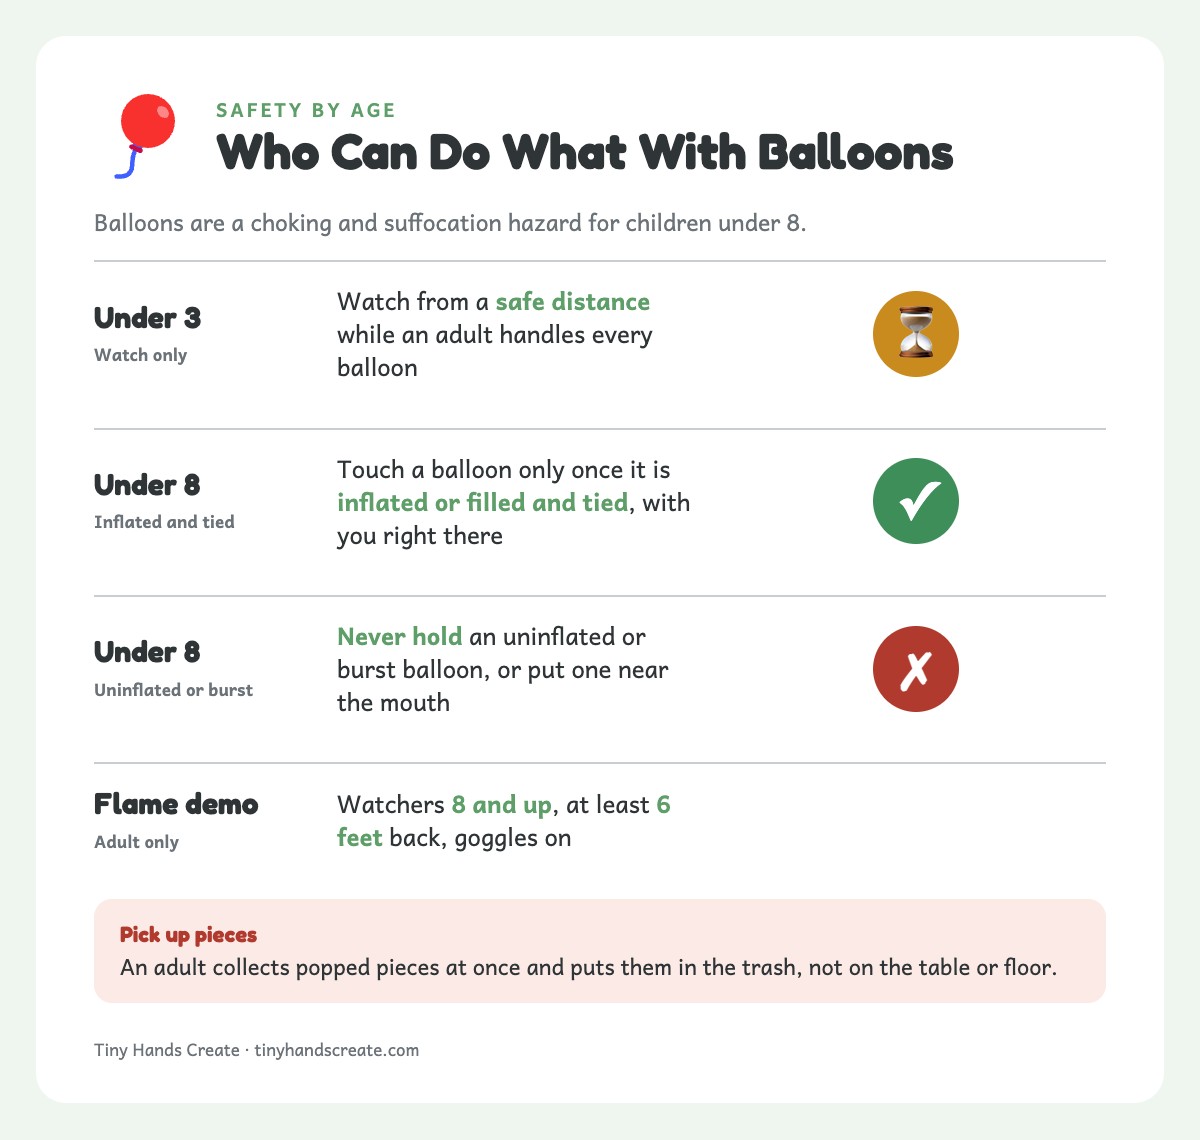
Safety firstBalloons are a choking and suffocation hazard for children under 8. Uninflated balloons and popped pieces are the biggest risk. An adult handles every balloon, inflates it (or uses a hand pump) and picks up popped pieces at once. Children under 3 only watch from a safe distance.
- Adult inflates every balloon for kids under 8. Use a hand pump when you can. Nobody should blow into a balloon or bottle while a child is holding it.
- Kids under 8 never hold an uninflated or burst balloon, and never put any balloon near their mouth. They can touch a balloon once it is inflated or filled and tied, with you right there.
- Keep spare balloons out of reach, and count them before and after the activity so no balloon or piece goes missing.
- Never suck air back through a balloon, and keep the balloon neck out of your mouth while a child is close.
- Collect popped pieces right away and put them in the trash, not on the table or floor.
- Goggles for everyone nearby during the skewer, vinegar and flame activities, since pops and splashes happen.
- Adults handle sharp, hot and small things: skewers, tacks, nails, scissors, hot glue, lighters and bottle caps.
- Latex allergy: keep latex balloons out of the room entirely. Stretchy latex-free balloons (polyisoprene, for example) work for most of these experiments, but they can behave a little differently, so test one first. Foil balloons do not stretch, so they will not work. Allergy symptoms need medical attention.
- Keep balloons away from pets. Swallowed pieces can block a pet’s intestines and need a vet.
1. Static Electricity Balloon Experiment (Hair Raiser)
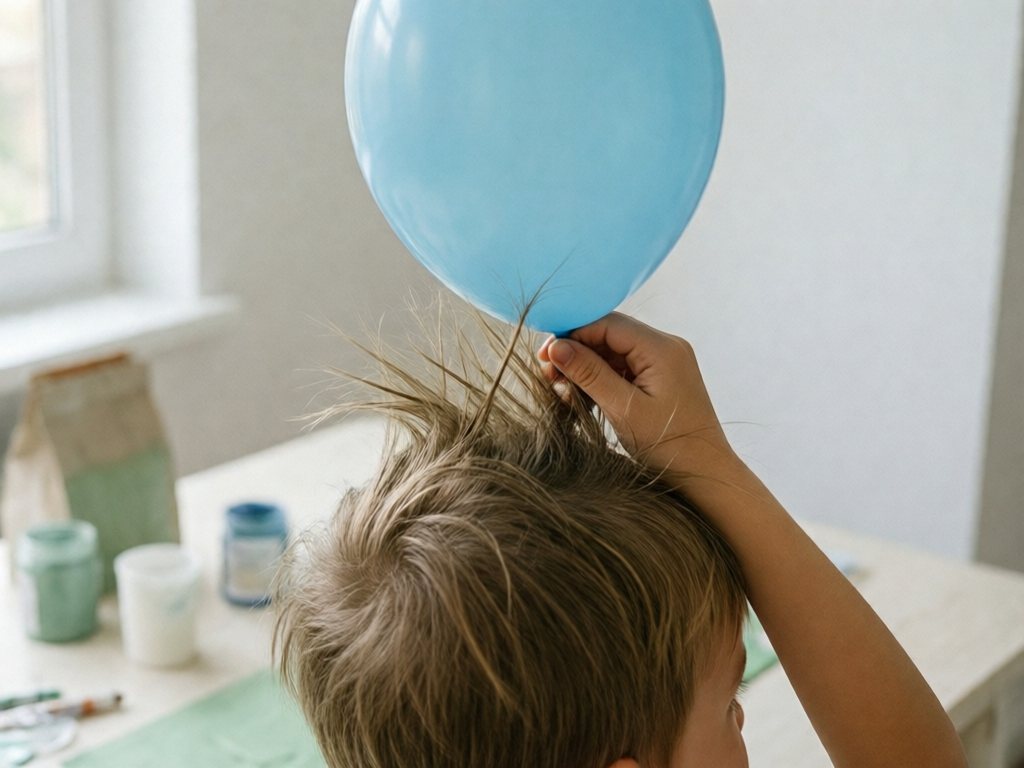
This is the classic. Nothing gets a bigger laugh than hair standing straight up like a cartoon light socket.
Materials Needed
- 1 inflated balloon
- Clean, dry, product-free hair (your child’s works great)
- Optional: small pieces of tissue paper or a thin stream of water from a faucet
Step-by-Step Instructions
- An adult inflates a balloon and ties it off.
- Have your child rub the balloon vigorously against their hair for about 10 to 15 seconds. Use quick, firm strokes in one direction.
- Slowly pull the balloon away from their head while they stand still.
- Watch as their hair reaches up toward the balloon, standing on end.
- For extra fun, hold the charged balloon near small pieces of torn tissue paper on a table. The paper will jump up and stick to the balloon.
- Another variation: Turn on a faucet to produce a thin stream of water. Hold the charged balloon near (not touching) the stream. The water will bend toward the balloon.
The Science Behind It
When you rub the balloon on hair, electrons (tiny particles with a negative charge) transfer from the hair to the balloon. The balloon becomes negatively charged, and the hair becomes positively charged. Since opposite charges attract, the hair reaches toward the balloon.
Every strand of hair now carries the same positive charge. Like charges push apart, so the hairs spread out and stand up.
The same principle works on tissue paper and water. The negatively charged balloon pulls on the slightly positive side of neutral objects, drawing them closer.
TipStatic works best in dry air with clean hair. On a humid day it fizzles, so try again indoors with the heat on. Cleanup is just a few scraps of tissue paper.
Age Adaptation Tips
- Ages 3-4: Keep it simple. Rub the balloon on their head, show them the hair trick, and let them try sticking the balloon to a wall (it will cling because of the static charge). Use the word “sticky” and “magic” to describe what they see.
- Ages 5-7: Introduce the tissue paper and water-bending variations. Use the words “positive” and “negative” and explain that tiny invisible particles called electrons are moving around.
- Age 8 and up: Test which fabric gives the best charge (wool, cotton or polyester) and record the results in a notebook.
2. Balloon Rocket Zip Line (Newton’s Third Law)
This one is fast and feels like a real engineering project. You can run it dozens of times.
Safety firstA tight string across a room is a strangulation and trip hazard for small kids. String the line above head height, where nobody can walk into it and no child can reach it. Stay with the kids the whole time, and take the line down as soon as you finish. Never leave a cord up or within a child’s reach.
Materials Needed
- 1 balloon (long “rocket-shaped” balloons work great, but round ones work too)
- A drinking straw
- Smooth, brightly colored string (about 10 to 15 feet). Skip fishing line, which is hard to see.
- Tape
- 2 sturdy anchor points above head height (high wall hooks, the top hinges of two doors, or tree branches if you are outside)
Step-by-Step Instructions
- Thread the string through the drinking straw.
- An adult ties each end of the string to a high anchor point so the string is stretched tight and roughly level, above head height and clear of walkways.
- Slide the straw to one end of the string.
- An adult inflates the balloon but does NOT tie it, and pinches the neck shut.
- Tape the inflated balloon to the straw. Use two pieces of tape on top of the balloon so the straw is secured along the balloon’s length.
- Kids count down. On “blast off,” the adult releases the balloon’s neck.
- Watch the balloon rocket zoom along the string to the other end.
- The adult collects the deflated balloon right away and keeps it between launches. When you are done, take the string down.
The Science Behind It
This experiment demonstrates Newton’s Third Law of Motion: for every action, there is an equal and opposite reaction. When air rushes out of the balloon in one direction, it pushes the balloon in the opposite direction.
Real rockets work the same way. The engines push hot gas down, and the rocket goes up.
Age Adaptation Tips
- Ages 3-4: Make them mission control. They shout “3, 2, 1, blast off!” and you let go of the balloon. Talk about how the air pushes the balloon forward. You pick up the deflated balloon straight away, before they can reach it.
- Ages 5-7: Have them experiment with different balloon sizes and different amounts of air. Which setup makes the balloon go the fastest or the farthest? For an uphill vs. downhill test, an adult reties one end of the string higher. Both ends stay above head height and out of the kids’ reach.
- Age 8 and up: Measure how far the balloon travels with different amounts of air and graph the results.
3. Baking Soda and Vinegar Balloon Experiment (Self-Inflating Balloon)
A balloon inflates itself with nobody blowing into it. It looks like sorcery, and the explanation is chemistry.
Materials Needed
- 1 balloon
- 1 empty plastic bottle (a 500ml or 16oz water bottle works perfectly)
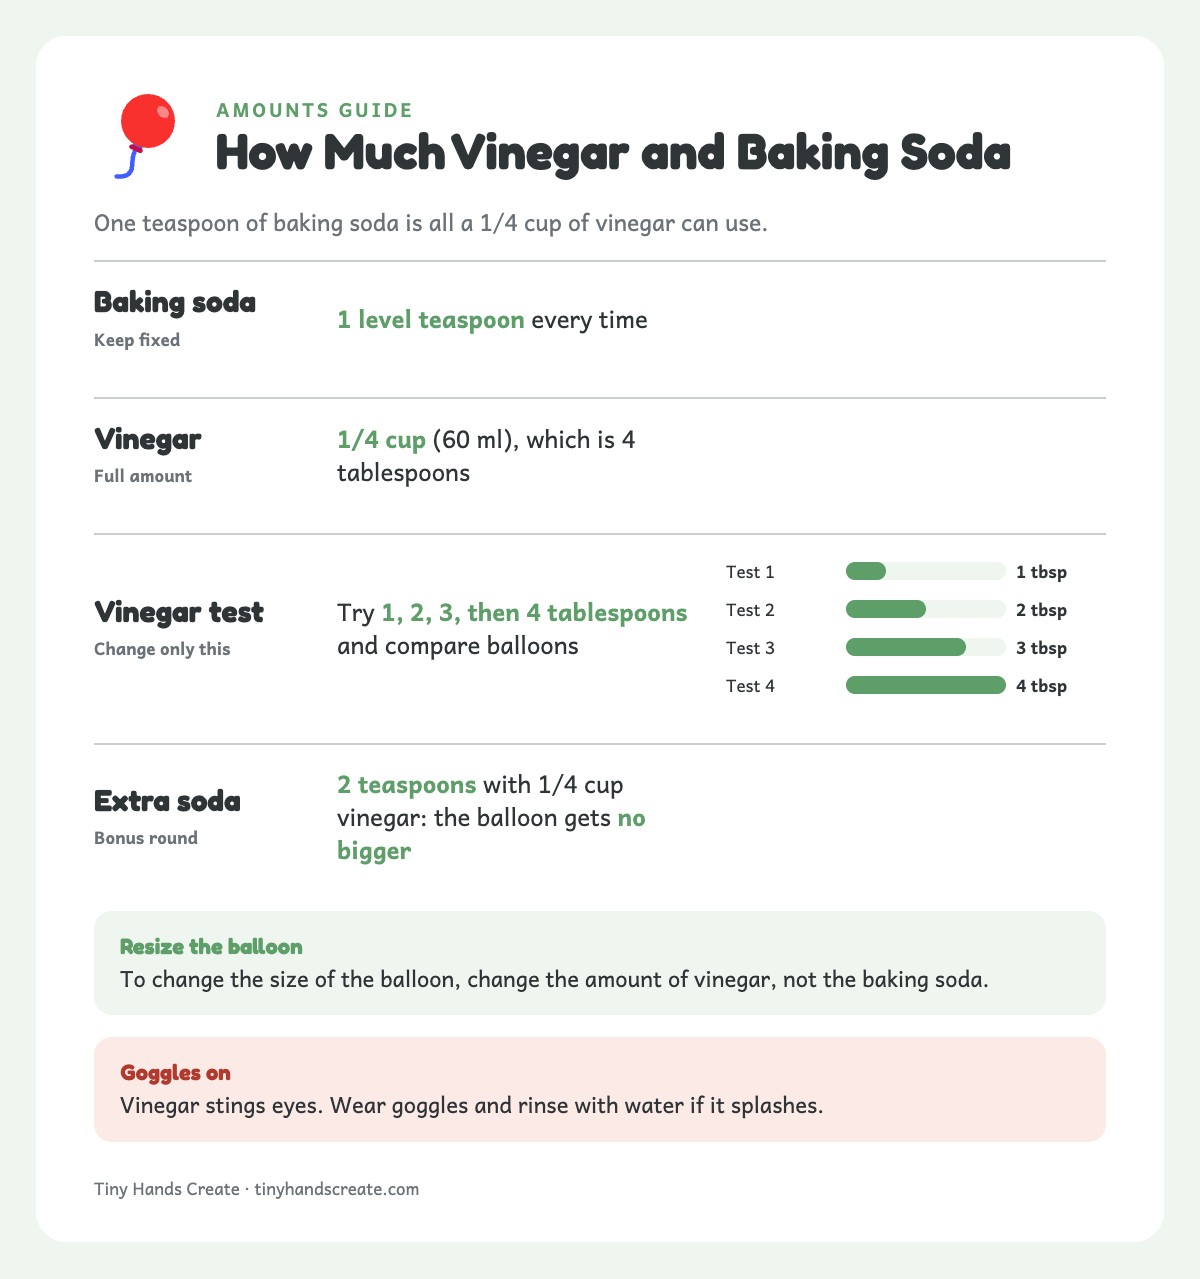
- 1/4 cup (60 ml) white vinegar
- 1 level teaspoon baking soda
- Safety goggles
- A funnel (or a piece of paper rolled into a cone)
Step-by-Step Instructions
- Put on goggles. Pour the 1/4 cup of vinegar into the empty plastic bottle.
- An adult holds the deflated balloon and uses the funnel to add the baking soda. Stretch the balloon’s opening over the funnel and tap the baking soda through. Shake gently until the baking soda settles into the bottom of the balloon.
- Carefully stretch the mouth of the balloon over the top of the bottle. Let the balloon hang to the side so the baking soda stays inside the balloon and does not fall into the vinegar yet.
- When you are ready, lift the balloon upright so the baking soda falls down into the vinegar.
- Watch as the mixture fizzes and the gas produced inflates the balloon.
The Science Behind It
Baking soda is a base and vinegar is an acid. When they meet, they react and make carbon dioxide gas, water and sodium acetate.
The gas has nowhere to go except up into the balloon, so the balloon inflates. It is the same gas that makes soda fizzy, and the same gas you breathe out.
Good to knowA 1/4 cup of vinegar can only react with about 1 teaspoon of baking soda. Once the vinegar is used up, extra baking soda just sits at the bottom and the balloon gets no bigger. To change the size of the balloon, change the amount of vinegar.
Safety firstVinegar stings eyes, so wear goggles and rinse with water if it splashes. Keep faces away from the bottle mouth. Do not taste or drink the mixture, and do not blow into the bottle.
TipIf the balloon won’t inflate, check that it fits snugly over the bottle neck and that you used the full 1/4 cup of vinegar. Keep a towel handy for fizzy spills.
Age Adaptation Tips
- Age 4: Present it as “magic” and let them watch the balloon grow. Ask them to predict if a bigger balloon or a smaller balloon will work better. The adult pours the vinegar while they count down.
- Ages 5-7: Teach the word “chemical reaction.” Let them measure the baking soda and vinegar themselves. Ask what would happen if they used LESS vinegar. Try 2 tablespoons, then the full 1/4 cup, with 1 teaspoon of baking soda each time, and compare the balloons.
- Age 8 and up: Design a controlled test. Keep the baking soda at 1 teaspoon and change only the vinegar: 1, 2, 3, then 4 tablespoons (4 tablespoons is 1/4 cup). Measure around the balloon with a string each time. For a bonus round, try 2 teaspoons of baking soda with 1/4 cup of vinegar and see that the balloon gets no bigger.
4. Balloon and Skewer Trick (Adult Demo)
An adult pushes a wooden skewer through an inflated balloon without popping it. It looks impossible, and kids ask to see it again and again.
Materials Needed
- Several balloons (you will probably pop a few while learning the technique)
- Safety goggles for everyone nearby
- Long bamboo skewers with the very tip blunted (bin any that are rough or splintered)
- A small amount of cooking oil or petroleum jelly
- Paper towels
Step-by-Step Instructions
- Goggles on. An adult inflates a balloon to about three-quarters of its maximum size, firm but not stretched to the limit, and ties it off.
- Look at the balloon carefully. You will notice two spots where the rubber is thicker and less stretched: the dark spot at the very top (opposite the tied end) and the thick area right around the knot where you tied it.
- Dab a tiny bit of cooking oil or petroleum jelly on the tip of the skewer. This helps it slide through smoothly.
- Hold the balloon in the air with one hand on its side, clear of both thick spots. Press the skewer into the thick rubber at the top (the dark spot). Never push toward your hand or body. Use slow, steady pressure with a slight twist. Do NOT jab.
- Once the skewer tip pierces through, continue pushing it gently and aim for the thick area near the knot on the other end. Keep your holding hand off the skewer’s path.
- Push the skewer all the way through and out the other side.
- The balloon should remain inflated with a skewer running straight through it. Keep hold of it yourself while the kids look.
- When the demo is over, step away from the kids and snip the neck just above the knot to let the air out slowly. Put the skewer and every piece of balloon in the trash.
The Science Behind It
Balloon rubber is a polymer, which means it is built from long, stretchy chains of molecules. At the thick spots (the top and near the knot), those chains are not fully stretched.
Push slowly through a thick spot and the rubber stretches around the skewer and seals against it. The air stays in.
The thin sides are already stretched to their limit. Poke there and the rubber tears, so the balloon pops.
TipIf it keeps popping, inflate a little less, use a drop of oil on the tip, and stick to the thick spots. Bamboo can splinter, so throw the skewers away when you finish.
Age Adaptation Tips
- Every age: The skewer is adult-only. Kids stay back, wear goggles and predict whether it will pop. The skewered balloon stays in your hands, so kids look but do not touch. Pulling the skewer out usually pops the balloon, so deflate it and bin everything before the kids come close.
- Ages 5-7: Explain that the balloon is thicker in some spots. Let them look and feel with fingertips to find the thick and thin spots before you begin.
- Age 8 and up: Ask them to predict where it will go in and why. The adult still does the piercing, and can try two skewers in one balloon.
5. Balloon in a Bottle Experiment (Air Pressure)
Try to inflate a balloon inside a bottle. It seems easy, and it is not. This shows the invisible power of air pressure.
Safety firstUse a balloon hand pump if you have one. If you blow by mouth, keep your child back, never suck air back through the balloon, and take your mouth away before they come close.
Materials Needed
- 1 balloon
- 1 empty plastic bottle (remove the cap)
- A balloon hand pump, if you have one
- A thumbtack or small nail for the adult to make the hole (keep it out of kids’ reach)
Step-by-Step Instructions
- An adult stretches the mouth of the balloon over the opening of the empty bottle so the deflated balloon hangs inside the bottle.
- Ask your child to predict what will happen. The adult tries to inflate the balloon inside the bottle, with a hand pump if possible, while the child watches.
- The balloon barely inflates, no matter how hard the adult tries.
- Now for the reveal: the adult pokes a small hole in the bottom of the bottle with a thumbtack, then puts the tack away.
- The adult inflates again. This time the balloon fills easily inside the bottle.
- While the balloon is full, the adult covers the hole with a finger, then takes the pump (or their mouth) away. With the hole covered, the balloon stays big. Lift the finger and watch it shrink.
The Science Behind It
The bottle looks empty, but it is full of air. That trapped air has nowhere to go, so it pushes back and the balloon cannot grow.
The hole gives the trapped air a way out. Now the balloon has room to fill.
Cover the hole and no air can get back into the bottle. The balloon cannot shrink without it, so it stays big until you lift your finger.
Age Adaptation Tips
- Age 4: Let them watch the “impossible” try, then see the magic hole. Talk about how air is invisible but takes up space.
- Ages 5-7: Before revealing the hole trick, ask them to hypothesize WHY the balloon will not inflate. Introduce the concept of air pressure and the idea that “empty” containers are full of air.
- Age 8 and up: Predict what happens with bottles of different sizes, and talk about air pressure and why airplane cabins are pressurized.
6. Balloon Hovercraft (Reduced Friction)
Build a hovercraft that glides across a table using a balloon, a CD and a bottle cap. It is surprisingly smooth.
Safety firstDiscs can snap into sharp pieces if bent, so never flex one and throw out any disc that cracks. The bottle cap is a choking hazard for young children, so an adult keeps hold of it until the glue is fully dry and the cap will not pull off. Hot glue is adult-only. An adult also fits and removes the balloon, so kids only touch the finished hovercraft.
Good to knowDo the gluing ahead of time, before the kids arrive at the table. That way the cap is already fixed when they first see the disc.
Materials Needed
- 1 balloon
- 1 old CD or DVD (not cracked, since cracked discs have sharp edges)
- 1 pop-top (push-pull) cap from a sports water bottle. Test that the balloon mouth stretches over it before you glue. Dish soap caps are often too wide.
- Hot glue gun, adult use only (burn risk; a low-temp gun is safer), or non-toxic craft glue in a ventilated room
- A smooth, flat surface (kitchen table, hardwood floor, or countertop)
Step-by-Step Instructions
- An adult glues the pop-top bottle cap over the center hole of the CD with the cap closed. Make sure the seal is airtight and let the glue dry completely.
- Once dry, close the pop-top cap.
- An adult inflates the balloon and twists the neck (do not tie it) to keep the air inside.
- While holding the twist, the adult stretches the mouth of the balloon over the pop-top cap.
- Place the CD on a smooth, flat surface.
- Open the pop-top cap and give the CD a gentle push.
- Watch as the CD glides across the surface on a cushion of air.
The Science Behind It
Air escapes from the balloon through the cap and flows out under the CD. That makes a thin cushion of air between the disc and the table.
The cushion cuts friction, the force that slows things down when they slide. With less friction, one gentle nudge sends the disc gliding. Real hovercraft do the same thing with powerful fans.
TipIt glides best on a smooth table or hard floor, not carpet. If it stalls, check the glue seal for air leaks.
Age Adaptation Tips
- Age 4: An adult builds it and fits the balloon. The child touches only the finished hovercraft, once the cap is glued on solid, and gives it the push.
- Ages 5-7: Once the glue is dry, let them check the seal, pick the launch surface and open the cap. An adult still inflates and fits the balloon. Have them compare how the CD slides with and without the balloon. Introduce the word “friction” and ask them what other things have low friction (ice skating, sliding on a water slide).
- Age 8 and up: Compare different disc shapes and measure how far each glides.
7. Sound Wave Balloon Drum (Dancing Salt)
Turn a balloon into a drum skin and watch sound make salt dance. Kids who love music especially like this one.
Safety firstAn adult cuts the balloon and stretches it over the can. The cut-off neck is a choking hazard, so it goes straight in the trash. Kids touch the drum only after the skin is banded on.
Materials Needed
- 1 balloon
- 1 empty can or plastic container (a Pringles can works great), with the rim taped smooth
- Salt or sugar
- Scissors
- Rubber band
- A phone or Bluetooth speaker to play music, or a metal baking tray and a spoon to tap
Step-by-Step Instructions
- An adult cuts the neck off the balloon with scissors so you have just the round body, and puts the cut-off piece straight in the trash.
- The adult stretches the balloon tightly over the open end of the can or container like a drum skin. Pull it taut.
- Secure it with a rubber band so it stays stretched tight.
- Sprinkle a tiny pinch of salt or sugar on top of the stretched balloon surface.
- Set the drum balloon-side up right beside a speaker playing bass-heavy music at low volume. No speaker? Hold a metal baking tray close to the drum and tap it with a spoon.
- Watch the salt or sugar grains bounce and dance on the balloon surface as the sound waves hit it.
- For another variation, skip the salt and let your child rest fingertips on the balloon drum. Keep the volume low and the speaker away from their ears.
The Science Behind It
Sound travels in waves, which are vibrations moving through the air. When those vibrations reach the stretched balloon, they cause it to vibrate too. The salt or sugar grains bounce because the balloon surface is moving up and down rapidly with each sound wave.
Louder sounds make bigger vibrations. Low bass notes make slower movements the grains can follow, so they jump higher.
A speaker works the same way in reverse. Its flexible cone vibrates to make the sound.
Age Adaptation Tips
- Age 4: Focus on the sensory experience. Let them feel the vibrations on their fingertips. Play different types of music and ask if the vibrations feel different. Use words like “buzzy” and “tingly.”
- Ages 5-7: Have them watch the salt dance and ask why louder music makes bigger jumps. Let them experiment with different types of music (classical vs. hip-hop vs. rock) and describe what they observe.
- Age 8 and up: Introduce frequency (pitch) and amplitude (loudness). Test which sounds make the biggest jumps.
8. Balloon-Powered Car (Newton’s Third Law Again)
Build a car that drives itself on air escaping from a balloon. It is engineering, physics and fun in one project.
Materials Needed
- 1 balloon
- 1 plastic bottle or small cardboard box (for the car body)
- 4 bottle caps or round lids (for wheels), or 4 ready-made toy or craft wheels
- 2 wide straws, such as smoothie straws (for axle sleeves)
- 2 thin straws or blunt wooden dowels (for axles) that spin loosely inside the wide straws. If you use skewers, trim the ends and cap them with tape.
- Tape
- A drinking straw (for the balloon nozzle)
- Scissors
- A nail or small hand drill, adult use only, to make a center hole in each wheel cap (keep it out of kids’ reach). Skip it if you have ready-made wheels.
Step-by-Step Instructions
- Take the plastic bottle or small box. This is your car body. Lay it on its side.
- Trim the two wide straws to the width of the car body. Tape them across the underside, one near the front and one near the back. Keep them parallel to each other and square to the body. These are the axle sleeves, so the body needs no holes.
- Slide a thin straw or dowel through each sleeve to make the front and rear axles. Each axle should stick out about an inch on both sides and spin loosely.
- Away from the kids, an adult makes a center hole in each bottle cap with the nail or small drill, working on a scrap board. Skip this step with ready-made wheels.
- Fix a wheel to each end of each axle. Push a dowel into the snug center hole, or hot glue the cap to the end of a straw axle (adult only). Turn the car over onto its wheels and check that the axles spin freely inside the sleeves.
- An adult inserts the drinking straw about 2 inches into the neck of the balloon and tapes it securely so no air leaks around the seal.
- Tape the balloon and straw assembly on top of the car body with the straw pointing out the back of the car.
- An adult inflates the balloon through the straw, or uses a hand pump, and pinches the straw to hold the air in.
- The adult sets the car on a smooth floor and lets go of the straw after the countdown. Watch it go.
- The adult picks up the car after each run, since the deflated balloon is still taped to it.
The Science Behind It
This experiment demonstrates Newton’s Third Law again, just like the balloon rocket. Air rushes out of the straw in one direction, and the car moves in the opposite direction.
The car adds an engineering challenge. The wheels must spin freely, the axles must line up, and the body must be light enough for the balloon to push. Engineers balance several design factors like this all the time.
TipIf the car veers, re-tape the axle sleeves so they are parallel and check that the axles spin freely inside them. Expect a few crooked first runs.
Age Adaptation Tips
- Age 5 is the minimum. Younger kids can watch and help with tape while an adult builds and inflates. They call the countdown, you let go of the straw, and you fetch the car afterward. Talk about how the air “pushes” it.
- Ages 5-7: Let them build as much of the car body as they can with guidance. The balloon, the nail and the loose wheel caps stay with the adult. When the car does not go straight (and it probably will not on the first try), talk about WHY and let them figure out adjustments. This problem-solving is as valuable as the physics lesson.
- Age 8 and up: Design the farthest-traveling car. Test body shapes, wheel sizes and straw lengths, and measure each run.
9. Water Balloon Magnifying Glass (Refraction)
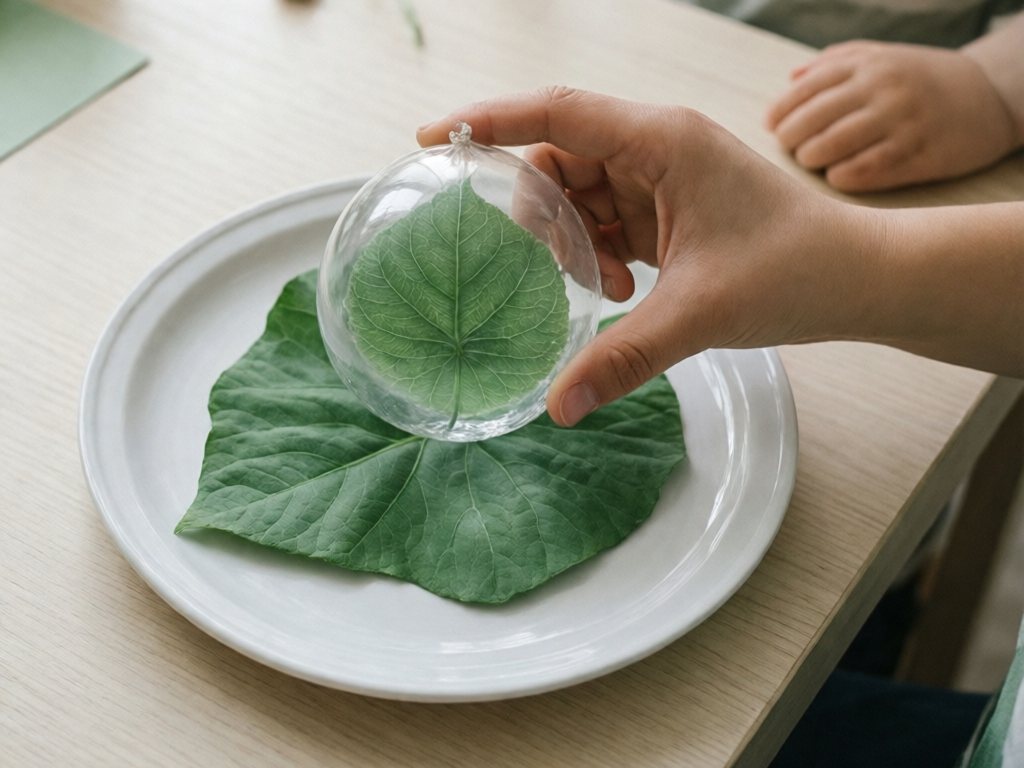
Fill a balloon with water and it becomes a working magnifying lens. It is a quick way to show how light bends.
Materials Needed
- 1 clear or light-colored balloon (transparent works best, but pale yellow is fine)
- Water
- A faucet or water bottle
- A newspaper, book page, or printed text
Step-by-Step Instructions
- An adult stretches the balloon a few times to loosen the rubber.
- An adult fills the balloon with water from a faucet, without overfilling. Aim for a small, round water balloon about the size of a tennis ball. The rounder it is, the better the lens.
- Tie off the balloon.
- Indoors and out of direct sun, hold the water balloon over printed text, about 1 to 3 inches above the page.
- Look through the balloon at the text below. Slowly move the balloon up and down until the text comes into sharp focus.
- The letters will appear magnified, just like looking through a magnifying glass.
The Science Behind It
The water-filled balloon acts as a convex lens. Light bends (refracts) when it passes from air into the curved water, and that makes the text look bigger.
Magnifying glasses, eyeglasses and cameras work the same way. So does your eye, which has a clear lens that bends light onto the retina.
Safety firstA water balloon is a real lens, so it can focus sunlight into a hot spot that burns skin or scorches paper. Use it indoors, away from sunny windows and direct sunlight, and never leave a water balloon sitting in the sun. If the balloon bursts, pick up every piece at once. Kids under 8 can choke on them.
Age Adaptation Tips
- Age 4: Fill the balloon yourself and let them hold it over a picture book with large images. Ask them what looks different when they look through the “water ball.” Keep it playful and exploratory.
- Ages 5-7: You fill and tie the balloon, then let them explore magnifying different objects: leaves, their fingerprints, fabric textures. Introduce the word “magnify” and compare it to an actual magnifying glass.
- Age 8 and up: Test whether the size or shape of the water balloon changes the magnification.
10. Water Balloon vs. Flame (Optional, Adult Demo Only)
Safety firstThis demo is optional and adult-only. Children under 8 skip it, and watchers 8 and up stay at least 6 feet back with goggles on. Be ready for either balloon to pop, and never let the rubber touch the flame. Latex burns, and a bursting balloon can throw hot rubber, so keep hands, faces and anything flammable clear. If the water balloon bursts it can splash hot water, so keep a towel ready.
- Work on a stable, non-flammable surface, with the candle away from the edge.
- Grip each balloon’s knot with long metal kitchen tongs so the balloon hangs below the tips of the tongs. The candle sits on the surface, under the balloon.
- Hold the tongs at full arm’s length, angled down and away from you. Your hand stays above and behind the tips, never directly over the flame. Lean your face and body back.
- Tie back long hair and push up or remove loose sleeves.
- Keep a bowl of water and a towel within reach, and keep lighters and matches out of reach of kids.
Good to knowIf you are not comfortable with flame, skip this one. The other nine experiments cover plenty of science without it.
An air-filled balloon pops over a flame. A water-filled one can hold out for a few seconds. It is a striking look at heat transfer, done by the adult while kids watch from a distance.
Materials Needed
- 2 balloons (same size and color for dramatic comparison)
- Water
- A candle
- A lighter or matches
- A stable, non-flammable surface (kitchen sink area or outdoor table)
- Long metal kitchen tongs, to hold each balloon by the knot
- A towel, for splashes if the water balloon bursts
- A bowl of water kept within reach
- Safety goggles (required for everyone within arm’s reach or in line of sight)
Step-by-Step Instructions
- The adult puts on goggles, inflates the first balloon with just air, and ties it off.
- Fill the second balloon with about a half cup of water, then inflate it with air the rest of the way and tie it off. The balloon should have water sloshing in the bottom.
- Light the candle in a stable holder (a tea light is the steadiest choice), away from the table edge, with a bowl of water nearby.
- First, grip the knot of the air-only balloon with the tongs so the balloon hangs below the tips. Hold the tongs at full arm’s length, angled down and away from you, with the balloon several inches above the flame. Your hand stays above and behind the tips, never directly over the candle. Lean your face and body back, then slowly lower the balloon. The thin rubber heats fast, weakens and bursts. Warn everyone it will be loud.
- Now grip the knot of the water balloon the same way, at full arm’s length, so it hangs below the tongs with the water-filled bottom just above the flame. Keep it there no more than 3 seconds. Never let the rubber touch the flame. Be ready for it to pop and splash hot water, and keep the towel close. Pull it away at once if the rubber looks thin or stretched.
- Take the balloon away after 3 seconds either way, then blow out the candle. A little black soot on the bottom is normal. Let the balloon cool, then wipe it off with a paper towel before anyone touches it.
The Science Behind It
Water soaks up heat quickly. The water inside the balloon pulls heat away from the rubber and spreads it around, so for a few seconds the rubber stays cool enough to hold.
That protection is brief. Hold the balloon over the flame too long and it will still pop.
Air cannot soak up heat nearly as well. In the air-only balloon the rubber heats fast and bursts. Car engines and power plants use water for cooling for the same reason.
Age Adaptation Tips
- Ages 3-7: Skip this one. Try the magnifying glass or static experiment instead.
- Age 8 and up, watching: Ask for predictions from 6 feet back, then write them down and compare to the results. The adult fills and holds the balloons.
- Afterward: Talk about why water is used as a coolant in car engines and power plants.
Run It Like a Science Fair
Once you have tried a few experiments, turn a weekend afternoon into a home science fair. This section also covers how to keep the learning going and how to keep the day calm for you.
Set Up Experiment Stations
Arrange 4 to 6 experiments around your kitchen like stations at a fair, with an adult at each one. Leave out the skewer and flame demos. The kitchen science experiments post has more station ideas, and the Balloon Science Experiment Cards + Lab Notebook printable gives you instruction cards.
Create a Lab Notebook
Use the Balloon Science Experiment Cards + Lab Notebook printable, or give each child a blank notebook. At each station, they write or draw:
- The question: What are we trying to find out?
- My prediction: What do I think will happen?
- What happened: What actually happened?
- Why: Why do I think it happened?
For younger kids who cannot write yet, let them draw pictures of what they observed. The notebook becomes a keepsake they can show to grandparents, teachers, or friends.
Award Certificates
Print or hand-write silly award certificates. “Best Hair Raise,” “Fastest Balloon Rocket,” “Most Dramatic Reaction.” Every child gets recognized for something.
Invite Friends
Balloon experiments are perfect for playdates and birthday parties. They require minimal setup, the materials are cheap, and every kid wants to try everything. For a science party, add lab coats (white button-up shirts from the thrift store) and safety goggles. Keep one adult on balloon duty the whole time.
Document the Fun
Take photos and short videos. The self-inflating balloon and the rocket make great clips for grandparents.
Extend the Learning
Once your kids are hooked on balloon science, here are ways to keep the momentum going.
Ask “what if” questions. After every experiment, ask what would happen if you changed one thing. What if you used a bigger balloon? What if you used lemon juice instead of vinegar? What if you used half the vinegar? These questions teach the scientific method naturally.
Start a hypothesis journal. Encourage your child to write down questions and predictions before each experiment. Over time, they will develop the habit of thinking scientifically: predicting, testing, observing, and reflecting.
Connect to real-world applications. After the balloon rocket, talk about how NASA rockets work. After the hovercraft, look up real hovercraft videos. After the flame demo (watchers 8 and up), talk about how water cools car engines. These connections show kids that science is not just a school subject; it is everything around them.
Explore related experiments. If the baking soda and vinegar balloon was a hit, try more kitchen science experiments. If the rocket and car were favorites, try simple machines for preschoolers or weather experiments. Let their interests lead.
Keep It Low-Stress for Parents
Vinegar spills, balloons pop without warning, and someone will probably cry at least once. These habits keep it manageable.
Prep materials in advance. Before your child sits down, measure out the baking soda, cut the straws, and inflate test balloons. The fewer tasks competing for your attention during the experiment, the more you can focus on your child’s experience.
Do experiments in the kitchen or outside. These experiments are not living room activities. Kitchen counters clean up easily, and outdoor experiments have the bonus of no mess anxiety at all.
Have extra balloons. Things pop. Keep the spares in a closed container on a high shelf and take out one at a time. That way a try-again is easy, and no uninflated balloon is within a child’s reach.
One experiment at a time. Unless you are doing a full science fair, choose one experiment per session. Kids absorb more when they are not rushed, and you will enjoy it more when you are not multitasking.
Embrace imperfection. The balloon car will probably veer left. The skewer might pop the first balloon. The hovercraft might not glide very far. That is all part of the process. When something does not work, ask your child why they think it failed and what they could change. The failures teach more than the successes.
Let kids lead where it is safe. Once you have shown an experiment, hand over the kid jobs: measuring baking soda, pushing the hovercraft, calling the countdown and predicting. Balloons, sharp tools and flame stay with you.
Crafty Mama
Crafty Mama is a former elementary art teacher turned stay-at-home parent who believes every child is creative — they just need the right invitation. She develops age-appropriate activities, crafts, and projects that spark imagination while keeping mess (and parent stress) to a minimum.
Frequently Asked Questions
What age is best for balloon science experiments?
Nine of the ten experiments suit kids 3 to 8, and the table near the top lists the minimum age for each. The static and rocket experiments start at 3, five more start at 4, and the skewer demo and the car start at 5. The flame demo is adult-only, with watchers 8 and up. Balloons are a choking and suffocation hazard for every child under 8, so an adult handles and inflates all balloons.
Are balloon experiments safe for toddlers?
Balloons are a choking and suffocation hazard for every child under 8. Toddlers under 3 need the closest watch, because uninflated balloons and popped pieces are the biggest risk. Children under 3 only watch from a safe distance while an adult handles every balloon. If you have a toddler in the house while doing experiments with older siblings, keep all balloon pieces off the floor and dispose of popped balloons immediately.
Do I need special balloons for these experiments?
Standard latex party balloons work for every experiment here, as long as nobody in the room has a latex allergy. If anyone does, keep latex balloons out of the room entirely. Stretchy latex-free balloons (polyisoprene, for example) work for most of the experiments, but test one first. For the balloon rocket and balloon car, longer “rocket-shaped” balloons (sometimes called modeling balloons) produce more thrust and are worth picking up. For the magnifying glass experiment, clear or light-colored balloons give the best visibility. Foil (mylar) balloons do not stretch, so they will not work for these experiments.
What if the balloon skewer experiment keeps popping the balloon?
This is the trickiest experiment to get right on the first try. Make sure you are only inflating the balloon to about three-quarters full, not maximum capacity. Put a drop of oil on the skewer tip. Push slowly with steady, gentle pressure at the thickest points (the dark spot at the top and the area near the knot). If it keeps popping, try a different brand of balloons. Some are thicker than others, and thicker balloons are more forgiving.
Can I use these experiments for a school science fair project?
Absolutely. The self-inflating balloon, balloon rocket, and balloon car are particularly strong for school science fairs because they lend themselves to controlled experiments with measurable variables. For example: “How does the amount of vinegar affect how much the balloon inflates?” Keep the baking soda at 1 teaspoon and test 1 to 4 tablespoons of vinegar. Or: “How does the length of the straw affect how far the balloon car travels?” Both can be measured and shown with data.
How do I explain the science to kids without confusing them?
Match your explanation to your child’s age and interest level. For young kids, simple cause-and-effect language works best: “The air pushes out this way, so the balloon moves that way.” For older kids, introduce proper scientific vocabulary one term at a time. The most powerful technique is to ASK your child to explain what they think happened before you tell them. You will often be surprised by how close they get, and their own reasoning helps them understand the concept far better than a lecture would.
What should I do if my child is scared of balloons popping?
Fear of balloons popping is very common in young children, and it is completely valid. Never force a child to participate. Start with experiments that do not involve popping (the hovercraft, magnifying glass, and static electricity experiments are pop-free). Let them watch from a distance during experiments where popping is possible. Over time, as they see that balloons are predictable and controllable, many kids outgrow the fear naturally. Child-sized earmuff-style ear defenders can also help during popping experiments. Skip earplugs for young children. They are small enough to choke on and do not fit little ears well.
Can these experiments be done outdoors?
Most of these experiments work great outdoors, and some are even better outside. The balloon rocket and balloon car benefit from long, smooth surfaces like driveways or patios. The flame demo is an adult-only activity best done on a stable table away from wind and the table edge. Keep the water balloon magnifying glass indoors or in full shade, because it can focus sunlight into a hot spot. Outside, tie the rocket string above head height and take it down when you finish. The static electricity experiment works less well outdoors on humid days because moisture in the air dissipates the charge. Choose a dry day for that one.
Let the Experiments Begin
Balloon science costs very little and needs little prep. Expect a few spills and a pile of popped balloons, and some real moments of wonder.
A balloon that inflates itself, or hair that stands on end, shows kids science as something they can see and touch. It is not a textbook chapter or a worksheet.
You do not need a physics degree to teach this. You need a bag of balloons, some baking soda, and the willingness to say, “Let’s find out what happens.”
So grab the balloons, put on the goggles and see what happens.