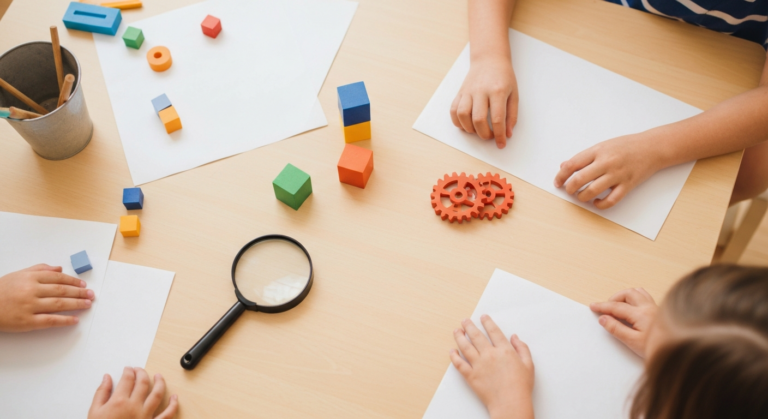
Simple Machine Activities for Preschoolers: Ramps, Levers & More
You'll discover nine hands-on simple machine activities like ramps and levers, designed to build your preschooler's early STEM skills through play. This guide provides a five-day lesson plan and practical tips for engaging your child with physics concepts.
- Explore nine hands-on simple machine activities for preschoolers.
- Build early STEM skills like predicting and testing with your child.
- Utilize the five-day lesson plan to tie activities together.
- Start with inclined planes (ramps) as the easiest simple machine.
- Prioritize safety by following age-appropriate guidelines for materials.
This post contains affiliate links. As an Amazon Associate I earn from qualifying purchases.
Balance a spoon on a block, set a big soft pom pom on the end, stand right beside your four-year-old, and let them smack the handle. The pom pom bounces off the couch, and you are suddenly deep in a physics lesson.
This guide has nine hands-on simple machine activities: ramps, a spoon catapult, a bucket pulley, wheels, wedges, and screws. You also get a playground hunt, a house hunt, and a discovery lab. A five-day lesson plan near the end ties it all together. Expect a few pom poms under the couch and not much else.
In this article (13 sections)
- What Are Simple Machines?
- Simple Machine Activities at a Glance
- Ramps and Inclined Planes: The Easiest Starting Point
- Levers and Catapults: Launch Into Learning
- Pulleys: Lift It Up!
- Wheels and Axles: Roll With It
- Wedges and Screws: Everyday Simple Machines
- Simple Machines on the Playground
- Simple Machines Around the House
- Putting It All Together: A Simple Machines Discovery Lab
- A 5-Day Simple Machines Lesson Plan for Preschool and Kindergarten
- Safety Notes for Hands-On Simple Machine Play
- Frequently Asked Questions
What Are Simple Machines?
Simple machines are the six basic devices that make work easier: the lever, inclined plane, wedge, screw, wheel and axle, and pulley. Preschoolers won’t memorize those words, and that’s fine. They’re building early STEM skills by predicting, testing, and noticing what happens.
For this age it’s all cause and effect. A ball rolls faster down a steep ramp than a gentle one, and a plastic knife slices dough because the blade is a wedge. Kids already love that kind of play.
Along the way kids pick up words like ramp, pulley, lift, push, and pull. The lesson plan below reuses them. If your child likes this, building challenges are a good next step.
Simple Machine Activities at a Glance
If you’re short on time and just need to know where to start, here’s every activity in this guide sorted by age and prep time:
| Activity | Best Age | Simple Machine | Prep Time |
|---|---|---|---|
| Build-Your-Own Ramp Station | 18 months–5 years (large items only under 4) | Inclined plane | 5 minutes |
| Water Ramp Play | 3–6 years | Inclined plane | 10 minutes |
| Spoon Catapult | 3–5 years (adult beside the launcher) | Lever | 2 minutes |
| Balance Scale Exploration | 3–6 years | Lever | 5 minutes |
| DIY Bucket Pulley System | 4–6 years (adult supervises the whole time) | Pulley | 10 minutes |
| Cardboard Box Car Build | 4–6 years (adult makes holes and glues) | Wheel and axle | 20 minutes (adult step) |
| Rolling vs. Sliding Experiment | 3–5 years | Wheel and axle | 5 minutes |
| Playdough Wedge Exploration | 2–5 years (blunt knives 3+) | Wedge | 0 minutes |
| Screw Exploration Station | 4–6 years (screwdriver 5+, close supervision) | Screw | 5 minutes |
Safety firstAnything that fits inside a toilet paper tube is a choking hazard. For children under 4, use only items clearly bigger than that, and balls at least 1.75 in. across. Ping pong balls, marbles, and beads are for ages 5+ with an adult beside the child, and never for a child who still mouths things. Any cord or rope activity needs an adult watching the whole time, with no loops and nothing around a neck or limb. Never tie rope to swing sets or play structures, and keep blind cords out of reach. Adults handle all sharp and hot-glue steps, and screwdrivers wait until age 5.
Ramps and Inclined Planes: The Easiest Starting Point
If you only explore one simple machine with your preschooler, make it the inclined plane. Ramps are intuitive, visually exciting, and endlessly customizable. Plus, kids already have an instinct to roll things downhill — we’re just giving that instinct a little structure.
Build-Your-Own Ramp Station
Materials needed:
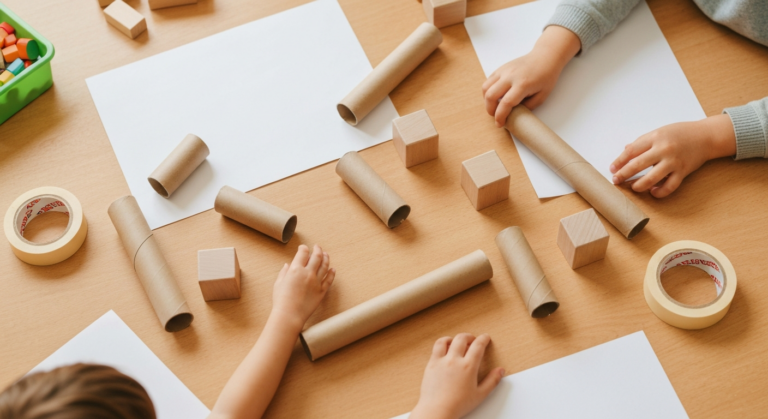
- Cardboard tubes (paper towel and wrapping paper rolls)
- Flat pieces of cardboard or foam board
- Wooden blocks or thick books for propping
- Painter’s tape
- Large toy cars and big balls (balls at least 1.75 in. across)
- Prop the board. Lean a piece of cardboard or foam board on a stack of books.
- Add tunnels. Tape paper towel tubes together and connect them to the ramp.
- Test. Roll a large car and a big ball, and ask your child which will be faster.
- Change the angle. Add or remove a book and race again.
- Compare. Try blocks too and sort what rolls from what slides.
Let your child experiment freely while you narrate: “Look, the big ball went really fast on the steep ramp! What will happen on the flat one?”
TipIf the ball stalls on cardboard, switch to foam board or smooth poster board. A cardboard ramp also sags after about ten minutes of races, so tape a second layer on the back.
Safety firstUnder 4, roll only large cars and big balls at least 1.75 in. across, and stay close while they race.
Water Ramp Play
Take ramp play outdoors with lengths of rain guttering or pool noodles cut in half lengthwise. Prop one end on an overturned bucket, pour water down, and send large rubber ducks or big foam shapes along for the ride. It pairs nicely with warm-weather water play.
Safety firstAn adult cuts the pool noodles and tapes or sands any rough gutter edges. Stay within arm’s reach of the water the whole time, and empty the buckets afterward.
Levers and Catapults: Launch Into Learning
Preschoolers love launching things through the air. Lever activities use that excitement to sneak in lessons about force, fulcrums, and balance.
Spoon Catapult
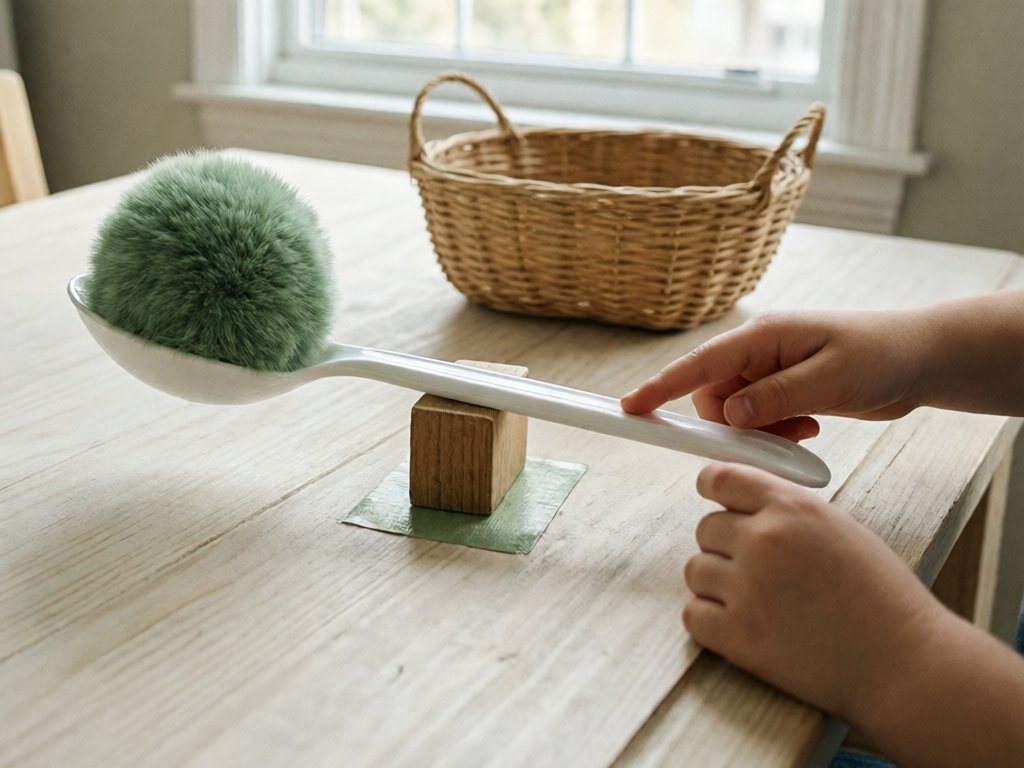
Materials needed:
- A sturdy plastic spoon
- A small wooden block or toilet paper roll (fulcrum)
- Large soft pom poms or foam balls (at least 1.75 in. across) for launching
- A basket or bowl for the target
- Painter’s tape to secure the fulcrum
- Set the fulcrum. Place the block on a flat surface and tape it down. Mark a launch line on the floor with painter’s tape.
- Balance the spoon. Lay it across the block like a seesaw.
- Load and launch. Put a large pom pom in the bowl end. Stand right beside your child at the launch line, then let them press the handle.
- Move the fulcrum. Slide it closer to or farther from the bowl and ask what changes. This is lever physics in its purest form.
- Add a target. Set a bowl a few feet away and keep score for extra math practice.
Safety firstYour child launches only while an adult stands right beside them. Everyone else stays behind or beside the launcher, never in front, and the catapult stays behind the taped launch line. Launch only large soft pom poms or foam balls, and aim at the bowl, never at faces. Eye protection is optional but sensible for siblings who hover.
TipIf the pom pom goes sideways, the spoon is probably not centered on the block. Re-balance it and try again.
Balance Scale Exploration
A simple balance scale made from a ruler balanced on a cylinder block teaches the lever concept from a different angle. Place various objects on each end — large wooden blocks, big pinecones, toy cars — and let children discover what makes it tip. Supervise under 4, and skip anything small enough to mouth. Ask questions like, “How many wooden blocks does it take to balance one toy car?” This naturally introduces early math concepts like comparison and estimation alongside the physics of levers.
Pulleys: Lift It Up!
Pulleys feel the most like magic to young children. Pull down on a rope and a bucket of toys rises into the air, which is a very big deal when you’re three feet tall.
DIY Bucket Pulley System
Materials needed:
- A wooden or plastic spool (an empty thread spool works) with a center hole the dowel fits through
- Soft cord, about 3 feet, with no loops
- A small bucket, cup, or basket
- A dowel rod that slides through the spool’s hole and is long enough to span two supports
- Two heavy boxes of the same height (weight them with books) or two heavy chairs, plus strong tape such as packing or duct tape
- Small toys, blocks, or stuffed animals to lift
- Build the frame (adult). Slide the spool onto the dowel. Set two heavy, book-filled boxes of the same height about a foot apart on the floor or a low, sturdy table, or use the seats of two heavy chairs. Lay the dowel across the gap with the spool in the middle. It should sit about 18–24 in. above the floor or tabletop.
- Lock the dowel (adult). Tape both ends of the dowel down firmly so it can’t roll or lift. Wrap a few turns of tape around the dowel on each side of the spool to keep the spool centered. Push on the frame to check that nothing tips, then give the spool a flick to check that it spins freely.
- Drape the cord. Lay the cord over the top of the spool so it sits between the rims and hangs down on both sides.
- Attach the bucket. An adult ties one end to the handle of a small bucket filled with light toys. Your child holds the other end, with no loops or wraps around a hand.
- Pull. Your child pulls down on the free end. The spool turns and the bucket rises. Try different numbers of blocks and talk about how the weight feels.
- Play construction site. Lift “building materials” to the second floor of a block tower.
Pulling may help build hand and arm strength while teaching how a pulley changes the direction of a pull.
Safety firstAn adult supervises constantly. Never loop cord around a neck or limb, keep loads light, and keep faces away from the bucket. Remove the cord after play and store it out of reach.
Wheels and Axles: Roll With It
Kids use wheels and axles all the time: strollers, toy cars, wagons, tricycles. They rarely stop to think about why wheels make moving things easier. These activities bring that out.
Cardboard Box Car Build
Materials needed:
- A small cardboard box
- 4 plastic bottle caps or wooden wheels from a craft store
- 2 blunt, sanded dowels or thick straws for axles
- Hole punch or pencil for poking axle holes
- A nail or awl for the cap holes, a low-temp glue gun, and tape (adult only)
- Markers and stickers for decorating
- Make the holes (adult). Poke two holes on each side near the bottom of the box with a blunt tool, straight across from each other. Make each hole slightly wider than the axle so the axle can spin freely. Then poke a center hole in each bottle cap with a nail or awl, working over a scrap board and away from children. The cap hole should grip the axle snugly. Wooden craft wheels usually come with a center hole already.
- Thread the axles. Slide the sanded dowels or thick straws through so the same length sticks out on each side. Give each one a spin. If it sticks, widen the box holes a little.
- Add wheels (adult). Push a cap onto each axle end, leaving a small gap between the cap and the box so nothing rubs. Glue each cap to the axle with a low-temp glue gun, children kept back, so the axle and wheels turn together. Wrap a band of tape around each axle tip just outside the cap as a backup stop.
- Check the spin. Once the glue has set, roll the car across the table. All four wheels should turn with their axles before any decorating starts.
- Decorate. Your child adds markers and stickers.
- Test. Roll the car down the ramps from your earlier activity.
- Compare. Push a box without wheels across the same surface. This direct comparison is what makes the concept click.
Once the car has raced its last race, the box doesn’t have to go straight to recycling. It can become one of these cardboard box crafts instead.
Safety firstAn adult makes the holes and handles all glue. Check that the caps are stuck on firmly, because a loose cap is a choking hazard.
Rolling vs. Sliding Experiment
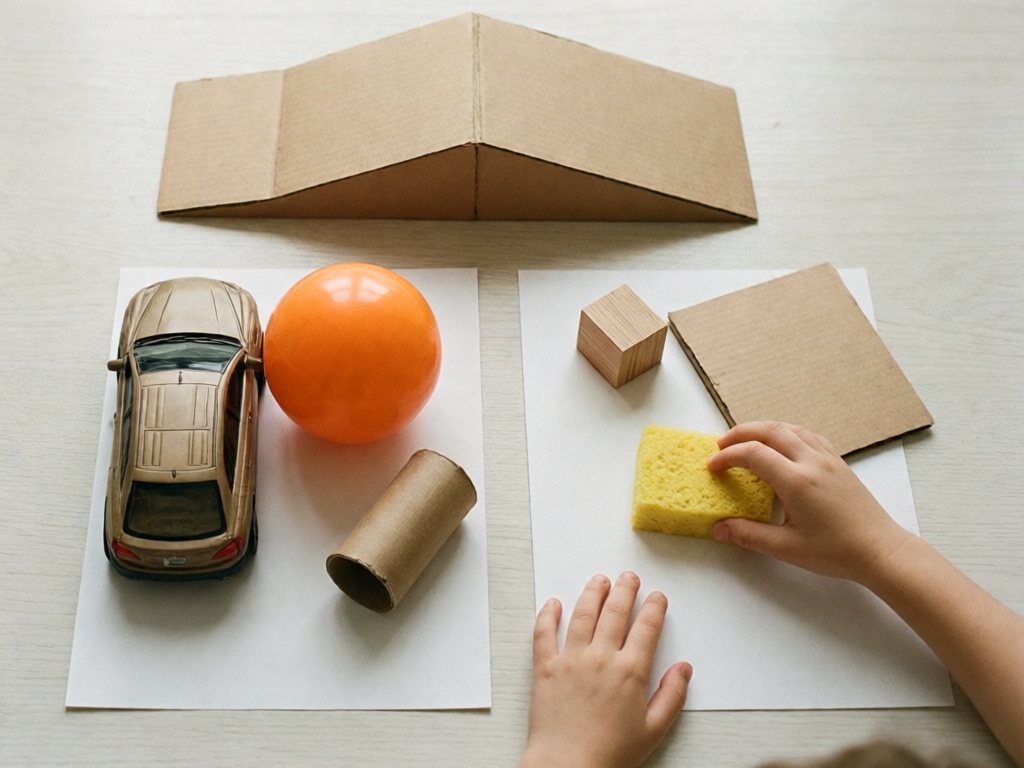
Gather a collection of objects — some with wheels or round shapes (toy cars, big balls, a cardboard tube) and some without (blocks, a sponge, a board book). Set up a ramp and have your child predict which objects will roll and which will slide. Create a simple two-column chart on a piece of paper labeled “Rolls” and “Slides” and let your child sort the objects after testing each one. This combines science, classification skills, and early literacy all in one activity.
Wedges and Screws: Everyday Simple Machines
Wedges and screws are often overlooked in preschool simple machine units, but they’re surprisingly easy to explore with materials you already have at home.
Playdough Wedge Exploration
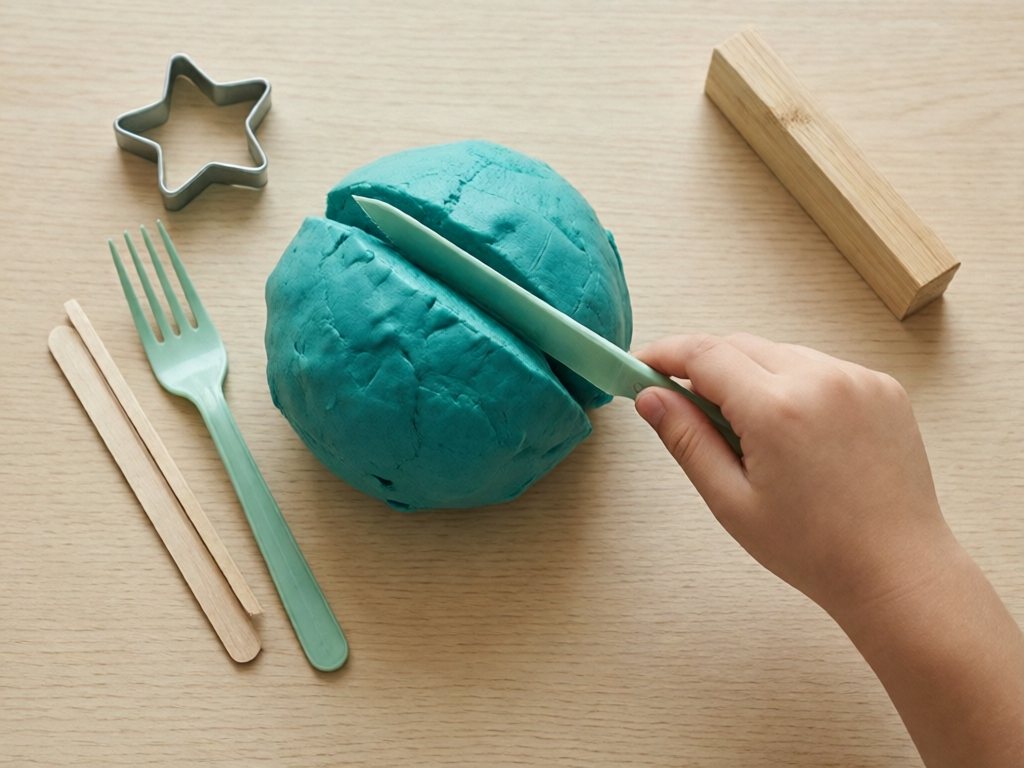
Materials needed:
- Homemade or store-bought playdough
- Blunt plastic knives, cookie cutters, and craft sticks
- A wooden doorstop (a perfect wedge shape)
Give your child a big ball of playdough and a few cutting tools. Grab one of our homemade playdough recipes if you need a fresh batch.
As they slice with a plastic knife, point out that the blade is a wedge: thin on one side, thick on the other. That shape helps it push through the dough. Let them compare the flat edge of a craft stick with the angled blade of the knife.
Then hand them a wooden doorstop and show how the same shape holds a door open by pushing into a space. Next, go wedge hunting: a garden shovel, adult-held scissors, and their own front teeth all count.
Safety firstTwo-year-olds use their hands, cookie cutters, and craft sticks only. Blunt plastic knives are for ages 3+, with an adult at the table. Most playdough, homemade or store-bought, contains wheat and a lot of salt. Check labels for allergies, keep it out of mouths, and supervise closely under 3.
Screw Exploration Station
An adult wraps a triangular piece of paper around a pencil to show that a screw is an inclined plane wrapped around a cylinder. Children as young as 4 can watch and help.
Then set up a station with one or two big plastic bolt-and-nut sets made for kids. Large metal hardware works too, as long as it can’t fit inside a toilet paper tube.
Twisting nuts onto bolts is great practice for fine motor strength and two-handed coordination.
For ages 5+, an adult clamps or holds a block of soft wood and starts a pilot hole for one large screw. Your child then turns the screw in with a short screwdriver that has a fat, fist-sized handle. The adult’s hands stay on the block the whole time.
Safety firstKeep an adult at the table the whole time, since kids mouth hardware, and check metal threads for burrs. Under 5, the station is bolt-and-nut sets only. Screwdrivers are for ages 5+ with an adult right beside the child.
Simple Machines on the Playground
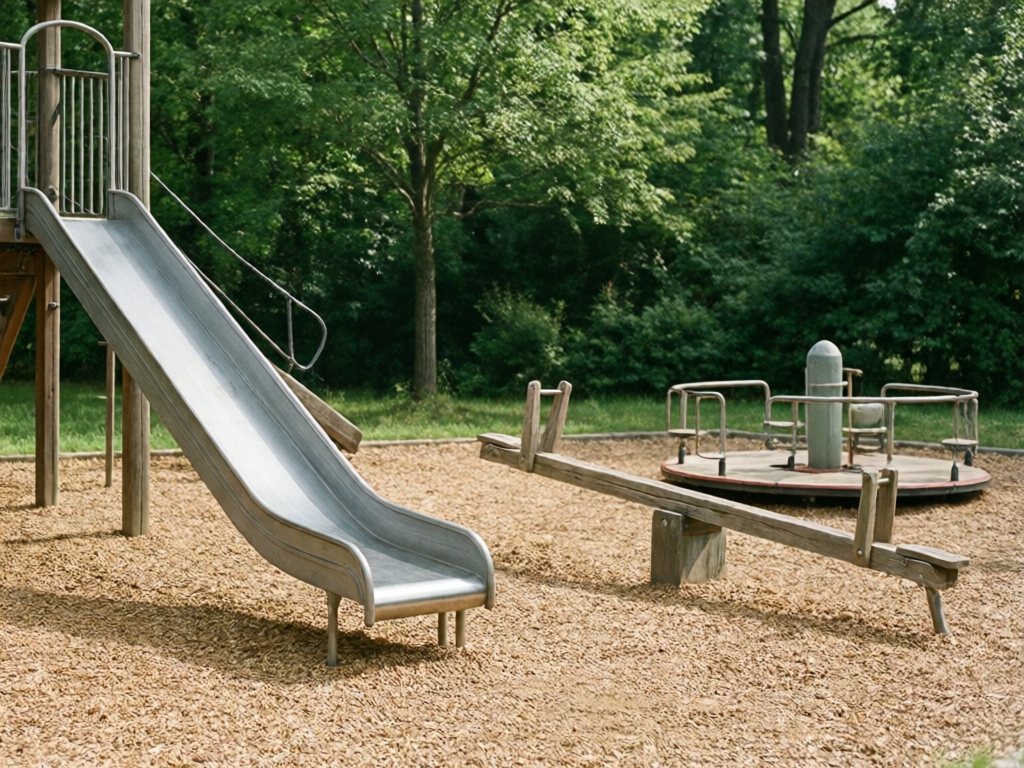
Before you buy a single craft supply, take your simple machines unit to the park. Preschoolers already know playground equipment inside and out, which makes it the perfect place to attach new vocabulary to something familiar.
| Playground Equipment | Simple Machine | What to Point Out |
|---|---|---|
| Slide | Inclined plane | Sliding down is easier and faster than climbing the same slope |
| Seesaw | Lever | The center bar is the fulcrum — a heavier rider sitting closer to the center can balance a lighter rider farther out |
| Merry-go-round | Wheel and axle | The center pole is the axle everything spins around |
Turn the walk from the parking lot to the play structure into “Simple Machine I Spy” — call out a machine type and have your child walk to touch the matching piece of equipment. It works just as well at a friend’s backyard swing set as it does at the community park. Stay close, and have kids touch the merry-go-round only when it has stopped.
Simple Machines Around the House
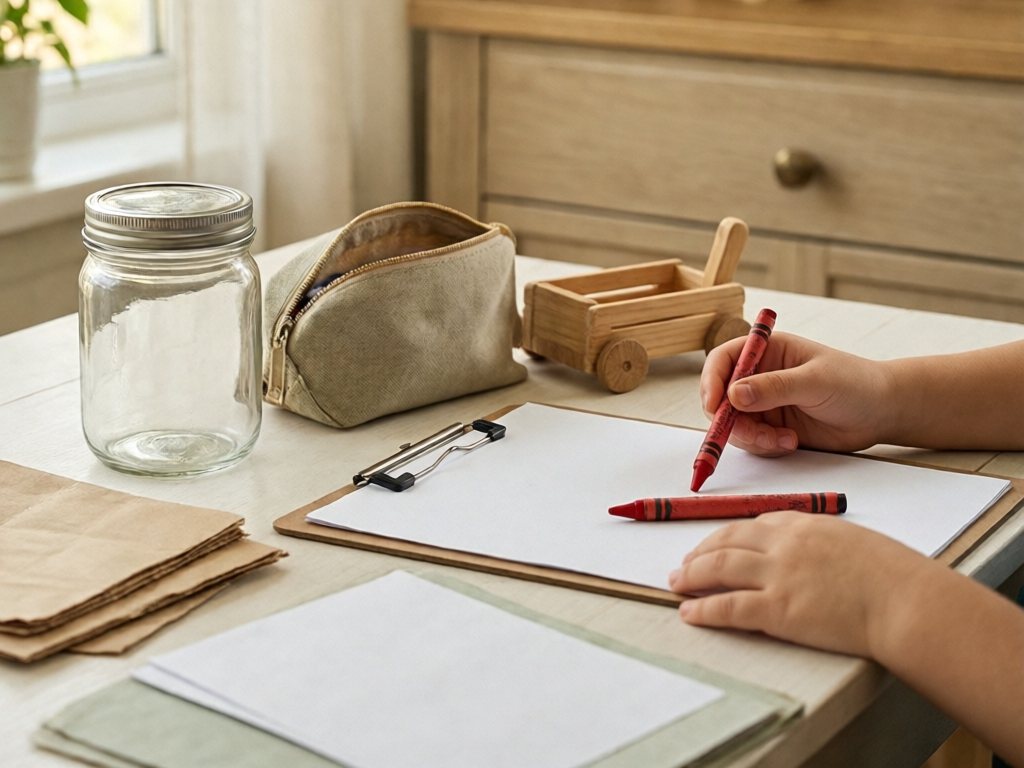
You don’t need a single new supply to explore simple machines — your kitchen and hallway are already full of them. This is a great five-minute mission for a slow morning or the stretch before dinner.
| Household Item | Simple Machine | Why It Counts |
|---|---|---|
| Doorknob | Wheel and axle | The larger knob turns the smaller spindle with less effort |
| Front steps | Inclined plane | A gentle slope beats a straight vertical climb |
| Jar lid | Screw | Spiral threads pull the lid tight as you twist |
| Scissors | Two levers with wedge-shaped blades | Handles are levers; each blade is a thin wedge (adult-held, look and touch only) |
| Bottle opener | Lever | The curved hook lifts a metal cap with little effort (adult-held, look and touch only) |
| Wagon or wheelbarrow | Wheel and axle | The wheels turn on an axle so a heavy load rolls instead of drags |
| Zipper | Wedge (sort of) | The pull tab splits the two rows of teeth apart |
| Flagpole rope | Pulley | The rope runs over a wheel at the top so pulling down lifts the flag up |
Hand your child a clipboard or crayon and paper and send them on a simple machine safari. The same format works beautifully as a rainy-day backyard scavenger hunt if you’d rather move the search outside. Bonus points if they can tell you which job each machine makes easier. Blind cords and curtain cords stay out of reach, so leave them off the list.
Putting It All Together: A Simple Machines Discovery Lab
Once your child has explored individual simple machines, it’s time to set up a discovery lab that brings everything together. This works wonderfully as a rainy afternoon activity or even as a birthday party station.
Setting Up Your Lab
Designate a table or floor area for each simple machine and label the stations with pictures and words: Ramps, Levers, Pulleys, Wheels, Wedges, and Screws. At each station, place the materials and a simple challenge card with a picture prompt (since most preschoolers are pre-readers). For example, the ramp station card might show a car at the top of a ramp with an arrow pointing down and a question mark at the bottom.
Safety firstThree-year-olds skip the pulley and screw stations, which are for ages 4+ with an adult at each one. Their wheel station is the Rolling vs. Sliding Experiment with large items, since the box car build starts at 4. The screw station means big plastic bolt-and-nut sets only, with no screwdrivers or driven screws. Keep ping pong balls, marbles, beads, and anything else that fits in a toilet paper tube out of the lab. At the lever station, an adult stands beside the launcher and everyone else waits behind the taped launch line. If you put a plastic tablecloth or shower curtain under the lab, keep babies and toddlers away from it because of the suffocation risk.
Mess Management Tips
- Keep wet wipes and a small dustpan handy for quick cleanups
- Set a timer for each station (5-7 minutes) and use a fun sound for rotation
- If doing the water ramp, set that station up on a tray or outside
A 5-Day Simple Machines Lesson Plan for Preschool and Kindergarten
If you’re homeschooling, teaching preschool, or just like a little structure, here’s a five-day plan. Each day pairs one simple machine with a quick circle-time introduction and a vocabulary word to repeat all day.
| Day | Simple Machine | Activity | Vocabulary Word | Time | Materials | Prep |
|---|---|---|---|---|---|---|
| 1 | Inclined plane | Build-Your-Own Ramp Station | ramp | 15–20 min | Cardboard or foam board, books, cardboard tubes, painter’s tape, large cars and big balls | 5 min: gather the supplies |
| 2 | Lever | Spoon Catapult | push | 15–20 min | Plastic spoon, small block, large soft pom poms, bowl, painter’s tape | 2 min: tape down the block |
| 3 | Pulley | DIY Bucket Pulley System | lift | 15–20 min | Spool, dowel, 3 ft of soft cord, small bucket, light toys, two heavy boxes or chairs, strong tape | 10 min: an adult builds the frame the night before |
| 4 | Wheel and axle | Cardboard Box Car Build | roll | 15–20 min | Small box, 4 bottle caps or wooden wheels, 2 axles, markers and stickers, a ramp | 20 min: an adult builds the car the night before so the glue sets |
| 5 | Wedge and screw | Playdough Wedge + Screw Station | twist | 15–20 min | Playdough, blunt plastic knives, cookie cutters, craft sticks, doorstop, big plastic bolt-and-nut sets | 5 min: set out the dough and bolt sets |
TipDays 3 and 4 need an adult build. Put the pulley frame and the box car together the night before, so the kids get the pulling, decorating, and racing.
Open circle time with one question a day:
- Day 1: “Which will reach the bottom first, the car or the ball?”
- Day 2: “What happens to the pom pom when I push this end down?”
- Day 3: “How can we get this bucket up high without picking it up?”
- Day 4: “Which is easier to push, the box with wheels or the box without?”
- Day 5: “Which will cut the dough, the knife’s thin edge or the flat craft stick?”
Three-year-olds need three swaps, since the pulley, box car, and screw activities start at age 4. Make Day 3 a second ramp day and Day 4 the Rolling vs. Sliding Experiment. On Day 5, do only the playdough half.
Introduce each day’s machine by holding up the real object, naming it, and asking “What do you think this does?” before letting kids test their prediction. Preschoolers do best with one machine per day and plenty of repetition. Kindergarteners can usually cover two machines per session. They are also ready to notice compound machines, which combine more than one simple machine. A wheelbarrow is a lever plus a wheel and axle, and scissors are two levers with wedge-shaped blades.
For toddlers as young as 18 months, skip the vocabulary and prediction questions entirely — just let them push large cars down a low ramp with an adult right beside them. At that age, the physical experience is the lesson.
Safety Notes for Hands-On Simple Machine Play
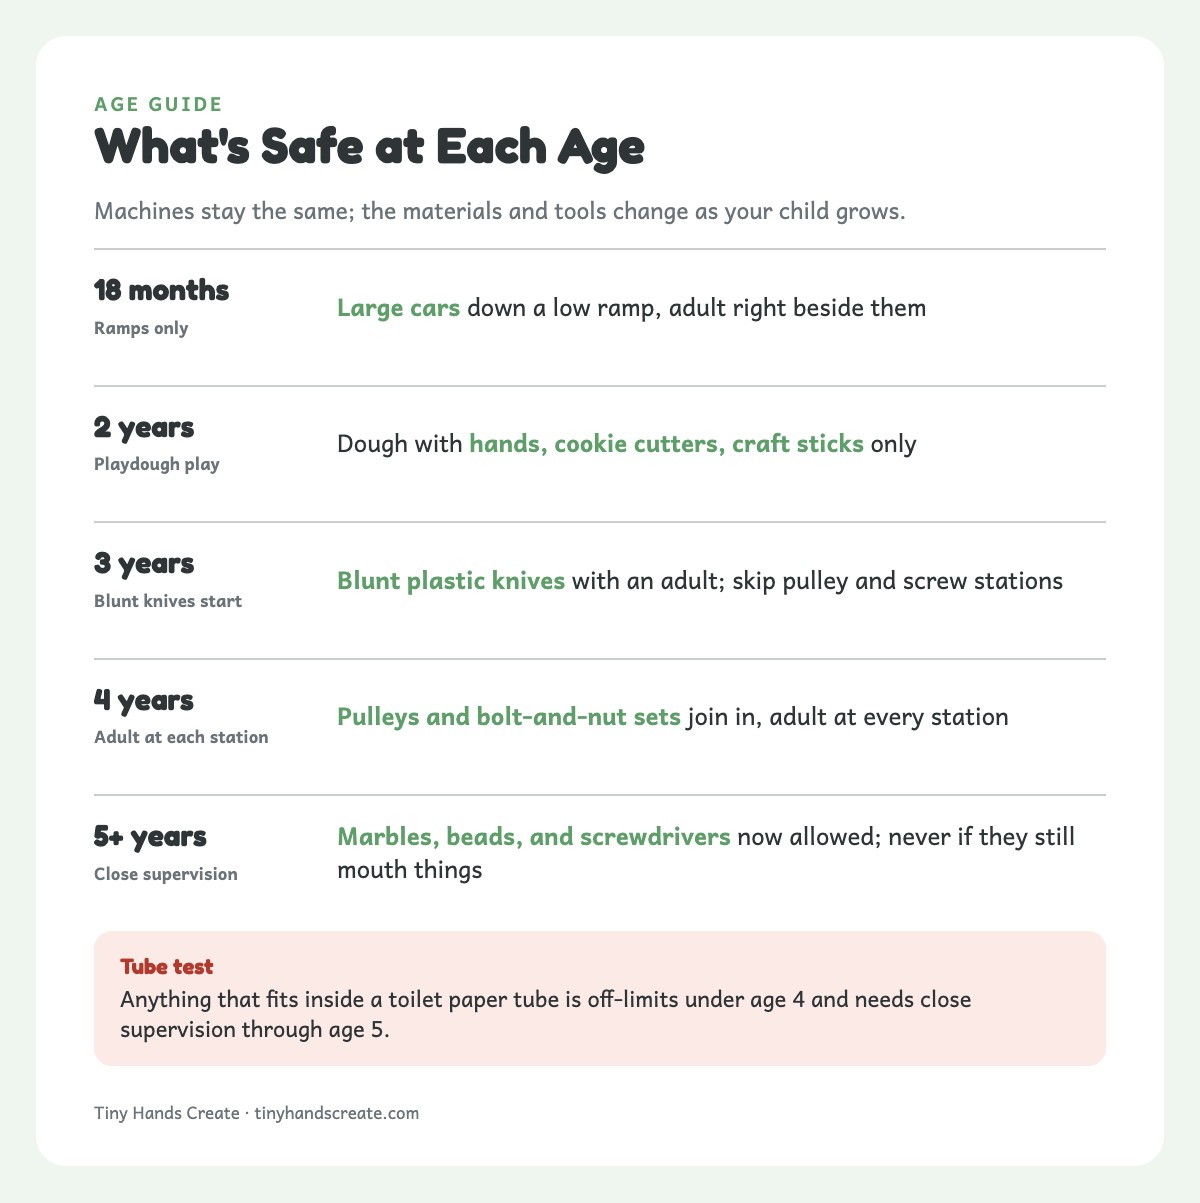
- Small parts (anything that fits in a toilet paper tube) are off-limits under age 4, and balls for under-4s are at least 1.75 in. across. Ping pong balls, marbles, and beads are for ages 5+ with an adult beside the child, and never for a child who still mouths things.
- The spoon catapult launches only large soft pom poms or foam balls, with an adult beside the launcher and everyone else behind or beside them at a taped launch line.
- Toddlers stick to large-item ramps and wheels. Two-year-olds can add playdough with hands, cookie cutters, and craft sticks; blunt plastic knives start at age 3. Most playdough, homemade or store-bought, contains wheat and a lot of salt, so check labels for allergies, keep it out of mouths, and supervise closely under 3.
- Hot glue, hole-making, and all sharp or pointed steps are adult-only. Use blunt, sanded dowels or thick straws.
- An adult supervises every cord or rope activity. No loops or neck wraps, and keep loads light and faces away from the bucket. Never tie or hang rope from swing sets, play structures, or deck railings. Remove all cord after play and store it out of reach.
- Screwdrivers are for ages 5+ with close adult supervision. Under 5, the screw station is big plastic bolt-and-nut sets only. Skip power tools at this age entirely.
The goal here isn’t memorizing six machine names. It’s wonder: the gasp when a pom pom sails off the spoon, or the “I did that!” when a bucket of toys rises on the pulley. That’s the real learning.
Frequently Asked Questions
What are the six simple machines?
The six simple machines are the lever, wheel and axle, pulley, inclined plane, wedge, and screw. Every one of them shows up somewhere in a typical house or playground — a seesaw is a lever, a doorknob is a wheel and axle, and a jar lid is a screw.
What age should kids start learning about simple machines?
Toddlers around 18 months can explore ramps and wheels through pure physical play, no vocabulary required. Preschoolers (ages 3–5) are the sweet spot for predicting and testing, and kindergarteners can start labeling machines and noticing compound machines like a wheelbarrow.
What simple machines are on a playground?
A slide is an inclined plane, a seesaw is a lever with the center bar acting as the fulcrum, and a merry-go-round is a wheel and axle built around a center pole.
Can I teach simple machines at home without buying a kit?
Yes — a spoon and a wooden block make a lever, cardboard propped on a book makes a ramp, and a jar lid demonstrates a screw. Most activities use household items. The pulley, the box car axles, and the screw station may need a small hardware-store or craft-store purchase, such as a dowel, a spool, or a kid-sized bolt-and-nut set.
How do you demonstrate a lever with just a spoon?
Balance a plastic spoon across a small block so it rocks like a seesaw, place a large soft pom pom in the bowl, and press down on the handle with an adult standing beside the child. The spoon launches the pom pom, and moving the block closer to or farther from the bowl changes how far it flies.
What’s the difference between preschool and kindergarten simple machines lessons?
Preschool lessons focus on one machine at a time with hands-on prediction and testing. Kindergarten lessons move a little faster, add labeling and drawing, and introduce compound machines like scissors or wheelbarrows.
Crafty Mama
Crafty Mama is a former elementary art teacher turned stay-at-home parent who believes every child is creative — they just need the right invitation. She develops age-appropriate activities, crafts, and projects that spark imagination while keeping mess (and parent stress) to a minimum.