Turkey STEM Challenge for Preschoolers: Build a Nest
Discover a fun Turkey STEM challenge for preschoolers (ages 3-6) where you build a nest to keep an egg from rolling away. This activity fosters engineering skills, persistence, and early math through engaging, hands-on play.
- Engage kids by framing the nest-building as a mission for 'Mama Turkey'.
- Teach structural thinking, material properties, and problem-solving through play.
- Encourage persistence by letting kids test, fail, and rebuild their nest designs.
- Ensure safety by supervising young children and using appropriate-sized materials.
- Guide learning by asking questions and resisting the urge to fix their creations.
This post contains affiliate links. As an Amazon Associate I earn from qualifying purchases.
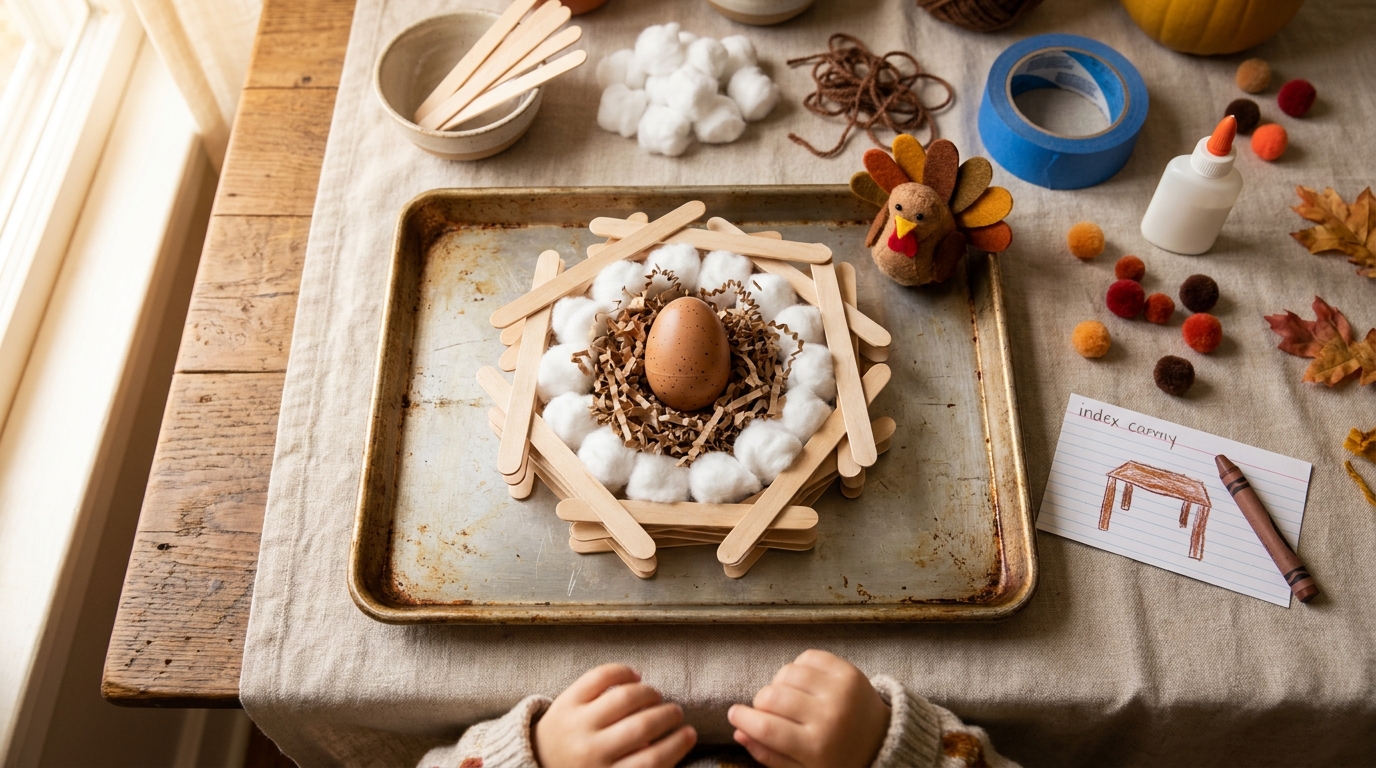
Last November my four-year-old glued one paper feather to his sleeve and wandered off to build a cushion ramp. So I handed him craft sticks, cotton balls, and a plastic egg. “Mama Turkey’s egg keeps rolling away. Can you build her a nest?” He built for forty minutes and tested everything twice.
This turkey STEM activity for preschoolers covers ages 3 to 6 with three levels, a challenge card, a scorecard, and honest notes on mess. Yes, there was glue on the dog.
Safety firstKids under 4, and any child who still mouths things, need an adult within arm’s reach the whole time. Cotton balls, pom-poms, ping-pong balls, and small craft eggs are choking hazards, so use an egg too big for a toilet-paper tube and keep loose supplies away from younger siblings. Use only a small handheld or paper fan for the wind test. Hot glue is adults-only.
In this article (18 sections)
- Why Turn a Turkey Craft Into a Building Challenge?
- What Kids Are Actually Learning (In Plain English)
- The Challenge in One Sentence
- Turkey Nest STEM Challenge: Materials List
- Setting Up Without Losing Your Mind
- Mama Turkey’s Nest Challenge Card
- Nest Scorecard and Materials Chart
- Step-by-Step Instructions
- Three Approaches Kids Tend to Take (and How to Respond)
- Making It Harder: Ideas for Older Kids and Mixed Ages
- Making It Easier: Ideas for Younger Builders
- Troubleshooting: When Things Go Sideways
- Adapting for a Classroom, Co-op, or Playdate
- Connecting the Challenge to Thanksgiving Week
- What to Do With the Finished Nests
- A Quick Safety Checklist
- Frequently Asked Questions
- Let Them Build, Let Them Wobble
Why Turn a Turkey Craft Into a Building Challenge?
Most Thanksgiving crafts for little kids are product-first. There’s a finished turkey in the adult’s head, and the kid’s job is to get close to it. That’s fine sometimes, and our handprint turkey craft is a keepsake. But it leaves a gap. Few Thanksgiving STEM activities for kids come without a scary amount of prep or a hot stove.
A building challenge fills that gap because it has three things preschoolers love:
- A character with a problem. Four- and five-year-olds will do enormous amounts of work for an animal who needs help. “Build a nest” is a chore. “Mama Turkey’s egg is rolling away and she’s worried” is a mission.
- A clear win condition. Either the egg stays put or it doesn’t. Kids can see the result themselves without waiting for a grown-up to say “good job.”
- Permission to fail and retry. A collapsing nest isn’t a mistake; it’s data. That’s the heart of engineering, and it’s a gentler lesson than any worksheet can deliver.
This is also a natural fit for the kindergarten crowd. If you’re searching for Thanksgiving STEM for kindergarten, the same challenge scales up easily with measuring, counting, and recording (the scorecard below handles that). For a wider view of how this fits with other early-years science and engineering, our guide to STEM activities for preschoolers covers the basics of what to expect at each age.
What Kids Are Actually Learning (In Plain English)
You don’t need a lesson plan, but it helps to know what’s hiding inside the play. Here’s what a craft stick building challenge for preschool quietly teaches:
| What they’re doing | What it’s building | How you might say it out loud |
|---|---|---|
| Stacking and crossing sticks | Structural thinking, balance | “Ooh, you made the wall wider at the bottom.” |
| Pressing sticks into a ring or square | Shapes, spatial reasoning | “That’s a circle shape! Will an egg fit inside?” |
| Testing whether the egg stays put | Cause and effect, hypothesis testing | “What do you think will happen if we wiggle the table?” |
| Choosing cotton vs. paper vs. yarn | Material properties (soft, stiff, bumpy) | “Which one feels squishy? Which one feels strong?” |
| Rebuilding after a collapse | Persistence, iteration | “What would you change this time?” |
| Counting sticks used | Early math, one-to-one counting | “You used twelve sticks. Can you do it with ten?” |
| Telling the turkey story | Language, sequencing | “First the turkey laid her egg, then what happened?” |
Your job is mostly asking short questions and resisting the urge to fix things. Drop in a few real words as you go (design, test, sturdy, balance, improve) and kids will use them back within a day or two.
The Challenge in One Sentence
Build a nest from craft sticks and soft materials that keeps one “turkey egg” from rolling away when the table gets bumped.
Everything else is optional. Kids who are ready for more can add a height rule, a weight test, or a “windstorm” from a small handheld fan. The difficulty levels below cover each.
Turkey Nest STEM Challenge: Materials List
I’ve done this with a fancy shopping list and with whatever was in the junk drawer, and the junk drawer version worked just as well. Here’s the realistic list.
The Must-Haves
- Craft sticks (jumbo or regular). Each child gets a kit of 12 sticks, so a 50-pack covers about four children. Jumbo sticks are easier for small hands and stack more predictably.
- Something to hold sticks together. Choose one: white school glue, tacky glue, or painter’s tape. Tape is much less frustrating for younger four-year-olds because there’s no drying time.
- One “turkey egg.” A plastic craft egg or a large wooden egg works well. Pick one that is too big to fit through a toilet-paper tube.
- Soft nest liner. Cotton balls, shredded brown paper, dried grass, scrunched tissue paper, or yarn scraps.
Nice-to-Haves
- A paper plate or tray to build on (keeps glue off the table, mostly)
- Brown, orange, and red pom-poms for decorating after the engineering is done
- A small stuffed or paper turkey to be Mama Turkey
- A ruler or a strip of paper for measuring
- A sheet of paper and crayon for the scorecard
- Painter’s tape to mark a “testing zone” on the table
Skip These
- Hot glue. Adults only, and honestly it takes the thinking out of the process because it sets instantly. If you want a sturdier keepsake nest, hot-glue it yourself after the challenge, while kids are away from the table. Let it cool fully before handing it back.
- Raw eggs. Messy, unsafe for little kids, and unnecessary. A plastic egg tells you everything you need to know.
- Tiny decorative beads or sequins near kids who still mouth things. Keep the small parts big.
Setting Up Without Losing Your Mind
Setup takes under five minutes. Do it before the kids walk in.
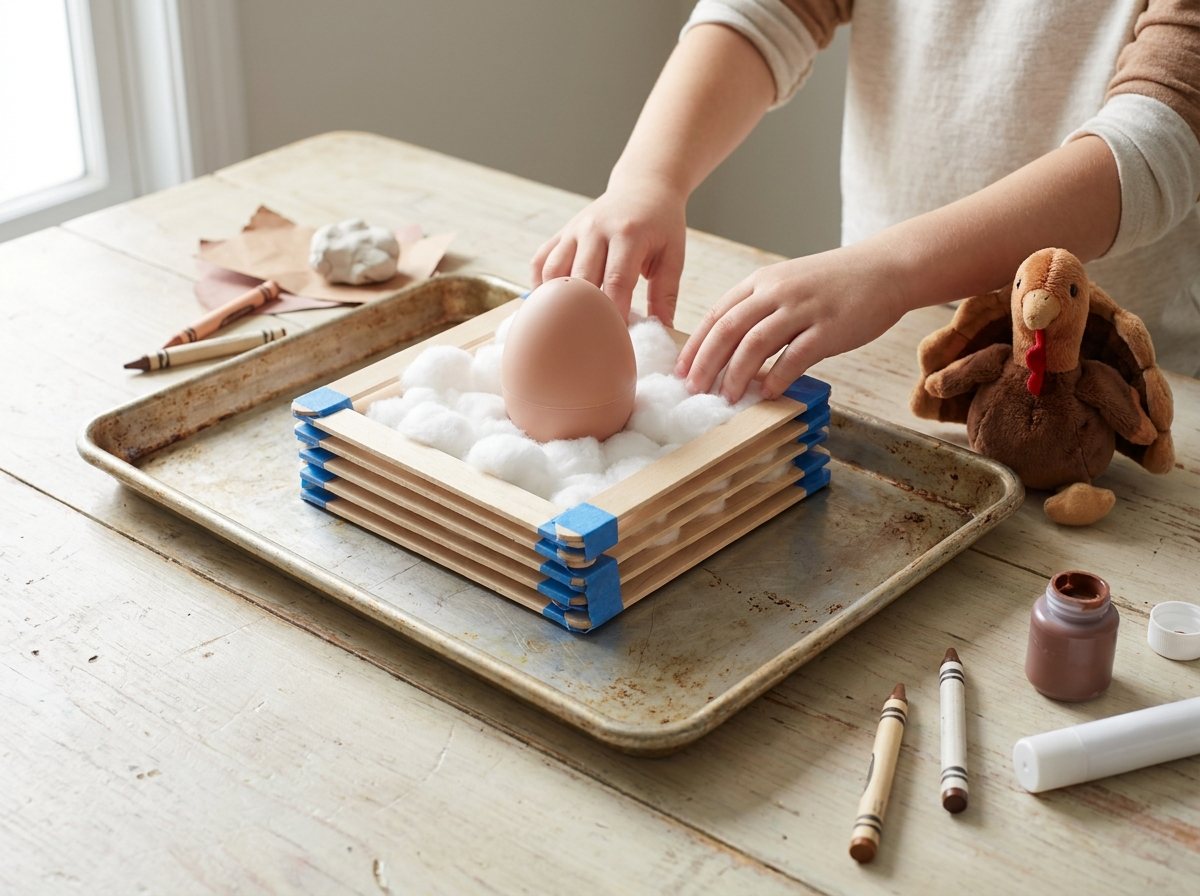
- Pick your building zone. A tray, a cookie sheet with a rim, or a paper plate works nicely. A sheet pan is my favorite because the edge catches errant sticks and cotton balls.
- Sort the materials into little bowls. One bowl for sticks, one for soft stuff, one for tape or a glue dish. When everything is in one pile, kids get overwhelmed and glue gets everywhere.
- Make a “testing spot.” Tape a square on the table or set out a baking sheet. This is where each nest gets tested, and it keeps testing from becoming a free-for-all.
- Introduce the problem as a story. Read the challenge card (below) out loud or paraphrase it. I like to hold up the turkey and do a worried voice.
- Set one rule. Mine is “The egg has to stay in the nest when we bump the table gently.” That’s the whole success criterion.
A Note on Mess (Because You’re Wondering)
With glue, expect sticky fingers and cotton fluff everywhere. Tape cuts the mess a lot. A cheap plastic tablecloth and a damp cloth within reach handle the rest, and in a group, give each child their own tray.
Mama Turkey’s Nest Challenge Card
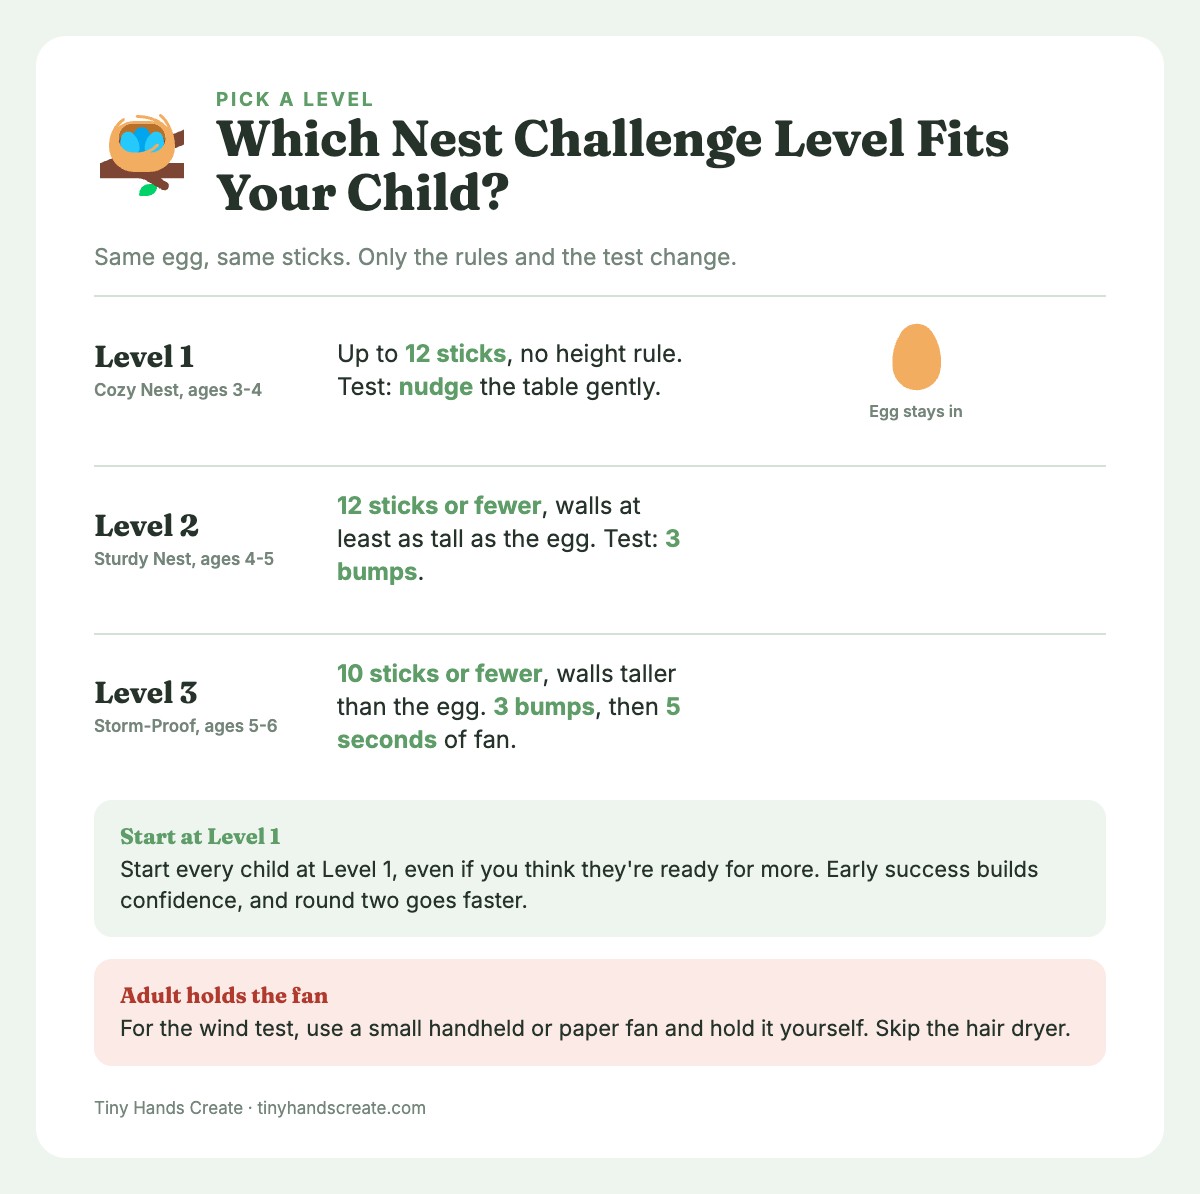
Read this card aloud or jot it on an index card. Preschoolers won’t read it themselves, so treat it as your guide. Kindergarteners can follow along with the numbers. For more challenges in this style, see our preschool STEM activities.
| Level 1: Cozy Nest | Level 2: Sturdy Nest | Level 3: Storm-Proof Nest | |
|---|---|---|---|
| Best for | Ages 3 to 4, first-timers | Ages 4 to 5 | Ages 5 to 6, kindergarten |
| The problem | “Mama Turkey’s egg keeps rolling away. Build a nest to hold it.” | “Mama Turkey wants a nest with walls so the egg can’t roll out.” | “A windy storm is coming! Build a nest that keeps the egg safe.” |
| Sticks allowed | Up to 12 sticks (the kit) | 12 sticks or fewer | 10 sticks or fewer |
| Soft materials | Cotton balls, tissue, or yarn | Pick any 2 kinds | Pick any 2 kinds, one must be used as a cushion layer |
| Height rule | None | Walls at least as tall as the egg | Walls taller than the egg, plus a base wider than the nest |
| Test | Nudge the table gently | Bump the table 3 times | Bump the table 3 times, then an adult blows a small handheld fan on the nest for 5 seconds |
| Win if… | The egg stays in | The egg stays in all 3 bumps | The egg stays in through bumps and wind |
| Extra challenge | Decorate with feathers | Add a roof or a perch | Build a nest that also holds 2 eggs |
TipStart every child at Level 1, even if you think they’re ready for more. Early success builds the confidence to tackle the next level, and the second round always goes faster.
Nest Scorecard and Materials Chart
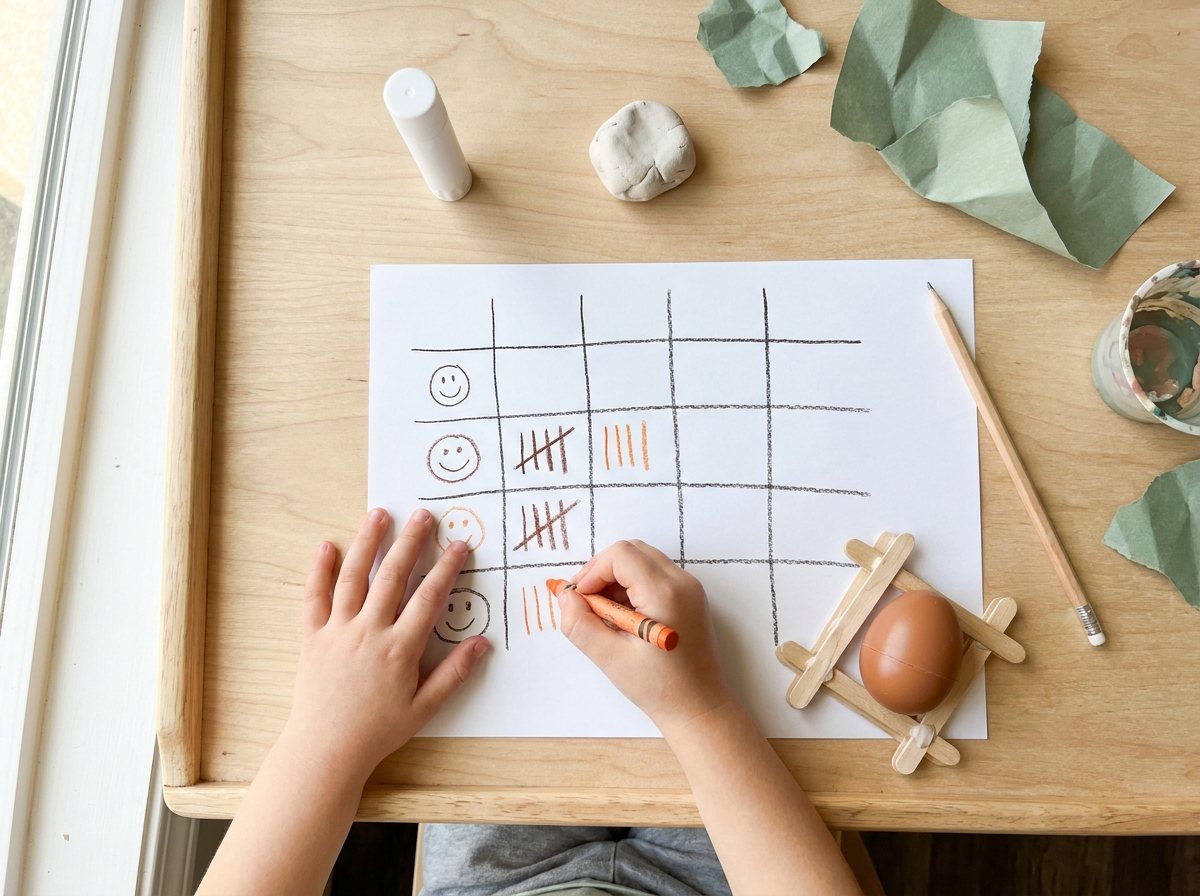
The printable Preschool STEM Challenge Cards & Journal has the same scorecard, so you can print it instead of copying the table by hand. The scorecard turns the activity into a mini science experiment. After each build, kids (or you, writing for them) record what they used and how it went. For preschoolers, I draw smiley faces; for kindergarteners, use numbers and tally marks.
Nest Scorecard
| Nest # | Sticks used | Soft material | How I joined the sticks (glue / tape) | Bumps the egg survived (0 to 3) | Wind test (Level 3 only: stayed / fell) | One thing I’d change |
|---|---|---|---|---|---|---|
| 1 | ||||||
| 2 | ||||||
| 3 |
And here’s a second table for comparing materials, which is where the real STEM thinking happens:
Which Material Works Best? Comparison Chart
| Material | Feels like… | Good for… | Not so good for… | My rating (1 to 5 stars) |
|---|---|---|---|---|
| Craft sticks | Hard, flat, smooth | Walls and the base | Soft cushioning | |
| Cotton balls | Fluffy, squishy | Padding the bottom | Holding up walls | |
| Yarn | Stringy, bendy | Wrapping and tying sticks | Standing up on its own | |
| Scrunched paper | Crinkly, light | Filling gaps | Staying put in wind | |
| Tape | Sticky, stretchy | Quick joins | Fixing mistakes (it tears) | |
| Glue | Wet, then hard | Strong joins once dry | Impatient builders |
Fill in the “Feels like” column together before the build, and the star ratings after. You’ll be surprised how often a child’s rating lines up with what actually worked.
Step-by-Step Instructions
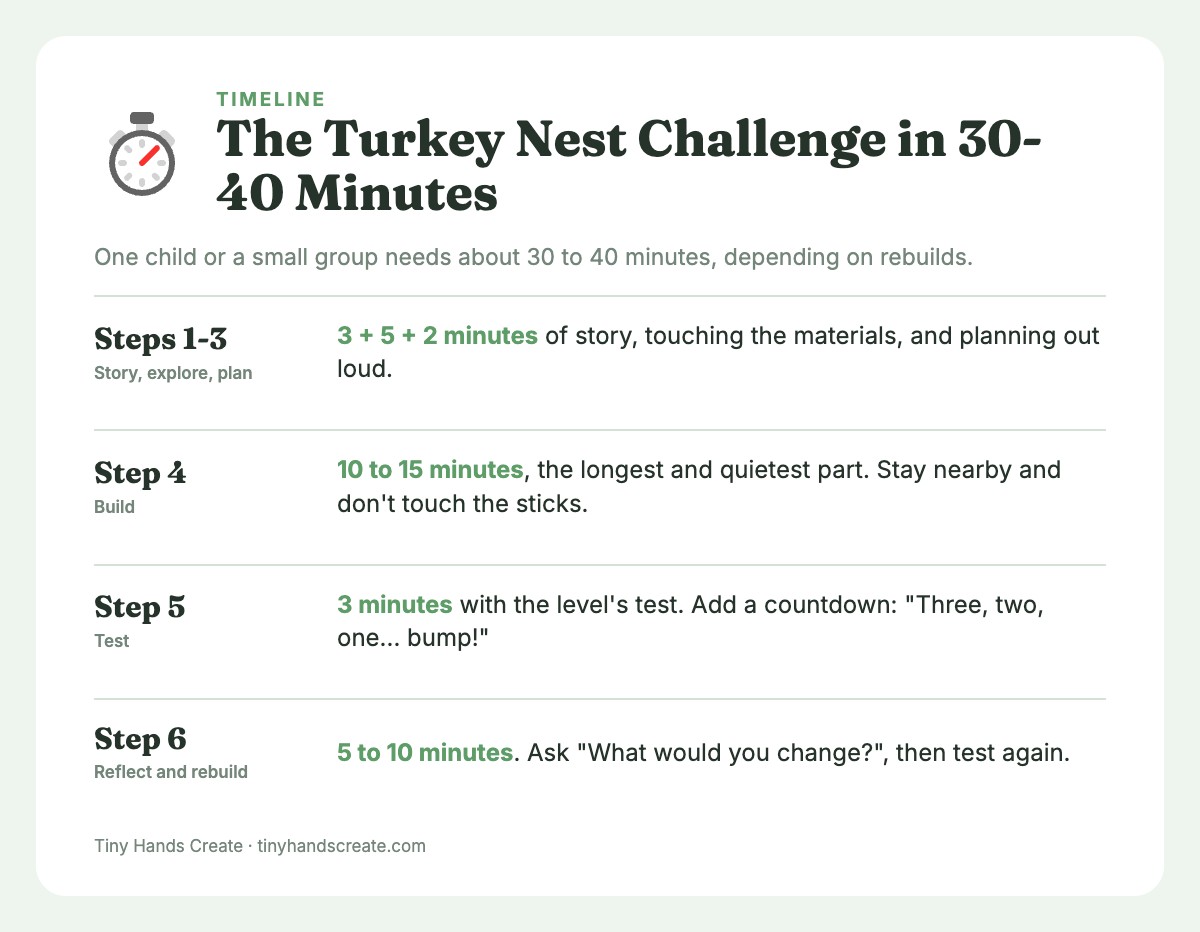
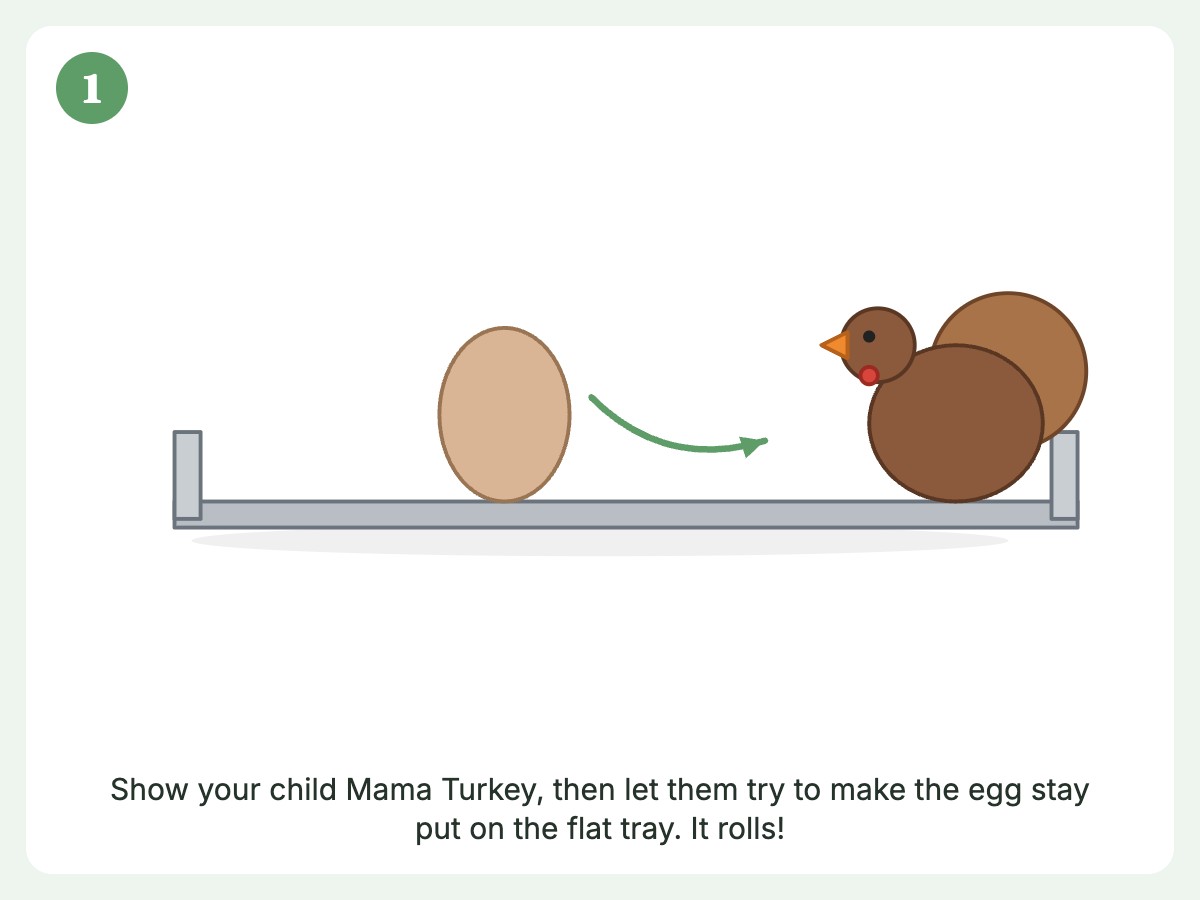
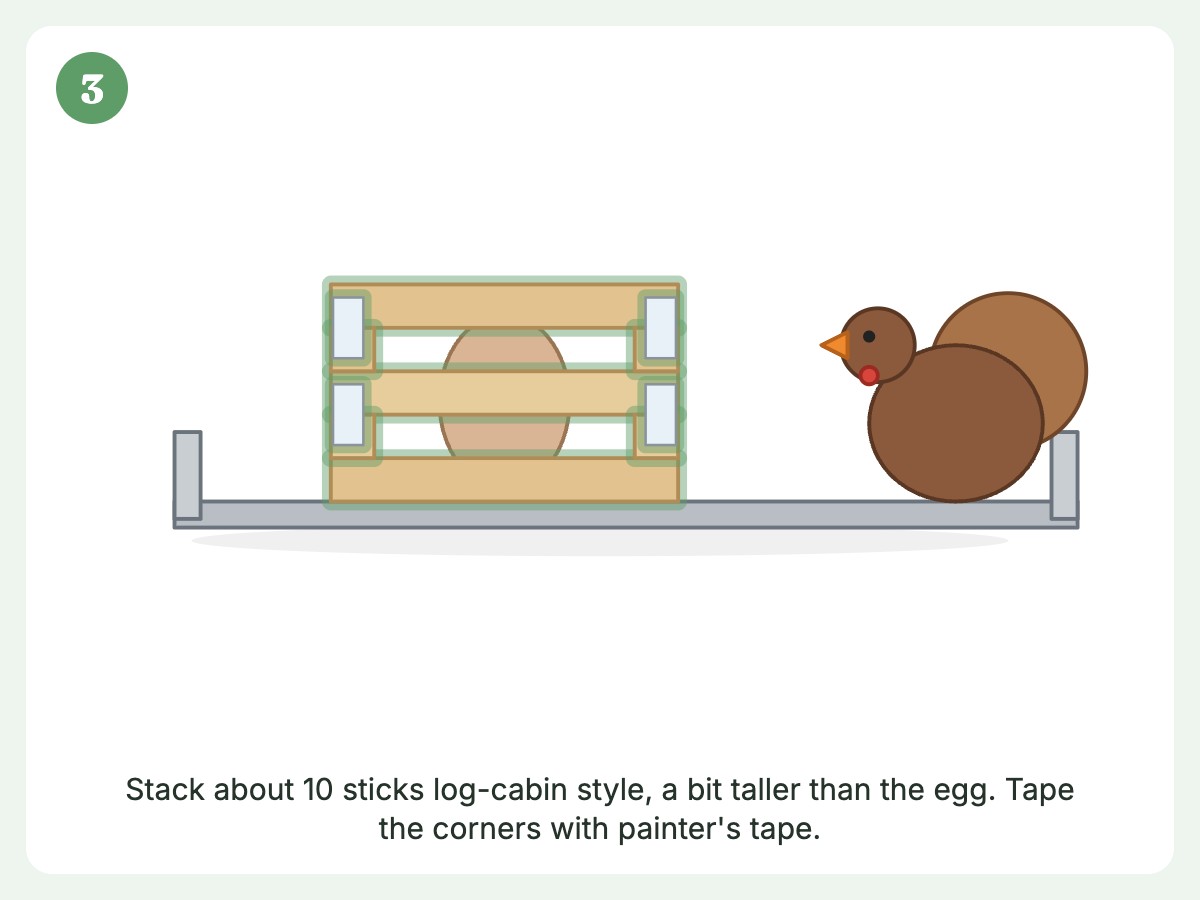
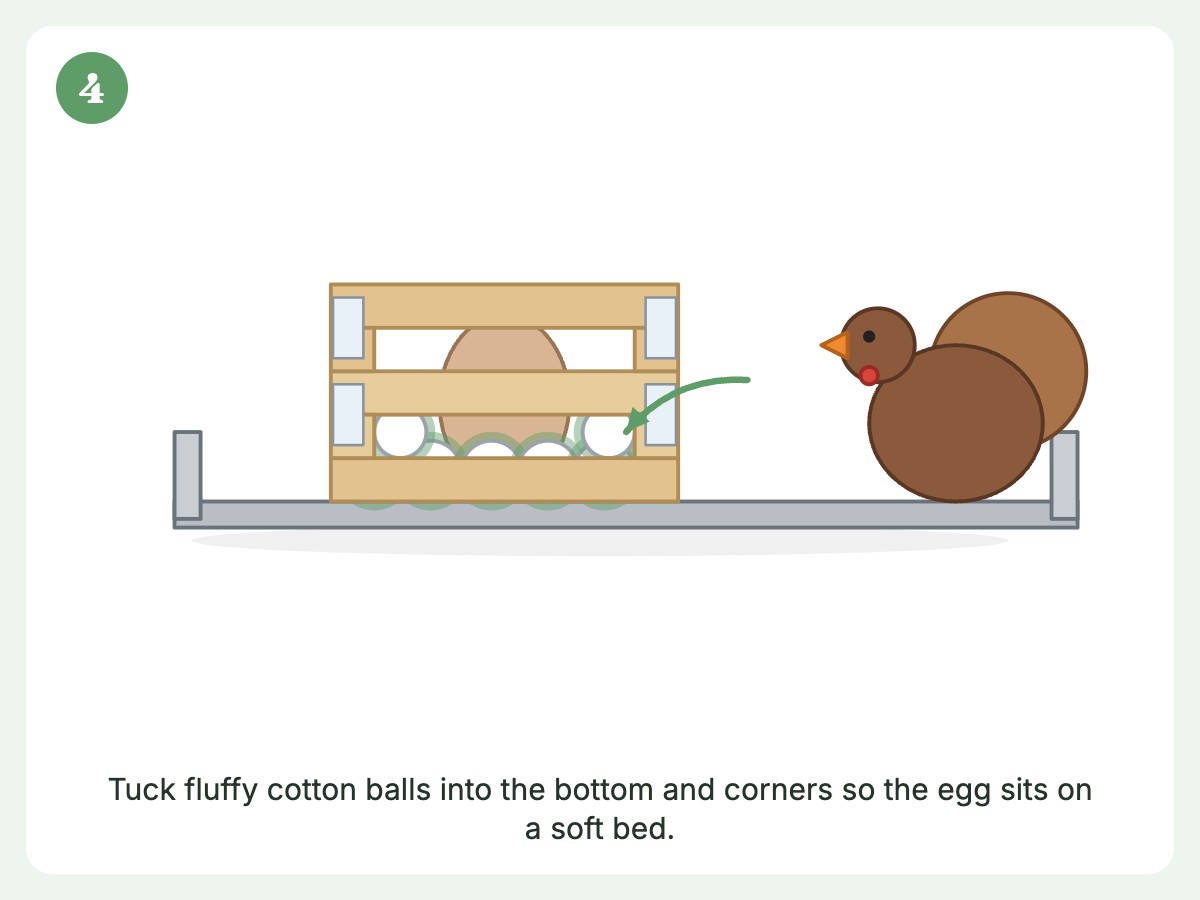
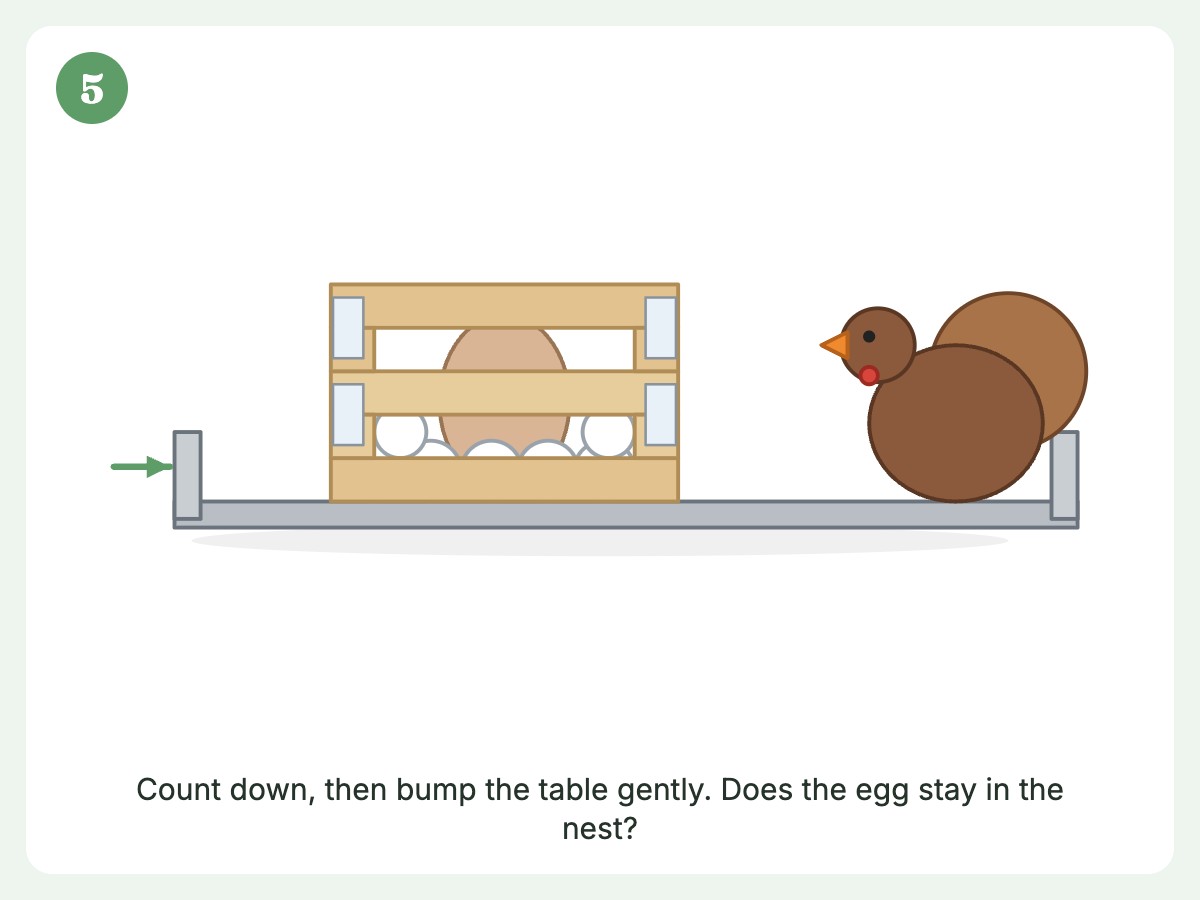
Here’s how I run it from start to finish, with timing. One child or a small group needs about 30 to 40 minutes, depending on how many rebuilds happen.
Step 1: The Story (3 minutes)
Hold up your turkey (a paper cutout, a toy, or even a drawing). Say something like: “This is Mama Turkey. She laid an egg, but she doesn’t have a nest, and the egg keeps rolling off the branch. Can you help her?”
Then hand over the egg and let them try to make it stay put on the flat tray with no help. It rolls. They laugh. Now they understand the problem in their body, not just their ears.
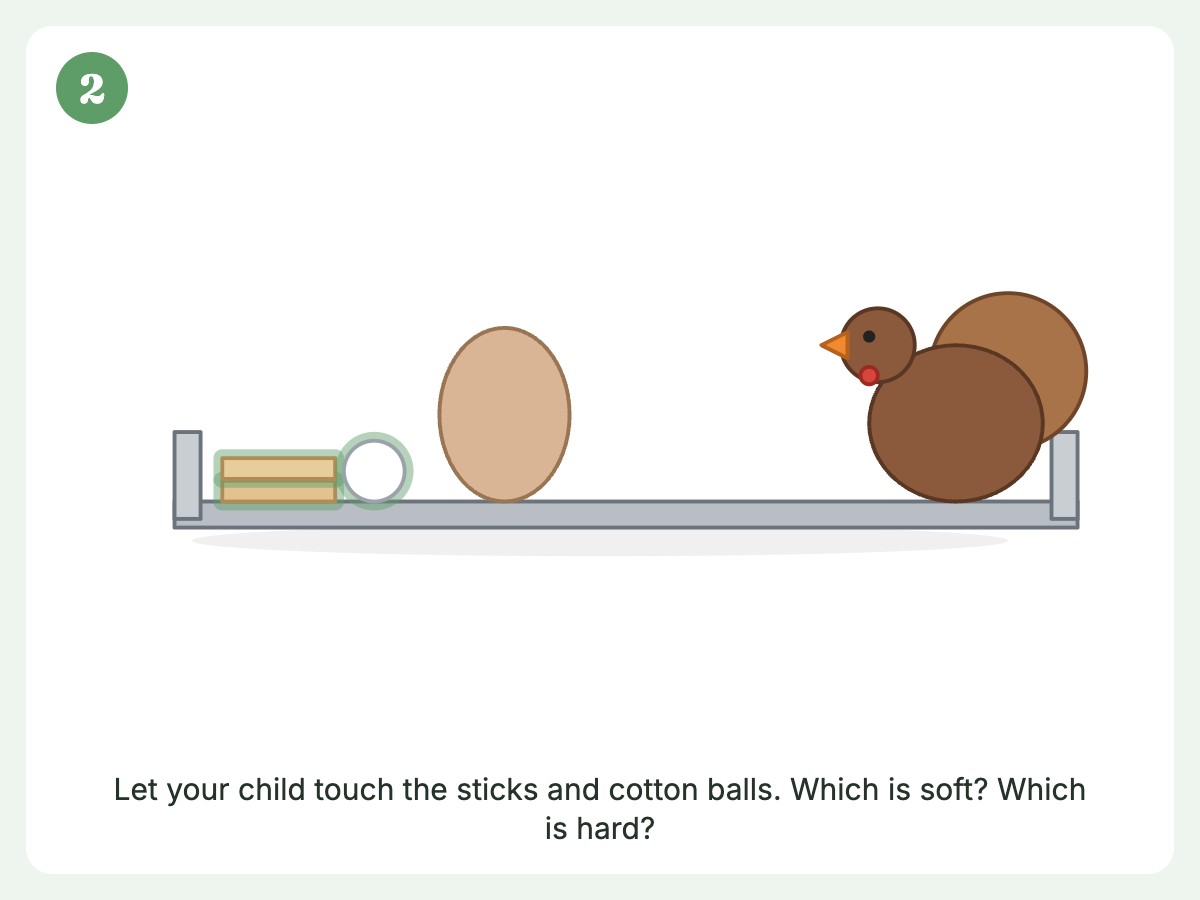
Step 2: Explore the Materials (5 minutes)
Let kids touch everything before they build. Ask:
- “Which one is soft?”
- “Which one is hard?”
- “Which one do you think would keep the egg from rolling?”
Don’t correct wrong guesses. A kid who says “the stick will hold the egg best” is about to discover something about edges and gaps. Let them.
Step 3: Plan (2 minutes)
Preschoolers rarely plan on paper, but they can plan out loud. Ask, “What are you going to build first?” Some will point and describe. Some will say “I don’t know,” which is also fine. Kindergarteners can sketch a quick drawing.
Step 4: Build (10 to 15 minutes)
This is the longest and quietest part. Your main job is to stay nearby, stay curious, and not touch the sticks. Useful things to say:
- “Tell me about what you’re building.”
- “How will you make the egg stay inside?”
- “I notice you put the soft part on the bottom. Why?”
Things to avoid: “No, put it like this,” “That’s not going to work,” and the instinct to quietly adjust a stick when they’re not looking. They always notice.
Step 5: Test (3 minutes)
Place the egg in the nest. Do the test for the level you chose. For Level 1, give the table a gentle nudge. For Level 2, three bumps. For Level 3, add the fan.
Build the drama a little. A countdown helps. “Three, two, one… bump!” Kids love this part, and it becomes the emotional high point of the activity.
Step 6: Reflect and Rebuild (5 to 10 minutes)
Whether the nest passed or not, ask, “What would you change?” Then let them make that change and test again. The second build is almost always better, and that’s the whole point. Mark it on the scorecard so they can see their own progress.
Step 7: Celebrate and Decorate (optional)
Once the engineering is done, bring out the pom-poms and let them make the nest pretty. This is where all the craft-loving kids get their moment. Add a paper turkey on top, glue on some “feathers,” and you’ve got a decoration that doubles as a trophy.
Three Approaches Kids Tend to Take (and How to Respond)
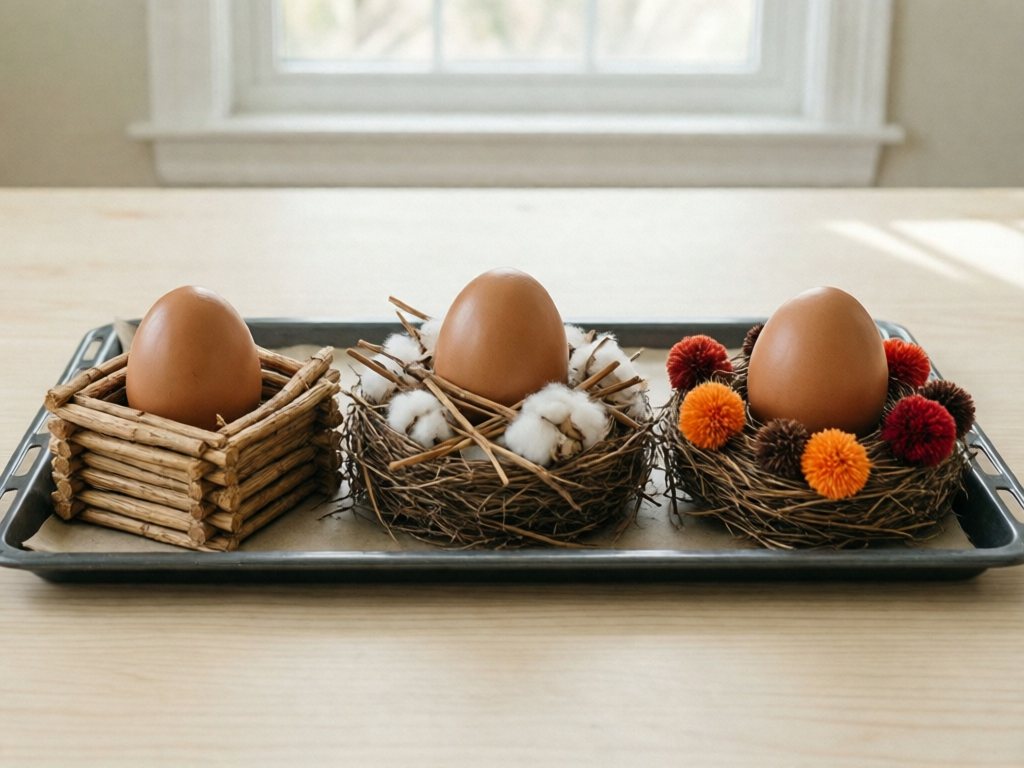
In my house and at a couple of playdates, kids tended to fall into three patterns. It helps to recognize them.
The Wall Builder
This child stacks sticks in a square, log-cabin style, building up and up. Their nests are often sturdy but have gaps at the corners. Ask: “What happens if the egg rolls into this corner?” They’ll often fix it by adding a stick across the gap or stuffing cotton in.
The Pile Maker
This child dumps everything into a heap and puts the egg on top. It looks chaotic, but the egg might actually stay put because it’s nestled in the cotton. Resist the urge to call it messy. Ask, “How does the pile keep the egg safe?” and listen to the answer. Then challenge them: “Can you make it work with fewer sticks?”
The Decorator
This child wants to make the nest beautiful before it’s functional. Let them. After a few minutes, ask, “Does it hold the egg yet?” and suggest a test. The first collapse usually flips them into engineer mode.
All three are doing real engineering. They’re just approaching the problem from different angles.
Making It Harder: Ideas for Older Kids and Mixed Ages
If you’re working with a mixed-age group (hello, siblings), the challenge card’s three levels help. A few additional twists for kindergarten and early elementary:
- Limit the budget. Give each stick a “cost” (a penny, a play coin) and let the child buy only what they need. This sneaks in addition and subtraction.
- Measure the nest. Use a ruler or a strip of paper to compare heights. “Which nest is tallest? Which is widest?”
- Weight test. Place cotton balls one at a time on top of the nest to see how many it can hold.
- Two-egg challenge. Can the nest hold two eggs without them touching?
- Time challenge (ages 7 and up). Set a sand timer for five minutes. Fast building often forces creative shortcuts.
- Partner build. Two kids, one nest, one rule: they have to agree on every stick. It’s a lesson in communication that rivals the STEM content.
For more open-ended ideas in this spirit, our collection of building challenges for kids has plenty of options that use the same basic supplies, and you can rotate through them once the turkey theme wears off.
Making It Easier: Ideas for Younger Builders
For three-year-olds or kids new to this kind of play, adjust down:
- Use a bowl or paper cup as a base. The nest is already half-built, and they only have to line it with soft materials.
- Use tape instead of glue. No waiting, no sticky fingers, immediate feedback.
- Offer fewer choices. Just sticks and cotton balls is plenty.
- Build alongside them. Narrate your own building with simple thoughts: “I’m putting the soft cotton at the bottom so the egg is cozy.”
- Try a rolling test first. Let them see how a bare egg rolls on a flat plate, then on a plate with a crumpled paper ring. The comparison alone is a victory.
Toddlers under three can do a very simple “nesting” play with a basket, fabric scraps or felt squares, large soft pom-poms, and a soft egg bigger than the tube test. Stay within arm’s reach, and skip cotton balls, ping-pong balls, and small craft eggs at this age. It works nicely alongside a fall sensory bin if you want a similar theme without the building part.
Troubleshooting: When Things Go Sideways
Every activity has its hiccups. Here are the common ones and how I handle them.
| Problem | What’s probably happening | Quick fix |
|---|---|---|
| Glue won’t hold sticks together | Too little glue, or sticks moved before it set | Switch to tape, or build on a flat plate and let it dry for 10 minutes before testing |
| Nest collapses instantly | Walls too tall for the base, or no support | Ask, “What if the bottom was wider?” Try a ring base first |
| Egg keeps rolling out | Gaps in the walls, or no soft lining | Add cotton to fill gaps and slow the roll |
| Child gets frustrated and quits | Goal feels too hard | Drop to Level 1, or build a simple version together |
| Child refuses to rebuild | Attached to the first version | Take a photo of the first nest, then say, “Let’s make version two.” Photos make it feel finished |
| Two kids fighting over sticks | Not enough supplies per child | Pre-portion into cups. 12 sticks each, no sharing needed |
| Everything is stuck to the table | Glue everywhere | Parchment paper or a sheet pan under the build. Peels right off |
Adapting for a Classroom, Co-op, or Playdate
If you’re running this for a group, a few things make life easier.
- Pre-portion everything. Zip bags or small paper cups with 12 sticks, 5 cotton balls, and a strip of tape for each child. Level 3 builders use only 10 of their 12 sticks.
- Use a shared test station. One tray with a tape square, where each child brings their nest to be tested by turn. It keeps the energy calm and makes the testing feel like an event.
- Assign “engineer” and “inspector” roles. One child builds, one child tests and records on the scorecard. Switch halfway.
- Plan a gallery walk. After testing, let kids walk around and look at each other’s nests. Ask them to find one clever idea they’d like to borrow.
- Keep extra eggs. At least one will go missing under a table.
For a class of eight to ten kids, plan on 45 minutes: 10 for the story and exploration, 15 for building, 15 for testing and rebuilding, and 5 for cleanup.
Connecting the Challenge to Thanksgiving Week
The turkey STEM activity fits right into a Thanksgiving-week plan. A few ways to weave it in without turning your whole week into a project:
- Before dinner: For kids 4 and up who no longer mouth things, this is a good kitchen-table activity while you cook a few steps away. Under-4s need a grown-up sitting right beside them, so save their turn for when another adult can pull up a chair.
- At the kids’ table: Before the meal, have one adult sit at the kids’ table and set out sticks and cotton at each place. Under-4s get the big-item toddler basket from the Making It Easier section, or skip this one. Clear every stick, cotton ball, and egg off the table before food is served, and move the finished nests to a windowsill where everyone can admire them.
- With cousins: The levels make it easy for a five-year-old and a seven-year-old to work on the same challenge without anyone feeling left out.
- As a decoration: Finished nests make charming decorations on a sideboard or windowsill, up out of toddler reach, especially with a few paper feathers tucked in. Pair them with a printable Thanksgiving placemat for the kids’ table and the whole setup looks intentional.
- As a gratitude prompt: While kids build, ask, “What’s something you feel cozy and safe with?” The answers are wonderful.
What to Do With the Finished Nests
Most nests end up on a windowsill for a week and then in the compost. To keep one:
- Let glue dry fully overnight.
- Brush on a thin layer of diluted glue to stiffen the soft materials, and let it dry fully before kids handle the nest.
- Add a name tag with the child’s name and the date.
- Display on a shelf alongside a paper turkey.
Or take a photo of each child with their nest and print it for the scorecard page. Months later, kids love seeing their own “engineer face.”
A Quick Safety Checklist
Because we’re working with small parts and sticky supplies, a few reminders:
- Keep an adult within arm’s reach of every child under 4 and any child who mouths objects. Cotton balls, pom-poms, ping-pong balls, and small craft eggs are choking hazards, so use an egg too big for a toilet-paper tube.
- Use plastic or wooden eggs, not raw eggs.
- Use hot glue only when kids are away from the table, let it cool fully before handing a nest back, and keep the cord out of reach.
- For the wind test, use a small handheld or paper fan and hold it yourself. Skip the hair dryer.
- Watch for skin reactions to glue, dyes, or scented craft materials, and check for any known sensitivities.
- Clear sticks, cotton, and eggs off the table before any food comes out, and keep finished nests out of toddlers’ reach.
- Wash hands after handling glue and craft materials.
Frequently Asked Questions
What is a good turkey STEM activity for preschoolers?
Build a craft-stick nest that keeps a plastic “turkey egg” from rolling away. It covers engineering (designing and testing), early math (counting and comparing), and fine motor skills. It takes about 30 to 40 minutes with supplies you probably already have.
What age is this Thanksgiving STEM activity best for?
Ages 3 to 6, with the right level: Level 1 for ages 3 to 4, Level 2 for ages 4 to 5, and Level 3 for ages 5 to 6. Seven-year-olds can add the extra twists, and you can run all three levels at one table.
Do I need to use real eggs for the engineering challenge?
No, and I’d avoid raw eggs entirely. A plastic craft egg or a wooden egg works perfectly and lets kids test again and again without cracking anything. Choose one too big to fit through a toilet-paper tube.
How do I keep craft stick building from getting too messy?
Use tape instead of glue for younger kids, build on a rimmed baking sheet or paper plate, and pre-portion the supplies into small cups so nothing gets dumped all at once. If you do use glue, keep a damp cloth nearby and expect some sticky fingers. A cheap plastic tablecloth makes cleanup much quicker.
What if my child gets frustrated when the nest falls apart?
That’s completely normal and actually part of the learning. Normalize it by saying, “Engineers rebuild all the time,” and ask what they would change. Taking a photo of the first attempt can help kids feel it was “finished” so they’re more willing to try version two. If frustration persists, drop down to an easier level or build a simple nest together first.
How can I make this a Thanksgiving STEM activity for kindergarten?
Use Level 3 on the challenge card and add measuring and recording. Kids count sticks, measure nest height with a ruler or paper strip, and fill in the scorecard with numbers or tally marks. A stick budget or two-egg extension adds more challenge.
What can I use instead of craft sticks?
Plenty of things work: twigs from the yard, straws cut in half, pipe cleaners (fold the ends over so no wire pokes out), strips of cardboard, or rolled newspaper “logs.” Keep yarn pieces short, no longer than your hand, and smooth any cut straw edges. Natural materials like small sticks and dried grass give the nest a more authentic look. The challenge stays the same: can it hold the egg through the test?
Let Them Build, Let Them Wobble
The best part of this activity isn’t the finished nest. It’s the moment a four-year-old bumps the table, watches the egg stay put, and looks up at you with total disbelief and pride. That small win, earned through their own hands and a few failed tries, is worth more than any perfectly glued paper turkey. So grab a bag of sticks, put on your best worried-turkey voice, and let your kids show Mama Turkey how it’s done. Expect a little glue on the dog. It’s part of the process.