Felt Finger Puppet Crafts for Toddlers (No-Sew Templates)
This article provides free, no-sew felt finger puppet templates specifically sized for toddlers, so your creations will actually fit their fingers and stay on. You'll get ten designs, a glue-only method, and tips for involving kids.
- Download free, no-sew felt puppet templates perfectly sized for toddlers.
- Craft puppets easily with a glue-only method, no sewing needed.
- Choose from ten fun puppet designs that will actually fit your child's finger.
- Find age-by-age tips to involve your kids in the crafting process.
- Utilize the free printable pack for measuring, steps, and troubleshooting.
This post contains affiliate links. As an Amazon Associate I earn from qualifying purchases.
Last fall I spent forty minutes making the cutest felt bunny finger puppet in the history of felt. On my two-year-old’s pointer finger, it hung off the end like a limp sock, so she shook it across the room and into the dog’s water bowl.
Most templates are drawn for adult fingers, and a puppet that doesn’t fit gets thrown, chewed, or abandoned. This page has toddler-sized templates (free printable pack included), a glue-only method, ten designs, and age-by-age ideas for how kids can help. Prefer to sketch your own? The size table below has every measurement.
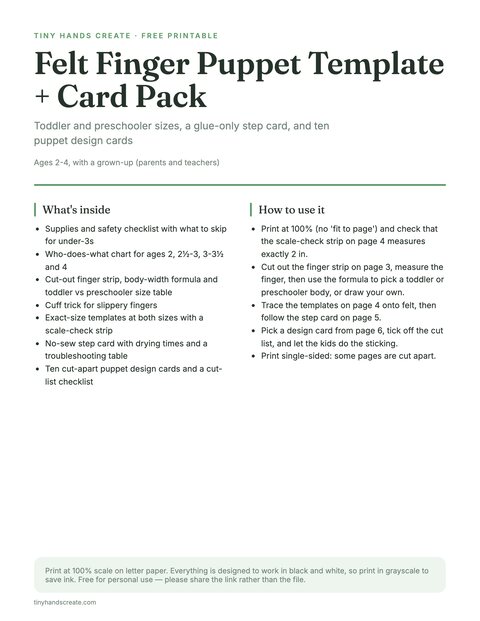
Free printable · 6 pages
Felt Finger Puppet Template + Card Pack
Exact-size toddler and preschooler puppet templates with a finger-measuring strip, size table, cuff trick, who-does-what age chart, no-sew step card, troubleshooting table, cut-list checklist and ten cut-apart puppet design cards.
Free. Your download link appears right here. You'll also join the Daily Printable Drop. Unsubscribe anytime. Privacy
In this article (12 sections)
- Why Felt Finger Puppets Work So Well for Ages 2 to 4
- What to Expect When Toddlers Make Puppets
- What You Need (and What to Skip)
- Felt Finger Puppet Template Sizes for Toddlers (Free Printable)
- How to Make No-Sew Felt Finger Puppets, Step by Step
- 10 Felt Finger Puppet Designs for Toddlers and Preschoolers
- Other No-Sew Ways to Make Finger Puppets
- How to Let Toddlers Help (Without Losing Your Mind)
- Playing With Your Finished Puppets
- Storing, Cleaning, and Keeping Puppets Alive
- Frequently Asked Questions
- Go Make a Wobbly, Wonderful Puppet
Why Felt Finger Puppets Work So Well for Ages 2 to 4
Felt finger puppet crafts hit a sweet spot that a lot of toddler projects miss. They’re a craft and a toy, which means the making is only half the fun.
- Felt is forgiving. It doesn’t fray when you cut it, it doesn’t tear like paper, and it’s soft enough that a messy glue job still looks cute.
- The finished puppet gets played with. A paper plate craft goes on the fridge. A finger puppet goes on a finger, talks in a silly voice, and hides behind the couch cushions. It also fits in a zip bag for waiting rooms and trips to Grandma’s.
- It builds real skills in disguise. Pressing a felt shape onto glue works the pincer grip. Fitting the puppet on a finger is body awareness. Making it “talk” is early storytelling and language.
Puppets are great for those long stretches between nap and dinner. They pair well with our quiet time activities for preschoolers guide, because a finished puppet can anchor a whole afternoon of pretend play.
What to Expect When Toddlers Make Puppets
Let’s set the bar where toddlers actually live. A two-year-old will not cut felt shapes. A two-year-old will probably not glue the eyes in the “correct” spot. A two-year-old may decide the puppet is finished after one big smear of glue and a single felt ear stuck to the side of its head.
All of that is a successful puppet. The goal is a toddler who says “mine!” and wiggles it at you, not a bunny that looks like the picture. I’ll show you where the grown-up does the precision work (cutting and the main glue seam) and where the kid gets to take over (decorating, which is the fun part anyway).
What You Need (and What to Skip)
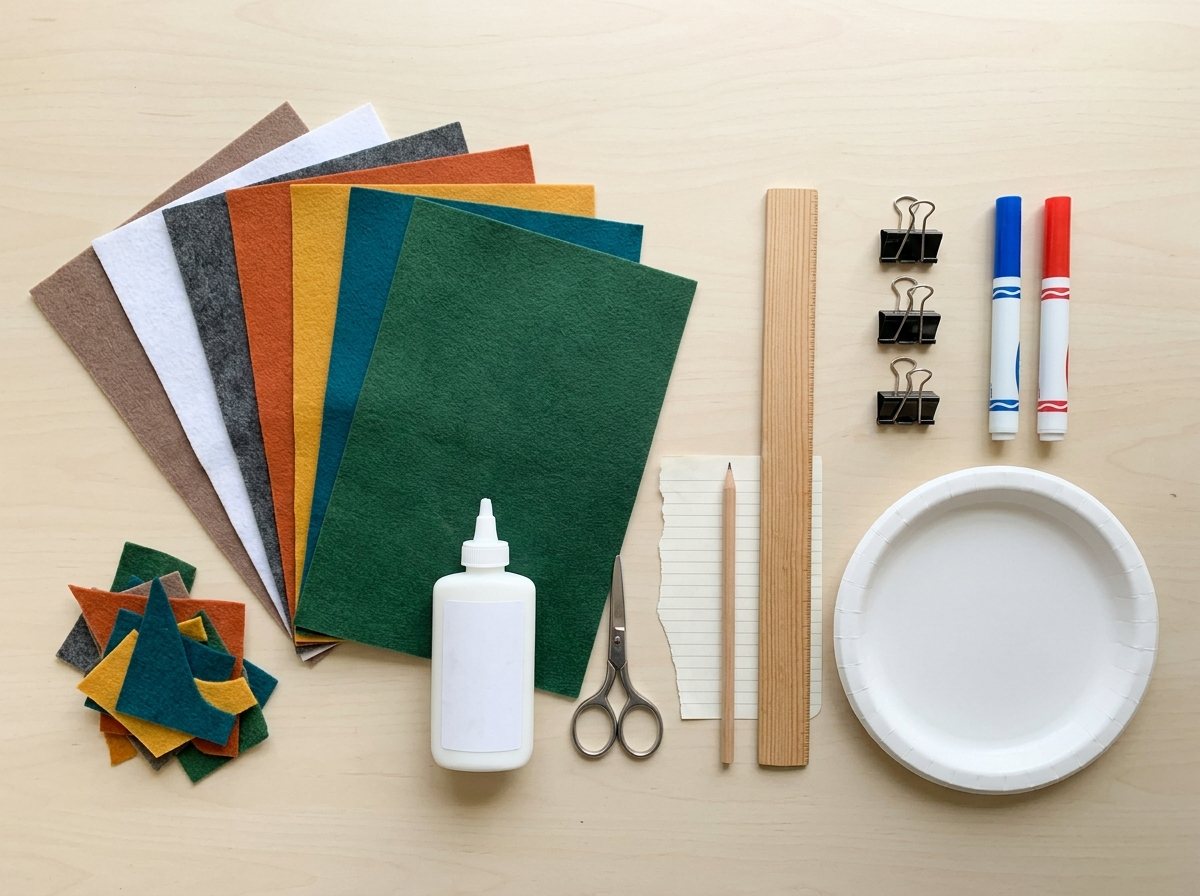
You probably have half of this already. Beyond the craft drawer, a few sheets of basic felt and one bottle of tacky glue are usually all you need to buy.
| Supply | What to get | Why it matters |
|---|---|---|
| Felt sheets | Standard 9 x 12 in craft felt, 6 to 8 colors | One sheet makes 8 to 12 toddler puppet bodies, so you don’t need much |
| Fabric glue or tacky glue | A non-toxic, washable tacky glue (the thick white kind) | Thinner school glue soaks into felt and takes forever to grip |
| Sharp scissors | Small, sharp craft scissors (adult use) | Dull scissors chew felt and leave fuzzy edges |
| Paper and a pencil | Any scrap paper | For tracing your templates and for the finger-measuring trick below |
| Ruler | Standard, with inches or cm | For checking template sizes |
| Felt scraps | Whatever’s left over | Eyes, noses, ears, cheeks, and tiny details |
| Binder clips or clothespins | A handful | Hold the glued seam while it dries so you don’t have to |
| Washable markers | Optional | Drawing on eyes and whiskers the quick way |
| Paper plate or scrap cardboard | One per kid | A glue-and-felt-bits “workstation” that contains the chaos |
What to Skip for Toddlers
A few popular add-ons are not great for little hands, and I’d leave them out:
- Googly eyes and pom-poms. They’re small, they pop off, and they’re the right size to be a choking hazard for kids who still mouth things. Felt circles are less likely to pop off, but any small piece can peel, so for under-3s a dot drawn with washable marker is the safest option. If you use felt for under-3s, cut each piece at least ¾ inch across and glue it very firmly.
- Buttons and beads. Same reasoning. If a toddler is going to wear the puppet on their finger and then wave it near their mouth, everything on it should be flat and glued down firmly.
- Hot glue guns in kid hands. If you want a stronger bond, you can use hot glue yourself while kids are out of the room, but for the kid-involved version stick to tacky glue.
- Glitter. I love glitter. I also still find it in my car from a project eighteen months ago. Skip it unless you’re feeling brave.
Safety firstSupervise the whole time. For children under 3, draw eyes, noses, whiskers, and other small details with washable marker. Glue every felt piece firmly and check it before each use; if a piece peels off, re-glue or toss it. Never leave a puppet on a finger if it feels tight, and take it off right away if it leaves a mark or the fingertip changes color.
Felt Finger Puppet Template Sizes for Toddlers (Free Printable)
This is the part most generic puppet templates get wrong. A standard “finger puppet” pattern assumes an adult finger, which is roughly 2 to 2¾ inches around. A toddler’s pointer finger is often around 1½ to 1¾ inches (always measure your own child). Cut a puppet for the wrong finger and you get the flying-bunny situation from my intro.
Step One: Measure the Actual Finger
You don’t need a tape measure. Try this:
- Cut a thin strip of paper, about ¼ inch wide and 4 inches long.
- Wrap it once around the middle of the finger the puppet will go on (usually the pointer, but middle fingers work well too).
- Pinch the spot where the paper overlaps, slide it off, and lay it flat against a ruler.
- That length is the finger circumference. Write it down.
Step Two: Use This Formula for the Body Width
Good to knowBody width = (finger circumference ÷ 2) + ½ inch
That extra half inch is “ease,” the breathing room that lets the glued puppet slide on and off without a fight. For example, a toddler with a 1½ inch finger gets a puppet body about 1¼ inches wide. A four-year-old with a 2 inch finger gets one about 1½ inches wide.
If you’d rather skip the math, here’s the cheat sheet.
The Template Size Table
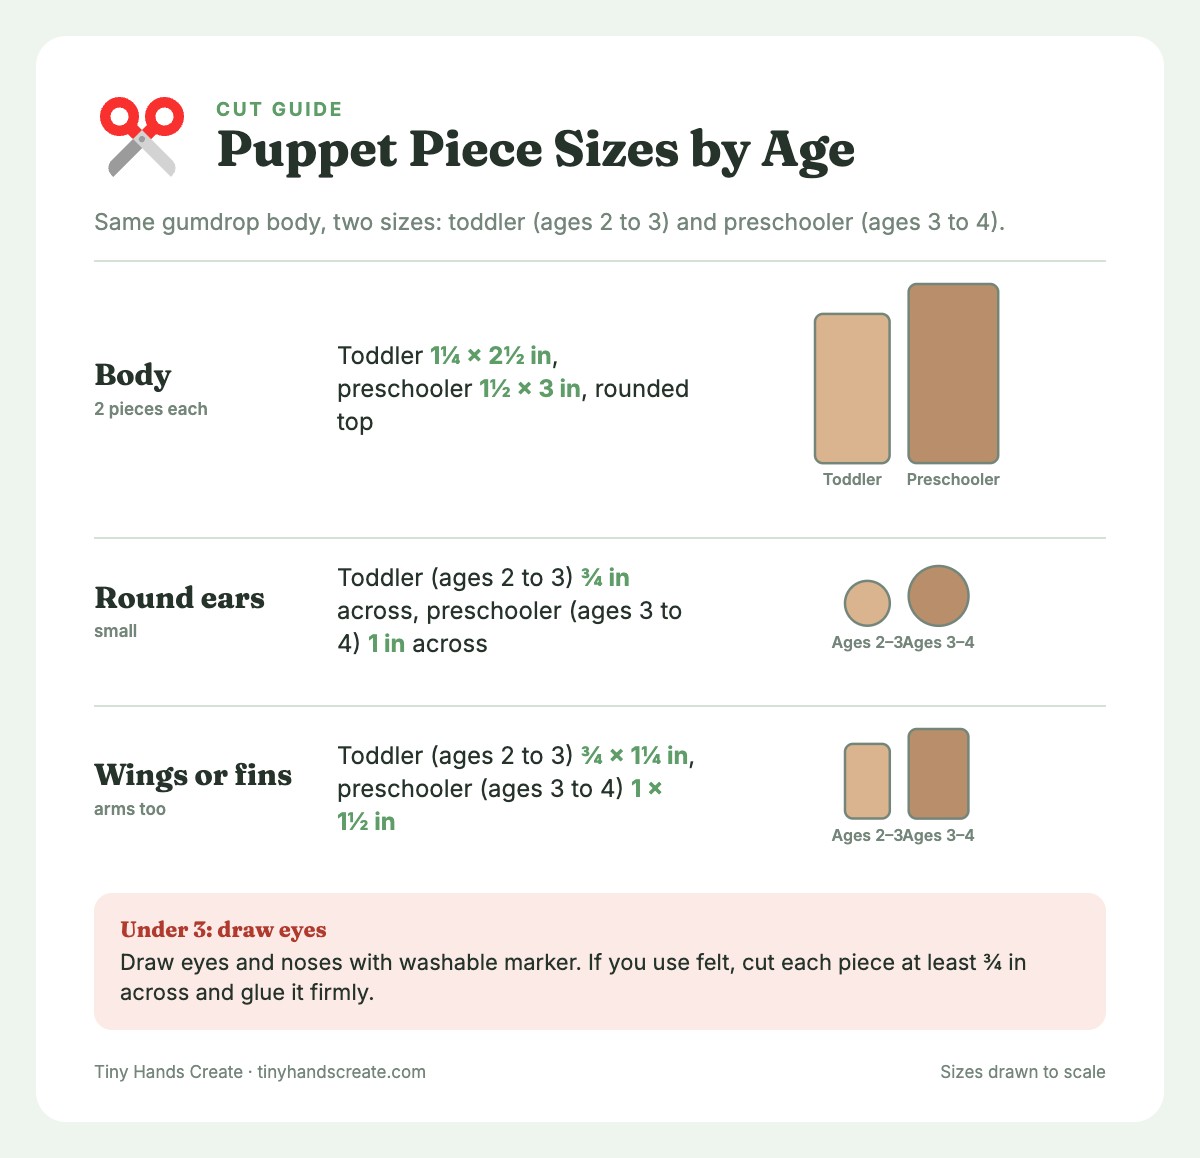
| Template piece | Toddler (ages 2 to 3) | Preschooler (ages 3 to 4) |
|---|---|---|
| Approximate finger circumference | 1½ to 1¾ in (3.8 to 4.4 cm) | 1¾ to 2¼ in (4.4 to 5.7 cm) |
| Body width (each of 2 pieces) | 1¼ in (3.2 cm) | 1½ in (3.8 cm) |
| Body height | 2½ in (6.4 cm) | 3 in (7.6 cm) |
| Top of body | Rounded, like a gumdrop | Rounded, like a gumdrop |
| Round ears (small) | ¾ in (1.9 cm) across | 1 in (2.5 cm) across |
| Pointy ears (triangle) | ¾ in wide, 1 in tall | 1 in wide, 1¼ in tall |
| Eyes (felt circles) | Draw with washable marker (under 3). If using felt, cut at least ¾ in and glue firmly. | ½ in (1.3 cm) across; check for lifting edges before each use |
| Nose (small circle or triangle) | Draw with washable marker (under 3). If using felt, cut at least ¾ in and glue firmly. | ½ in (1.3 cm); check for lifting edges before each use |
| Cheeks or tummy patch | ¾ in (1.9 cm) circle | 1 in (2.5 cm) circle |
| Wings, arms, or fins | ¾ in wide, 1¼ in tall | 1 in wide, 1½ in tall |
| Glue seam allowance | ⅛ in along each side | ⅛ in along each side |
| Wrap-around cuff (alternate style) | 2¼ in long x ¾ in tall | 2¾ in long x 1 in tall |
How to use it: The body is the big piece, and the small pieces in the table are the decorations. A whole puppet-making kit takes about ten minutes.
- Draw the body. Sketch the rectangle on scrap paper at the size you need.
- Round the top. Snip off the top corners so it looks like a gumdrop, then cut it out.
- Trace twice on felt. You need a front and a back piece.
- Cut the small pieces. Trace and cut a few of each decoration at once.
A tip that saves a lot of cutting: stack two sheets of felt, trace once, and cut through both layers. You get matching front and back pieces in a single pass.
The Quick “Cut-List” Checklist
Copy this onto a sticky note for your craft station (the template pack has print-ready versions too). It’s the cut list for one basic animal puppet.
- 2 body pieces (same size, rounded top)
- 2 ears (round or pointy, depending on the animal)
- 2 eyes (felt circles), or draw them with washable marker for under-3s
- 1 nose (drawn on for under-3s)
- 1 tummy or cheek patch (optional)
- Any extras: tail, wings, whiskers, mane
For a set of five puppets (a nice number for a story, and a solid afternoon of crafting), multiply the body count by five and cut the decorations as you go. Having every piece pre-cut, with the little bits sorted in a muffin tin, is what turns a chaotic craft into a calm one.
Two Sizes in One Session
If you have a toddler and a preschooler (or you’re making puppets for a playdate with mixed ages), cut both sizes and let each kid pick. In my experience, older siblings feel proud when they get the “bigger kid” size. And the smaller size makes a perfect puppet for a doll or a stuffed animal who needs a pet.
How to Make No-Sew Felt Finger Puppets, Step by Step
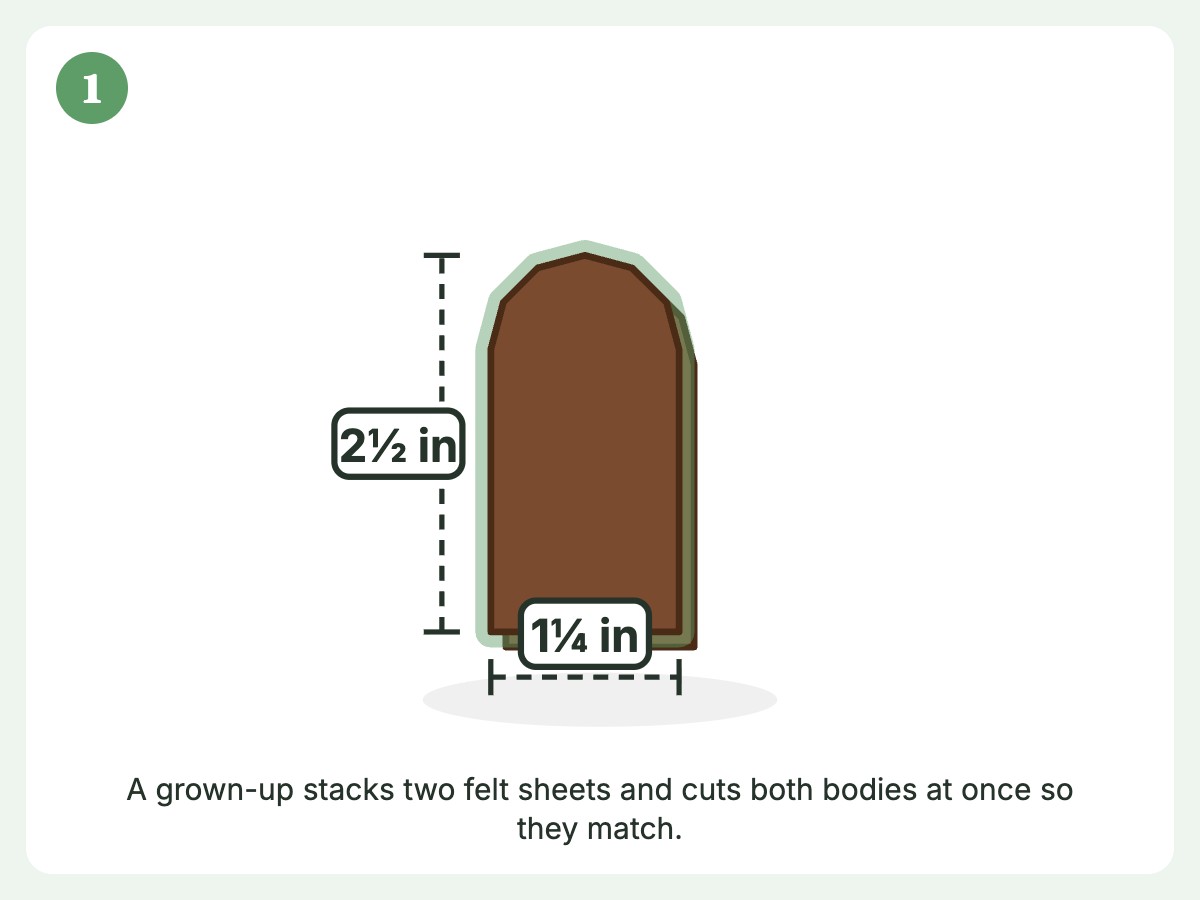
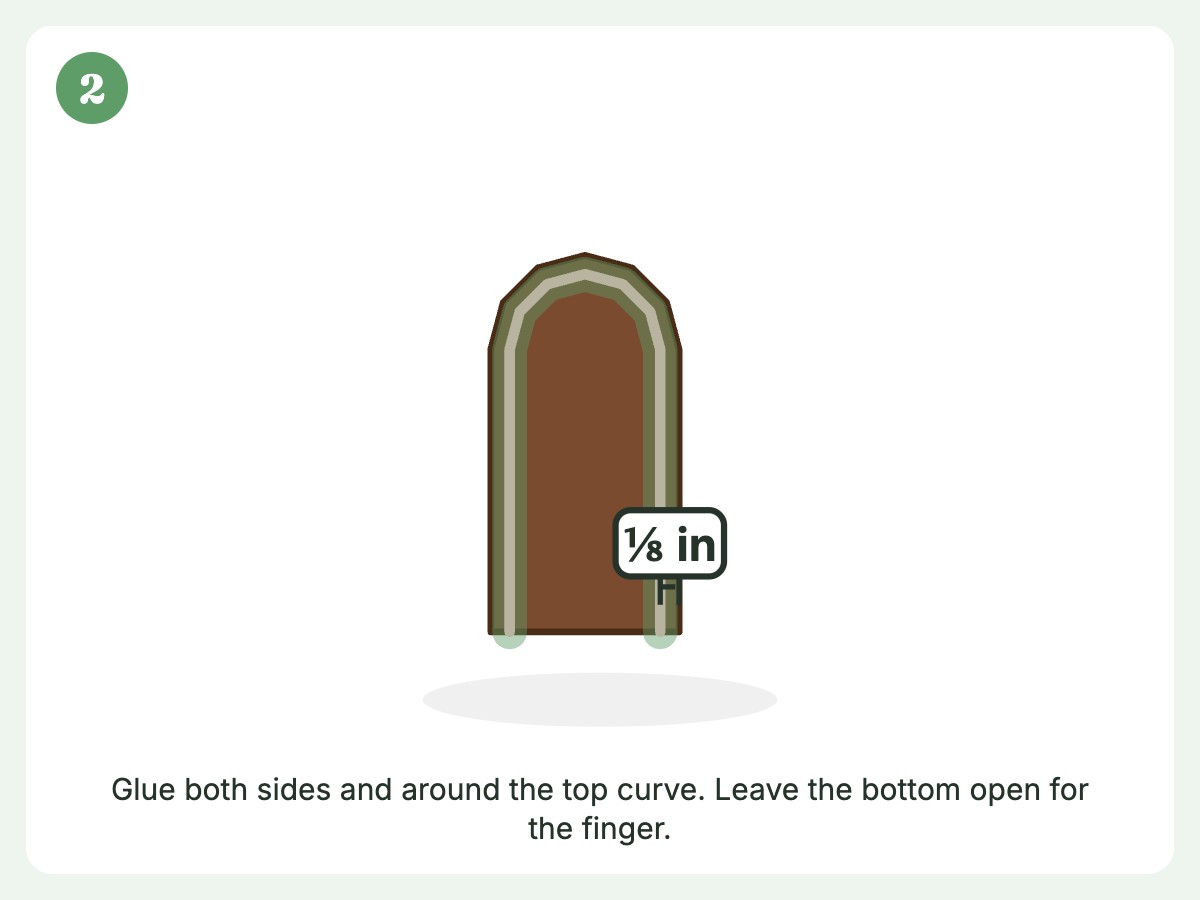
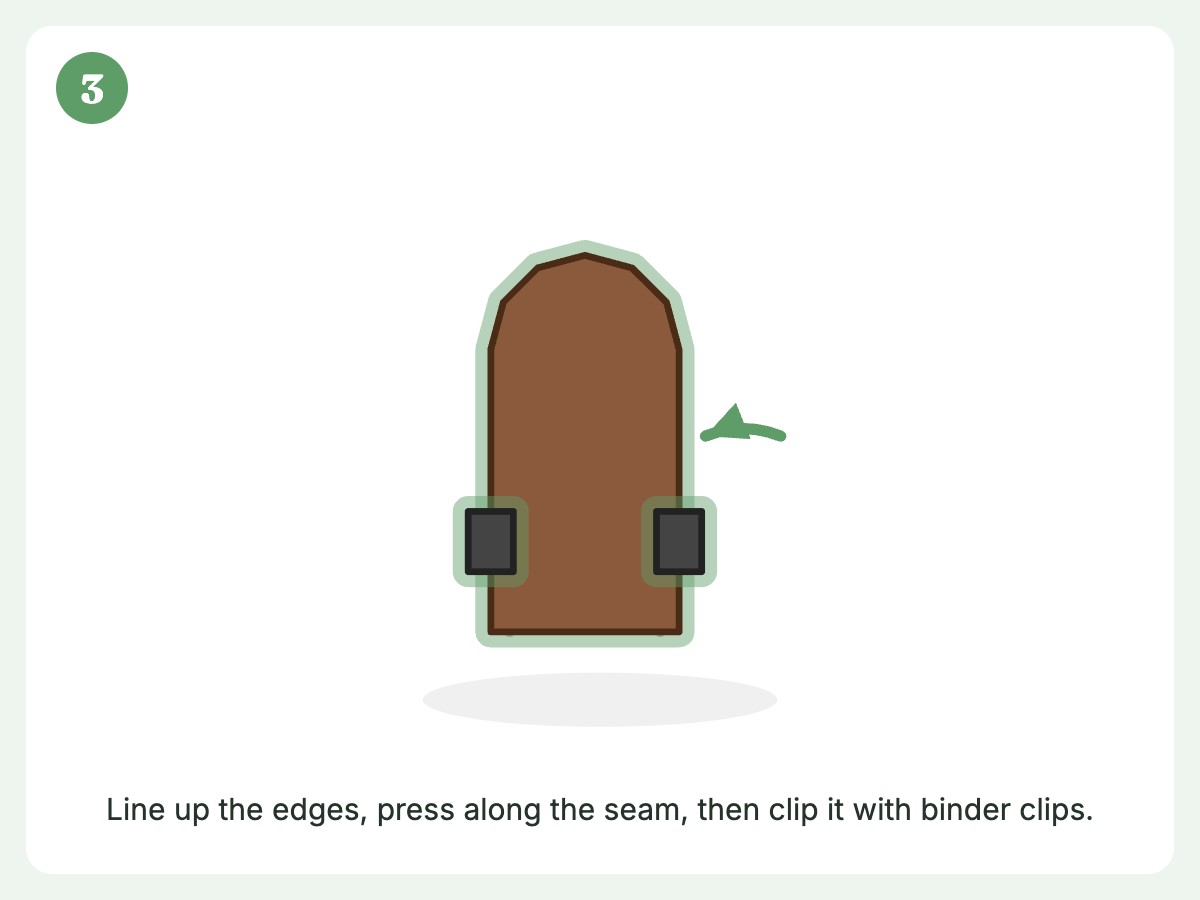
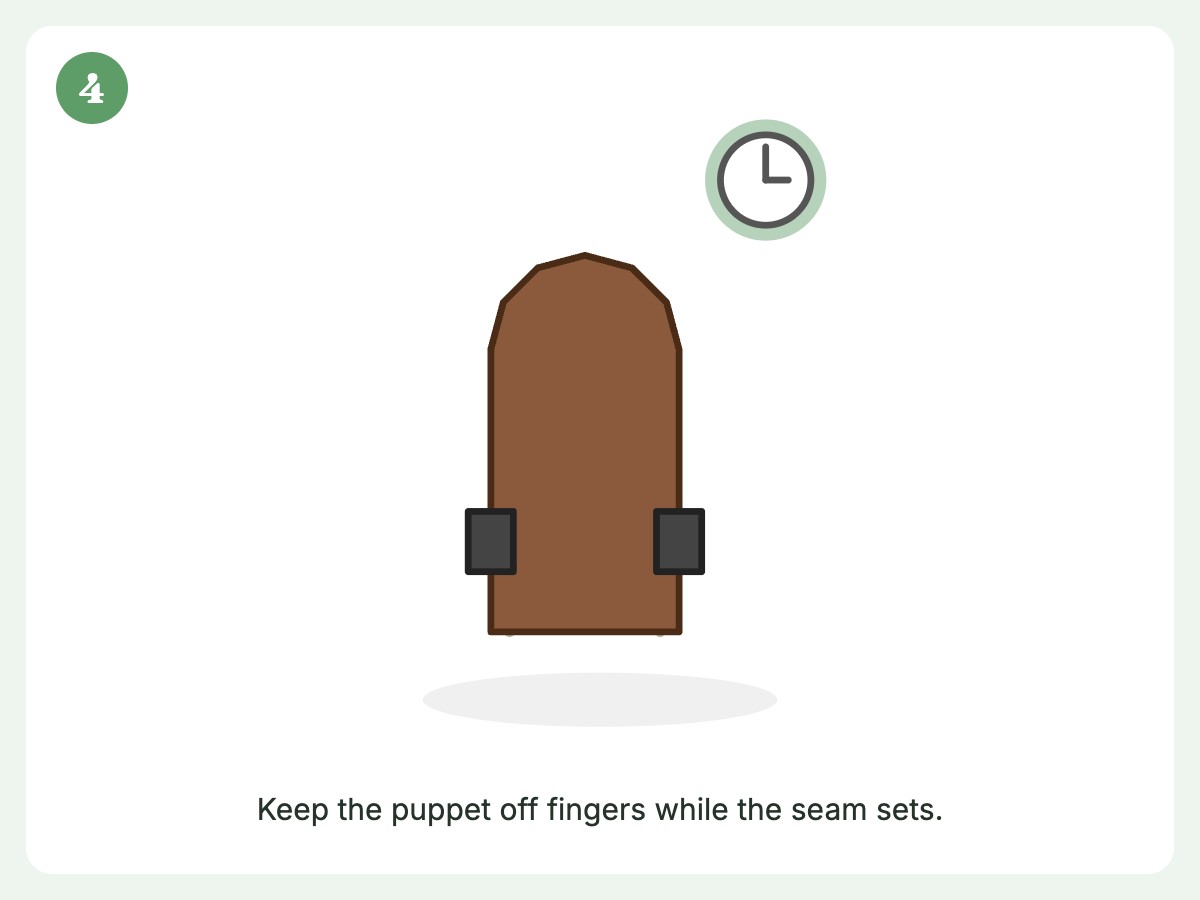
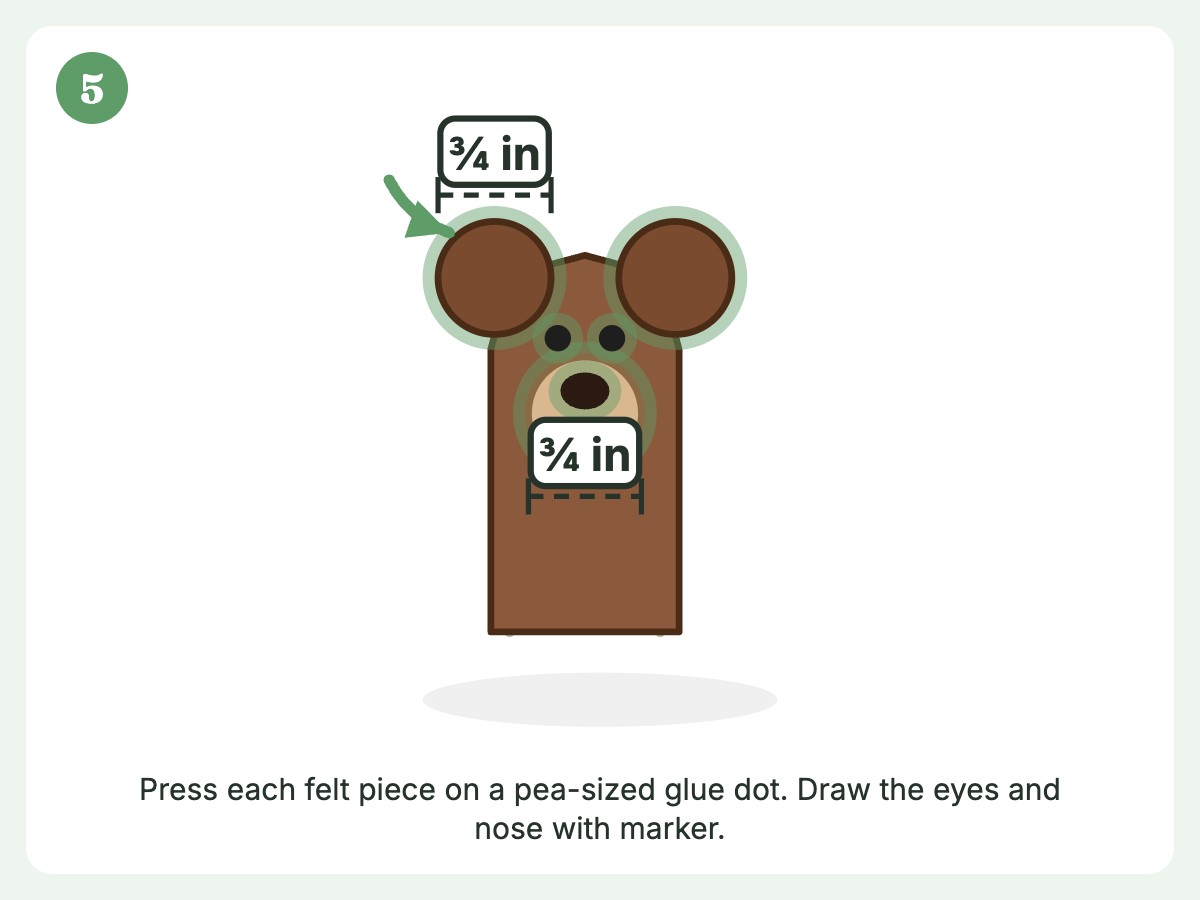
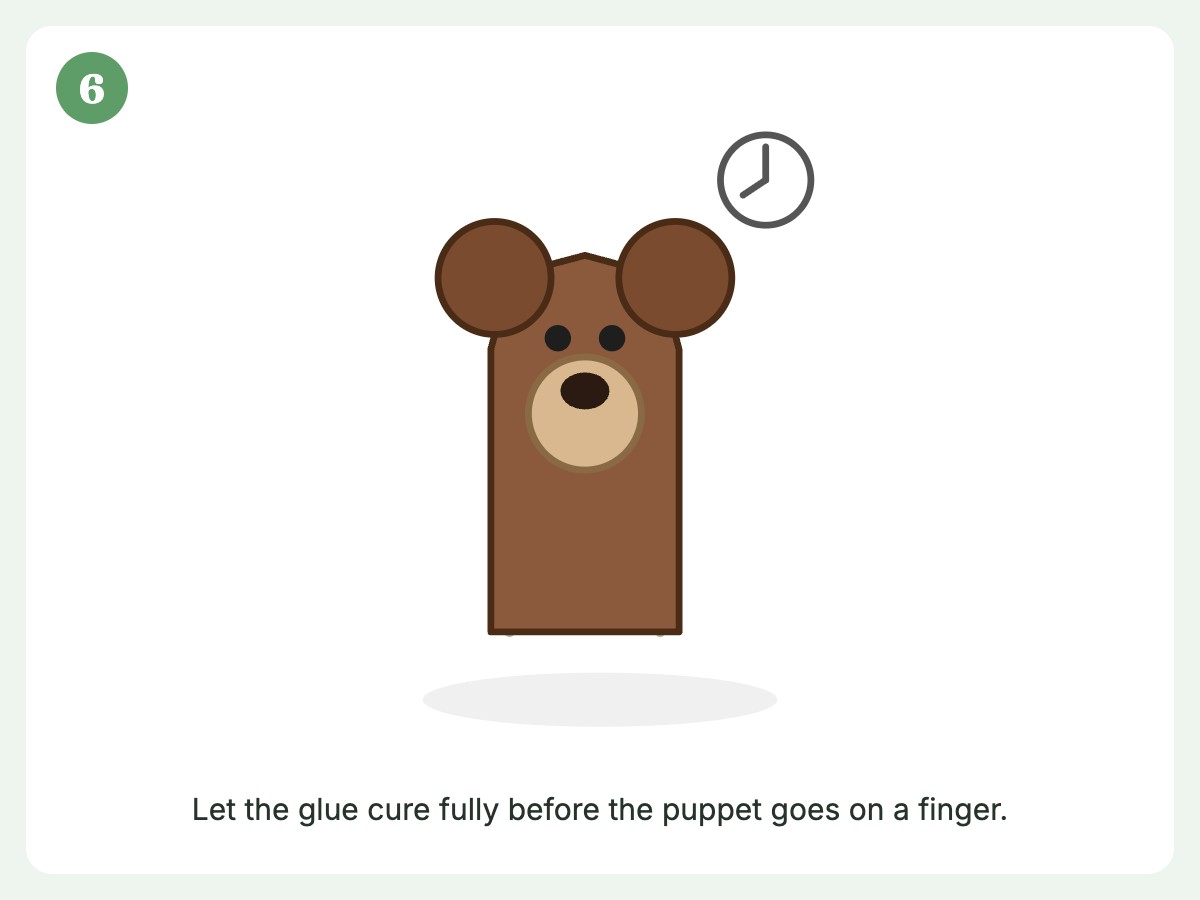
This is the base method. Every design in the next section is a small variation on it.
- Cut the body pieces. Two matching felt rectangles with a rounded top, using the size from the table.
- Decide who does what. Grown-up cuts the bodies and the tiny details. Kids do the sticking.
- Apply glue to the sides. Put a thin line of tacky glue along the left, right, and (optionally) top curve of one body piece, about ⅛ inch from the edge. Leave the bottom open. That’s where the finger goes.
- Press the second piece on top. Line up the edges and press gently along the seam. Felt shifts a little, so check the bottom edge before you walk away.
- Clip it. Use binder clips or clothespins on the seam, or just press it between a heavy book and the table for a few minutes.
- Let the seam set. Give it about 30 minutes before decorating. This is not the wearing time (see step 8), so keep the puppet off fingers for now.
- Decorate. Now the kids can add ears, eyes, noses, and whatever else. Use dots of glue, not smears; a pea-sized blob goes a long way. For under-3s, draw the eyes, nose, and other small details with washable marker instead.
- Dry again. Leave the finished puppet at least 1 hour before it goes on a finger, and ideally overnight before toddler play, because tacky glue keeps curing.
The “Wrong Way” That Works Anyway
I should be honest about what actually happens with toddlers at the table. A toddler will often put glue on the outside of the body, stick the eyes on crooked, and decorate before the seam is dry. Their puppet will look like it lost a fight with a glue bottle.
Here’s what I do: I let it happen. If the puppet is wobbly, I quietly re-glue the seam after the kid has gone to bed (or after they’ve moved on to the playdough). The craft stays theirs, the puppet works, and nobody has a meltdown about “doing it wrong.”
Troubleshooting Table
| Problem | Likely cause | Fix |
|---|---|---|
| Seam peels apart | Too little glue, or glue wasn’t allowed to set | Re-glue, clip, and leave it for a full hour |
| Puppet slides off the finger | Body is too wide for that finger | Make a smaller body, or add a cuff (see below) |
| Puppet is too tight | Seam allowance too wide, or felt is thick | Take it off right away and never leave a tight puppet on a finger. Trim the seam edge or cut a slightly wider body next time. If the fingertip looks pale, purple, or swollen and doesn’t recover quickly, call your pediatrician. |
| Glue soaked through the felt | Too much glue, or the glue is too thin | Use thick tacky glue, apply a thin line, and blot extras |
| Decorations keep falling off | Not enough drying time or too little glue | Re-glue with a pea-sized dot, press for 10 seconds |
| Felt edges look fuzzy | Dull scissors | Switch to sharp craft scissors, and cut in one smooth motion |
| Eyes ended up on the nose | Toddler artistic license | Embrace it. Name the puppet “Gerald.” |
10 Felt Finger Puppet Designs for Toddlers and Preschoolers
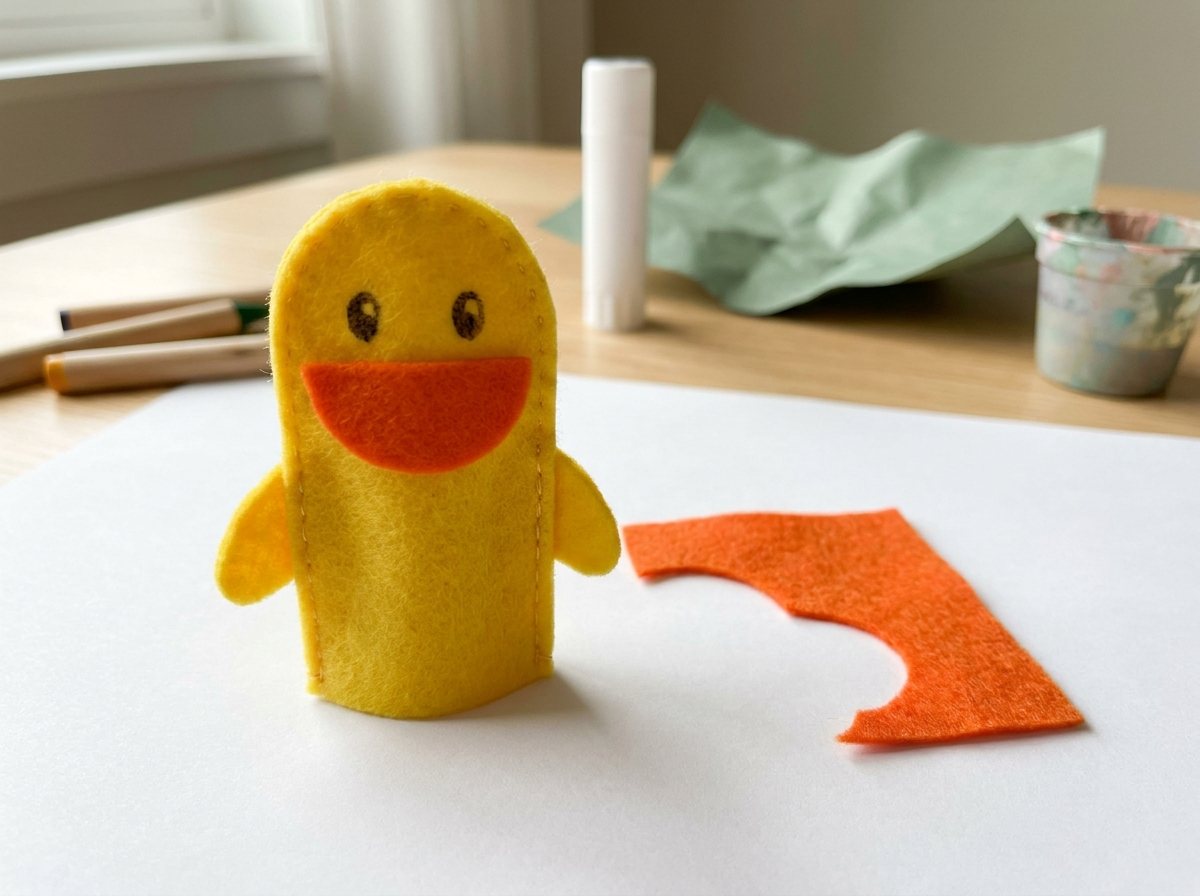
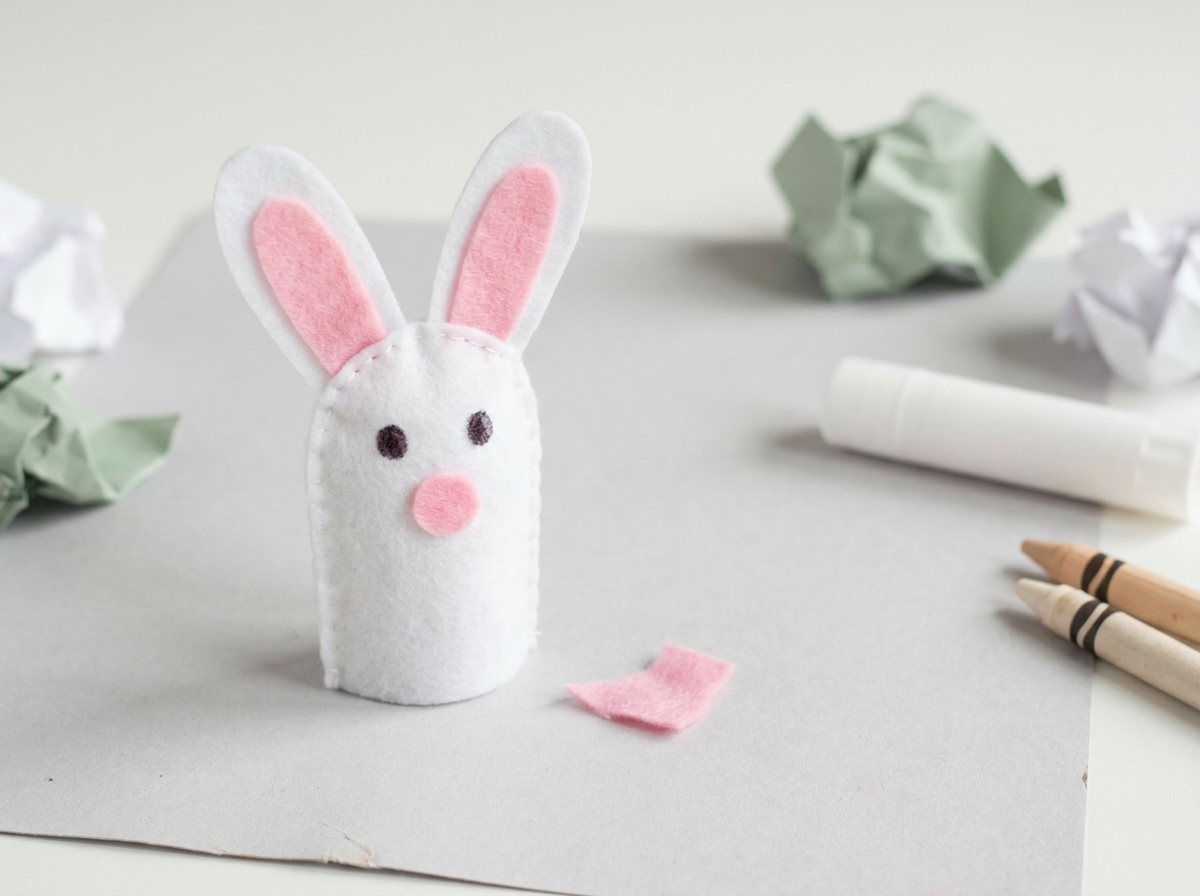
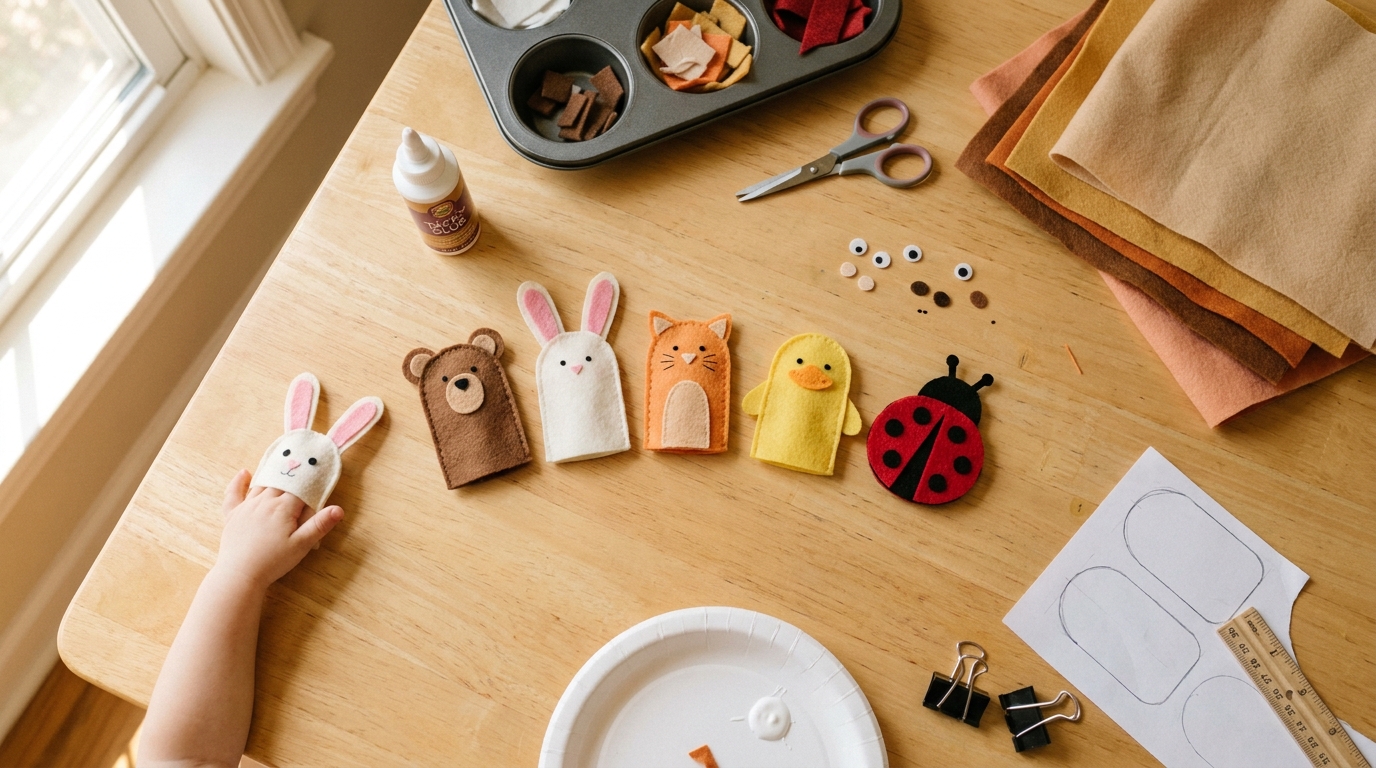
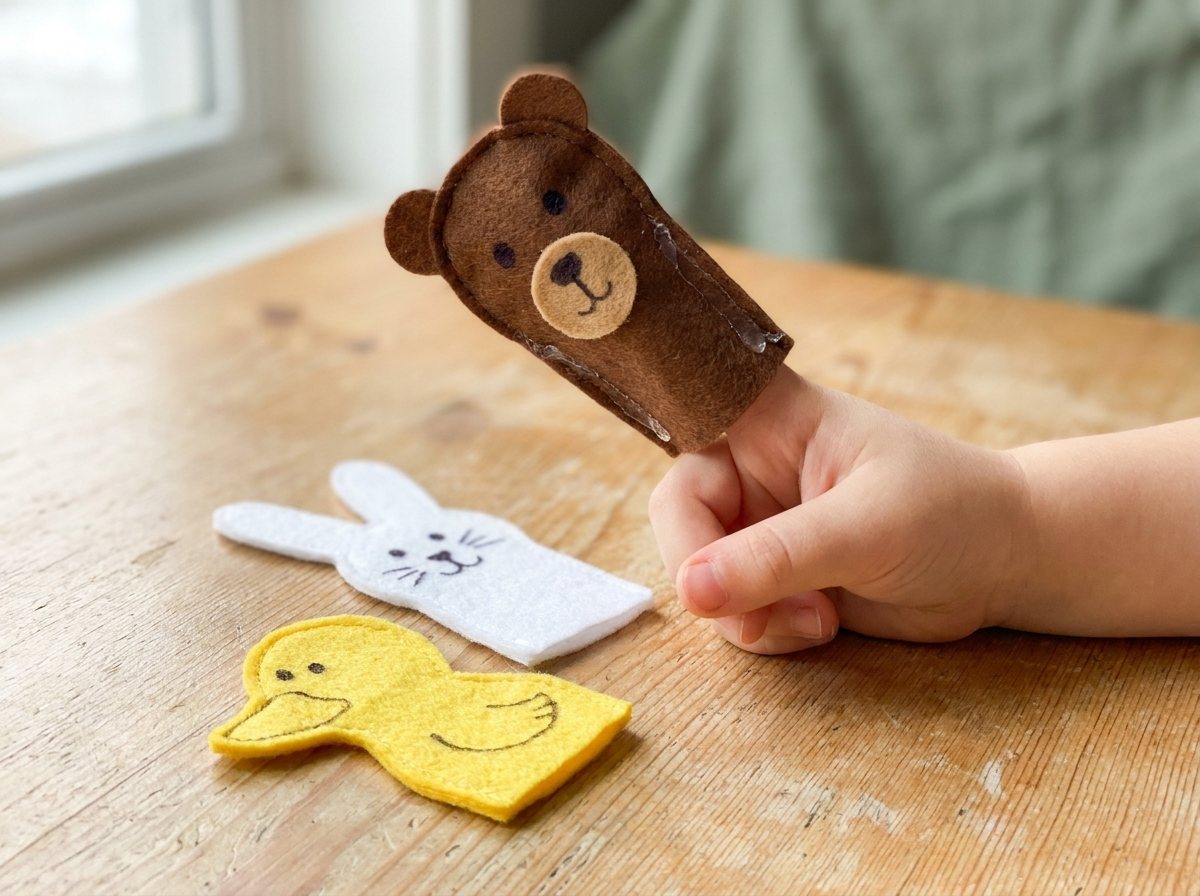
Every one of these uses the same basic body from the template table. Only the small pieces change. I’ve listed them roughly from easiest (the bear, bunny, and duckling suit two-year-olds) to a bit more detailed (fun for four-year-olds).
| # | Puppet | Body color | Small pieces to cut | Difficulty |
|---|---|---|---|---|
| 1 | Little Bear | Brown | 2 round ears, 1 tan muzzle circle, 1 dark nose, 2 eyes | Easiest |
| 2 | Bunny | White or gray | 2 long ears (¾ x 1½ in, toddler size), 2 pink inner ears, 2 eyes, 1 pink nose | Easy |
| 3 | Kitty | Orange or gray | 2 triangle ears, 2 eyes, 1 small nose, 3 whisker strips per side | Easy |
| 4 | Duckling | Yellow | 1 orange beak (half-circle, ¾ in for toddlers), 2 eyes, 1 wing on each side | Easy |
| 5 | Ladybug | Red | 5 to 6 black dots, 2 eyes, 2 thin antennae strips | Easy |
| 6 | Pumpkin | Orange | 1 green stem, 2 triangle eyes, 1 jagged mouth, 1 curly vine strip | Medium |
| 7 | Monster | Any bright color | 1 big eye, a zigzag mouth strip, 2 horns, some spots | Medium |
| 8 | Fish | Blue or teal | 1 tail, 2 side fins, 1 eye, scale dots in a second color | Medium |
| 9 | Owl | Brown or gray | 2 big eyes with smaller pupils, 1 tiny beak, 2 ear tufts, 2 wings | Medium |
| 10 | Dragon | Green | 2 horns, 3 spikes down the back, 1 belly patch, 2 eyes, 2 small wings | Most detailed |
Safety firstFor under-3s, draw spots, scales, whiskers, antennae, and other small details with washable marker. Or stick to the bear, bunny, and duckling, made with large felt pieces (at least ¾ inch, glued firmly). Save the multi-piece designs (ladybug, fish, owl, dragon) for ages 3 and up, with a grown-up close by.
A Few Notes on Making These Work
- The bear is my go-to for a first-time two-year-old. The shapes are all circles. There is no wrong place to put a circle on a bear.
- The bunny has long ears that tend to flop. Glue the ear bottoms inside the seam, between the two body layers, before you press the back piece on. That locks them in place much better than gluing them onto the outside.
- The kitty whiskers are thin felt strips, which are hard to cut. Skip them and draw whiskers with a fine marker once the glue is dry. Same result, much less frustration. For under-3s, do the same with the ladybug’s antennae and the pumpkin’s vine: draw them, and save loose felt strips for preschoolers with supervision.
- The duckling is the other easy win for two-year-olds: one beak and two wings. Tuck the wing edges into the side seams, the same way as the bunny ears, so little fingers can’t peel them off. For under-3s, draw the eyes on and keep the beak at least ¾ inch.
- The ladybug is secretly the best puppet for counting. Ask your kid to give her three spots, then four, then “as many as she wants.” (Spoiler: she wants nine.)
- The pumpkin is a good seasonal choice. If you’re deep in October crafts, it fits right in alongside the ideas in our Halloween crafts for kids roundup. Make it a friendly pumpkin with a wide smile and you’ve got a decoration that doubles as a toy.
- The monster is the one my kids ask for most. A monster can’t be wrong. One eye? Seven eyes? Spots on the mouth? It’s a monster, it’s perfect.
- The fish is great for dry-land ocean play. Let it swim through a blue scarf.
- The owl is where the preschoolers start showing off. Two big eye circles with smaller dark circles layered on top feels like a real art decision, and they know it.
- The dragon has the most pieces, so I’d only plan it for a patient four-year-old with a grown-up nearby. Every dragon I’ve ever made with a preschooler has ended up with at least one backwards wing, and honestly that’s what gives it character.
Building a Whole Set
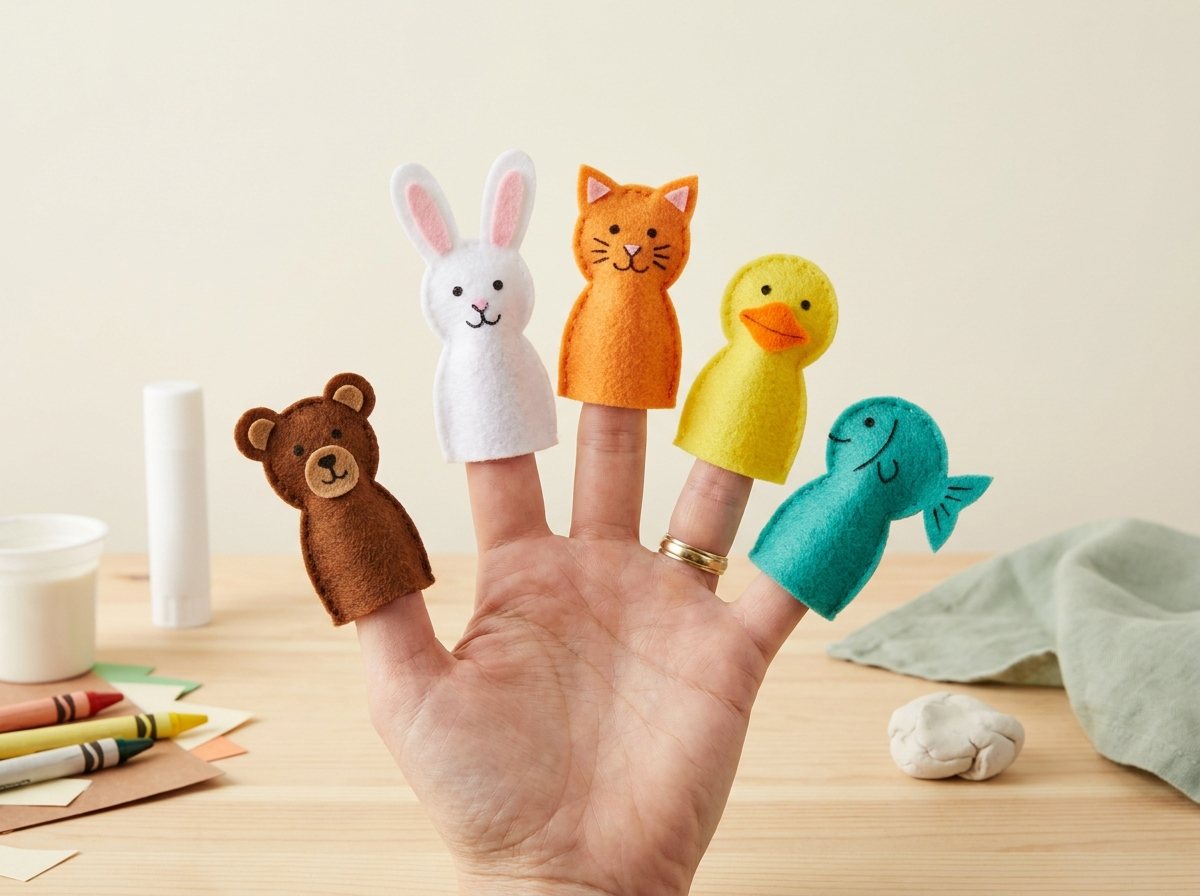
If you make five of the same family (say, a bear, bunny, kitty, duckling, and fish), you have a built-in cast for a story. Five puppets also fit on one hand, which my kids find hilarious. “Look, I’m a puppet show!”
You can group sets by theme, too:
- Farm: duck, pig (pink, with a round snout), cow (white with black spots), sheep (white with fluffy ears)
- Forest: bear, owl, fox, hedgehog
- Ocean: fish, crab, octopus (a wavy bottom edge), whale
- Family: simple smiling faces in different felt colors, for a “my family” puppet set. Draw the hair with marker for under-3s; felt hair pieces suit ages 3 and up.
- Autumn: pumpkin, scarecrow, squirrel, owl, and a leaf-shaped puppet
Other No-Sew Ways to Make Finger Puppets
The glued-sleeve puppet is my favorite, but it isn’t the only way. Depending on your kid’s age and your patience level, one of these may suit you better.
| Method | How it works | Best for | Downside |
|---|---|---|---|
| Glued sleeve (the basic method) | Two body pieces glued on the sides | Most toddlers and preschoolers | Needs drying time |
| Wrap-around cuff | A small felt strip glued into a ring, with the character stuck on the front | Very small fingers, or kids who lose puppets easily | Character sits slightly lower on the finger |
| Glove-finger puppet | Cut a finger off an old cotton or knit glove, then decorate with felt | Zero-prep afternoons | Needs a spare glove, and the felt shapes can be bulky |
| Folded-felt puppet | One piece of felt folded in half, glued along two sides | Faster prep, one fewer piece to cut | Fold edge sometimes bunches up |
| Fabric tape version | Double-sided fabric tape instead of glue | Impatient crafters | Tape is pricier and less forgiving to reposition |
| Peel-and-stick felt | Adhesive-backed felt sheets | Ages 3 and up | Stickiness can wear off with finger oils and sweat |
The Cuff Trick (My Favorite for Slippery Fingers)
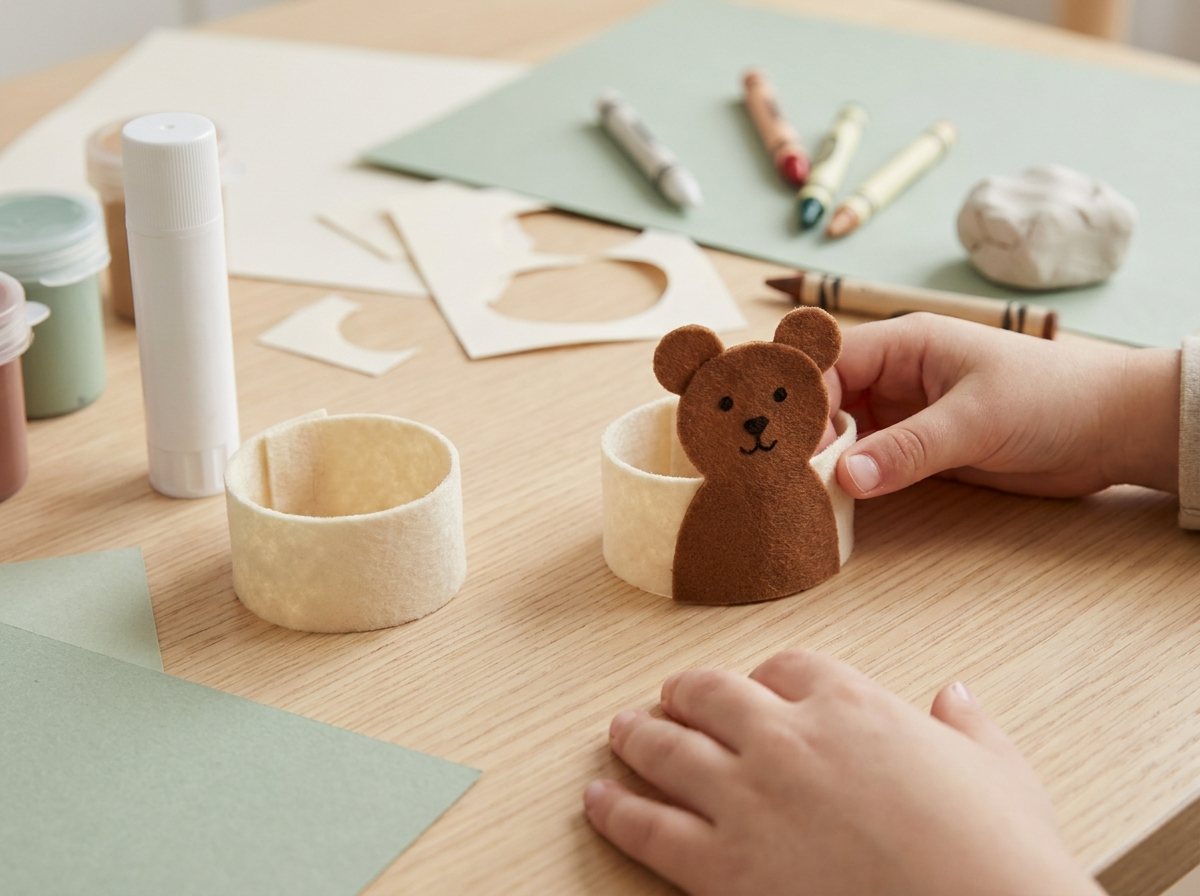
If a puppet keeps sliding off, a cuff is the fix. Cut a felt strip (see the template table), glue the ends together to make a small ring, and let it dry. Then glue the character’s body to the front of the ring. Your kid’s finger goes through the ring, and the character sits on top like a little crown.
This is great for the youngest kids because the ring is sized to their finger, while the character can be as large or small as you like.
Cut the strip to the finger circumference, plus ½ inch of ease, plus about ¼ inch of overlap for gluing. Test the ring on the finger before you glue the character on, and make sure it slips on and off freely.
Safety firstRemove any cuff or puppet that leaves a mark on the finger or changes the color of the fingertip.
Glove-Finger Puppets for Zero-Prep Days
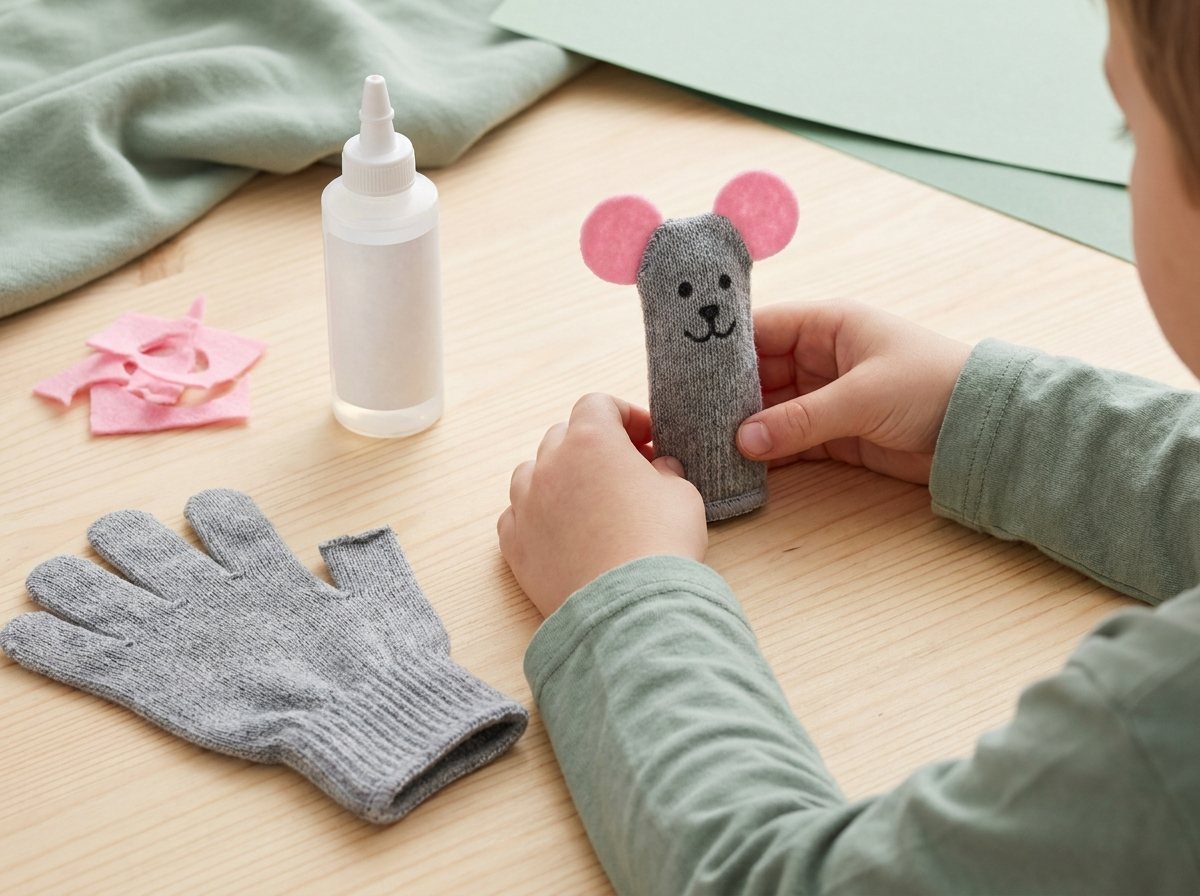
If you have an old knit glove with no mate, snip off a finger, and you have an instant puppet base. Dab the cut edge with glue (or fold and glue a small hem), trim any loose threads, and check for stray strands before each use. Felt eyes and ears glue right on. The knit texture means you may need a bit more glue, but it works. It’s a good rainy-day rescue when you don’t want to cut a single rectangle.
If your kids are into felt in general, you’ll probably enjoy our collection of no-sew felt crafts for toddlers, which are all glue-only and use the same basic supplies you’ve already got.
How to Let Toddlers Help (Without Losing Your Mind)
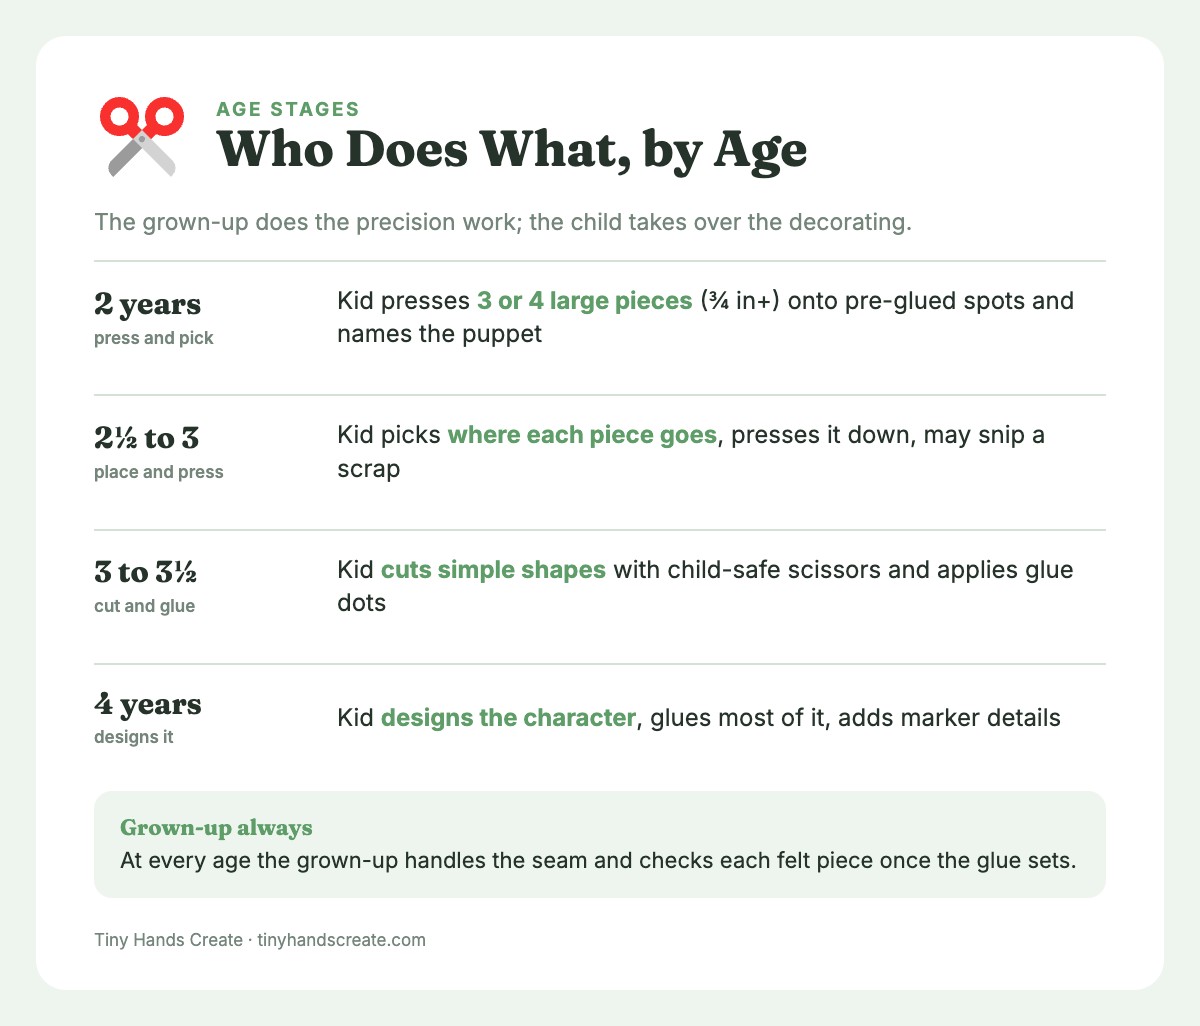
The big question with any toddler craft is how much to do yourself versus how much to hand over. Here’s how I split the work by age.
| Age | What the grown-up does | What the child does |
|---|---|---|
| 2 years | Cuts everything, glues the main seam, draws the eyes and nose, offers 3 or 4 large pre-cut pieces (¾ inch or bigger), stays close, and checks every piece once the glue sets | Presses felt pieces onto pre-glued spots, chooses colors, names the puppet |
| 2½ to 3 years | Cuts everything, glues the seam, puts out dots of glue | Picks where each piece goes, presses it down, may try a few scissor snips on a scrap |
| 3 to 3½ years | Cuts the body, helps with the seam | Cuts simple shapes with child-safe scissors, applies glue dots, decorates independently |
| 4 years | Cuts bodies, supervises the seam | Cuts shapes, designs the character, glues most of it, may draw extra details with markers |
The “Dot Station” Trick
For the youngest kids, the thing that saves me every time is dotting the glue for them. I draw the eyes and nose on with marker, put small dots of glue where the ears and tummy patch should go, then hand over the big felt bits.
The kid’s job becomes “press the circle on the sticky spot,” which they can do on their own and which gets them a good-looking puppet nearly every time. Keep every felt piece at least ¾ inch, press it down firmly, and check it once the glue has set.
For a three-year-old who wants control, flip it: give them a small paper cup with a dab of glue and a craft stick or a cotton swab for “painting” glue on the felt. It’s still going to be messy, but it’s an agreeable kind of messy.
Keep Expectations Cozy
My honest mess forecast for a toddler puppet session:
- Glue on at least one sleeve
- A felt scrap under the table that you’ll find in three days
- A puppet that looks nothing like your example
- A kid who is incredibly proud anyway
Put a vinyl tablecloth or an old shower curtain under the table, keep a damp cloth within reach, and put the glue in a shallow lid so nobody tips a whole bottle. If you’re looking for more low-cleanup options for the same age group, our mess-free art activities for toddlers list has plenty.
Playing With Your Finished Puppets
The making is the warm-up. The play is where finger puppets really earn their place on the shelf.
Simple Play Ideas for Ages 2 to 3
- Hello, puppet! Let the puppet greet your toddler by name. Toddlers will often answer a puppet when they’re too shy to answer a grown-up.
- Puppet peek-a-boo. Hide the puppet behind your back, pop it out, and say “Boo!” It’s an old trick for a reason.
- Follow the puppet. The puppet “walks” across the table, up your arm, and onto your head. Your toddler follows with their own puppet.
- Puppet kisses. Little puppets give very gentle kisses to cheeks, tummies, and stuffed animals.
- Name the feelings. Let a puppet say, “I’m feeling sleepy,” or “I’m a little grumpy today.” Many toddlers respond more readily to a puppet than to a talk, so it can be a gentle way to introduce feeling words.
Play Ideas for Ages 3 to 4
- Tiny puppet shows. Drape a tea towel over the back of two chairs or the edge of the couch, and your puppets pop up from behind it.
- Rhymes and songs. Five Little Ducks, Itsy Bitsy Spider, and Five Little Monkeys all work with one puppet per finger. A set of five duck puppets for “Five Little Ducks” is worth the afternoon on its own.
- Story retelling. After reading a favorite picture book, use puppets to act out the plot. This is surprisingly good practice for sequencing: first, next, last.
- Puppet bedtime. Each puppet gets “tucked in” in a shoebox bed with a hankie blanket. It’s a gentle bridge into the actual bedtime routine.
- Silly voices. Let your preschooler choose a voice for each puppet. You’ll be asked to do the same, and you’ll be expected to commit.
A Puppet “Menu” for Quiet Moments
When the house needs a calm half hour, I hand over the puppet basket and a small tray. Here’s what a quiet puppet session can look like:
| Setup | What to offer | How long it tends to last |
|---|---|---|
| Puppet picnic | A small blanket, paper plates, felt “food” pieces | 15 to 25 minutes |
| Puppet hotel | A shoebox with scrap-fabric beds | 15 to 20 minutes |
| Puppet parade | Hallway “stage” with a blanket curtain | 10 to 20 minutes |
| Puppet doctor | A toy stethoscope and bandage strips (felt works) | 15 to 30 minutes |
| Puppet storytime | Favorite picture books and a cozy corner | 15 to 30 minutes |
This slots right into a rotation with other low-key activities. If you like having a few ready-to-go options, our post on busy bags for toddlers shows how to pack a small kit (puppets included) that lives in the car or diaper bag.
Storing, Cleaning, and Keeping Puppets Alive
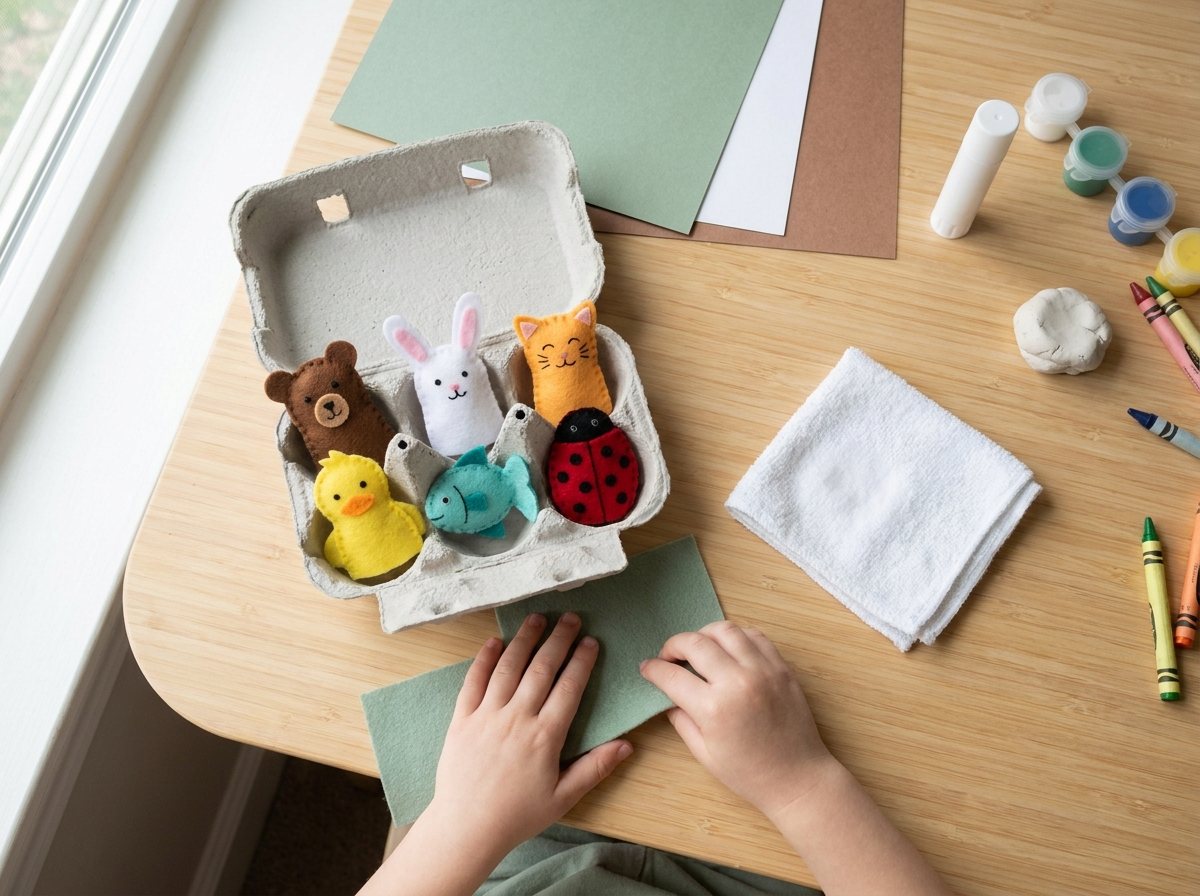
Felt puppets are tougher than they look, but they do wear out with toddler love. A few habits help.
- Store them in a zip bag, a small tin, or an egg carton. An egg carton gives each puppet its own cup, which is oddly satisfying for kids to tidy up.
- Spot clean only. Choose a glue labeled non-toxic and washable, and wipe puppets with a barely damp cloth. Soaking loosens the seam, so skip the sink and the washing machine.
- Re-glue as needed. A seam that starts to peel takes thirty seconds to fix, and a puppet that works is better than a puppet that’s perfect.
- Retire the dead ones gracefully. After a few months of daily use, a puppet may get fuzzy or flat. Let it have a “puppet retirement party,” then make a new one.
- Check them regularly. Look over each puppet for loose pieces before play, especially for younger toddlers who might mouth things.
Making Puppet Day a Tradition
Make a new set each season (spring bunnies, summer fish, autumn pumpkins, winter snowmen), or let each child make a “birthday puppet” every year so a small puppet family grows alongside them.
In fall, felt acorn and leaf puppets pair nicely with acorn crafts for toddlers or a nature walk, and real leaves make great “puppet scenery” for a woodland story.
Frequently Asked Questions
What age can toddlers start making felt finger puppets?
Most kids can take part around age 2, as long as a grown-up does the cutting and the main seam. At that age they’re pressing felt shapes onto pre-placed dots of glue and choosing colors. By 3 they can apply glue themselves and may try cutting simple shapes with child-safe scissors. By 4 many kids can design and decorate a whole puppet on their own, with help on the seam. Start with the age you have and adjust the job list to match.
What kind of glue works best for no sew finger puppets?
A thick tacky glue or fabric glue labeled non-toxic and washable holds felt best. Thin school glue tends to soak into the fibers, take forever to dry, and leave the seam weak. Apply a thin line rather than a puddle, press the layers together, and wait at least an hour before the puppet goes on a finger, ideally overnight for toddler play. Tacky glue keeps strengthening as it cures. Non-toxic doesn’t mean it’s meant to be eaten, so keep the bottle out of reach between uses and supervise the whole time.
How do I make the puppet fit a toddler’s finger?
Wrap a thin strip of paper around the finger, mark the overlap, and measure it. Then use this formula: body width equals half the finger circumference plus a half inch. For most toddlers that works out to about 1¼ inches per body piece. If the puppet still slips off, use the cuff method: glue a small felt strip into a ring sized to the finger, then attach the character to the front of the ring.
Are felt finger puppets safe for kids under 3?
They can be, with the right choices and supervision. For under-3s, draw eyes, noses, and other small details with washable marker. If you use felt, cut pieces at least ¾ inch across and glue them firmly. Skip googly eyes, buttons, beads, and pom-poms, since these can come loose and are choking hazards. Check each puppet for loose bits before play and re-glue anything that lifts. Because toddlers mouth things, stay close while they play with puppets, and retire any puppet that starts falling apart.
Can I make finger puppets without cutting felt?
Yes. Peel-and-stick felt sheets make decorating easy for kids who can’t use scissors, and you can still cut the bodies yourself. For under-3s, use peel-and-stick only for bodies or large pieces (at least ¾ inch), add a layer of tacky glue under each sticky piece, and re-check often, since a lifting edge can end up in a mouth. Draw small details on with washable marker instead.
Another zero-cut option is to snip a finger off an old glove and let your child press on pre-cut felt shapes. You can also buy pre-cut felt shapes in craft packs and let the toddler glue them on; for under-3s, pick the larger shapes. The goal is a puppet the child feels proud of, and that doesn’t require them to do every step.
How long do glued felt puppets last?
With normal toddler play, a well-glued puppet often lasts weeks to months. The first thing to go is usually a small decoration or a bit of the seam, and both are easy to re-glue. Puppets that get chewed, soaked, or used as dog toys will wear out faster. Standard acrylic craft felt holds up better than thin sheets, which pill and tear sooner. If you’d like them to last longer, let the glue cure overnight before the first big play session, and store them flat in a tin or egg carton.
How can I use finger puppets to help with talking and language?
Puppets give kids a low-pressure audience. Many toddlers who are quiet with adults will chat happily to a puppet. Ask the puppet simple questions (“What’s your favorite color?”), name body parts together, sing action songs, and retell favorite stories with each puppet as a character. For preschoolers, taking turns “speaking” as different puppets helps with vocabulary, listening, and early storytelling. If you have concerns about your child’s speech, check in with your pediatrician or a speech-language pathologist.
Go Make a Wobbly, Wonderful Puppet
The puppet doesn’t have to look like the picture. It has to fit on a little finger, hold together long enough to be loved, and make a small person giggle when it pops out from behind a couch cushion.
Grab a sheet of felt, measure one tiny finger, and cut out a rounded rectangle. Give your toddler a dot of glue and a bear nose. Let the eyes go where they go. Then slide that lopsided, glue-fingerprinted puppet onto a finger and give it a name. Mine was Gerald, and he’s still the most popular guy in our house.