Veterans Day Handprint Flag Craft for Preschoolers
Learn how to create a meaningful Veterans Day handprint flag and thank-you card with your preschooler, complete with age-specific tips, supply lists, and troubleshooting for common craft issues.
- Craft a handprint flag with a heartfelt thank-you card for veterans.
- Adapt the craft for ages 2-5 with specific star options and safety tips.
- Gather supplies using the detailed checklist, noting cardstock and washable paint.
- Follow tips for managing paint mess and common craft challenges.
- Prioritize the meaning over perfection; a child's touch is cherished.
This post contains affiliate links. As an Amazon Associate I earn from qualifying purchases.
Last November my four-year-old stood at the kitchen counter, studied a photo of her great-uncle in his Navy uniform, and asked, very seriously, “Is that his costume?”
I laughed, then realized it was a fair question. Nobody had ever explained to her what it means to serve in the military.
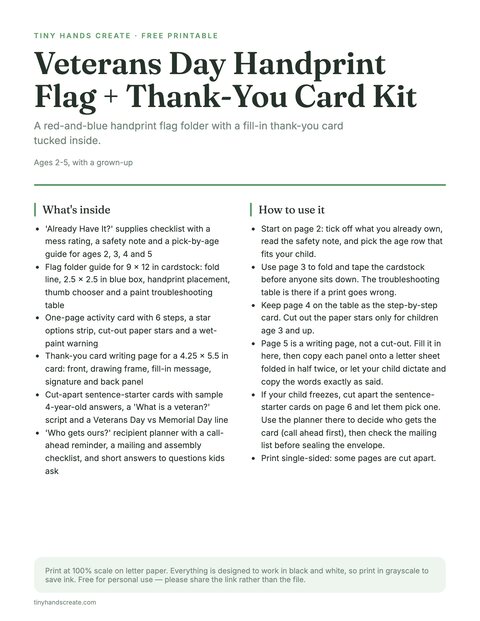
Free printable · 6 pages
Veterans Day Handprint Flag + Thank-You Card Kit
A supplies checklist with a pick-by-age guide, a folder and handprint placement guide with a paint troubleshooting table, a six-step activity card with cut-out stars, a fill-in thank-you card, sentence-starter cards, and a recipient planner with a mailing checklist.
Free. Your download link appears right here. You'll also join the Daily Printable Drop. Unsubscribe anytime. Privacy
So we made a messy red handprint flag with a handwritten thank-you card tucked inside, and mailed it to Great-Uncle Ray. He called the day it arrived and could barely get through the first sentence. The flag is cute, but the card is the part a veteran keeps.
If you’re looking for veterans day crafts for preschoolers that mean more than “stick it on the fridge,” this guide gives you a handprint flag, a fill-in thank-you card, age tweaks, and fixes for the usual paint trouble.
In this article (13 sections)
- Supplies for the Handprint Flag and Folder
- Prep Before the Kids Sit Down
- How to Make the Handprint Flag, Step by Step
- What to Tell Your Child About Veterans Day
- Age-by-Age Adaptations
- Thank-You Card: Message, Size and Layout
- Assembling the Keepsake Folder
- Talking With Your Child While You Craft
- Who Can Receive Your Craft
- Troubleshooting: When the Craft Goes Sideways
- More Veterans Day Crafts for Preschoolers to Try
- Frequently Asked Questions
- One Small Handprint, One Big Thank You
Supplies for the Handprint Flag and Folder
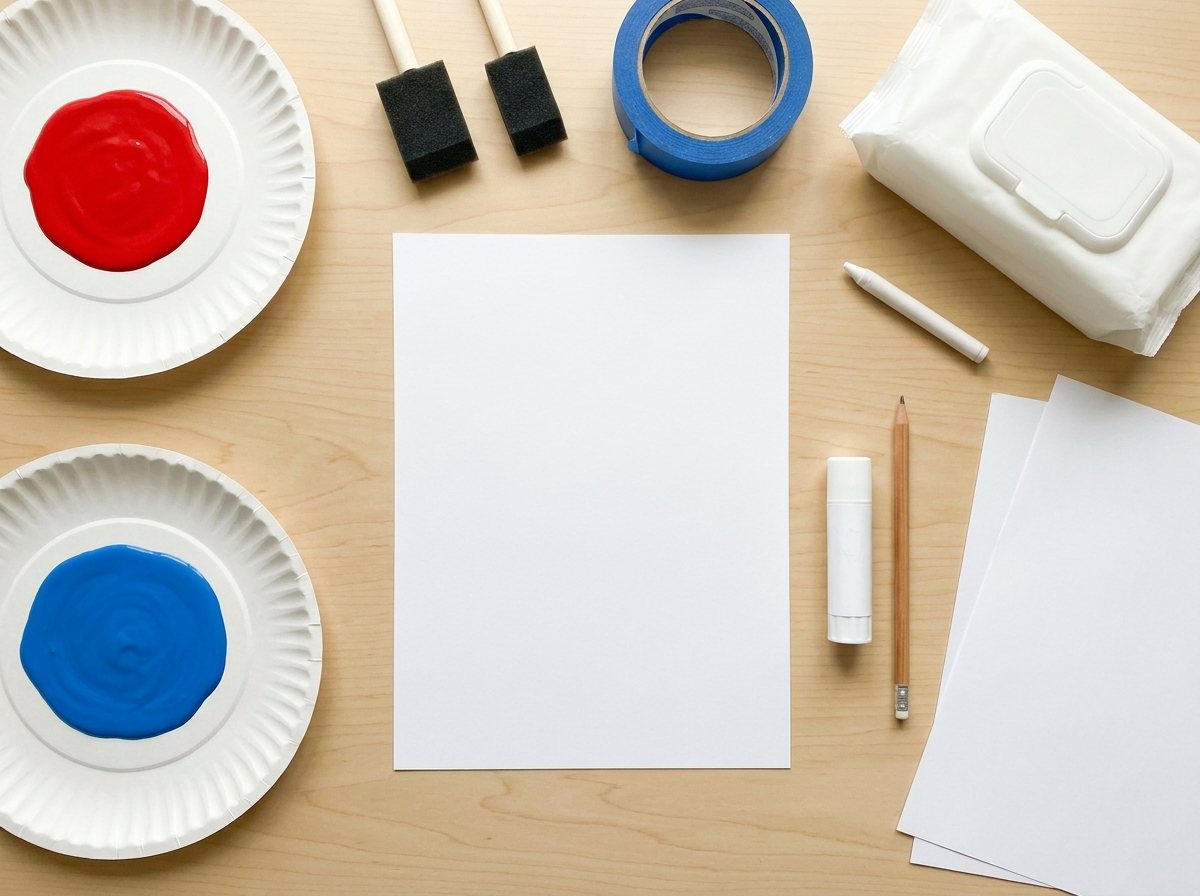
You almost certainly own most of this already. I’ve marked the things worth buying if you don’t.
| Item | Amount | Notes |
|---|---|---|
| White cardstock, 9 x 12 inches | 1 per craft | Cardstock holds up to wet paint far better than printer paper. Construction paper works but the colors dull. |
| Washable red tempera paint | A few tablespoons | Washable is non-negotiable at this age. |
| Washable blue tempera paint | A few tablespoons | For the star field. |
| Small foam brush or flat paintbrush, 1 inch | 1 for red, 1 for blue | Foam brushes are cheap and don’t leave bristle streaks on skin. |
| Paper plate | 1 per color | Palette for the brush. Pour a thin layer. |
| White paint pen, white crayon, or star stickers | 1 type | For the stars. See the star options below. |
| Painter’s tape or masking tape | 1 roll | Masks the blue rectangle and hangs the wet paper to dry. |
| Baby wipes and a damp towel | Lots | Stage these before painting. Trust me. |
| Old newspaper or a wipe-clean tablecloth | 1 | Protects the table. |
| Pencil | 1 | For labeling the back. |
| Scissors and glue stick | 1 each | For the optional card pocket. |
| Letter-size paper (8.5 x 11) | 1 per card | For the thank-you card inside. |
| Crayons or markers | Any | For the child’s own drawing and signature. |
Safety firstStickers, cotton swabs, paper stars and pen caps are choking hazards under age 3, so an adult stays beside the child for all of them. For age 2, use a white crayon only: no stickers, no swabs, no pens. Stickers and swab dotting start at age 3 with an adult beside the child. The paint pen is adult-only; choose a water-based, non-toxic one and check the age range on the label.
Choosing Your Stars
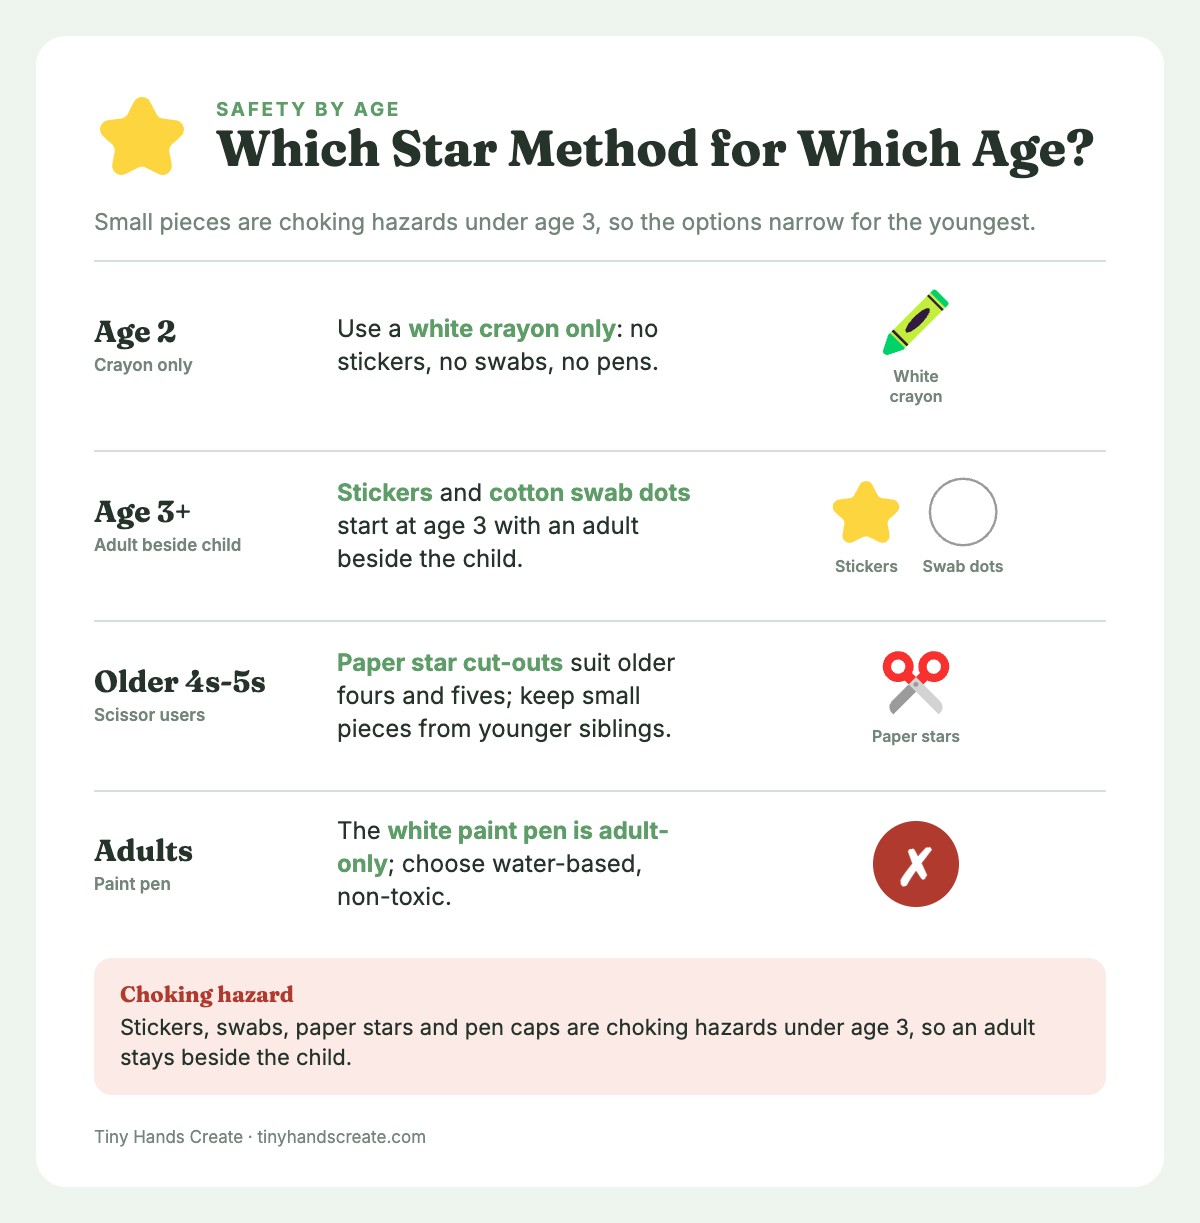
The real U.S. flag has 50 stars, arranged in rows. You are not going to get 50 stars out of a four-year-old, and that’s okay. Pick whichever option matches your child’s skill level:
- Star stickers (easiest, ages 3 and up): Great for three-year-olds with an adult beside them. Five to ten stars is plenty.
- White crayon (all ages) or white paint pen (adult only): Draw stars, or even just dots. Dots read as stars at flag scale. Age 2 sticks to the crayon.
- Finger or cotton swab dots (ages 3 and up): Dip in white paint and dab, with an adult beside the child. Fast, messy-ish, very preschooler.
- Star cut-outs from white paper: Best for older fours and fives who like using scissors. Keep the small pieces away from younger siblings.
Resist the urge to make it perfect. A few lopsided stars tell the veteran a kid made it.
Prep Before the Kids Sit Down
Ten minutes of setup saves a lot of grief. Here’s the order I follow.
- Cover the table. Newspaper, a plastic tablecloth, whatever you have.
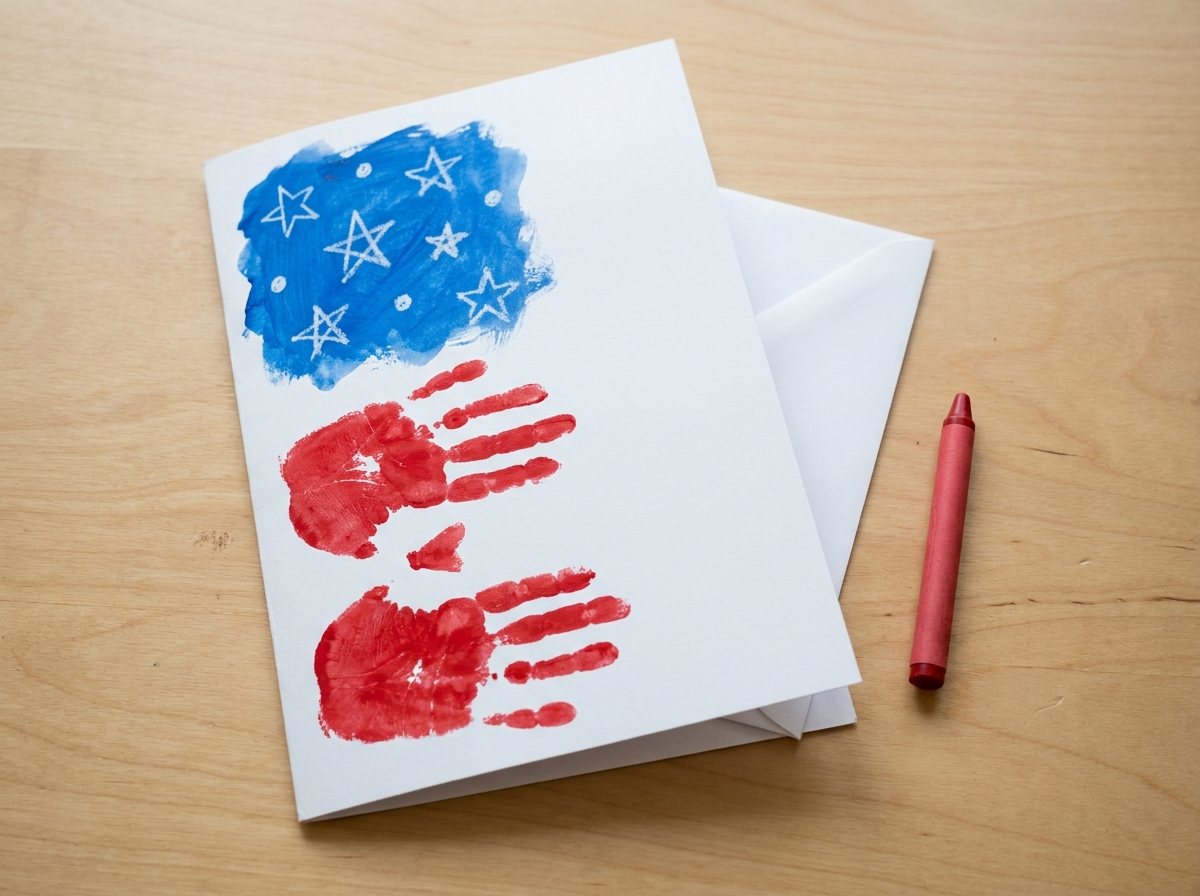
- Fold the cardstock. Fold the 9 x 12 sheet in half so it measures 6 x 9 inches when closed. Crease it hard with the side of a ruler or your thumbnail. Hold the folded sheet like a book with the spine on the left: the front cover is your painting panel, 6 inches wide and 9 tall. Open it flat to paint.
- Tape off the star field. On the front cover (the right half when the sheet is opened flat), use tape to mark a rectangle in the upper left corner for the blue canton. It should be roughly 2.5 inches wide and 2.5 inches tall. This is a rough guide, not a ruler test.
- Pour paint. One plate for red, one for blue. A thin, even layer works better than a puddle. Puddles lead to blobs.
- Set up the cleanup station. Wipes open, damp towel folded, and a sink within running distance.
- Prep a drying spot. A countertop, an unused table, or a baking sheet all work. Wet cardstock curls a bit, but it flattens as it dries.
If you have more than one child painting, do the red hand stage one kid at a time, with an adult. Everything else can happen side by side.
Dress for the mess too: an old adult t-shirt worn backwards makes a full-coverage smock, sleeves get rolled up before the first print, and only one paint plate sits within reach at a time. Pour less paint than you think you need.
How to Make the Handprint Flag, Step by Step
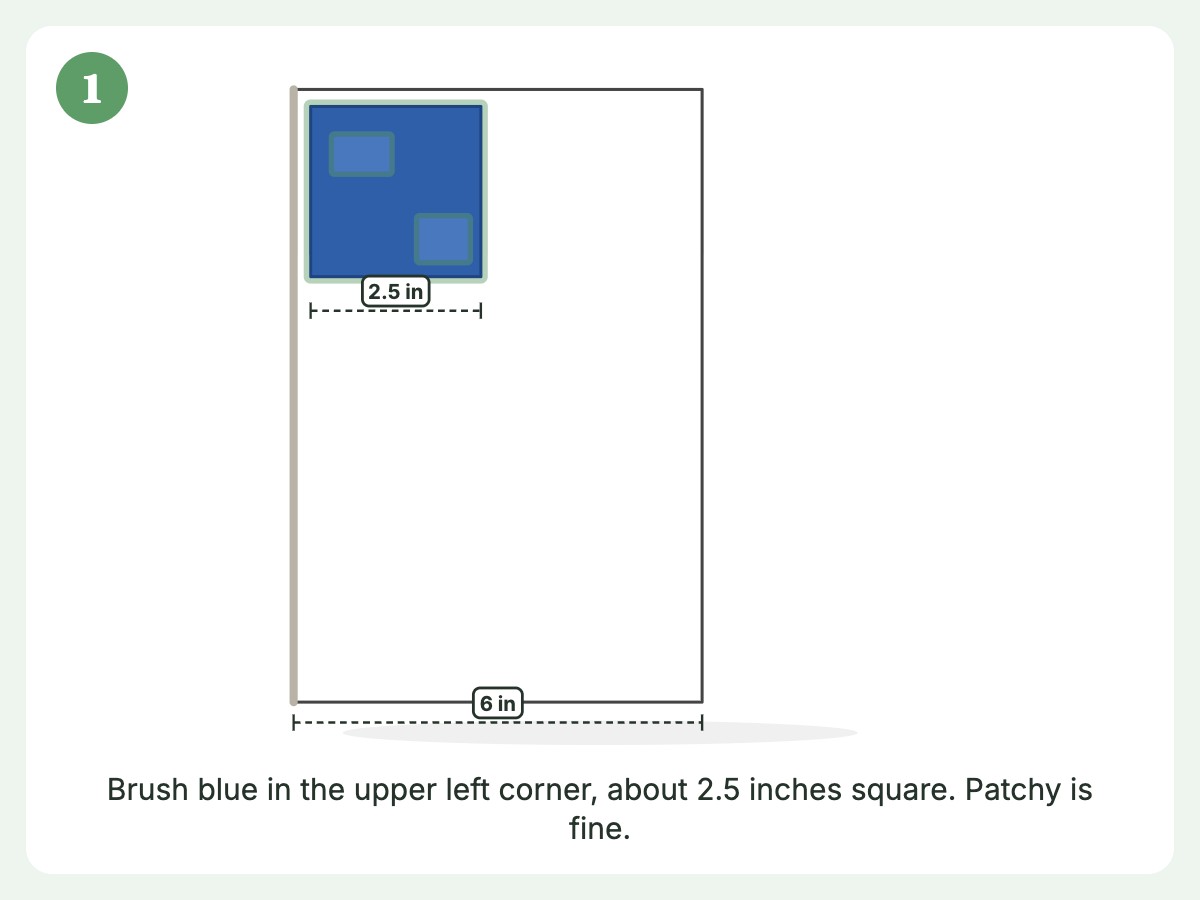
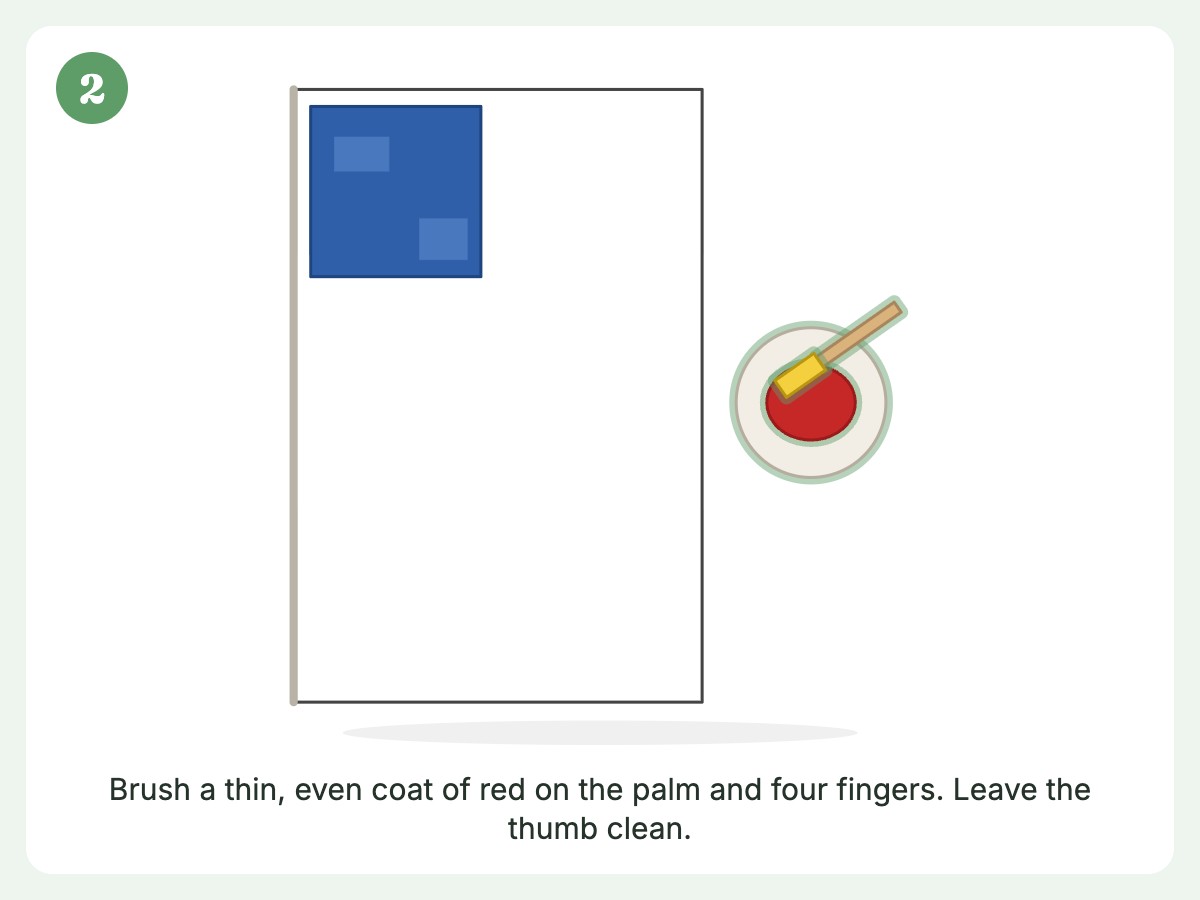
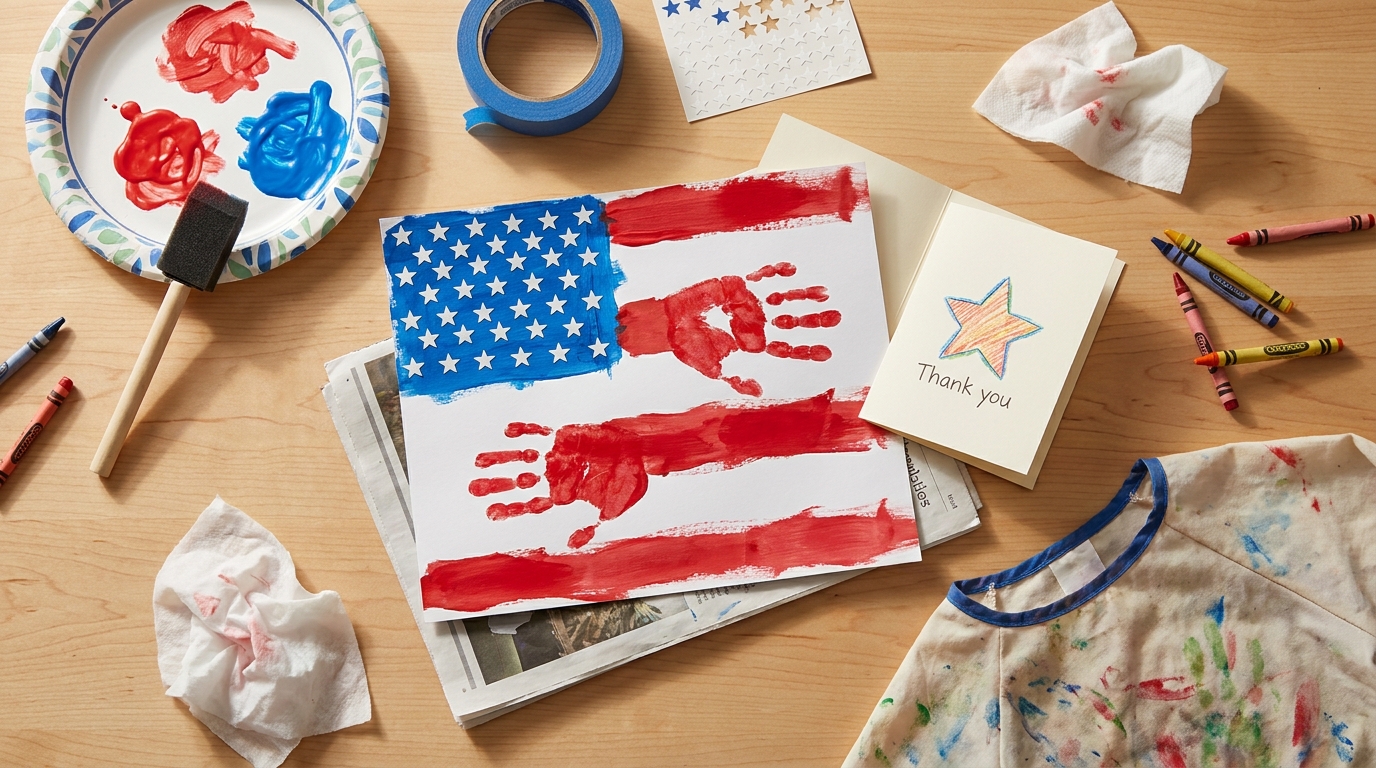
Short version: blue box, red handprints for stripes, white stars, done.
Step 1: Paint the Blue Star Field First
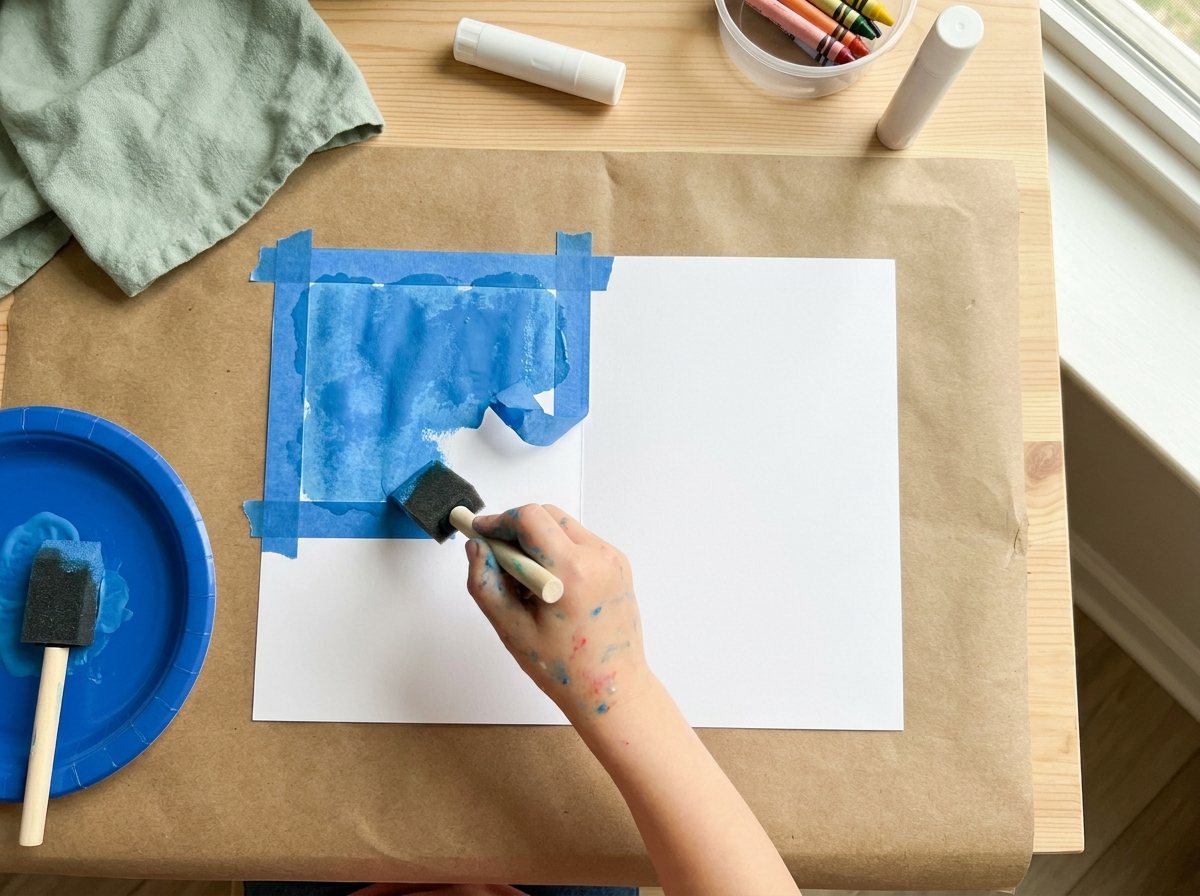
Blue goes on before red because it’s the smaller, calmer part of the project. It also gives your child a warm-up with the brush before the hand-painting starts.
Have your child brush blue paint inside the taped rectangle. Encourage even strokes, but accept patchy ones. Patchy blue looks like a weathered flag, which is charming. If your child’s blue paint creeps under the tape (it will), you can tidy the edge later with a damp cotton swab.
Peel the tape off while the paint is still a little wet. Pulling it when it’s dry can lift bits of cardstock. Set the page aside for a few minutes while the blue firms up.
Step 2: Paint the Hand Red
Now the fun part. Here’s how to get a clean print from a wiggly hand:
- Have your child spread their fingers wide and keep them flat on the plate (or you can use the foam brush to paint their palm and fingers).
- Paint the whole palm and all four fingers. The thumb is optional. See “The Thumb Question” below.
- Use a thin, even coat. If the paint looks glossy and wet, it’s too thick and will smear.
Painting the hand with a brush instead of pressing it into a plate of paint gives you far better control. It also tickles, which gets giggles, which gets wiggles. Be warned.
Step 3: Press the Handprints Sideways to Make Stripes
This is the trick that turns a handprint into a flag.
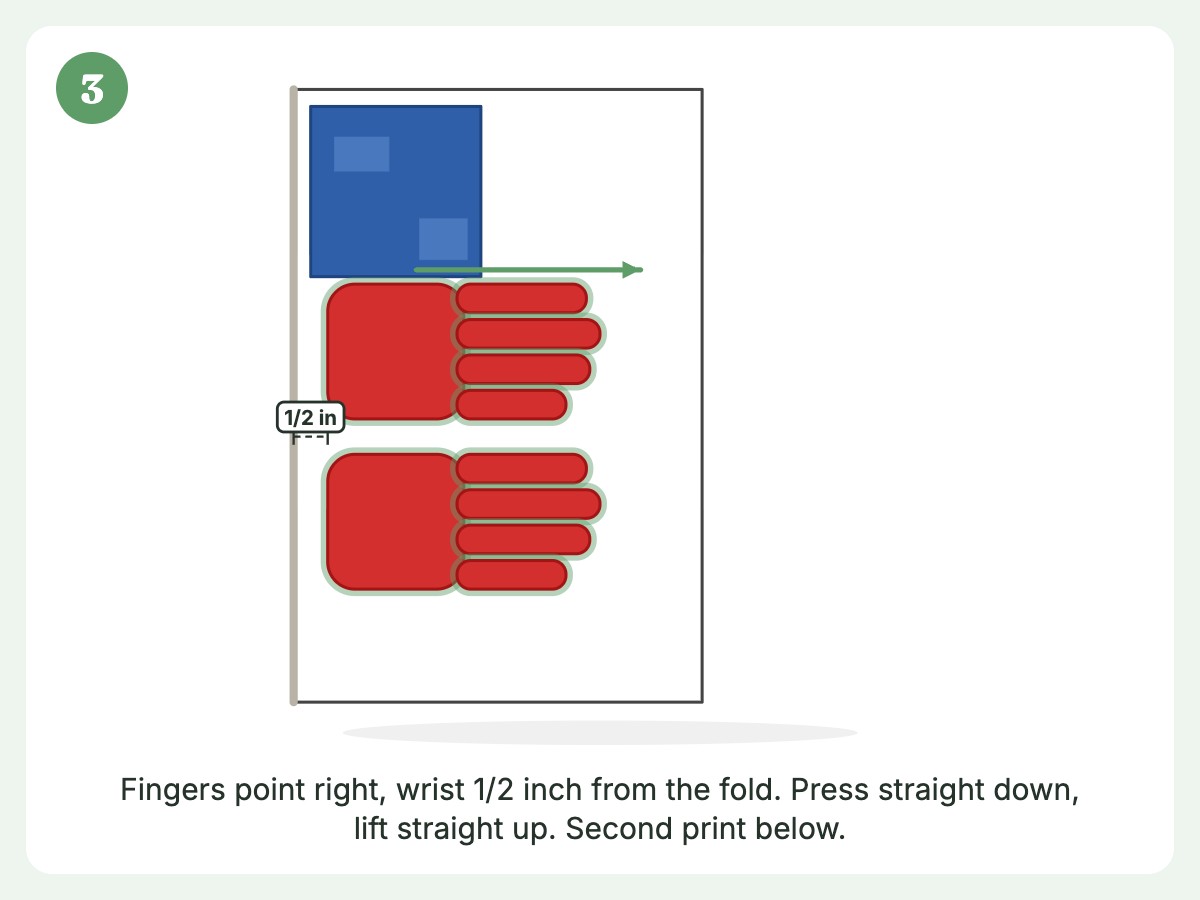
Rotate your child’s hand so the fingers point to the right and the wrist is on the left. Press it onto the page just below the blue rectangle, so the fingers extend across the flag. Each finger becomes a red stripe, and the white gaps between the fingers become the white stripes.
- Press, don’t slide. Press straight down. Sliding smears the stripes together.
- Hold for a count of three. “One-banana, two-banana, three-banana.”
- Lift straight up. Peel the hand off from the wrist, not the fingertips. Or hold the paper flat with your free hand and let your child lift.
- Fan the fingers just slightly. Fingers that are spread slightly apart leave visible white stripes. Fingers pressed together make one big red blob.
Hold the folder in portrait, so the front panel is 6 inches wide and 9 inches tall. Print 1 sits just under the blue canton with the fingers pointing right. Print 2 goes below it with a finger-width gap. Small hands may need a third print. You’ll end up with roughly 8 to 12 red stripes depending on how many prints you make. The real flag has 13 stripes (7 red, 6 white), so yours is a fine abstraction.
TipPut the wrist about 1/2 inch in from the fold and keep paint off the crease. Stripes under the canton may fall short of the right edge. That’s fine, because real handprint flags look handmade.
The Thumb Question
The thumb sticks out sideways and makes a lumpy red bump above the pointer finger. There are three solutions:
- Tuck it. Have your child fold the thumb under their palm. This takes concentration, which is a fun challenge for fours and fives.
- Embrace it. Let the thumb print wherever it lands. It becomes a stripe too.
- Wipe it. Skip painting the thumb entirely and keep it clean.
For three-year-olds, I go with “wipe it.” For fives, I let them tuck.
Step 4: Let the Paint Dry
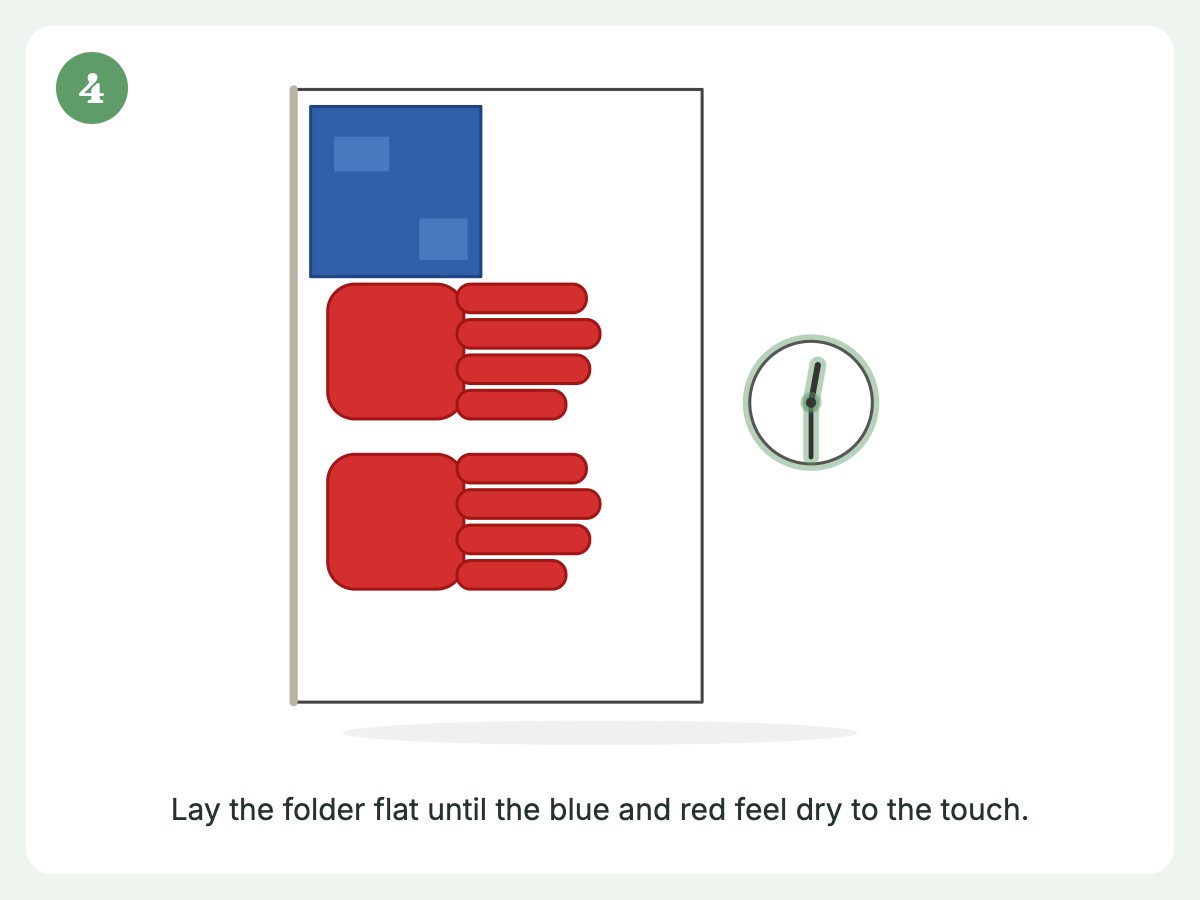
Lay the page flat for about 30 minutes, until the blue canton and the red prints are dry to the touch. White paint over wet blue turns pale blue, so wait before adding painted stars.
While you wait, you can wash hands (more on this below) and start on the card.
Step 5: Add the Stars
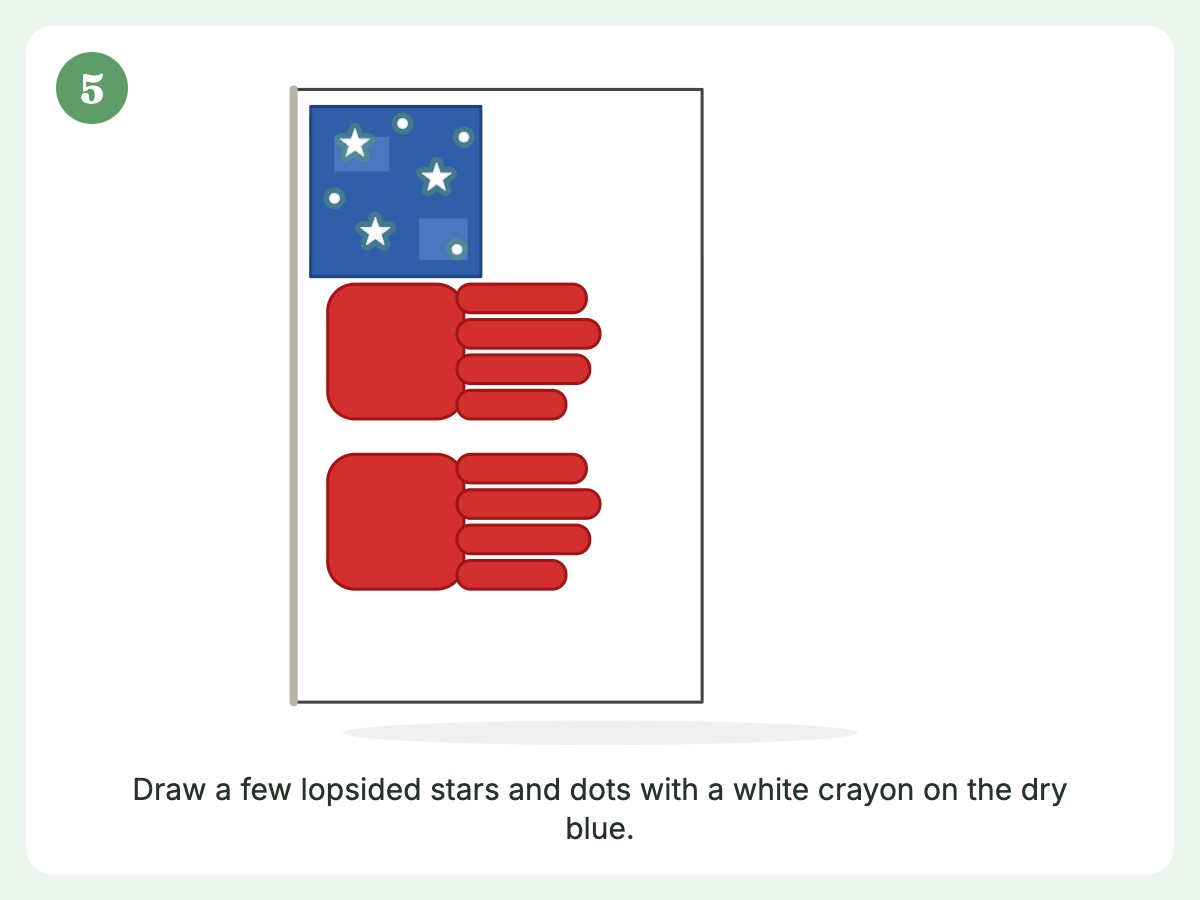
Once the blue has dried, add the stars. Offer your child the star option you picked in the supply list.
A few star tips:
- Stickers (ages 3 and up): Easiest and neatest, with an adult beside the child.
- White paint pen (adult only): Test it on scrap paper first, since some are stingy until you shake them. Pens work best on fully dry blue.
- Dot stars (ages 3 and up): A cotton swab dipped in white paint, dabbed straight down, gives you a small perfect dot. An adult stays beside the child.
- Counting: If your child enjoys counting, give them a target like ten stars. If counting makes them anxious, skip the goal.
Step 6: Sign and Date the Back
Flip the page over after it dries and write: your child’s name, their age, and the date. This is the most ignored step and the one the recipient will love most. A veteran who gets a keepsake from a five-year-old wants to know it was made by a five-year-old, in this particular year.
What to Tell Your Child About Veterans Day
Give your child about two minutes of context, either before painting or while the paint dries. Preschoolers do best with short, concrete statements they can repeat back.
A veteran is a person who used to be in the military. The military is a big group of people who work to keep our country safe. People who are still serving are called service members. On Veterans Day, we say thank you to veterans. Today we’re making something to say thank you to someone we know.
Veterans Day is November 11 and honors everyone who served in the U.S. military, especially the veterans we know. It began as Armistice Day, marking the end of fighting in World War I in 1918, and was renamed in 1954. Memorial Day (late May) is different: it remembers those who died in service. Answer the question your child asked, not the one you’re afraid they’ll ask next.
Age-by-Age Adaptations
A three-year-old and a five-year-old can make the same craft in very different ways. Here’s how I adjust.
| Age | What they can do | What to do for them | Realistic expectation |
|---|---|---|---|
| Age 2 | Scribble white crayon on the dry blue patch, press a red handprint, scribble on the card | Paint a quick blue patch with no tape, hold the paper steady, write the card message | Abstract red blob with crayon scribbles. Totally lovable. |
| Age 3 | Brush the blue, press the hand with help, place stickers, draw a scribble picture | Position the hand, handle the second print, write the message | Recognizable flag, uneven stripes |
| Age 4 | Paint the blue neatly, press the hand, add dot stars, draw a simple picture, copy their name | Keep the paper from sliding, help with the card message | Real flag shape with a hand-painted look |
| Age 5 | Do most steps solo, cut stars from paper, write some letters or words | Fold the card, trim edges, supply the spelling | Neat enough to hang proudly |
For veterans day crafts for toddlers, strip it down. Skip the tape and paint a quick blue patch yourself. After it dries, your toddler scribbles on it with a white crayon, then you paint their palm red and they press once. No stickers at this age. You can write the thank-you on the back.
If you want more toddler-friendly options with minimal cleanup, the roundup of mess-free art activities for toddlers has several that would pair well with a quick flag stamp.
Thank-You Card: Message, Size and Layout
This is the part that turns the craft into a keepsake. The text below is written out on this page, so you can copy it into any document or write it by hand.
Good to knowThe free printable Veterans Day kit has the card already laid out, so if you print it you can skip the size math below.
Card Size and Fit
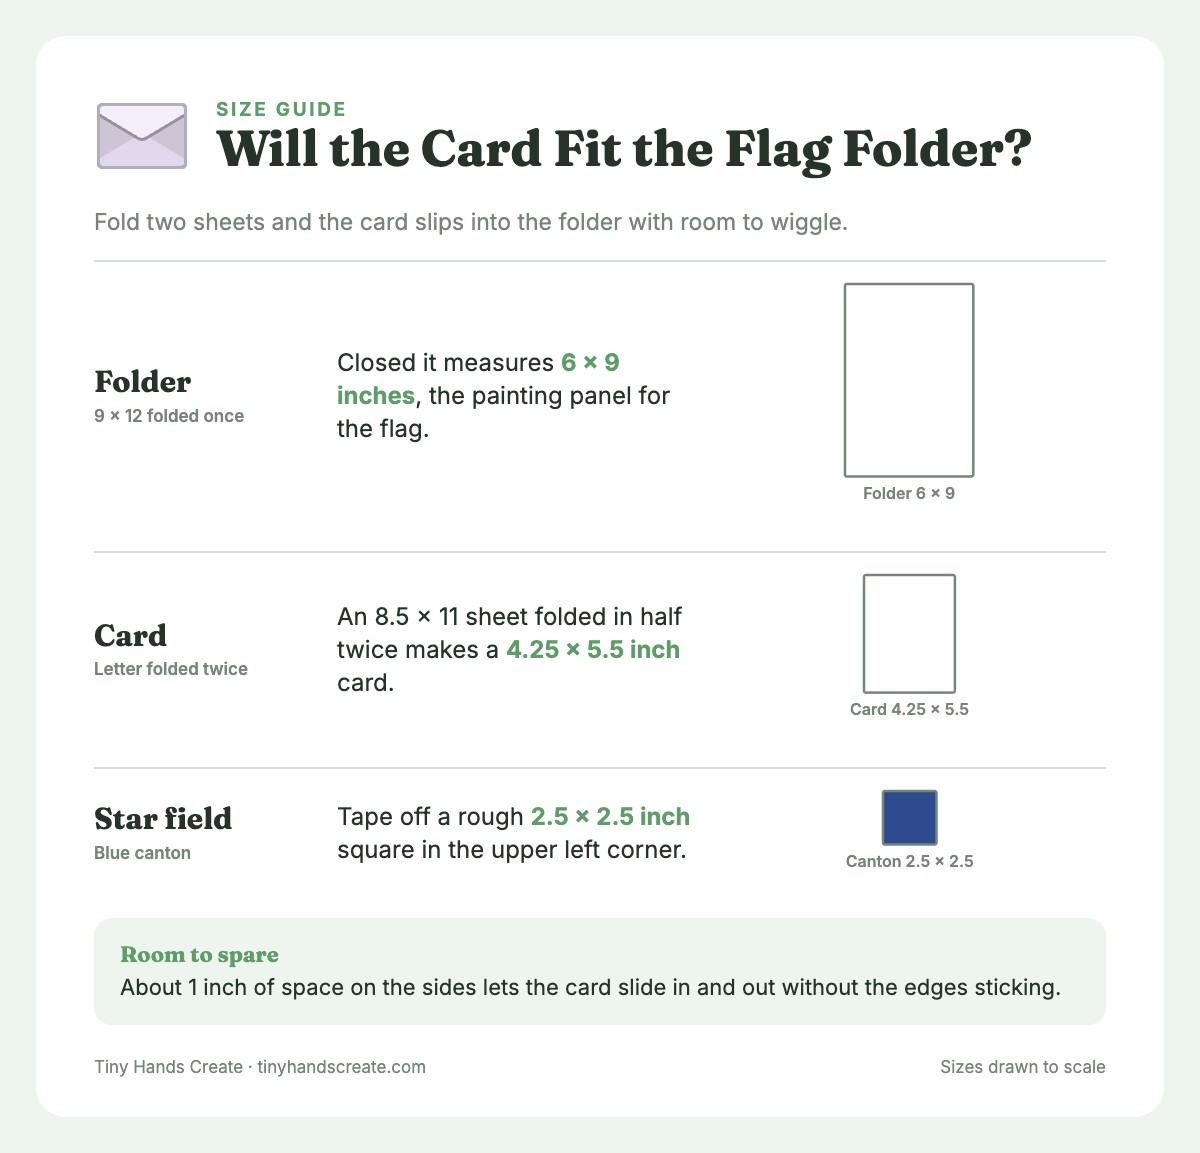
The card is built to slide into the folded flag folder. The math:
- Your folder is a 9 x 12 sheet of cardstock folded in half, so it measures 6 x 9 inches closed.
- The card is a standard letter sheet (8.5 x 11) folded in half twice, which makes a 4.25 x 5.5 inch card.
- That leaves about 1 inch of room on the sides and more at the top and bottom, enough to slide it in and out without the edges getting stuck.
If you don’t have cardstock, plain printer paper folded the same way works fine. It just feels a little flimsier.
Card Layout at a Glance
| Panel | Where it is | What goes on it | Suggested size of text |
|---|---|---|---|
| Front | Outside, front cover | “Thank You for Your Service” plus a small drawing or star sticker | Large, about 1/2 inch letters |
| Inside left | Left half, opened | Child’s drawing or handprint | Whatever they like |
| Inside right | Right half, opened | The message, sentence starters, signature | About 12 to 14 pt if typed, or big handwriting |
| Back | Outside, back cover | Child’s name, age, date | Small is fine |
The Message, Ready to Copy
Here is the text for the front of the card:
Thank You for Your Service
Happy Veterans Day!
Here is the inside message. Fill the blanks together, or let your child dictate and you write:
Dear ____________________,
Happy Veterans Day! Thank you for being a veteran.
I made this flag for you with my own hand.
I think you are brave because ____________________.
My favorite thing about you is ____________________.
Thank you for helping keep our country safe.
Love,
____________________
Age ____
November 11, 20___
Sentence Starters for Kids Who Freeze
Preschoolers can go blank when asked to “say something nice.” Offer a few starters and let them pick, or have them finish a sentence out loud while you write.
| Sentence starter | Sample answers a 4-year-old might give |
|---|---|
| “I think you are brave because…” | “…you wore a hard hat.” “…you went far away.” “…you’re not scared of spiders.” |
| “My favorite thing about you is…” | “…you make pancakes.” “…you tell funny stories.” “…you have a big truck.” |
| “When I grow up, I want to…” | “…be a firefighter, like you.” “…have a dog.” |
| “Thank you for…” | “…helping people.” “…keeping us safe.” “…coming to my birthday.” |
| “I love when you…” | “…play with me.” “…give me a ride.” |
Kid answers rarely match the formal tone of a Veterans Day card, and that’s the point. “You’re not scared of spiders” is a better sentence than anything I could write.
No printer? Fold a letter sheet in half twice (4.25 x 5.5) and write the same words by hand with a marker. Handwriting is better anyway, honestly.
Making It Sound Like Your Kid
- Write exactly what they dictate. Don’t fix grammar. “Thank you for the army” is more charming than the corrected version.
- Let them draw before you write. Drawing first warms up their thinking.
- Keep it short. Three sentences from the child plus a signature is a full card.
- Add a handprint or fingerprint if they’re feeling it. One small fingerprint star on the card ties it back to the flag.
Assembling the Keepsake Folder
Once the paint is dry (give it at least 30 minutes, longer in humid weather) and the card is done, assemble.
- Check the crease. Refold the cardstock along the original crease. If the flag side bowed from drying, press it under a heavy book for ten minutes.
- Make a pocket (optional). For a fancier version, cut a strip of leftover cardstock. Make the strip about 5 inches wide and 3 inches tall, then glue the left, right and bottom edges to the inside right panel, centered, leaving the top open. This makes a little slot that holds the card in place.
- Slide in the card. It should fit with a little wiggle room.
- Add a finishing touch. A star sticker on the closing edge, a ribbon, or a strip of red washi tape all look nice.
- Write the recipient’s name on the outside back. It sounds obvious. Do it anyway.
If you want to go further, tuck in a small extra: a pressed fall leaf, a photo of your child, or a drawing. Keep it flat so the whole thing fits in a 9 x 12 envelope. If you’re working on other handmade gifts at the same time, the handmade gifts kids can make roundup has ideas that adapt easily for veterans and neighbors.
Talking With Your Child While You Craft
The craft gives you a gentle reason to chat.
Starters That Work for Ages 3 to 5
- “Who do we know who was in the military?”
- “What do you think we could say to say thank you?”
- “Why do you think a flag has stars?”
- “How do you think Grandpa will feel when he opens this?”
Questions Kids Actually Ask (and Short, Honest Answers)
| What your child might ask | A simple, age-appropriate answer |
|---|---|
| “Is Great-Uncle Ray a soldier?” | “He was in the Navy. That’s part of the military, like the Army. He worked on a ship.” (Adjust for the actual branch and role.) |
| “Why did they go away?” | “Their job took them far from home for a while. Their families missed them a lot, and they missed their families too.” |
| “Did they fight?” | “Some people in the military do jobs that are dangerous. Some do jobs like fixing airplanes or cooking food. All of them helped.” |
| “Why is today special?” | “Because we get to say thank you to people who served.” |
| “Does it make them sad?” | “Sometimes. Some memories are happy and some are hard. Saying thank you can feel really good.” |
| “Did anyone die?” | “Sometimes people do. That’s what Memorial Day is for. Veterans Day is for everyone who served.” (Say this only if asked.) |
A couple of reminders:
- It’s okay to say “I don’t know.” “I’m not sure. Let’s ask Grandpa when we give him the card.” Kids love the idea of asking the veteran themselves.
- Follow your child’s lead. If they’re more interested in the paint than the meaning, that’s fine. Meaning builds slowly over years of small moments.
- Be thoughtful if your family’s relationship to service is complicated. If a veteran in your life carries heavy memories, a card that says “thank you” and “we love you” is welcome. A card that asks about their service might not be. When in doubt, ask the adults first.
Who Can Receive Your Craft
Not every family has a veteran at the dinner table. That doesn’t mean you can’t do this project. Here are ideas for everyone.
If you know a veteran personally:
- A grandparent, great-grandparent, aunt, uncle, parent, or neighbor
- A coach, teacher, or coworker who served
- A family friend you only see at holidays
If you don’t:
- A local VFW or American Legion post (call first to ask whether they accept cards and how to deliver them)
- A nursing home or assisted living facility with veteran residents (always call ahead, since many have drop-off rules)
- A local VA medical center or veteran community organization (policies vary, so check their website or call)
- Your child’s school or library, if they run a Veterans Day card collection
A note on mailing: a flat 6 x 9 folder needs a 9 x 12 or 6.5 x 9.5 envelope or larger. Add a piece of cardboard behind it for protection, and if it’s heading to a facility, use their preferred address and any labeling rules they’ve shared.
Some families like to deliver in person. Preschoolers often love the moment of handing it over, and veterans often love the moment of receiving it. If that’s possible, a short “Thank you for being a veteran” from the child’s own mouth beats any card.
Troubleshooting: When the Craft Goes Sideways
Something will go wrong. Here are the most common hiccups and what to do.
| Problem | Why it happens | Fix |
|---|---|---|
| Handprint is a smeared red cloud | Too much paint, or the hand slid | Use a thinner coat. Press straight down and lift straight up. Re-do on a fresh sheet; you have plenty of cardstock. |
| Stripes are blobby, not separate | Fingers were pressed together | Gently spread the fingers before pressing. Paint between each finger with a thin brush if needed. |
| Blue paint bled under the tape | Tape wasn’t pressed down | Smooth the tape edges with a fingernail before painting. Tidy up with a damp cotton swab after. |
| Stars look pale or streaky | White paint over wet blue | Let the blue dry fully, then re-dot. Use stickers only for ages 3 and up. |
| Cardstock curled up | Too much water in the paint | Press under a heavy book for an hour once dry. |
| Child refuses to touch the paint | Sensory aversion to wet or sticky hands | Use a foam brush to paint the hand, or use a sponge stamp in a hand shape, or use a paper-hand cut-out and paint that. |
| Child wants to paint everything red | Totally reasonable | Let them. Make a second sheet for the “official” flag. |
| Paint on the sleeve | It’s preschool | Washable paint, cold water, a little dish soap. Move on. |
| The card won’t fit in the folder | Folder or card is a hair too big | Trim 1/4 inch off the card edges with scissors. |
Handwashing Without Tears
- Wipe first, wash second. A baby wipe takes off most of the paint before the sink.
- Avoid scrubbing hard. Washable paint comes off with soap and warm water. If a stain lingers, it fades by bath time.
More Veterans Day Crafts for Preschoolers to Try
If the handprint flag goes over well and your child wants to keep making things, here are quick follow-ups. Most take under 20 minutes plus drying time and use supplies you already have.
- Red, white, and blue paper chain. Cut strips of construction paper, loop them into a chain, and drape it over a doorway. Great for fine motor practice.
- Star-stamping with a potato. Press a star cookie cutter into a thick potato slice and trim around it. An adult does all knife work away from the child; the child only dips and stamps.
- Thank-you rocks. Paint rocks larger than your child’s fist with stars or stripes, with an adult beside them. Use washable, non-toxic paint, and have an adult add a sealer for rocks that will sit outdoors.
- Coffee filter flags. Color coffee filters with washable markers, spritz with water, and let the colors bleed together. Flatten to dry and use as a backdrop.
- Read-aloud. Ask your librarian for a book about community helpers or the flag.
For a broader seasonal crafting calendar, we have plenty of fall projects that carry right into November, including handprint turkey craft ideas if you want a second handprint project for Thanksgiving week.
Frequently Asked Questions
What are the easiest Veterans Day crafts for preschoolers?
The handprint flag in this post is about as easy as it gets: one blue rectangle, a couple of red handprints, and white crayon dots (or stickers for ages 3 and up) for stars. If you want something even simpler, a paper chain in red, white, and blue takes five minutes, and a hand-drawn thank-you card needs only a folded sheet of paper and a crayon. Pick the project that matches your child’s attention span for the day.
Can toddlers do this handprint flag craft too?
Yes, with adjustments. Skip the tape and paint a quick blue patch yourself. Once it dries, your toddler scribbles on it with a white crayon, then you paint their palm and fingers red and they press once. No stickers under age 3. You can write “Thank you” on the back. The keepsake still works because a toddler’s tiny handprint is exactly what a grandparent wants to see.
Do I need a printer for the thank-you card?
No. The card text is written out in full on this page, so you can copy it into any document and print it, or write it by hand on a folded sheet of paper. Handwriting often feels warmer anyway. Just fold a sheet of letter paper in half twice to get a 4.25 x 5.5 inch card, which fits inside the 6 x 9 flag folder.
How do I get a clean handprint from a wiggly preschooler?
Brush a thin coat of paint on with a foam brush, spread the fingers slightly, press straight down for a count of three, and lift from the wrist. Expect two or three tries and let your child pick a favorite. See Step 3 for the full routine.
What if we don’t know any veterans?
You still have options. Many VFW and American Legion posts, assisted living facilities, and veteran community organizations welcome handmade cards, though each has its own rules, so call ahead before dropping anything off. Some schools and libraries also collect cards around November 11. You can also just keep the craft at home and use it as a way to start the conversation about what Veterans Day means.
How do I explain the difference between Veterans Day and Memorial Day?
For preschoolers, keep it simple. Veterans Day (November 11) honors everyone who served in the U.S. military, especially the veterans we know. Memorial Day (late May) is a quieter day for remembering people who died while serving. Most preschoolers don’t need the Memorial Day half yet, so feel free to focus on the thank-you part and answer the harder questions only if your child brings them up.
What kind of paint is safest for kids this age?
Look for washable tempera paint labeled for children, with the ASTM D-4236 conformance statement or the AP Seal. Washable formulas come off skin and most clothing with soap and water. Test a small spot on any fabric you’re worried about, and keep paint away from mouths and eyes. If your child is still in the stage of tasting everything, supervise closely or choose crayons instead.
One Small Handprint, One Big Thank You
Somewhere in your life is a person who put on a uniform and did something hard, and who probably doesn’t get thanked as often as they’d like. A four-year-old with a red handprint and a crooked star is more than enough to change that. Don’t worry about neat stripes or perfect spelling. Make the flag, fold the card, and mail it by early November so it arrives before the 11th.