Free Printable Emotions Chart for Toddlers and Preschoolers
Get your free printable 8-face emotions chart (feelings wheel) for toddlers and preschoolers. You'll learn how to make it, use it effectively, and why a movable pointer helps your child express feelings and build skills.
- Download your free 8-face feelings wheel and pointer template for toddlers and preschoolers.
- Understand why a movable pointer is more effective than a static poster for emotional expression.
- Help your child express feelings without words, build fine motor skills, and learn feelings are changeable.
- Learn how to assemble the wheel in about 15 minutes and integrate it into your child's routine.
- Discover what's in the PDF, including a 'what helps' card and a black-and-white coloring version.
This post contains affiliate links. As an Amazon Associate I earn from qualifying purchases.
A flat feelings poster is something toddlers look at. A feelings wheel with a clothespin pointer is something they can actually use. This page gives you a free printable 8-face emotions chart for toddlers and preschoolers, plus how to make it, an age-by-age rollout, five-minute practice games, and troubleshooting.
Ready to build? Skip down to What You Need and How to Make It, Step by Step. The whole thing takes about 15 minutes. It pairs nicely with a daily routine chart.
Free printable · 3 pages
Feelings Wheel
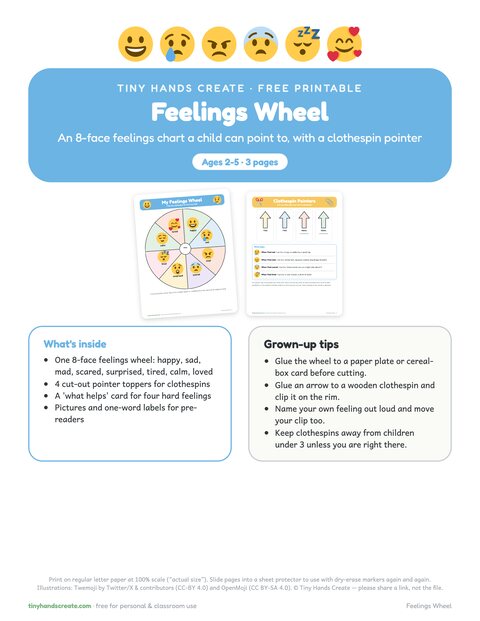
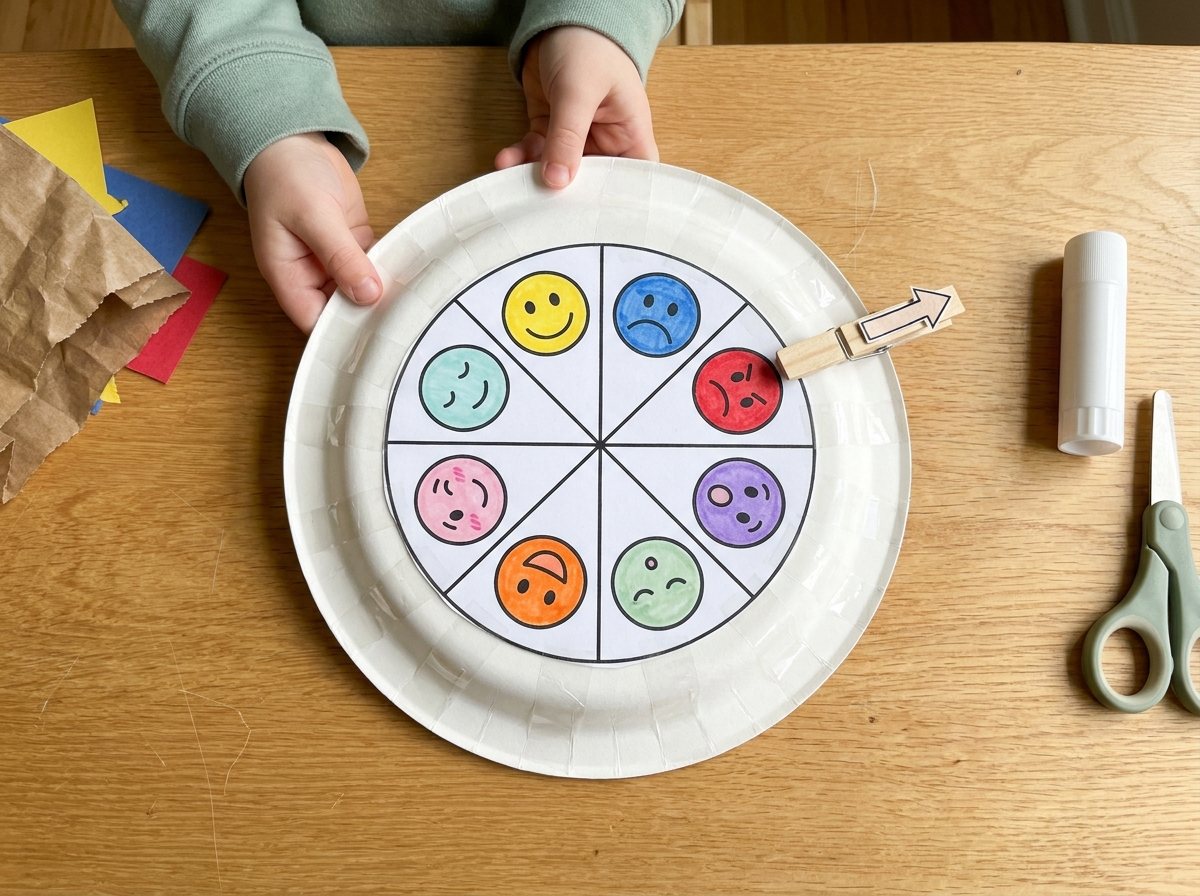
An 8-face feelings wheel a child can point to, four cut-out clothespin pointer toppers and a 'what helps' card for four hard feelings.
Free. Your download link appears right here. You'll also join the Daily Printable Drop. Unsubscribe anytime. Privacy
In this article (15 sections)
- Why a Movable Pointer Beats a Static Poster
- What’s in the Free PDF
- What You Need (Spoiler: Probably Already in Your Craft Drawer)
- How to Make It, Step by Step
- Meet the Eight Feelings
- Introducing the Wheel by Age
- Teach It Before You Need It
- Build the Wheel Into Your Day
- When the Big Feelings Hit
- When to Talk to a Professional
- Keep It Fresh: Activities Beyond the Wheel
- Troubleshooting: When the Wheel Doesn’t Go as Planned
- Customize It for Your Family
- Frequently Asked Questions
- Give It a Try (Even If It’s Messy)
Why a Movable Pointer Beats a Static Poster
Last spring I taped a twelve-face feelings poster to the wall at toddler eye level, and my kid lost interest in about four seconds. Then a late Tuesday morning collapsed into wailing on the hallway floor. Asking a screaming two-year-old “sad or mad?” got me a full-body flop.
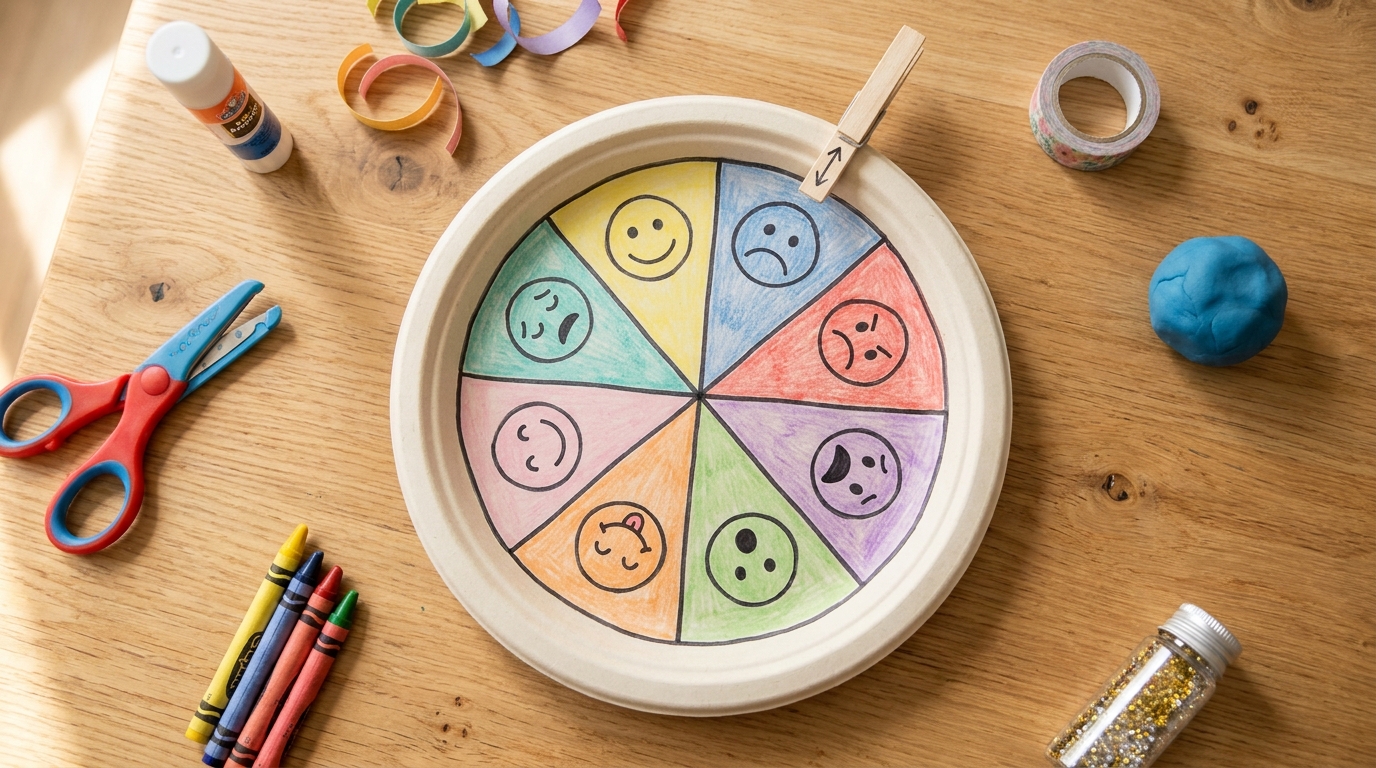
So I grabbed a paper plate, drew two faces on it, and clipped a clothespin to the rim. Then I crouched right beside my kid and held it out.
My kid squeezed the pin open and clamped it onto the angry face. No words, just a very clear message: this one. Within a minute or so the shrieking eased to a grumble. Feeling understood often helps kids settle. That scrappy plate became the printable on this page.
Most of what toddlers learn comes through their fingers, and emotional vocabulary is no different. Here’s why the pointer matters:
- Choosing is a skill, not just seeing. Clipping is an answer, so a child with thirty words and a thousand feelings can skip the telling.
- The clip is satisfying. Squeezing a clothespin helps build hand strength and finger control, which pencil use draws on, and kids return to it because it’s fun.
- Feelings feel changeable. Mad in the morning can become silly by lunch, a concrete lesson that feelings come and go.
- It gives you data. “Tired” at 4 p.m. three days running tells you something about naps, snacks, or pickup time.
| Feature | Static poster | Movable feelings wheel |
|---|---|---|
| Child participation | Looks and points (maybe) | Picks up, squeezes, clips, moves |
| Fine motor practice | None | Hand strength and finger control |
| Shows feelings changing | No | Yes, pointer moves through the day |
| Works for non-verbal kids | Somewhat | Very well |
| Survives toddler handling | Rarely | Reasonably, if you laminate or tape |
| Gives you a daily record | No | Yes, glance at the pointer |
What’s in the Free PDF
The download is a short, printer-friendly packet. Nothing fancy, no ink-guzzling backgrounds.
Free PDF: 8-Face Feelings Wheel + Clothespin Pointer Template
Inside you’ll find:
- The feelings wheel page, a big circle divided into eight wedges, each with a simple, bold face and a one-word label. Faces are drawn with thick lines and high contrast so they read clearly from across the room.
- The cut-out pointer template, a little arrow-and-hand shape that you can glue to a clothespin, or a plain clothespin-topper circle if you’d rather just clip to the edge.
- A mini “my feeling today” strip, a small bookmark-sized version for backpacks, car seats, or the fridge.
- A black-and-white version of the wheel for kids who want to color their own faces (very popular with the 4 and 5 crowd).
- A one-page parent cheat sheet with the short phrases I use for each feeling.
If you’d like, print two copies of the wheel. One lives at home, one lives in the diaper bag or the car.
What You Need (Spoiler: Probably Already in Your Craft Drawer)
This is a low-supply project. No special purchases.
Essentials:
- The printed wheel (regular printer paper is fine, cardstock is better)
- Scissors (grown-up scissors for the wheel, kid scissors if your preschooler is helping with the pointer)
- 1 standard wooden or plastic clothespin
- Glue stick or white craft glue
- A paper plate, piece of cardboard, or cereal-box panel to mount the wheel
Nice to have:
- Clear packing tape or self-laminating sheets (this is the “snack hands” insurance)
- Washi tape or masking tape for edges
- Crayons or markers if you printed the black-and-white version
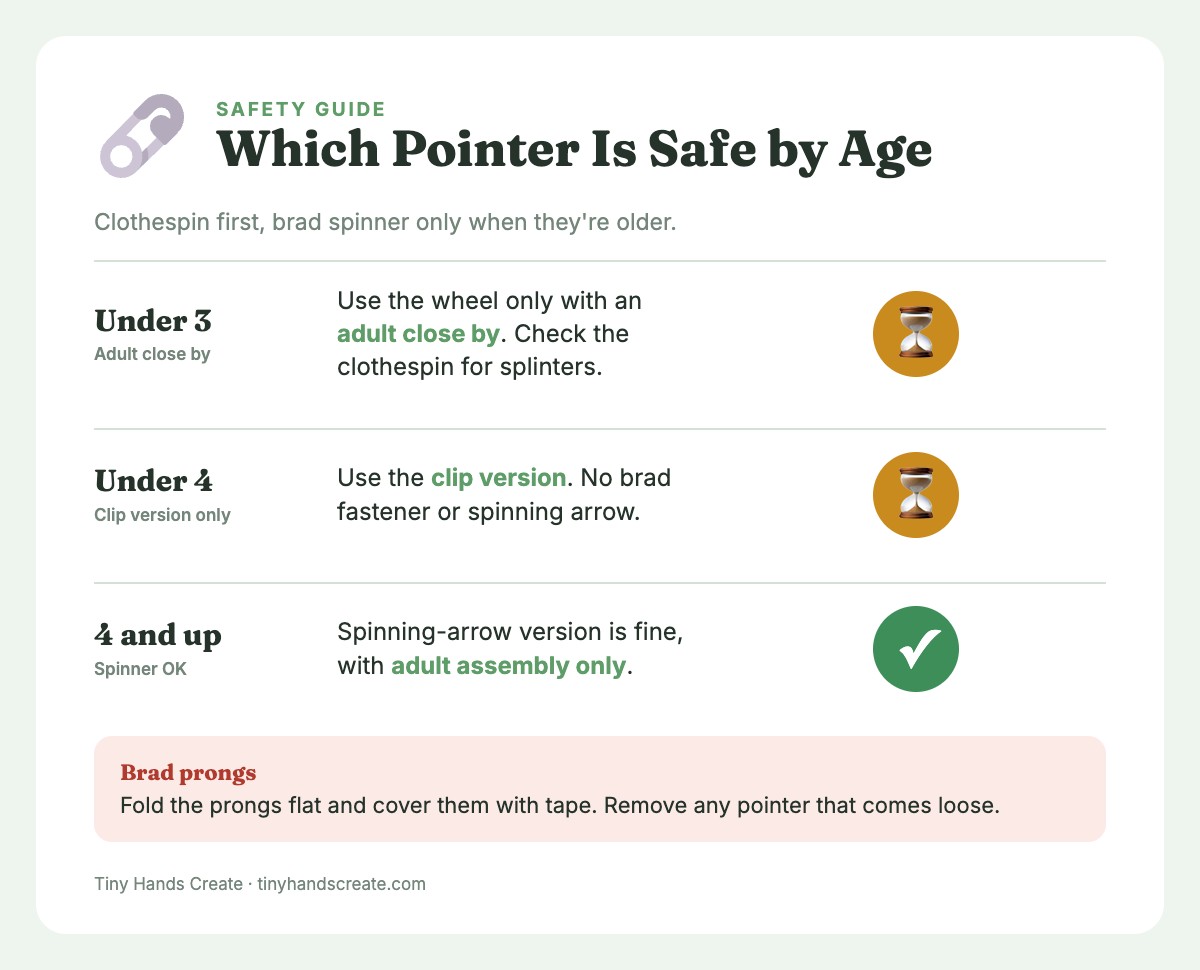
- A brad fastener for the spinning-arrow version (adult assembly only, children 4 and up)
Realistic mess expectations: This is a low-mess craft, maybe a 3 out of 10. Glue sticks are your friend. The most likely disaster is a pointer peeled off mid-meltdown, so cut out a spare while you have the scissors out.
Safety firstUnder 2, skip the clothespin and the wheel: just model the faces and name feelings aloud. From 2 to 3, use the pin only while an adult is actively watching, and store it out of reach between check-ins.
Before each use, check the pin for splinters or a loose spring, and the pointer for peeling. Re-glue or remove a loose pointer. Never let a child mouth the pin, and skip it for kids who still mouth objects.
Brads are adult-assembly only, with prongs folded flat and taped. Use the clip version for children under 4.
How to Make It, Step by Step
Total active time: about 15 minutes for you, plus however long your kid wants to “help.” Plan for help to double the timeline and triple the glue on the table.
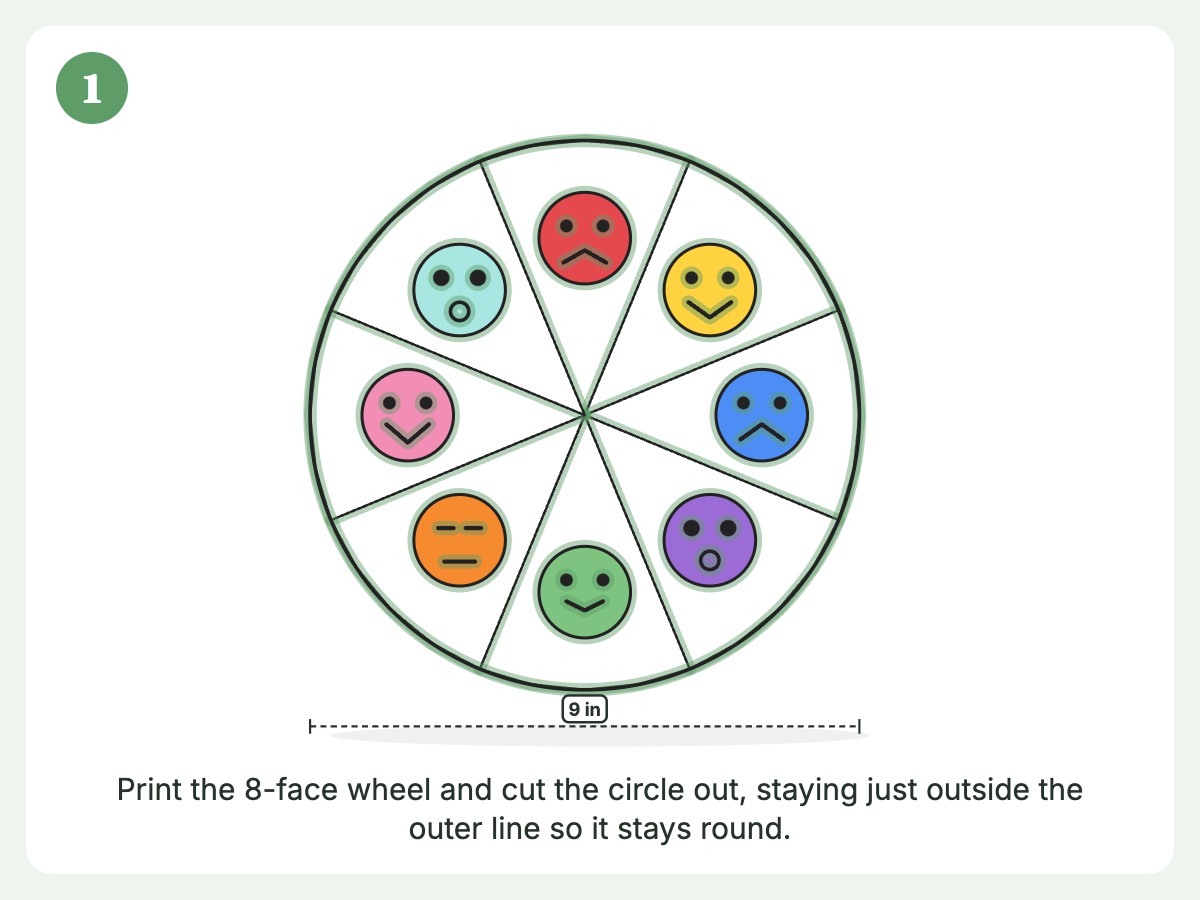
Step 1: Print and Trim
Print the wheel page on cardstock if you have it. If not, regular paper works fine as long as you mount it on something sturdier later. Cut out the circle along the outer line. A tip from experience: cut just outside the line rather than on it, so the final wheel doesn’t end up lopsided.
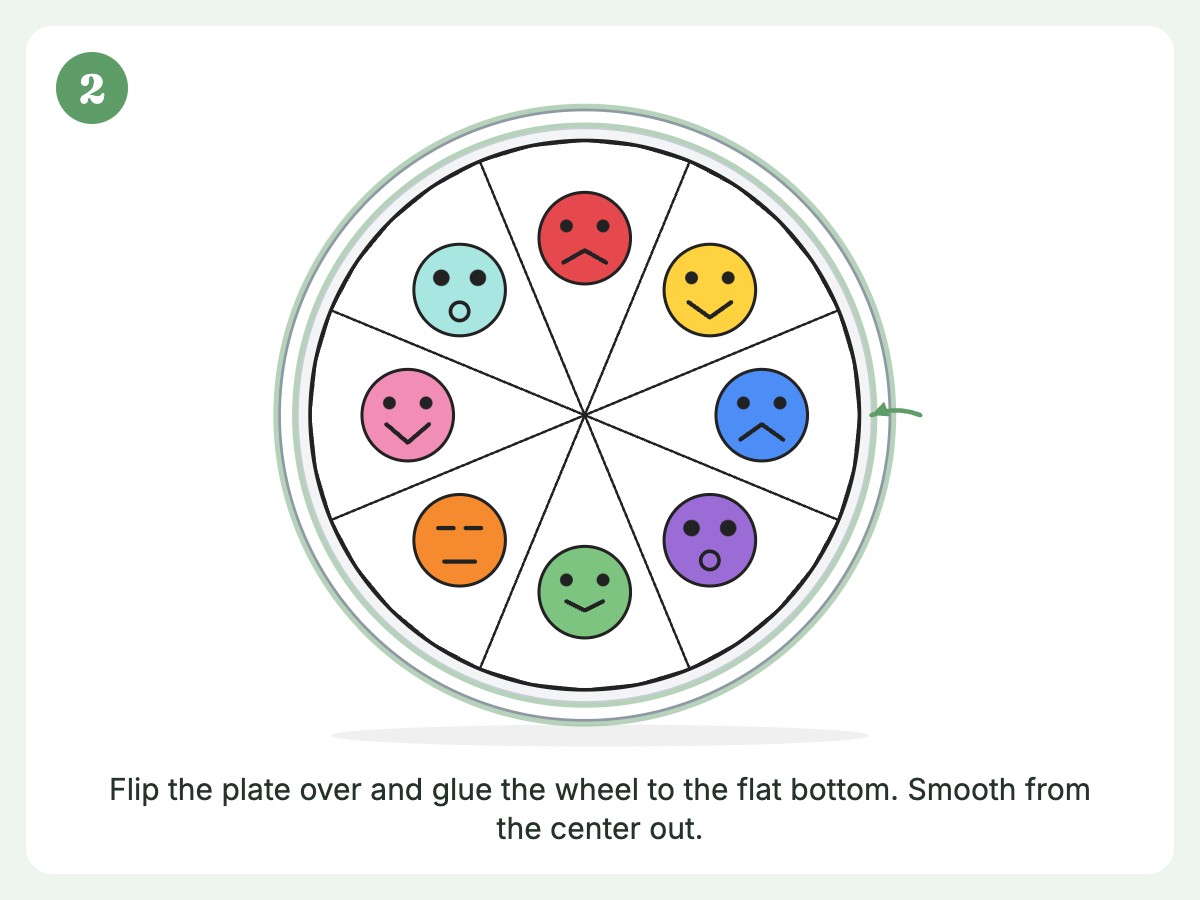
Step 2: Mount It
Glue the wheel onto a paper plate (flip the plate upside down so the flat bottom is your surface), a circle of cardboard, or the flat panel of a cereal box. Smooth it from the center outward so you don’t trap air bubbles. A heavy book on top for ten minutes keeps it flat while it dries.
If you’re making this with your kid, this is a great job to hand over. Let them spread glue on the back with a glue stick. It’ll be messy and slightly crooked. That’s what makes it theirs.
Step 3: Make the Pointer
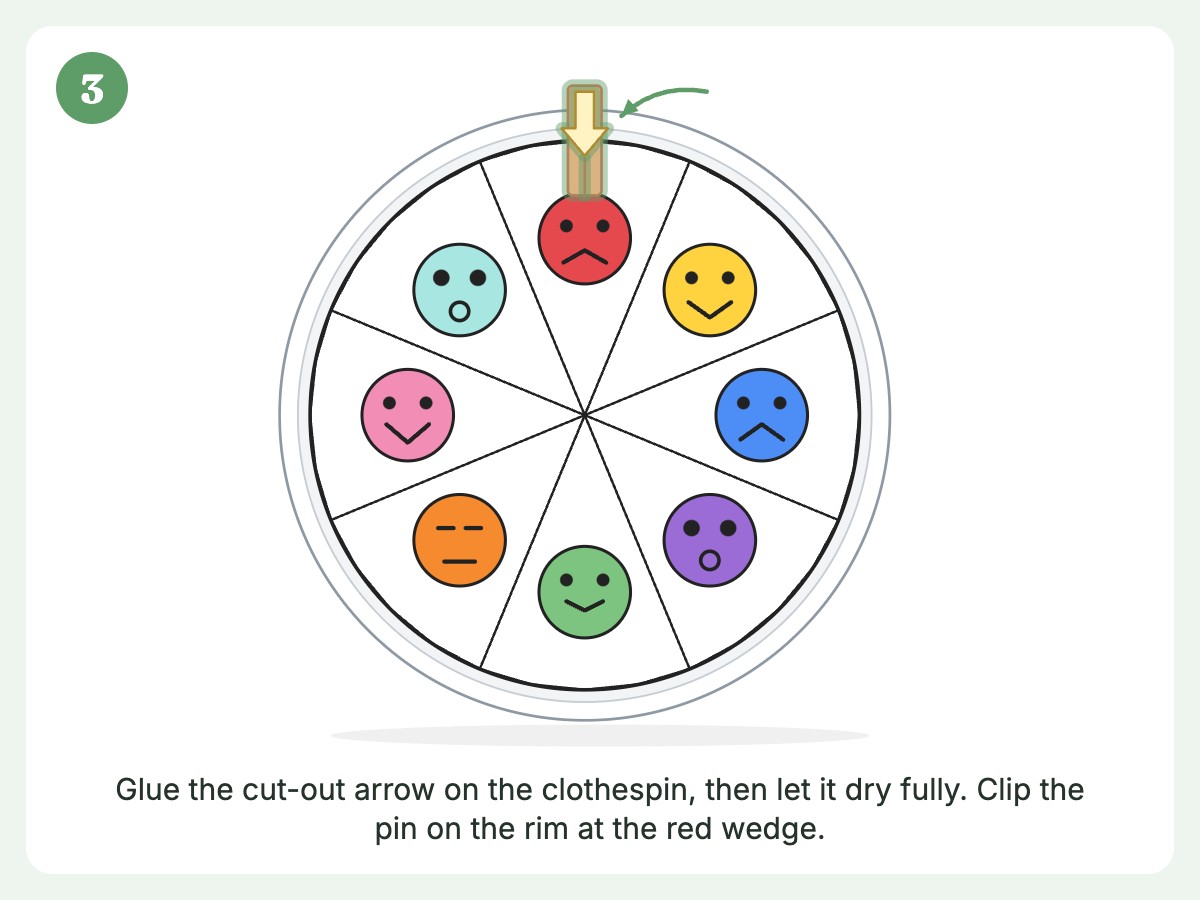
Cut out the pointer shape from the template. Glue it onto the front or top of the clothespin so the arrow points where the pin will clip. If you’ve chosen the circle-topper option, glue that on instead and plan to clip the pin right at the edge of the wedge you’re picking.
Let the glue dry fully before anyone squeezes. I learned this the hard way when a half-dry pointer slid off and ended up stuck to a sock.
Step 4: Protect It
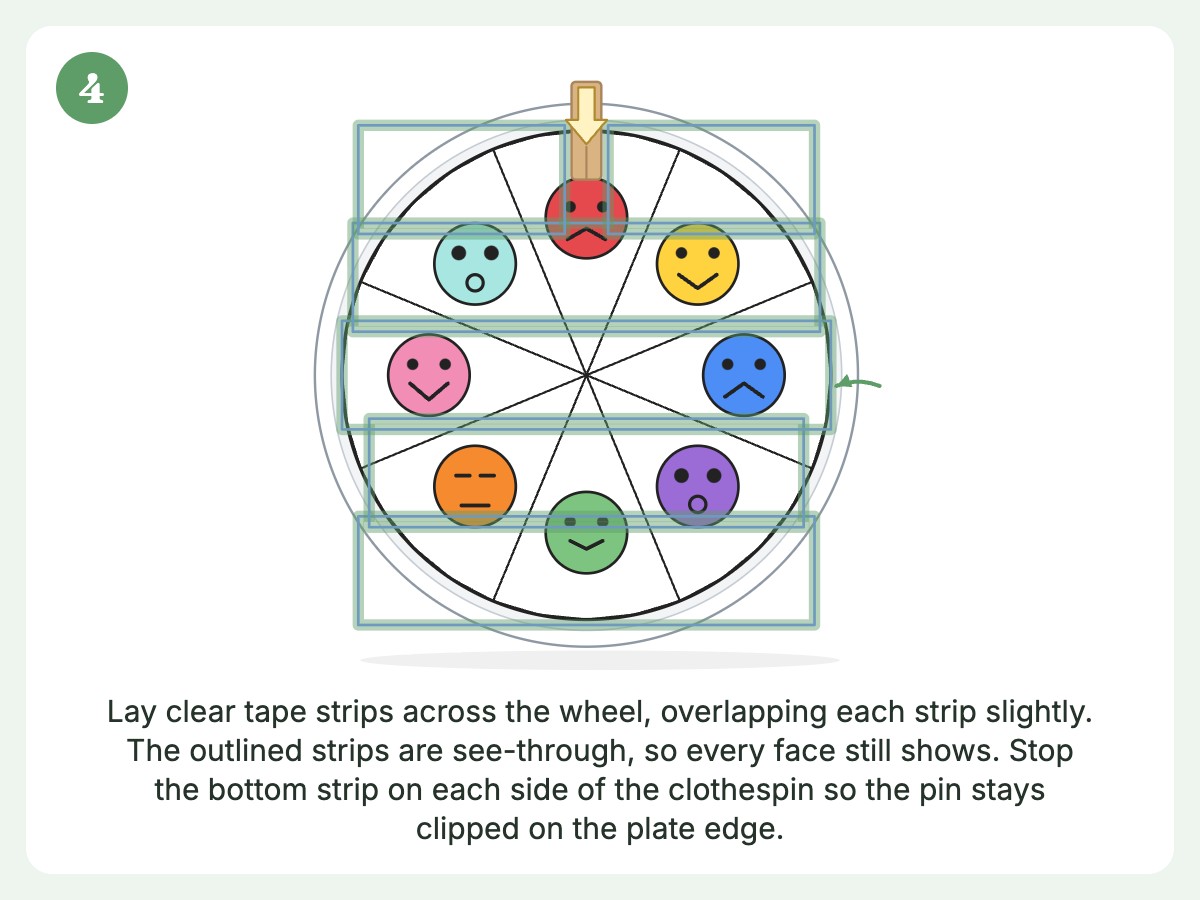
Cover the wheel with clear packing tape, overlapping the strips slightly, or slide it into a self-laminating sheet. This step adds about three minutes and saves you from reprinting after the first juice spill. Clip the pin on the edge of the plate so the tape doesn’t tear when it’s squeezed.
Step 5: Pick a Home
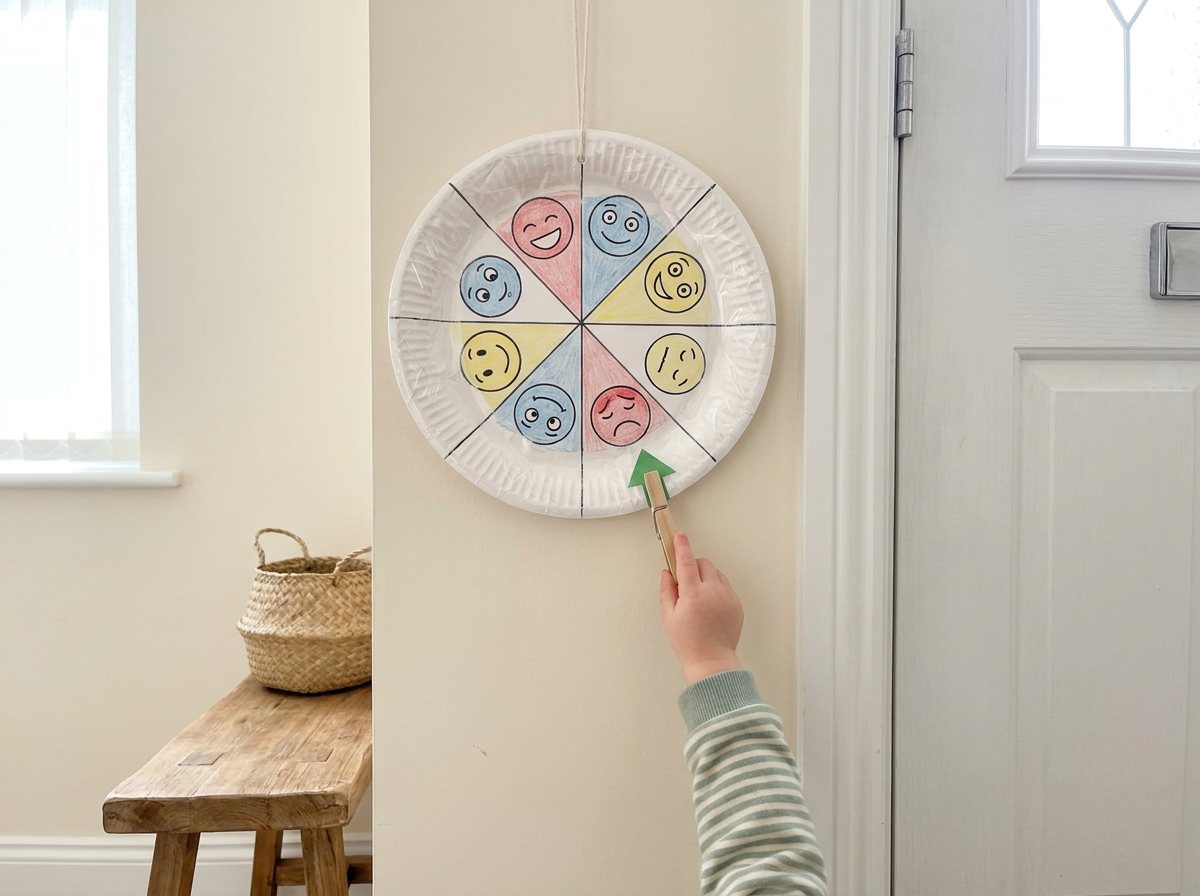
Hang or prop the wheel somewhere your child can reach without help. For children under 3, the wheel can stay in reach, but keep the clothespin up high and hand it over when you’re there to watch. Good spots include:
- On the fridge at kid height, held with tape or a flat adhesive magnet sheet a child can’t peel off (keep loose magnets away from children under 6, and get urgent medical care if one is swallowed)
- On a low wall near the front door
- In the calm-down corner (more on that below)
- Taped to the inside of a kitchen cabinet door you’ve designated as “kid-accessible”
Then clip the pin to whatever feeling you think they’re having right now and say, “Right now it’s on tired. Does that feel right?” You’ve just taught the first rule: the pointer can move.
Optional Upgrade: The Spinning Arrow
If your preschooler loves spinners, an adult can poke a brad fastener through the center of a paper arrow and through the wheel, then fold the prongs flat and cover them with tape. Skip this version for children under 4, and check now and then that it hasn’t loosened. They can spin to land on a feeling. It’s more of a game than a check-in, but it’s great for the practice rounds in the next sections. Just keep the clothespin version for real-time check-ins, because spinning invites randomness, and randomness is not what you want at a meltdown.
Meet the Eight Feelings
I chose eight faces because they fit neatly on a wheel and cover a typical week of feelings, including “silly” and “tired” alongside “happy” and “sad.” You don’t have to start with all eight, and I’d start smaller than you think. When I launched all eight faces, a calm-down corner, and a daily routine at once, my toddler took one look and went back to the crayon bin. Begin with fewer faces and add one piece at a time.
Here’s the lineup, with the short phrases I use for each one.
| Feeling | What the face looks like | Body clue to ask about | Simple phrase to say |
|---|---|---|---|
| Happy | Big smile, round cheeks | “Does your face feel wiggly and your tummy light?” | “Happy feels bubbly.” |
| Sad | Down-turned mouth, droopy eyes | “Do your eyes feel wet? Does your chest feel heavy?” | “Sad feels heavy and slow.” |
| Mad | Furrowed brows, tight mouth | “Are your fists squeezy? Does your face feel hot?” | “Mad feels hot and tight.” |
| Scared | Wide eyes, small open mouth | “Is your heart thumpy? Do you want to hide?” | “Scared feels like a thumpy heart.” |
| Tired | Half-closed eyes, a yawn | “Are your eyes heavy? Is your body floppy?” | “Tired feels floppy.” |
| Silly | Tongue out, crooked smile | “Is your body wiggly and giggly?” | “Silly feels giggly.” |
| Surprised | Round eyes, round mouth | “Did your eyes get big? Did you gasp?” | “Surprised feels like a gasp.” |
| Calm | Soft smile, relaxed eyes | “Are your shoulders down? Is your breath slow?” | “Calm feels quiet and smooth.” |
Why These Eight?
Happy, sad, mad, and scared are the four basic feelings many early-childhood programs start with, so your child may already know them from daycare or preschool. Using the same words means everyone’s speaking the same language.
Tired is on the wheel because so much of what looks like misbehavior at this age is exhaustion. Giving your child a way to say “I’m tired” can head off a spiral.
Silly matters because feelings aren’t all heavy. Kids need a way to flag the wild, giggly energy too.
Surprised gives a name to that sudden gasp when a balloon pops or a surprise guest shows up.
Calm is the target. Seeing it on the wheel makes calm feel like a place they can go, not just the absence of a tantrum.
What About Frustrated, Jealous, Embarrassed, and Worried?
They’re real feelings, and you’ll absolutely get there. But for ages 2 to 5, starting with fewer, clearer options works better. Once your child has the eight down (for many kids this takes weeks to a couple of months), you can add a “grown-up wedge” using a sticky note for more nuanced feelings like frustrated, nervous, or left out. Preschoolers at 4 and 5 often start inventing their own. My favorite so far was “crunchy,” which turned out to mean a mix of tired and grumpy. We kept it.
Introducing the Wheel by Age
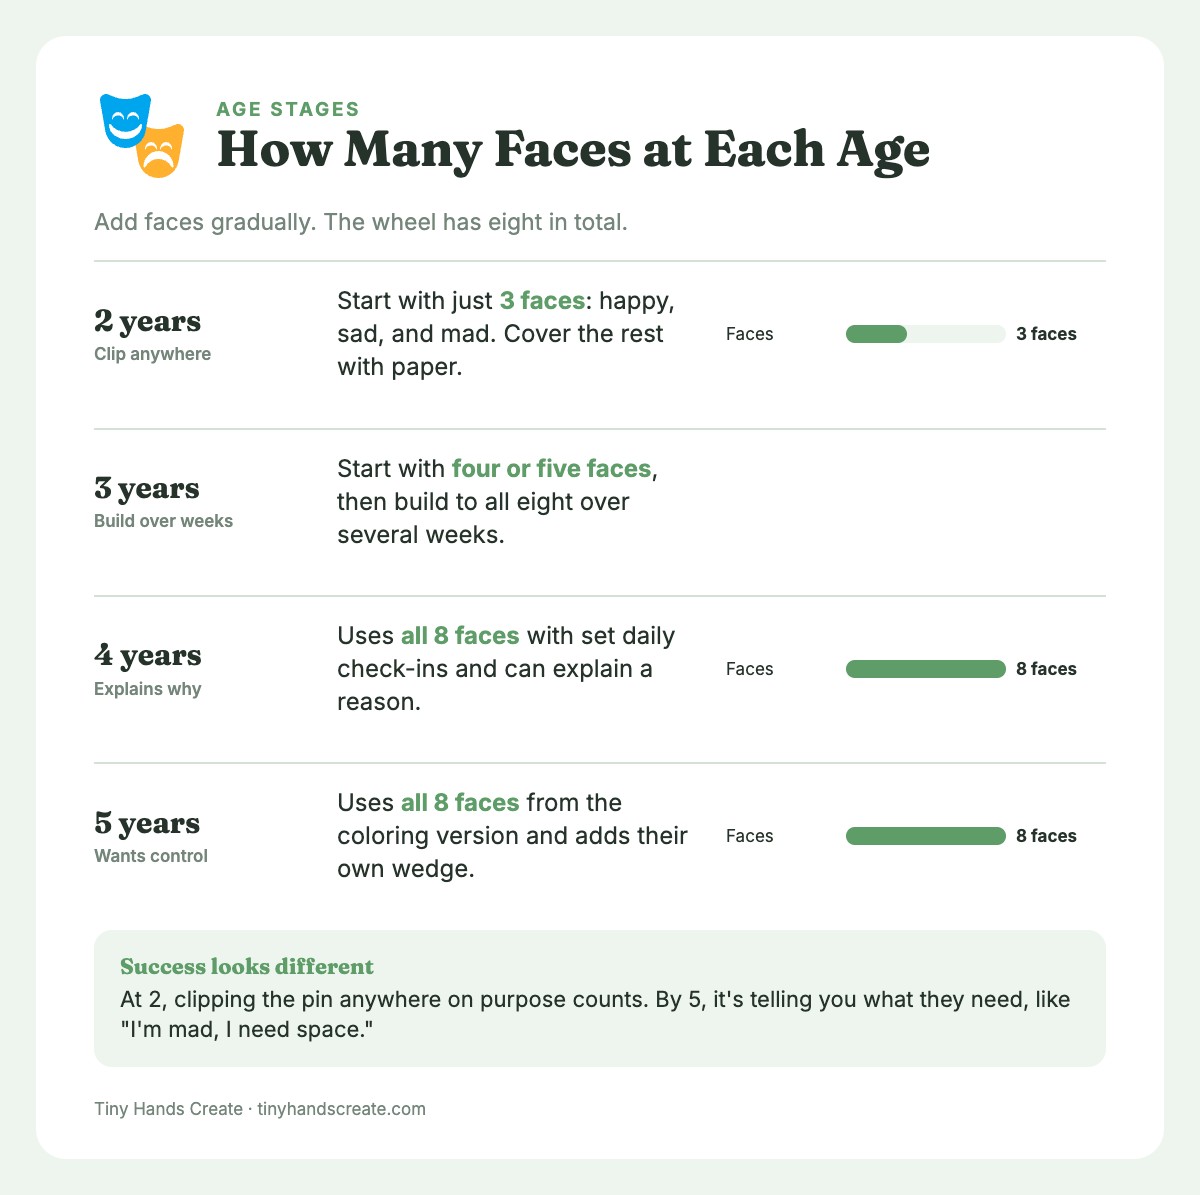
A two-year-old and a five-year-old will use this tool very differently. Here’s how I’d roll it out.
| Age | What to expect | How to introduce it | What counts as success |
|---|---|---|---|
| 2 years | Little language, lots of grabbing. They may only use 2 or 3 faces. | Start with just happy, sad, and mad. Cover the other wedges with paper if it helps. Model: “I feel happy!” and clip it. | Clipping the pin anywhere on purpose. Pointing at a face when you name it. |
| 3 years | Starting to name feelings, but often picks “happy” for everything. | Start with four or five faces and build to all eight over several weeks. Play the “silly faces in the mirror” game. | Choosing a face that roughly matches the situation, even if wrong sometimes. |
| 4 years | Can name feelings and connect them to causes (“I’m sad because…”). | Let them check in at set times each day. Ask “what made you feel that way?” | Using the wheel without prompting, and explaining a reason. |
| 5 years | Can talk about feelings, wants more control, may also feel “too old.” | Hand over the coloring version and let them customize. Add their own wedge. | Using it to tell you what they need, like “I’m mad, I need space.” |
If your five-year-old rolls their eyes at a “baby chart,” try framing it as a tool for people who want to be good at feelings, like a coach’s playbook. Or let them be the keeper of the wheel for a younger sibling. Taking on a teaching role often changes the whole vibe.
Teach It Before You Need It
Here’s the number one mistake I made: I only brought out the wheel when someone was already melting down. That’s like teaching swimming while someone is drowning. A child in the middle of a big feeling can’t learn a new system.
Practice during calm, cheerful moments. Think of it like a fire drill. You rehearse when nothing’s on fire so everyone knows what to do when something is.
Five-Minute Practice Games
Mirror faces. Stand in front of a mirror together. Say “Show me mad!” and scrunch your faces. Then “Show me silly!” Kids who can make the face can recognize the face.
Your turn, my turn. You clip the pin and make that face, and they guess the feeling. Then swap. Toddlers love catching you being wrong, so clip “sad” while grinning. They’ll correct you with total confidence.
Stuffed animal check-in. Hold the wheel and “ask” a favorite stuffy how they’re feeling. Make the stuffy pick a feeling and explain why. (Mine, a worn-out bunny, is mostly tired.) Practicing on a stuffy has lower stakes than practicing on yourself.
Story pauses. While reading a picture book, stop on a page and ask, “How do you think that character feels? Can you clip it?” Books with big, expressive illustrations are perfect for this. A library stack of five or six keeps it fresh.
Feelings freeze dance. Play music and dance. When it stops, call out a feeling, and everyone freezes in a pose that shows it. Mad is a stomp-pose. Tired is a floppy slump. Silly is whatever happens. Then clip the matching pin.
Build the Wheel Into Your Day
The wheel works best when it becomes part of the rhythm of the day, not a special event. Here are the check-in moments that worked for us. Pick one or two, not all five. Checking in all day starts to feel like surveillance, and kids need space to just be. Leave the rest for when your child reaches for the wheel on their own. It also pairs well with a daily routine chart, so the check-in becomes one more predictable step.
| Time of day | Check-in idea | Why it works |
|---|---|---|
| Morning, before breakfast | “How’s your body feeling today?” | Sets the tone and shows you whether it’s going to be a gentle day. |
| After daycare or preschool pickup | Clip the pin before the car ride home. | Kids often hold it together all day, then fall apart at home. A quick check-in catches it. |
| Before nap or quiet time | “Are you tired or silly?” | Helps you know whether they need a wind-down or a snack. |
| Before dinner | Clip it while you cook. | The “witching hour” is real. This gives a non-meltdown outlet. |
| Bedtime | “Where’s your pin tonight?” | A gentle ritual that ends the day on connection. |
How to Respond When They Clip a Feeling
This part matters more than the printable itself. The way you react teaches your child whether it’s safe to be honest.
- Name it, don’t fix it. “You’re clipping sad. I see that.” Resist the urge to say “Oh, don’t be sad!” or jump straight to solutions.
- Thank them. “Thank you for showing me.” It tells them that sharing is welcome, not annoying.
- Offer, don’t force. “Do you want a hug, some space, or a snack?” Giving two or three choices respects their autonomy.
- Don’t punish a feeling. The clip itself should always feel safe. If they clip “mad” and then hit or yell, redirect right away and calmly: “Mad is okay. Hitting is not. Let’s stomp instead.” Talk about it afterward, once everyone is calm.
- Keep it short. A toddler doesn’t need a ten-minute discussion. “You’re mad. Want to stomp it out?” is plenty.
- Don’t correct the pick. If your kid clips “silly” when they’re obviously furious, resist the urge to fix it. They might not have the words yet, or they might be telling you something you haven’t understood. Stay curious.
- Clip your own feelings too. “I’m feeling tired today, so I’m going to move a bit slower.” Modeling honest, calm self-awareness teaches more than any lesson.
I’ll be honest, I fumbled this constantly at first. I’d clip “tired” for my kid and then give a lecture about bedtime. They stopped using the wheel for about a week. Lesson learned: if you want honest answers, make honesty low-cost.
When the Big Feelings Hit
A feelings chart is not a magic wand. During a full-blown meltdown, nobody is reading faces. What the wheel does is give you a bridge to the calm-down tools you already use, and it makes those tools easier to reach for.
Here’s the flow that’s worked for us:
- Get low and stay close. Crouch down. Keep your voice slow and quiet.
- Offer the wheel. Hold it out without demanding anything. Some kids clip right away. Some need a minute.
- Name what you see. “Looks like mad. Your fists are tight.”
- Move to a calm-down tool. Once the pin is clipped and they’ve felt heard, offer a next step.
For that last step, you want a short menu of options your child already knows. Our calm down activities for kids list has twenty ideas, like belly breathing with a stuffy or squeezing playdough. Pick three that suit your child and tape them next to the wheel as a mini menu. For longer wind-downs, try our quiet time activities for preschoolers.
Another favorite is a sensory bottle for calming down. Shaking a glitter bottle and watching it settle is a beautiful metaphor for big feelings settling too. Use a plastic bottle (never glass) with the cap glued or taped shut, check it regularly, and supervise closely for children under 3. Keep it next to the wheel. When “mad” is clipped, you can say, “Want to shake the glitter and watch it fall?” It gives their body something to do while their brain catches up.
Build a Tiny Calm-Down Corner
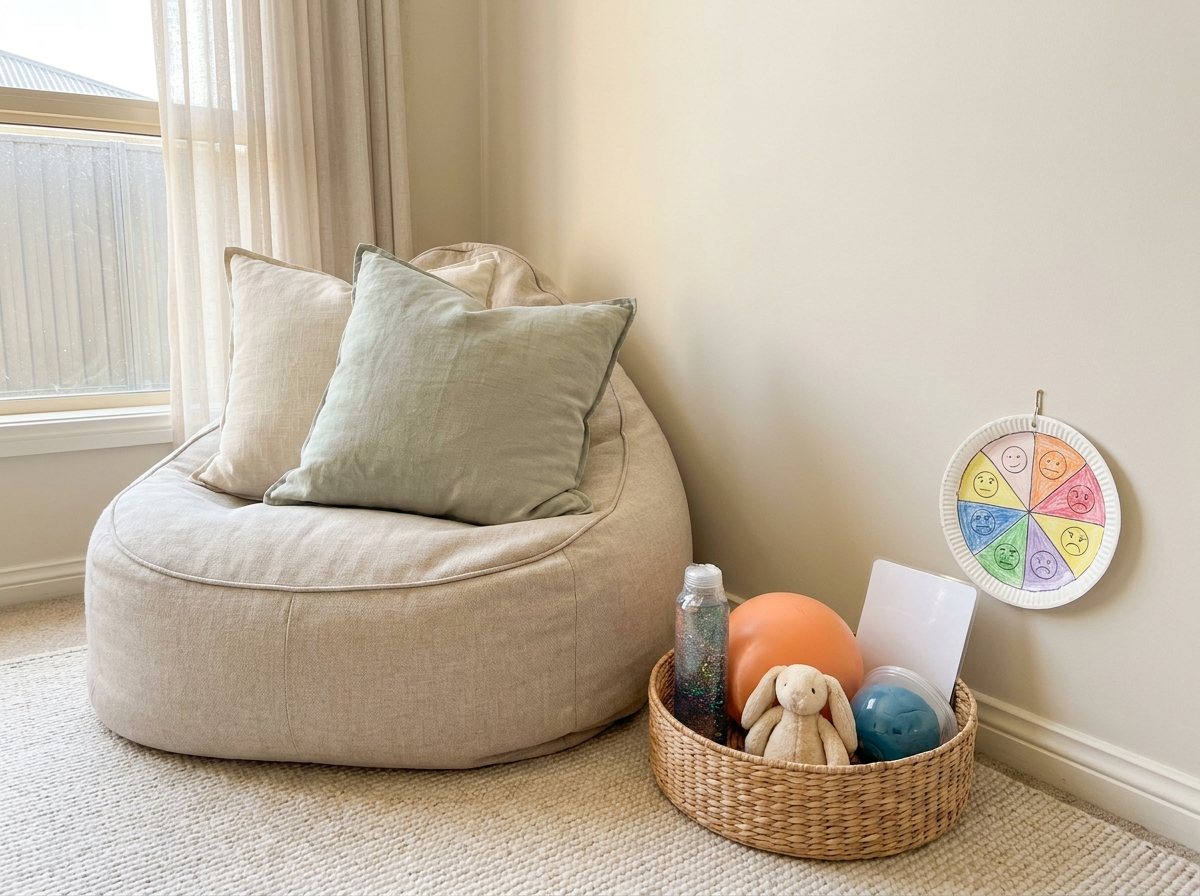
Pair the wheel with a small, cozy spot. It doesn’t need to be Pinterest-perfect. Ours is a beanbag, two pillows, and a basket. Keep an adult nearby for children under 3. In the basket:
- The sensory bottle
- A solid, larger squishy ball with no small parts or loose filling, or a handful of playdough (not for eating)
- A picture book or two about feelings
- A small stuffed animal
- One sturdy laminated card with three breathing steps (smell the flower, blow the candle, repeat), not loose small pieces
Hang the wheel on the wall next to it. The goal isn’t to send them away. It’s to give them a place where feelings are welcome and tools are within reach. I usually sit nearby, reading my own book, available but not hovering.
When to Talk to a Professional
Good to knowThe wheel is a communication tool, not a diagnostic or treatment tool. Talk to your pediatrician or a child mental-health professional if meltdowns are very frequent or long. Do the same if your child hurts themselves or others, or seems persistently sad, anxious, or withdrawn. Also reach out if they’ve lost skills they used to have.
Keep It Fresh: Activities Beyond the Wheel
Once the wheel is part of your routine, you can build around it. These activities extend the learning and keep it from getting stale.
Feelings Face Crafts
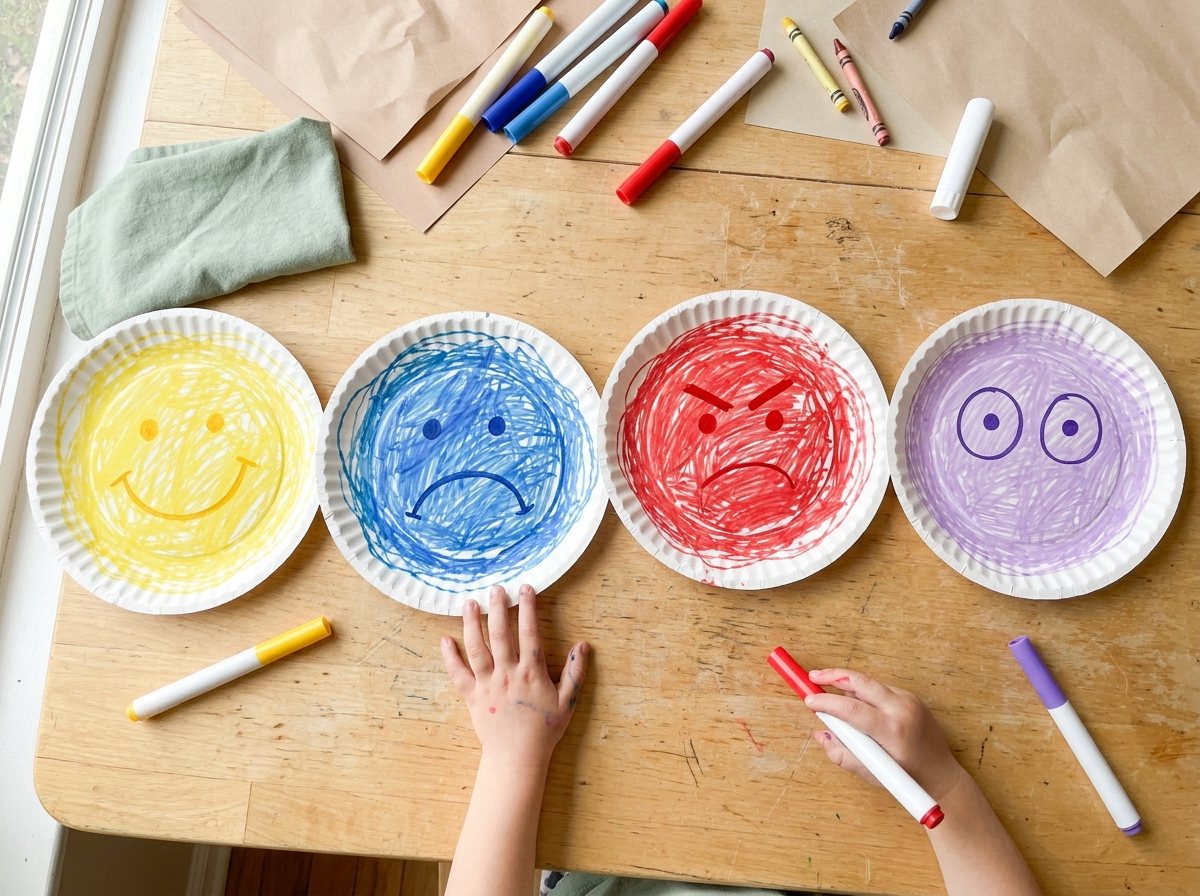
- Paper plate faces. Draw or glue on eyes and mouths to match each feeling. Make all eight and line them up.
- Playdough faces. Roll a ball, press it flat, and let your child press in large playdough shapes or draw on features for eyes, a nose, and a mouth. Skip beads for children under 4, and remember playdough is not for eating.
- Sticker faces. Blank circles plus a sheet of eye and mouth stickers equals a simple, low-mess face-builder.
- Felt faces. A felt board with interchangeable eyes and mouths is endlessly reusable. If you’re sewing-averse, check out our felt finger puppet crafts for toddlers, which use no-sew templates. Making an “angry” puppet and a “sleepy” puppet is a great way to act out feelings.
Safety firstKeep play with small pieces, playdough, and loose-grain bins supervised at all times. Use only large pieces for children under 4.
Movement and Sensory Play
- Feelings walk. Stomp like you’re mad, tiptoe like you’re scared, float like you’re calm, jump like you’re surprised.
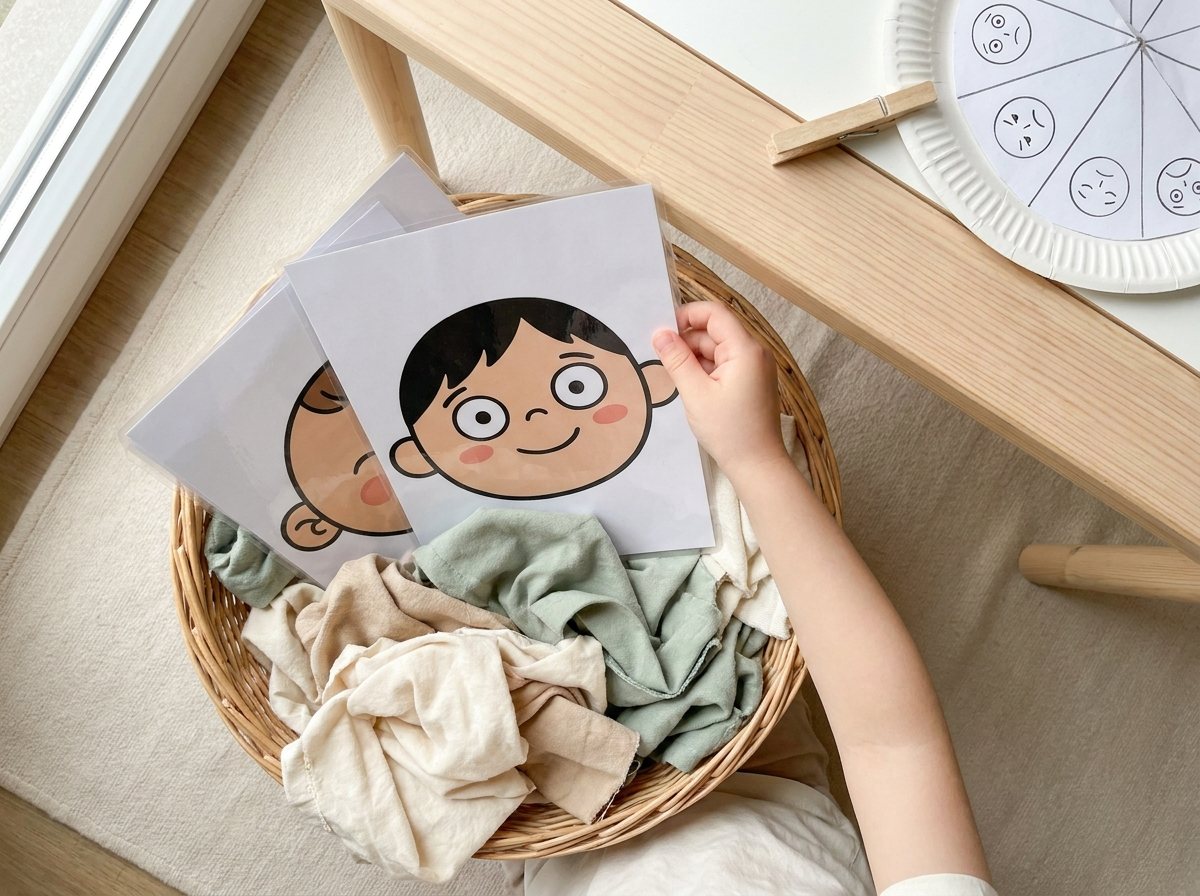
- Feelings in a bin. For kids who no longer mouth objects, hide large laminated face cards in a bin of rice or oats, with an adult nearby and the bin away from pets. Your child digs them up, names the feeling, and clips the pin to match. For younger kids, hide the cards in a basket instead, with no grain.
- Bubble breathing. Practice slow breaths by blowing bubbles together. Pair it with the “calm” wedge.
Real-Life Scavenger Hunt
Over the course of a day, play “feelings spotter.” When you see someone with an obvious feeling, whisper, “What do you think they’re feeling?”
Your spot could be a person in a store, a character on a show, or a dog excited about the mailman. This builds empathy, not just self-awareness.
Troubleshooting: When the Wheel Doesn’t Go as Planned
No tool works perfectly out of the gate. Here are the bumps we hit, and what helped.
| Problem | What’s probably going on | What to try |
|---|---|---|
| They clip “happy” every time | They’ve learned that happy gets a good reaction, or they don’t yet know other faces. | Play the mirror game. Model other feelings yourself. Reassure them that all faces are okay to choose. |
| They treat it like a toy and ignore the faces | Totally normal at 2. The clip is the fun part. | Let them play while you watch, and keep the pin out of mouths. Say the feeling name each time they clip. Meaning comes later. |
| They refuse to use it during a meltdown | They can’t process anything in that moment. | Skip it. Offer comfort first. Return to the wheel when they’ve settled. |
| They clip a feeling and then deny it | They may feel embarrassed or pressured. | Back off. Say, “That’s okay. The pin’s here whenever you want it.” |
| Siblings fight over it | Shared tools are tricky. | Make two wheels. It’s only a paper plate. |
| The clothespin keeps popping off | The plate or cardboard is too thin. | Reinforce the edge with a strip of tape or use a thicker base. |
| They lose interest after a week | Novelty wore off. | Rotate the location or add a themed sticker. For children 4 and up, switch to the adult-assembled spinner version for a few days. |
| They use it to avoid things (“I’m tired” = no bath) | Feelings can be strategic. That’s normal. | Acknowledge the feeling, hold the limit. “You’re tired. Bath still happens. Want to pick the bubbles?” |
Customize It for Your Family
One reason I love a DIY wheel over a store-bought chart is that it can match your kid, your home, and your quirks.
Use your own photos. Snap pictures of your child making each face, print them small, and glue them over the printed faces. Many kids connect more strongly with their own expression than a cartoon.
Add a family-language wedge. Every family has its own words. Ours includes “grumbly” and “wiggly-worry.” If your child invents a term, write it on a sticky note and add it to the wheel.
Match your child’s sensory needs. If your child is sensitive to bold colors, use pastel markers on the black-and-white version. If they love tactile things, glue a scrap of fuzzy felt on the “calm” wedge so they can stroke it.
Make a travel version. Print the mini strip, laminate it, and keep it in a bag or on the fridge. Waiting rooms, restaurants, and car rides are prime meltdown territory, and a pocket-sized check-in can save the day.
Go bilingual. If you speak more than one language at home, write the feeling words in both.
Frequently Asked Questions
What age is an emotions chart for toddlers appropriate for?
Most kids start getting value from a feelings chart around age 2, mostly by pointing and clipping rather than talking. Start with three faces (happy, sad, mad) at 2, build to four or five at 3, and by 4 to 5 most children can use all eight and explain why they feel that way. Under 2, skip the clothespin and the wheel. Just model the faces and name feelings aloud, since a child that young will mouth the pin.
How is a movable feelings wheel different from a regular feelings chart printable for preschool?
A standard feelings chart is a static poster. It’s useful for looking at, but kids can’t interact with it. The wheel with a clothespin pointer turns it into an action: your child picks up the pin, squeezes it, and chooses a face. That physical step makes it easier for toddlers who can’t yet say how they feel, builds fine motor strength, and lets the pointer move as feelings change. It also gives you a quick visual to check at a glance.
My toddler just plays with the clothespin and ignores the faces. Is it working?
Yes, it’s normal. At age 2, the clothespin itself is the exciting part. Let them explore it while you watch, and keep it out of their mouth. Each time they clip it somewhere, say the feeling name out loud: “Oh, you clipped happy!” Over days and weeks, the words and faces start to connect. Think of the first few weeks as familiarization, not performance. If it helps, start with a simpler version that shows only two or three faces so there’s less to take in.
Should I laminate the printable emotions chart?
If you can, yes, because toddlers are tough on paper. Self-laminating sheets or wide clear packing tape work if you don’t own a laminator. Mount the wheel on a paper plate first, then clip the pin to the plate’s edge so the tape doesn’t tear. If you’d rather not laminate, keep a spare printed copy in a drawer for when the first one gets juice-stained.
What if my child only ever picks one feeling?
This is very common, and “happy” is the usual pick because it earns a warm response. Start by modeling other feelings yourself, using the wheel to show your own mood honestly. Play the mirror-face game and the “your turn, my turn” game so they practice recognizing and making all the faces. Avoid reacting strongly (positively or negatively) to any particular choice. When every answer gets the same calm “thank you for showing me,” kids feel safe picking what’s true. If a child consistently picks one negative feeling over several weeks and seems distressed, it’s worth mentioning to your pediatrician or your child’s teacher.
Can I use this with a child who is nonverbal or has speech delays?
Yes. A pointer-based chart gives children with limited speech a way to communicate without words, and you can use fewer faces, photos of your child’s own expressions, or a gesture for each face. It isn’t a substitute for an evaluation, so talk to your pediatrician or a speech-language pathologist about a speech delay, and share the wheel with any therapist so everyone uses the same visuals.
How often should we use the feelings wheel?
One or two natural check-ins a day is plenty: maybe morning and after daycare pickup, or before bed. Keep it low-pressure. The best sign of success is when your child reaches for the wheel on their own. If it starts to feel like a chore, scale back and focus on playful practice (mirror games, stuffed animal check-ins) instead of formal check-ins. Consistency matters more than frequency.
Give It a Try (Even If It’s Messy)
You don’t need a perfect craft or a perfectly calm child to start. A printed circle, a clothespin, and a little glue are enough to give your toddler a new way to say, “This is how I feel.” Some days they’ll ignore it. Some days they’ll clip “mad” and you’ll feel like you just won a tiny parenting lottery. Both count.
Print the wheel, make your pointer, and put it where small hands can reach. Then go easy on yourself and on them. Feelings are big, and learning to name them takes practice, one squeeze of the clothespin at a time.