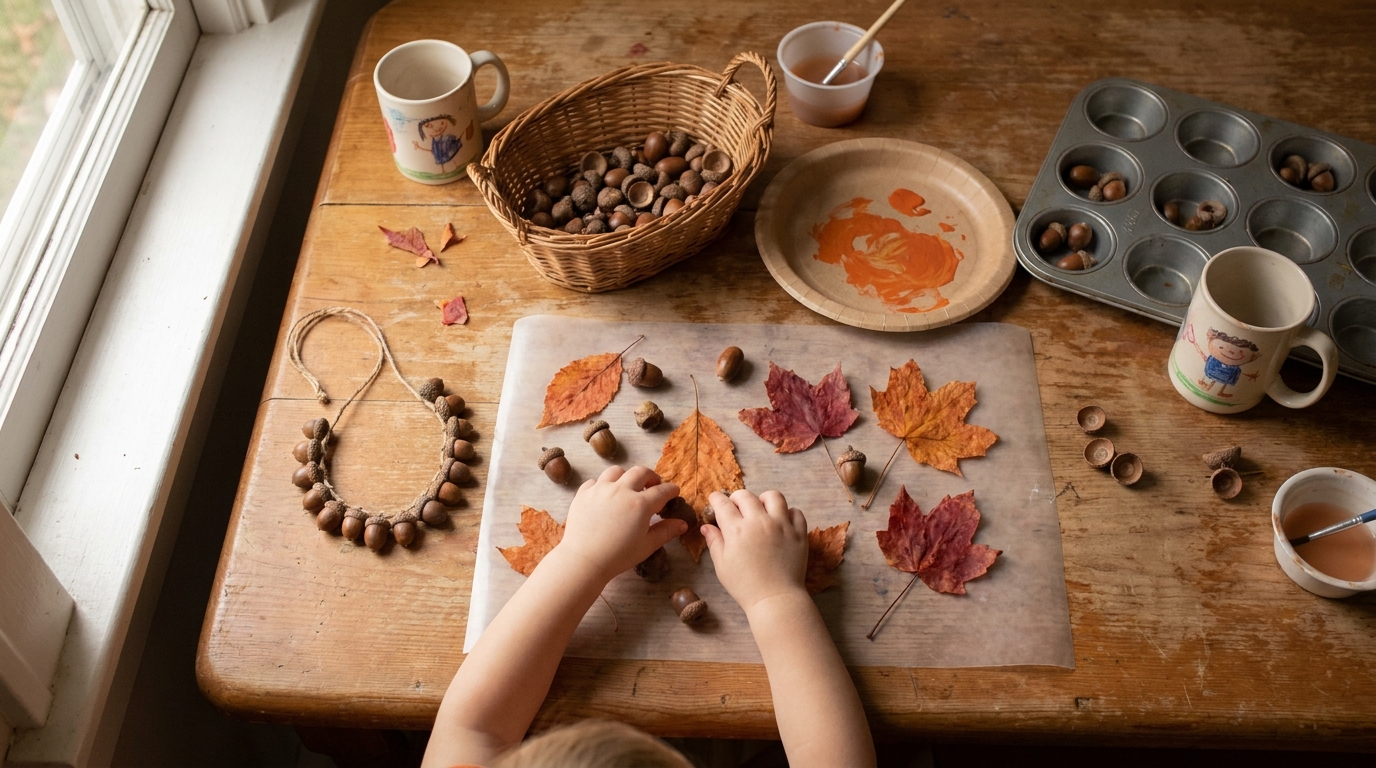
Acorn Crafts for Toddlers: 5 No-Mess Fall Projects to Try
This post contains affiliate links. As an Amazon Associate I earn from qualifying purchases.
My son found his first acorn on our driveway last September and carried it around for two days like a diamond. By the eleventh one in the couch cushions, I decided to put them to work.
This post covers five low-mess acorn projects for toddlers and young preschoolers (about 2-5), with ages, supplies, rough costs, and the choking, string and tannin rules to read first. Fair warning: acorns are a supervised material. Some days your kid will mouth them or scatter them across the kitchen, and that’s your cue to stop and try something else.
In this article (14 sections)
- The 5 Acorn Projects at a Glance
- Why Acorns Work So Well for Toddler Crafts
- What You’ll Actually Need: Supply List and Cost Comparison
- Safety First: What to Know Before You Start
- Project 1: Sticky Nature Collage (Low Mess, No Glue)
- Project 2: Acorn Cap Stamping (Paint, But Barely)
- Project 3: Acorn Sorting and Counting (No Craft Supplies at All)
- Project 4: Acorn Rolling Painting (Mess, Contained)
- Project 5: Acorn Cap Garland (Fine Motor, Adult-Only Tools)
- How to Prep Acorns Before Any of These Projects
- Turning This Into a Full Fall Nature Afternoon
- Common Mistakes to Avoid
- Frequently Asked Questions
- A Small Pile of Acorns Goes a Long Way
The 5 Acorn Projects at a Glance
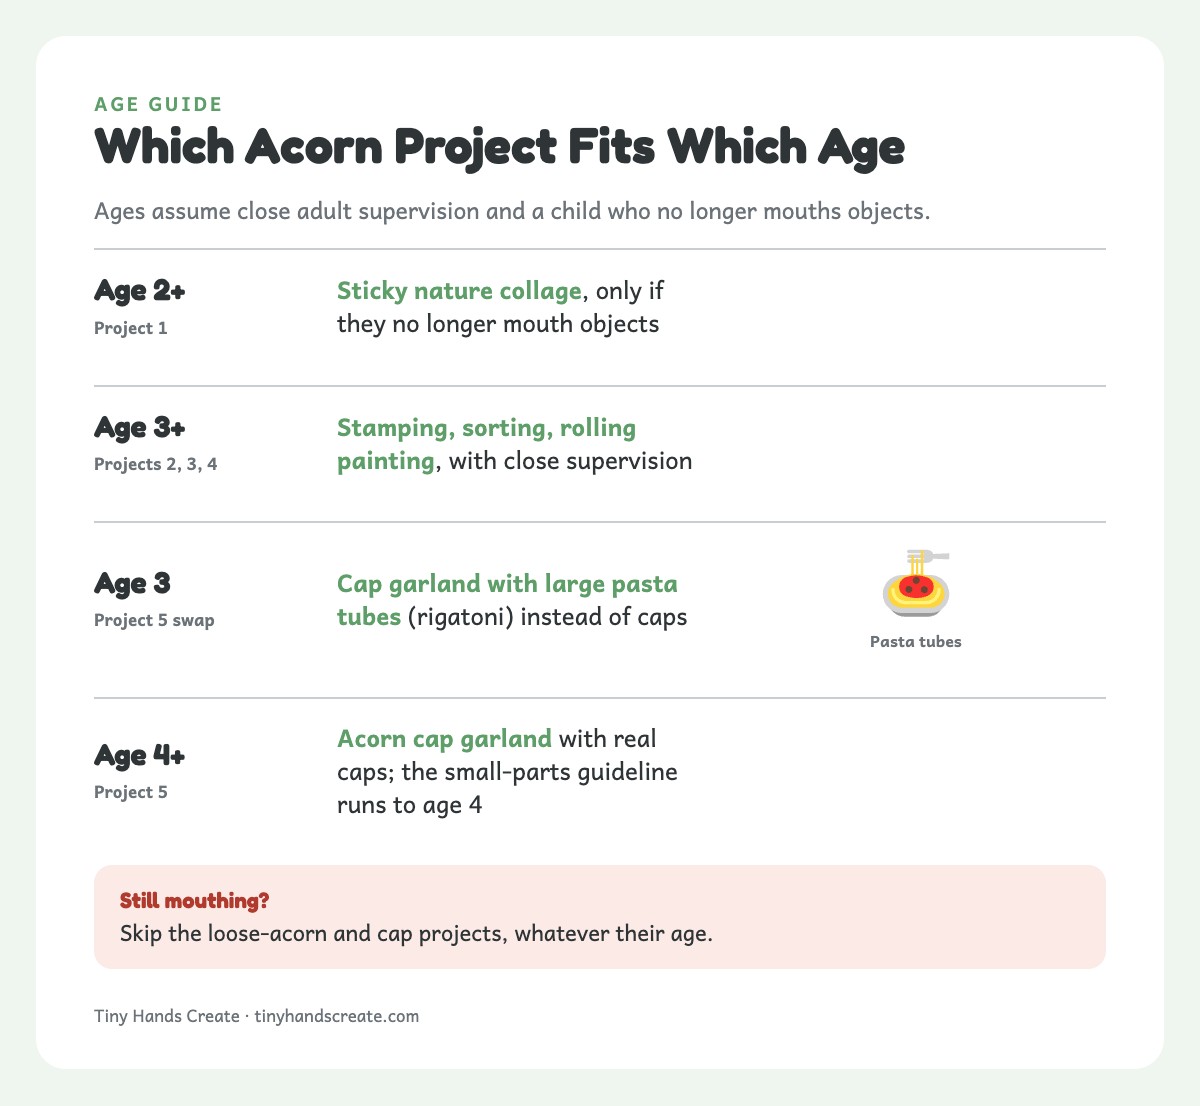
Every project here skips the glue gun and the long paint-and-wait cycle. They’re built for short attention spans and a craft table that is really your kitchen table five minutes before lunch. Here’s the lineup:
| Project | Minimum age | Time | Mess | Loose-parts risk |
|---|---|---|---|---|
| 1. Sticky nature collage | 2+ (not for kids who still mouth objects) | 15 min | Low | Acorns are loose until sealed |
| 2. Acorn cap stamping | 3+ | 15 min plus drying | Medium | Cap is held in a clothespin |
| 3. Sorting and counting | 3+ (past the mouthing stage) | 10-20 min | None | Loose whole acorns |
| 4. Rolling painting | 3+ | 10 min | Low (contained) | Acorns stay inside a taped box |
| 5. Acorn cap garland | 4+ (3+ with large pasta tubes instead of caps) | 15 min | None | Loose caps and string |
Ages assume close adult supervision. Any child who still mouths objects should skip the loose-acorn and cap projects, whatever their age.
Does your toddler love collecting things outside? Try our fall leaf crafts for kids too. Leaves and acorns tend to show up on the same walk.
Why Acorns Work So Well for Toddler Crafts
Acorns hit a sweet spot that a lot of craft supplies miss for this age group. They’re free, and they’re interesting to touch and look at. Best of all for toddlers, the collecting is just as engaging as the crafting. You don’t need to convince a toddler that acorns are cool. They already know.
A few reasons acorns work well for toddlers and young preschoolers (about 2-5):
- The sensory appeal is built in. Smooth, cool acorn bodies and slightly rough, textured caps give toddlers two different tactile experiences from one object. No need to manufacture a sensory activity — nature already did it.
- Size varies, so check every one. Acorns are hard and round, and many small ones fit inside a toilet-paper tube, which means they can block a small airway. Use only acorns too big to fit through a tube, and keep an adult watching. Loose caps are smaller still.
- They don’t require a trip to the craft store. For a lot of families, that’s the actual barrier to doing a “craft” on a random Tuesday. Acorns require a walk, not a shopping trip.
- The activity naturally extends outdoors. Collecting IS the first project. You get outside time and craft prep in the same 20 minutes.
If you’re weighing whether to source acorns for real or just buy the craft-store version, the cost comparison below should make the decision pretty easy for most families.
What You’ll Actually Need: Supply List and Cost Comparison
Here’s the full supply list across all five projects, plus what things cost if you go the free route versus buying materials. These are rough estimates, and your local prices will vary.
| Supply | Real Acorns (Free Route) | Craft-Store Alternative | Notes |
|---|---|---|---|
| Acorns | $0 — collected on a walk | $6-9 for a bag of 24-36 faux acorns | Real acorns need prep to deal with bugs and moisture (see below) |
| Acorn caps only | $0 — pop off collected acorns | $5-7 for a bag of loose craft caps | Loose caps are a choking hazard for under-4s regardless of source |
| Washable paint (labeled non-toxic, ASTM D-4236 or AP certified) | N/A | $5-8 for a basic set | Skip on any project where a toddler might mouth the acorn |
| Contact paper or painter’s tape | $0-4 (often already in the house) | Same | Used for the “no paint” sticky crafts below |
| Cardstock or paper plates | $0-3 | Same | Base for several projects |
| Washable glue stick (not liquid glue) | $2-3 | Same | Glue sticks are far less messy than bottled glue for this age |
| Small basket or bucket for collecting | $0 (repurpose one) | $5-10 | Any container works |
| Muffin tin or ice cube tray | $0 (already in kitchen) | N/A | Doubles as a sorting tool, see Project 3 |
Total cost, real-acorn route: roughly $7-18, mostly paint, plus tape and paper you may already have.
Total cost, fully store-bought route: roughly $23-44 for faux acorns, caps, paint, and a basket.
The real-acorn route is cheaper, and your toddler will find it more interesting because they were there for the “finding” part. If you don’t have oak trees nearby, craft-store acorns can work.
Don’t assume faux acorns are safer, though. Check them against a toilet-paper tube, and skip flocked or glittered ones, since their coatings aren’t made to be mouthed.
Safety First: What to Know Before You Start
Most acorn craft tutorials skip this part, and it matters most for this age group.
Safety firstChoking. Acorns are hard and round, and caps are small. The small-parts guideline applies to children under 4. Use only acorns too big to fit through a toilet-paper tube, and keep an adult within arm’s reach the whole time. If your child still mouths objects, skip the loose-acorn and cap projects, whatever their age.
Safety firstIf one goes in the mouth. Take it out only if you can see it and reach it easily. Never do a blind finger sweep, which can push a hard, round object deeper. If your child is choking, can’t breathe, or is coughing, gagging or drooling after swallowing a piece, call 911 or your local emergency number right away.
Safety firstTannins. Acorns contain tannins, which can cause stomach upset and vomiting. Discourage mouthing. If a child chews or swallows a piece and is breathing normally, call Poison Control at 1-800-222-1222 (US) or your pediatrician. For any trouble breathing, call 911 first.
Safety firstString. Cord and yarn are a strangulation risk. Project 5 is a garland only, never worn. Keep any string your child handles under 12 inches, and hang the finished garland out of reach.
Safety firstBad acorns. Throw out any acorn with holes, cracks, mold, or a musty smell. Prep steps are in the checklist near the end.
Good to knowBrief any sitter or older sibling. Make sure they know acorns aren’t snacks and that loose caps and acorns stay out of the toddler’s hands unless an adult hands them over. Keep older children’s small craft pieces out of the toddler’s reach too.
None of this means avoid acorns. It means supervise as you would with any small object, and pick the project that fits your child.
Project 1: Sticky Nature Collage (Low Mess, No Glue)
This is the easiest entry point if your toddler has never done a “craft” before. It needs no paint and no glue, and cleanup is peeling tape off a table.
What you need:
- Two sheets of clear contact paper
- 5-10 acorns too big to fit through a toilet-paper tube, plus a few fall leaves
- Tape to hold the sheet down
- Optional: a paper frame for hanging it in a window
How to do it:
- Set up the sheet. Tape the contact paper sticky-side up to a tray or table so it can’t slide when your toddler presses hard.
- Hand over one piece at a time. Keep the acorns and leaves in your lap, not in reach.
- Let them press. There’s no wrong arrangement. The sticking is the activity.
- Seal it right away. Count the acorns back, then cover with the second sheet. Acorns stay loose and peelable until it’s sealed.
- Trim and hang. Trim the edges and tape it in a window. The light through the leaves looks pretty.
Once it’s sealed, the acorns can’t be pulled off easily. Until then they’re loose, so stay close. A child who still mouths things should skip this one for now.
It’s also a low-key version of the approach in our process art for toddlers guide, where the point is the doing, not a polished final product.
Project 2: Acorn Cap Stamping (Paint, But Barely)
If you want a little paint without a full painting session, try stamping. The cap makes a natural stamp, and a shallow plate instead of a brush means less paint ends up in surprising places.
What you need:
- 4-6 acorn caps, popped off ahead of time by you
- A large clothespin or cork for each cap, to use as a handle
- Washable paint in 2-3 fall colors, labeled non-toxic (ASTM D-4236 or AP certified). Not for eating.
- A shallow paper plate for each color
- Cardstock or a paper bag
How to do it:
- Make the stamps. Clip each cap into a large clothespin (or set it on a cork) so your child never holds a loose cap.
- Pour the paint. Use just enough to coat the plate bottom, a shallow puddle and not a pool.
- Dip and press. Your toddler dips the stamp and presses it onto the cardstock. The ridged cap leaves a detailed circle print.
- Layer colors. Let the prints overlap for a scattered-leaves look.
- Dry flat. Give it about 20 minutes before handling, and put the caps away when you’re done.
TipOffer one paint color at a time, not all three plates at once. Kids this age dip into every color fast, and the prints turn muddy brown. Swapping plates yourself keeps the prints cleaner and gives you a natural pause if attention is fading.
Already done apple stamping activities this season? This is the same stamping motion with a different fall object. Kids tend to pick up a familiar motion faster the second time.
Project 3: Acorn Sorting and Counting (No Craft Supplies at All)
Not every activity needs to produce a keepsake. Sorting is useful practice, and it needs only acorns and a container with compartments.
What you need:
- 10-15 large whole acorns of varying sizes, all too big to fit through a toilet-paper tube
- A muffin tin, ice cube tray, or egg carton
- Optional: a small scoop or spoon for transferring
How to do it:
- Set up. Put the acorns in a bowl and sit right next to your child. This is a direct-supervision activity.
- Sort. Ask them to sort by size, or just put “one in each cup” if sorting by size is still developing.
- Add counting. For older kids: “How many are in this cup? Can you find one more?”
- Count them back. When you’re done, make sure every acorn goes back in the bowl.
If your child is still mouthing everything, sort large pinecones or big leaves instead and save the acorns for later.
Keep this one in your back pocket for a day when you don’t have the bandwidth for a “real” craft. You still get ten to twenty minutes of hands-busy play. It overlaps with loose parts play, which is built on the same idea: open-ended objects and no fixed “right way” to use them.
Want more like this? See our sorting activities for toddlers.
Project 4: Acorn Rolling Painting (Mess, Contained)
Some kids want paint everywhere. This project uses acorns as rolling “marbles” inside a lidded shoebox, so the paint stays in the box and off your table.
What you need:
- A shoebox with a lid, and tape
- A sheet of paper cut to fit inside
- 3-5 large acorns, all too big to fit through a toilet-paper tube
- Washable non-toxic paint (ASTM D-4236 or AP certified), a few dots of 2-3 colors
How to do it:
- Load the box. Place the paper in the bottom and dot paint at a few spots.
- Add the acorns. Drop them in, then put the lid on and tape it shut.
- Shake. Your toddler tilts and shakes the closed box so the acorns roll through the paint and leave trails.
- Open and count. An adult opens the box, takes out the acorns, and counts them.
- Dry flat. Lift out the paper and let it dry.
The taped lid keeps the acorns from flying out and keeps hands out of the wet paint. It suits a kid who has outgrown the careful stamping in Project 2 and wants something more physical. If they still want paint on their fingers, give them a separate dab on a plate.
If mess-free is a non-negotiable in your house right now, our mess-free art activities for toddlers roundup has more ideas built around this same “contain the chaos” principle.
Project 5: Acorn Cap Garland (Fine Motor, Adult-Only Tools)
This is the most “finished product” project here. Your child handles loose caps, so it’s for ages 4 and up, and only for kids who no longer mouth objects. An adult handles the tools, and the garland is for hanging only.
Have a 3-year-old who wants in? Swap the caps for large pasta tubes like rigatoni and keep everything else the same. Our threading activities for toddlers has more lacing ideas for that age.
What you need:
- 8-10 empty acorn caps (nut removed)
- A hand drill or awl and a scrap of fine sandpaper, for you
- For a 3-year-old: large pasta tubes (rigatoni) instead of caps
- A shoelace or plastic-tipped lace no longer than 12 inches
How to do it:
- Pierce the caps (adult only). Caps have no ready-made through-hole. Pre-pierce each one with a hand drill or awl, with your child out of the room.
- Smooth the edges (adult only). Run a fingertip around each hole. Sand any rough or splintered spot, and toss any cap that cracked.
- Check the lace. Use a lace with a built-in tip. Check the end before and after use.
- Thread. Hand over one cap at a time. Your child pushes the lace through and slides the cap down.
- Count the caps back. Every cap should be on the lace or back in your bin before you move on.
- Finish it yourself. Join the short strands into a garland and drape it along a mantel or window, out of reach.
TipPierce the caps the night before. Drying them out first makes them easier to drill, and you won’t be doing it with an impatient toddler watching.
Threading is great fine motor practice. It’s a preschooler-sized version of the same core skill older kids use in friendship bracelet making.
Safety firstString can be a strangulation risk and loose caps can be a choking risk. Never let a child wear the garland. Supervise the whole activity, and put the string and caps away when it ends.
How to Prep Acorns Before Any of These Projects
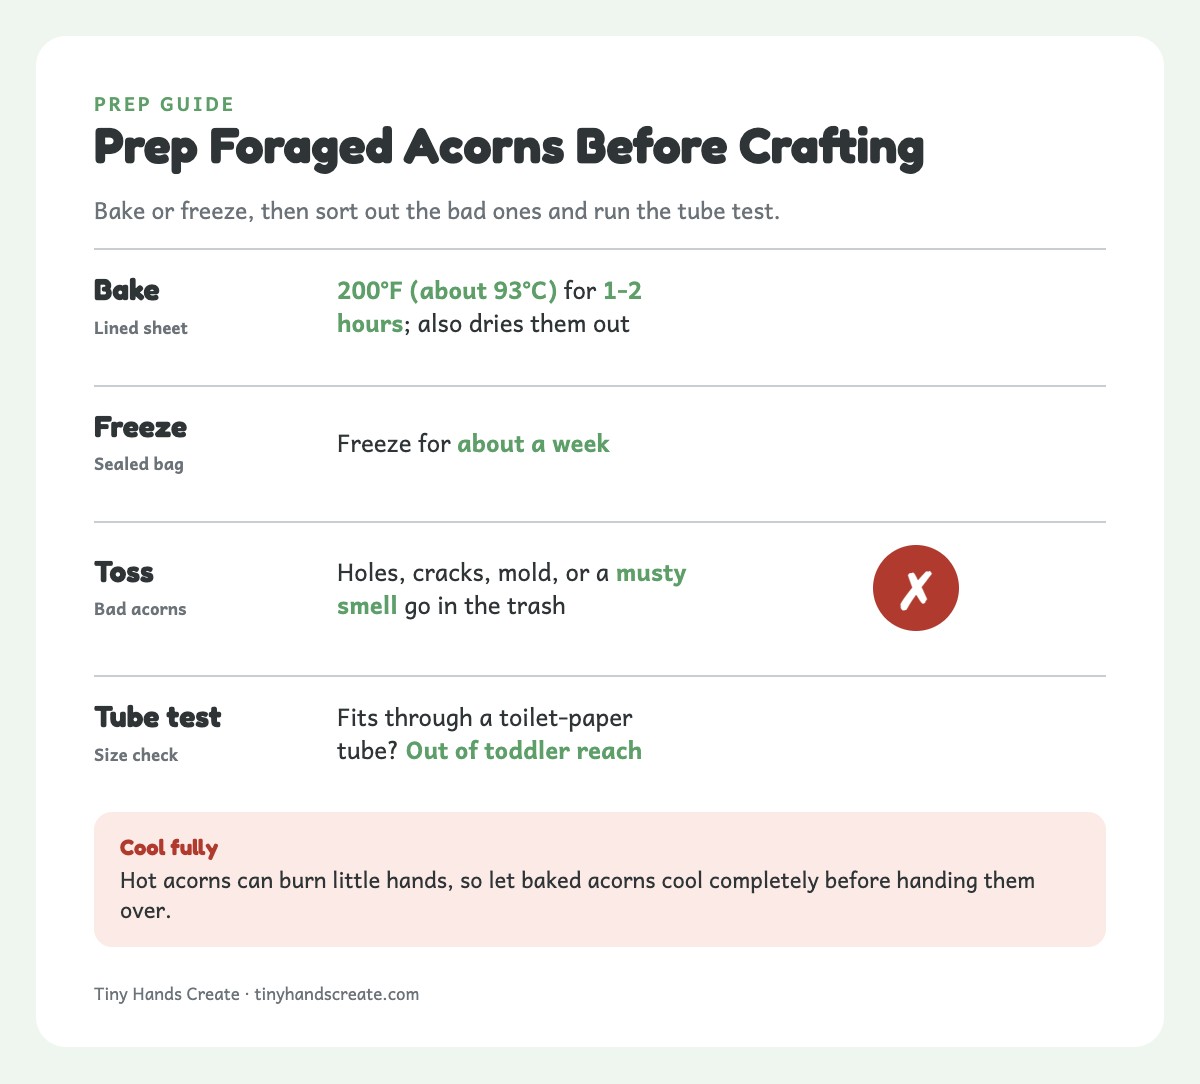
A few housekeeping steps make all five projects go more smoothly, regardless of which one you pick first:
- Collect extra. Toddlers drop, lose, and occasionally “plant” acorns mid-activity.
- Discard the bad ones. Toss any acorn with holes, cracks, mold, or a musty smell. A small round hole is a larva’s exit hole.
- Do the tube test. Any acorn that fits through a toilet-paper tube stays out of the toddler’s reach.
- Bake or freeze. Bake at 200°F (about 93°C) for 1-2 hours on a lined sheet, or freeze in a sealed bag for about a week. This helps with larvae and dries them out. Cool fully, because hot acorns can burn little hands.
- Store in a jar or bin, not a plastic bag, so moisture doesn’t cause mold.
- Keep caps in their own bin, out of reach, once you pop them off for Projects 2 and 5.
Turning This Into a Full Fall Nature Afternoon
Have more than twenty minutes? Here’s a sequence that fits most toddlers’ attention spans:
- Start outside (15-20 min). Do the collecting walk. It’s often the best part and counts as outdoor time.
- Prep (while they snack). Do the discard and tube test from the checklist above. Bake or freeze extras for another day.
- Pick one project (10-15 min). The sticky collage suits a calmer mood, and rolling painting suits a kid with energy to burn.
- Display the result. Hang the collage in a window, tape stamped paper to the fridge, or drape the garland out of reach.
Collect outside, then craft inside. The same pattern works for other seasonal walks too. Use it with any of our nature crafts, whether the season’s found object is acorns, leaves, or pinecones.
Common Mistakes to Avoid
Here’s a quick fix-it table for the usual hiccups:
| Problem | Why it happens | Fix |
|---|---|---|
| An acorn or cap goes in the mouth | Toddlers explore with their mouths | Remove it only if you can see it and reach it easily. No blind finger sweeps. If your child is choking, can’t breathe, or is coughing, gagging or drooling after swallowing, call 911 or your local emergency number. If they chewed or swallowed a piece and are breathing normally, call Poison Control at 1-800-222-1222 (US). Stop the activity for today. |
| Muddy brown prints | All the colors are in reach | Offer one color at a time. |
| Acorns scattered everywhere | Too many out at once | Start with 5-10 and add more only if attention holds. |
| Paint on clothes | Washable paint still splashes | Use a smock or old T-shirt, and wipe up right away. |
| Your child loses interest | Short attention span | Stop. Dumping acorns into a muffin tin for ten minutes counts as a win. |
And a few mistakes I see a lot:
- Skipping prep for foraged acorns. Going straight from driveway to craft table is tempting. Bake or freeze them the night before, and you avoid something crawling out of a decorative acorn on your shelf.
- Leaving loose caps or string out. Put both away the moment the activity ends.
- Walking away. Acorn crafts are a “watch the hands” activity, not a “set it up and leave” one.
- Expecting a finished craft every time. Some days the muffin tin is the whole activity, and that’s not a lesser version of a “real” craft.
Frequently Asked Questions
What age can toddlers start doing acorn crafts?
These projects suit toddlers and young preschoolers, roughly ages 2-5. The sticky collage (Project 1) can work from about 2, but only for a child who no longer mouths objects. An adult hands over each acorn and seals the sheet quickly. Projects 2 through 4 are better for ages 3 and up with close supervision. The cap garland (Project 5) is for ages 4 and up, because the small-parts guideline runs to age 4. Any child who still mouths objects should skip the loose-acorn and cap projects, whatever their age.
Are acorns safe for toddlers to handle?
With close supervision, yes, but acorns are not risk-free. They’re hard and round, and many small ones fit inside a toilet-paper tube, so use only acorns too big to fit through one. Loose caps are a choking hazard for children under 4. Acorns also contain tannins that can cause stomach upset, so discourage mouthing. If a child is choking, struggling to breathe, or coughing, gagging or drooling after swallowing a piece, call 911 or your local emergency number. If they chewed or swallowed a piece and are breathing normally, call Poison Control at 1-800-222-1222 (US) or your pediatrician.
Do I need to clean or treat acorns before crafting with them?
Yes. Bake foraged acorns at 200°F (about 93°C) for 1-2 hours, or freeze them in a sealed bag for about a week. Either helps deal with larvae that are common in outdoor acorns, and baking also dries them out. Throw away any acorn with holes, cracks, mold, or a musty smell. Let baked acorns cool completely before handing them over.
What can I do with acorns if my toddler still puts everything in their mouth?
Skip the acorn projects for now. Every one of them involves loose acorns or caps at some point, even if only briefly. Try a leaf-only version of the sticky collage or large pinecones for sorting, and come back to acorns in a few months.
How long do acorn crafts keep once they’re finished?
Stamped or painted paper crafts keep indefinitely once dry, just like any paper craft. The sticky contact-paper collage holds up well for weeks in a window before the leaves inside start to fade and dry out further. Acorn cap garlands last as long as the string does, so check the knots now and then.
Can I use craft-store acorns instead of real ones?
Yes, if you don’t have oak trees nearby or it’s off-season. Don’t assume they’re safer, though. Faux acorns can be small enough to fit through a toilet-paper tube, and flocked or glittered ones have coatings not meant for mouths. Check the size and skip the sparkly ones.
What’s the least messy acorn craft for a quick activity?
The sticky nature collage (Project 1) and the sorting activity (Project 3) are both nearly mess-free, with no paint, no glue, and no drying time. Both still need an adult watching the loose acorns. If you have five minutes and a muffin tin already in your kitchen, sorting is the fastest option with zero setup.
A Small Pile of Acorns Goes a Long Way
You don’t need a big haul to get several afternoons of play out of a handful of acorns. Start with whatever suits your child’s mood that day: sorting on a rainy afternoon, a sticky collage after a walk, or stamping when you have patience for paint.
Prepped acorns keep in a jar for months, so there’s no rush. Keep an eye on the hands, and call it done the moment your toddler starts mouthing or scattering them.