How to Draw an Ice Cream Cart (Easy Step by Step)
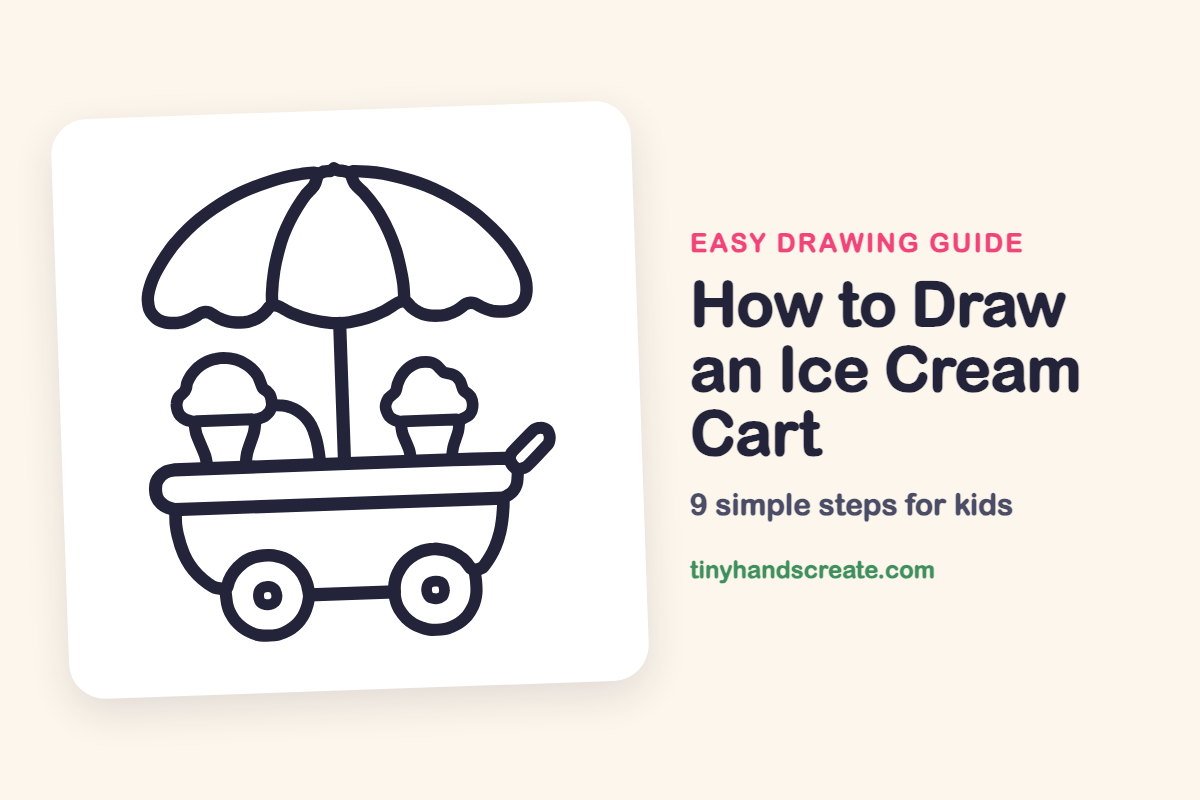
An ice cream cart is a fun thing to draw because it is built from simple shapes. You will use a long rim, a curved bowl, circles for wheels, a big scalloped dome for the umbrella, and cones with puffy scoops. When you finish, you will have a little shop on wheels ready to sell ice cream.
- Medium
- 15 minutes
- 9 steps
You need: paper, a pencil, an eraser, and crayons or markers for coloring.
Start drawing
In this article (7 sections)
How to draw an ice cream cart step by step
How to Draw an Ice Cream Cart · tinyhandscreate.com
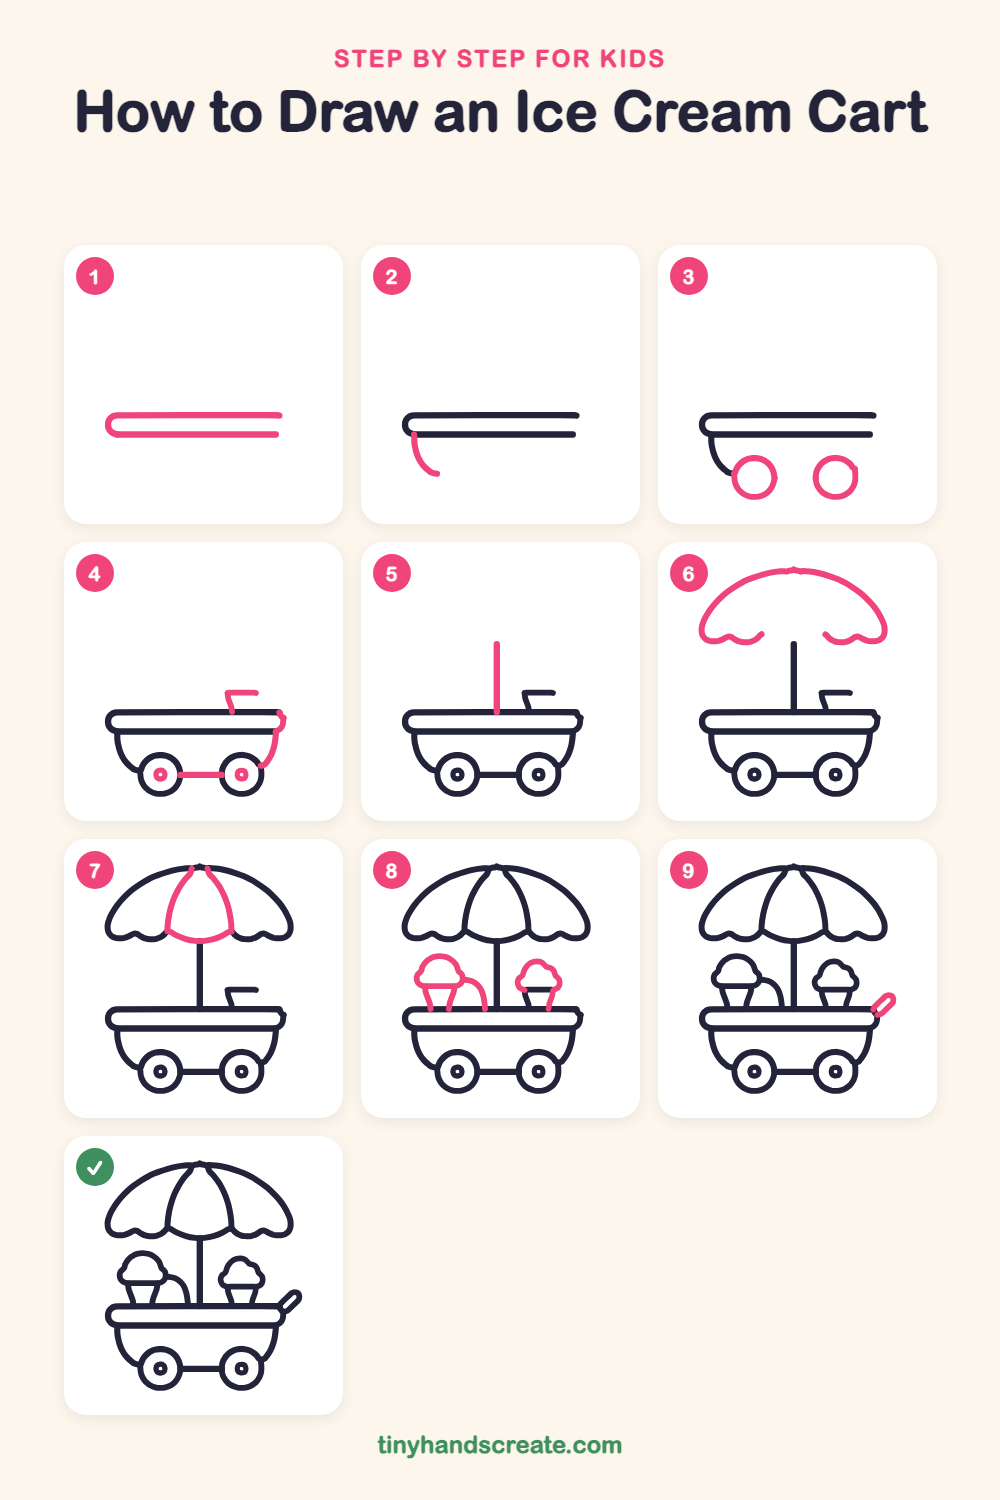
Step 1: Cart rim
Draw a long, skinny shape like a lying-down pill, but leave the right end open. Start at the right on the top line, go left, curve around the end, and come back along the bottom line, so you have two straight lines joined at the left.
Step 2: Left side of bowl
Under the left end of the rim, draw a curved line that starts at the rim and swoops down and to the right, like the left half of a bowl.
Step 3: Two wheels
Draw two circles under the cart, one on the left and one on the right. Let the left circle touch the end of the curved line, and leave a gap between the two wheels.
Step 4: Axle, hubs and right side
Draw a short straight line between the wheels for the axle, and a tiny circle in the middle of each wheel. Then draw the right side of the bowl, curving down from the right end of the rim to the right wheel, and add a small bent bracket sticking up above the right end of the rim.
Step 5: Umbrella pole
Draw one tall straight line standing up from the middle of the rim. Leave plenty of room above it for the umbrella.
Step 6: Umbrella canopy
At the top of the pole, draw a big wide dome with a tiny peak in the center. On each side, make the bottom edge wavy with two little scallops, and leave a gap in the middle around the pole.
Step 7: Umbrella sections
Draw two curved lines from the peak at the top down to the wavy edge, close to the pole. Then join them at the bottom with a gentle curve to make the middle section of the umbrella.
Step 8: Ice cream cones
Draw two upside-down cones that sit on the rim, one on each side of the pole, and top each with a puffy, cloud-shaped scoop. Make the left one a little bigger, and add a curved line rising from beside the left cone toward the pole.
Step 9: Pushing handle
At the right end of the rim, draw a small, skinny rounded rectangle slanting up and out. This is the handle for pushing the cart.
All done!
Go over your lines with a marker, then color it in.
Finished your ice cream cart? Keep the pencils out and learn how to draw boba tea or how to draw a cupcake next.
Tips for drawing an ice cream cart
- Draw the wheels as big as you can fit. If a circle comes out wobbly, try again lightly and trace over the best one.
- The wavy edge of the umbrella is the trickiest part. Make two small bumps on each side, all about the same size, like a row of little hills.
- Draw the pole before the umbrella so you know where the middle is. Then both halves of the umbrella will match.
Free ice cream cart coloring page
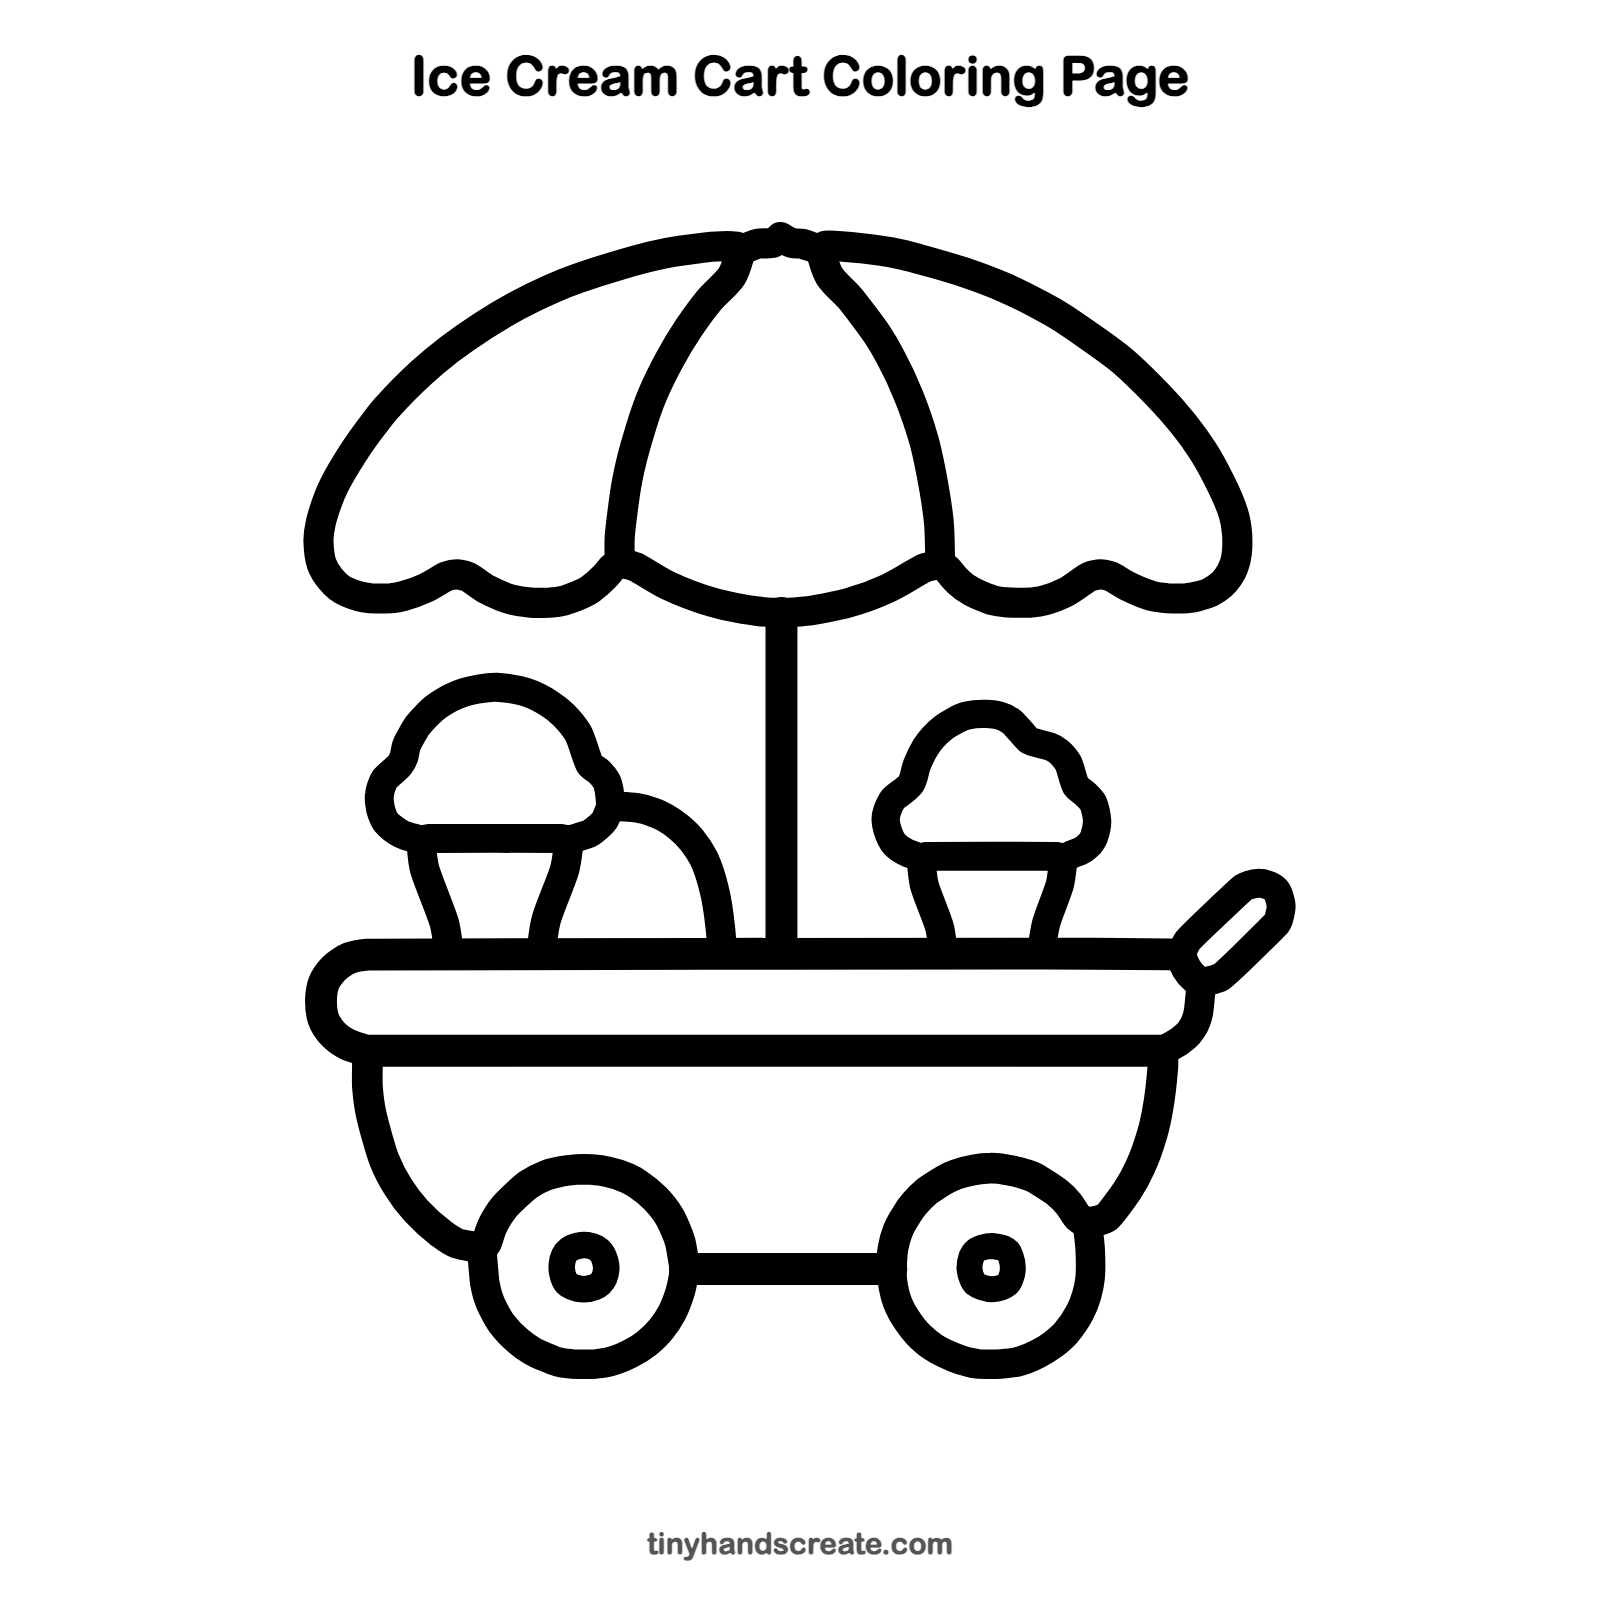
Want to go straight to coloring? Open this ice cream cart coloring page at full size and print it. It is the same drawing you just learned, with clean lines ready for crayons or markers.
How to color your ice cream cart drawing
Try red and white stripes on the umbrella, pink and brown for the ice cream scoops, and a bright color for the cart. Give each scoop its own flavor color, like strawberry pink or mint green.
Ice cream cart fun fact for kids
Vanilla, one of the most popular ice cream flavors, comes from the seed pods of a kind of orchid.
Questions about drawing an ice cream cart
What shapes do I need to draw an ice cream cart?
You need a long rounded rim, a curved bowl, circles for the wheels, a big dome for the umbrella, and cones with puffy cloud-shaped scoops.
How do I make my ice cream cart look more fun?
Add stripes to the umbrella, more scoops, or sprinkles on the ice cream. Bright colors make it feel cheerful.
How do I draw the umbrella so it looks even?
Start with the straight pole in the middle, then draw the dome so it is the same width on both sides. Make two bumps on each side of the wavy edge.