How to Draw a Rearing Horse (Easy Step by Step)
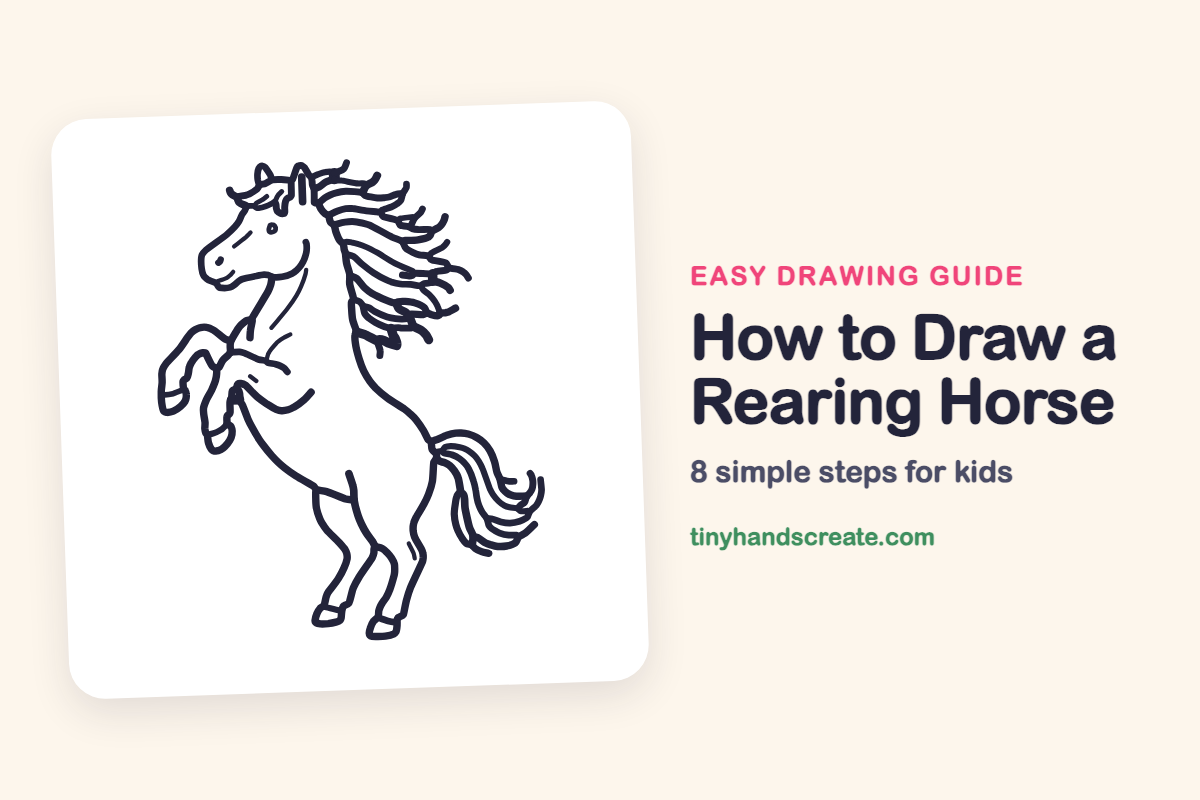
A rearing horse looks full of energy, standing tall on its back legs with a flying mane and tail. You start with the head and ear, add the neck and chest, then fold up the front legs. Hind legs, a wavy mane, and a swishy tail finish the pose. Take it one part at a time and the horse comes together easily.
- Medium
- 20 minutes
- 8 steps
You need: paper, a pencil, an eraser, and crayons or markers for coloring.
Start drawing


In this article (7 sections)
How to draw a rearing horse step by step
How to Draw a Rearing Horse · tinyhandscreate.com
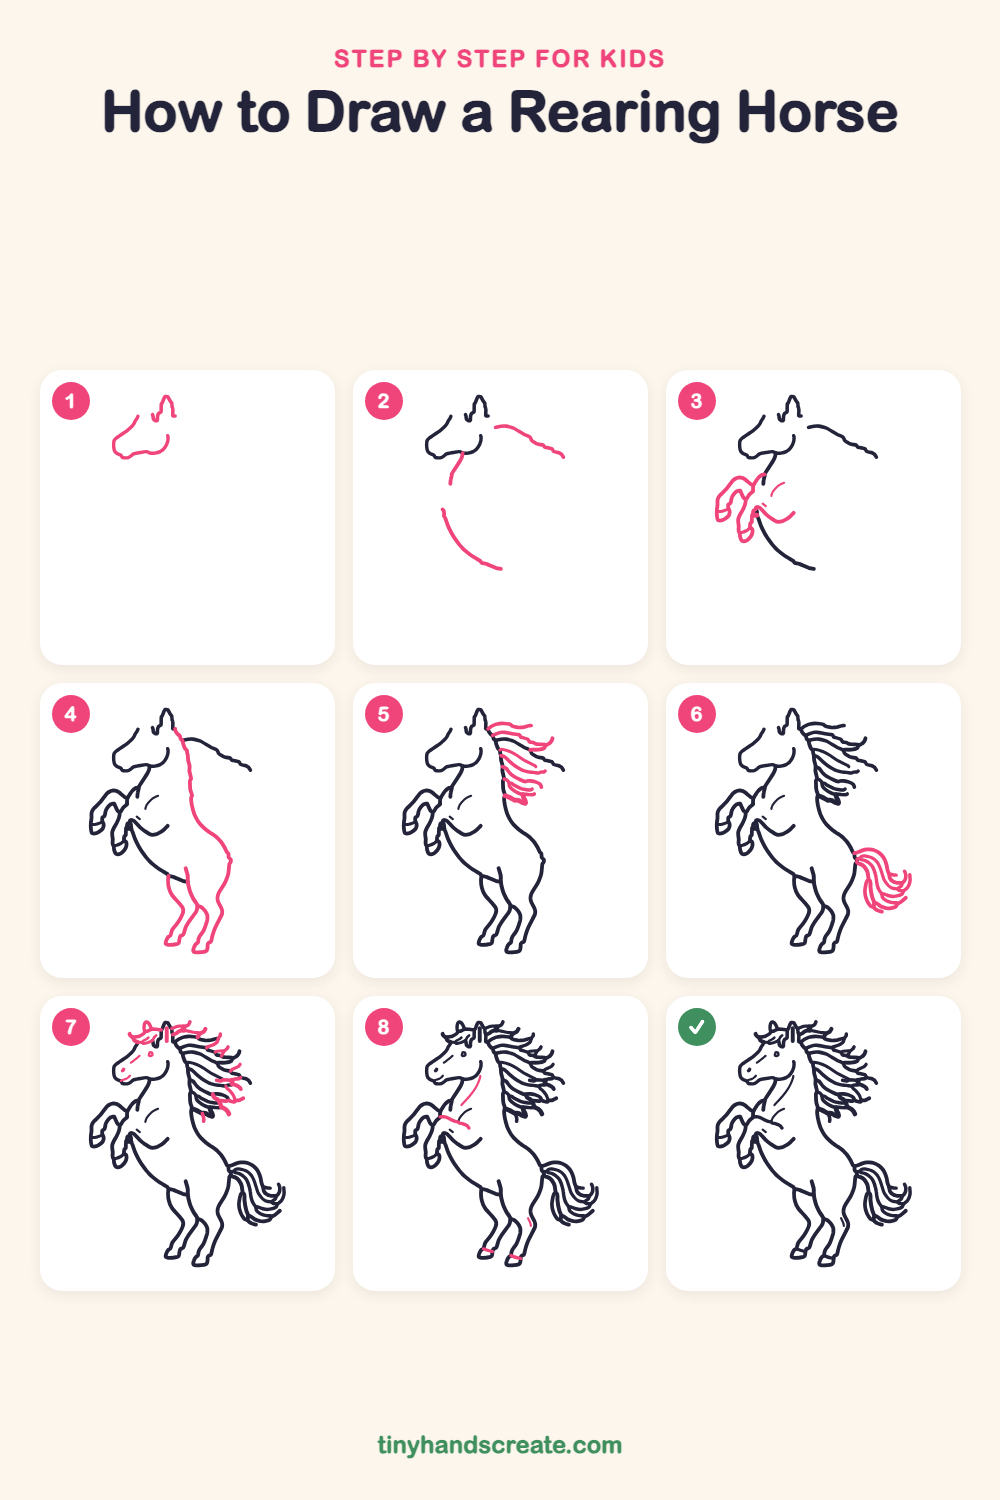
Step 1: Head and ear
Draw the side of a horse's head: a curved line for the nose and chin, and a curve up the forehead. Finish with a small pointy ear on top, like a little tent.
Step 2: Neck and belly lines
Draw a long wavy line sweeping out to the right from behind the ear for the top of the neck. Then add a short curve under the chin for the throat and a big curve down below for the front of the chest and belly.
Step 3: Raised front legs
Draw two bent legs folded up in front of the chest, like arms waving. Each one is a bendy sausage shape that ends in a small hoof. Add two tiny curves on the chest.
Step 4: Back and hind legs
Draw a long curve from the ear down the back and around the rump. Then draw two long legs stretching down from the body, each ending in a small hoof.
Step 5: The flowing mane
Along the back of the neck, draw long wavy lines that sweep out to the right like ribbons in the wind. Make some longer and some shorter, with curly tips.
Step 6: The swishy tail
At the back of the body, draw a bunch of long curved lines that swoop down and out, like a flowing feather. Let the tips curl at the ends.
Step 7: Face and forelock
Add a small eye, a tiny nostril, and a short mouth line on the face. Then draw a few wispy curls of hair on top of the head near the ear, and a few more curls in the mane.
Step 8: Final details
Add a small curved line on the neck and a short line across the chest. Then draw tiny marks just above each back hoof.
All done!
Go over your lines with a marker, then color it in.
Finished your rearing horse? Keep the pencils out and learn how to draw a fox or how to draw a hedgehog next.
Tips for drawing a rearing horse
- Draw the neck line and the belly curve first so the horse leans back and looks like it is rearing.
- The bent front legs are the trickiest part. Think of them as two sausages folded in the middle, and draw the knees as little bumps.
- For the mane and tail, draw lines that all sweep the same way. Matching curves make it look like the wind is blowing.
Free rearing horse coloring page
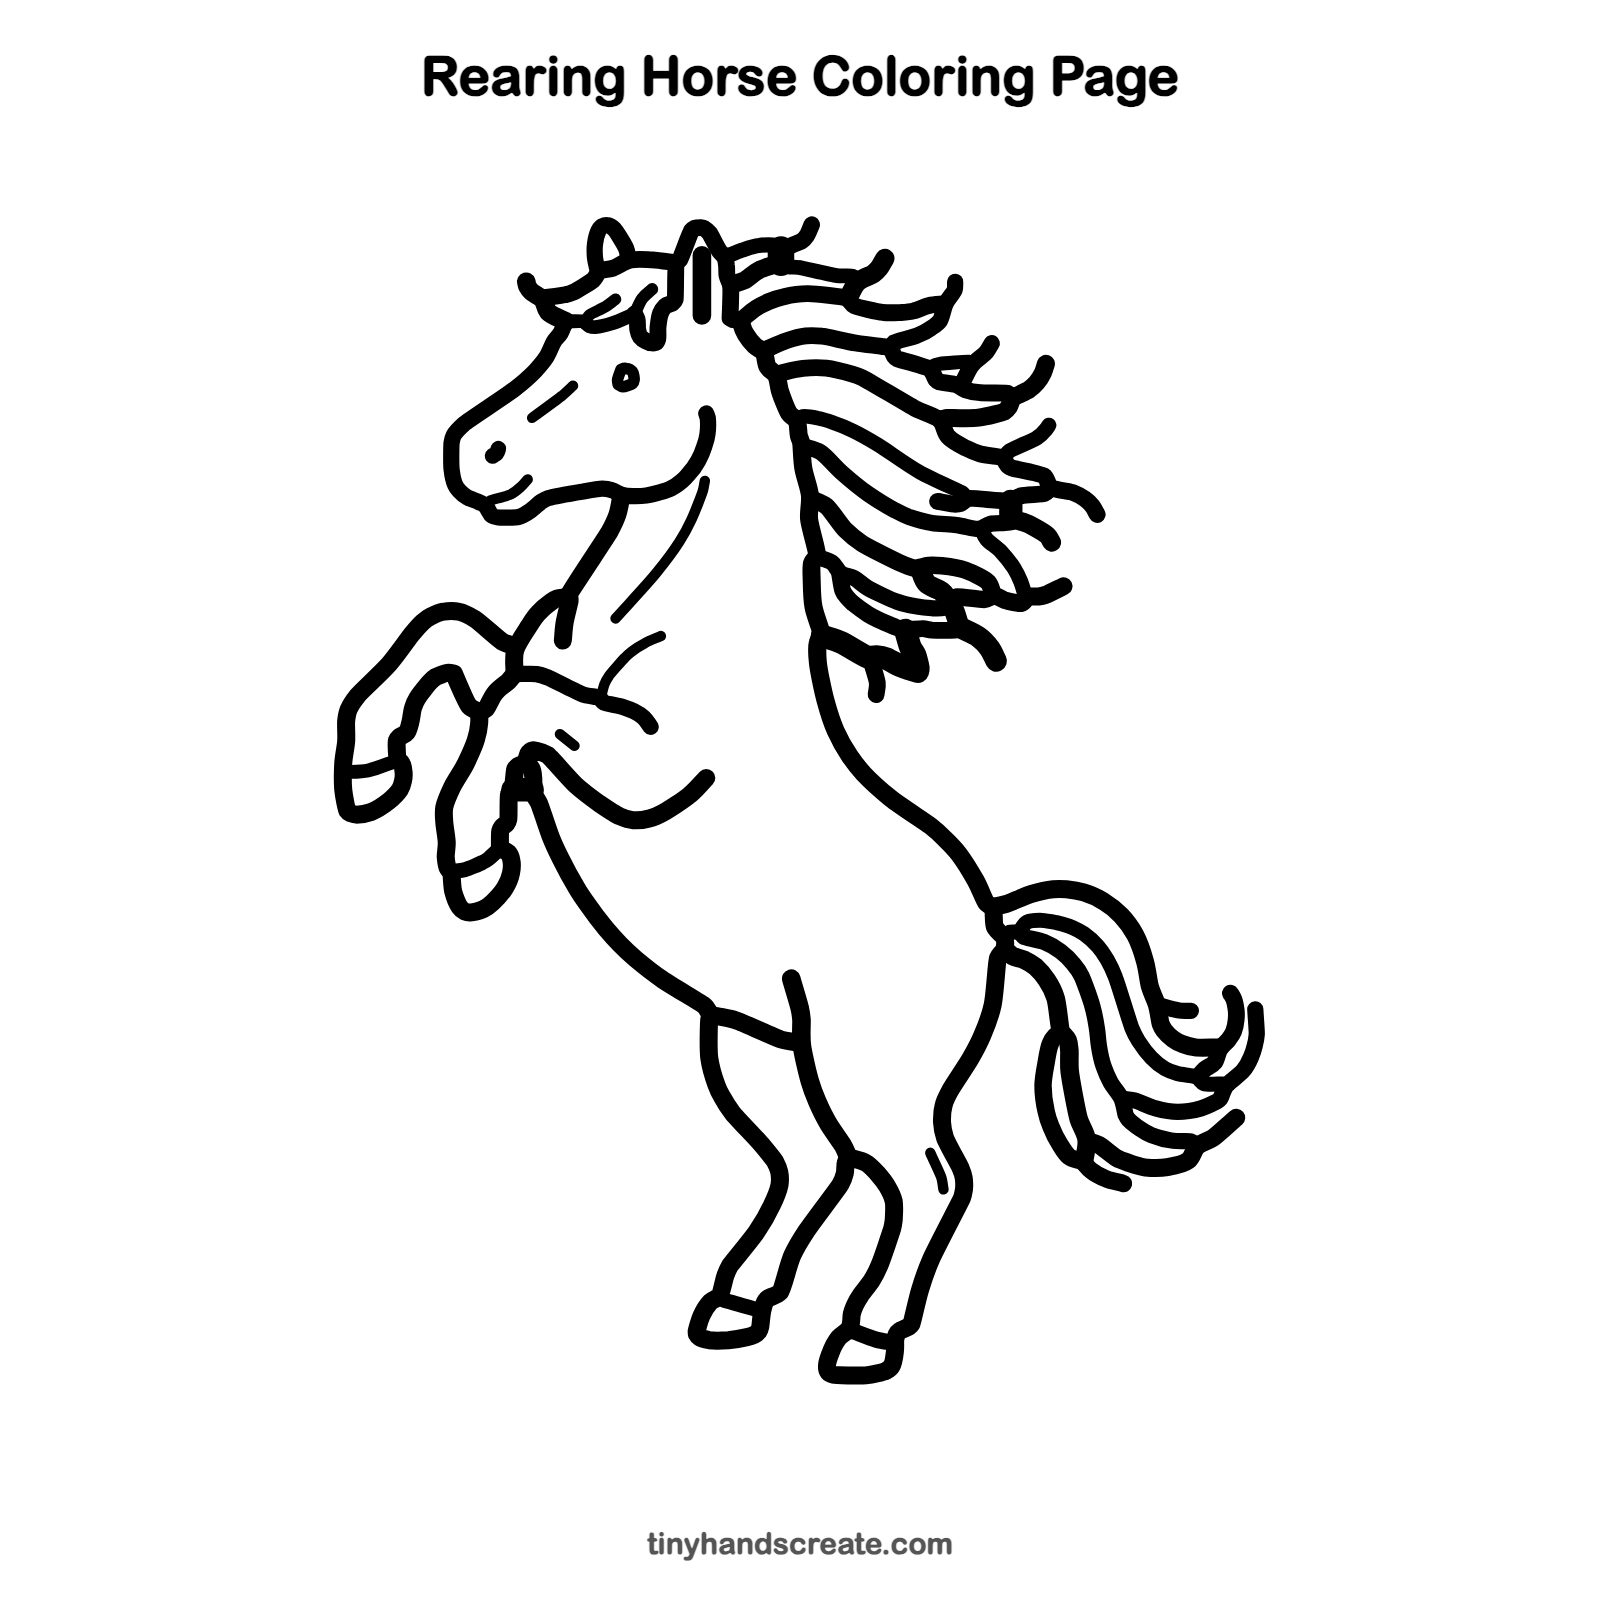
Want to go straight to coloring? Open this rearing horse coloring page at full size and print it. It is the same drawing you just learned, with clean lines ready for crayons or markers.
How to color your rearing horse drawing
Try a chestnut brown or soft gray body with a darker mane and tail. For a creative twist, color the mane and tail in rainbow stripes to make a magical horse.
Rearing horse fun fact for kids
Horses can sleep standing up. A special lock in their leg joints lets them rest without falling over, though they lie down for their deepest sleep.
Questions about drawing a rearing horse
What shapes do I need to draw a rearing horse?
You need a small head with a pointy ear, a long curved neck and body, and bendy sausage shapes for the legs. The mane and tail are long curved lines.
How do I make my horse look like it is rearing up?
Draw the chest high and the back legs low, then fold the front legs up near the chest. Having the neck curve back a little helps too.
How do I draw a horse mane that looks like it is blowing?
Draw long wavy lines starting at the back of the neck and sweeping in one direction. Vary the lengths and curl the tips so the hair looks like it is moving.