How to Draw a Cricket (Easy Step by Step)
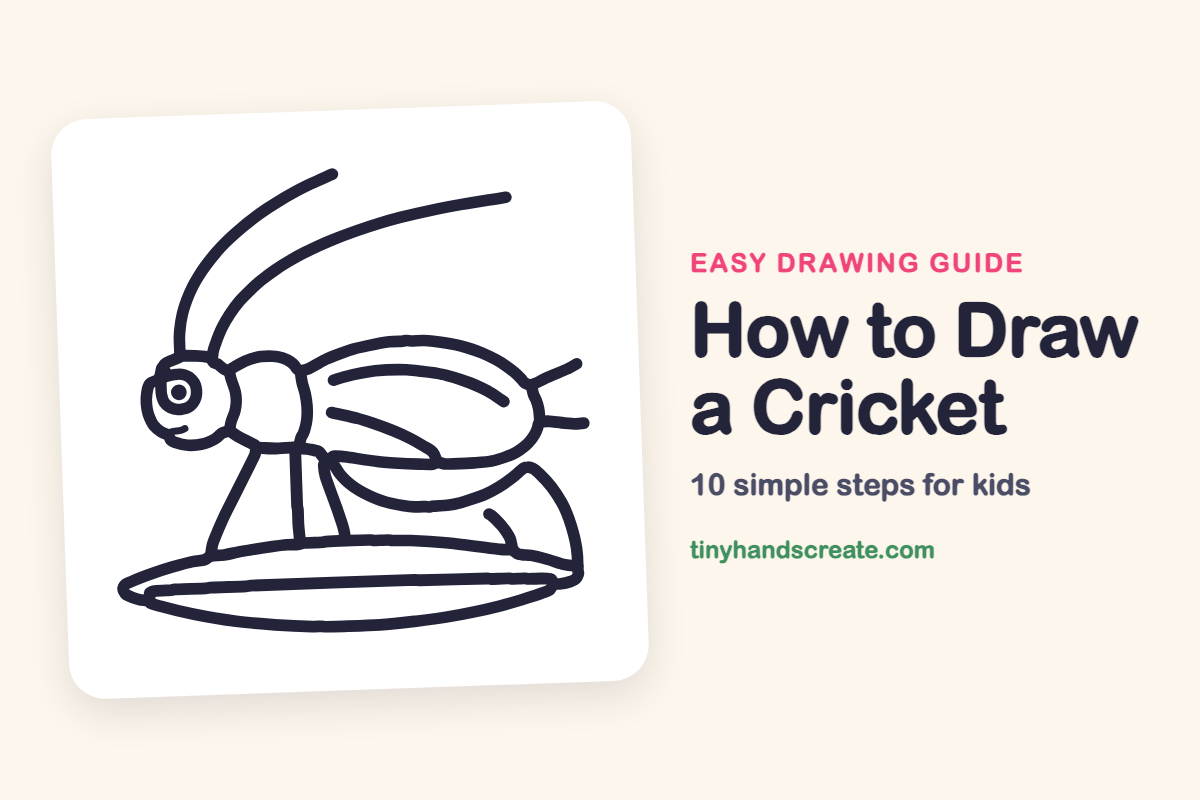
Learn to draw a cricket easily with step-by-step instructions. You'll use simple shapes like curves and lines to create its head, body, legs, and antennae, finishing with your cricket on a leaf.
- Start by drawing a round head and a rounded chest.
- Form the cricket's body using a long oval shape.
- Add thin lines to create its legs and antennae.
- Finish your drawing by placing the cricket on a leaf.
This post contains affiliate links. As an Amazon Associate I earn from qualifying purchases.
A cricket is a fun one to draw because it is mostly curves and lines. You will build it from a round head, a rounded chest, a long oval body, and a few thin lines for the legs and antennae. By the end, your cricket will be sitting on a leaf, ready to jump.
- Medium
- 15 minutes
- 10 steps
You need: paper, a pencil, an eraser, and crayons or markers for coloring.
Start drawing
In this article (7 sections)
How to draw a cricket step by step
How to Draw a Cricket · tinyhandscreate.com
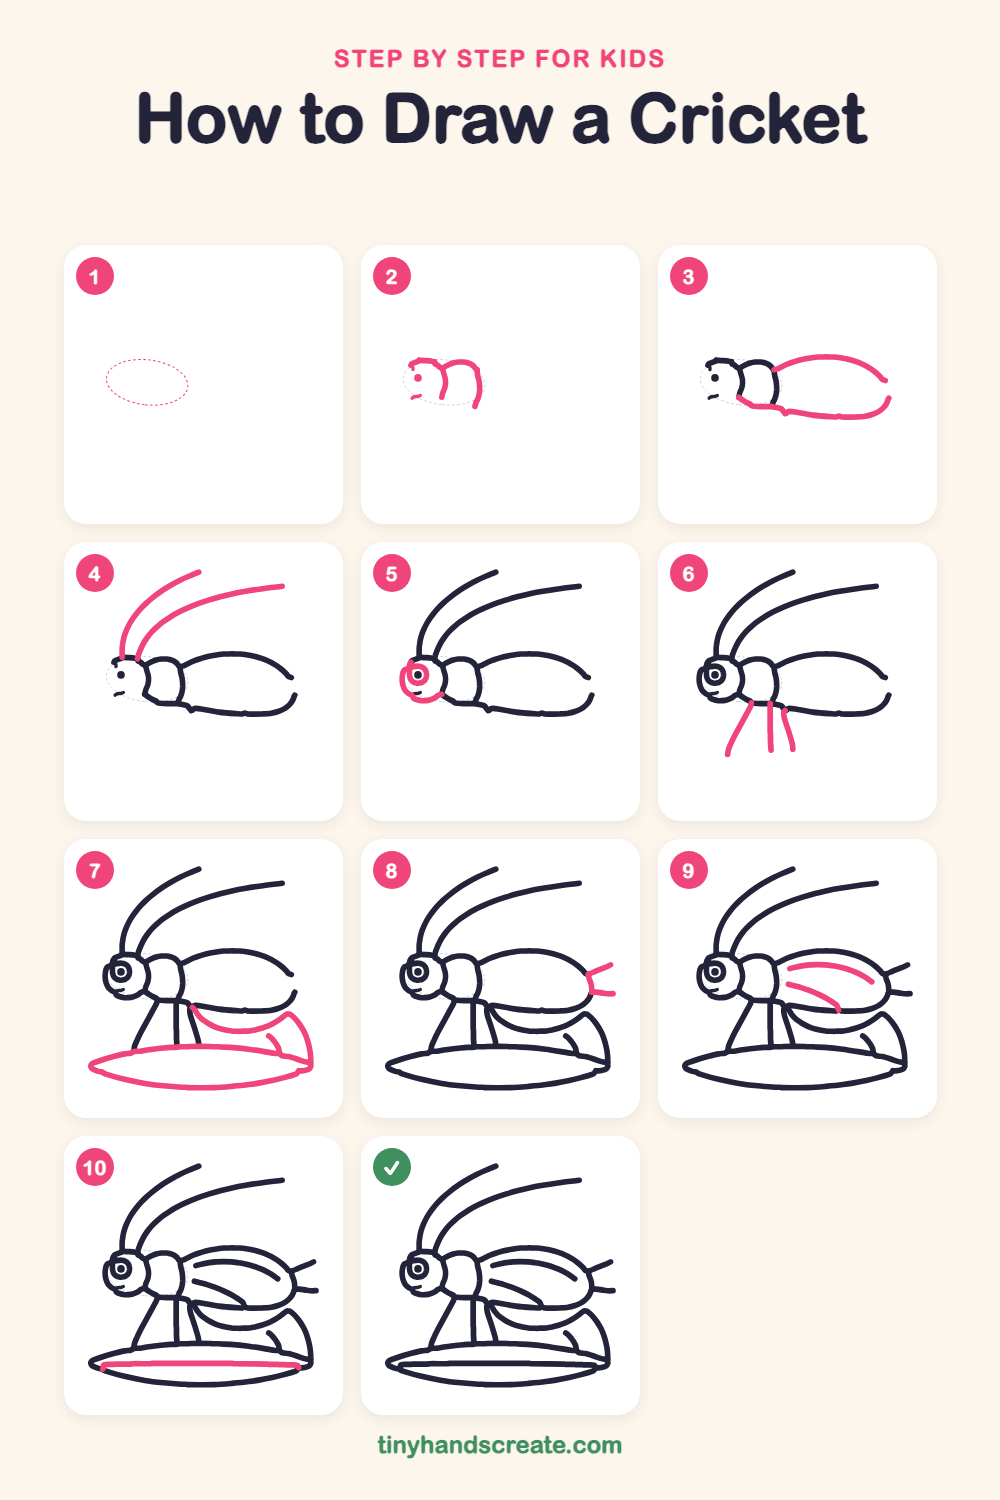
Step 1: Guide shapes
Lightly sketch this oval. It only shows where the big parts go, so press softly. You will erase it at the end.
Step 2: Head and chest
Start on the left with a small round head. Put a dot for the eye and a tiny line for the mouth, then draw a rounded chest curve right next to the head.
Step 3: Back and belly
Draw a long curve arching over the top from the chest to the tail end. Then draw a lower line along the bottom from the chest to the tail, to make a big oval body.
Step 4: Long antennae
From the top of the head, draw two long, curved lines that sweep up and back like thin whips. Make one a little longer than the other.
Step 5: Eye and face
Draw a round ring around the eye dot to make a big eye. Then trace a curved line around the front of the face.
Step 6: Three thin legs
Draw three thin lines going down from under the body, with the first one slanting forward. Leave room below for a leaf.
Step 7: Leaf and back leg
Draw a long pointy oval under the cricket for the leaf, so the thin legs end on it. Then add the big back leg as a curved shape under the back of the body, with a short bent line for the knee.
Step 8: Tail feelers
At the right end of the body, draw two short lines poking out like tiny whiskers.
Step 9: Wing lines
Inside the body, draw two long curved lines that follow the shape of the back, like gentle smiles lying on their sides.
Step 10: Leaf center line
Draw one straight line along the middle of the leaf for its center vein.
All done!
Erase the guide shapes, go over your lines, then color it in.
Finished your cricket? Keep the pencils out and learn how to draw a fox or how to draw a hedgehog next.
Tips for drawing a cricket
- Draw the two antennae with one smooth swoop each, and let them curve the same way so they look like a matching pair.
- The big back leg is the trickiest part. Start under the body, curve it back and up to a point, then bring it down to the leaf.
- Keep the three thin legs straight, and have them all end on the leaf so your cricket looks steady.
Free cricket coloring page
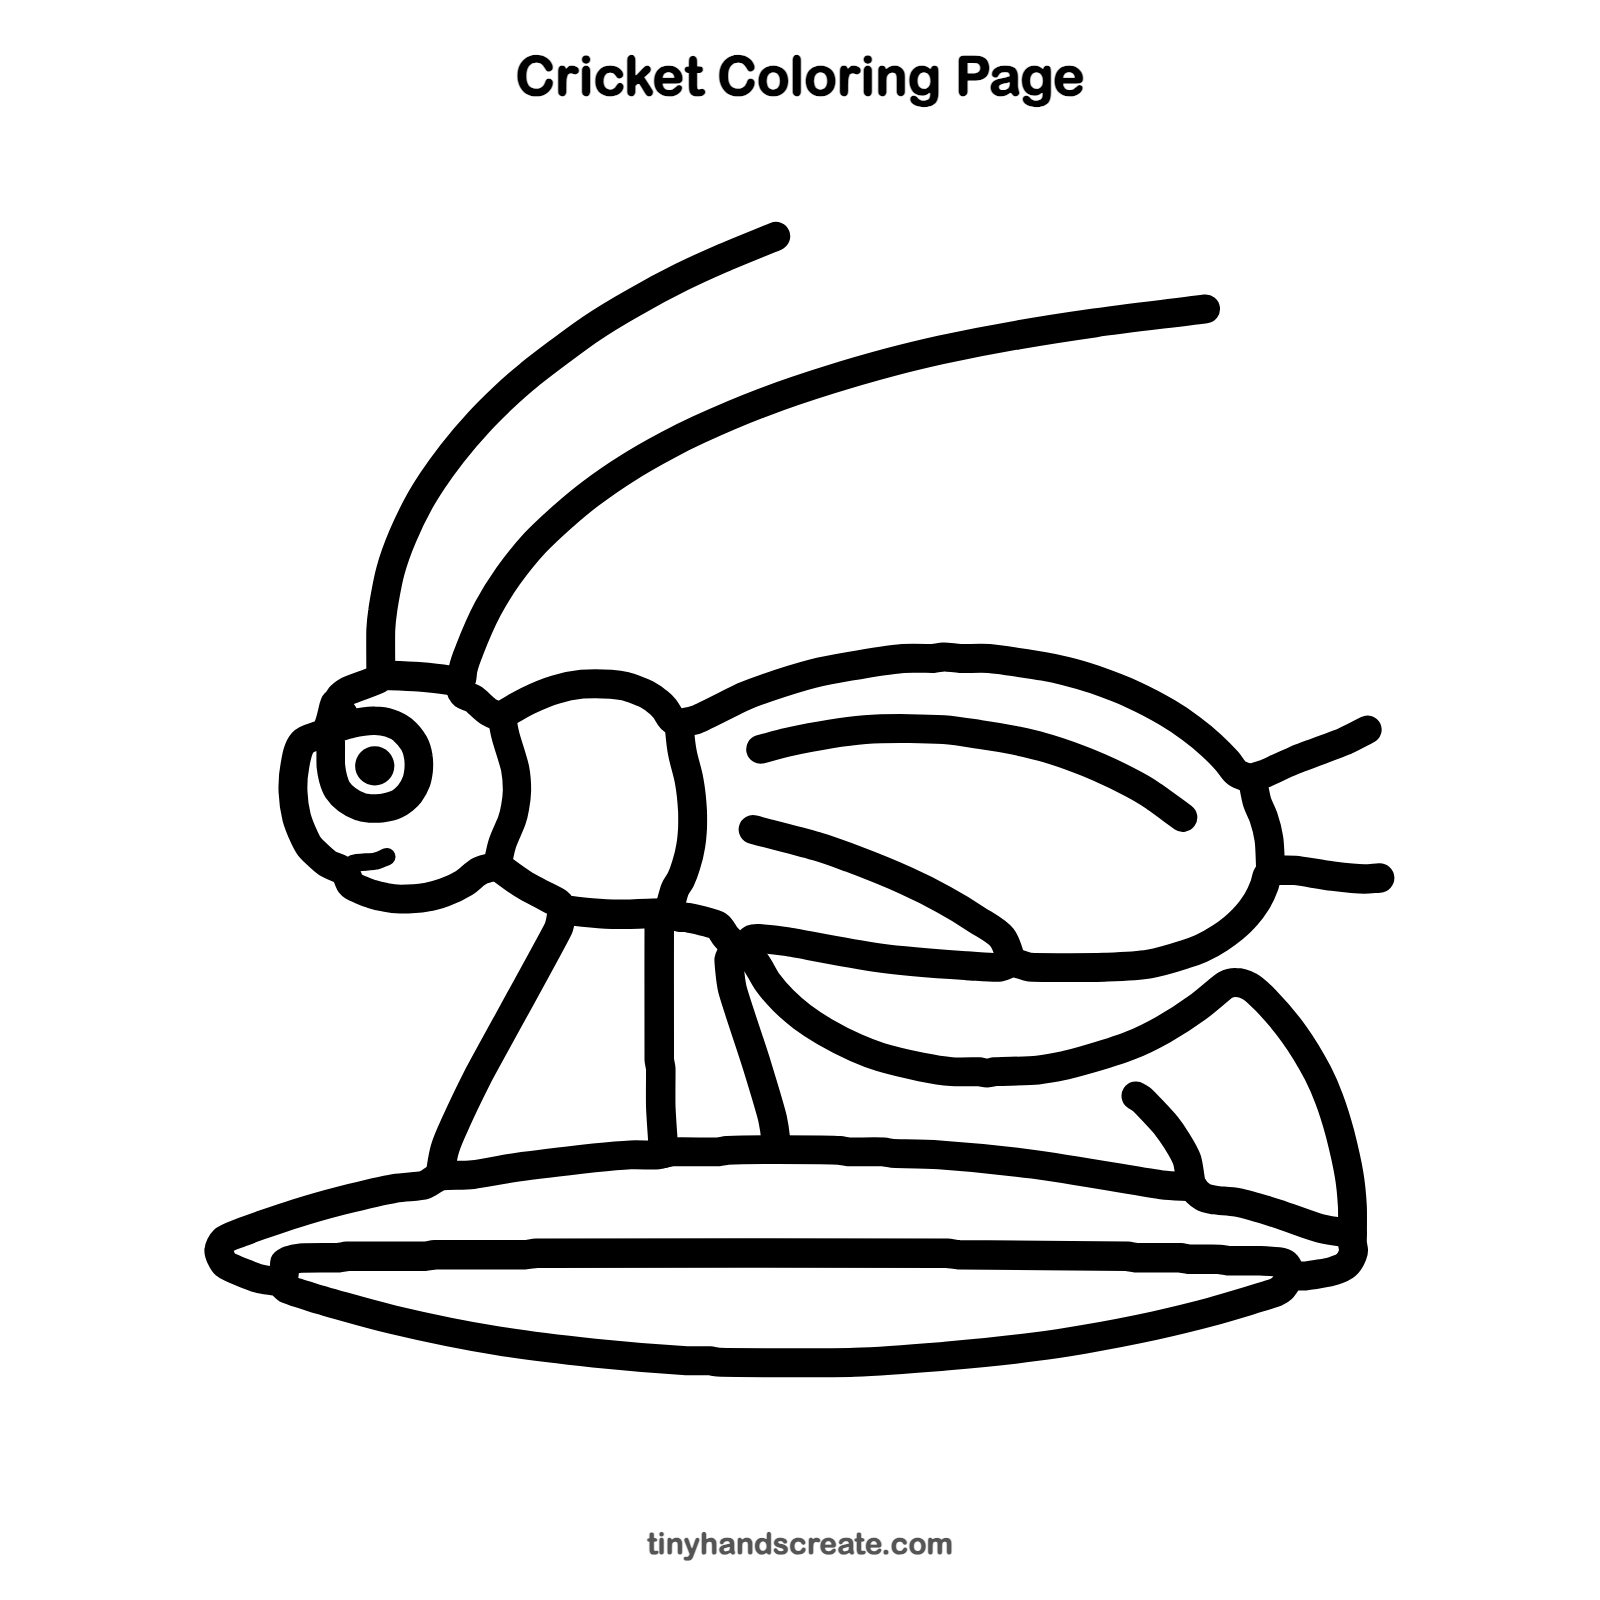
Want to go straight to coloring? Open this cricket coloring page at full size and print it. It is the same drawing you just learned, with clean lines ready for crayons or markers.
How to color your cricket drawing
Try a grass green or a warm brown for the body, with a bright green leaf. Add a darker color for the eye and the lines on the back.
Cricket fun fact for kids
Male crickets make their chirping sound by rubbing their wings together.
Questions about drawing a cricket
What shapes do I need to draw a cricket?
You need a small round head, a rounded chest, and a long oval body. Long curved lines make the antennae, and thin straight lines make the legs.
How do I make my cricket look cuter?
Make the eye big and round and keep the tiny mouth line. Long, curvy antennae also give your cricket a friendly look.
How do I draw the cricket's back leg?
Draw a wide, curved shape under the back of the body that rises into a point and then slopes down toward the leaf. Add a small bent line for the knee.