How to Draw Thumbelina (Easy Step by Step)
This post contains affiliate links. As an Amazon Associate I earn from qualifying purchases.
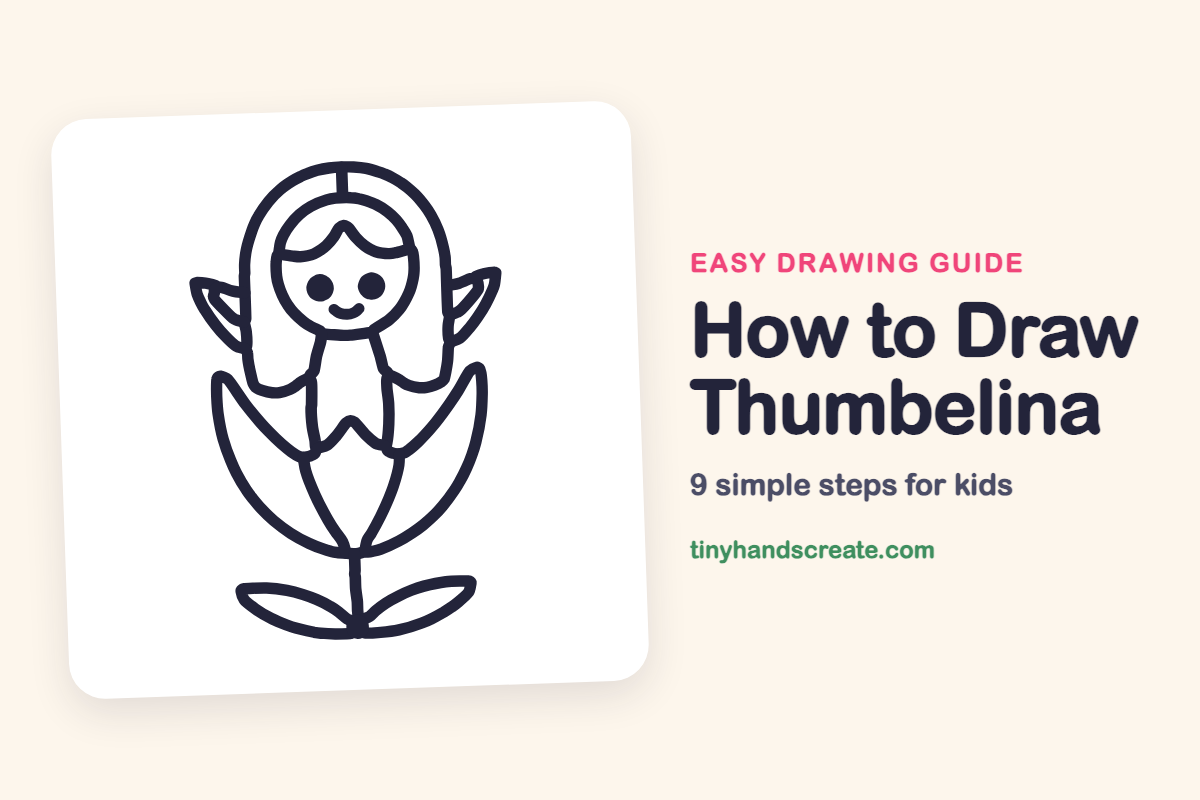
Thumbelina is a tiny girl who sits inside a flower, and this drawing is built from simple shapes: circles, curved lines and leaf shapes. The round face, the long hair and the flower petals all come from curves you already know. It is a sweet way to practice drawing one shape tucked inside another.
- Medium
- 15 minutes
- 9 steps
You need: paper, a pencil, an eraser, and crayons or markers for coloring.
Start drawing
In this article (7 sections)
How to draw Thumbelina step by step
How to Draw Thumbelina · tinyhandscreate.com
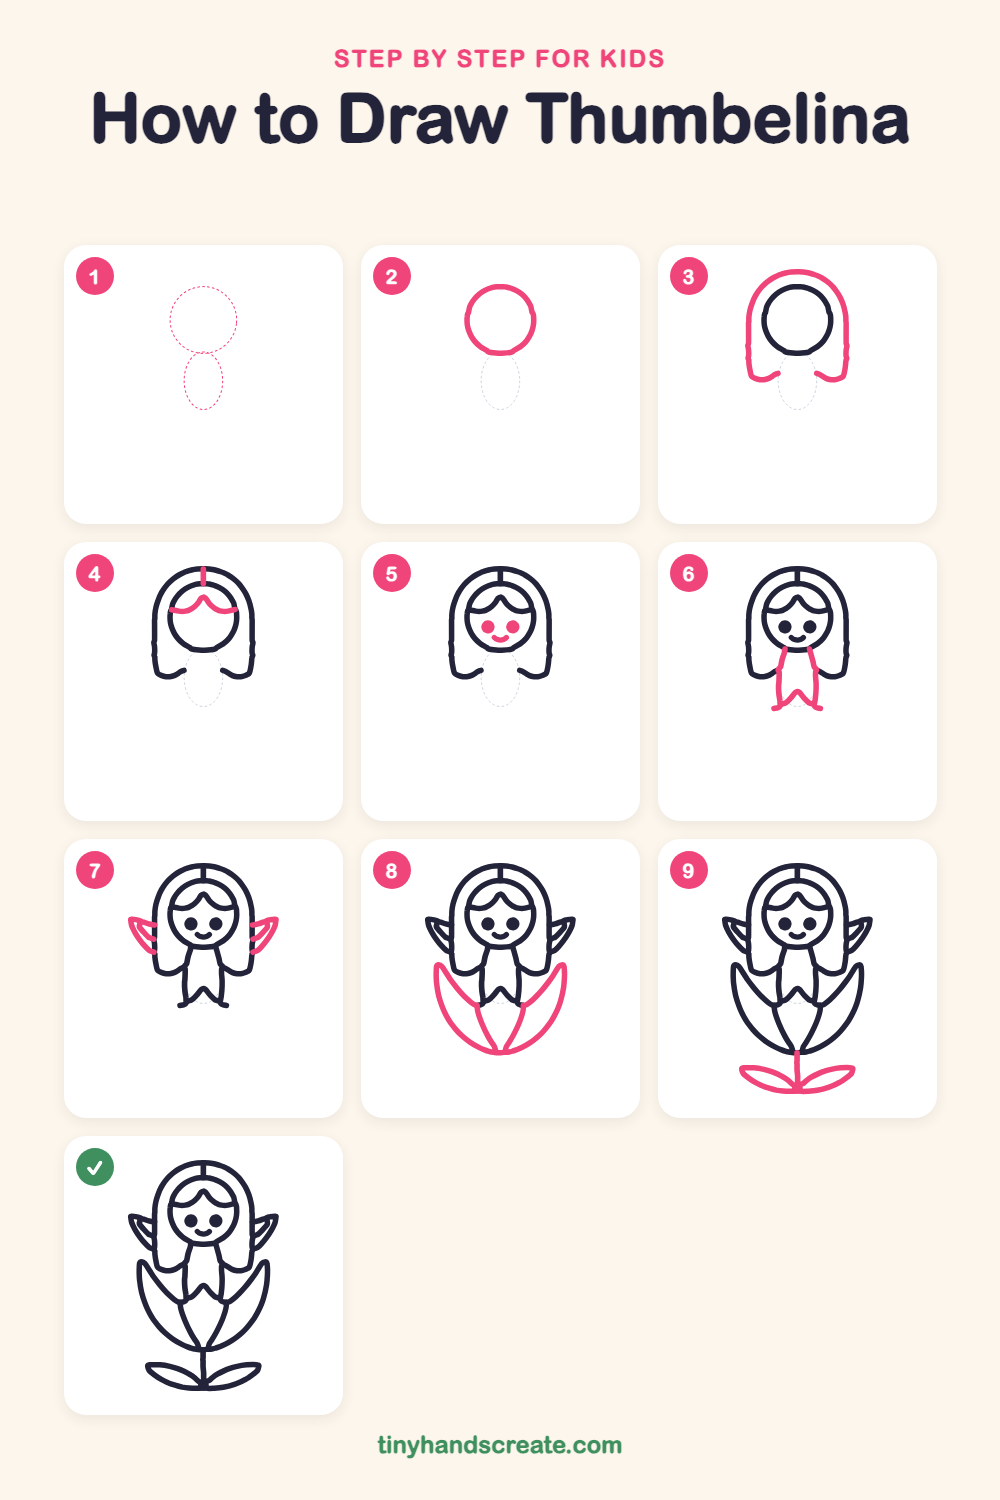
Step 1: Guide shapes
Lightly sketch these 2 ovals. They only show where the big parts go, so press softly. You will erase them at the end.
Step 2: The round head
Draw a big circle near the top of your page. Make it round like a ball, since this is Thumbelina's face.
Step 3: Long hair
Start low on the left side of the head and draw a tall arch up and over the top, then bring a straight line down the right side. Let both sides hang down past the chin and curl the ends inward at the bottom.
Step 4: Bangs and hair part
Inside the head, draw a wavy line across the forehead with a small peak in the middle, like a tiny hill. Then draw a short straight line from the top of the head up to the top of the hair.
Step 5: Eyes and smile
Fill in two round dots for eyes, side by side in the middle of the face. Add a small curved smile below and between them.
Step 6: The little body
Draw two gently curved lines going down from under the chin, a little wider at the bottom, like a tiny dress. Finish the bottom with a zigzag edge that points up in the middle, with a small curl at each corner.
Step 7: Tiny wings
On each side of the hair, draw a pointy leaf shape that sticks out and up, like a thin triangle with a curved bottom. Add a short curved line inside each wing.
Step 8: The flower petals
Draw two big petals that sweep out from the body like a cup, with pointy tops reaching up on each side and curves that meet at a point at the bottom. Then add two curved lines in the middle that come down from the body to meet at the same point.
Step 9: Stem and leaves
Draw a short straight line down from the bottom of the flower for the stem. At the bottom, add two leaves shaped like long ovals pointing out to the left and right.
All done!
Erase the guide shapes, go over your lines, then color it in.
Finished your Thumbelina? Keep the pencils out and learn how to draw a magic mirror or how to draw the golden goose next.
Tips for drawing Thumbelina
- Draw the head circle first and leave plenty of room around it, because the hair has to wrap all the way around the outside.
- Keep the two hair sides even by drawing them down one after the other, left and then right, and stopping them at the same height.
- For the flower petals, start at the pointy tips and curve down to meet in the middle, so both sides look like matching twins.
Free Thumbelina coloring page
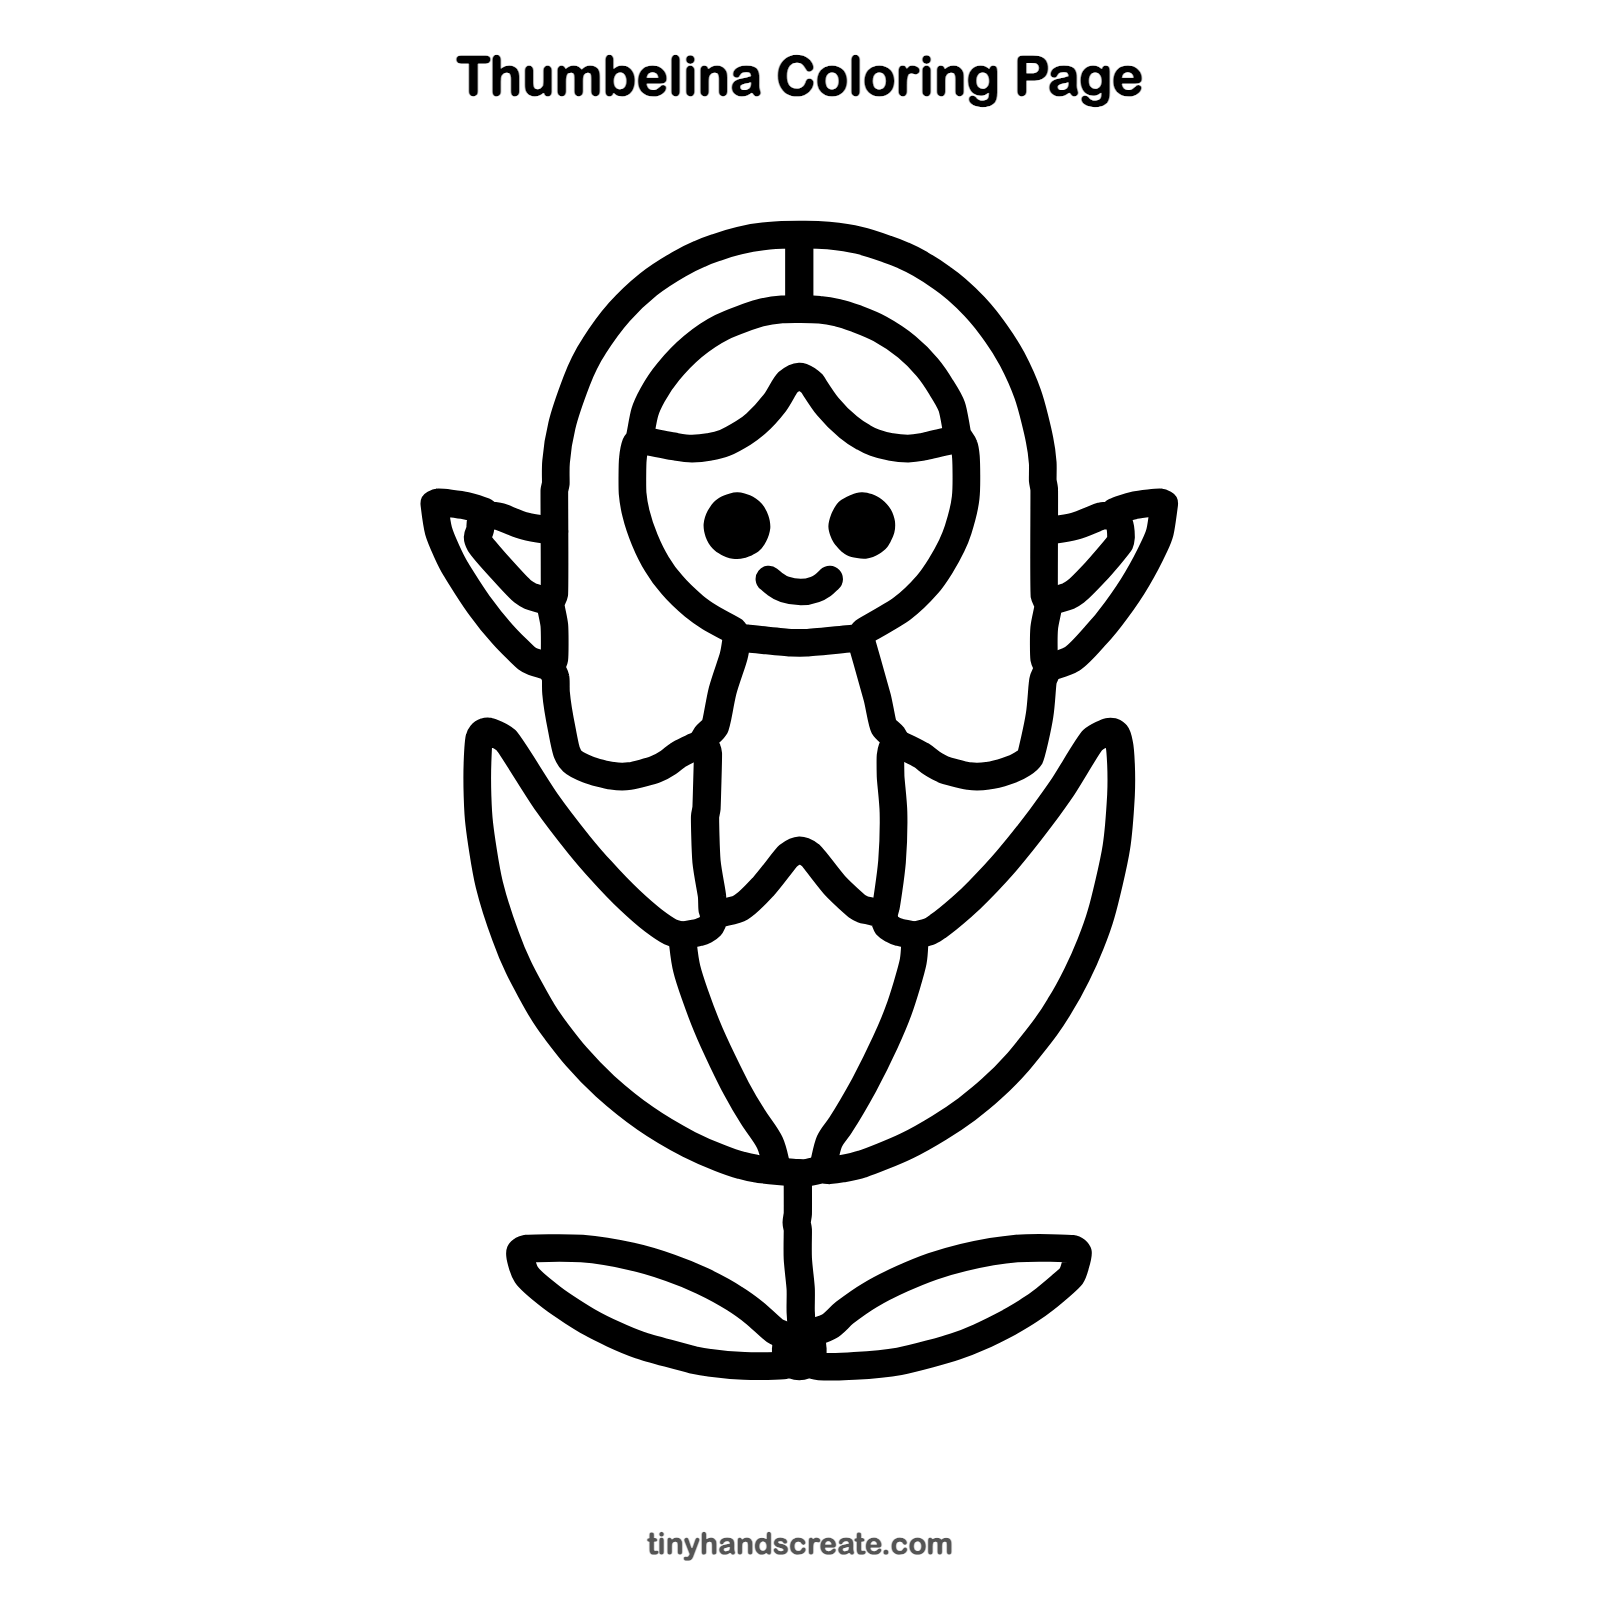
Want to go straight to coloring? Open this Thumbelina coloring page at full size and print it. It is the same drawing you just learned, with clean lines ready for crayons or markers.
How to color your Thumbelina drawing
Try golden yellow or brown hair, pink petals and green leaves and stem. For a creative twist, color the wings with a rainbow of tiny stripes so they look like they sparkle.
Thumbelina fun fact for kids
Thumbelina comes from a fairy tale by Hans Christian Andersen, first published in Denmark in 1835. In the story she is only about as tall as a thumb, which is how she got her name.
Questions about drawing Thumbelina
What shapes do I need to draw Thumbelina?
You need a circle for the head, a narrow dress shape for the body, pointy leaf shapes for the wings, long ovals for the leaves, and a big curved cup shape for the flower petals.
How do I make Thumbelina look cuter?
Draw the eyes big and round and place them a little low on the face. A small smile and a wavy bang line add a lot of charm.
How do I draw the hair so it stays even?
Start with the arch over the top, then draw both sides down. Stop each side at the same height and curl the ends inward so the hair looks balanced.