How to Draw a Pull-Along Duck Toy (Easy Step by Step)
This post contains affiliate links. As an Amazon Associate I earn from qualifying purchases.
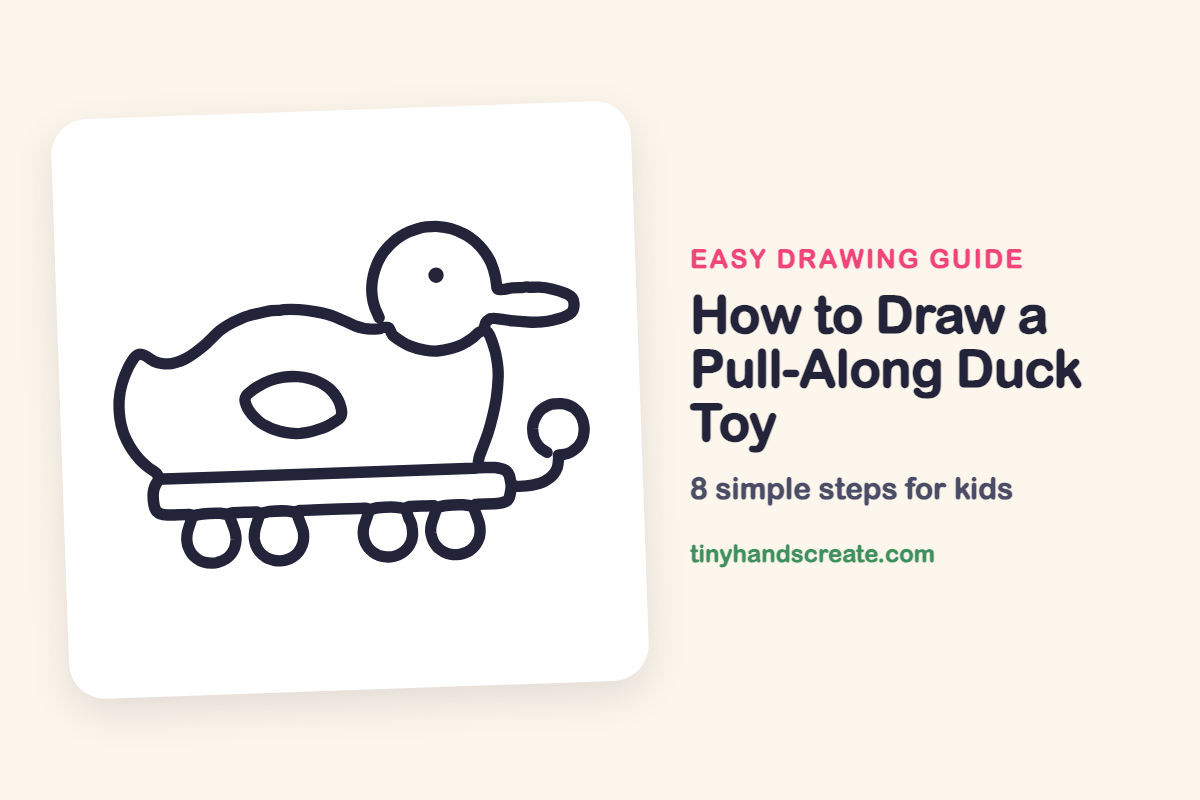
A pull-along duck is a classic wooden toy, and it is easy to draw because it is made of just a few simple shapes. You will start with a wavy body outline and a round head with a beak, then add a flat base, four little wheels, a wing, an eye, and a string with a handle. It is a great drawing for practicing round shapes and getting them to line up.
- Easy
- 12 minutes
- 8 steps
You need: paper, a pencil, an eraser, and crayons or markers for coloring.
Start drawing
In this article (7 sections)
How to draw a pull-along duck toy step by step
How to Draw a Pull-Along Duck Toy · tinyhandscreate.com
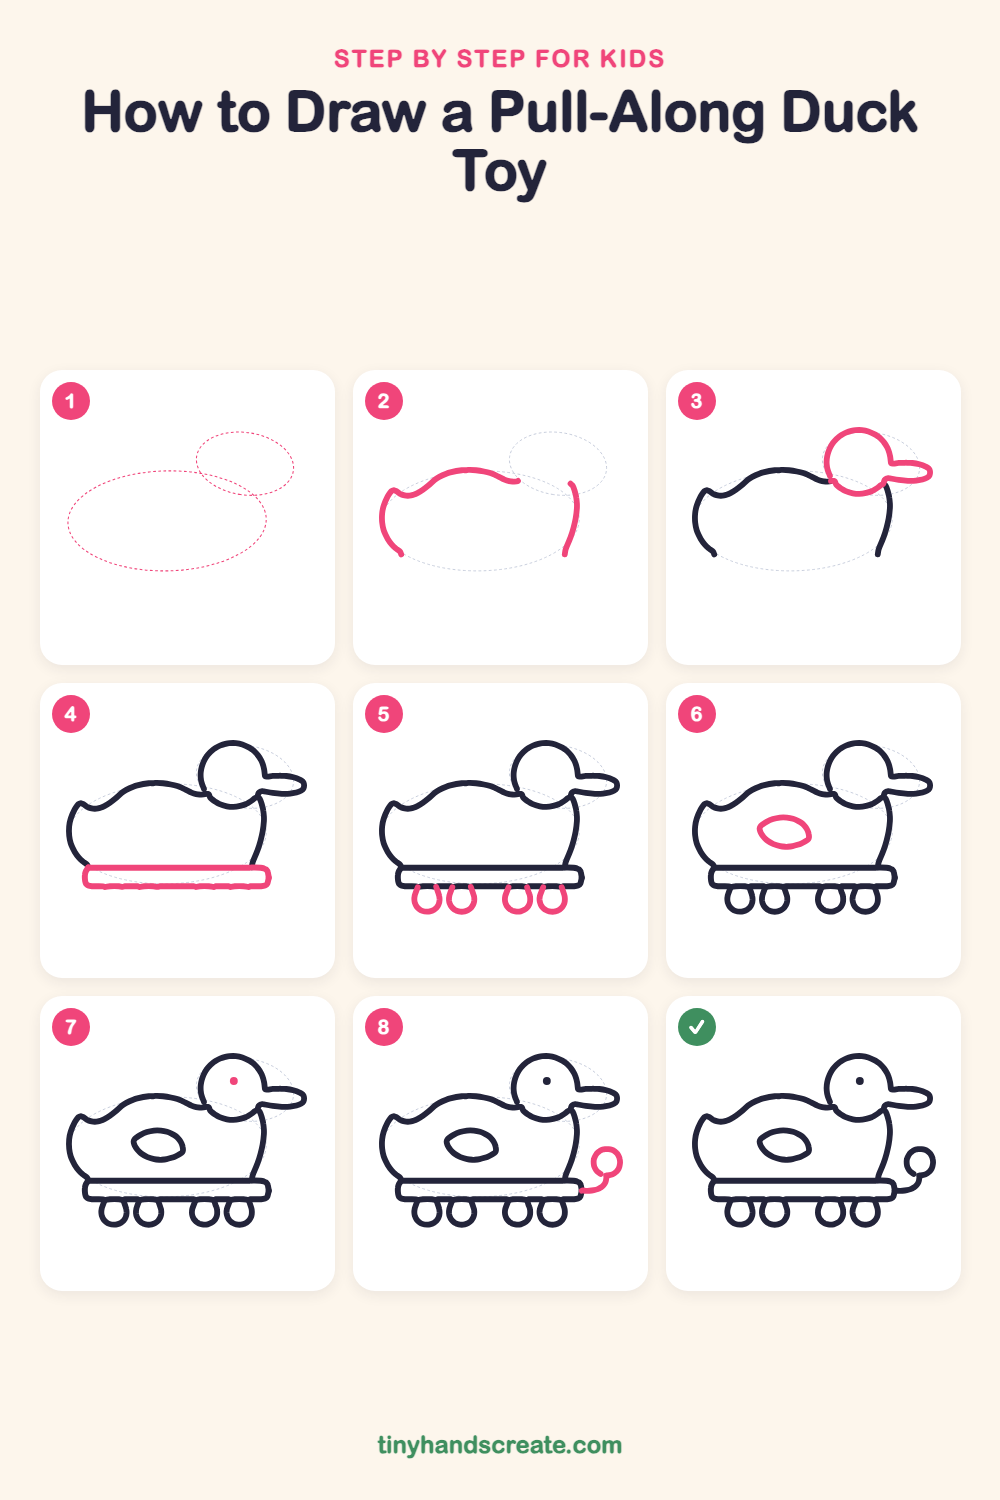
Step 1: Guide shapes
Lightly sketch these 2 ovals. They only show where the big parts go, so press softly. You will erase them at the end.
Step 2: Body outline
Draw a wavy line for the back of the duck, with a little notch for the tail on the left, curving down the left side. Then draw a curved line down the right side for the chest. Leave the bottom open for now.
Step 3: Head and beak
Draw a circle for the head on the upper right of the body, overlapping the back line a little. Add a long, rounded beak poking out to the right from the side of the head.
Step 4: The wooden base
Under the body, draw a long, flat rectangle with softly rounded corners, like a little board. It closes the open bottom of the duck.
Step 5: Four wheels
Under the base, draw four small U-shaped wheels hanging from the bottom edge. Put them in two pairs with a bigger gap in the middle, and try to make them the same size.
Step 6: The wing
In the middle of the body, draw a pointy oval like a leaf or a lemon slice. This is the duck's painted wing.
Step 7: The eye
Add a small dot in the upper middle of the head. This is the duck's eye.
Step 8: String and handle
From the right end of the base, draw a short curved line that swoops up and to the right. Finish it with a small circle at the top, the handle for pulling.
All done!
Erase the guide shapes, go over your lines, then color it in.
Finished your pull-along duck toy? Keep the pencils out and learn how to draw stacking rings or how to draw a baby rattle next.
Tips for drawing a pull-along duck toy
- Draw the body outline lightly at first, so you can change the wavy back line before you press harder.
- Let the head circle overlap the back line a little. That makes the duck look like its neck is connected.
- Draw the four wheels hanging from the bottom of the base, and try to keep them about the same size.
Free pull-along duck toy coloring page
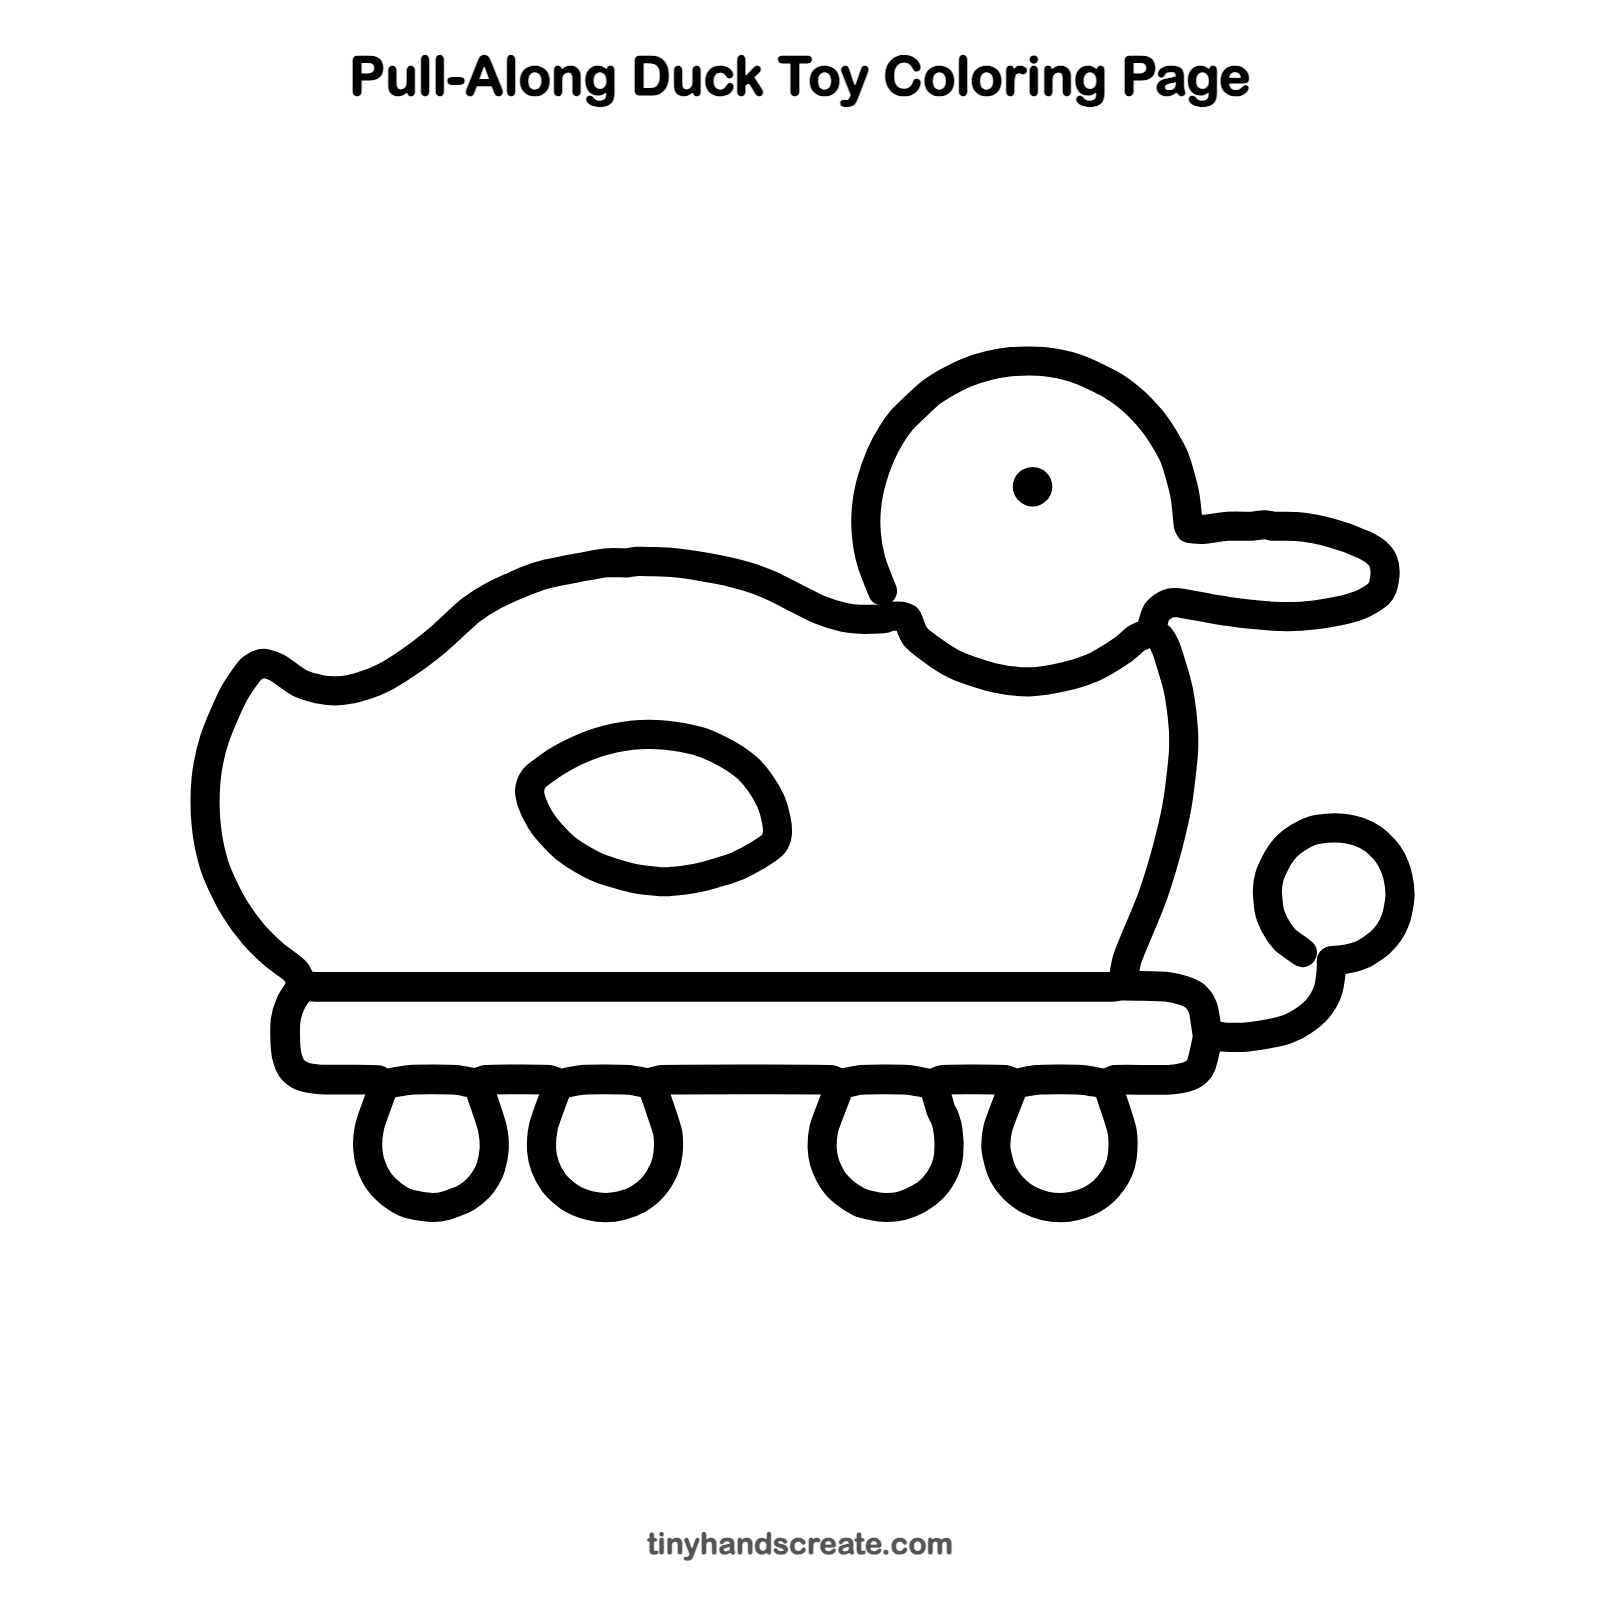
Want to go straight to coloring? Open this pull-along duck toy coloring page at full size and print it. It is the same drawing you just learned, with clean lines ready for crayons or markers.
How to color your pull-along duck toy drawing
Try a sunny yellow body with an orange beak and bright red, blue, and green wheels, like a painted wooden toy. For a creative twist, give the wing a pattern of stripes or stars.
Pull-along duck toy fun fact for kids
Toy animals on wheels are very old. Archaeologists have found small wheeled toy animals made thousands of years ago.
Questions about drawing a pull-along duck toy
What shapes do I need to draw a pull-along duck?
You need a wavy body outline, a circle for the head, a rounded beak, a long rectangle with round corners for the base, four small wheels, a pointy oval for the wing, a dot for the eye, and a small circle for the handle.
How do I make my toy duck look cuter?
Make the head circle a little bigger and keep the eye small and round. A chubby body and a bright pattern on the wing also help.
How do I draw the wheels so they look even?
Draw one wheel first, then copy its size for the others. Lightly mark four spots along the bottom of the base, in two pairs, so they line up in a row.