How to Draw a Hairdresser (Easy Step by Step)
Learn to draw a friendly hairdresser using simple shapes like circles, ovals, and rounded boxes. You'll discover how to incorporate essential tools like a spray bottle, hair dryer, and scissors to bring your drawing to life.
- Begin your drawing with simple shapes, such as a big circle for the head.
- Construct the hairdresser's body and apron using rounded shapes.
- Draw essential tools like a spray bottle, hair dryer, and tiny scissors.
- Add a standing mirror to complete your hairdresser's setup.
This post contains affiliate links. As an Amazon Associate I earn from qualifying purchases.
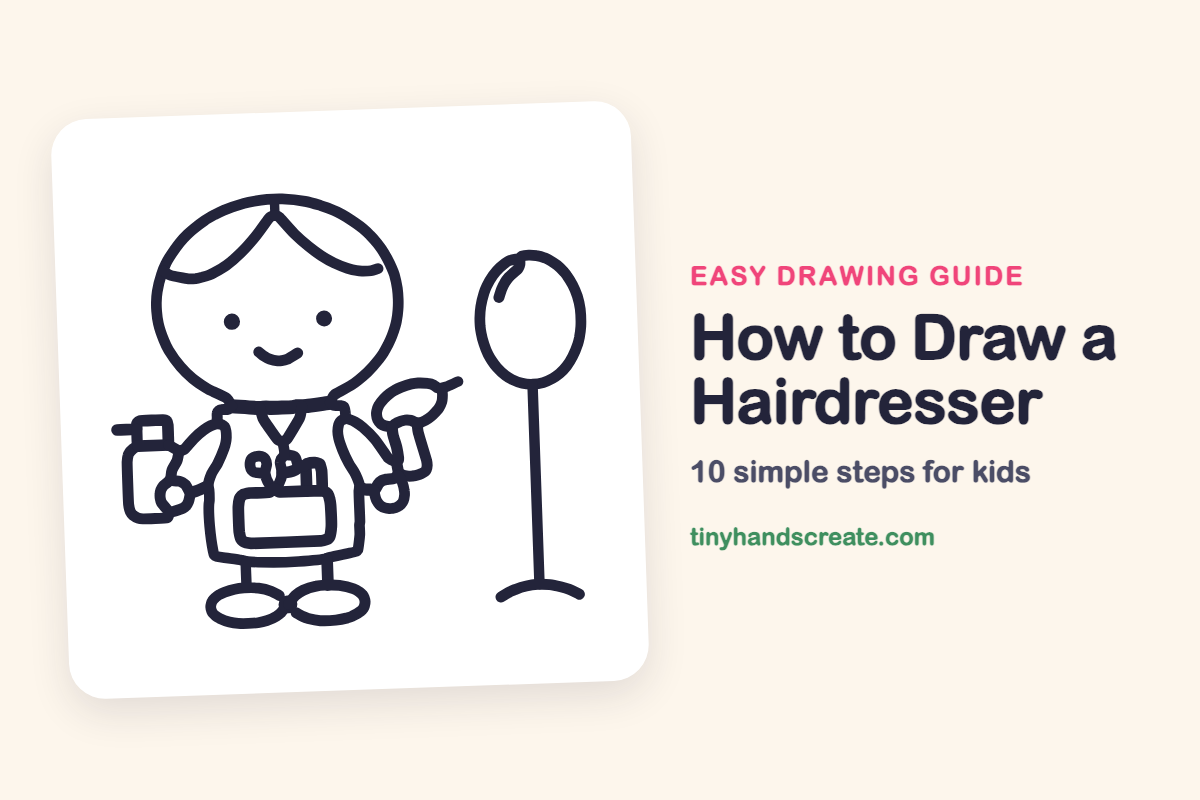
This friendly hairdresser is built from simple shapes: a big circle for the head, a rounded apron, and ovals and rounded boxes for the tools. Every tool tells a little story about the job, from the spray bottle and hair dryer to the tiny scissors in the pocket and the standing mirror.
- Medium
- 15 minutes
- 10 steps
You need: paper, a pencil, an eraser, and crayons or markers for coloring.
Start drawing
In this article (7 sections)
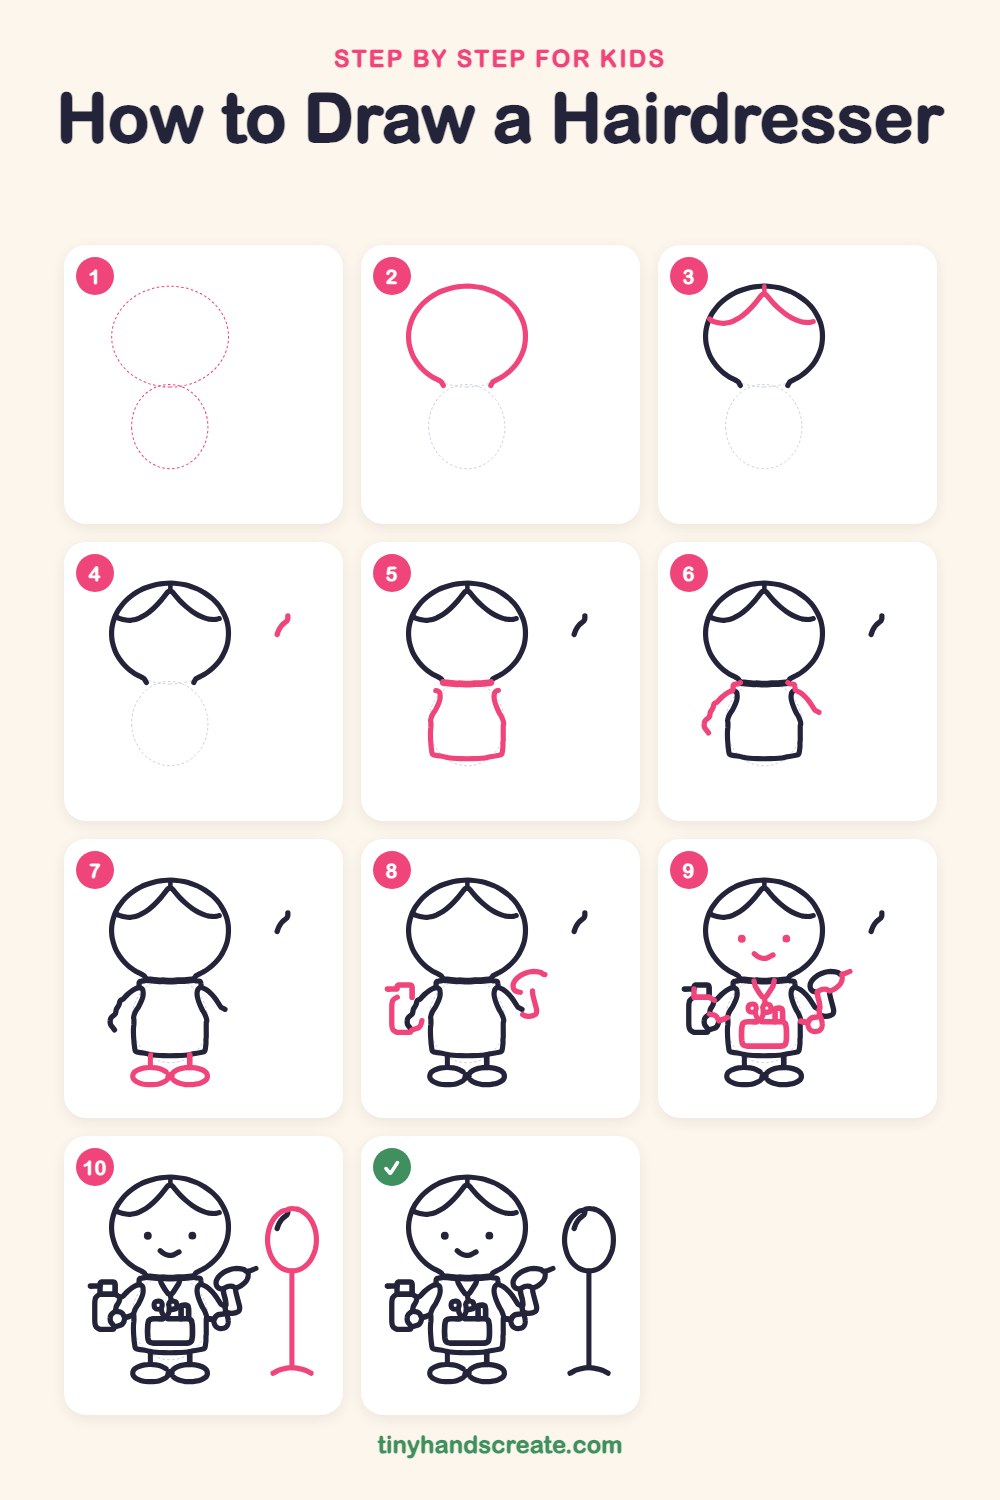
How to draw a hairdresser step by step
How to Draw a Hairdresser · tinyhandscreate.com
Step 1: Guide shapes
Lightly sketch these 2 ovals. They only show where the big parts go, so press softly. You will erase them at the end.
Step 2: The round head
Draw a big circle that is a little wider than it is tall. Stop the line before it closes, so there is a small gap at the bottom where the neck will go.
Step 3: Hair and bangs
Start at the top of the head with a small point. Draw one curved line sweeping down to the left and another sweeping down to the right, like a gentle hill on each side.
Step 4: Small curved mark
To the right of the head, draw one short curved line, like a tiny comma lying on its side. It will be the shine on the mirror later.
Step 5: Collar and apron
Draw a short straight line across the gap under the head for the collar. Then draw the apron below it with slightly curved sides and a flat bottom.
Step 6: Bent arms
Draw a long bent arm on each side of the apron, starting at the collar and curving out and down, like a sausage. Leave the ends open.
Step 7: Legs and shoes
Draw two short straight lines below the apron for legs. At the bottom of each, draw a wide flat oval for a shoe.
Step 8: Bottle and hair dryer
At the hand on the left, draw a rounded rectangle for a spray bottle. At the hand on the right, draw a hair dryer with a rounded body and a short handle.
Step 9: Face, pocket and details
Add two little round dots for eyes and a small curved smile below them. Draw a V shape at the neck and a rounded rectangle pocket on the apron with tiny scissors and a comb poking out. Add small details to the bottle and the hair dryer.
Step 10: The mirror stand
Next to the hairdresser, draw a tall oval for the mirror. Draw a straight line down from its bottom for the stand, and finish with a short curved line at the bottom for the base.
All done!
Erase the guide shapes, go over your lines, then color it in.
Finished your hairdresser? Keep the pencils out and learn how to draw an architect or how to draw a kid programmer next.
Tips for drawing a hairdresser
- Draw the apron with light guide lines first, so both sides come out about the same width.
- The scissors in the pocket are tiny. Draw two small circles first, then add thin lines going down from them.
- Draw the hair dryer as a rounded bean shape first, then add the handle below it, so it looks like it is being held.
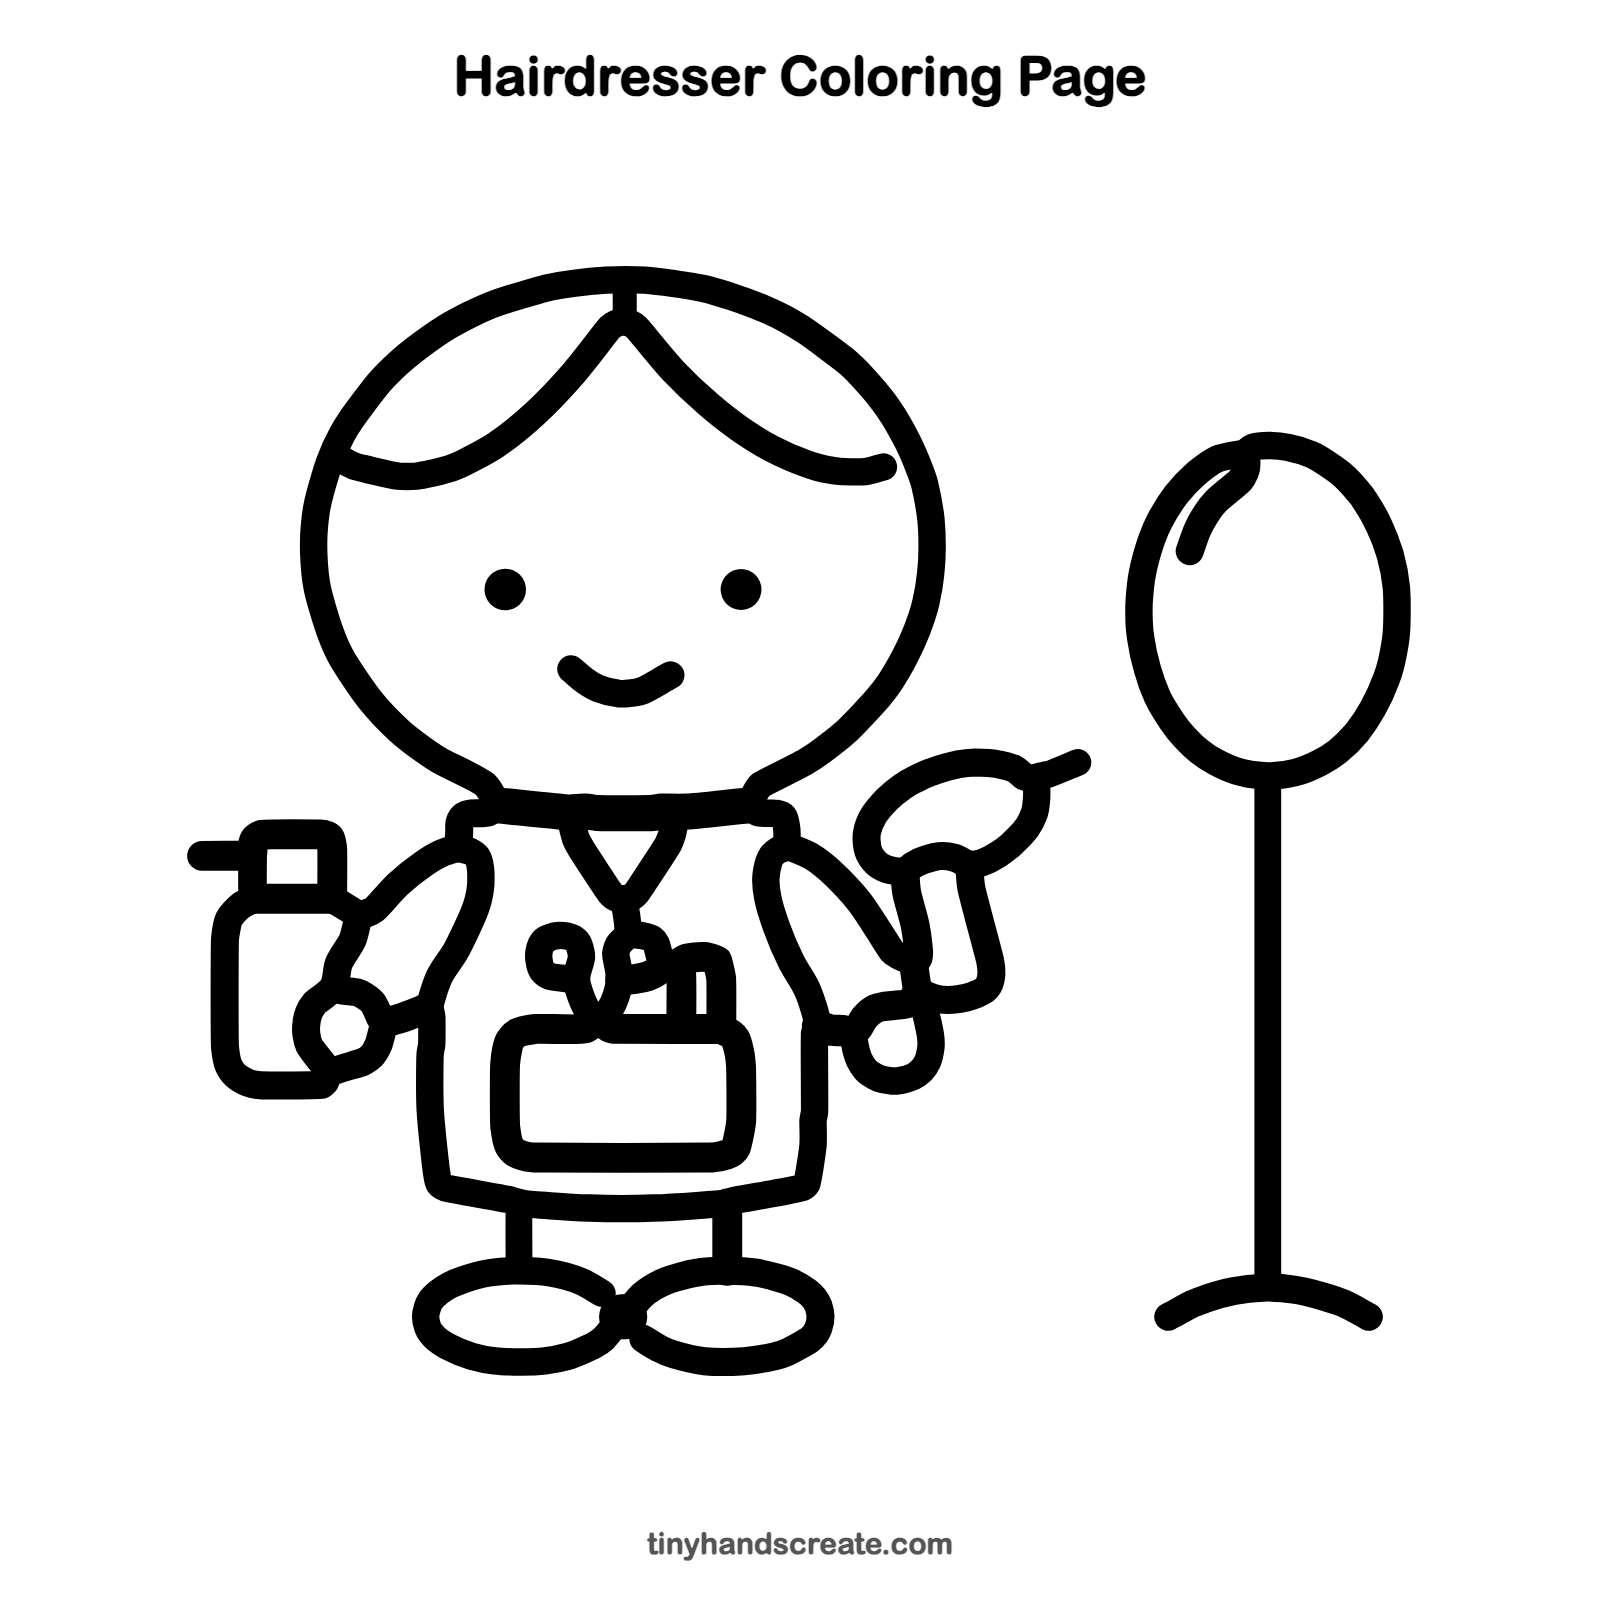
Free hairdresser coloring page
Want to go straight to coloring? Open this hairdresser coloring page at full size and print it. It is the same drawing you just learned, with clean lines ready for crayons or markers.
How to color your hairdresser drawing
Try a bright apron in purple or teal, brown or golden hair, and pale blue for the mirror glass. For a creative twist, give the hairdresser rainbow hair.
Hairdresser fun fact for kids
Hair is made mostly of a protein called keratin, the same material that makes up fingernails.
Questions about drawing a hairdresser
What shapes do I need to draw a hairdresser?
You need a big circle for the head, a rounded apron shape, and ovals for the shoes and the mirror. Small rounded boxes make the pocket and the spray bottle.
How do I make my hairdresser look friendlier?
Give them a small curved smile and two round dot eyes. Place the eyes in the middle of the face with the smile just below them.
What tools can a hairdresser hold?
Hairdressers use scissors, combs, hair dryers, spray bottles, and mirrors. This drawing has a spray bottle, a hair dryer, scissors, a comb, and a standing mirror, so you can pick your favorite to start with.