How to Draw a Wooden Puppet Boy (Easy Step by Step)
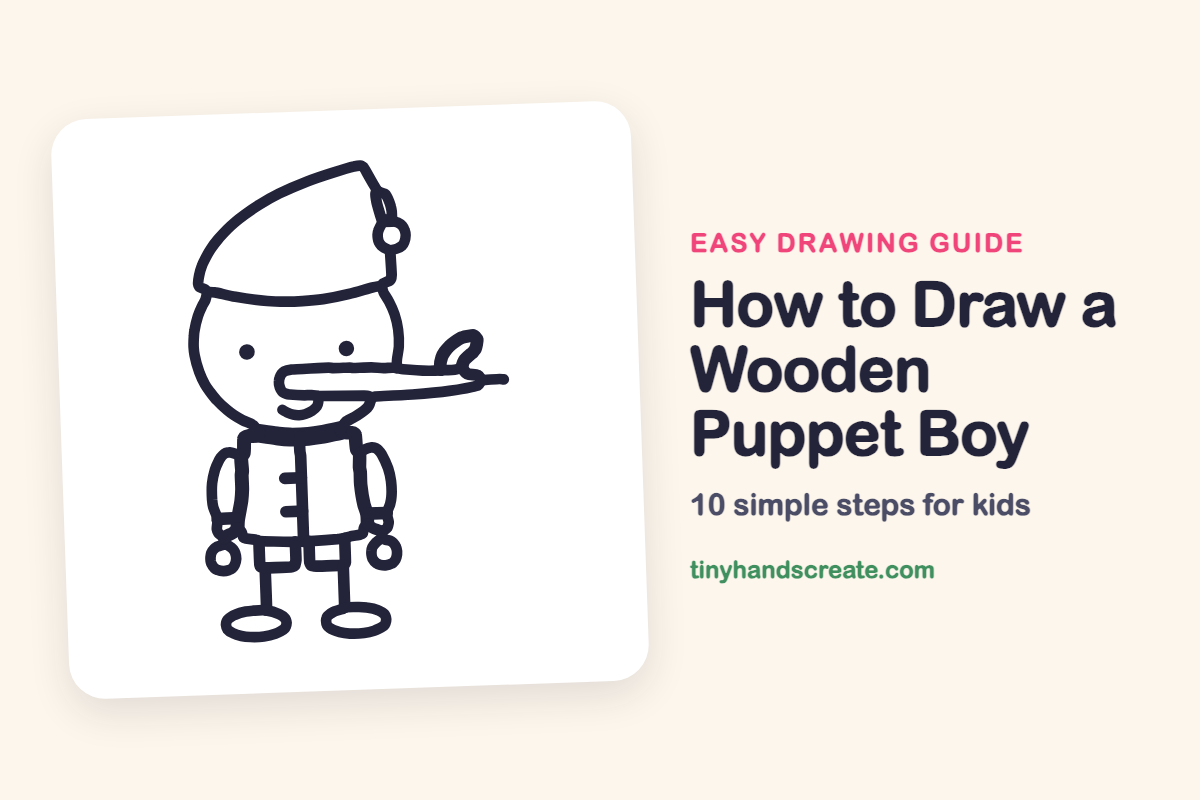
You will learn how to draw a wooden puppet boy using simple shapes like curved lines for the head, a rectangle for the jacket, and circles for hands. You'll create his recognizable long nose and pointy hat.
- Use simple shapes for the puppet's body.
- Draw curved lines to form the puppet's head.
- Create the jacket using a simple rectangle shape.
- Add small circles for hands and flat ovals for feet.
- Include a long nose and pointy hat for easy recognition.
This post contains affiliate links. As an Amazon Associate I earn from qualifying purchases.
A wooden puppet boy with a very long nose is a fun character to draw because he is made of simple shapes. You will use curved lines for his head, a rectangle for his jacket, small circles for his hands, and flat ovals for his feet. The long nose and pointy hat make him easy to recognize.
- Easy
- 15 minutes
- 10 steps
You need: paper, a pencil, an eraser, and crayons or markers for coloring.
Start drawing
In this article (7 sections)
How to draw a wooden puppet boy step by step
How to Draw a Wooden Puppet Boy · tinyhandscreate.com
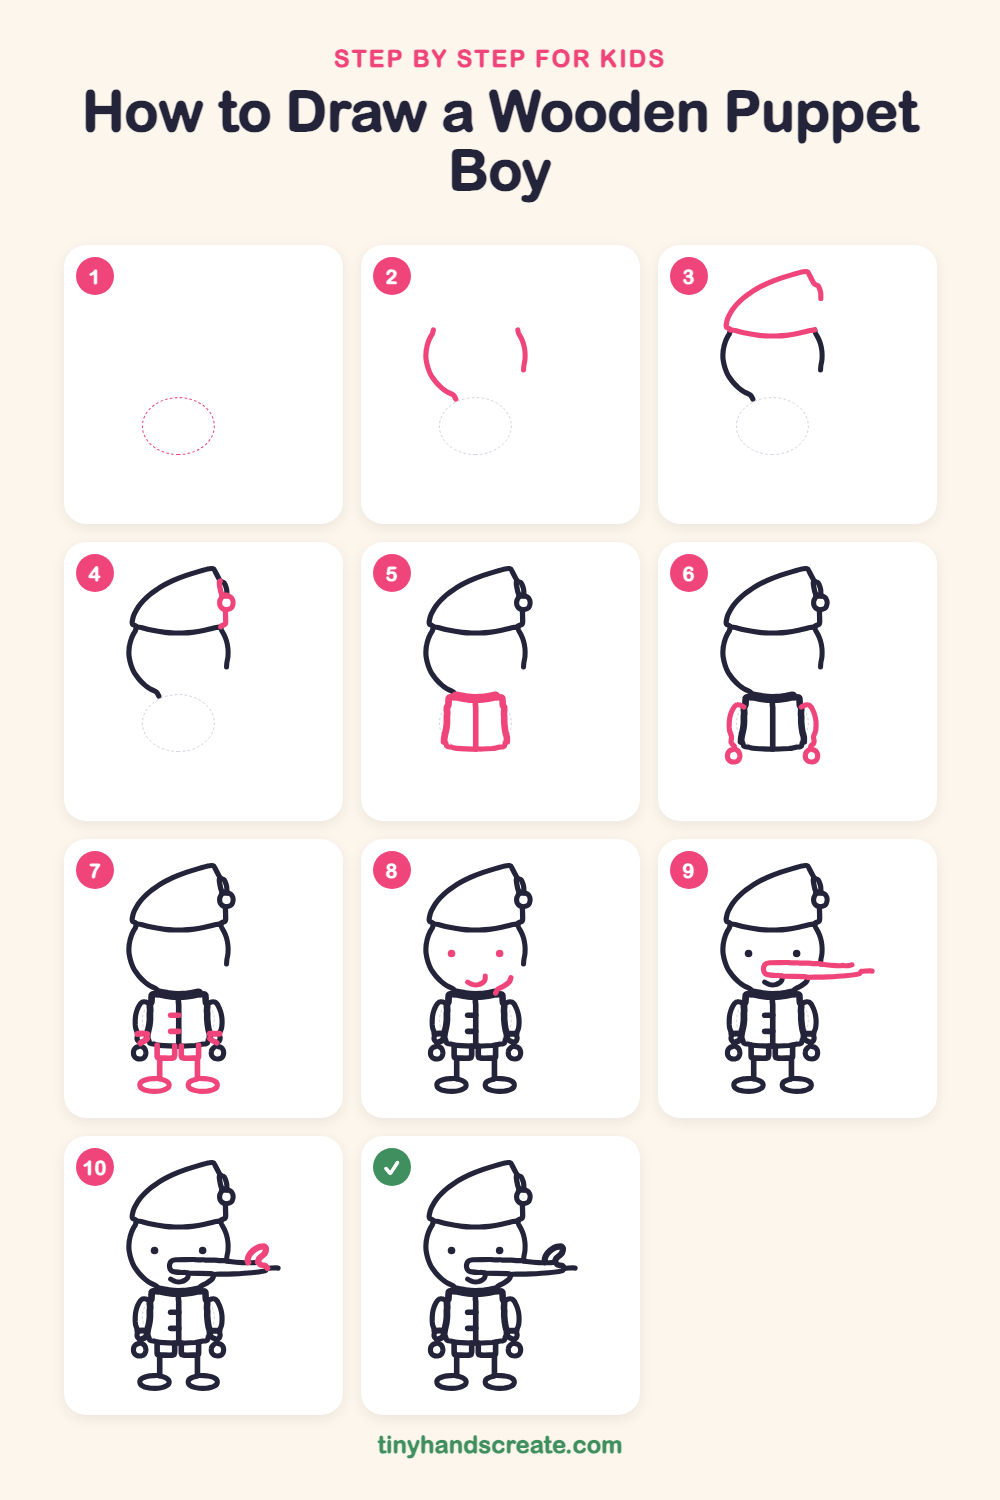
Step 1: Guide shapes
Lightly sketch this oval. It only shows where the big parts go, so press softly. You will erase it at the end.
Step 2: Sides of the head
Draw two curved lines for the sides of the round head. Make the left one a big curve that bends like the letter C, and the right one a shorter curve, with a gap at the top for the hat.
Step 3: The pointy hat
Draw a curved dome shape across the top of the head, with a small pointed tip leaning to the right. Close the bottom with a gently curved line for the hat brim.
Step 4: Bobble on the hat
Near the hat's tip on the right, draw a small circle for a bobble. Add a short line that runs down from the tip to the circle and on toward the brim.
Step 5: The jacket
Under the head, draw a rectangle for his jacket. Then draw one straight line down the middle.
Step 6: Arms and hands
On each side of the jacket, draw a long curved line for an arm. At the bottom of each arm, draw a small circle for a hand.
Step 7: Buttons, legs and feet
Draw a few short dashes down the front of the jacket for buttons. Under the jacket, draw two small boxes for shorts, then a straight line down from each for a leg, and a flat oval at the bottom for each foot.
Step 8: Eyes and smile
Draw two small dots for eyes in the middle of the face. Add a little curved smile below them, and a short curved line on the right near the chin.
Step 9: The long nose
Draw a long, skinny shape that starts in the middle of the face and sticks out to the right, like a pencil lying on its side. Make it get thinner toward the tip.
Step 10: Leaf on the nose
Near the tip of the nose, draw a small pointed leaf shape sprouting upward. Add a tiny curl where it joins the nose.
All done!
Erase the guide shapes, go over your lines, then color it in.
Finished your wooden puppet boy? Keep the pencils out and learn how to draw Thumbelina or how to draw a magic mirror next.
Tips for drawing a wooden puppet boy
- Draw the nose after the face is done. Start it near the middle of the face and slide your pencil straight out to the right, getting thinner as you go.
- Leave a gap at the top of the head when you draw its sides, so the hat has room to sit there. Then draw the hat as a dome with a curved line across the bottom for the brim.
- Draw the arms as long curved lines on each side of the jacket. Put a small circle at the bottom of each arm so the hands look like they hang from it.
Free wooden puppet boy coloring page
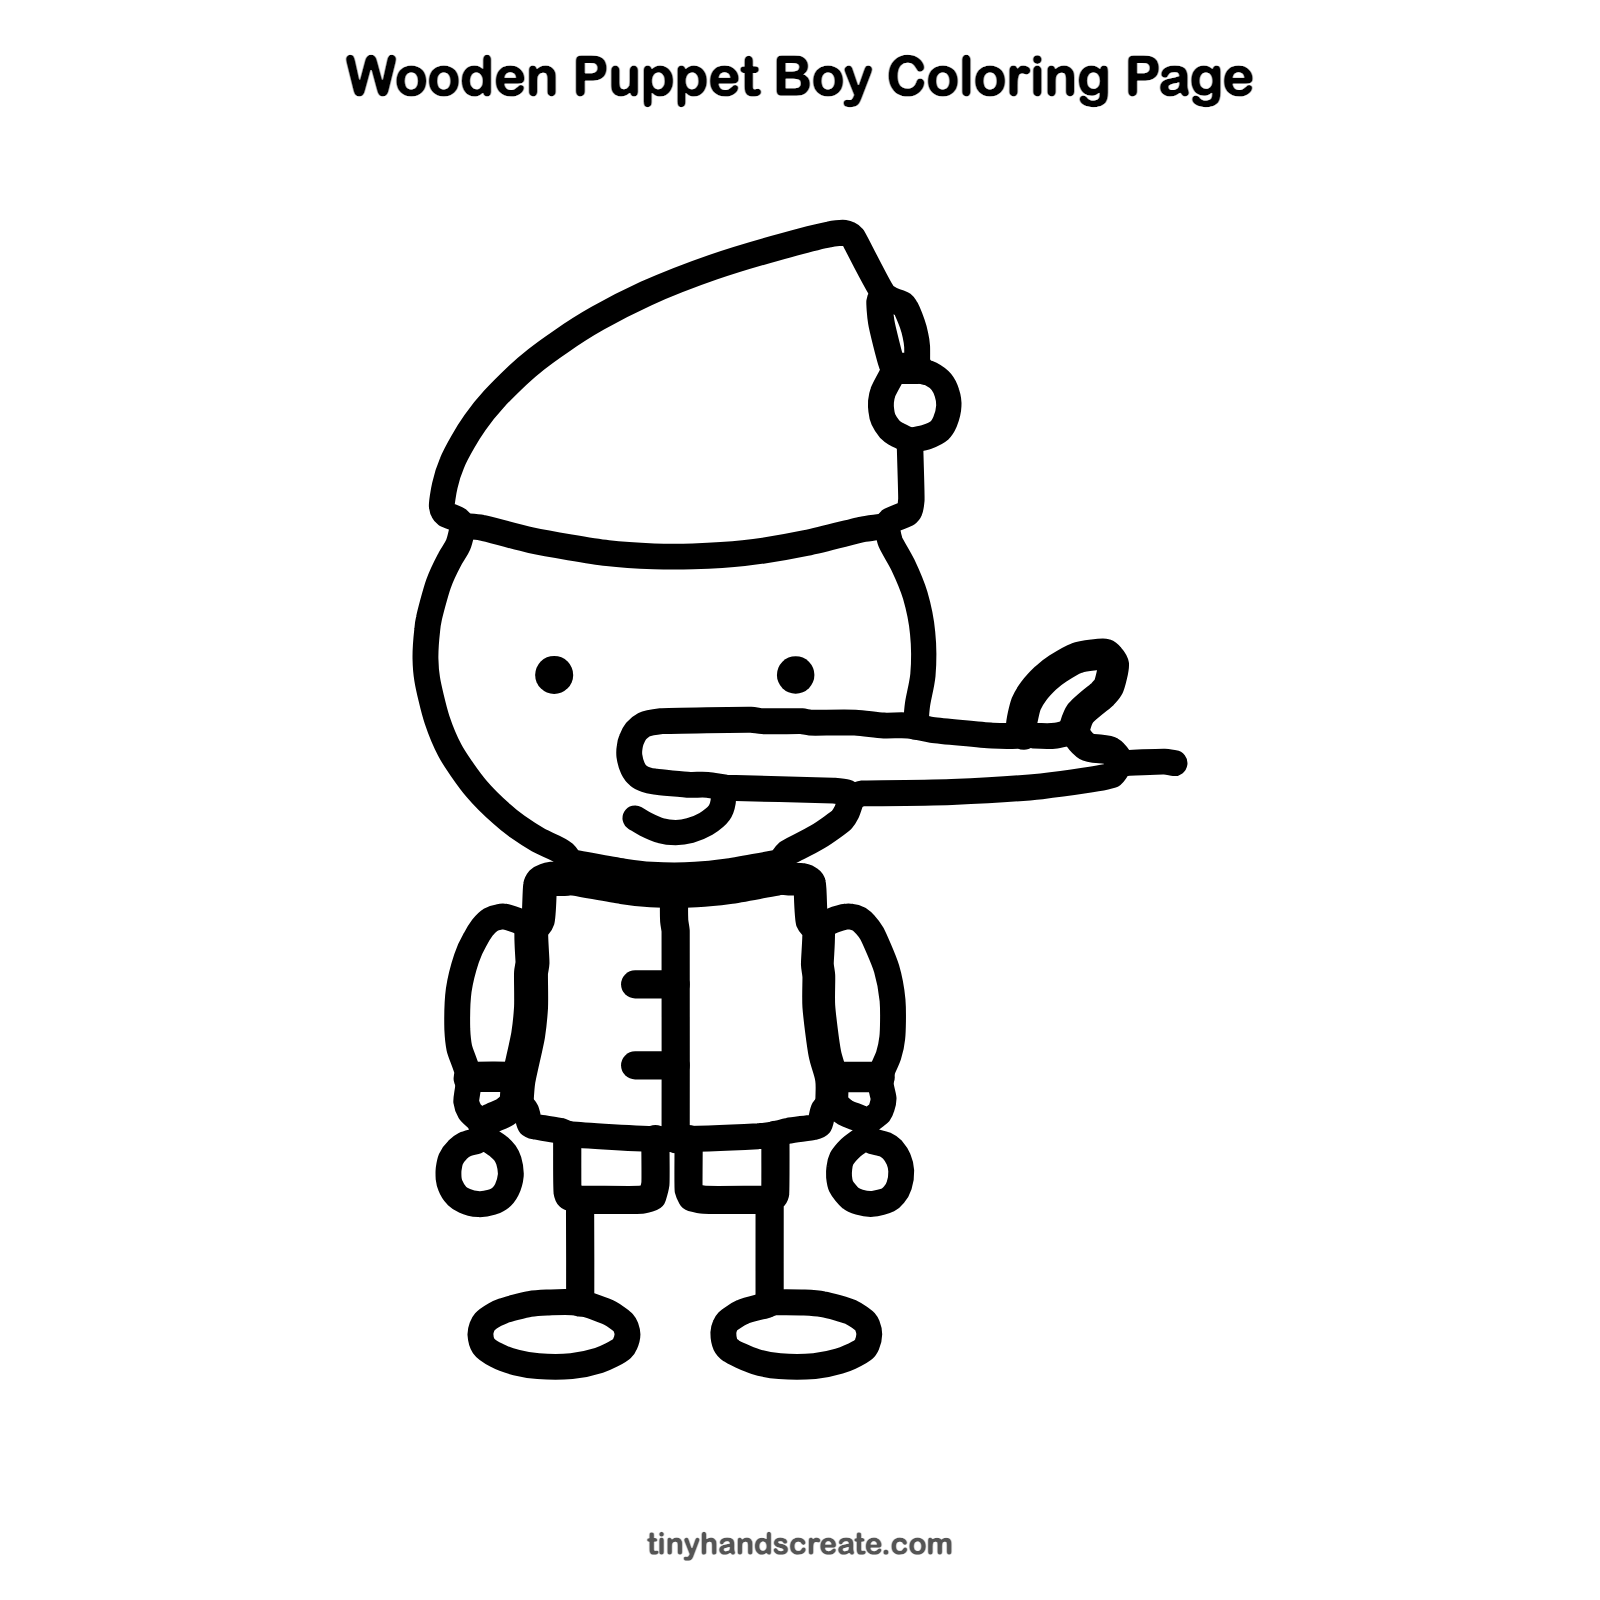
Want to go straight to coloring? Open this wooden puppet boy coloring page at full size and print it. It is the same drawing you just learned, with clean lines ready for crayons or markers.
How to color your wooden puppet boy drawing
Try warm wood-brown for the face and hands, a bright red hat, and a blue jacket with yellow buttons. For a creative twist, add a few wood-grain lines to the nose and make the leaf at the tip bright green.
Wooden puppet boy fun fact for kids
Pinocchio is a wooden puppet from an Italian story by Carlo Collodi, which came out as a book in 1883. In the story his nose grows longer whenever he tells a lie.
Questions about drawing a wooden puppet boy
What shapes do I need to draw a wooden puppet boy?
You need curved lines for the head, a dome for the hat, and a rectangle for the jacket. Small circles make the hands and bobble, flat ovals make the feet, and a long thin shape makes the nose.
How do I make the long nose look right?
Start the nose in the middle of the face and draw it straight out to the right like a long pencil that gets narrower at the end. Then add a tiny leaf near the tip.
How do I make my puppet boy look cuter?
Draw the eyes as small dots and add a gentle curved smile. A round head and a small bobble on the hat also make him look friendlier.