How to Draw an Egg Tart (Easy Step by Step)
This post contains affiliate links. As an Amazon Associate I earn from qualifying purchases.
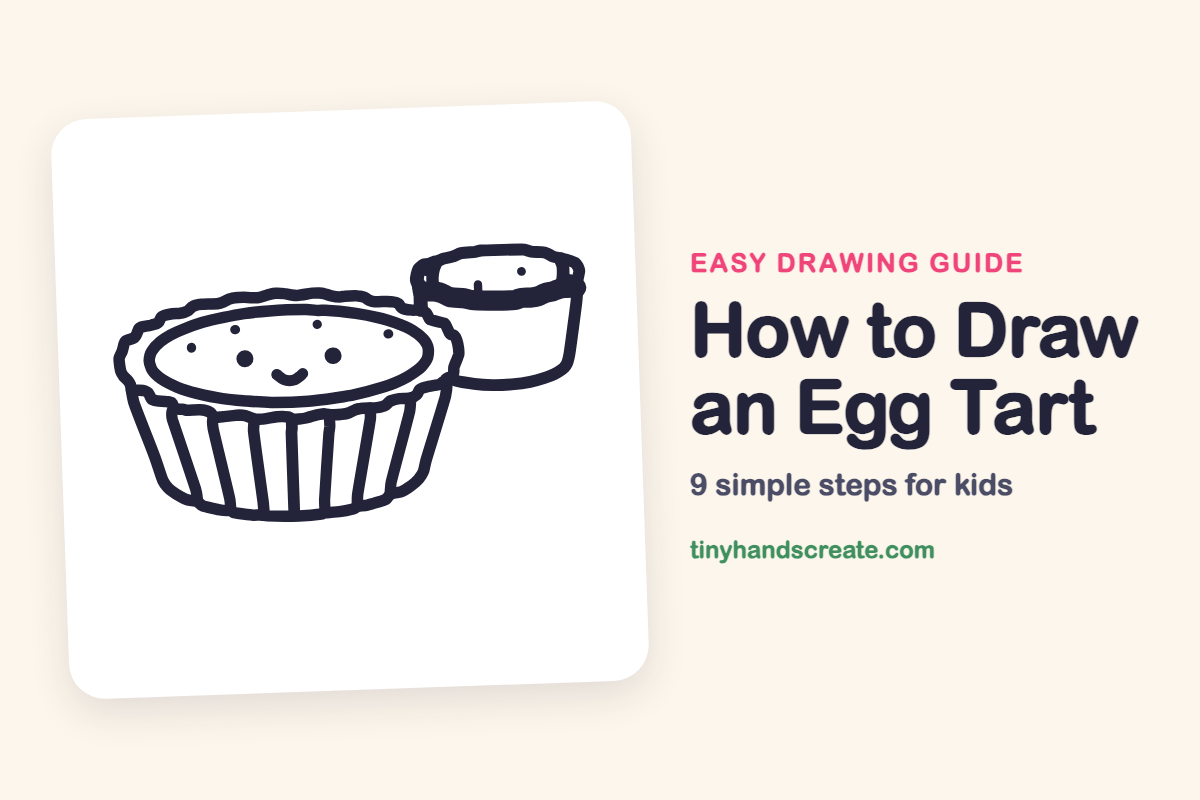
An egg tart is a small custard pie with a crinkly crust, and it becomes a friendly drawing once you give it a smiley face. It is built from a few shapes: a bowl for the cup, a flat oval for the custard, and straight lines for the folds. This guide also adds a second little tart on the right, so you practice drawing one thing tucked beside another.
- Medium
- 15 minutes
- 9 steps
You need: paper, a pencil, an eraser, and crayons or markers for coloring.
Start drawing
In this article (7 sections)
How to draw an egg tart step by step
How to Draw an Egg Tart · tinyhandscreate.com
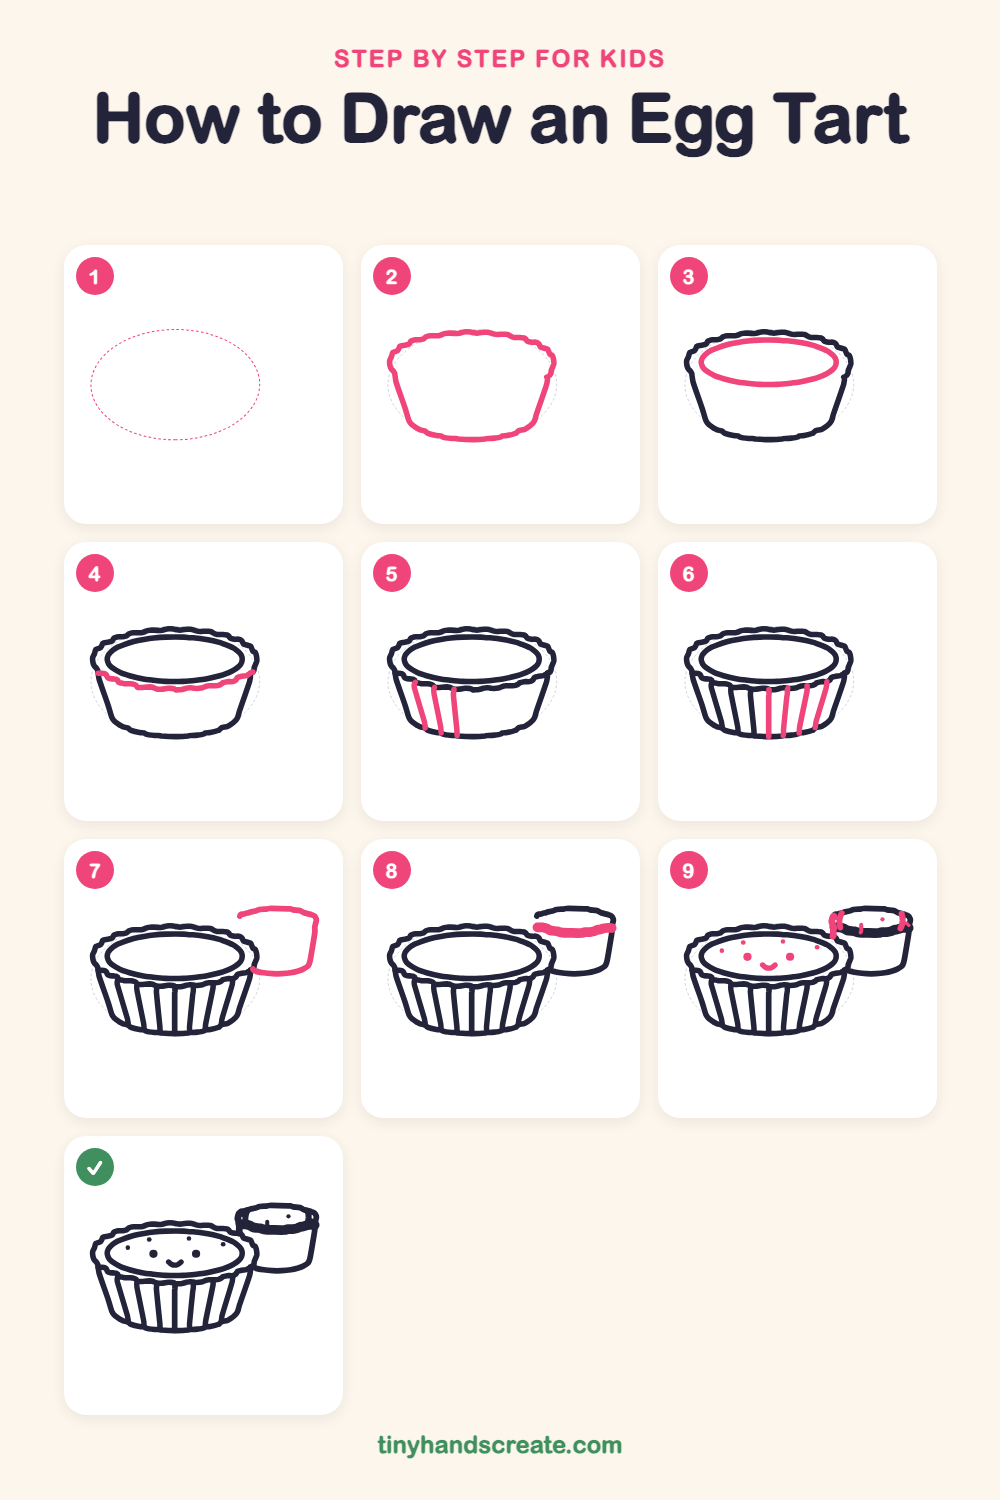
Step 1: Guide shapes
Lightly sketch this oval. It only shows where the big parts go, so press softly. You will erase it at the end.
Step 2: The tart cup
Draw a wide bowl shape that is wider at the top than the bottom. Make the top edge wavy and ruffled, and curve the bottom gently.
Step 3: The custard oval
Inside the top of the cup, draw a big flat oval for the custard. Let it nearly touch the wavy edge on the left and right.
Step 4: The front rim
Draw a wiggly line under the custard oval, going from one side of the cup to the other. This is the crinkly crust that holds the filling.
Step 5: Left side ridges
Under the rim on the left, draw three slightly slanted lines from the rim down to the bottom of the cup. They are the folds of the crust.
Step 6: More ridges
Fill in the rest of the cup with four more lines from the rim down to the bottom. Space them evenly and let the ones on the right lean a little to the right.
Step 7: The little tart
On the right, draw a wavy line for the top of a small tart. From its right end, draw a line down and curve it around the bottom, ending where it meets the big tart.
Step 8: Little tart rim
Draw a thick, wavy band across the top of the little tart, just under its top edge. This makes the crinkly rim around its custard.
Step 9: Face and spots
On the big custard, draw two round dots for eyes and a small smile between them. Add a few tiny dots around the custard, and a few small marks on the little tart's rim.
All done!
Erase the guide shapes, go over your lines, then color it in.
Finished your egg tart? Keep the pencils out and learn how to draw a peanut butter and jelly sandwich or how to draw a jar of jam next.
Tips for drawing an egg tart
- Draw the top edge of the cup as a wavy line with small bumps instead of sharp zigzags. Think of a cloud outline.
- Keep the ridge lines evenly spaced and slightly slanted. They follow the round shape of the cup, so the ones near the sides lean more than the ones in the middle.
- For the little tart, end its bottom line where it meets the big tart. This makes it look like it is sitting behind instead of floating in front.
Free egg tart coloring page
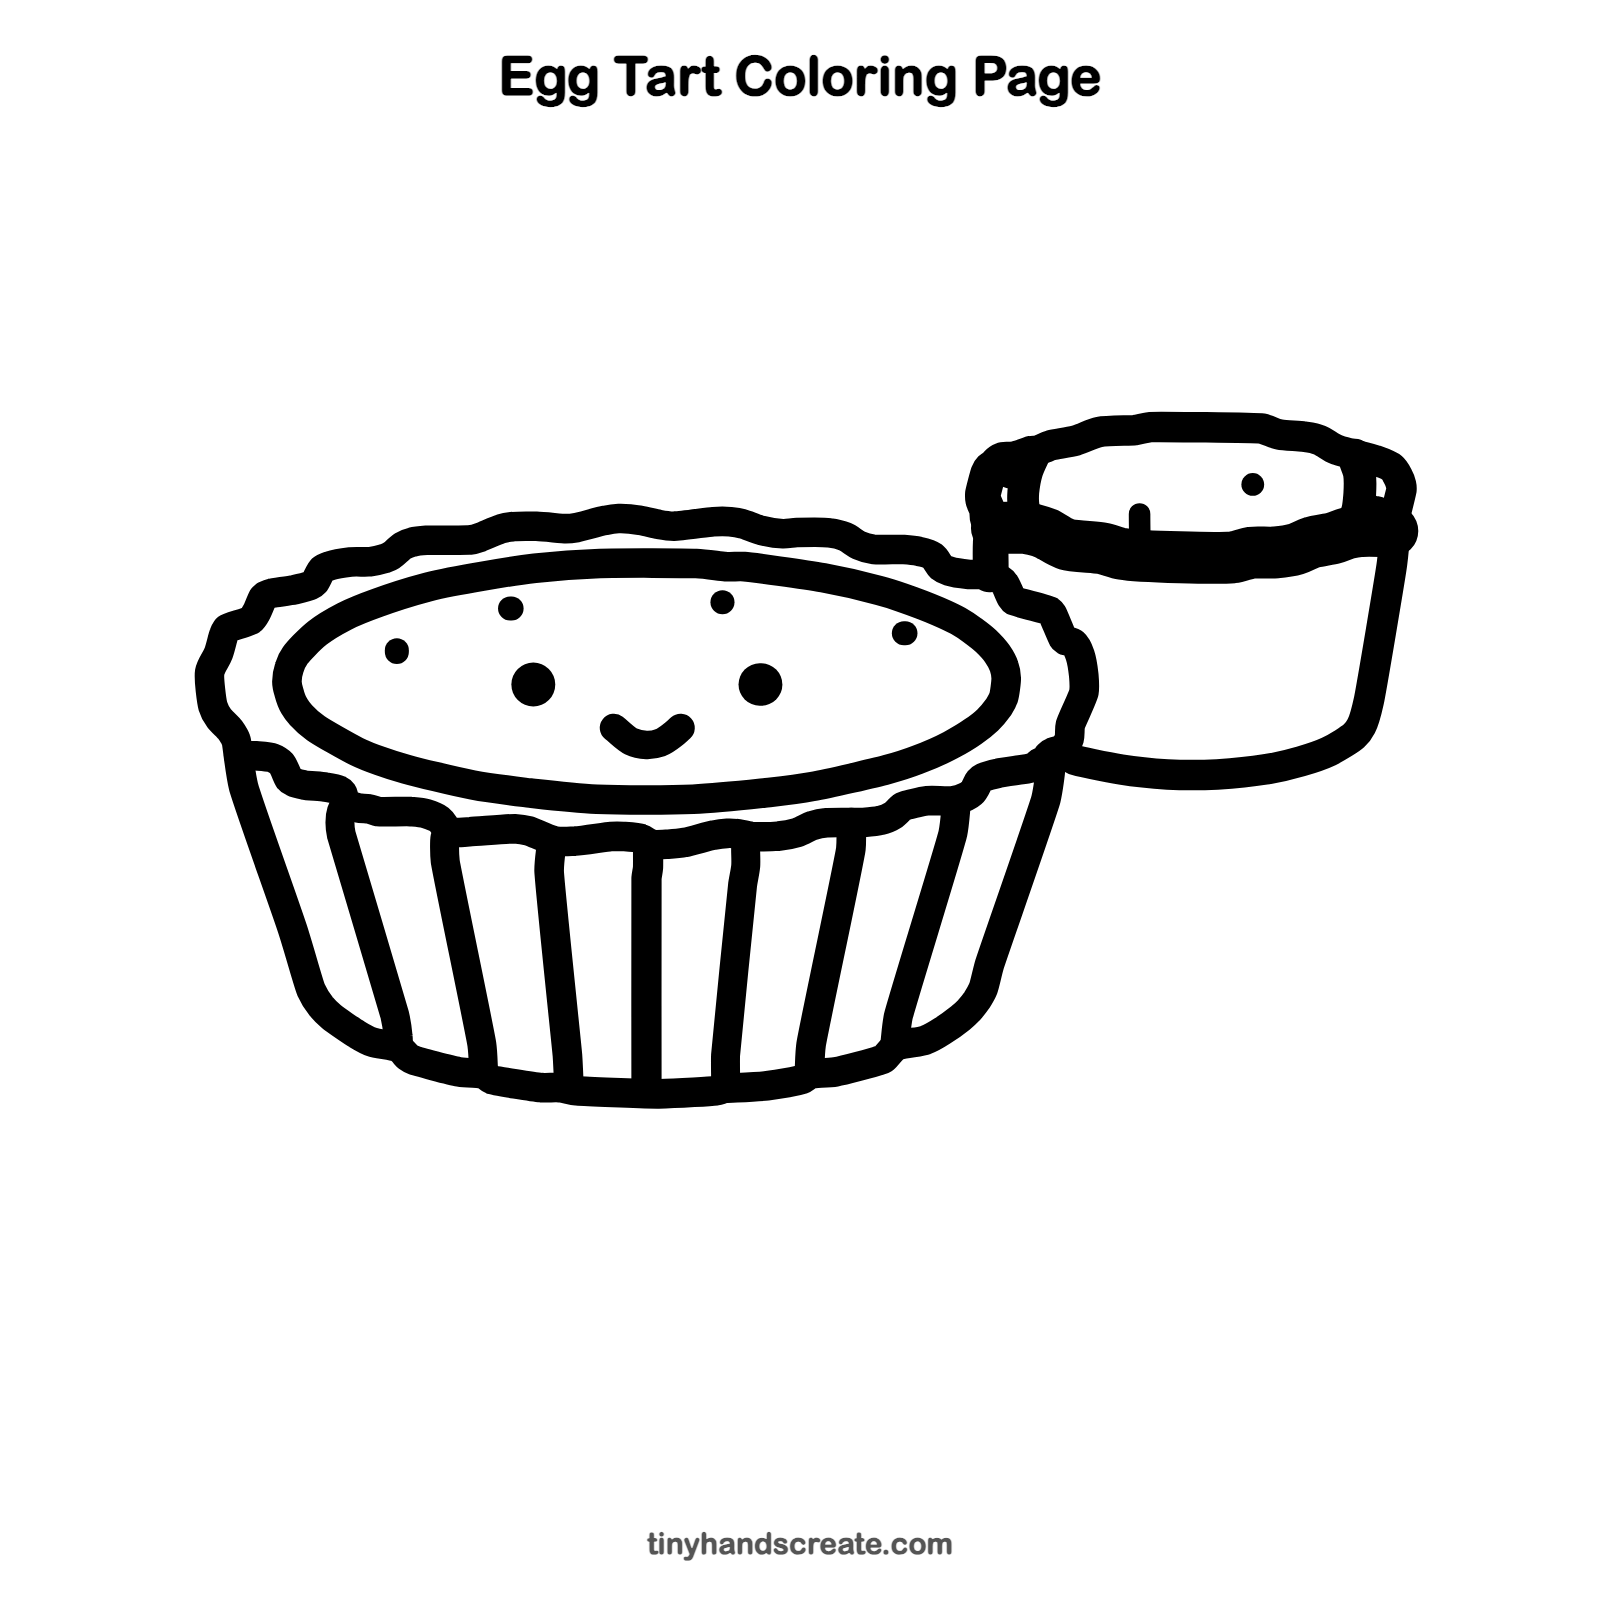
Want to go straight to coloring? Open this egg tart coloring page at full size and print it. It is the same drawing you just learned, with clean lines ready for crayons or markers.
How to color your egg tart drawing
Color the crust a light golden brown and the custard a bright sunny yellow, with darker orange for the toasty spots. For a creative twist, give each tart a different mood face, or add a tiny paper cup holder under them.
Egg tart fun fact for kids
The Portuguese custard tart called pastel de nata comes from Lisbon, Portugal. Egg tarts are a popular treat in Hong Kong and Macau, and they are related to it.
Questions about drawing an egg tart
What shapes do I need to draw an egg tart?
You need a bowl shape for the cup, a wide oval for the custard, and straight lines for the ridges. Two dots and a short smile make the face.
How do I make the crinkly crust edge?
Draw a wavy line with small, round bumps, like a gentle cloud. Go slowly and lift your pencil if you need a break.
How do I make my egg tart look cuter?
Place the eyes wide apart on the custard, with a small smile in the middle. Round dot eyes and a tiny smile look the friendliest.