How to Draw a Thankful Jar (Easy Step by Step)
This post contains affiliate links. As an Amazon Associate I earn from qualifying purchases.
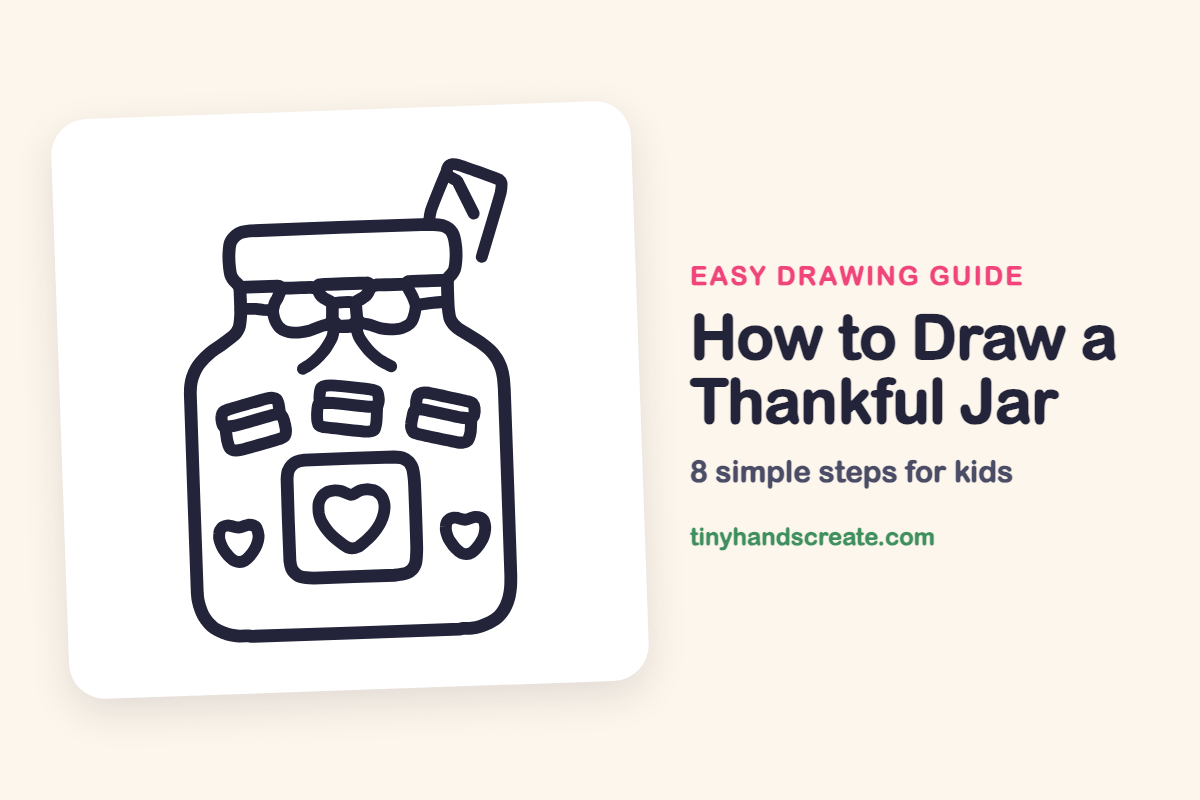
A thankful jar is a fun drawing because it is built from simple shapes: a rounded jar, little loops, tilted rectangles, and hearts. You will draw a jar with a lid, a ribbon bow, a small paper flag, three notes, and a label with a heart. It is a nice project to draw while thinking about the things you feel thankful for.
- Medium
- 15 minutes
- 8 steps
You need: paper, a pencil, an eraser, and crayons or markers for coloring.
Start drawing
In this article (7 sections)
How to draw a thankful jar step by step
How to Draw a Thankful Jar · tinyhandscreate.com
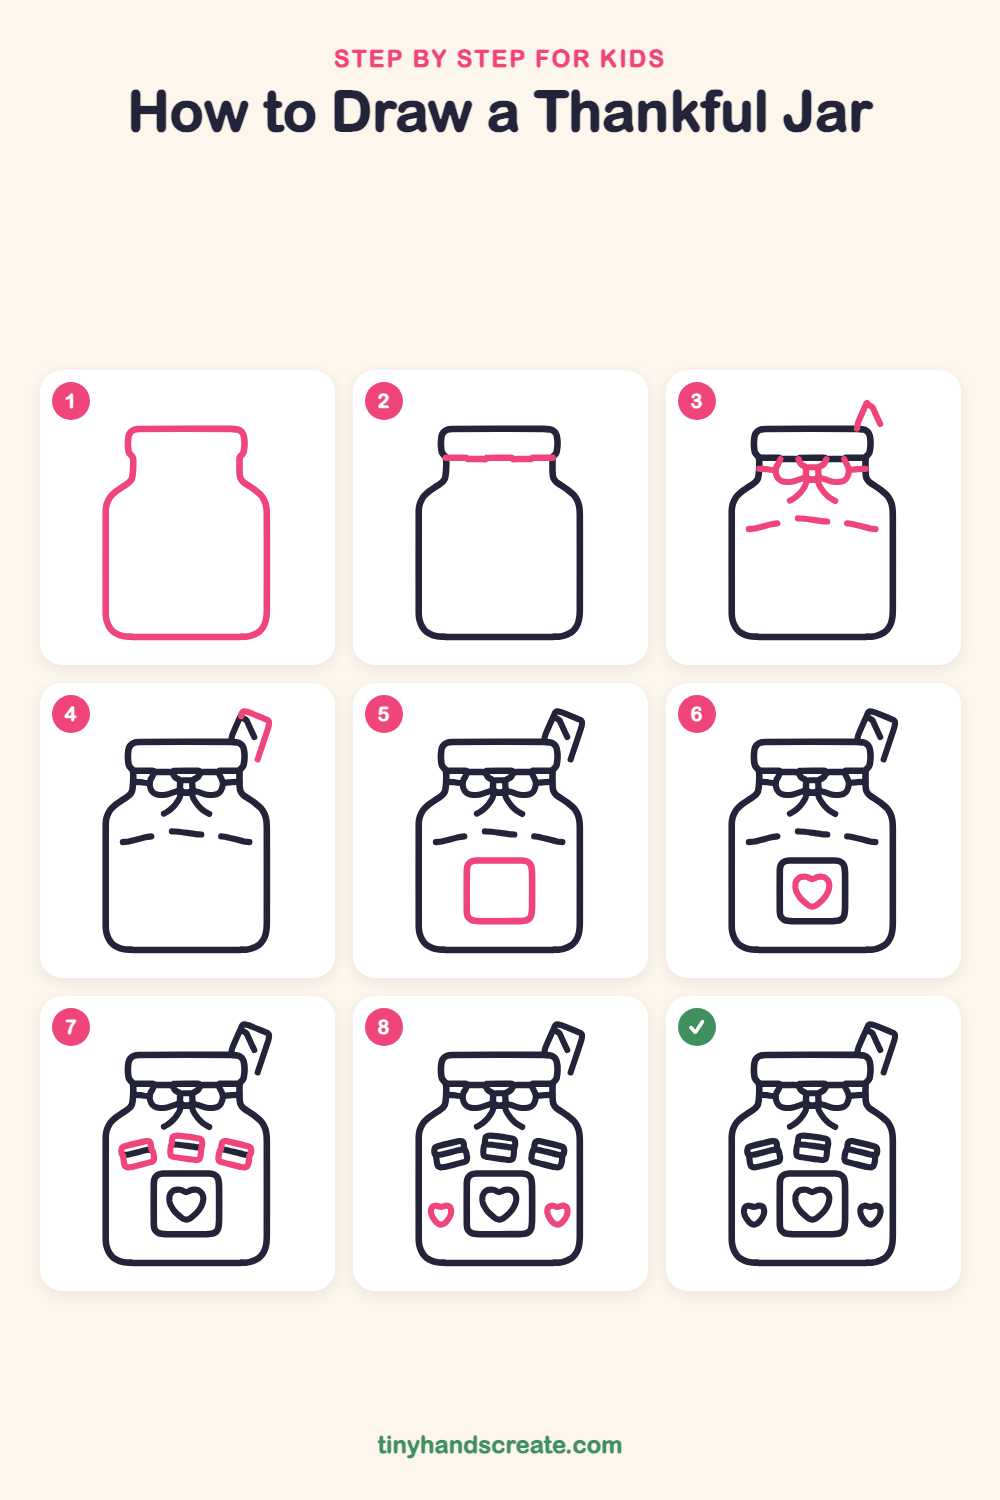
Step 1: Jar outline
Draw one long outline for the jar. Start with a short, wide top, bring the sides in to a narrow neck, flare out into rounded shoulders, then go down to a big body with a rounded bottom.
Step 2: Lid line
Draw a straight line across the jar near the top, from the left side to the right side. It splits the top part off to make a flat lid.
Step 3: Bow and dashes
Under the lid, draw two small loops with a tiny knot between them, and two short tails hanging down. Add a short line going out to each side of the neck. Then draw three short slanted dashes below the bow, and a tiny pointed peak above the lid on the right.
Step 4: Paper flag
Above the lid on the right, finish the little flag. Draw a short slanted line down from the peak and a short line across the top to close it in.
Step 5: Square label
Near the bottom of the jar, draw a square with rounded corners. Keep it in the middle so there is room on both sides.
Step 6: Label heart
Draw a heart inside the square label. Start with two bumps at the top and bring the lines down to a point.
Step 7: Three paper notes
Above the label, draw three small rounded rectangles, each tilted a little differently. Put one on the left, one in the middle, and one on the right, and draw a short line across each one.
Step 8: Side hearts
Draw one small heart on the left of the label and one on the right, near the bottom of the jar. Make them about the same size.
All done!
Go over your lines with a marker, then color it in.
Finished your thankful jar? Keep the pencils out and learn how to draw decorative gourds or how to draw a turkey cupcake next.
Tips for drawing a thankful jar
- Draw the jar outline slowly in one smooth line. Make the neck narrow and the body wide.
- Draw the bow small, with a loop on each side of a tiny knot and two tails below it.
- Draw the three notes at slightly different tilts so they look like they were dropped in by different people.
- Leave a little space between the notes, the label, and the jar walls so nothing feels squished.
Free thankful jar coloring page
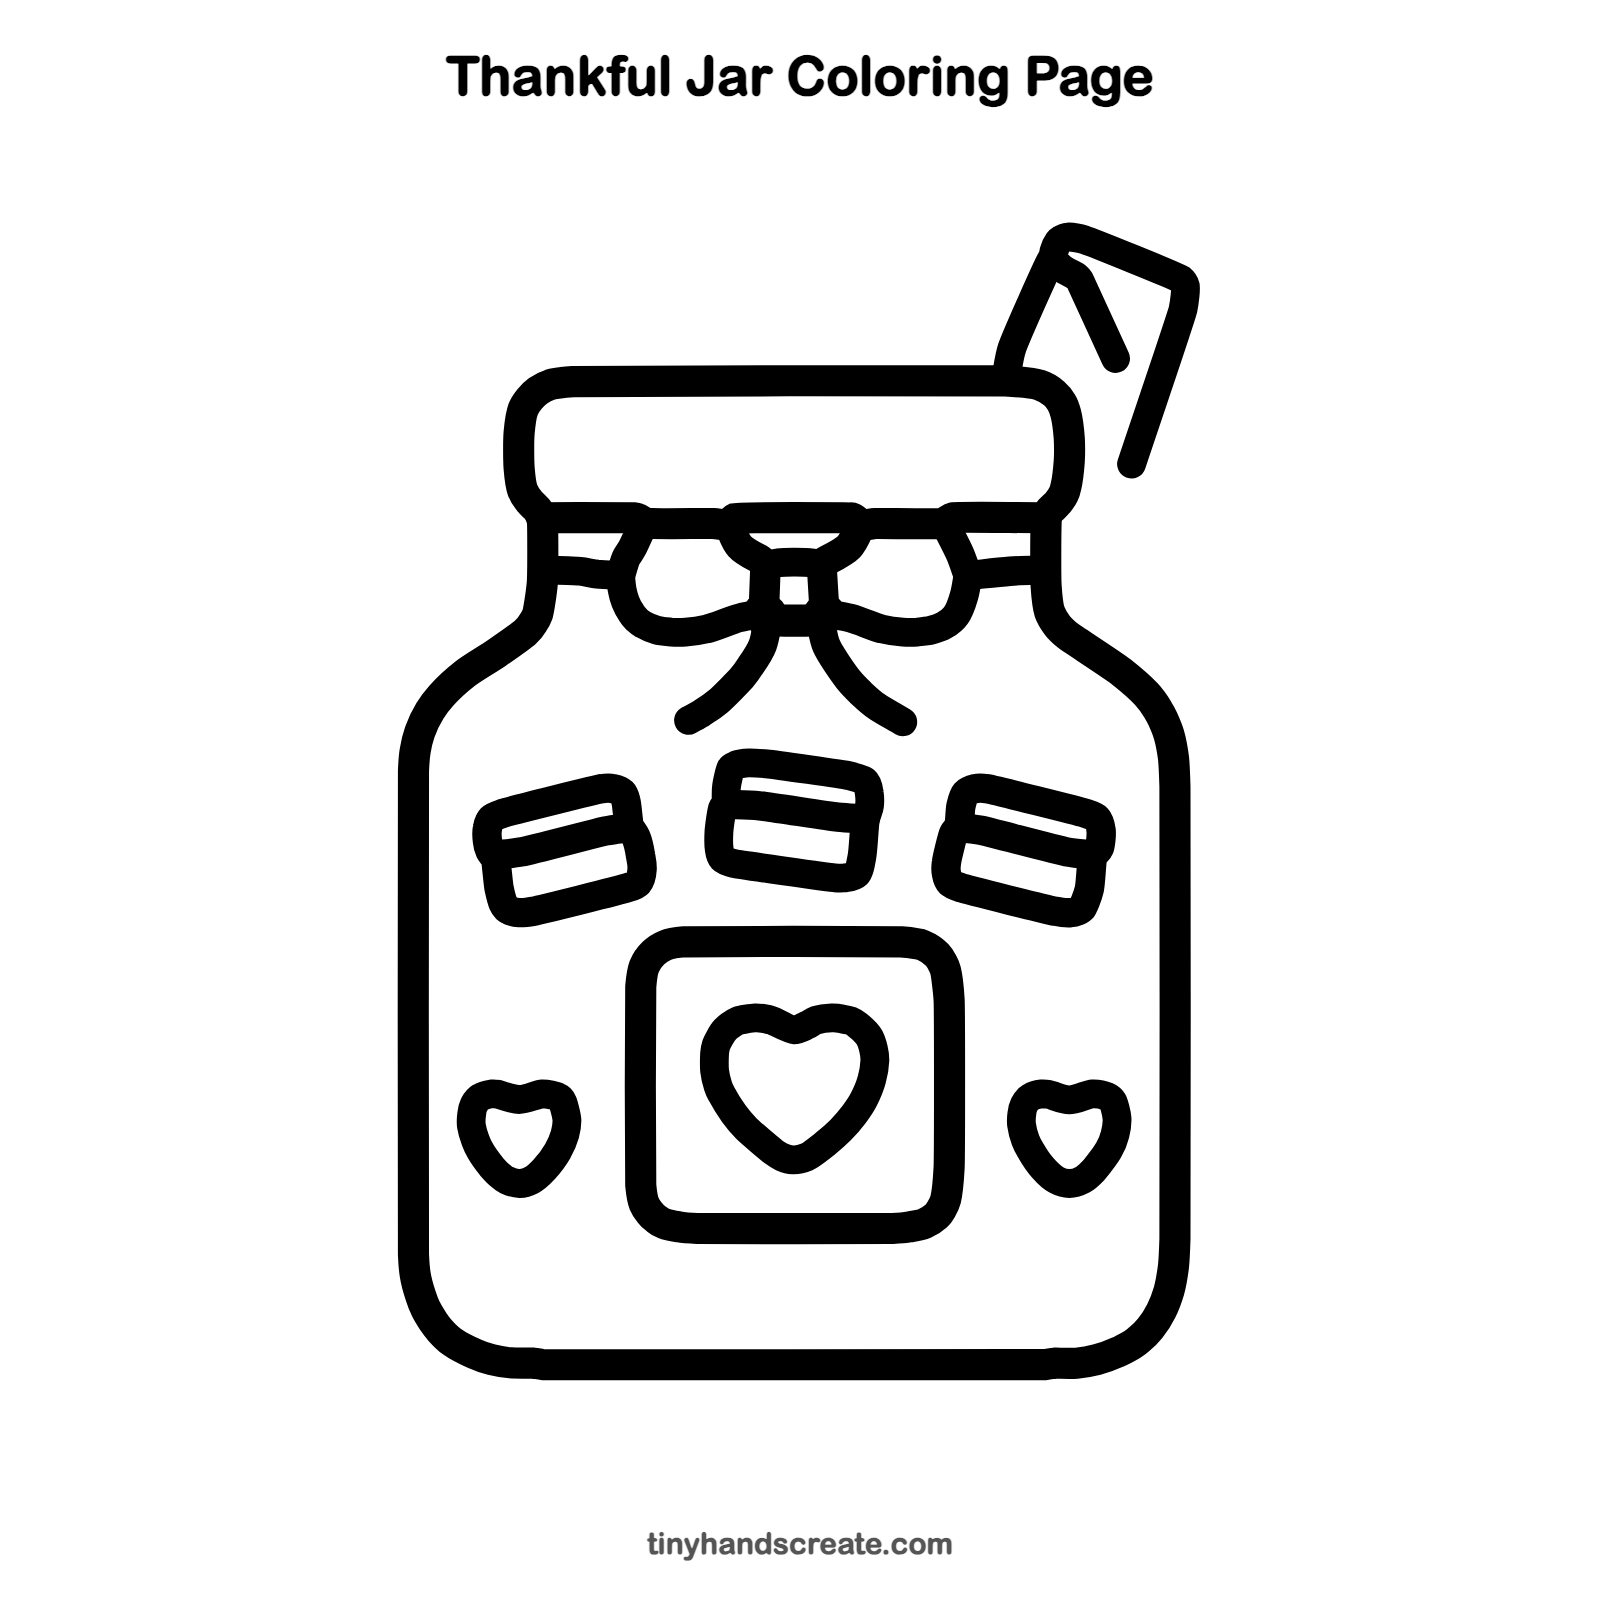
Want to go straight to coloring? Open this thankful jar coloring page at full size and print it. It is the same drawing you just learned, with clean lines ready for crayons or markers.
How to color your thankful jar drawing
Try a red or pink ribbon, a light blue jar, and bright yellow, orange, and green notes. Color the hearts pink or red. You could write or draw one thing you are thankful for on each note.
Thankful jar fun fact for kids
Thanksgiving in the United States is held on the fourth Thursday of November. Many families celebrate by sharing what they are thankful for, which is the idea behind a thankful jar.
Questions about drawing a thankful jar
What shapes do I need to draw a thankful jar?
You need a jar shape with a narrow neck, a rounded square for the label, and small tilted rectangles for the notes. Add loops for the bow and a few hearts for the finishing touches.
How do I make my thankful jar look cuter?
Add the small hearts beside the label, color the bow in a bright shade, and give each note a different color. A little tilt on the notes makes the jar feel playful.
How do I draw a heart that looks even?
Start with two small bumps at the top and draw the sides down to a point at the bottom. If it looks uneven, try drawing a light line down the middle first.