How to Draw a Groundhog (Easy Step by Step)
This groundhog is peeking out of the dirt on a sunny day, and it is built from simple shapes: a round head, a bell-shaped body, and a few dots. The big front teeth give it so much personality. It is a great drawing for practicing round shapes and keeping them neat.
- Easy
- 15 minutes
- 10 steps
You need: paper, a pencil, an eraser, and crayons or markers for coloring.
Start drawingIn this article (7 sections)
How to draw a groundhog step by step
How to Draw a Groundhog · tinyhandscreate.com
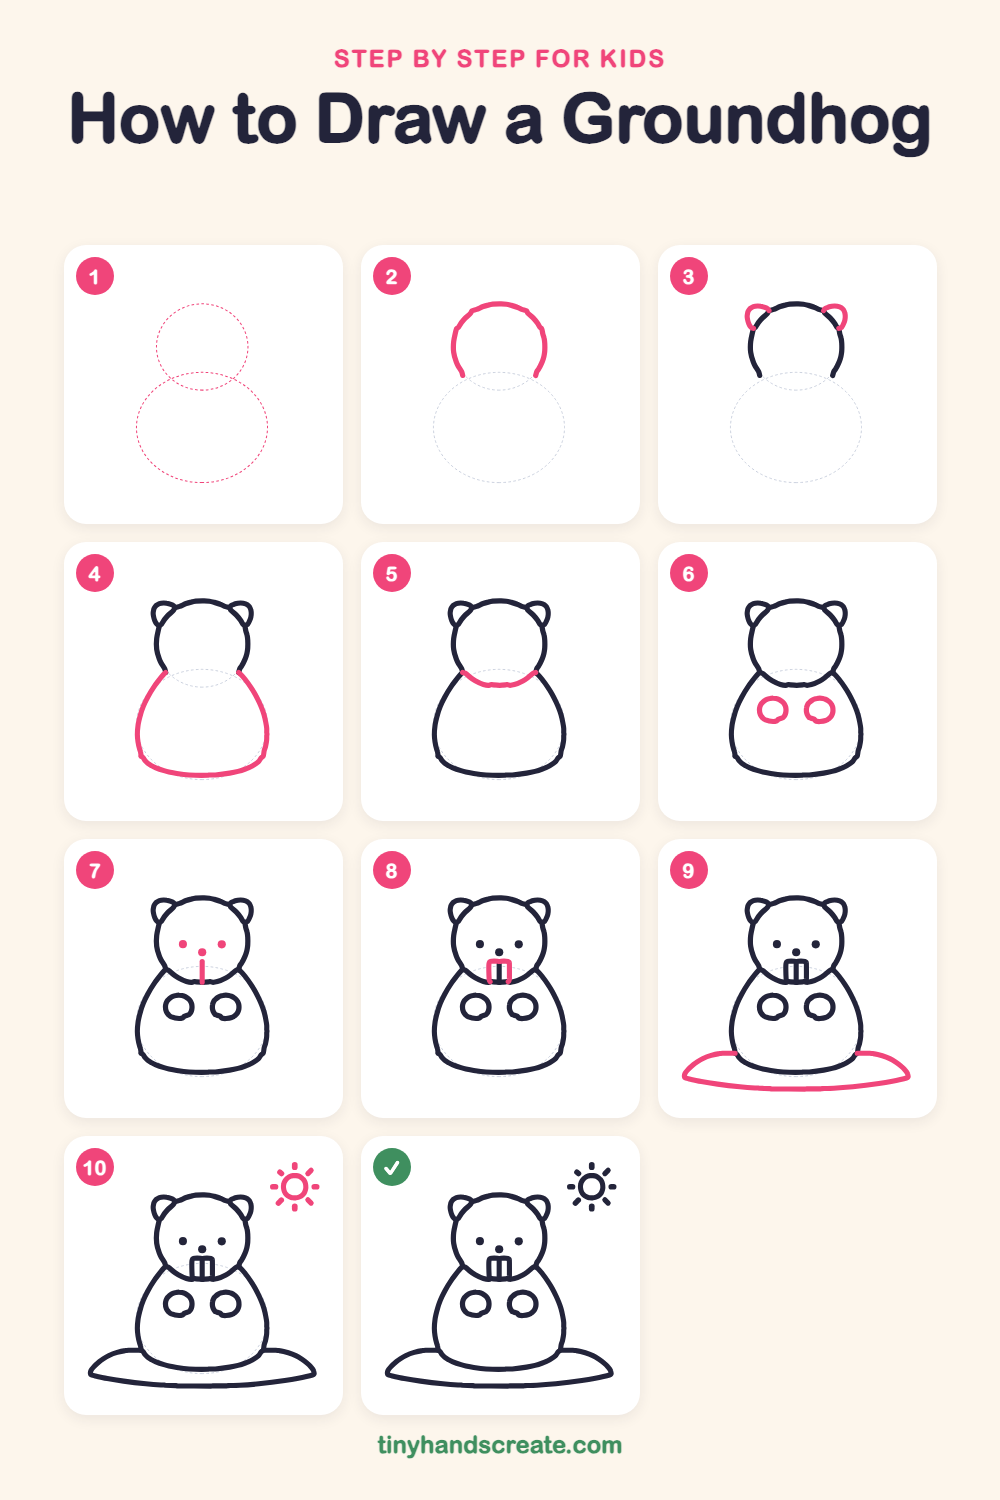
Step 1: Guide shapes
Lightly sketch these 2 ovals. They only show where the big parts go, so press softly. You will erase them at the end.
Step 2: Top of the head
Draw a big curved line like an upside-down U near the top middle of your paper. It starts on the left, arches over the top, and ends on the right, making the top of the round head.
Step 3: Two little ears
Draw a small curved ear on each side of the top of the head, like a tiny rounded triangle. Each ear starts and ends on the head line.
Step 4: The chubby body
Start at the bottom of the head on one side and draw a line that curves down and out. Round it along the bottom and bring it up the other side to make a body shaped like a bell or a gumdrop.
Step 5: The chin line
Draw a gentle curve across the bottom of the head, from one side to the other. This closes the head and makes the chin look tucked in.
Step 6: Little front paws
On the tummy, draw two small round circles side by side. These are the paws held up in front.
Step 7: Eyes, nose and a line
Draw two dots for eyes in the middle of the face. Add a dot for the nose between and a bit below them, then draw a short straight line going down from the nose.
Step 8: Big front teeth
Around the line under the nose, draw a small box with rounded top corners. The line you drew before is now the middle between two big teeth.
Step 9: The dirt mound
Start at one side of the body and draw a curve that bulges out and down to a pointy end. Draw the same on the other side, then join them with a long, gentle curve underneath so the groundhog sits in a wide, flat hill.
Step 10: The sunshine
In the top corner, draw a small circle for the sun. Add short lines all around it like rays.
All done!
Erase the guide shapes, go over your lines, then color it in.
Finished your groundhog? Keep the pencils out and learn how to draw 2027 New Year balloons or how to draw a dove next.
Tips for drawing a groundhog
- Draw the top of the head lightly and keep it round, so the body can tuck neatly underneath it.
- The two paws are the trickiest part. Make each one a small circle, and keep them the same size and the same height.
- Draw the teeth as one small box with a line down the middle, and keep it centered under the nose.
Free groundhog coloring page
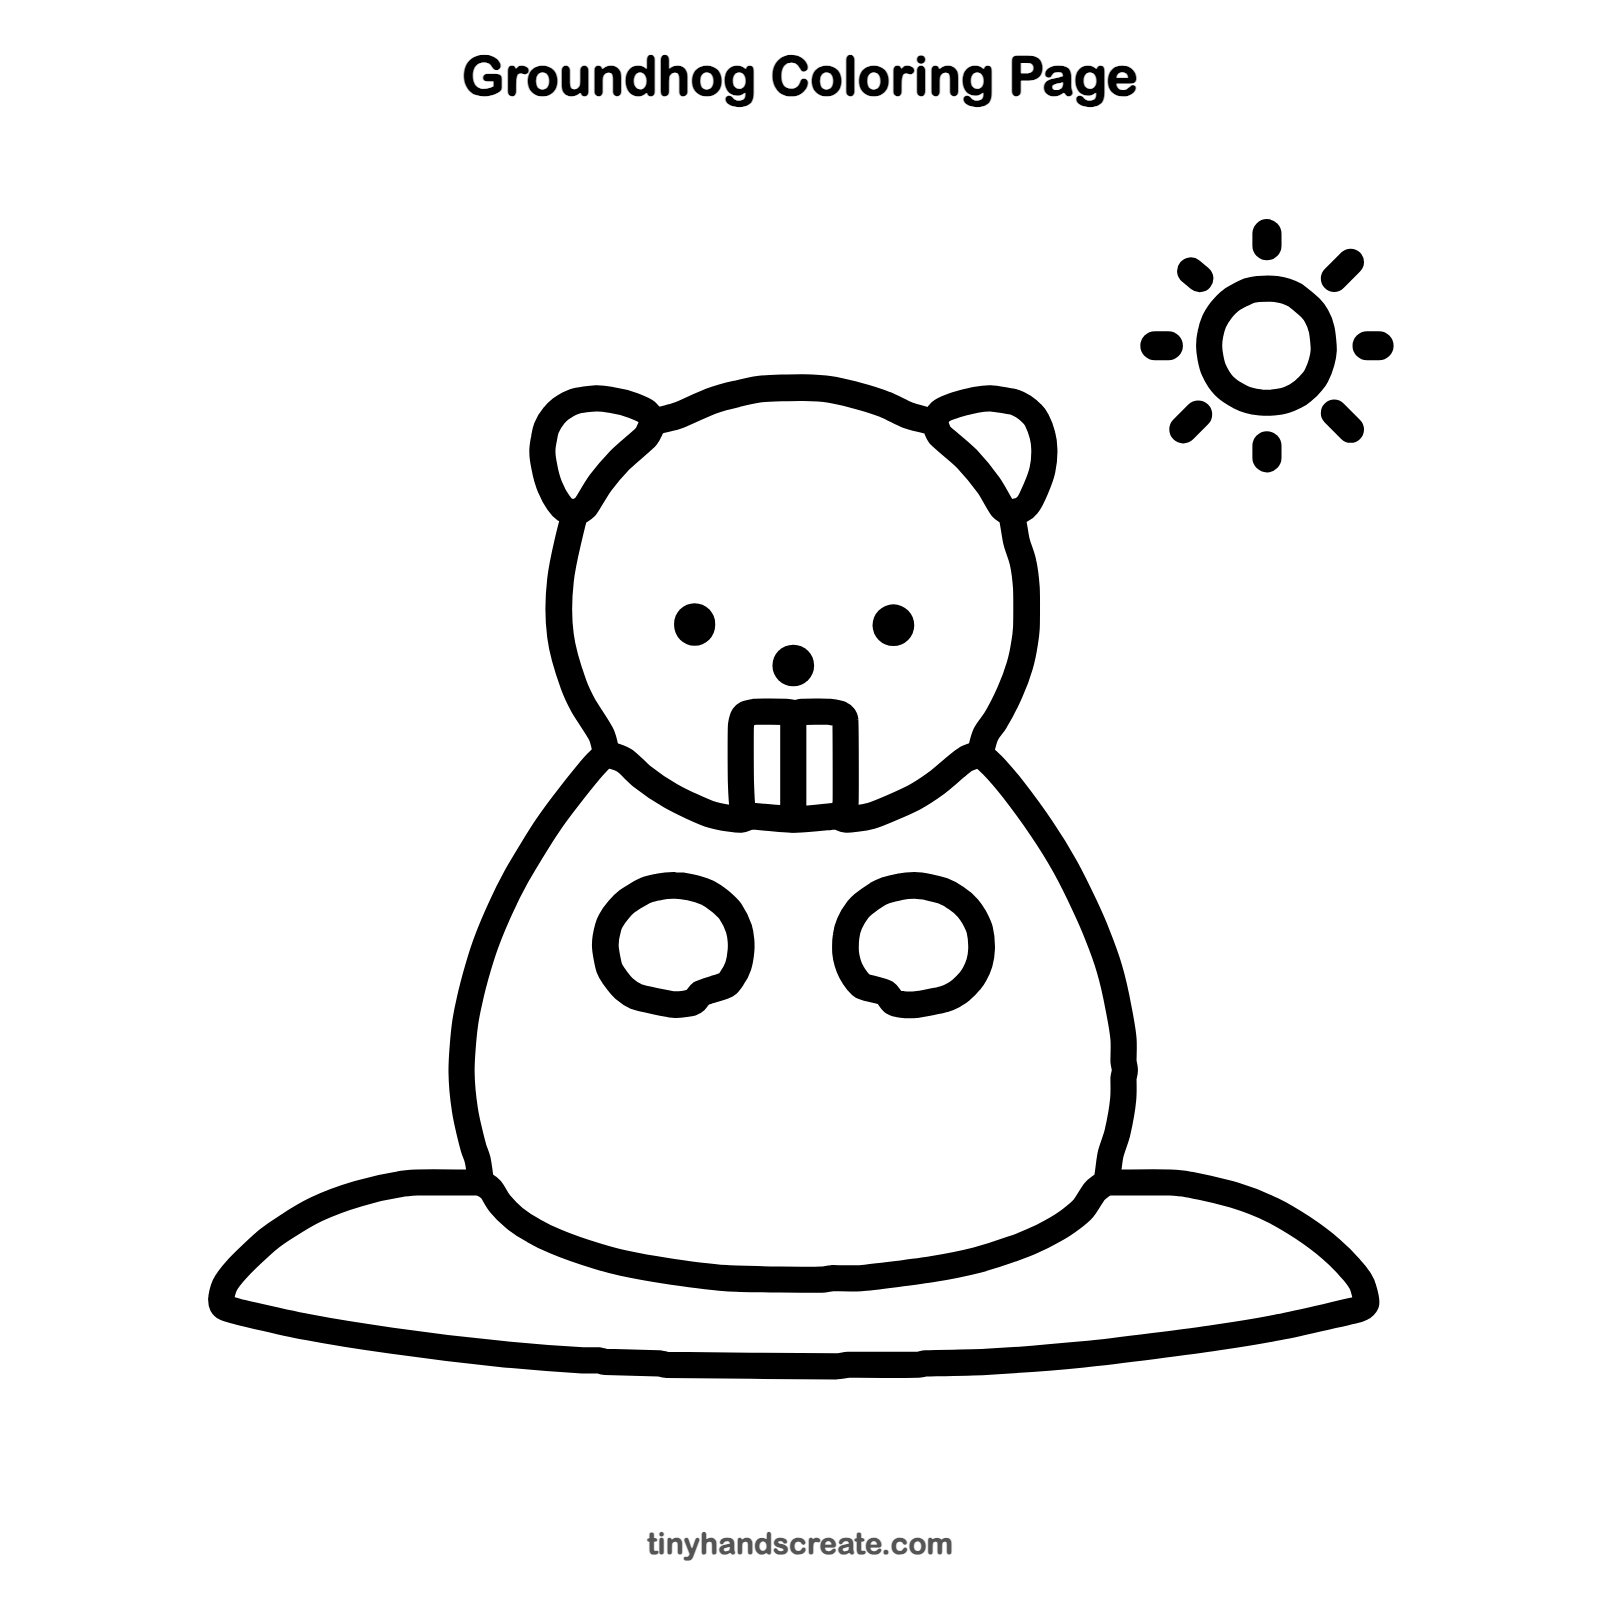
Want to go straight to coloring? Open this groundhog coloring page at full size and print it. It is the same drawing you just learned, with clean lines ready for crayons or markers.
How to color your groundhog drawing
Try warm browns for the fur, white for the teeth, green grass on the mound, and a bright yellow sun. For a twist, color the mound a deep reddish brown like fresh dirt.
Groundhog fun fact for kids
Groundhogs are also called woodchucks, and they hibernate all winter in underground burrows. Every February 2, people in the United States watch for a groundhog to come out and see if it spots its shadow.
Questions about drawing a groundhog
What shapes do I need to draw a groundhog?
You need a big round shape for the head, a bell shape for the body, two small curved ears, and two small circles for paws. A little box makes the teeth.
How do I make my groundhog look cuter?
Make the head extra round and keep the eyes small and wide apart. Big front teeth and tiny paws held up on the tummy also help.
Why is the groundhog sitting on a mound?
Groundhogs live in burrows, so they pop up out of the ground. The mound shows the dirt around the burrow entrance.