How to Draw a St. Patrick’s Day Chick (Easy Step by Step)
You will learn how to easily draw a St. Patrick's Day chick, complete with a leprechaun hat and lucky clover, using simple, step-by-step instructions.
- Draw a St. Patrick's Day chick wearing a leprechaun hat.
- Incorporate a lucky clover into your festive drawing.
- Build your chick using simple, easy-to-draw shapes.
- Follow step-by-step guidance for a fun drawing experience.
This post contains affiliate links. As an Amazon Associate I earn from qualifying purchases.
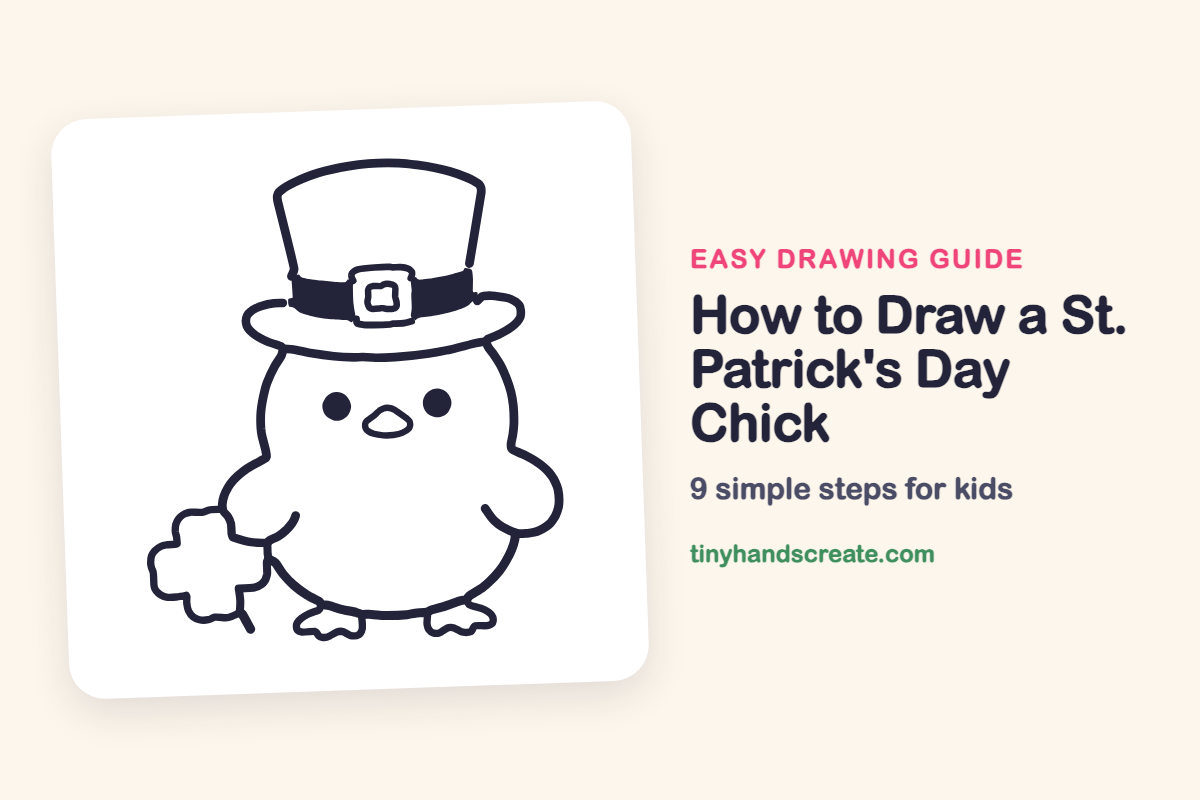
This little chick wears a tall leprechaun hat and stands next to a lucky clover, which makes it a fun drawing for St. Patrick's Day. It is built from simple shapes: a big round body, a flat oval hat brim, a tall hat with a buckle, and two dot eyes. Every part is easy to draw one step at a time.
- Easy
- 15 minutes
- 9 steps
You need: paper, a pencil, an eraser, and crayons or markers for coloring.
Start drawing
In this article (7 sections)
How to draw a St. Patrick's Day chick step by step
How to Draw a St. Patrick's Day Chick · tinyhandscreate.com
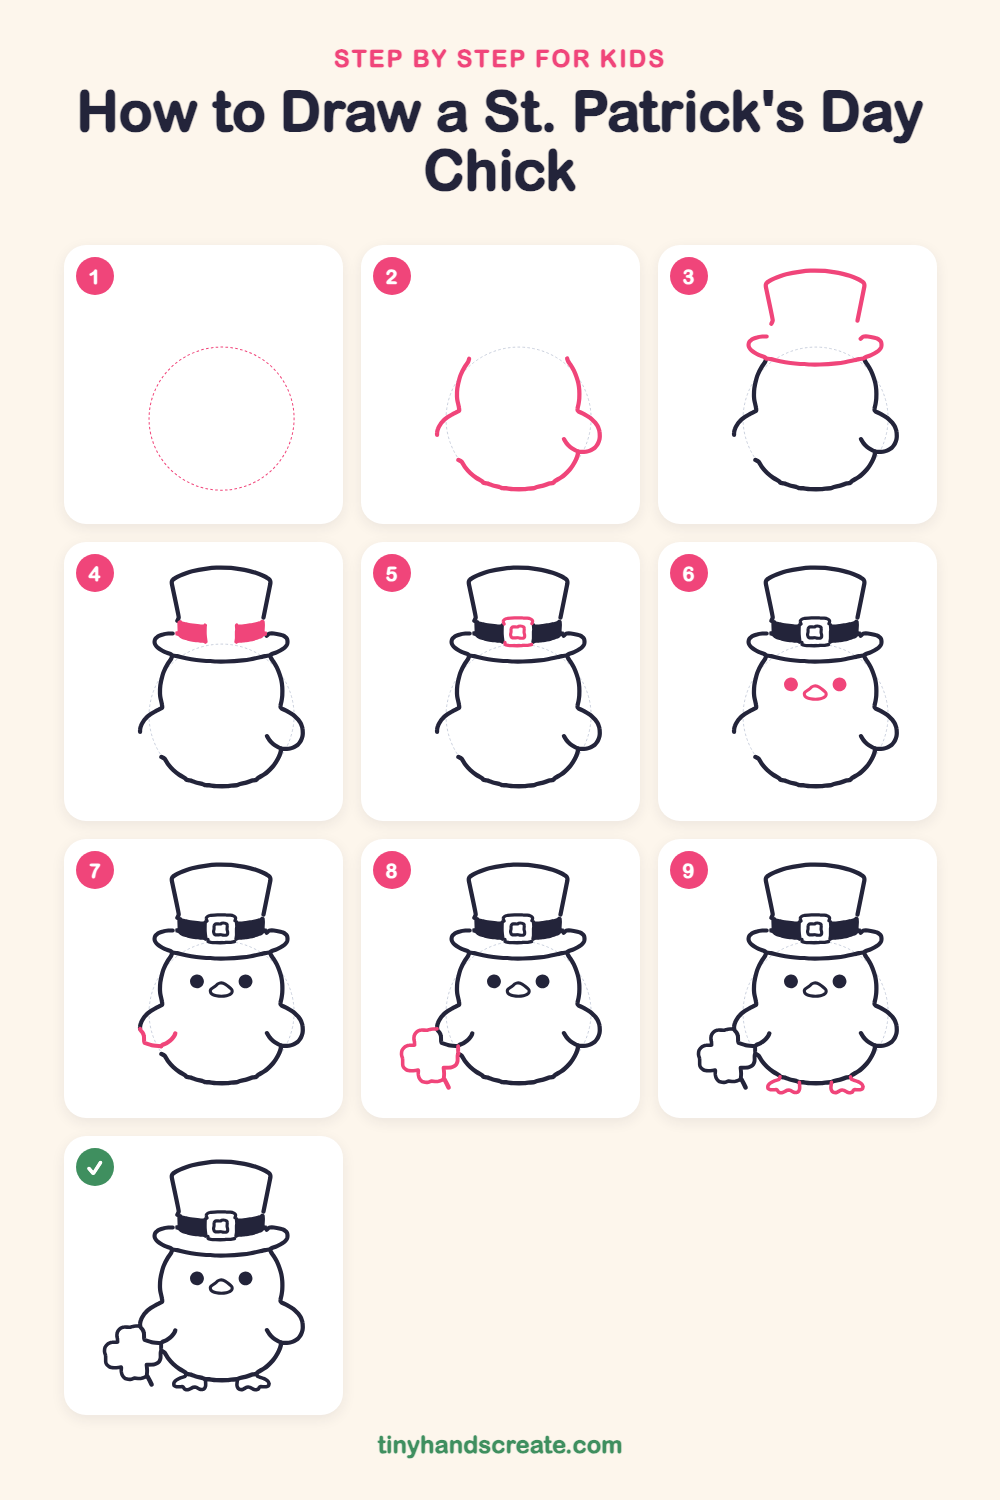
Step 1: Guide shapes
Lightly sketch this oval. It only shows where the big parts go, so press softly. You will erase it at the end.
Step 2: The round body
Draw a big round body shape with a little bump sticking out on each side for the wings. Leave the top open for now, because the hat will cover it.
Step 3: Hat and brim
Draw a wide, flat oval across the top of the body for the hat brim. Then draw a tall hat above it with slightly slanted sides and a gently curved top.
Step 4: The hat band
Near the bottom of the tall hat, draw two short, thick bands, one on the left and one on the right. Fill them in solid and leave a gap in the middle.
Step 5: The square buckle
In the gap between the two bands, draw a small square with rounded corners. Draw a smaller square inside it to make the buckle.
Step 6: Eyes and beak
Draw two round dots for eyes, set wide apart. Between them and a little lower, draw a small rounded oval for the beak.
Step 7: The left wing
On the left side of the body, draw a short curved line inside the wing bump. It matches the wing on the right and makes the left wing look tucked in.
Step 8: The clover
Next to the left side of the chick, draw a puffy clover shape made of rounded bumps. Add a short stem sloping down from the bottom.
Step 9: Little feet
At the bottom of the body, draw two small feet. Each one is a little rounded shape with tiny toe bumps along the bottom.
All done!
Erase the guide shapes, go over your lines, then color it in.
Finished your St. Patrick's Day chick? Keep the pencils out and learn how to draw a menorah or how to draw a dreidel next.
Tips for drawing a St. Patrick's Day chick
- Draw the hat brim as a wide, flat oval first. Then the tall part of the hat has an easy place to sit.
- Leave a gap in the middle of the hat band for the buckle. Draw the two dark bands first, then fit the square buckle between them.
- For the clover, draw puffy rounded bumps all around, then add the short stem last.
Free St. Patrick's Day chick coloring page
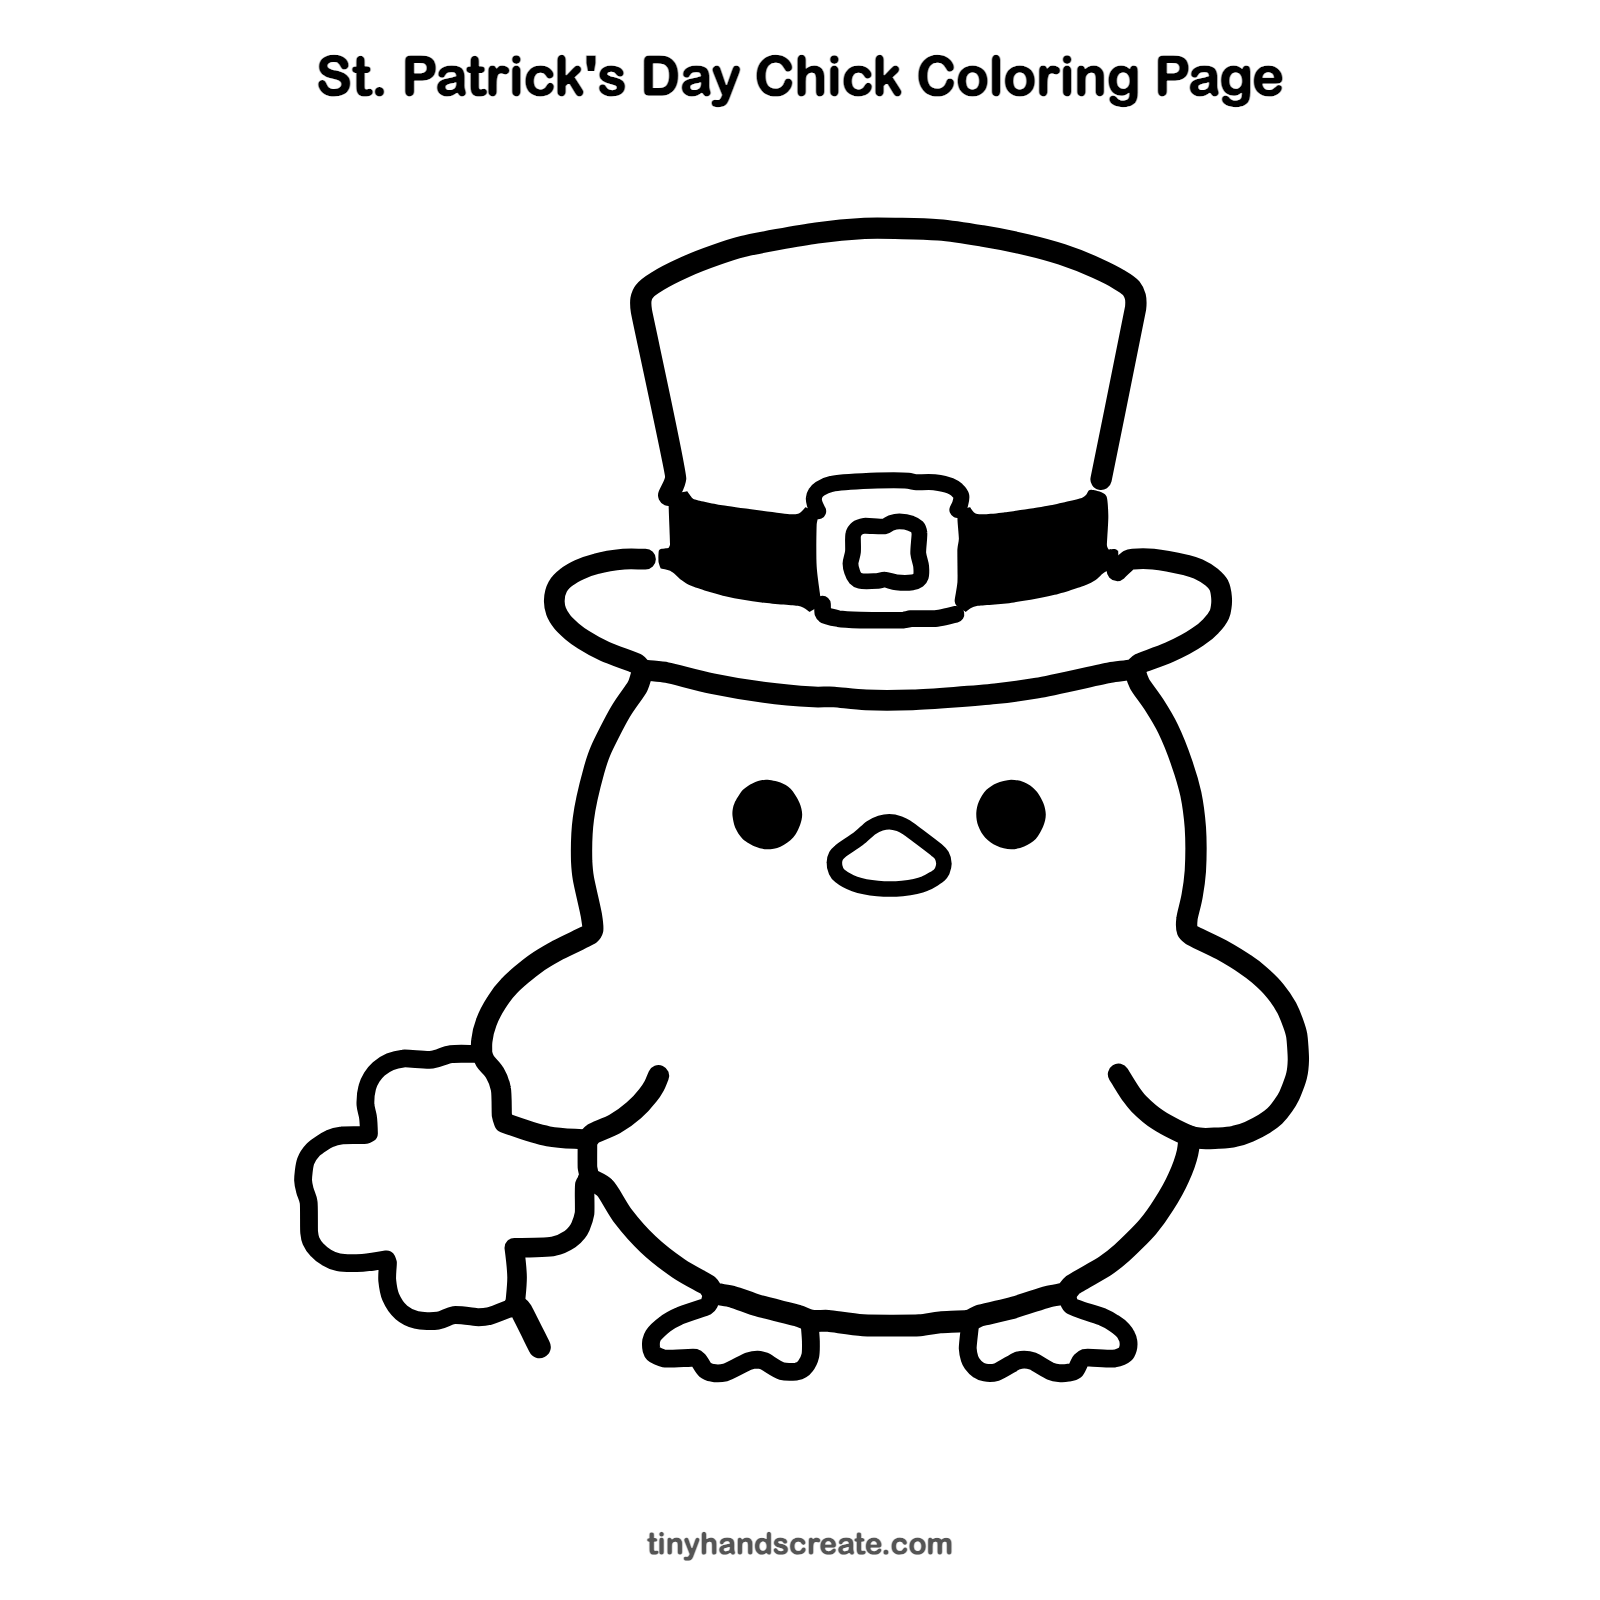
Want to go straight to coloring? Open this St. Patrick's Day chick coloring page at full size and print it. It is the same drawing you just learned, with clean lines ready for crayons or markers.
How to color your St. Patrick's Day chick drawing
Color the hat and clover green, the band black, the buckle gold, and the chick soft yellow with an orange beak and feet.
St. Patrick's Day chick fun fact for kids
Baby chicks start peeping inside their eggs a day or two before they hatch, and the mother hen clucks back to them.
Questions about drawing a St. Patrick's Day chick
What shapes do I need to draw a St. Patrick's Day chick?
You need a big round shape for the body, a flat oval and a tall shape with slanted sides for the hat, a small square for the buckle, and two dots for the eyes. The clover is a puffy shape made of rounded bumps.
How do I make my chick look cuter?
Place the eyes wide apart and keep the beak small. Make the body very round and chubby.
How do I draw a clover?
Draw a puffy shape with rounded bumps all around, like a little cloud. Then add a short stem sloping down from the bottom.