Pumpkin Crafts for Kids: 18 Fall Projects Using Real and Paper Pumpkins
Discover 18 fun, messy pumpkin crafts for kids using real and paper pumpkins, perfect for fall. You'll find projects for all ages, supply lists, and tips to make crafting easy and enjoyable, starting in September.
- Begin pumpkin crafting in September to enjoy weeks of fall fun before Halloween.
- Embrace the mess; it's part of the satisfying pumpkin craft experience for kids.
- Explore 18 projects using real pumpkins, paper plates, and recycled materials for all ages.
- Gather supplies like mini pumpkins, tempera paint, and sturdy paper plates in one trip.
- Try no-carve ideas like paint-dipped or yarn-wrapped mini pumpkins for any age.
The first time I let my kids loose on a crate of mini pumpkins from the farm stand, I made the rookie mistake of also handing them acrylic paint and zero ground rules. Ninety minutes later I had four pumpkins that looked like Jackson Pollock had a sugar crash, paint under every fingernail in the house, and two kids who asked to do it again the next day. That’s the trade-off with pumpkin crafts: they’re some of the messiest, most satisfying fall activities you’ll do all season, and the mess is 100% the point.
September is actually the smart time to start, before carving knives and jack-o’-lantern stress take over in October. Real pumpkins are cheap and everywhere, craft stores are fully stocked with fall supplies, and your kids get weeks of pumpkin-themed play instead of one rushed carving night. This roundup covers 18 projects split across real pumpkins, paper plates, painting techniques, pumpkin seed sensory play, and recycled materials — so whether you’ve got a two-year-old who wants to smear paint with her palms or a nine-year-old who wants a “real” craft project, there’s something here that fits.
What You’ll Need Before You Start
You don’t need to buy everything at once. Most of these projects pull from a shared supply pool, so one shopping trip covers a whole season of pumpkin crafting.
| Category | Items | Notes |
|---|---|---|
| Real pumpkins | Mini pumpkins (3-4 per kid), 1-2 medium pumpkins | Mini pumpkins run $1-3 each at farm stands in September |
| Paint | Acrylic or tempera paint, paintbrushes, foam brushes | Tempera washes out of clothes easier than acrylic |
| Paper goods | Paper plates (sturdy, not the flimsy kind), construction paper, tissue paper | Buy the “heavy duty” paper plates — thin ones tear under wet glue |
| Adhesives | School glue, glue sticks, hot glue gun (adult-only step) | Hot glue holds pumpkin stems and yarn far better than school glue |
| Texture add-ins | Yarn, washi tape, push pins, golf tees, bubble wrap, marbles | Grab these from a dollar store bin, not a craft store aisle |
| Recycled materials | Toilet paper rolls, egg cartons, brown paper bags, cardboard scraps | Start saving two weeks ahead if you don’t already have a stash |
| Seed play | 1-2 real pumpkins for gutting, small scoops, sorting trays or muffin tins | Buy an extra “sacrifice” pumpkin just for the seed digging — don’t use your good decorating one |
If your kids also went through a leaf-collecting phase this month, a lot of this overlaps nicely with fall leaf crafts — the same glue, paint, and “let them get messy” mindset carries right over.
No-Carve Pumpkin Decorating for Real Pumpkins
These five projects use actual pumpkins — mostly minis, which are easier for small hands to manage and cheap enough that a “ruined” one isn’t a tragedy. All of them skip knives entirely, so they work for any age as long as you’re comfortable with the mess level.
1. Paint-Dipped Mini Pumpkins
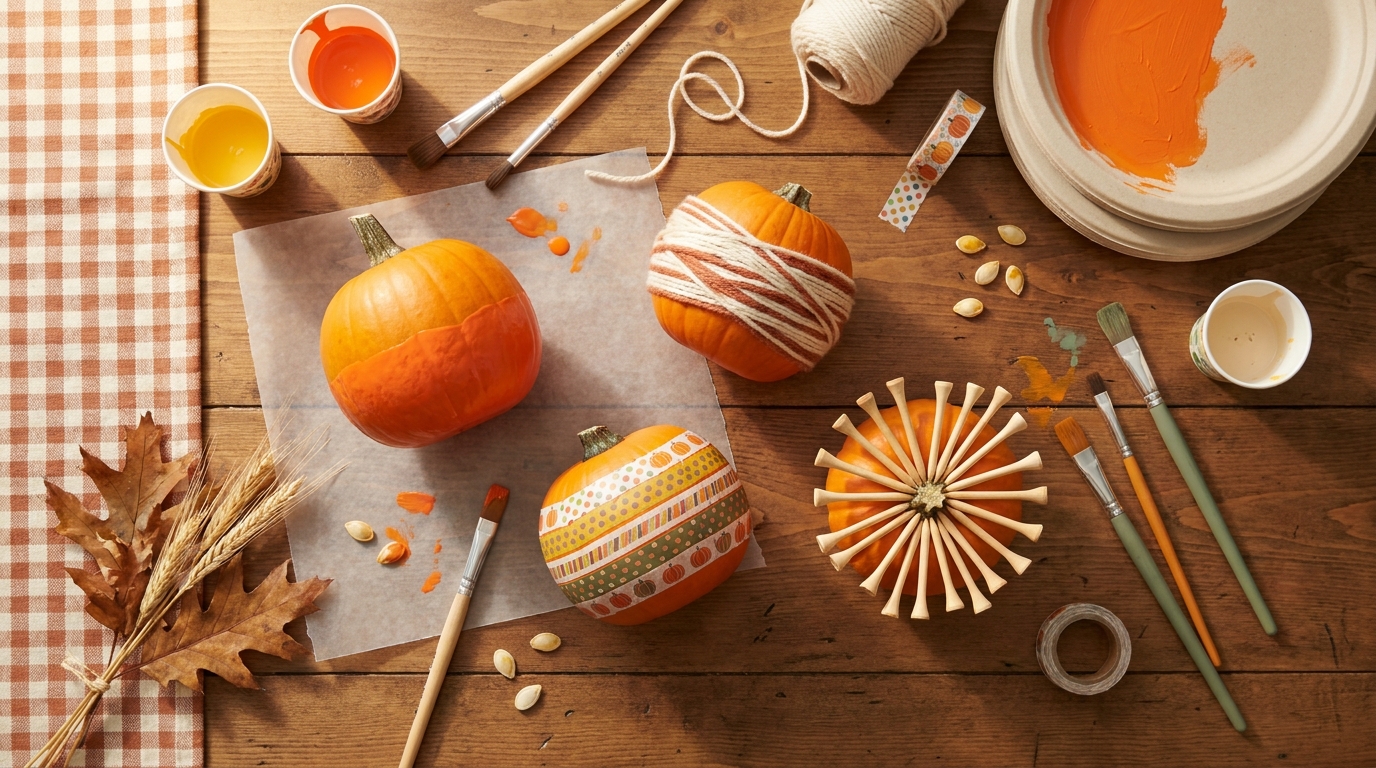
This is the easiest win in the whole list and the one I’d start with if your kids are new to pumpkin crafts. Pour a shallow layer of acrylic paint into a paper bowl or plate, and let kids dip the bottom third of a mini pumpkin straight into the color — no brush required. Set it stem-up on wax paper to dry. The dipped edge comes out clean and graphic, almost like a paint-dip nail trend, and even a three-year-old can manage the motion of “dip, lift, set down.”
Tip: Do one color per pumpkin the first round. Kids will want to layer colors on their second or third pumpkin once they see how the first one turns out — let them experiment then.
2. Yarn-Wrapped Pumpkins
Squeeze a line of hot glue around the base of a mini pumpkin’s stem (adult step), then have your child wrap yarn around the pumpkin in a spiral, tucking the end under the last wrap. This one is genuinely great fine-motor practice — the wrapping motion works the same muscles as learning to tie shoes. Mix two or three yarn colors on one pumpkin for a woven look, or do a whole crate in a single color for a cohesive mantel display.
For kids under 5, pre-wrap the first two rows yourself so they have a groove to follow — starting from a bare, round pumpkin is genuinely hard to keep tight.
3. Push-Pin Constellation Pumpkins
Give kids a handful of colorful push pins (or golf tees for younger kids who shouldn’t handle actual pins) and let them push them into a pumpkin in patterns — stars, spirals, initials, or just a happy scatter. This is a strangely calming activity; something about the resistance of pushing a pin into pumpkin flesh keeps kids focused for way longer than you’d expect. Push pins work on any size pumpkin, but golf tees need a medium-to-large pumpkin since they’re thicker.
Safety note: This one needs direct supervision for kids under 6 — push pins are genuinely sharp. Golf tees are the safer swap and still make a great texture.
4. Washi Tape Pumpkins
Tear or cut strips of washi tape in fall colors and let kids stick them onto a pumpkin in stripes, X patterns, or a plaid-style grid. Washi tape’s low-tack adhesive means it repositions easily, which makes this one of the few truly no-mistakes crafts on this list — perfect for a kid who gets frustrated when something doesn’t look “right” the first time. It also peels off cleanly if you want to reuse the pumpkin for something else next week.
5. Decoupage Napkin Pumpkins
Buy a pack of fall-themed paper napkins (leaves, plaid, little pumpkins — dollar stores stock these in September), separate the top printed layer from the plain layers underneath, tear it into pieces, and brush a mix of glue and water over a pumpkin to adhere the pieces. This is the messiest project on the list in terms of glue, so it’s an outside-table or old-tablecloth activity, but the finished pumpkins look genuinely decorative — the kind you’d actually want on your porch, not just on the craft shelf.
Paper Plate Pumpkin Crafts for Toddlers and Preschoolers
When real pumpkins feel like too much mess or too much money for a Tuesday afternoon, paper plates are the workhorse of fall crafting. These four projects are sized for toddlers and preschoolers specifically — simpler motor skills, forgiving materials, and finished products that dry flat for easy display.
6. Woven Paper Plate Pumpkin
Cut slits around the edge of a paper plate (an adult step for kids under 6), paint it orange, and once dry, have your child weave strips of green and brown paper through the slits to build up the pumpkin’s texture. This is one of the better “practice weaving” crafts out there because the plate’s rigid shape keeps the strips from slipping the way they would on floppy paper — genuinely useful pre-K fine motor practice disguised as a fall craft.
7. Tissue Paper Stained-Glass Pumpkin
Cut the center out of a paper plate to leave just the rim, then have kids glue overlapping squares of orange, yellow, and red tissue paper across the open circle. Tape it to a window when it’s done, and the tissue paper glows when sunlight comes through — it’s one of those crafts that gets a genuine “whoa” reaction from little kids, and it’s a nice change of pace if you’ve mostly been doing crafts that sit on a shelf instead of ones you can display in a window.
8. Torn-Paper Textured Pumpkin
Skip scissors entirely and have kids tear orange, red, and yellow construction paper into small pieces, then glue them onto a pumpkin shape drawn on a paper plate. Tearing paper is an underrated toddler skill-builder — it works the same pincer grip that scissors need, without the safety concerns. This is a good one to set out with zero instructions and let a toddler just go; there’s no wrong way to place the pieces.
9. Paper Plate Pumpkin Patch Handprint Scene
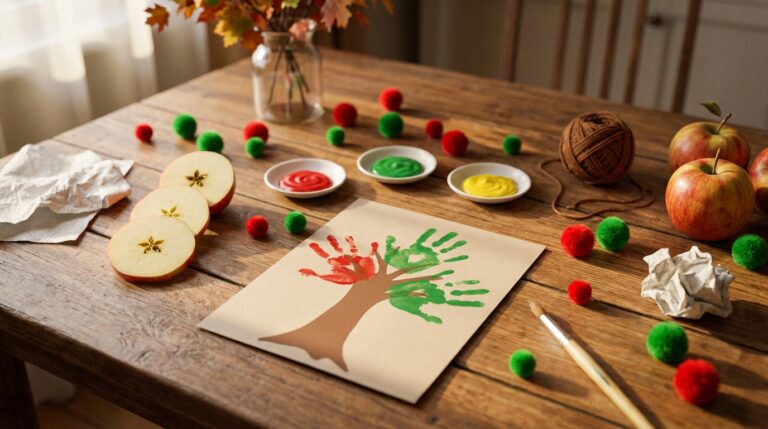
Paint a paper plate blue for the sky and green along the bottom for grass, then have your child press orange-painted handprints across the green section — each handprint becomes a pumpkin once you add a small green construction-paper stem on top. This is the sentimental one, the kind you’ll actually keep. If you’ve got more than one kid, do a joint “family pumpkin patch” plate with everyone’s handprints on one scene.
Pumpkin Painting Projects for All Ages
Straight-up painting deserves its own section because pumpkins are such a satisfying painting surface — round, textured, and forgiving of imperfect brushwork. These four techniques go beyond “paint it orange” and work for a wide age range.
10. Bubble Wrap Pumpkin Printing
Wrap a small piece of bubble wrap around a block or a rolled-up sock, dip it in orange and yellow paint, and stamp it across paper or a real pumpkin’s surface to create a mottled, textured print. It’s a satisfying sensory motion — the pop of pressing bubble wrap into paint — and the printed texture actually looks like real pumpkin skin, which feels like a happy accident every time.
11. Marble-Rolled Pumpkin Painting
Cut paper into a pumpkin shape and lay it in the bottom of a shallow box or baking tray. Drop in a spoonful of paint and a marble, then have kids tilt the tray side to side to roll the marble through the paint, leaving trails. This is a favorite in our house because it takes the pressure off “making something good” — the marble does the art, and kids just get to control the tilt. It pairs naturally with a broader process art mindset, where the doing matters more than the finished product.
12. Real Pumpkin Half Stamping
Cut a small pumpkin in half (adult step) and let kids dip the cut face in paint to stamp pumpkin-shaped prints across paper — the ridges create a natural pumpkin outline every time. It’s oddly satisfying to watch a shape appear that looks intentional even though the “tool” is just half a vegetable. Do this one over big paper on the floor or an easel; the stamping motion tends to fling paint droplets wider than kids expect.
13. Fingerprint Pumpkin Vine Art
Draw or print a simple vine outline on paper, then have kids press orange fingerprints along the vine to become pumpkins, with a green thumbprint or two mixed in for leaves. This is a low-mess, low-prep option for a rainy afternoon when you want a pumpkin craft but don’t want to break out the full paint station — one small dish of paint and a paper towel is all you need.
Pumpkin Seed Sensory Play and Fine Motor Activities
Don’t toss the guts when you carve — or better, buy a “sacrifice” pumpkin in September specifically to dig into before carving season even starts. Pumpkin seed play is some of the best sensory input fall has to offer, and it sets kids up to actually enjoy the real carving process in October instead of being grossed out by it.
14. Pumpkin Guts Sensory Bin
Cut open a pumpkin and dump the stringy insides — seeds and all — into a large bin or tray. Add a few kitchen tools: tongs, spoons, small cups for scooping and sorting. Let kids dig in with bare hands first (it’s cold, slimy, and stringy in a way that’s genuinely novel for most kids), then introduce the tools once the initial exploring winds down. If your kids are sensory-avoidant, offer gloves as a middle step rather than skipping the activity — some kids need that buffer before they’re ready for bare-hands contact. This slots right into a rotation with other sensory bin fillers if pumpkin guts become a seasonal favorite worth repeating.
15. Pumpkin Seed Counting and Sorting Jars
Rinse a batch of seeds and let them air dry overnight, then set kids up with small jars, a muffin tin, or an egg carton to count and sort them into groups of five or ten. For preschoolers, this is straightforward counting practice. For grade-schoolers, turn it into simple addition or estimation (“how many seeds do you think are in this whole pumpkin?”) before they start counting for real.
16. Pumpkin Seed Mosaic Art
Once seeds are dried, have kids glue them onto paper in a pumpkin outline, a spiral, or their own name written in bubble letters. Dried seeds have enough texture and size that even a preschooler can place them with some precision, and a coat of orange or yellow spray paint over the finished, dried mosaic (adult step, outside) gives it a uniform, finished look if you want it display-ready.
Pumpkin Crafts from Recycled and Household Materials
If you’re all pumpkin-ed out on real ones, or you just want a zero-cost afternoon project, these two crafts build pumpkins from stuff already in your recycling bin.
17. Toilet Paper Roll Pumpkin Patch
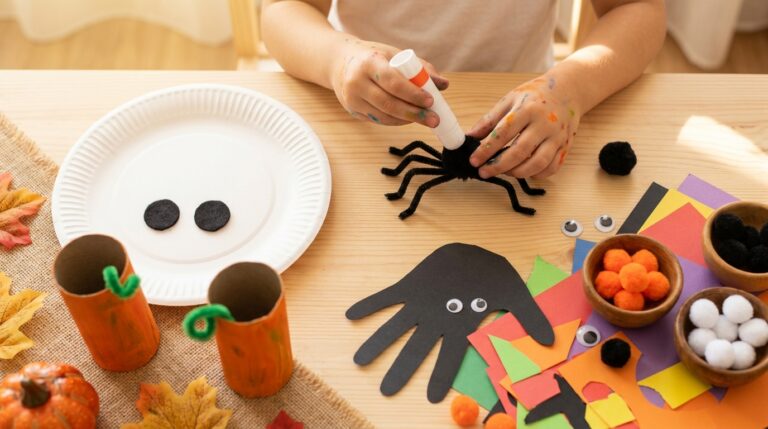
Paint toilet paper rolls orange, let them dry, then squeeze the top slightly and clip a green pipe cleaner or twisted paper stem into the opening. Line up five or six on a windowsill for an instant pumpkin patch. This is a great “use up the stash” project if you’ve been saving rolls — and if your kids enjoy building things out of what would otherwise go in the recycling bin, it’s worth digging into a full session of cardboard box crafts next, since the same save-and-build mindset carries over well.
18. Paper Bag Stuffed Pumpkins
Stuff a brown paper lunch bag with crumpled newspaper, twist the top closed, and wrap twine or a pipe cleaner around the twist to cinch it into a pumpkin shape. Paint it orange, add a construction-paper stem, and you’ve got a soft, 3D pumpkin that costs basically nothing. Grade-schoolers can manage the whole process solo; toddlers do best if you handle the stuffing and twisting and hand off the painting.
Matching Projects to Your Kid’s Age
Not every project on this list works for every age, and knowing that going in saves you from a frustrated toddler or a bored eight-year-old. Here’s a rough guide based on how these actually play out at home.
| Age Range | Best Fits | Skip or Modify |
|---|---|---|
| Toddlers (1-3) | Paint-dipped mini pumpkins, torn-paper pumpkin, handprint pumpkin patch, paper bag pumpkin (adult stuffs) | Push pins, real pumpkin carving-adjacent tools, anything with small dried seeds (choking risk) |
| Preschoolers (3-5) | Woven paper plate pumpkin, bubble wrap printing, seed counting jars, yarn-wrapped pumpkins (with help) | Hot glue steps, push pins without close supervision |
| Grade-schoolers (6-9) | Push-pin constellation pumpkins, decoupage pumpkins, marble-rolled painting, seed mosaic art | Nothing off-limits — most benefit from being handed more independence, not less |
| Mixed ages / group | Pumpkin guts sensory bin, real pumpkin stamping, toilet paper roll patch | Assign toddlers the “dump and squish” role, older kids the “shape and finish” role |
If you’re planning a craft afternoon with kids spanning several ages — a playdate, a co-op, or just siblings with a big gap between them — the pumpkin guts sensory bin is genuinely the best group activity here. Every age finds something to do in it, from a toddler just squeezing the pulp to a nine-year-old running a seed-counting side project.
Setting Up for Minimum Cleanup Chaos
A few habits make the difference between a fun mess and a mess that ruins your afternoon:
- Cover the table before you start, not after the first spill. An old shower curtain or a stack of flattened cardboard boxes works better than a plastic tablecloth, which tends to slide around under pumpkin weight.
- Pre-portion paint into small cups instead of setting out full bottles. Kids dump less when the container is already small.
- Keep a damp rag pile within arm’s reach, not in the next room. Half the “wipe it before it dries” battles are lost because the rag was too far away.
- Do seed and paint projects outside or in the kitchen, not on carpet. Pumpkin pulp especially stains and is genuinely hard to fully extract from fibers.
- Let real pumpkin projects dry somewhere out of the way — a porch table or garage shelf — for at least 24 hours before moving them, since paint and glue on a curved pumpkin surface dries slower than you’d expect.
If your family also does a lot of mess-free art activities most weeks, treat pumpkin season as the planned exception — a couple of intentionally messy afternoons a year that you’re prepped for, rather than trying to make every pumpkin craft tidy. Some of these just work better wet, sticky, and a little wild.
Frequently Asked Questions
How long do painted or decorated pumpkins actually last?
A real, uncarved pumpkin decorated with paint, yarn, or tape typically lasts 4-8 weeks if kept out of direct sun and away from heat, which comfortably covers you from a Labor Day craft session through Halloween. Mini pumpkins tend to last a bit longer than full-size ones since they have less surface area to soften. Once you spot a soft spot or mold near the stem, it’s time to retire it — that’s decay starting from the inside, not something you can craft around.
What paint works best on real pumpkin skin?
Acrylic craft paint adheres best to a pumpkin’s waxy surface and gives the most vibrant, opaque color. Tempera paint works too and washes off little hands more easily, but it can look chalkier and doesn’t hold up quite as long outdoors. Whichever you use, wipe the pumpkin’s surface with a dry cloth first — farm-stand pumpkins often have a light dust or waxy coating that keeps paint from sticking evenly.
Are pumpkin seeds safe for toddlers to handle and play with?
Fresh, wet seeds straight out of the pumpkin are safe for sensory play at any age since they’re too slippery to pose a choking risk in the moment. Once seeds are rinsed and fully dried, though, treat them like any small object — supervise closely with kids under 3, since dried seeds are hard, small, and exactly the size that ends up in a toddler’s mouth. For mosaic or counting activities with that age group, stick to the wet-seed stage or swap in larger craft pom-poms instead.
Do I need real pumpkins, or can I do all of this with paper and craft store minis?
You can absolutely build a full pumpkin-craft season without a single real pumpkin — the paper plate crafts, painting projects, and recycled-material pumpkins in this list use zero produce. Real pumpkins add a nice sensory and seasonal element (and they’re genuinely cheap in September), but if you’re short on time, budget, or patience for pumpkin residue on your counters, the paper-based half of this list covers you completely.
What’s the cheapest way to do a pumpkin craft afternoon?
Toilet paper roll pumpkins and torn-paper paper plate pumpkins cost close to nothing if you already have basic craft supplies on hand, since both lean entirely on things most households already save or stock. A single mini pumpkin split across a family of three or four kids for paint-dipping is also a low-cost option — mini pumpkins run $1-3 each in September, and one pumpkin easily supplies a dipped base coat for several small hands to take turns on.
My kid is scared to touch pumpkin guts. How do I get them to try the sensory bin?
Don’t push a full hands-in dive on the first attempt. Start by handing them a spoon or tongs so they can interact with the guts without direct contact, and let them watch a sibling or you dig in first. Some kids warm up after a few minutes of watching; others need several separate sessions before they’re ready to touch it bare-handed, and that’s completely normal — sensory aversions to wet, stringy textures are common and usually soften with repeated, low-pressure exposure rather than one big push.
Can these crafts double as a classroom or co-op activity?
Yes — the paper plate crafts and seed counting jars scale especially well to groups since they don’t need a real pumpkin per child. Set up 3-4 stations (painting, weaving, counting, gluing) and rotate small groups through rather than trying to run one big craft for the whole class at once; pumpkin projects tend to move at different speeds per kid, and stations let faster finishers move on without waiting.
A Season Worth Getting Messy For
Pumpkin season only lasts a few weeks, and honestly, half the fun is that these projects don’t need to look perfect — a lopsided yarn-wrapped pumpkin or a paint-splattered handprint patch is still going to end up on the porch or the fridge, mess and all. Pick two or three projects to start with, keep the rag pile close, and let the rest of the list wait until you’re ready for round two. By the time real carving season rolls around in October, your kids will already be pumpkin experts.