Earth Day Crafts for Kids: 15 Projects Made Entirely from Recycled Materials
Discover 15 Earth Day craft projects made entirely from recycled materials to engage your kids in hands-on environmental learning. You'll learn how turning 'trash into treasure' fosters creativity and builds lasting sustainable habits.
- Engage kids with 15 recycled crafts to build environmental awareness more effectively than lectures.
- Foster creativity by using imperfect recycled materials for open-ended projects.
- Build lifelong sustainable habits by creating valued items from discarded materials.
- Use common recyclables and basic supplies for free, meaningful Earth Day activities.
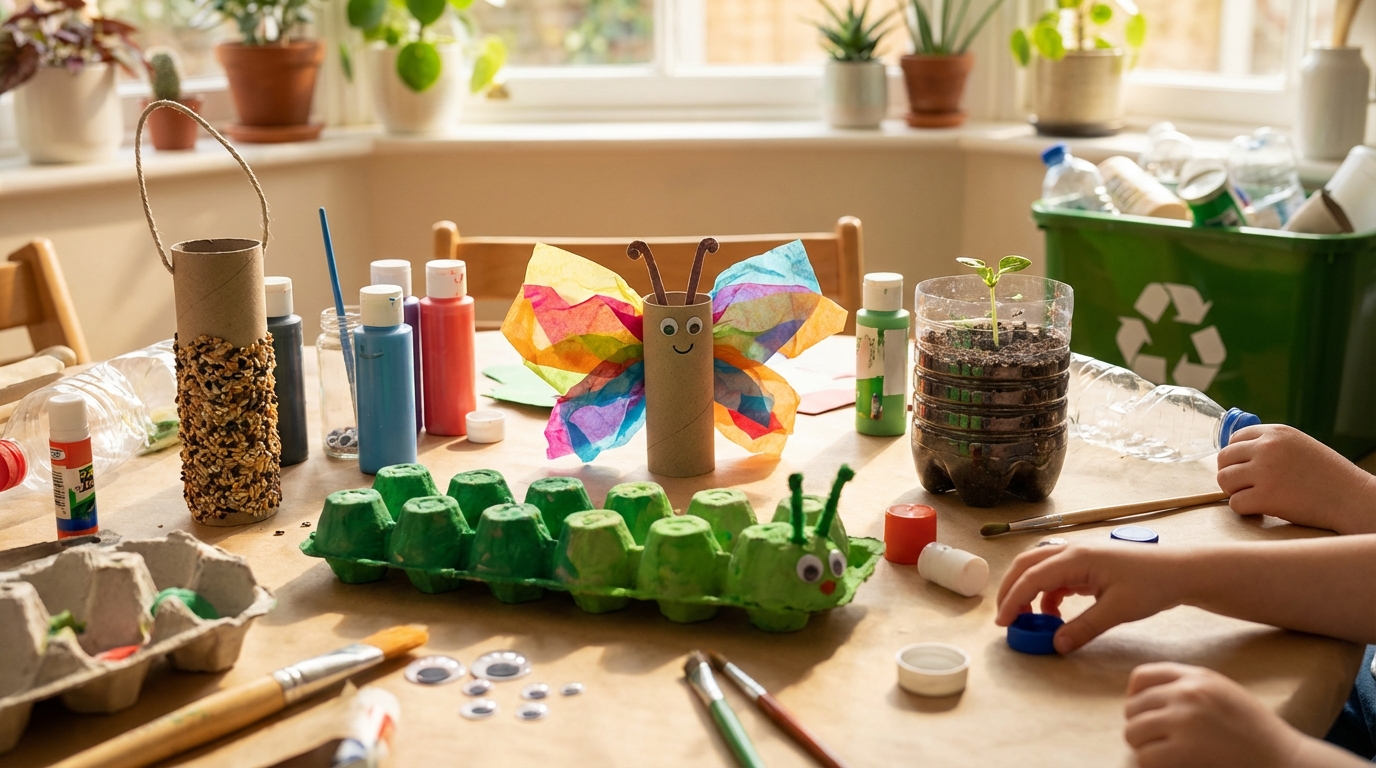
Last April, my five-year-old picked up a plastic bottle at the park, held it up like a trophy, and announced, “Mom, this is trash. We should make something with it.” And honestly? That moment was worth more than any Earth Day worksheet or coloring page could ever teach. She didn’t learn to care about the planet from a lecture. She learned it from all those afternoons at the kitchen table turning cereal boxes into castles and egg cartons into caterpillars. Somewhere along the way, she connected the dots: the things we throw away have another life in them, if we’re willing to look.
Earth Day is April 22nd, and whether you’re a parent looking for a meaningful afternoon activity or a teacher planning a classroom project, you’re in the right place. Every single craft in this article uses materials from your recycling bin plus basic craft supplies you already have. No special purchases. No Amazon orders. Just your recyclables, some paint and glue, and a kid who’s ready to turn trash into treasure.
I tested all 15 of these with my own kids and their friends, ages 2 through 10. I noted what actually worked, what needed modification, and what fell apart (literally, in the case of one overambitious toilet roll sculpture). What you’ll find here are the projects that survived real children with real attention spans and real opinions about glue.
Let’s make something beautiful from something that was about to be thrown away.
Why Earth Day Crafts Matter More Than You Think
Here’s the thing about Earth Day: if you just tell a kid “we should take care of the planet,” they’ll nod and go back to whatever they were doing. But if you hand them a cardboard box and say “let’s turn this into something amazing instead of throwing it away” — now you have their attention. Now they’re participants, not spectators.
The Science of Hands-On Environmental Learning
Research consistently shows that children develop environmental awareness most effectively through direct, hands-on experience rather than passive instruction. When a child physically transforms a milk carton into a bird feeder, they internalize something that no worksheet can teach: that resources have value beyond their original purpose, and that they personally have the power to reduce waste.
This is exactly the same principle behind process art for toddlers — when kids focus on the act of making rather than the final product, they develop deeper understanding and more creative thinking. Recycled material crafts are inherently process-focused because the materials are imperfect, irregular, and full of possibility.
Building Lifelong Habits Early
A 2024 study from the University of Cambridge found that children who regularly engaged in reuse and recycling activities before age 7 were significantly more likely to maintain sustainable habits into adolescence. The researchers noted that the emotional experience of creating something valued from discarded materials was more impactful than factual knowledge about recycling.
In other words: the pride your kid feels when they turn a yogurt cup into a planter does more for the planet’s future than memorizing which bin plastic goes in. Both matter, but the emotional connection comes first.
Why Recycled Materials Make Better Craft Supplies
I’ve spent hundreds of dollars at craft stores over the years, and I’ll tell you a secret: some of the best crafts we’ve ever made came entirely from the recycling bin. There’s a reason for this. When you hand a child a pre-cut foam shape with a specific purpose, there’s one thing they can do with it. When you hand them a cardboard tube and say “what could this be?” — the possibilities are limitless. That open-endedness is where creativity actually lives.
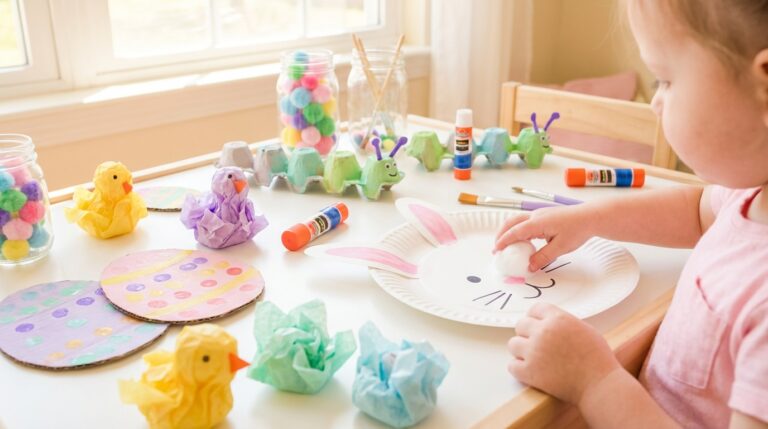
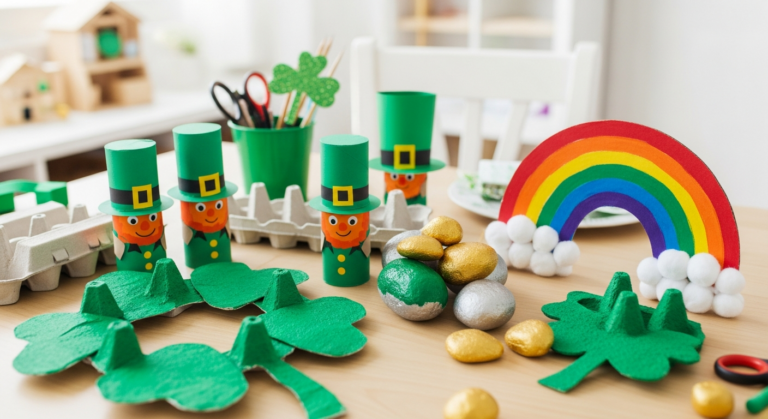
If you loved our St. Patrick’s Day crafts from recycled materials, you already know this. Same philosophy, new holiday, fresh projects.
Your Recycled Materials Supply List: What to Start Saving Now
Start collecting these items a week or two before Earth Day. Tell your kids you’re building a “craft recycling station” — they’ll become the most enthusiastic recyclers in the house overnight.
Paper and Cardboard
- Toilet paper tubes — the undisputed MVP of recycled crafts. You’ll need 6-8 for this article’s projects.
- Paper towel tubes — longer and sturdier, great for structural projects.
- Egg cartons — cardboard ones work best (styrofoam is harder to paint), both 6-count and 12-count.
- Cereal boxes and cracker boxes — lightweight cardboard that’s easy for kids to cut.
- Shipping boxes — any size. Amazon boxes are perfect. See our full guide to cardboard box crafts for kids for even more ideas.
- Newspaper and magazines — especially ones with green, blue, and brown imagery.
- Brown paper bags — grocery bags or lunch bags.
- Junk mail and old calendars — surprisingly useful for collage work.
Plastic and Metal
- Plastic bottles — water bottles and soda bottles (labels removed).
- Plastic bottle caps — save in assorted sizes and colors.
- Yogurt cups and pudding cups — rinsed and dried.
- Tin cans — edges filed smooth (adult prep required). Soup cans, bean cans, etc.
- Aluminum foil — used sheets that have been smoothed out.
- Plastic produce containers — the clear clamshell kind from berries or tomatoes.
Other Recyclables
- Old t-shirts or fabric scraps — for stuffing, wrapping, or painting.
- Wine corks — if you have them (great for stamping).
- Jar lids — metal or plastic, various sizes.
- Broken crayons — we’ll melt these into something new.
- Old buttons — from the junk drawer collection every household seems to have.
Basic Craft Supplies You’ll Also Need
These aren’t recycled, but most households have them on hand:
- White school glue and/or hot glue gun (adult use only for the glue gun)
- Washable tempera paint in green, blue, brown, yellow, white, and red
- Paintbrushes (various sizes)
- Scissors (kid-safe for younger ones, regular for adults)
- Tape — masking tape and clear tape
- Markers, crayons, or colored pencils
- String or yarn
- Googly eyes (optional but always a hit)
- Soil and seeds (for the planter projects)
Craft Overview at a Glance
| # | Craft | Best Age | Time | Mess Level | Key Recycled Materials |
|---|---|---|---|---|---|
| 1 | Paper Bag Earth Puppet | 2-4 | 15 min | Low | Brown paper bag |
| 2 | Egg Carton Garden Bugs | 2-5 | 20 min | Medium | Egg carton |
| 3 | Tissue Paper Earth Collage | 2-4 | 15 min | Low | Old tissue paper, magazines |
| 4 | Toilet Roll Binoculars (Nature Walk) | 3-6 | 15 min | Low | 2 TP rolls |
| 5 | Cardboard Tube Tree | 2-5 | 20 min | Medium | Paper towel tube, newspaper |
| 6 | Plastic Bottle Terrarium | 4-8 | 30 min | Medium | 2-liter plastic bottle |
| 7 | Egg Carton Flower Garden | 3-6 | 25 min | Medium | Egg carton, straws or sticks |
| 8 | Cereal Box Earth Puzzle | 4-8 | 25 min | Low | Cereal box |
| 9 | Magazine Collage Earth Mosaic | 5-10 | 30 min | Low | Old magazines |
| 10 | Tin Can Planter | 5-10 | 25 min | Medium | Tin can |
| 11 | Plastic Bottle Bird Feeder | 5-10 | 30 min | Low | Plastic bottle, sticks |
| 12 | Cardboard Box Recycling Center | 4-8 | 40 min | Low | Large box + small boxes |
| 13 | Newspaper Seed Pots | 6-10 | 20 min | Low | Newspaper |
| 14 | Melted Crayon Earth Suncatcher | 5-10 | 25 min | Medium | Broken crayons, wax paper |
| 15 | Recycled Materials Robot | 4-10 | 45 min | Low | Everything in your bin |
Toddler Earth Day Crafts (Ages 2-3)
These five crafts are designed for the shortest attention spans and the grabbiest hands. Minimal steps, maximum sensory engagement, and results that look impressive even when executed by someone who still puts glue sticks in their mouth.
1. Paper Bag Earth Puppet
Materials: Brown paper bag, blue and green paint (or torn tissue paper in blue and green), glue stick, googly eyes (optional)
Time: 15 minutes | Mess Level: Low | Difficulty: Easy
What it teaches: Earth’s colors (blue for water, green for land), creative expression, puppet play and storytelling
Steps:
- Lay the paper bag flat with the folded bottom flap facing up (this becomes the puppet’s face area).
- Let your toddler paint or glue blue and green tissue paper all over the bag. No need for geographical accuracy — this is toddler art, not cartography.
- If using paint, let dry for 10 minutes.
- Add googly eyes on the bottom flap if desired — now the Earth has a face!
- Slip your hand inside and practice making the Earth “talk.” Ask your toddler: what would the Earth say to us?
Crafty Mama tip: This is a perfect opening for a simple Earth Day conversation. “The Earth is blue because of water and green because of trees and grass. Our job is to help keep it beautiful.” That’s enough for a two-year-old. Plant the seed, don’t deliver a lecture.
2. Egg Carton Garden Bugs
Materials: Cardboard egg carton (cut into individual cups or strips of 2-3 cups), paint in various colors, pipe cleaners, googly eyes, glue
Time: 20 minutes | Mess Level: Medium | Difficulty: Easy
What it teaches: Insect awareness, color recognition, fine motor skills (painting small objects)
Steps:
- Pre-cut the egg carton into sections: single cups for ladybugs or spiders, strips of 3 for caterpillars, strips of 2 for bees.
- Let your toddler paint them any colors they want. Red with black dots for ladybugs, green for caterpillars, yellow and black stripes for bees — or purple with orange spots, because toddlers.
- While paint dries, bend pipe cleaners into antennae (adult task).
- Once dry, glue on googly eyes. Poke pipe cleaner antennae through the top of the cups.
- Take your bugs outside and place them in the garden. Talk about how real bugs help plants grow.
Crafty Mama tip: Pair this with an actual bug hunt in the yard. Our guide to bug hunting activities for kids has tons of ideas for turning a backyard walk into a science expedition. The crafted bugs can “join” the real ones.
3. Tissue Paper Earth Collage
Materials: Large circle cut from cardboard (cereal box works — trace a dinner plate), blue and green tissue paper torn into pieces, white school glue thinned with water, paintbrush
Time: 15 minutes | Mess Level: Low | Difficulty: Easy
What it teaches: Earth’s appearance from space, tearing and gluing skills, color sorting
Steps:
- Cut a large circle (8-10 inches) from a cereal box or cardboard. This is the Earth.
- Put small piles of torn blue and green tissue paper in front of your toddler. (Pre-tear it for the youngest kids; 3-year-olds can tear their own.)
- Brush the glue-water mixture onto a section of the cardboard.
- Let your child press tissue paper pieces onto the gluey surface. Blue for oceans, green for land — but again, artistic freedom reigns.
- Keep brushing glue and pressing paper until the whole circle is covered. Let dry.
- Punch a hole at the top and hang with string for an Earth Day decoration.
Crafty Mama tip: Show your child a photo of Earth from space on your phone first. They’ll get so excited when they see their craft looks like the real thing. Even loosely. Even very loosely.
4. Toilet Roll Binoculars for a Nature Walk
Materials: 2 toilet paper tubes, masking tape or glue, paint or markers, string or yarn, stickers (optional)
Time: 15 minutes | Mess Level: Low | Difficulty: Easy
What it teaches: Observation skills, nature awareness, creative decoration
Steps:
- Help your toddler paint or color both toilet paper tubes. Green and brown are “nature” colors, but any color works.
- Once dry, tape or glue the two tubes side by side.
- Punch a hole on the outer side of each tube near the top. Thread yarn through both holes and tie to create a neck strap.
- Decorate with stickers, drawn-on leaves, or glued-on bits of tissue paper.
- Head outside for an Earth Day nature walk! Ask your toddler to “look through the binoculars” and tell you what they see.
Crafty Mama tip: These pair beautifully with our outdoor nature activities for kids. Make the binoculars in the morning, use them for a nature exploration walk in the afternoon. The binoculars don’t magnify anything, of course, but your toddler doesn’t know that — and the act of looking through a frame actually does help children focus their observation.
5. Cardboard Tube Tree
Materials: Paper towel tube (or 2 toilet rolls taped end to end), brown paint, green tissue paper or newspaper, glue, cardboard base (optional)
Time: 20 minutes | Mess Level: Medium | Difficulty: Easy
What it teaches: Tree structure (trunk and canopy), nature appreciation, 3D construction
Steps:
- Paint the cardboard tube brown. This is the tree trunk. Let dry (or speed it up with a hair dryer).
- Crumple balls of green tissue paper or green-painted newspaper. Make them walnut-sized.
- Glue the green balls into and around the top of the tube to form the tree canopy. Stuff some inside the tube opening too.
- Optional: cut two small slits at the bottom of the tube on opposite sides. Slide a small rectangle of cardboard through to create a base so the tree stands up.
- Make a whole forest if you’re feeling ambitious. Your toddler will want to.
Crafty Mama tip: Cut a few small slits in the trunk and tuck in small paper birds or tissue paper flowers. Suddenly it’s an ecosystem.
Preschool Earth Day Crafts (Ages 3-5)
Preschoolers can handle more steps, use scissors with supervision, and are starting to care about what their craft looks like. These five projects offer more complexity while staying firmly in the “success is guaranteed” zone.
6. Plastic Bottle Terrarium
Materials: Clear 2-liter plastic bottle (cut in half by an adult), small rocks or pebbles, soil, small plants or seeds, water, tape
Time: 30 minutes | Mess Level: Medium | Difficulty: Medium
What it teaches: Water cycle, ecosystems, plant needs (soil, water, light), greenhouse effect basics
Steps:
- Adult prep: cut the plastic bottle in half horizontally with scissors or a box cutter. Smooth any sharp edges with tape.
- In the bottom half, have your child layer: small rocks (1 inch), then soil (3-4 inches).
- Plant small seedlings, herbs, or sprinkle grass/wildflower seeds on top of the soil.
- Water lightly — just enough to moisten the soil, not flood it.
- Place the top half of the bottle over the bottom half like a dome. Tape the seam loosely (you want a little airflow).
- Place in a sunny window and watch over the next few weeks.
The science conversation: “We made a tiny version of how the Earth works! The sun heats the water in the soil, the water turns into tiny drops on the walls — that’s like rain — and it falls back down to water the plants again. The Earth does the same thing, just much bigger.”
Crafty Mama tip: Put a strip of masking tape down the side and mark the soil line. Have your child check every few days and draw a line where the first sprouts appear. This turns a craft into a weeks-long observation project.
7. Egg Carton Flower Garden
Materials: Cardboard egg carton, paint (assorted bright colors), green pipe cleaners or green-painted sticks, scissors, glue, buttons or bottle caps for flower centers
Time: 25 minutes | Mess Level: Medium | Difficulty: Easy-Medium
What it teaches: Flower anatomy (petals, stem, center), color mixing, fine motor cutting skills
Steps:
- Cut the egg carton into individual cups. Each cup becomes a flower.
- Using scissors, cut 4-6 slits from the rim down toward the base of each cup to create “petals.” Gently bend them outward.
- Paint each flower a different color. Get creative — stripes, dots, two-tone petals.
- Once dry, glue a button or painted bottle cap in the center of each flower.
- Poke a green pipe cleaner or painted stick through the bottom of each cup for the stem.
- Cut leaf shapes from green cardboard scraps and tape or glue to the stems.
- “Plant” your flowers by poking the stems into a ball of clay, a styrofoam block, or an upside-down egg carton half with holes poked in it.
Crafty Mama tip: Make this a gift project. Preschoolers love giving gifts, and a bouquet of egg carton flowers for Grandma on Earth Day is genuinely charming. They never need water and they never wilt.
8. Cereal Box Earth Puzzle
Materials: Cereal box (or any lightweight cardboard), blue and green paint or markers, scissors, pencil
Time: 25 minutes | Mess Level: Low | Difficulty: Medium
What it teaches: Geography awareness, spatial reasoning, problem-solving
Steps:
- Cut one large flat panel from a cereal box (the front or back).
- On the plain (inside) side, draw a large circle that fills most of the panel.
- Paint the circle to look like Earth — blue background with green land masses. It doesn’t need to be geographically precise. Blobs are fine.
- Once dry, flip the panel over and draw puzzle piece shapes on the back with pencil. For preschoolers, make 6-8 large pieces. For older kids, 12-15 smaller pieces.
- Cut along the puzzle lines.
- Mix up the pieces and let your child assemble the Earth!
- Store pieces in a ziplock bag for repeat play.
Crafty Mama tip: Before cutting, take a photo of the painted Earth. Print it small and tape it to the ziplock bag as a “reference image” — just like real puzzles.
9. Magazine Collage Earth Mosaic
Materials: Old magazines or catalogs, large cardboard circle (trace a dinner plate), glue stick, scissors
Time: 30 minutes | Mess Level: Low | Difficulty: Easy-Medium
What it teaches: Color sorting, composition, fine motor (cutting and tearing), environmental awareness
Steps:
- Cut a large circle from cardboard.
- Flip through magazines and tear or cut out pieces that are blue (water, sky) and green (plants, grass, leaves).
- Sort the pieces into two piles: blue and green.
- Glue the pieces onto the cardboard circle — blue for the ocean areas, green for the land masses. Overlap pieces for a mosaic effect.
- Once the whole circle is covered, you have a stunning Earth made entirely from recycled paper.
Crafty Mama tip: This is one of those crafts that genuinely looks beautiful when finished. Frame it or mount it on construction paper for a display-worthy Earth Day art piece. The variety of blues and greens from different magazine pages gives it incredible depth.
10. Tin Can Planter
Materials: Clean tin can (label removed, edges filed smooth — adult prep), paint or fabric scraps, glue, small rocks, potting soil, seeds or small plant
Time: 25 minutes | Mess Level: Medium | Difficulty: Medium
What it teaches: Plant needs, responsibility/caretaking, reuse mindset, patience (waiting for growth)
Steps:
- Adult prep: remove the label from a tin can, check that the top edge is smooth (use a can opener that cuts from the side for smooth edges, or cover the rim with masking tape).
- Let your child decorate the outside of the can. Options: paint it, wrap it in fabric scraps secured with glue, or decoupage with tissue paper. Add Earth-themed decorations — painted flowers, a tree, the words “I help the Earth grow.”
- Once decoration is dry, add a layer of small rocks to the bottom (1 inch) for drainage.
- Fill with potting soil to about an inch below the rim.
- Plant seeds (herbs like basil or chives are fast growers) or transplant a small seedling.
- Water lightly and place in a sunny spot.
Crafty Mama tip: This craft teaches ongoing responsibility. Put the planter in your child’s room or on a windowsill they pass daily. Help them water it every other day. When that first sprout appears, you will see genuine wonder on their face. That’s the real Earth Day lesson — that growing things takes care and time.
School-Age Earth Day Crafts (Ages 6-10)
These projects have more steps, require some patience, and produce functional items that kids will actually use. This is where the sustainability message gets more sophisticated and the engineering gets more real.
11. Plastic Bottle Bird Feeder
Materials: Clean plastic bottle (1-liter or 2-liter), 2 wooden sticks or chopsticks, string, scissors or box cutter (adult), birdseed
Time: 30 minutes | Mess Level: Low | Difficulty: Medium
What it teaches: Bird ecology, animal habitat, engineering design, cause and effect (what food attracts which birds)
Steps:
- Adult prep: use a box cutter to cut two small “window” openings on opposite sides of the bottle, about 2 inches from the bottom. Make them about 1 inch tall by 2 inches wide.
- About half an inch below each window, poke a hole through both sides of the bottle. Push a stick or chopstick through so it extends a few inches on each side — these are the perches.
- Repeat at a different angle about 4 inches higher for a second set of perches and windows (optional).
- Let your child decorate the outside with permanent markers or paint (avoid covering the windows).
- Remove the cap, fill with birdseed through the top, replace the cap.
- Tie string tightly around the neck of the bottle. Hang from a tree branch.
- Watch and wait. Keep a “bird journal” to record which birds visit.
The science conversation: “Different birds like different food and different perch sizes. Keep watching to see who visits our feeder. If we put this near a tree, birds feel safer because they can fly to cover if a predator comes.”
Crafty Mama tip: Hang the feeder where you can see it from a window. Pair it with our nature crafts for kids collection for a full nature-themed afternoon. A bird feeder you made from a plastic bottle is a daily reminder that recycling isn’t just about the bin — it’s about reimagining what things can become.
12. Cardboard Box Recycling Center (Pretend Play)
Materials: 1 large cardboard box, 3-4 smaller boxes or containers, paint, markers, labels, tape
Time: 40 minutes | Mess Level: Low | Difficulty: Medium
What it teaches: Recycling sorting, material categories, organizational thinking, pretend play
Steps:
- Take the large box and cut the top flaps off. This is the main recycling center structure.
- Paint or decorate the outside. Add a sign: “[Your Child’s Name]’s Recycling Center” or “Earth Helper Station.”
- Place 3-4 smaller boxes or containers inside the big box. Label each one: PAPER, PLASTIC, METAL, GLASS. Color-code them if you like (blue for paper, yellow for plastic, gray for metal, green for glass).
- Gather a pile of clean recyclables from around the house: junk mail, a plastic bottle, a tin can, a glass jar, cardboard scraps, a magazine, an aluminum foil ball.
- Let your child sort the items into the correct bins.
- Talk through any tricky ones together (“Is a cereal box paper or cardboard? Actually, cardboard IS paper — it goes in the paper bin!”).
Crafty Mama tip: This craft has incredible replay value. Set it up in a corner of the kitchen and use it as your actual household recycling station for a week. When kids are in charge of sorting, they start recognizing materials everywhere. “Mom, this yogurt cup is plastic — it goes in the yellow bin!” That awareness is the whole point of Earth Day, living in their daily routine.
13. Newspaper Seed Pots
Materials: Newspaper (4-5 full sheets per pot), a glass or can to use as a mold, potting soil, seeds
Time: 20 minutes | Mess Level: Low | Difficulty: Medium
What it teaches: Biodegradable materials, germination, sustainability (zero-waste planting)
Steps:
- Take a sheet of newspaper and fold it in half lengthwise.
- Place a glass or can on its side at one end of the newspaper strip, with about 2 inches of paper extending past the bottom of the glass.
- Roll the newspaper around the glass, keeping it snug.
- Fold the excess paper at the bottom up and over the base of the glass, like wrapping a present. Press firmly to crease.
- Carefully slide the glass out. You now have a newspaper pot.
- Fill with potting soil, plant seeds, and water gently.
- When seedlings are big enough to transplant, plant the whole pot directly in the ground — the newspaper will decompose!
The science conversation: “This pot is made from newspaper, which is made from trees, which came from the earth. When we plant this pot in the soil, it breaks down and becomes part of the earth again. It’s a cycle — just like the water cycle or the life cycle of a plant.”
Crafty Mama tip: Make 6-8 of these and start a windowsill seedling nursery. Herbs, wildflowers, or vegetable seeds all work. When they’re ready to transplant, you get a second activity: gardening day!
14. Melted Crayon Earth Suncatcher
Materials: Broken crayon pieces (blues and greens), wax paper, iron and thin towel (adult use only), hole punch, string, scissors
Time: 25 minutes | Mess Level: Medium | Difficulty: Medium
What it teaches: States of matter (solid to liquid and back), color blending, upcycling
Steps:
- Peel any paper wrappers off broken crayon pieces. Sort into blues and greens.
- Using a handheld sharpener or a knife (adult only), create crayon shavings. Let kids sort shavings by color.
- Tear off two sheets of wax paper, each about 8 inches square.
- Arrange crayon shavings on one sheet of wax paper in a rough circular shape — blues around the outside, greens in patches for landmasses.
- Place the second sheet of wax paper on top.
- Cover with a thin towel. Adult presses a warm iron (low heat) over the towel for 15-20 seconds, moving slowly. The crayons will melt and fuse between the wax paper layers.
- Let cool completely (2-3 minutes).
- Cut around the melted crayon circle, leaving a small wax paper border.
- Punch a hole at the top, thread string through, and hang in a sunny window.
The science conversation: “We turned solid crayons into a liquid with heat, and then they cooled back into a solid — but in a completely new shape! We also took crayons that were broken and too small to use and made them into something beautiful again. That’s what recycling is all about.”
Crafty Mama tip: The light streaming through these is genuinely gorgeous. Make several in different color combinations — sunset colors, rainbow, ocean blues. They make beautiful gifts too.
15. Recycled Materials Robot
Materials: Everything in your recycling bin — boxes, tubes, caps, lids, cans, bottles, foil, buttons. Plus tape, glue, and whatever else you have.
Time: 45 minutes | Mess Level: Low | Difficulty: Open-ended (scales to any age)
What it teaches: Engineering, design thinking, creative problem-solving, resourcefulness
Steps:
- Dump a selection of clean recyclables on the table. The more variety, the better.
- The challenge: build a robot using ONLY these materials (plus tape and glue to hold it together).
- Let your child design first — what will the head be? The body? The arms and legs? Encourage them to hold different pieces up and see what fits.
- Build from the bottom up. A sturdy box body first, then attach limbs, then the head.
- Add details: bottle cap eyes, aluminum foil accents, cardboard tube arms, buttons for control panels.
- Name the robot. Give it a backstory. What is its job? (Spoiler: mine always end up being “cleaning robots” or “cookie-making robots.”)
Crafty Mama tip: This is the ultimate open-ended project and the perfect grand finale for an Earth Day craft session. No two robots look alike. No instructions to follow. Just raw materials and imagination. If your child loves this kind of building, they’ll also love our cardboard box crafts for kids collection, which takes the same approach on a bigger scale.
Earth Day Conversation Starters by Age
Crafting opens the door to talking about why the Earth matters. But what you say depends on who you’re talking to. A three-year-old and a nine-year-old need very different conversations.
Ages 2-3: Keep It Sensory and Simple
At this age, abstract concepts like “the environment” don’t land. Keep it concrete and connected to their world.
- “We’re using this box again instead of throwing it away. That’s being kind to the Earth!”
- “Trees give us shade and clean air. Let’s hug a tree and say thank you.”
- “See this flower? A bee helped it grow. Bees are Earth helpers, just like us.”
- “Let’s pick up this trash at the park. The Earth likes to be clean, just like you after bath time.”
Ages 4-5: Introduce Cause and Effect
Preschoolers can start understanding that their actions have consequences — in a positive, empowering way.
- “When we recycle this bottle, it can be made into something new instead of sitting in a trash pile.”
- “Plants need clean water to grow, just like you need clean water to drink. That’s why we don’t put yucky things in rivers.”
- “If everyone threw their trash on the ground, what would the playground look like? That’s why we use trash cans.”
- “Animals live in forests and oceans. When we take care of those places, we’re taking care of the animals’ homes.”
Ages 6-8: Connect to Systems
School-age kids can grasp broader systems and their role in them.
- “Where do you think this plastic bottle goes after we put it in the recycling bin? Let’s look it up together.”
- “Our food comes from farms, which need healthy soil and clean water. Taking care of the Earth is how we take care of our food supply.”
- “What would happen if there were no bees? No butterflies? Every living thing is connected.”
- “You know how we compost our food scraps? That turns into soil that helps plants grow. It’s a cycle.”
Ages 9-10: Empower Problem-Solving
Older kids are ready to think critically and take action beyond crafts.
- “What’s one thing our family could do differently to create less waste?”
- “If you could invent something to help the Earth, what would it be?”
- “Some companies are making packaging from seaweed instead of plastic. What materials do you think we should use more of?”
- “Let’s calculate how many plastic bottles our family uses in a month. What could we replace those with?”
Crafts That Double as Functional Items
One of the most powerful Earth Day lessons is that reuse isn’t just an art project — it’s a lifestyle. Five of the crafts above produce items your family will actually use:
| Craft | Function | Lifespan |
|---|---|---|
| Plastic Bottle Terrarium (#6) | Living ecosystem / science observation | Weeks to months |
| Tin Can Planter (#10) | Herb or flower planter | Ongoing (plant and repot as needed) |
| Plastic Bottle Bird Feeder (#11) | Functional bird feeder | Months (refill as needed) |
| Cardboard Box Recycling Center (#12) | Actual sorting station | Weeks (until cardboard wears out) |
| Newspaper Seed Pots (#13) | Biodegradable seedling starters | Until transplanting day |
The fact that these crafts have a purpose beyond the craft itself drives the sustainability message home. Your kid isn’t just making something pretty — they’re making something useful from something that was going in the trash. That’s the core of Earth Day in action.
How to Make Earth Day a Year-Round Mindset
April 22nd is one day. But the habits and awareness you build through these crafts can carry through the entire year. Here’s how to keep the momentum going.
Create a Permanent Craft Recycling Station
Dedicate a box, bin, or shelf in your home to “craft-worthy recyclables.” When your child finishes a cereal box, ask them: “Trash, recycling, or craft box?” You’ll be amazed how quickly they start choosing the craft box. Keep it stocked and accessible, and you’ll never be caught without craft materials again.
Monthly Recycled Craft Challenges
Pick one day a month — “Reuse Day” or “Invention Day” or whatever your family wants to call it. Dump the craft recycling station on the table and challenge everyone to make something. No rules, no templates, just materials and imagination. Time it for 30 minutes and share what everyone made. This is essentially what loose parts play looks like at its best — open-ended, materials-driven creativity.
Nature Connection as a Habit
Earth Day crafts work best when they’re paired with regular time outdoors. Kids who spend time in nature feel personally connected to the environment and are naturally more motivated to protect it. Make outdoor exploration a weekly habit — even 20 minutes in a local park counts. Our guide to outdoor nature activities for kids is packed with ideas that pair perfectly with these crafts.
Talk About Materials
Start narrating the lifecycle of everyday objects casually. “This Amazon box used to be a tree. Then it was made into cardboard. It carried our package to us, and now we’re going to make it into a robot. That tree got a lot of use!” Kids absorb this kind of thinking over time, and it becomes part of how they see the world.
Start a Family Compost
If you did the Newspaper Seed Pots or Tin Can Planter projects, you’re already thinking about soil. A simple kitchen compost bin (even just a container for food scraps that you dump in the yard) teaches kids that waste is part of a cycle, not an endpoint. Banana peels become dirt. Dirt grows plants. Plants become food. It’s the ultimate recycling lesson, and kids find it genuinely fascinating — especially the worm part.
Frequently Asked Questions
What age is best for Earth Day crafts?
Every age can participate — you just need to match the project to the child’s abilities. Toddlers (2-3) thrive with simple painting, gluing, and tearing activities like the Paper Bag Earth Puppet or Tissue Paper Collage. Preschoolers (3-5) can handle multi-step projects with cutting and assembly. School-age kids (6-10) are ready for functional crafts like bird feeders and planters, plus deeper conversations about sustainability. The overview table above marks the best age for each project.
How do I explain Earth Day to a very young child?
Keep it simple and positive: “Earth Day is a special day when we say thank you to our planet for giving us trees, water, animals, and flowers. We show the Earth we care by picking up trash, planting seeds, and making new things from old things instead of throwing them away.” That’s enough. You don’t need to get into climate change, pollution statistics, or anything scary. Focus on the positive actions they CAN take, not the problems they can’t solve. Empowerment, not anxiety.
What if I don’t have all the recycled materials listed?
Substitute freely. No egg carton? Use cupcake liners. No tin can? Use a yogurt cup. No newspaper? Use junk mail or old worksheets. The whole point of recycled material crafts is working with what you have. Look at your recycling bin right now and work backward from what’s in it. Every craft in this article can be adapted based on available materials.
Are these crafts safe for toddlers who put everything in their mouths?
The toddler crafts (1-5) are designed with this in mind — paper, cardboard, paint, and tissue paper are the primary materials. Use non-toxic, washable paint always. Avoid small items like buttons, bottle caps, or googly eyes with children who still mouth objects — draw eyes with markers instead. The school-age crafts (11-15) involve tin cans, melted crayons, and smaller pieces that are NOT suitable for toddlers. Always supervise, and when in doubt, leave it out.
Can these be done as a classroom or group activity?
Absolutely. The best group crafts from this list are: Tissue Paper Earth Collage (#3), Egg Carton Garden Bugs (#2), Magazine Collage Earth Mosaic (#9), and Newspaper Seed Pots (#13). These are easy to prep in bulk, require minimal individual adult help, and clean up fast. Pre-cut materials where possible, set up stations, and assign one adult or older student per station. The Recycled Materials Robot (#15) is fantastic as a group challenge — divide kids into teams and give each team the same set of recyclables.
How do I keep these crafts from becoming more waste?
This is the great irony of Earth Day crafts, isn’t it? You take recyclables, add paint and glue, and now they can’t be recycled anymore. Here’s how to handle it thoughtfully: First, prioritize the functional crafts (planters, bird feeders, seed pots) that have ongoing use. Second, display art crafts for a period — hang them up, photograph them, appreciate them — then let them go. Third, talk about it honestly with older kids: “We turned recyclables into art, and when we’re done enjoying the art, we’ll put the materials in the trash. But the lesson we learned about reusing materials — that stays with us forever.”
My child wants to do ALL 15 crafts. How should I spread them out?
Don’t try to do them all on Earth Day itself — that’s a recipe for exhaustion (yours, not theirs). Instead, spread them across the two weeks surrounding Earth Day. Do 2-3 toddler/preschool crafts per session (they’re quick). Plan one school-age craft per session (they take longer and have more steps). Save the Recycled Materials Robot for Earth Day itself as the grand finale. This pacing also means you have time to collect different recyclables between sessions.
What’s the best Earth Day craft for a mixed-age group of siblings?
The Recycled Materials Robot (#15) works for literally any age — toddlers can stick on bottle caps and stickers while older kids handle the engineering and construction. The Egg Carton Flower Garden (#7) also scales well: a toddler can paint the cups while a school-age sibling does the cutting, assembly, and detailing. When in doubt, give the youngest child the painting job and the oldest child the construction job. Everyone contributes, nobody’s bored.
Making This Earth Day Count
Here’s my honest take after years of doing seasonal crafts with kids: the craft itself is never really the point. The paint will dry. The glue will set. The cardboard robot will eventually fall apart. What sticks — what actually lasts — is the conversation that happens while your hands are busy.
It’s the moment your four-year-old says, “Why do people throw things away if we can make stuff with them?” It’s your eight-year-old checking on the bird feeder every morning and reporting which birds came. It’s the whole family looking at the recycling bin differently, seeing potential instead of waste.
Earth Day isn’t really about April 22nd. It’s about building a generation of kids who instinctively think, What else could this become? And the beautiful thing is, you don’t need a curriculum or a special program to do that. You just need a kitchen table, a recycling bin, and the willingness to get a little glue on your hands.
Happy Earth Day, friends. Go raid your recycling bin. Your kids are waiting.