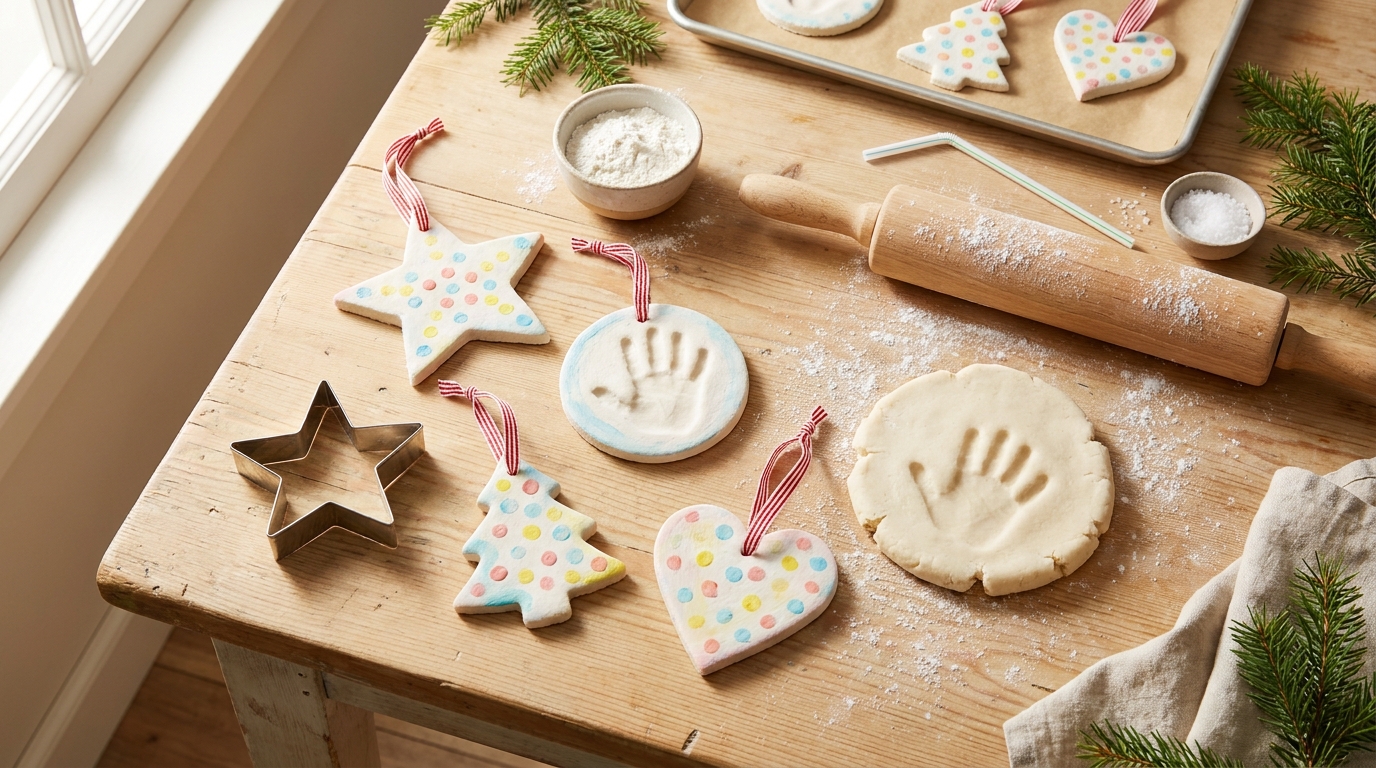
Salt Dough Ornament Crafts for Toddlers (Ages 1-3)
You'll learn how to make safer salt dough ornaments for toddlers (ages 1-3) with a lower-salt recipe and crucial safety guidelines, including flour heat-treating and five rules to prevent ingestion and choking hazards.
- Always heat-treat flour before mixing dough to eliminate E. coli/Salmonella risk.
- Use the lower-salt recipe, but remember dough is never food and is a poisoning risk.
- Avoid small add-ins; make ornaments at least 3 inches with rounded edges.
- Hang finished ornaments high with short loops, away from toddlers and pets.
- Call Poison Control immediately if your child ingests any dough.
This post contains affiliate links. As an Amazon Associate I earn from qualifying purchases.
My toddler’s first salt dough session lasted about four minutes. They patted the dough once, announced “cookie,” and took a small, very salty bite. Since then I build every toddler craft around little mouths and short attention spans.
This guide has a lower-salt dough with safer handling, a supply and cost table, a bake-time chart by thickness, a nap-friendly schedule, and age-by-age ornament ideas, handprints included.
In this article (12 sections)
- Salt Dough Safety for Toddlers Who Mouth Things
- What You Need: Supply List and Cost Table
- The Toddler-Friendly Salt Dough Recipe
- Shaping the Ornaments: Toddler-Proof Ideas
- Oven-Bake Timing Chart (By Thickness)
- A Nap-Friendly Baking Schedule
- Painting and Decorating (Toddler-Style)
- Hanging, Storing, and Gifting
- Toddler Salt Dough Mess and Realistic Expectations
- Troubleshooting: Quick Fixes
- Make Salt Dough Ornaments a Yearly Tradition
- Frequently Asked Questions
Salt Dough Safety for Toddlers Who Mouth Things
Before the fun part, let’s be straight about what salt dough is. It’s flour, salt, and water. Every ingredient is in your pantry, which makes it feel like food. It is not food, and it’s very salty on purpose, since salt is what makes the dough harden and keeps it from molding.
Safety firstEven this lower-salt dough is not food, and it can poison a small child.
- Salt dough is not food. Eating it is a poisoning risk, so tasting is never okay.
- Stay within arm’s reach the whole time.
- Raw flour can carry E. coli or Salmonella. Heat-treat it (steps just below) and wash hands afterward.
- Call Poison Control at 1-800-222-1222 (US) for any real mouthful of dough or ornament. If unsure, call.
- Seek urgent care for vomiting, extreme thirst, unusual sleepiness, irritability, or seizures. Don’t wait for symptoms.
How to heat-treat the flour
- Spread it out. Put the flour in a thin layer on a baking sheet.
- Bake and stir. Bake at 350°F, stirring every few minutes so the edges don’t scorch. Start checking at about 5 minutes, and keep going as long as it takes.
- Check the temperature. Keep baking until an instant-read thermometer reads at least 165°F in several spots, not just one. A microwave works too: heat in short bursts, stirring every 30 seconds, until it reads at least 165°F in several spots.
- Cool completely. Let it cool fully before mixing.
- Wash up. Wash hands and the sheet afterward.
Salty dough is a risk for dogs and cats too. No dough is mouth-proof, so I plan around mouths with five rules.
The five toddler-safety rules
- Cut the salt, keep the dough working. The recipe below uses about half the salt of the classic 2:1:1 dough. It still bakes into a lasting ornament, but it is not safe to eat and tasting is never okay.
- Nothing small goes in or on the dough. No beads, sequins, glitter, whole cloves, peppercorns, rice, or googly eyes. A toilet paper tube is a quick guide for small parts: anything that fits through it is a choking hazard under age 4. Skip add-ins for every child in this age range, since a pressed-in bead can pop out of baked dough.
- Go big and chunky on the ornaments. Make each one at least 3 inches overall, with rounded corners and tips. Pinch or trim any sharp point round before baking, and skip thin arms and legs. Retire any ornament that cracks, sheds pieces, or has a tip that snaps.
- Scraps never get baked. Toddlers pinch off crumbs. Those crumbs get pushed back into the main ball or thrown out, never baked as little “bonus” pieces.
- Hang them high and keep the loops short. Finished ornaments live on upper branches, away from toddlers and pets. Use a short ribbon loop (under 4 inches, tied closed), not long dangling string.
One more note: if you have a child who aggressively eats everything, or a dog who treats the tree as a buffet, this may not be your year for salt dough. Homemade playdough is salty too and not food, so it is no safer for a taster. Instead, use an ink-free print kit, or make a handprint on paper with washable, non-toxic paint (adult-supervised, hands washed right afterward), and frame it. No judgment at all. A craft that ends in a trip to the ER is not a keepsake.
What You Need: Supply List and Cost Table
The best part of salt dough is how little it costs. Most of this you already own.
Core supplies
- All-purpose flour: 2 cups per batch, heat-treated first (bake on a sheet until it reads at least 165°F in several spots, then cool completely) because toddlers handle the dough and then touch their mouths
- Fine table salt: 1/2 cup per batch (fine grains dissolve better than coarse or kosher)
- Warm water: about 3/4 cup per batch
- Rolling pin or a sturdy, straight-sided cup
- Cookie cutters, 3 inches or bigger (or a jar lid, a bowl, or a paper template and a butter knife)
- Drinking straw for punching the hanging hole
- Parchment paper and a baking sheet
- Spatula, for lifting soft ornaments without bending them
- Washable, non-toxic paint (tempera works well)
- Chunky brushes, sponges, or just fingers
- Clear sealer: a water-based sealer labelled non-toxic (ASTM D-4236), or a clear acrylic spray, applied by an adult
- Ribbon, about 8 inches per ornament, tied closed into a loop under 4 inches with the cut ends trimmed
- Damp rag and a towel, which you will need more than anything else here
Optional extras
- Textured items for pressing: a clean toy with a pattern, a leaf, a fork, a potato masher, a textured rolling pin
- A permanent marker (adult use) for writing names and years on the back
- A little extra heat-treated flour for dusting the counter and palms; sprinkle lightly, don’t shake, to avoid dust clouds, and wash hands afterward
- A baby wipe pack, because yes
What it actually costs
Prices vary by store and region, so treat these as ballpark numbers.
| Item | Estimated cost | Notes |
|---|---|---|
| Flour (2 cups from a 5-lb bag) | $0.40 | Cheapest brand works fine |
| Fine salt (1/2 cup) | $0.20 | Table salt, not coarse |
| Water | Free | |
| Parchment paper | $0.30 | A few sheets per batch |
| Cookie cutters or jar lid | $0–$5 | Skip if you cut around a paper template |
| Washable tempera paint (set) | $5–$8 | Lasts many projects |
| Chunky brushes or sponges | $3–$5 | A kitchen sponge cut into squares works |
| Brush-on sealer | $5–$7 | Lasts years of ornaments |
| Ribbon (12 ornaments) | $2–$3 | Or reuse gift ribbon |
| One batch of dough only | about $1 | Makes about 3-4 handprints (1/2 inch) or about 10 three-inch shapes (3/8 inch) |
| Full first-time setup | about $16–$29 | Most of it carries over to future years |
One batch costs about $1, and the paint and sealer carry over to next year.
The Toddler-Friendly Salt Dough Recipe
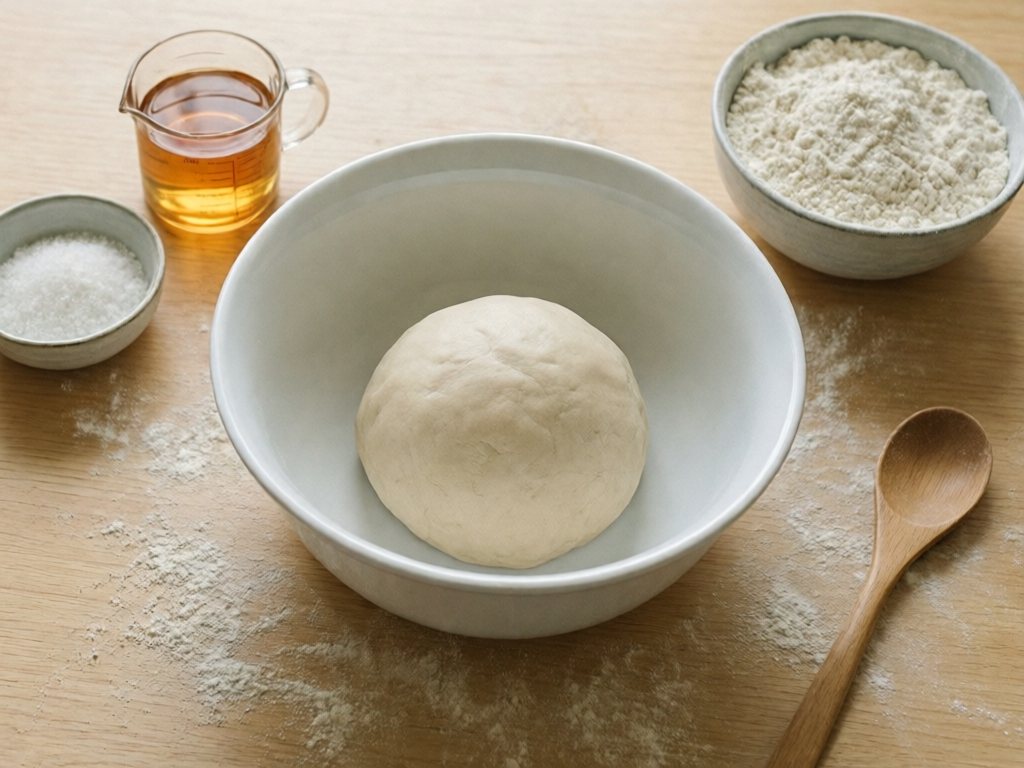
This is the low-salt dough I use for ages 1 to 3. It’s soft, forgiving, and easy for small hands to squish.
Ingredients (one batch)
- 2 cups all-purpose flour, heat-treated and cooled (see the safety box above)
- 1/2 cup fine table salt
- 3/4 cup warm water, plus a tablespoon or two if needed
A batch makes about 3-4 handprint ornaments at 1/2 inch thick, or about 10 three-inch shapes at 3/8 inch. For a family of kids or a gifting crowd, mix a second batch rather than doubling. Big batches get tiring to knead, and a tired adult is a cranky adult.
How to mix it (with toddler jobs)
Toddlers can do more than you’d think here. This is also a good fine motor activity, because scooping, pouring, and squeezing dough can help support the hand strength kids use later for scissors and pencils.
- Measure the dry ingredients. Let your toddler scoop flour into a big bowl (a large bowl, because flour will escape). Put the salt in yourself, or let them dump it in from a small cup while you hold the bowl.
- Stir the dry mix. Hand over a wooden spoon. Stirring is a full-body event at this age, and half the flour will end up on the counter. That’s the mess I promised.
- Add the water slowly. You pour, they stir. Begin with 1/2 cup, then add the rest a splash at a time.
- Knead. This is the best part. Dump the shaggy dough on a surface dusted with cooled, heat-treated flour and let your toddler squish, squeeze, and punch it. Knead for about 3 to 5 minutes total. They’ll lose interest around minute two, and that’s fine. You can finish the kneading while they play with a lump of the dough.
- Check the texture. The dough should feel like soft playdough, smooth and not sticky. If it sticks to your fingers, add a tablespoon of heat-treated flour. If it cracks and crumbles, add water a teaspoon at a time.
Wrap any dough you aren’t using right away in plastic wrap or a zip bag. It dries out fast.
Why the lower-salt dough works
Salt helps harden the dough and keep it from molding, so cutting it back does change things a little. Ornaments made with this recipe are slightly more crumbly at thin edges than classic dough, which is the reason for the thickness rules later in this post. Keep anything a toddler will handle at least 3/8 inch thick, and discard any ornament that cracks or sheds crumbs. Thick enough and sealed, they’ll last the season and for years afterward.
Tinting the dough (optional)
If painting is too much for one day, tint the dough instead. Knead in a few drops of food coloring before shaping. Save paint for after baking and cooling. The colors bake slightly darker and a touch muted, which looks lovely. You can skip painting altogether and seal a naturally colored ornament. Pastel and earthy tones look especially nice against a green tree.
Shaping the Ornaments: Toddler-Proof Ideas
Here’s where we choose ornaments that a one-, two-, or three-year-old can really make. The rule is “press and squish,” not “cut and decorate carefully.” Roll the dough to the thickness you need (see the timing chart below) before the toddler gets to it, then let them leave their mark.
1. Handprint ornaments (the classic)
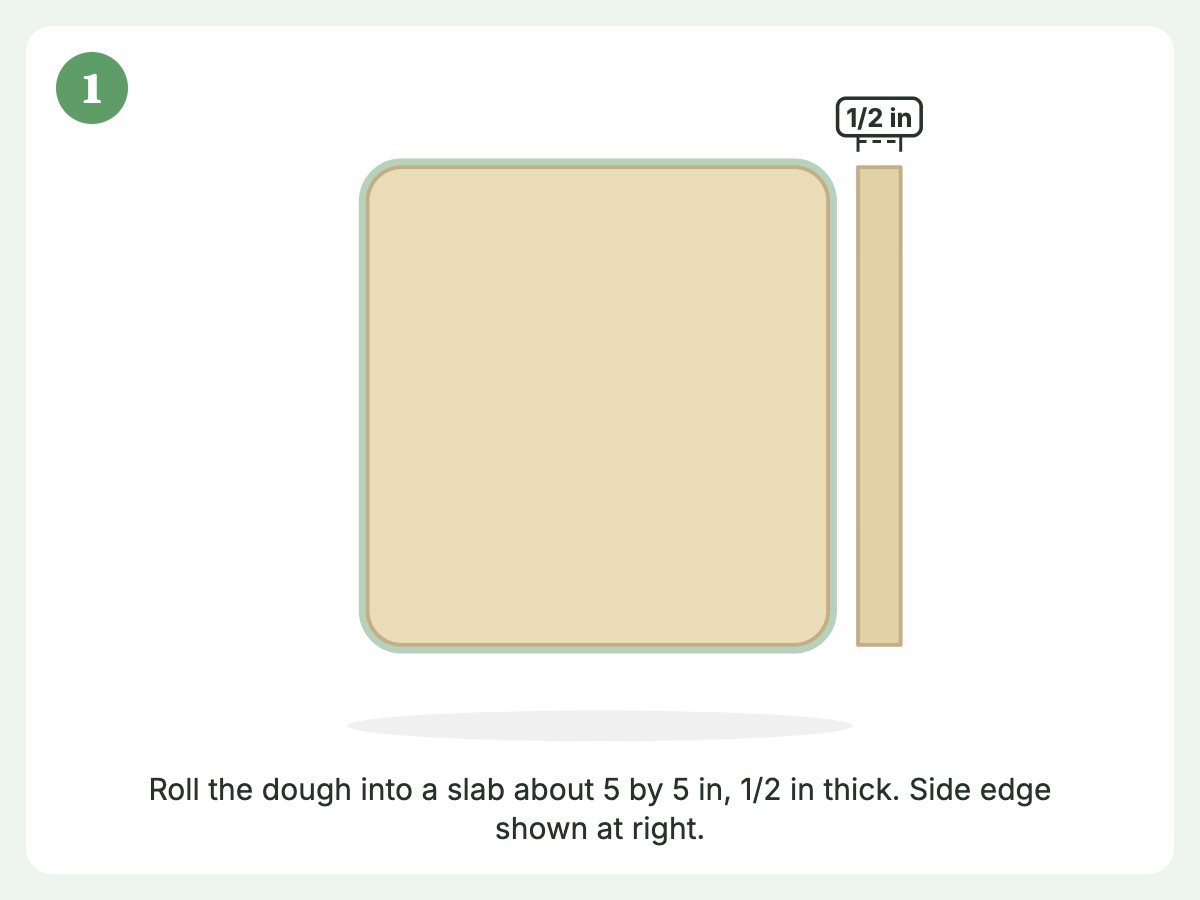
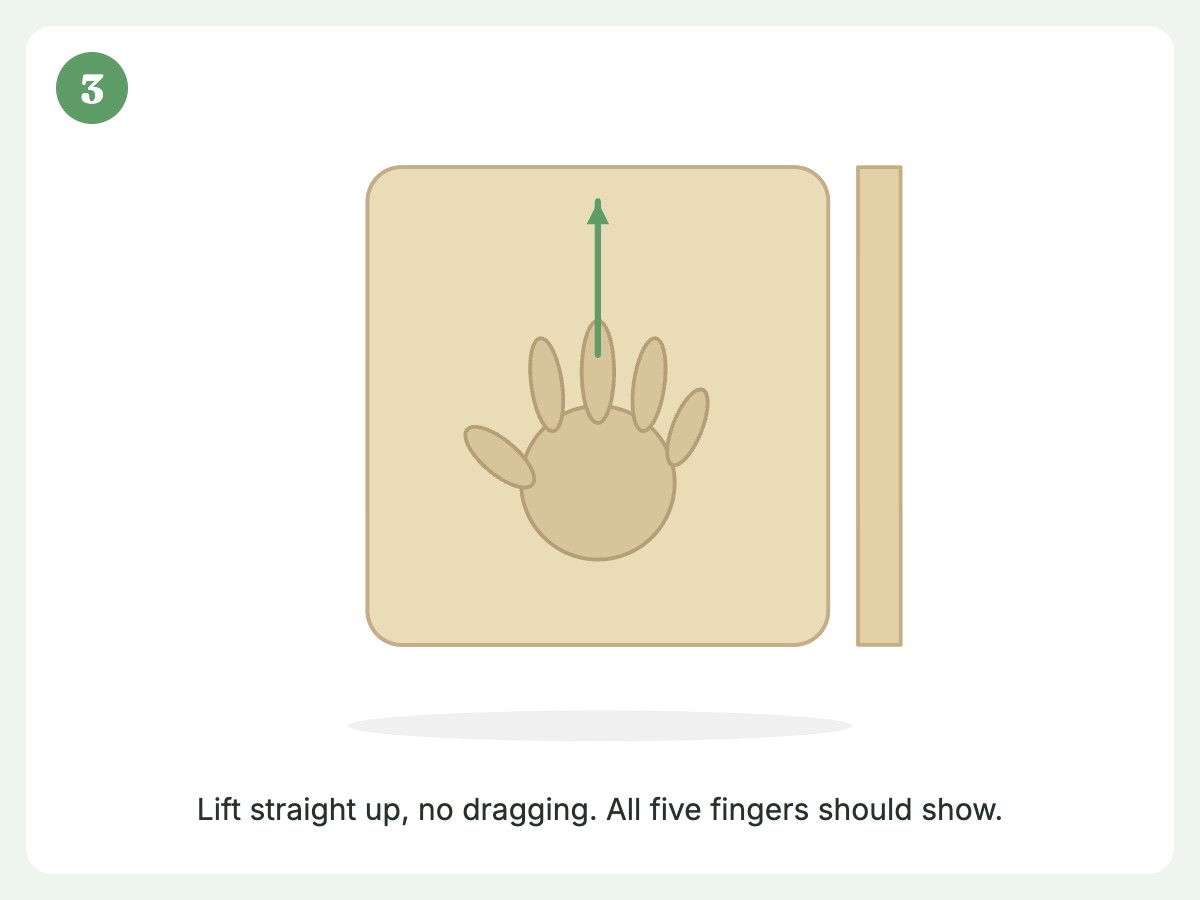
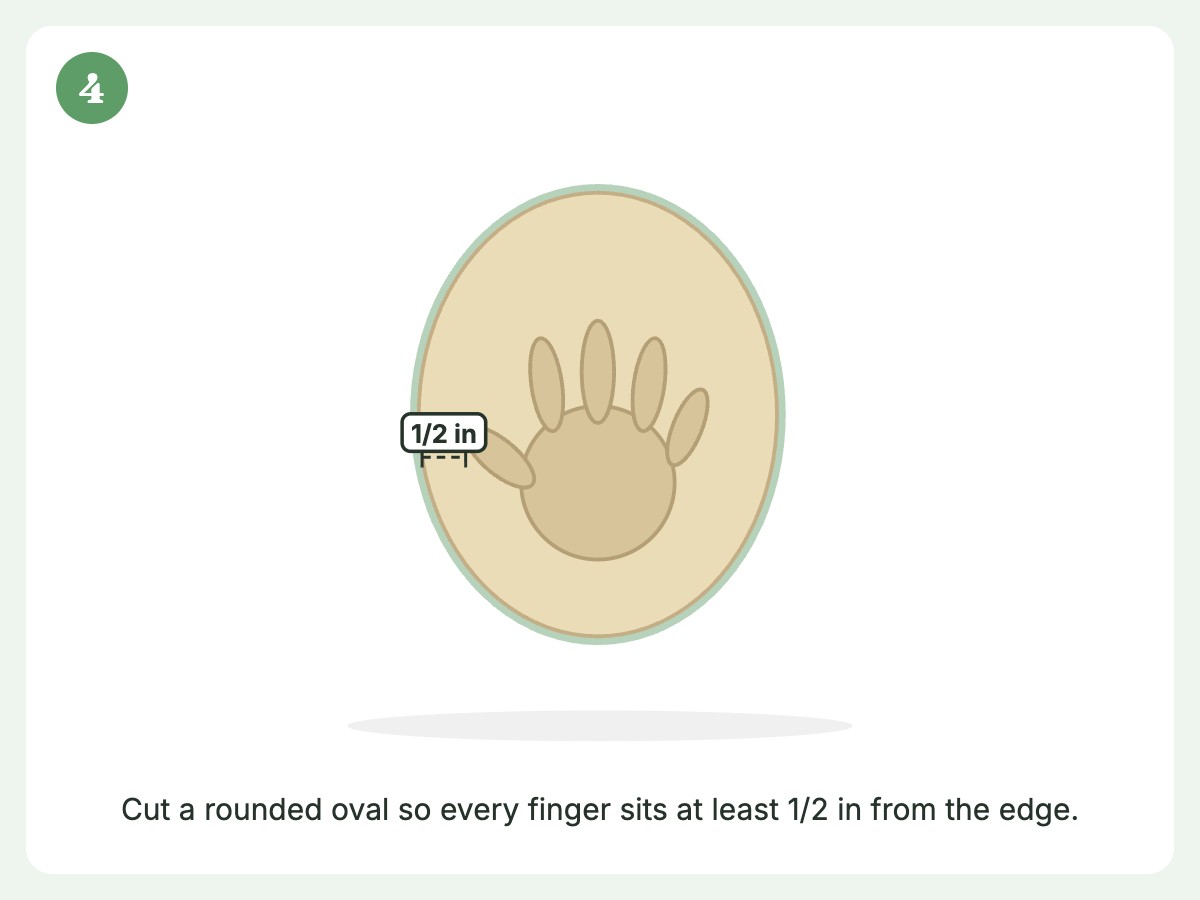
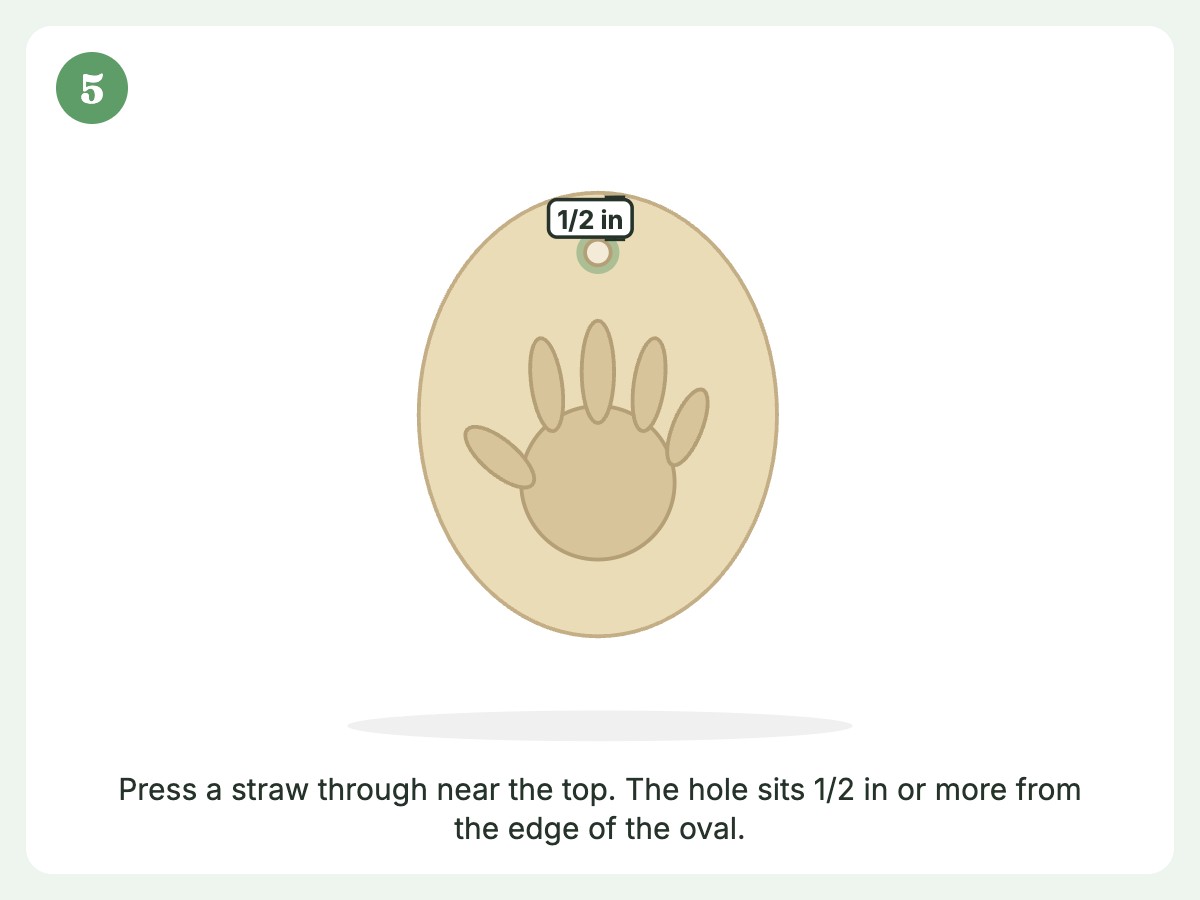
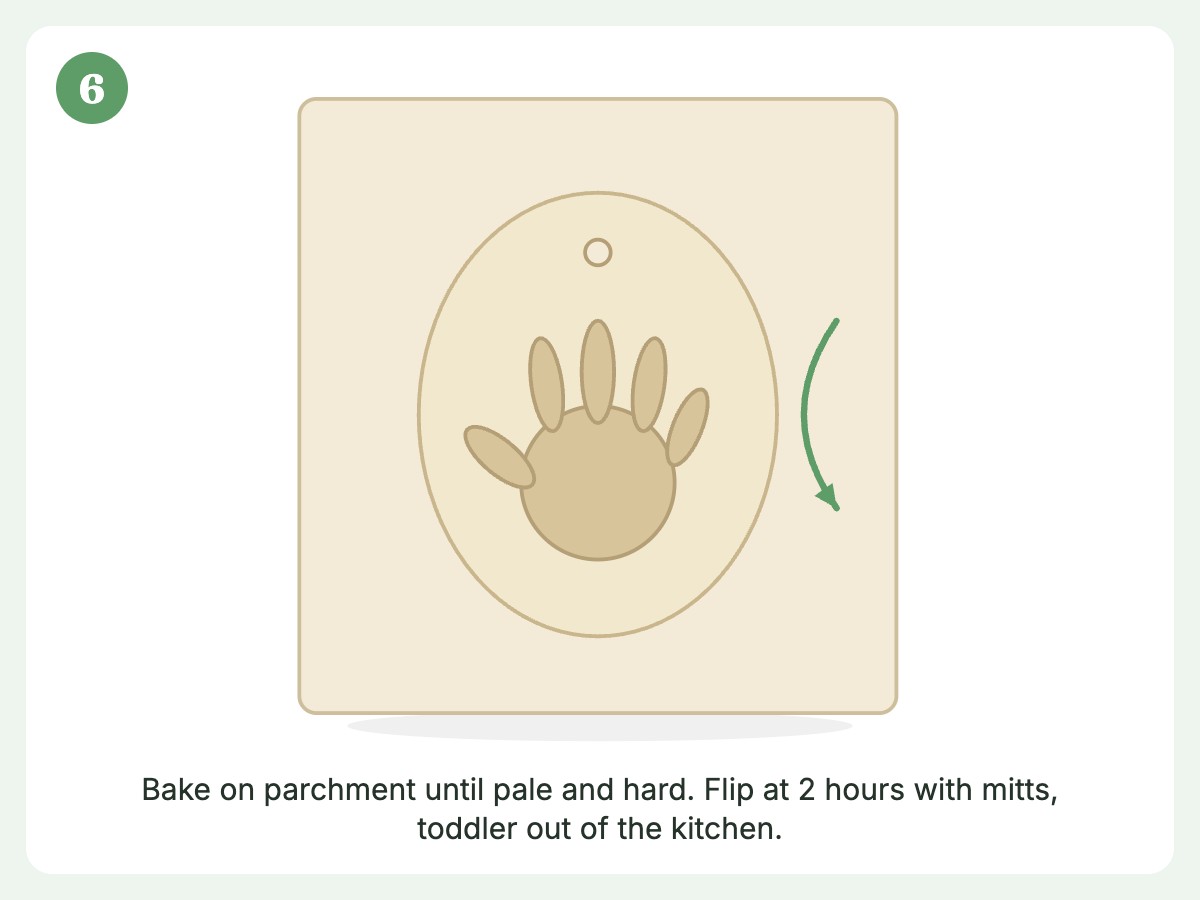
This is the keepsake everyone wants and the one most likely to go wrong, so here is the method that works.
- Roll it out. Roll the dough to 1/2 inch thick in a rough rectangle or circle large enough for the hand, about 5 by 5 inches.
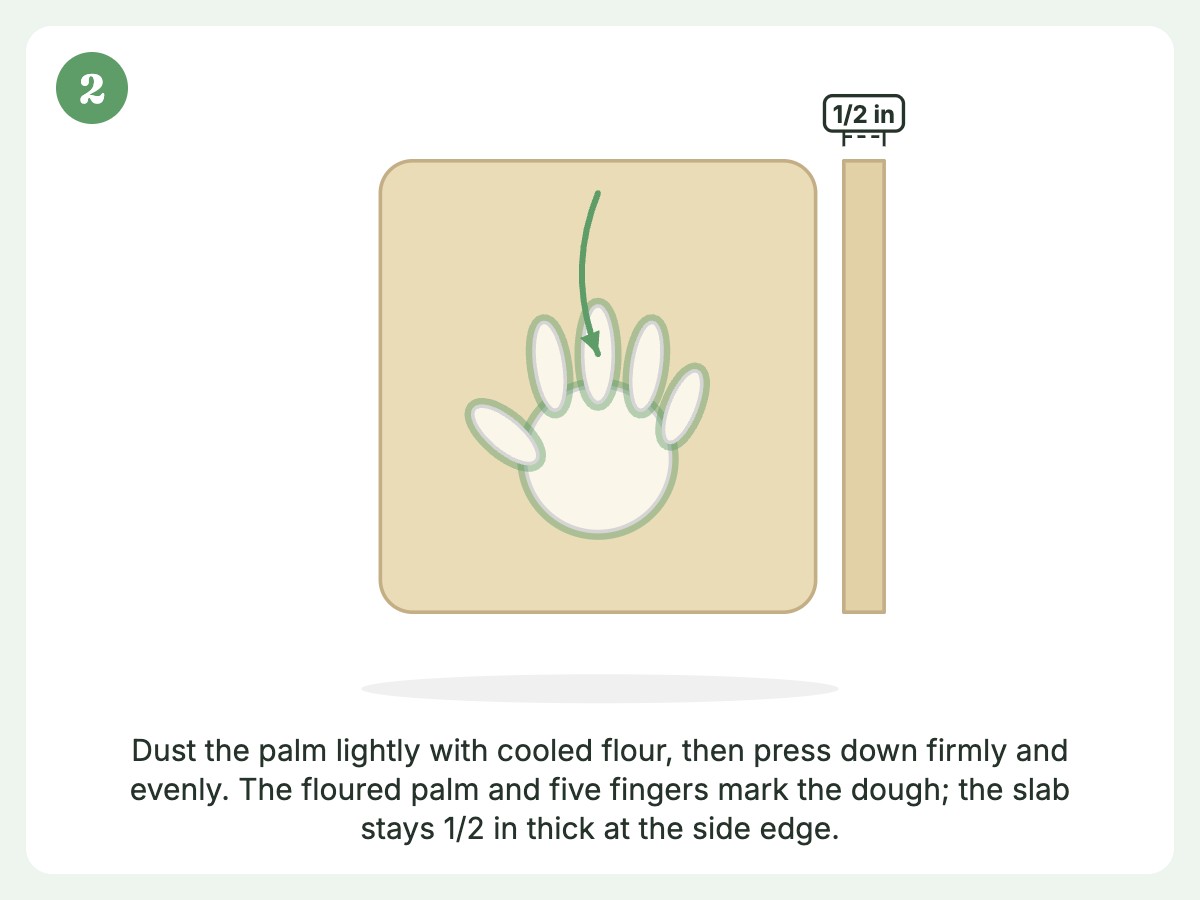
- Flour the palm. Dust your toddler’s palm lightly with cooled, heat-treated flour so the dough doesn’t stick.
- Press. Hold their wrist and press down firmly and evenly. Use the flat of your own hand over the back of theirs for a second, so every finger registers.
- Lift straight up. Don’t drag.
- Trim. Cut a rounded oval or heart around the print with a butter knife, so the fingers sit inside the shape with at least 1/2 inch of border. Do the cutting away from your toddler, and retire the ornament if a fingertip snaps.
- Punch the hole. Use a straw near the top, at least 1/2 inch from any edge.
Squirmy toddlers move, and the first print is rarely the best. Roll out a spare patch and do three attempts. Pick the best, and recycle the rest into the main ball.
For babies and young toddlers who clench their fists, gently press from the back of the hand and spread the fingers with your thumb. A relaxed hand after a snack or during a distraction (hand them a favorite toy in the other hand) helps a lot.
2. Footprint ornaments
Same method, but the dough needs to be larger (6 by 6 inches) and 1/2 inch thick. Footprints are easiest with a seated toddler, or press the dough up against their foot while they’re in a high chair. They look adorable cut into a heart or a rough oval.
Babies under 12 months shouldn’t handle salt dough. For a younger baby, use an ink-free print kit instead.
3. Thumbprint stars and trees
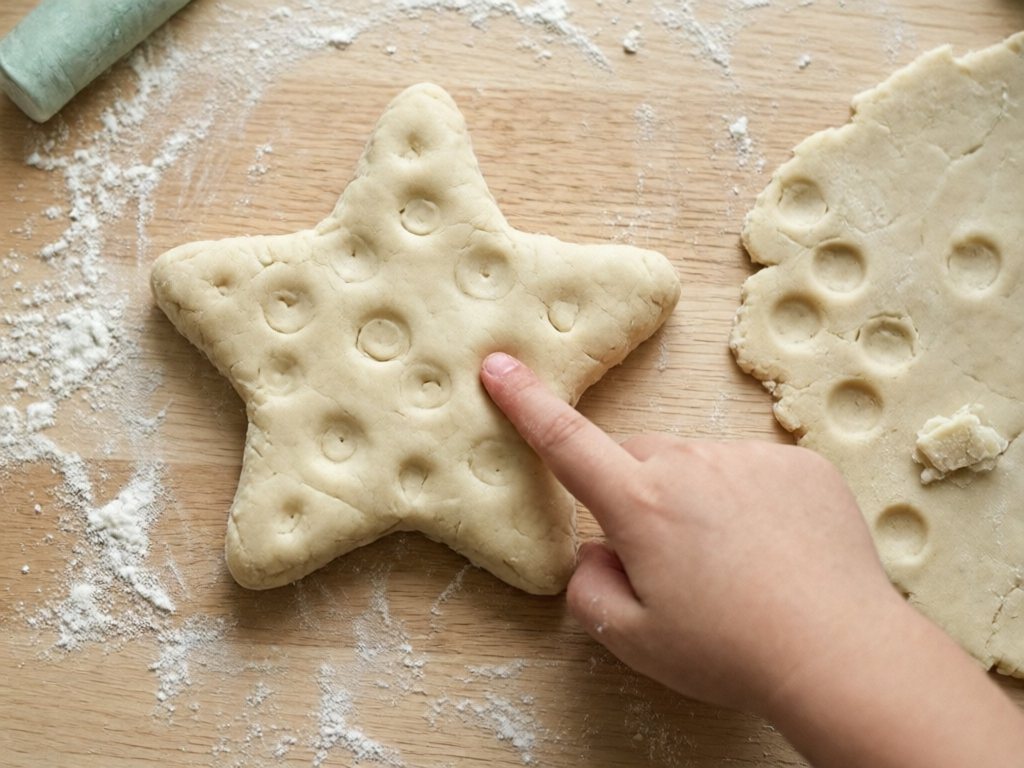
For the youngest crafters (around 12 to 18 months), this one is nearly foolproof. Cut a big, chunky star or tree shape (at least 3 inches) and round off the tips with your fingers, then hand your toddler the job of poking it with their thumb or finger. Each poke leaves a little dimple. There’s no wrong way to do it, and the finished ornament looks like deliberate texture.
TipKeep a spare patch of dough for practice pokes and prints first. Roll to 3/8 inch minimum for anything a toddler handles.
4. Cookie-cutter pressing
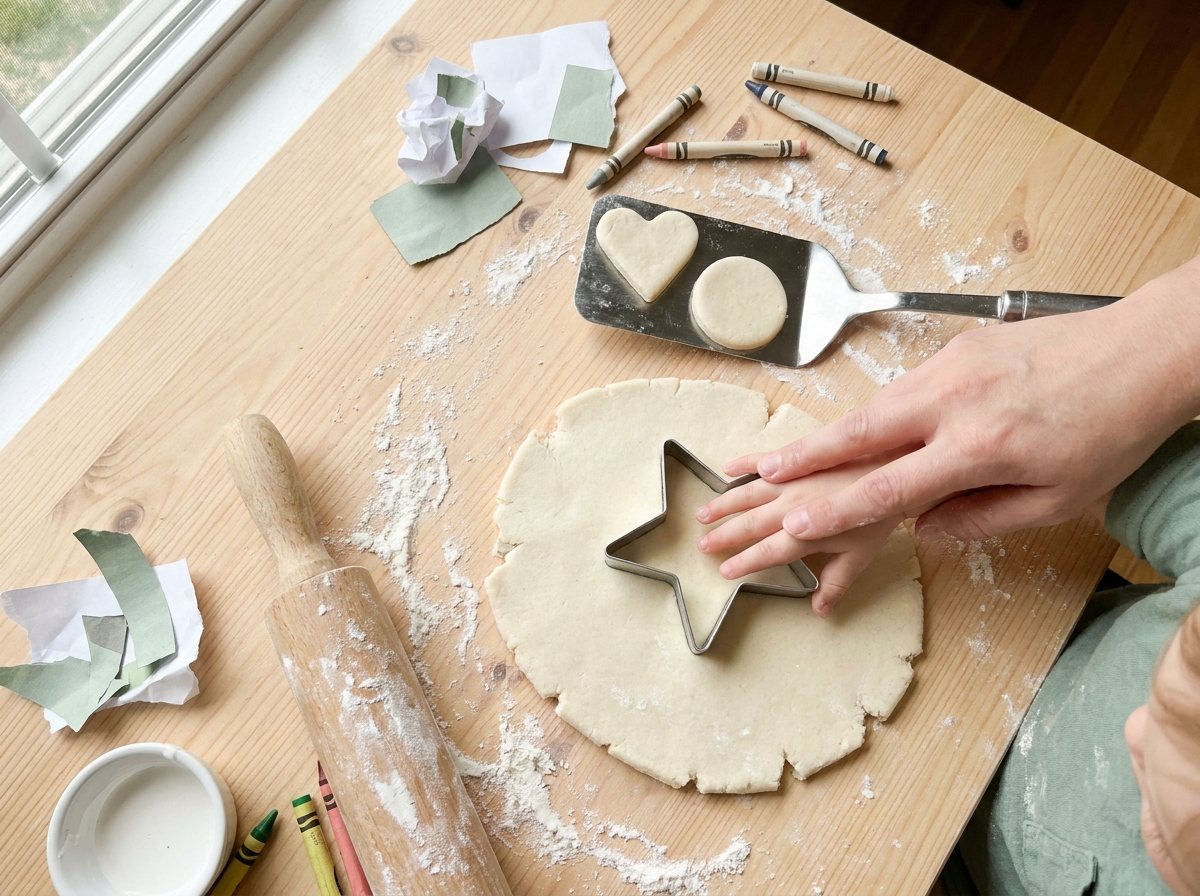
Roll the dough to 3/8 inch, and let your toddler push a big cookie cutter in, wiggling it a bit. You pull away the extra dough and lift the shape. Chunky shapes with rounded tips work best: stars, trees, hearts, circles. Pinch any sharp point round before baking, and skip cutters with thin arms, legs, or spikes, since those snap off (and become small, loose pieces).
5. Texture-stamping
Give your toddler anything with a pattern and let them press it into the dough. Good options:
- The bottom of a toy truck’s tires
- A blunt toddler fork or a patterned toy instead of a sharp-tined fork (stay within arm’s reach)
- A potato masher
- A textured rolling pin
- A leaf (for a veined impression; the leaf sun print science activity is a nice follow-up for the same fall obsession)
- A chunky plastic animal’s feet
Lift the object straight up, and you’ve got a bumpy, surprising ornament. Toddlers are mesmerized by the cause and effect of “I pressed it and it left a pattern.”
6. Name-and-year ornaments
Skip these in the toddler’s hands. Wait until your toddler has left the table. Then use the blunt end of a pencil to write the year and your child’s name on the back of the soft dough, just before it goes in the oven. Put the pencil out of reach right away. Or skip tools and write the name with a marker after baking. Baked and painted, these become the most treasured ones in ten years.
Which ones fit which age?
| Ornament | Best age | Adult help needed | Mess level |
|---|---|---|---|
| Thumbprint star or tree | 12–18 months | Low | Low |
| Handprint | 12 months and up | High (needs a steady press) | Medium |
| Footprint | 12 months and up | High | Medium |
| Texture stamping | 18 months and up | Low | Medium |
| Painted ornament | 18 months and up (sponge or fingers) | Medium | High |
| Cookie-cutter pressing | 2–3 years | Medium | Medium |
Oven-Bake Timing Chart (By Thickness)
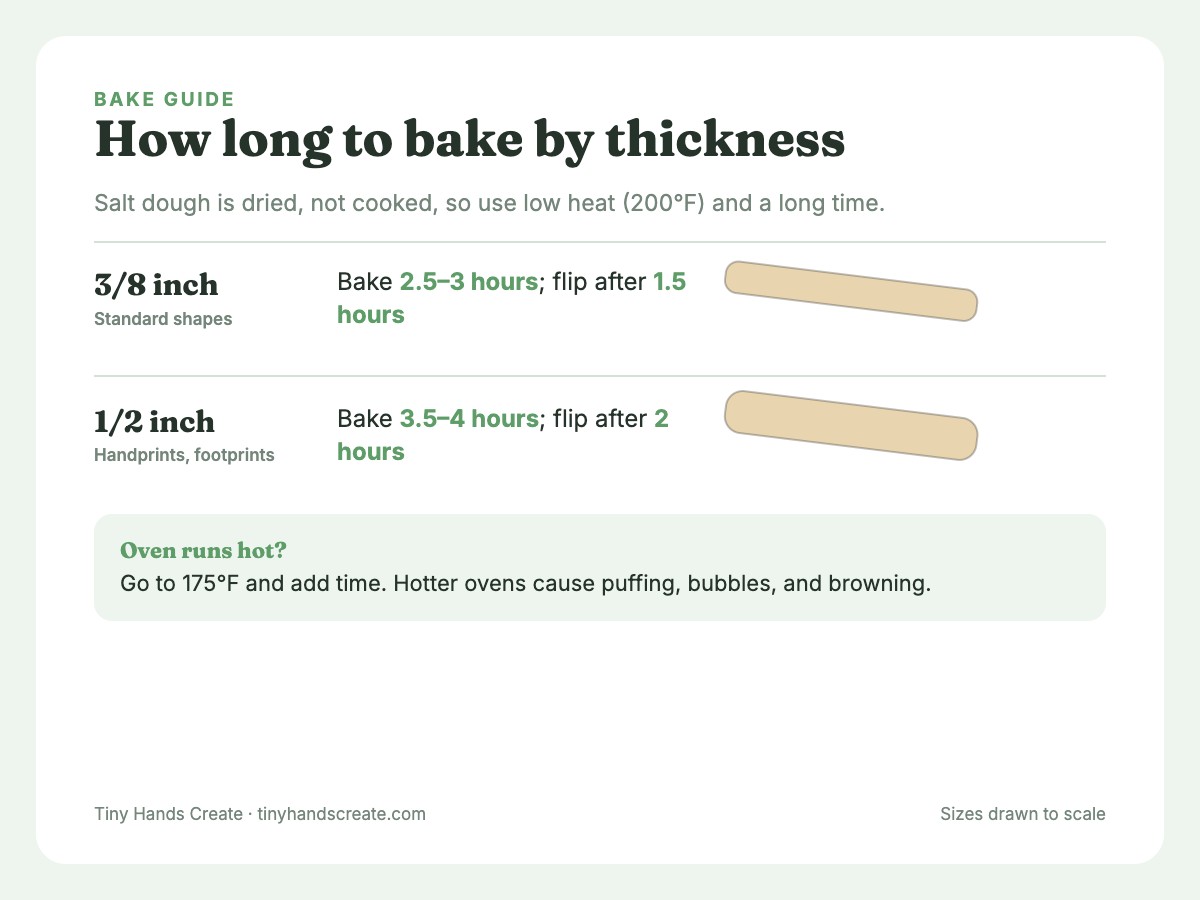
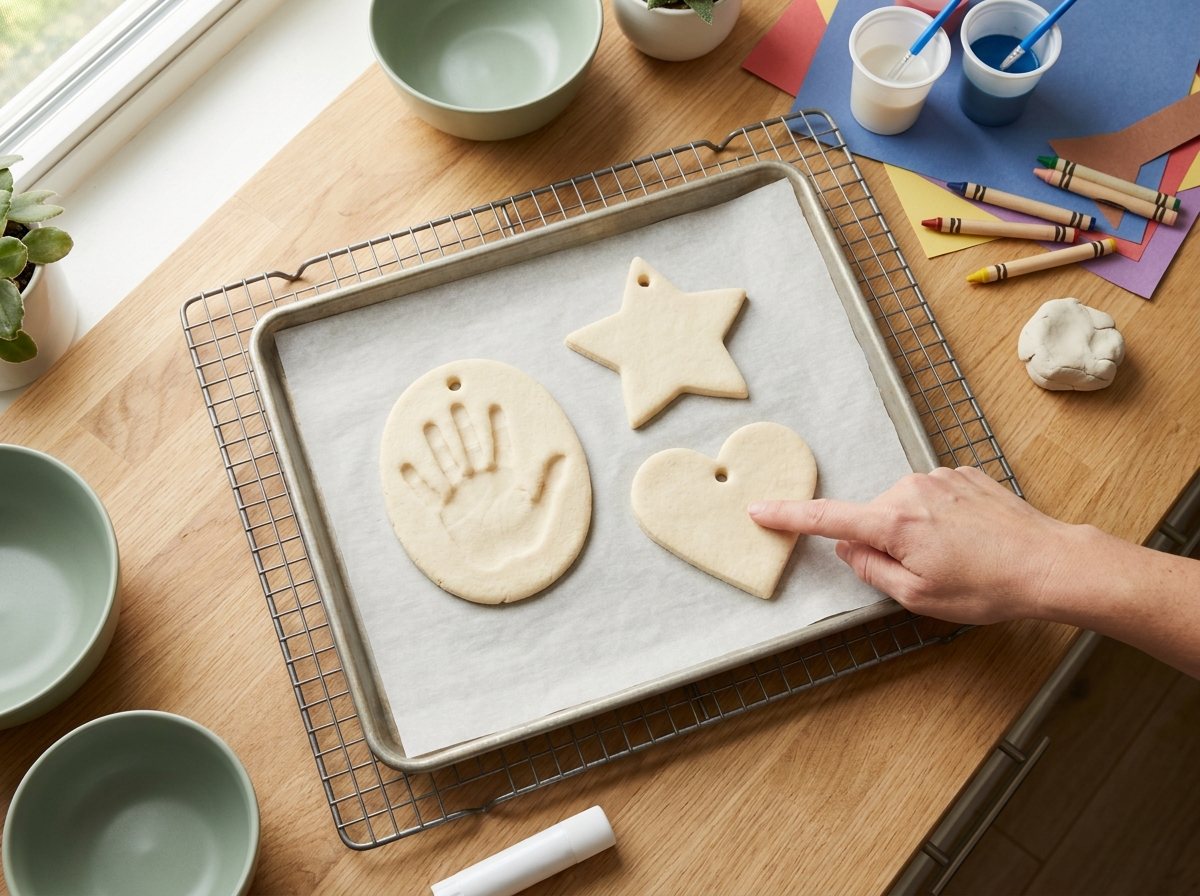
This is the heart of the post, and the part most recipes get vague about. Salt dough doesn’t bake like cookies. You’re drying it out, not cooking it, which means low heat and a long time. Thickness is what matters most, so measure yours.
Set your oven to 200°F (95°C) and use a baking sheet lined with parchment. If your oven runs hot, go to 175°F and add time. Hotter ovens cause puffing, bubbles, and browning. I leave out a 1/4-inch row on purpose: this dough is crumbly, and thin pieces shed bits toddlers can swallow. I skip anything thicker than 1/2 inch too, since it ties up the oven for most of a day and handprints don’t need it.
Safety firstKeep your toddler out of the kitchen or behind a gate while the oven is on, and use an oven-door guard if you have one. Stay home and awake the whole time the oven is on. Set a timer plus a phone alarm, tape a note to the oven door, and use oven mitts. Never leave ornaments in a turned-off oven overnight, since someone may preheat it.
| Ornament thickness | Typical use | Total bake time at 200°F | When to flip |
|---|---|---|---|
| 3/8 inch (10 mm) | Standard 3–4 inch shapes | 2.5–3 hours | After 1.5 hours |
| 1/2 inch (12 mm) | Handprints, footprints | 3.5–4 hours | After 2 hours |
How to know it’s done
- Tap it. It should sound hard and dry, like tapping a ceramic tile. A dull, soft thud means there’s moisture left inside.
- Check the middle. The center is the last part to dry. Flip it over and press on the back. There should be no give.
- Cool first, then check for cool spots. Use mitts to move the tray to a rack and wait several minutes before tapping or touching, since hot ornaments burn. Once cool, a damp ornament feels cooler than a dry one. If any part feels cool or soft, bake another 30 minutes.
- Look for color. The surface should stay pale. If edges are browning, drop the temperature or tent a piece of foil over the sheet.
If an ornament seems done on the outside but still soft inside, keep baking and check every 30 minutes. If you have to stop, take the tray out, cool the ornaments on a rack, and finish baking the next day.
Fixing common bake problems
| Problem | Likely cause | Fix |
|---|---|---|
| Puffy bubbles on the surface | Oven too hot, or air pockets in dough | Lower temperature next time; prick bubbles with a pin and press down early in baking |
| Cracks across the ornament | Dried too fast, or the dough was too thin | Use a lower temp and make it at least 3/8 inch thick next time. Retire the cracked one, since cracks shed pieces |
| Edges brown or curl | Too hot, or too close to the heating element | Lower the rack, tent with foil, drop to 175°F |
| Soft center after hours | Ornament too thick, or oven runs cool | Keep baking and check every 30 minutes; if you stop, cool them and finish the next day |
| Warped or curved shape | Uneven drying | Flip regularly; bake on a wire rack for airflow |
A Nap-Friendly Baking Schedule
Toddler time doesn’t run on craft-blog time. “Bake for 4 hours” is a fantasy when your kid naps for 90 minutes and wakes up hungry. Most of the bake is hands-off, so split the work into small active windows and let the oven do the rest. Here are two schedules that fit around real toddler days.
Safety firstKeep the toddler out of the kitchen whenever the oven is on or the tray is hot. Do flips while another adult has them, or while they are asleep or behind a gate. These plans keep an adult home and awake the whole time the oven runs, so they are not for errands or a nap of your own.
Option A: One-day handprint plan (1/2-inch ornaments)
| Time | What’s happening | Active? |
|---|---|---|
| 9:00 a.m. | Mix dough with your toddler | 10 minutes |
| 9:20 a.m. | Press 1/2-inch handprints; poke holes | 15 minutes |
| 9:45 a.m. | Ornaments go into a 200°F oven | 5 minutes |
| 11:45 a.m. | Flip with mitts while the toddler is gated out of the kitchen or with another adult | 3 minutes |
| 12:30 p.m. | Nap starts; you stay home and awake while the oven runs, timer and phone alarm set | None |
| 1:45 p.m. | Turn off the oven; use mitts to move the tray to a rack | 5 minutes |
| After nap | Cool fully and check for dryness; store out of reach | 2 minutes |
Option A is for 1/2-inch handprints only. If you also made 3/8-inch shapes, they are done earlier, at about 3 hours, so take them out then.
Option B: Two-day plan (the lower-stress one)
- Day 1, morning: Mix, shape 3/8-inch ornaments, and punch holes. Bake them 2.5 to 3 hours around the nap, then cool them on a rack.
- Day 2, morning: Mix a fresh batch, press the handprints, and bake 3.5 to 4 hours at 200°F, flipping at 2 hours while the toddler is out of the kitchen. Then turn off the oven and cool them on a rack.
- Day 2, nap time: Once the ornaments are cool and fully dry and hard, sand any rough edges and set them out for paint.
- Day 2, afternoon: Paint for 10 minutes. An adult seals during a later nap, once the paint is dry.
I’m a fan of Option B for anyone with a spirited toddler. Splitting it up means no step is more than 15 minutes of active effort, and you aren’t racing the clock.
Short on oven time? The air-dry shortcut
Thin ornaments (3/8 inch) can air dry on a rack in a dry room for several days. Flip them once a day. It’s slower and more prone to warping, but it needs zero oven time. Thicker ornaments really do need the oven, because the center stays damp for days and can get moldy.
Safety firstDrying dough stays soft, salty, and tempting for days. Keep the rack on a high shelf or in a closed room, out of reach of children and pets, for the whole drying time.
After several days, run the same checks as the oven batch: tap it, press the center from the back, and feel for cool spots. If your room is humid or the center still feels soft, finish it in a 200°F oven and check every 30 minutes. If it smells musty or shows spots or fuzz, throw it out. I do this check again right before painting or sealing.
Painting and Decorating (Toddler-Style)
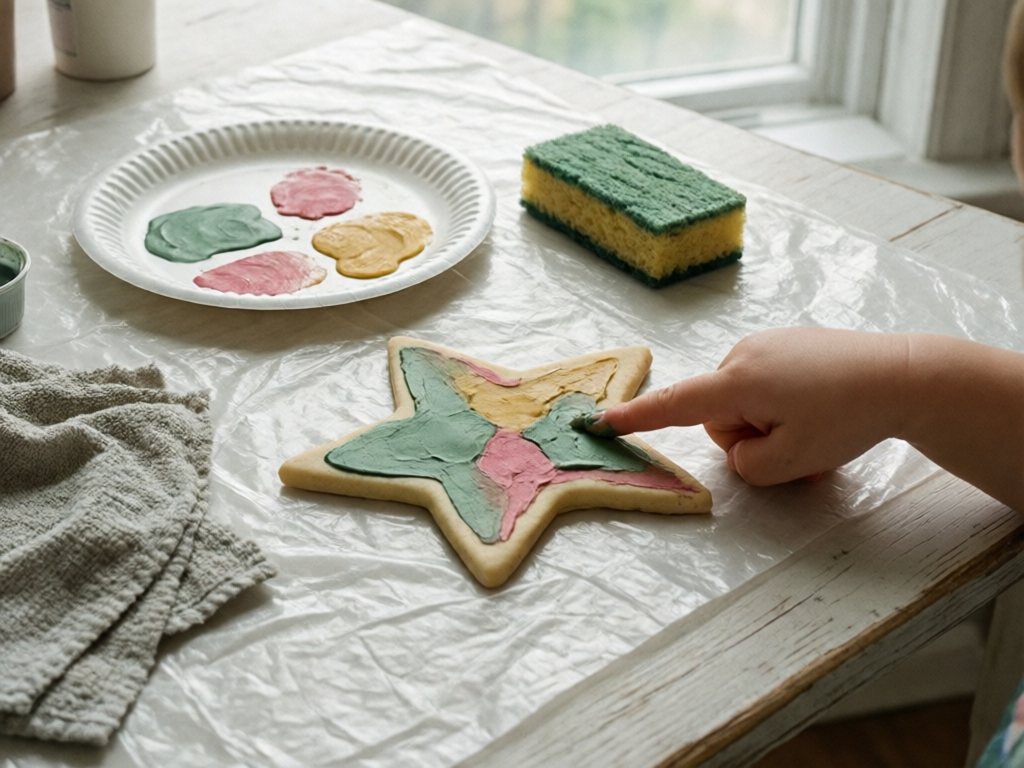
Once the ornaments are baked (or air-dried), cooled, and fully dry and hard all the way through, it’s painting time. Before you set out paint, tap each one and press the center from the back. A soft or cool spot means it goes back in a 200°F oven first. A musty smell, spots, or fuzz can mean mold, so that one goes in the trash. Sealing or painting damp dough traps moisture and invites mold.
Setting up for success
- Cover the table with a plastic tablecloth or old sheet, and put your toddler in a smock or an old t-shirt.
- Limit the colors to two or three. Toddlers will mix everything into brown anyway, and starting with limited colors keeps the results prettier.
- Squeeze small puddles of paint onto a paper plate, not a full cup (cups get dumped).
- Use big brushes or sponges. Tiny brushes frustrate small hands. A sponge dab is easy from about 18 months.
- Keep it short. 10 minutes is a good session. When the paint starts going on the floor or the toddler, you’re done.
Finger painting is often the best technique. Fingers are what they want to use, and a thumbprint of red on a white star is perfectly charming. Process matters more than polish here. If you want more ideas along those lines, the mess-free art post and the process-art ideas are great for building that “it’s about the doing” mindset.
A tip for handprint ornaments
Don’t paint the handprint itself too heavily, or you’ll lose the detail. Paint the background in one color and leave the hand raised and bare, or paint the hand a contrasting color with a light touch. An adult can add the child’s name and year in marker once it’s dry.
Adult-only finishing
Anything with a fine line, glitter, or small details is adult territory. Skip glitter completely for the under-3 set. It ends up in mouths, eyes, and carpets for months.
Sealing
Salt dough absorbs moisture from the air, so an unsealed ornament can soften and get musty within a year or two. Seal every ornament, but only once the paint is dry and the ornament still passes the tap-and-press check.
- Brush-on method (adult applies): Use a water-based sealer labelled non-toxic (ASTM D-4236). Brush a thin coat on the front, let it dry, then do the back and edges. Two coats are better than one thick coat. Non-toxic does not make an ornament edible or safe to mouth.
- Spray method (adult only): Use a clear acrylic spray outdoors, away from kids and pets. Keep them away until the ornaments are fully cured (check the can, often 24 hours).
Sealed ornaments should be fully cured and no longer tacky before they go anywhere near the tree or your toddler.
Hanging, Storing, and Gifting
Hanging safely
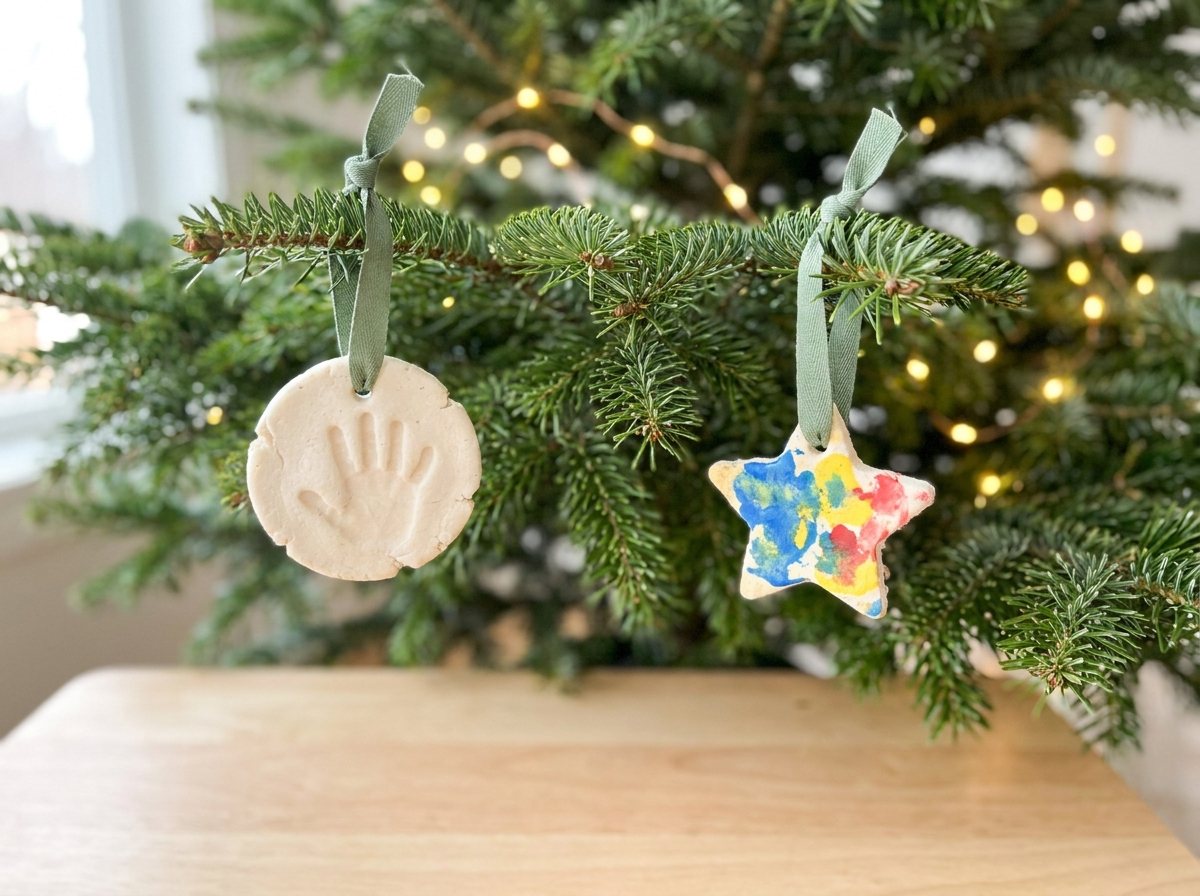
- Thread a ribbon through the hole and tie a short, secure loop (under 4 inches), with cut ends trimmed.
- Hang ornaments on upper branches, well out of toddler reach, and away from pets.
- Skip long strings or cords, which are a strangulation hazard for small children.
- Look at each ornament before hanging it. If one has cracked or lost a chunk, retire it.
Storing for next year
Wrap each ornament in tissue paper or a soft cloth, and store in a sturdy box in a dry place, not a damp basement or hot attic. Label the box with the year. Never stack them heavily, since the handprints are fragile at the thin points.
Gifting
Handprint ornaments are the sort of present grandparents will keep for decades. A few ideas:
- Write the child’s name, age, and year on the back.
- Wrap each in tissue and tuck it in a small box with a note.
- Pair with a small gift from the stocking stuffers for toddlers list for a complete, low-cost present.
- Make a “set” over several years, with a new handprint each Christmas, so you can watch the hand grow.
Toddler Salt Dough Mess and Realistic Expectations
This isn’t a calm, Instagram-worthy activity. Here is what happens in a typical house.
- Flour gets everywhere. On the floor, the chair, the dog, and in your hair. Plan on a quick sweep afterward.
- Your toddler will lose interest quickly. Five to fifteen minutes of hands-on time is about right, and that’s fine.
- Some ornaments won’t look “right.” A smooshed star is still a star made by tiny hands. The charm is in the imperfection.
- Mouthing may happen even with your guard up. Keep dough in small amounts, stay within arm’s reach, and move the dough away at the first taste. The lower salt does not make it safe. If they swallow a real mouthful, call Poison Control.
- The best part comes later. In January, when you take down the tree and see a tiny handprint on the box, it hits you.
Age-by-age expectations
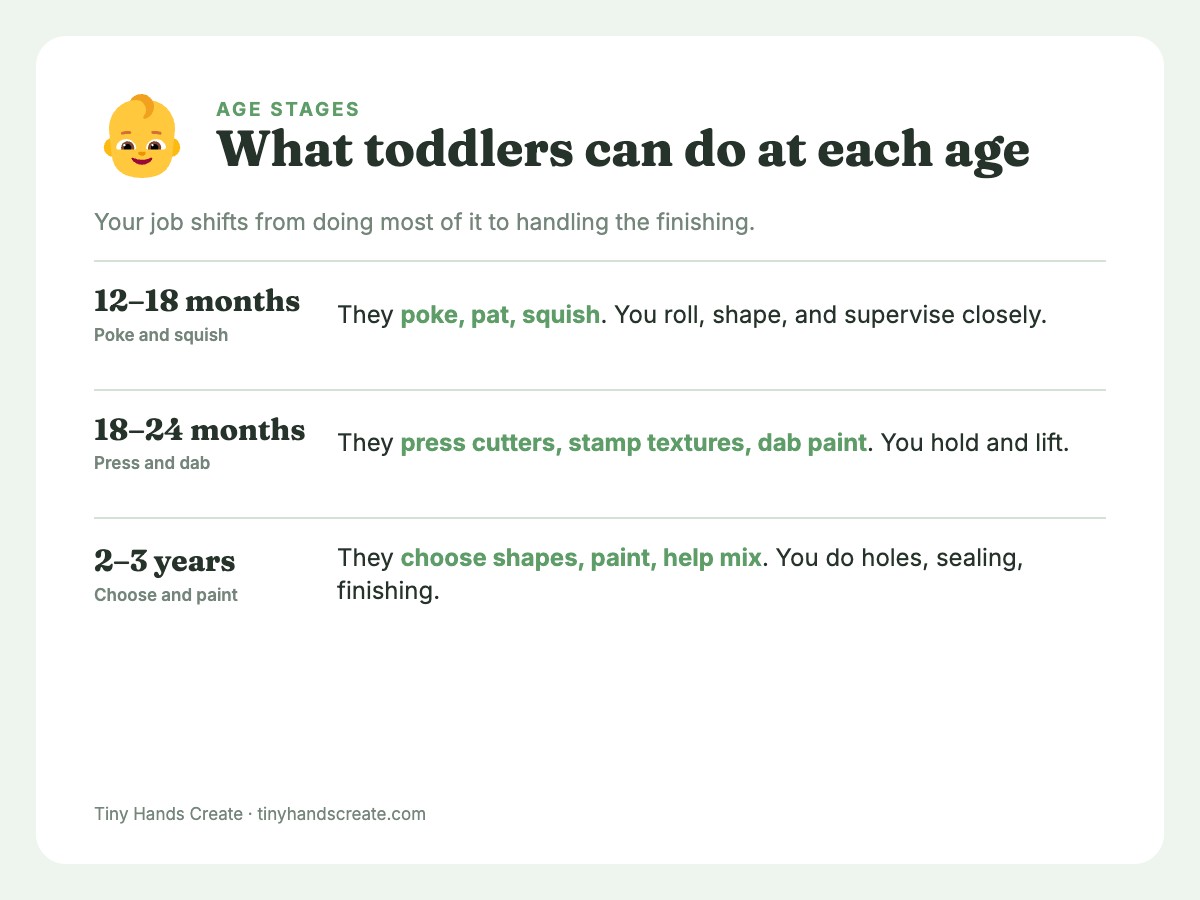
| Age | What they can do | What you do |
|---|---|---|
| 12–18 months | Poke, pat, squish; press a thumb | Most of the shaping, roll the dough, supervise closely |
| 18–24 months | Press cutters, stamp textures, dab paint | Hold the dough steady, lift shapes |
| 2–3 years | Choose shapes, paint with brushes, help mix | Handle holes, sealing, and finishing |
Troubleshooting: Quick Fixes
| Issue | What to try |
|---|---|
| Dough is too sticky | Add heat-treated flour a tablespoon at a time and knead |
| Dough is too dry or crumbly | Add water a teaspoon at a time |
| Toddler keeps tasting the dough | Stop, put the dough away, offer a snack and a drink, and try again another day. Call Poison Control (1-800-222-1222) if they swallowed a real mouthful |
| Handprint is blurry | Dust the hand with cooled, heat-treated flour; press straight down and lift straight up |
| Hole tore at the edge | Move the hole in at least 1/2 inch from the edge; poke with a straw before baking |
| Paint won’t stick | Make sure the ornament is cool and fully dry; wipe off flour dust first |
| Ornament feels soft after weeks | If it smells musty or shows spots or fuzz, throw it out. If it’s only damp, re-dry it in a 200°F oven, then seal both sides well |
Make Salt Dough Ornaments a Yearly Tradition
Salt dough ornaments are the sort of craft that gets better each year. By the third Christmas, your toddler will remember what’s coming and ask for “dough” in November. You’ll also have a row of tiny hands on your tree, each one a little bigger than the last.
If you’re looking for other seasonal ideas to go with this one, try the Thanksgiving handprint turkey craft earlier in the season, and a bin of air-dry clay projects for the colder months when everyone’s stuck inside. They use many of the same skills.
Frequently Asked Questions
Is salt dough safe for toddlers who put everything in their mouths?
It’s not food, and even the half-salt recipe is a poisoning risk if a child eats it. This recipe cuts the salt in half, keeps small add-ins out of the dough, and makes ornaments chunky so they are less likely to shed small pieces, but none of that makes tasting safe. Watch for vomiting, extreme thirst, unusual sleepiness, irritability, or seizures. Stay within arm’s reach the whole time, and call Poison Control at 1-800-222-1222 (US) for any real mouthful of dough or ornament. If unsure, call. If your toddler is a determined eater, save salt dough for later. Homemade playdough is salty too and not food, so try an ink-free print kit, or a handprint on paper made with washable, non-toxic paint (adult-supervised, hands washed right afterward), instead.
How thick should toddler handprint ornaments be?
About 1/2 inch is the sweet spot. That’s thick enough to hold up when lifted and hung, and thick enough for a clear print, but not so thick that it takes all day to dry. At 200°F, plan on roughly 3.5 to 4 hours, flipping once about halfway. Don’t go thinner than 3/8 inch, since thin pieces crack and shed crumbs, especially with the lower-salt dough.
Can I make salt dough ornaments without an oven?
Yes, with a caveat. Thin ornaments (about 3/8 inch) can air dry on a rack in a dry room for several days, flipping once a day. Keep them on a high shelf or in a closed room, out of reach of children and pets, the whole time. They may warp a little, but they work. If the room is humid, or the center still feels soft after several days, finish them in a 200°F oven. Throw out any that smell musty or show spots. Thick ornaments such as handprints really need the oven, because the center stays damp for days and can mold or never fully harden. If you don’t want to use the oven, press a handprint into a ball of air-dry clay instead.
Why did my ornaments puff up or bubble in the oven?
Usually the oven was too hot. Salt dough should dry slowly at around 200°F, and a higher temperature turns trapped moisture into steam and makes bubbles. Air pockets from rushed kneading can cause the same thing. Next time, lower the temperature to 175–200°F, knead thoroughly, and press down any early bubbles or pop them with a pin in the first 20 minutes of baking.
How long do salt dough ornaments last?
Properly dried and sealed on both sides, they can last for many years, and plenty of families display the same ones for decades. The enemy is moisture, so seal them well, wrap them in tissue, and store them somewhere cool and dry rather than a damp basement or a hot attic. If one feels a little soft but smells fine and shows no spots, re-dry it in a 200°F oven and reseal it. If it smells musty or shows spots or fuzz, throw it out.
Do I have to paint them?
No. Plenty of lovely ornaments are left natural and just sealed, or tinted with food coloring kneaded into the dough before shaping. A plain pale handprint with the name and year on the back looks classic. Painting is a bonus for toddlers who enjoy it, not a requirement.
How far ahead should I make them?
Start in early to mid-November, which leaves time for baking, painting, drying, and sealing without rushing, and it gives you a buffer if a handprint attempt goes sideways. If you’re making gifts for grandparents, give yourself a few extra weeks for shipping. The ornaments themselves can be made any time, since they keep well once sealed.