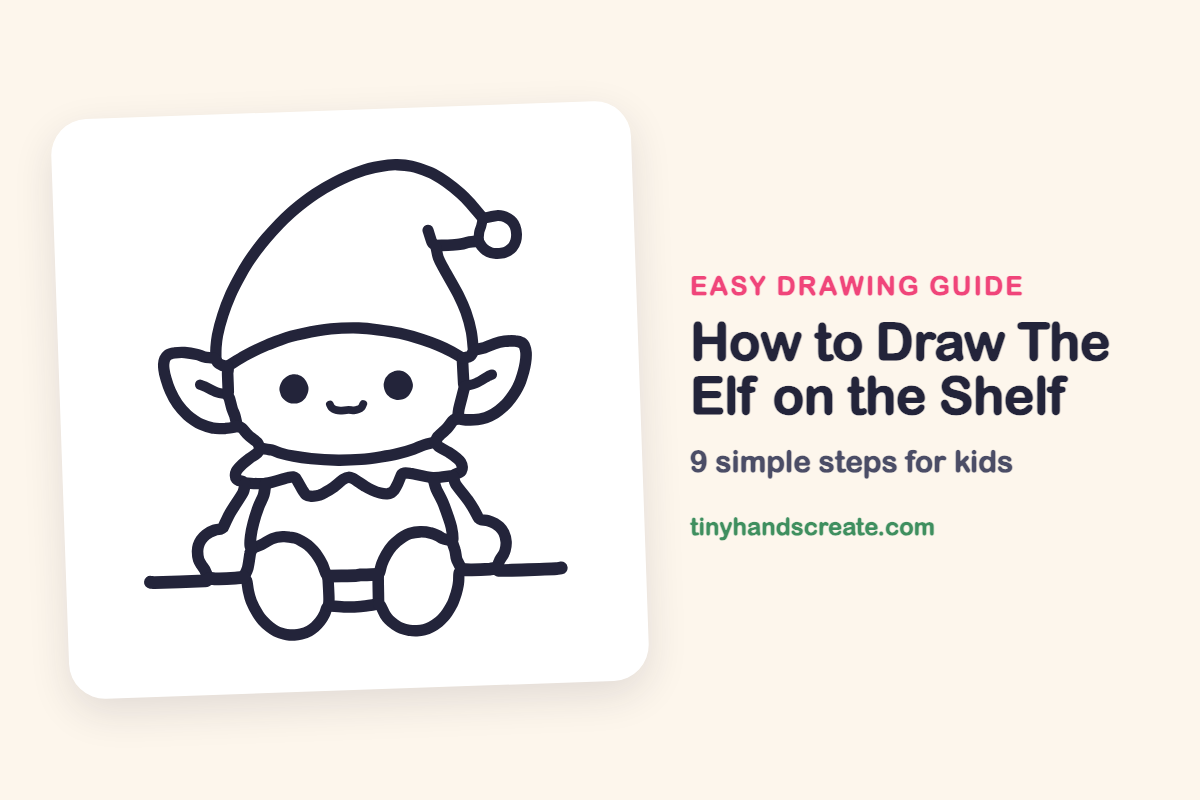
How to Draw The Elf on the Shelf (Easy Step by Step)
Learn how to draw The Elf on the Shelf step by step using simple foundational shapes like cones, ovals, and ruffles.
- Build your drawing starting with simple geometric shapes.
- Use a cone for the tall floppy hat and a rounded shape for the head.
- Sketch ovals for the legs and finish with a wavy ruffle collar.
This post contains affiliate links. As an Amazon Associate I earn from qualifying purchases.
The Elf on the Shelf is a cheerful little helper with a tall floppy hat, big pointy ears and a sweet smile. The whole drawing is built from simple shapes: a cone for the hat, a rounded shape for the head, ovals for the legs and a wavy ruffle for the collar.
- Easy
- 15 minutes
- 9 steps
You need: paper, a pencil, an eraser, and crayons or markers for coloring.
Start drawingIn this article (7 sections)
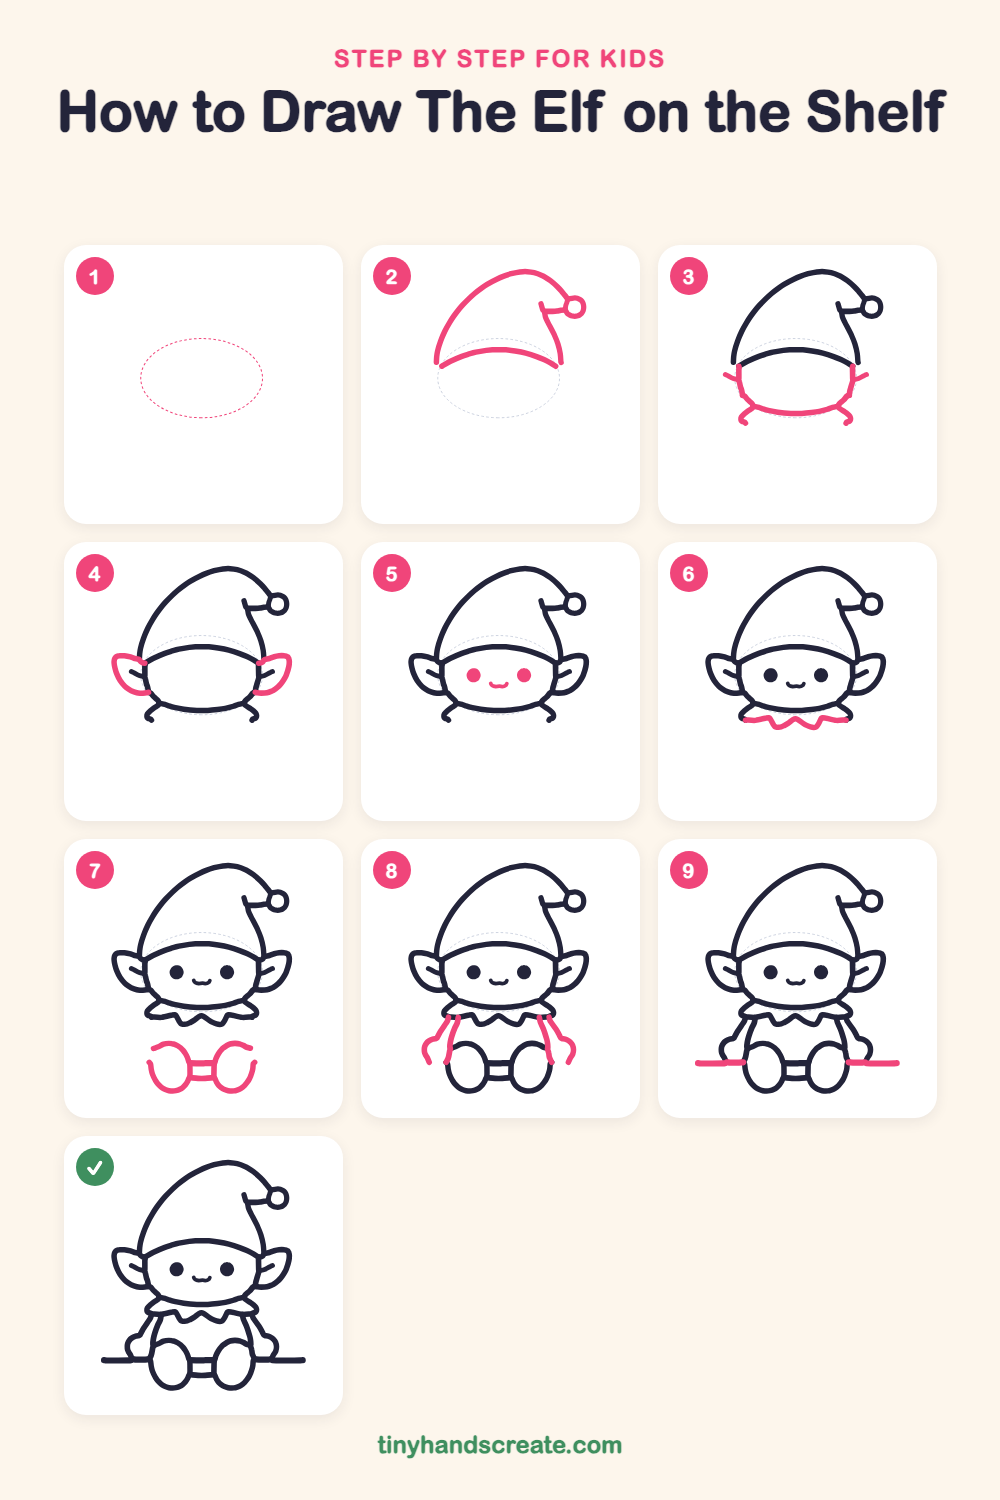
How to draw The Elf on the Shelf step by step
How to Draw The Elf on the Shelf · tinyhandscreate.com
Step 1: Guide shapes
Lightly sketch this oval. It only shows where the big parts go, so press softly. You will erase it at the end.
Step 2: The pointy hat
Draw a tall, curvy cone like a party hat, with a curved line across the bottom for the brim. Let the tip bend over to the right and finish it with a little round pom-pom circle.
Step 3: The round head
Under the hat brim, draw a wide rounded face. Start the sides at the ends of the brim and join them with a smooth curve for the chin. Add a tiny curl at each bottom corner.
Step 4: Pointy ears
Draw a leaf-shaped ear on each side of the head, with the point sticking out and up. Add a short curved line inside each ear.
Step 5: Cute face
Draw two round dots for eyes, set wide apart in the middle of the face. Add a tiny curved smile between them.
Step 6: The wavy collar
Under the chin, draw a ruffled collar with a wavy, scalloped edge. Start at one bottom corner of the head and wiggle across to the other.
Step 7: Two round legs
Below the collar, draw two big ovals side by side for the legs. Join them with a short band in the middle, and add a small curl at the top of each oval.
Step 8: Body and arms
From each end of the collar, draw lines curving down to the leg on that side to make the tummy. Then add an arm on each side, with a small round hand at the bottom.
Step 9: The shelf
Draw a long straight line on each side of the elf, starting where it touches the legs and hands and going out to the edge. This is the shelf the elf is sitting on.
All done!
Erase the guide shapes, go over your lines, then color it in.
Finished your Elf on the Shelf? Keep the pencils out and learn how to draw SpongeBob SquarePants or how to draw Cinderella next.
Tips for drawing The Elf on the Shelf
- Draw the hat first and keep the brim line gentle. The head then fits right under it, so no lines get crossed.
- The wavy collar is the trickiest part. Make the little waves in a row and try to keep them about the same size.
- Draw both legs as ovals before you add the body sides, so the body lines have a clear place to stop.
Free Elf on the Shelf coloring page
Want to go straight to coloring? Open this Elf on the Shelf coloring page at full size and print it. It is the same drawing you just learned, with clean lines ready for crayons or markers.
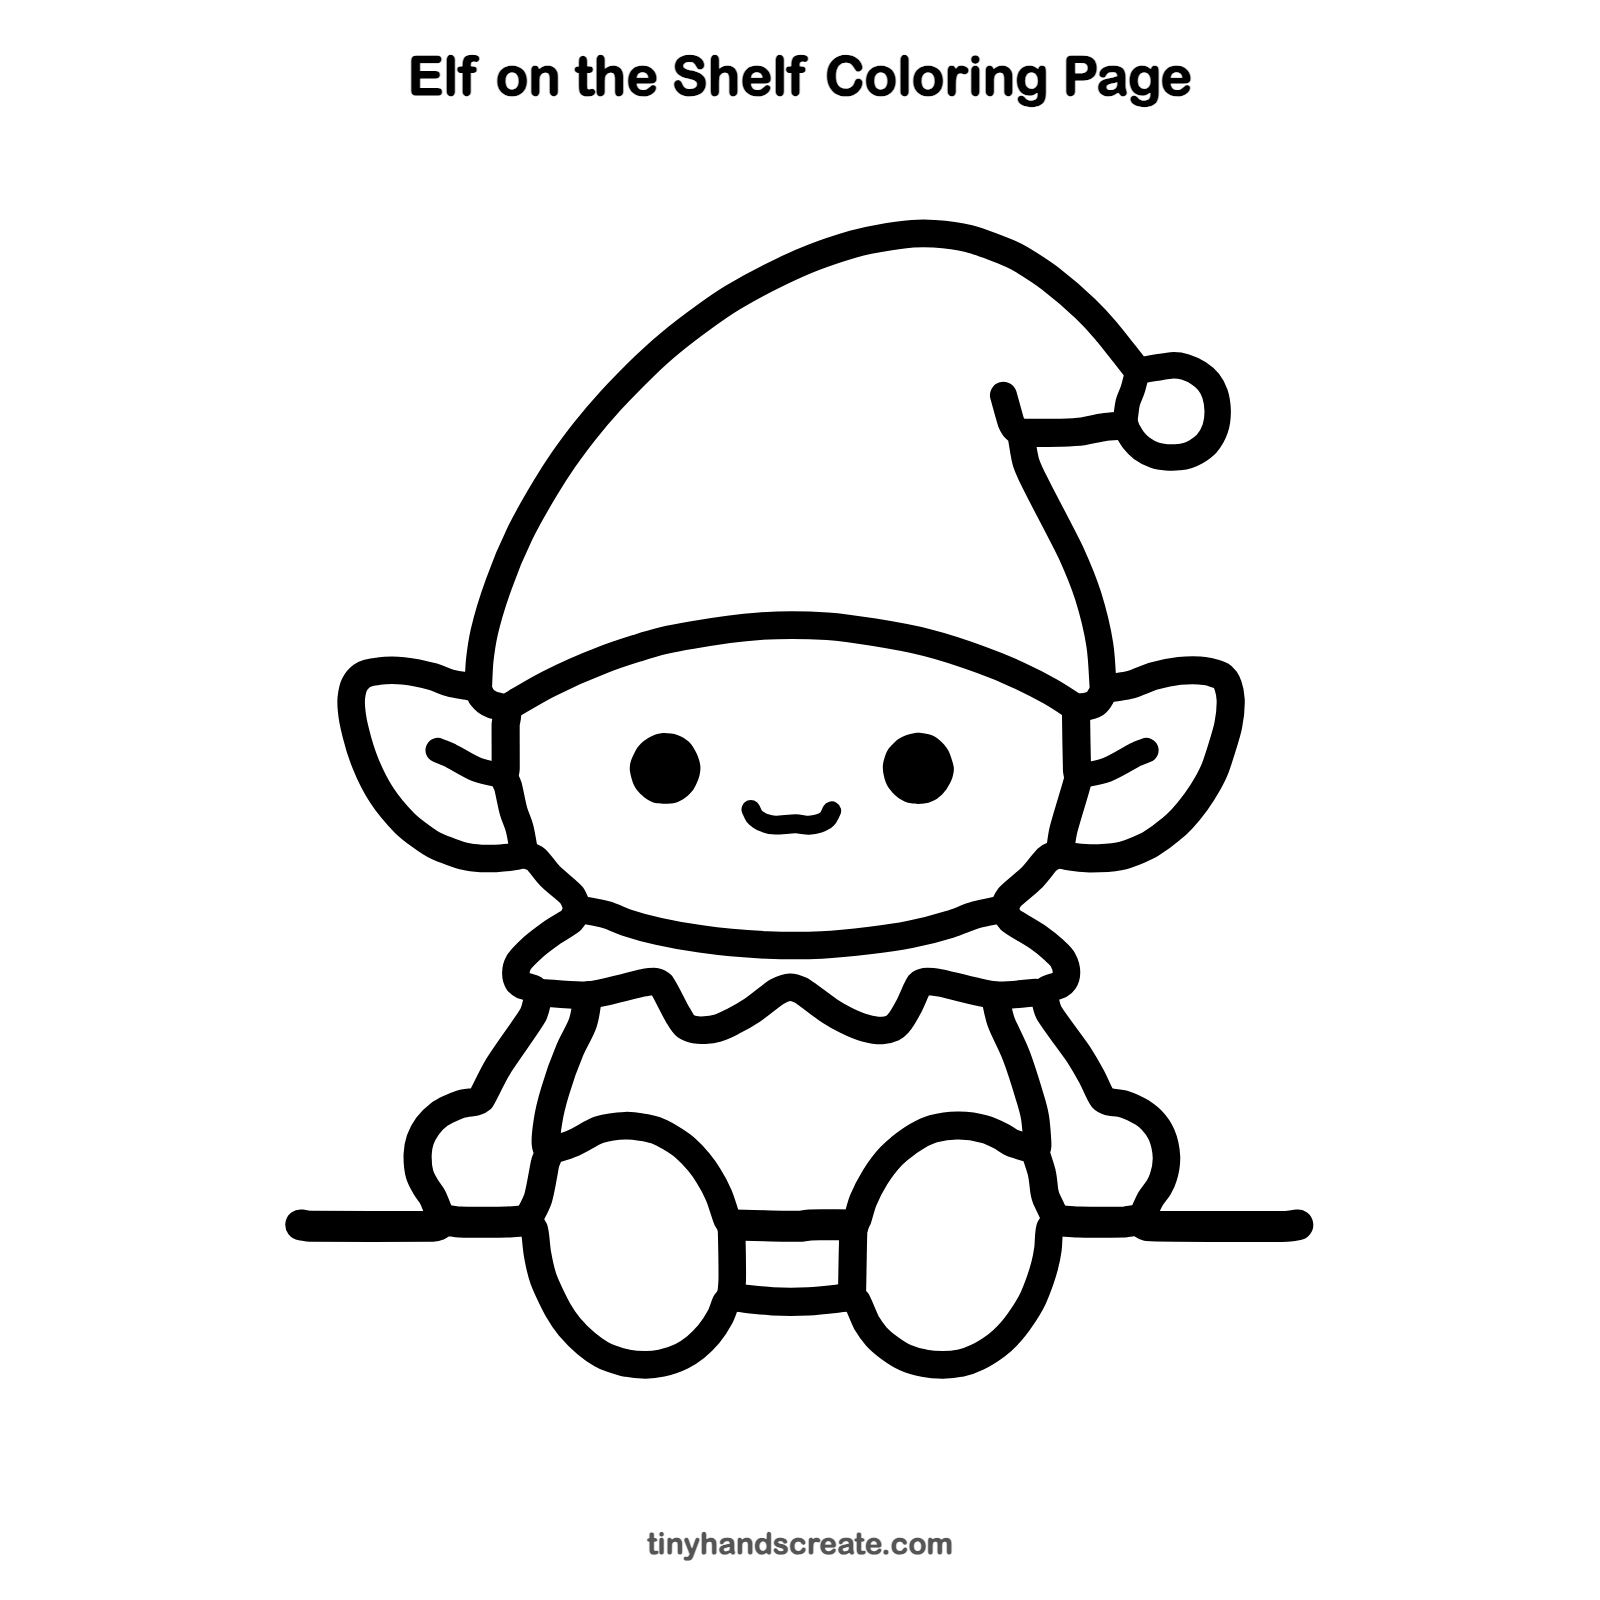
How to color your Elf on the Shelf drawing
A red hat and red collar with green clothes look classic, with pale peach skin on the face and ears. For a twist, make a rainbow elf with a striped hat or a hat covered in sparkly dots.
Elf on the Shelf fun fact for kids
The Elf on the Shelf started as a picture book published in 2005, and the story says the elf flies to the North Pole each night to tell Santa how the day went.
Questions about drawing The Elf on the Shelf
What shapes do I need to draw the Elf on the Shelf?
You need a cone for the hat, a rounded shape for the head, two ovals for the legs and a wavy line for the collar. Two leaf shapes make the ears.
How do I make my elf look cuter?
Place the eyes wide apart on the face, and keep the smile small. Big round ears and a floppy hat tip also add lots of charm.
Where should I draw the shelf?
Draw it last as a long straight line on each side of the elf. Start each line where it touches the legs and hands so the elf looks like it is really sitting on it.
More easy character drawings
 How to Draw SpongeBob SquarePants
 How to Draw Cinderella
 How to Draw Harry Potter
 How to Draw Grogu (Baby Yoda) From The Mandalorian
 How to Draw a Tiger Cub
 How to Draw a Water Buffalo
See all easy character drawings or browse every easy drawing guide for kids.
This is an unofficial fan-art drawing guide. The Elf on the Shelf and related names are trademarks of CCA and B. Tiny Hands Create is not affiliated with or endorsed by CCA and B.