How to Draw a Tourist (Easy Step by Step)
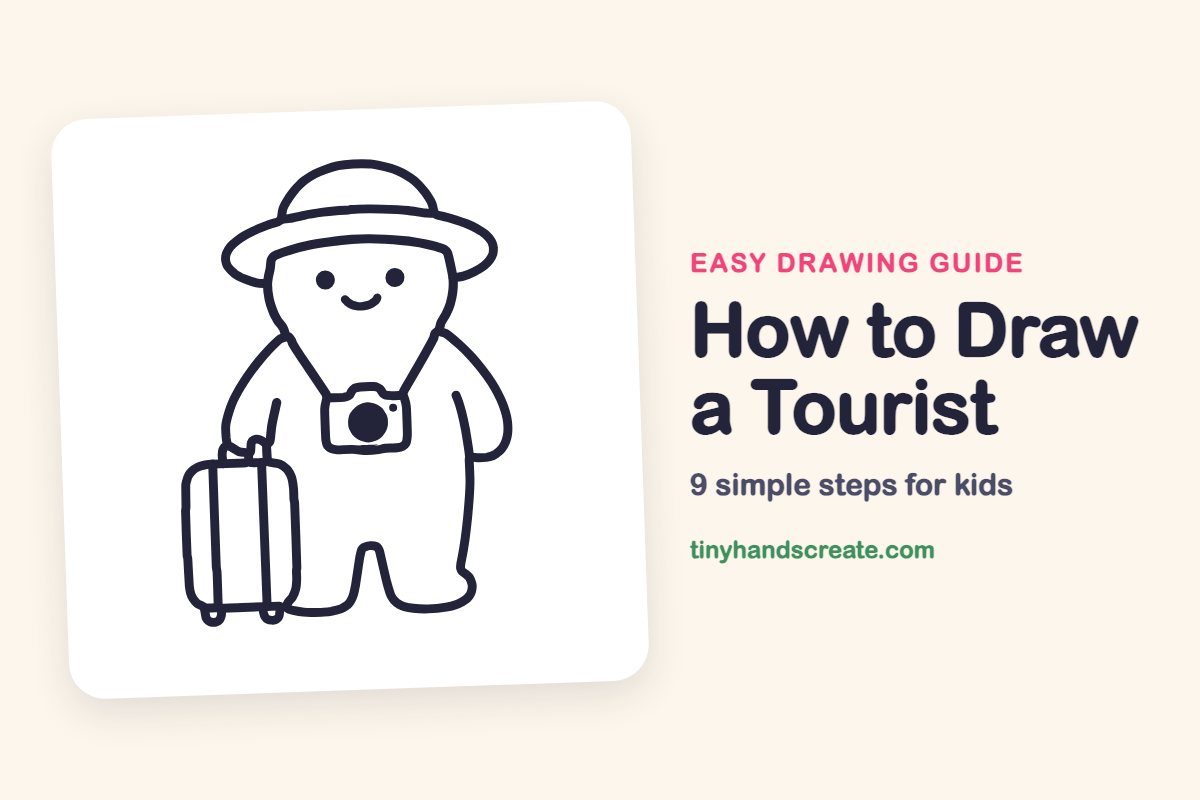
Learn how to draw a friendly tourist character using easy step-by-step instructions. You'll use simple shapes like ovals, circles, and rectangles to create a fun figure complete with a sun hat, camera, and suitcase.
- Build your tourist drawing from simple shapes like ovals and circles.
- Incorporate details such as a sun hat, camera, and suitcase.
- Follow easy step-by-step instructions, perfect for beginners.
This post contains affiliate links. As an Amazon Associate I earn from qualifying purchases.
This little tourist is ready for an adventure, with a big sun hat, a camera, and a suitcase. It is built from simple shapes: ovals, circles, rounded rectangles, and a few curved lines. Even beginners can make it look friendly and fun.
- Medium
- 15 minutes
- 9 steps
You need: paper, a pencil, an eraser, and crayons or markers for coloring.
Start drawing


In this article (7 sections)
How to draw a tourist step by step
How to Draw a Tourist · tinyhandscreate.com
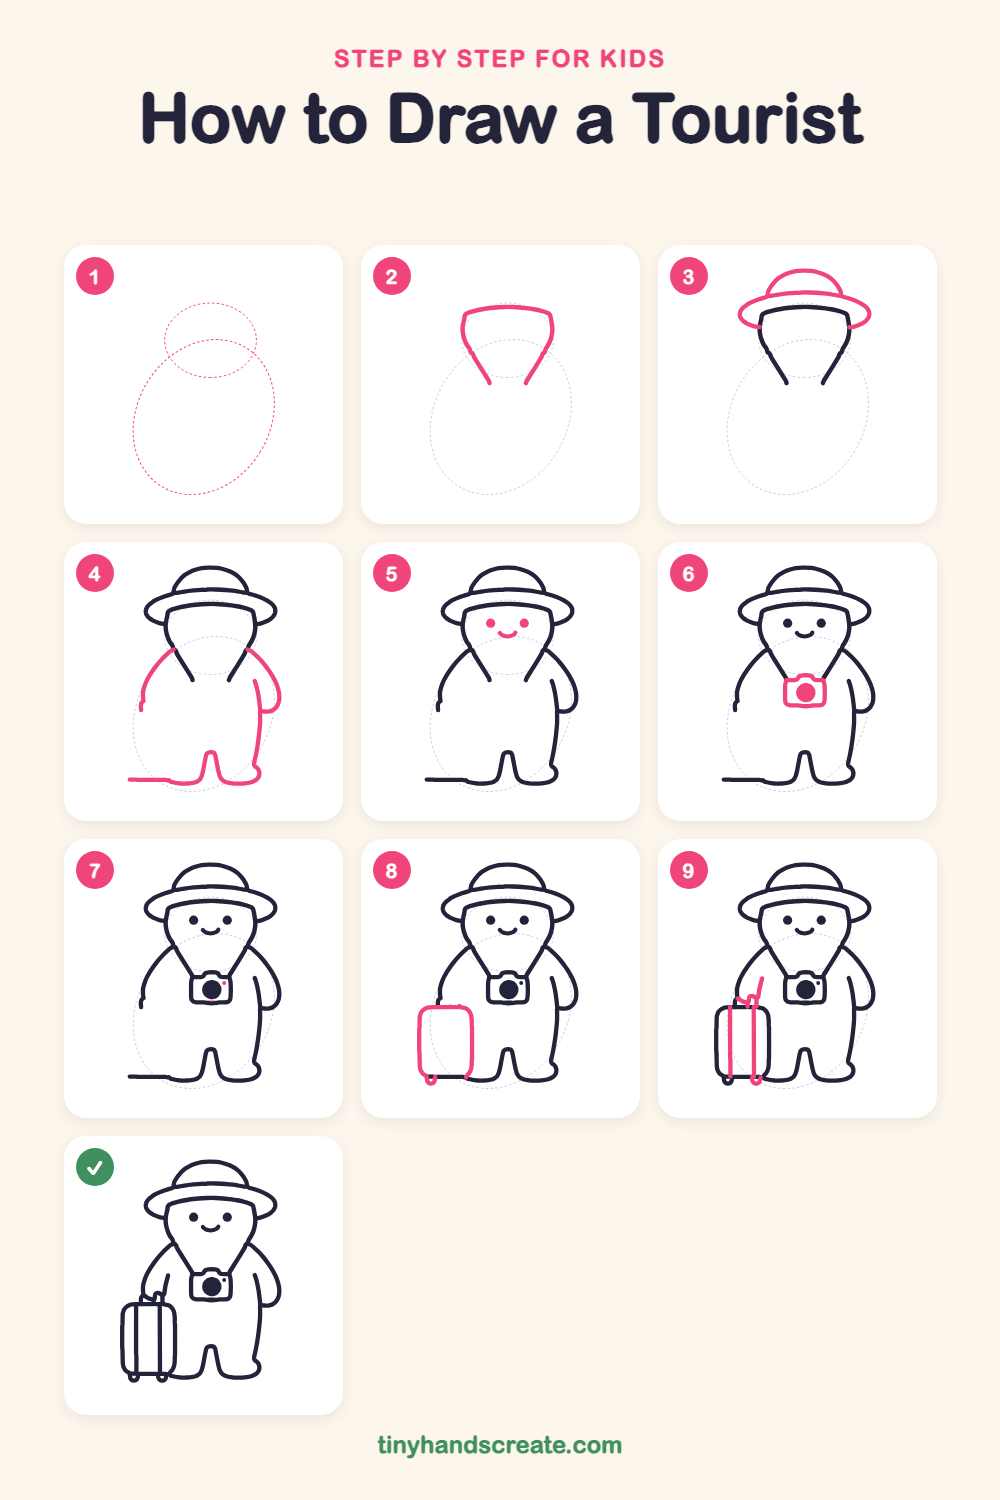
Step 1: Guide shapes
Lightly sketch these 2 ovals. They only show where the big parts go, so press softly. You will erase them at the end.
Step 2: Head and neck
Draw a flat line for the top of the head. From each end, curve a line down and in so the shape gets narrower, like a lightbulb. The two lines stop at the neck and stay open at the bottom.
Step 3: The sun hat
Draw a wide, flat oval across the top of the head for the brim. Then add a half circle on top of the brim for the round part of the hat.
Step 4: Body and feet
From each side of the neck, draw a curved line down and out for the round shoulders. Keep going down to make the sides of the body. At the bottom, draw two little feet with a gap between them.
Step 5: Eyes and smile
Draw two small round dots for eyes in the middle of the face. Add a little curved smile below and between them.
Step 6: The camera
Draw a small rounded rectangle on the chest, just under the neck, with a tiny bump on top. Then draw a big circle in the middle for the lens.
Step 7: Camera flash
Add one tiny dot near the top right corner of the lens for the flash. It is a small mark, so keep it little.
Step 8: The suitcase
Draw a tall rounded rectangle on the left side of the tourist, standing next to the feet. Make the corners soft and curvy. Add two tiny bumps at the bottom for feet.
Step 9: Handle and stripes
Draw a short handle on top of the suitcase that reaches up toward the tourist's hand. Then draw two straight lines down the front of the suitcase for stripes.
All done!
Erase the guide shapes, go over your lines, then color it in.
Finished your tourist? Keep the pencils out and learn how to draw a rocket or how to draw a shooting star next.
Tips for drawing a tourist
- Draw the hat brim as a wide, flat oval first. If it is wide enough, it will look like it is sitting on the head.
- Keep the suitcase corners round, not pointy. Draw the rectangle lightly and then smooth the corners.
- Put the camera in the center of the chest, just under the neck. Make the lens circle big so it is easy to see.
Free tourist coloring page
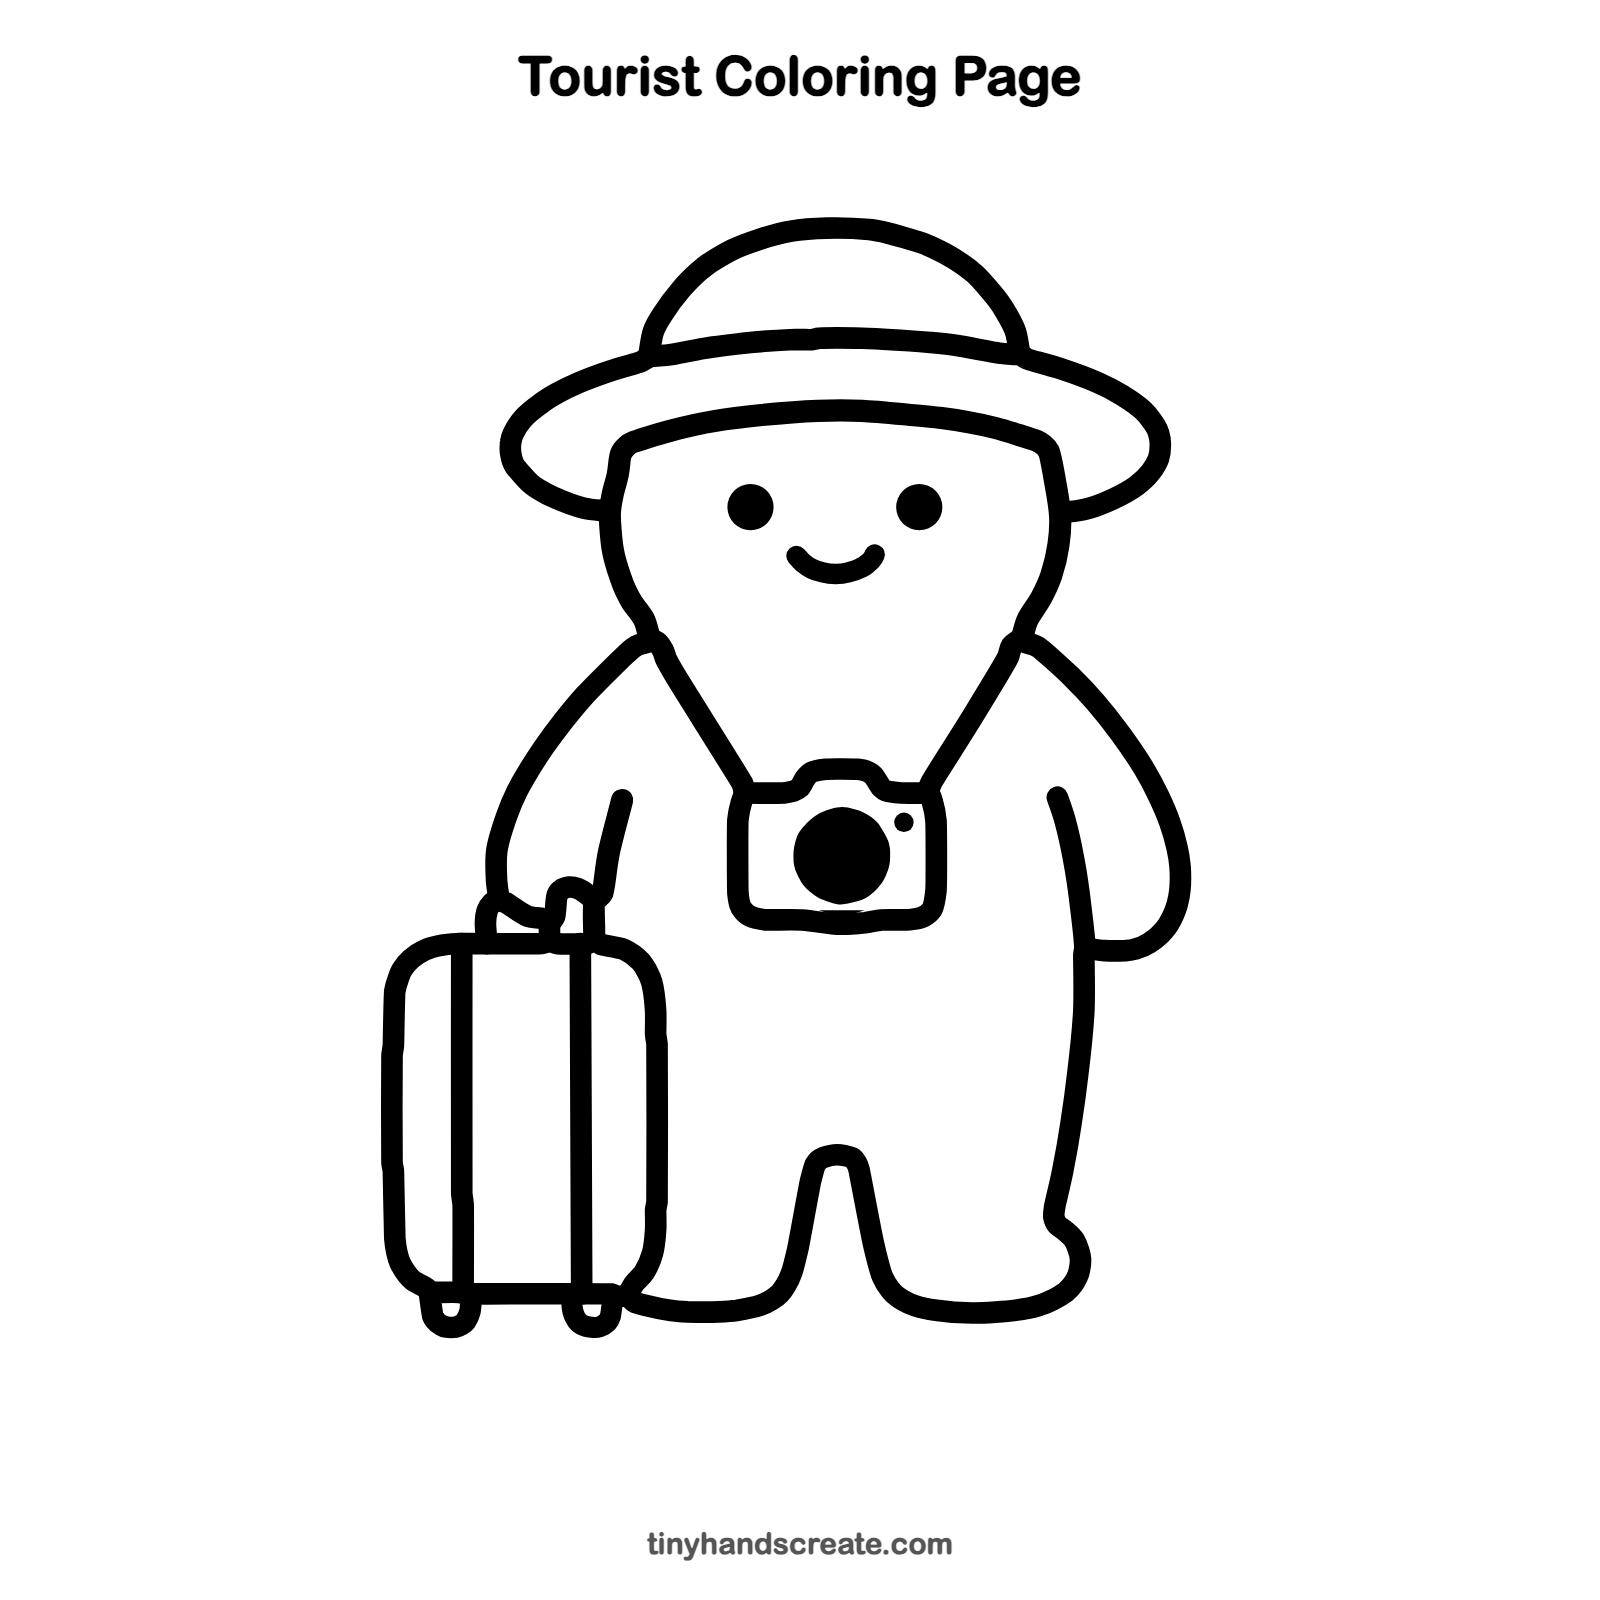
Want to go straight to coloring? Open this tourist coloring page at full size and print it. It is the same drawing you just learned, with clean lines ready for crayons or markers.
How to color your tourist drawing
Try a yellow hat, a red camera, and a blue suitcase. For a creative twist, draw stickers from faraway places all over the suitcase.
Tourist fun fact for kids
The word camera comes from the Latin phrase camera obscura, which means dark room. Early cameras were really dark boxes with a tiny hole to let light in.
Questions about drawing a tourist
What shapes do I need to draw a tourist?
You need a wide oval for the hat brim, a half circle for the hat top, a lightbulb shape for the head, and rounded rectangles for the camera and suitcase.
How do I make my tourist look cuter?
Keep the eyes small and round, and draw a little curved smile. A wide hat and a round body also make the tourist look friendly.
How do I draw the camera so it looks right?
Draw a small rounded rectangle with a tiny bump on top. Then add a big circle in the middle for the lens and a tiny dot for the flash.