How to Draw a Gray Cat (Easy Step by Step)
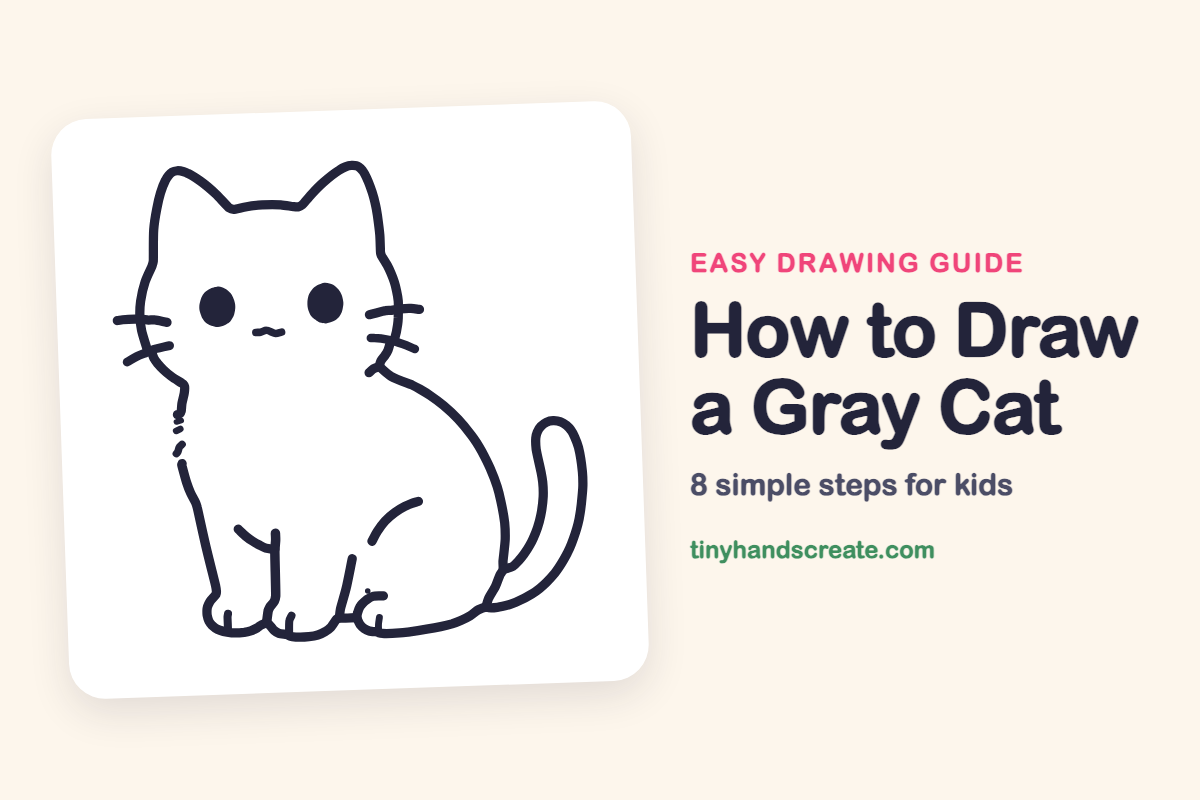
A sitting gray cat is a great first animal because it is made from simple shapes: a round head, two triangle ears, a bean-shaped body and a curly tail. The big dot eyes and tiny smile give it a sweet, cuddly look. Kids can draw it in a few easy steps.
- Easy
- 12 minutes
- 8 steps
You need: paper, a pencil, an eraser, and crayons or markers for coloring.
Start drawing


In this article (7 sections)
How to draw a gray cat step by step
How to Draw a Gray Cat · tinyhandscreate.com
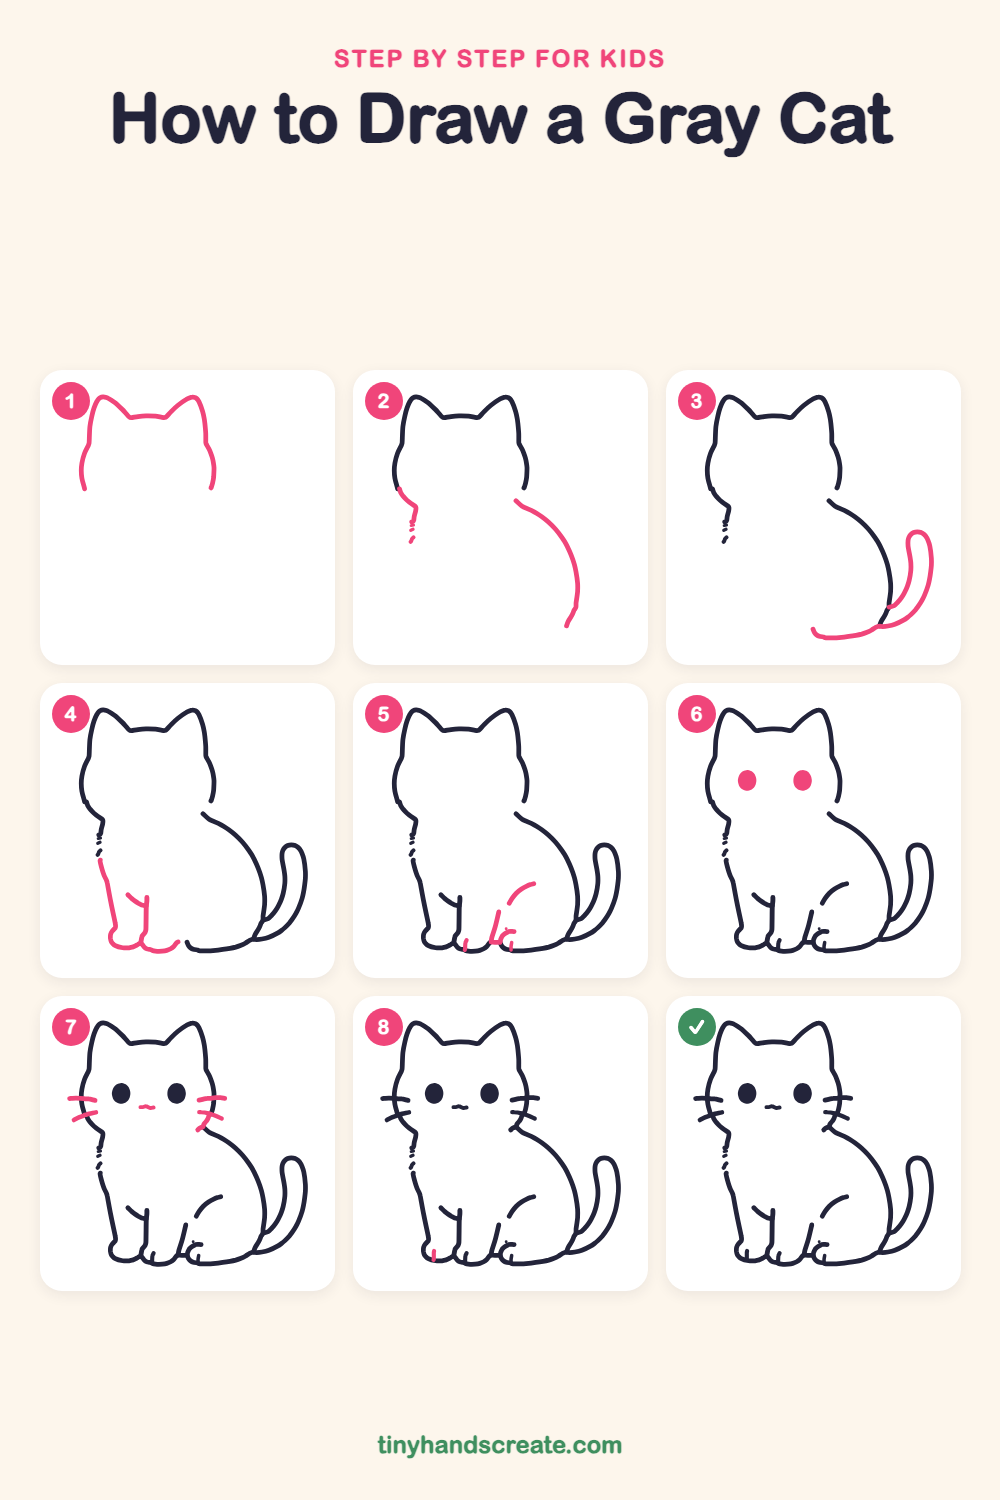
Step 1: Head and ears
Draw the top of the head as one curved line with two pointy ears and a little dip between them. Let the line curve down on each side to make the cheeks, and stop at the bottom of each cheek.
Step 2: Chest and back
On the left, draw a short wobbly line going down from the cheek for the chest. On the right, start below the other cheek and draw a big curve that swoops down and around like the back of a bean.
Step 3: The tail
At the bottom of the back, draw a long curved line that sweeps out to the right and curls up. Draw a second line beside it to make the tail thick, and join the two lines at the tip.
Step 4: The front legs
Under the chest, draw two straight lines going down for the front legs. At the bottom of each leg, add a rounded bump for a paw.
Step 5: The back leg
On the side of the body, draw a short curved line for the round hip. Then draw a short slanted line down to a small paw on the ground.
Step 6: Big round eyes
Draw two big oval eyes on the face, side by side with a space between them. Fill them in.
Step 7: Nose and whiskers
Between the eyes, draw a tiny wavy smile for the nose and mouth. Then draw two short whisker lines on each cheek that fan out.
Step 8: Toe line
Draw one tiny short line on the front paw to show a toe. It is just a little line going up from the bottom edge.
All done!
Go over your lines with a marker, then color it in.
Finished your gray cat? Keep the pencils out and learn how to draw a fox or how to draw a hedgehog next.
Tips for drawing a gray cat
- Sketch the head and body as light ovals first, then draw the final lines over them so the cat stays round and balanced.
- The tail can be tricky. Draw one long curve first, then add the second line beside it so the tail has the same width all the way up.
- Draw the front legs as two straight lines going down, with a round bump at the bottom of each so the paws look like they are sitting on the ground.
Free gray cat coloring page
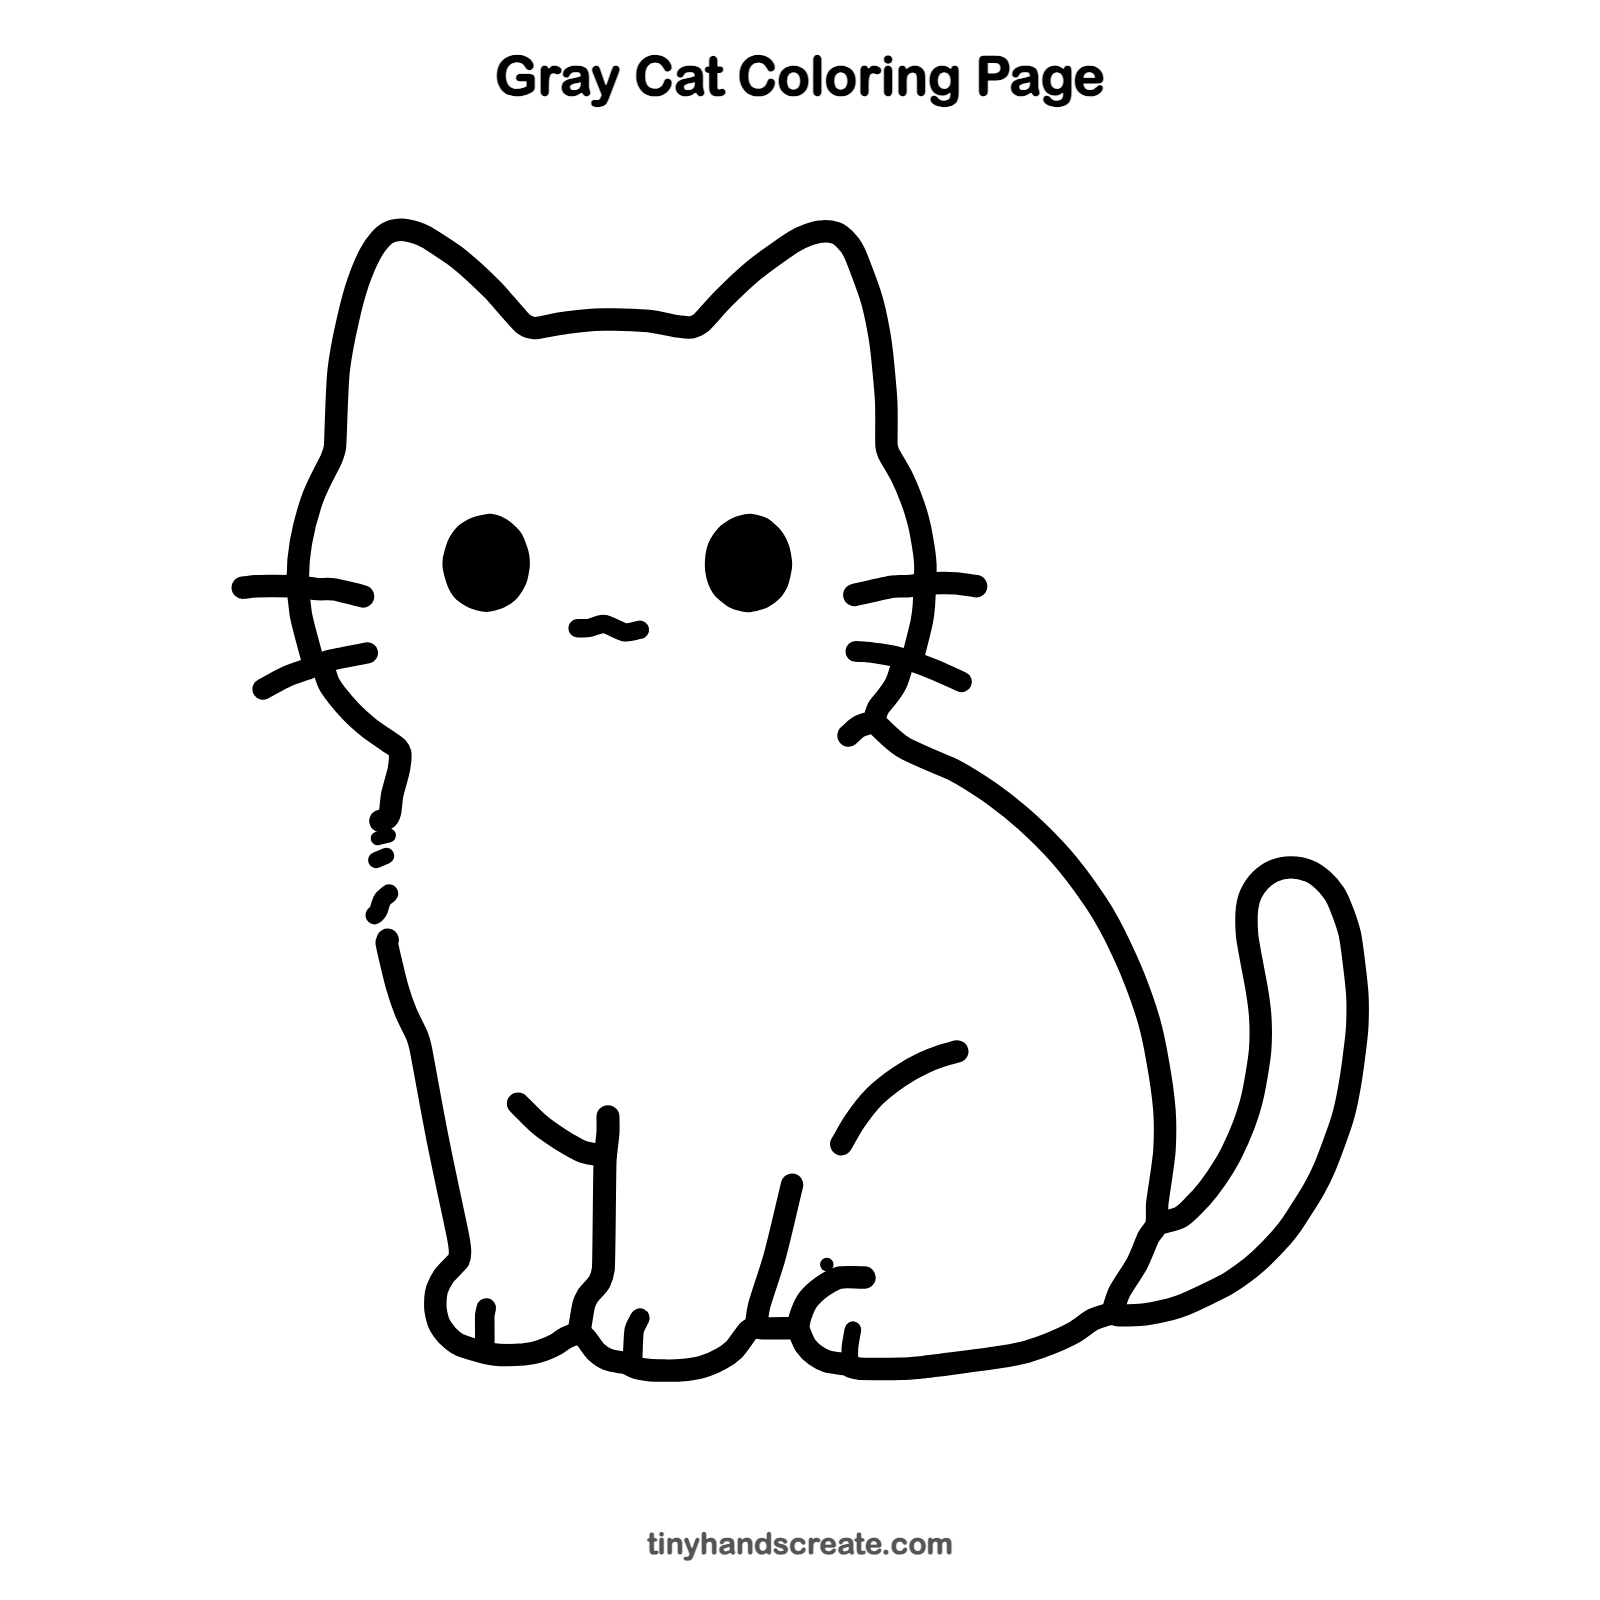
Want to go straight to coloring? Open this gray cat coloring page at full size and print it. It is the same drawing you just learned, with clean lines ready for crayons or markers.
How to color your gray cat drawing
Color the cat gray, with a pink nose and light pink inside the ears. For a creative twist, give your cat rainbow stripes.
Gray cat fun fact for kids
A cat's whiskers are rooted deeper in the skin than ordinary hairs, and they help the cat feel things around it. Cats use them to sense whether they can fit through a narrow space.
Questions about drawing a gray cat
What shapes do I need to draw a cat?
You need a circle or oval for the head, two triangles for the ears, a bean shape for the body and a long curved line for the tail.
How do I make my cat look cuter?
Make the eyes big and round and place them low on the face, with the little smile close between them. A round head with chubby cheeks also helps.
How do I draw a cat tail?
Start at the bottom of the back and draw a long curve that sweeps out and curls up at the end. Then draw a second curve next to it and join them at the tip.