15 Christmas Crafts for 2 Year Olds That Actually Work
You'll find 15 Christmas crafts specifically designed for 2-year-olds, complete with clear adult prep steps and toddler-friendly activities. Learn how to set up for success with essential tips to avoid common toddler craft frustrations.
- Always complete adult prep (cutting, taping, pouring paint) before your toddler sits down.
- Prioritize safety by performing the toilet paper tube choke test on all craft items.
- Minimize mess by taping down surfaces and paper, dressing for mess, and keeping wipes within reach.
- Choose age-appropriate crafts without scissors or tiny loose parts, noting age adjustments.
- Stock up on washable paint, contact paper, masking tape, and large pom-poms for these projects.
This post contains affiliate links. As an Amazon Associate I earn from qualifying purchases.
Last December my two-year-old sat down at my “adorable” wreath setup, ate a sequin, dumped the glue on the plate, and announced “SNOW!” Total craft time: ninety seconds.
So I started designing crafts for the kid actually in my kitchen. Below are 15 Christmas crafts for 2 year olds. Each has a PRE-DO line (your prep), a TODDLER DOES line (their part), a mess rating, and a safety note wherever small parts or supervision matter.
In this article (13 sections)
- How I Chose These Crafts
- Before You Start: The Prep-Ahead Checklist
- The Quick-Reference Table: All 15 Crafts at a Glance
- Crafts 1-5: Easy Christmas Crafts for Toddlers (Lowest Stress)
- Crafts 6-10: Sensory Christmas Crafts for Toddlers
- Crafts 11-15: Christmas Card and Gift Crafts for Toddlers
- How to Adjust Crafts for Different Ages
- Toddler Craft Safety: What to Skip and What to Watch
- Mess Control Tips That Actually Help
- Christmas Activities for Toddlers Beyond Crafting
- A Realistic Weekly Plan for December
- Frequently Asked Questions
- Make It Merry, Not Perfect
How I Chose These Crafts
Every craft here passes three filters:
- No scissors for the toddler. If cutting is involved, you do it before they sit down.
- No loose small parts. Nothing that fits through a toilet paper tube (the classic choke-test) is left within reach. Sequins, googly eyes, tiny beads, and loose glitter did not make the cut. The one flat exception is large dot stickers (craft 11), which need close supervision.
- Honest about the grown-up work. Most roundups show a photo of a finished craft and quietly skip the twenty minutes of adult prep behind it. I’m not skipping it. Every craft below has a clear PRE-DO line telling you exactly what you do before your toddler sits down, and a TODDLER DOES line for the part that is genuinely theirs.
Most of these work for kids from about 18 months to 3 years, with notes on adjusting for age. Three of them (puffy paint, pinecones, and bubble wrap) are only for kids who no longer mouth things, usually around 2.5 and up. The quick-reference table flags them.
Before You Start: The Prep-Ahead Checklist
This is the part most toddler craft lists leave out, and it’s the part that decides whether the craft works. A two-year-old’s attention span for a single activity is roughly 5 to 10 minutes, and some days it’s 90 seconds. If you spend those minutes hunting for tape, the window closes.
Use this checklist before you call anyone to the table.
The 10-Minute Setup Routine
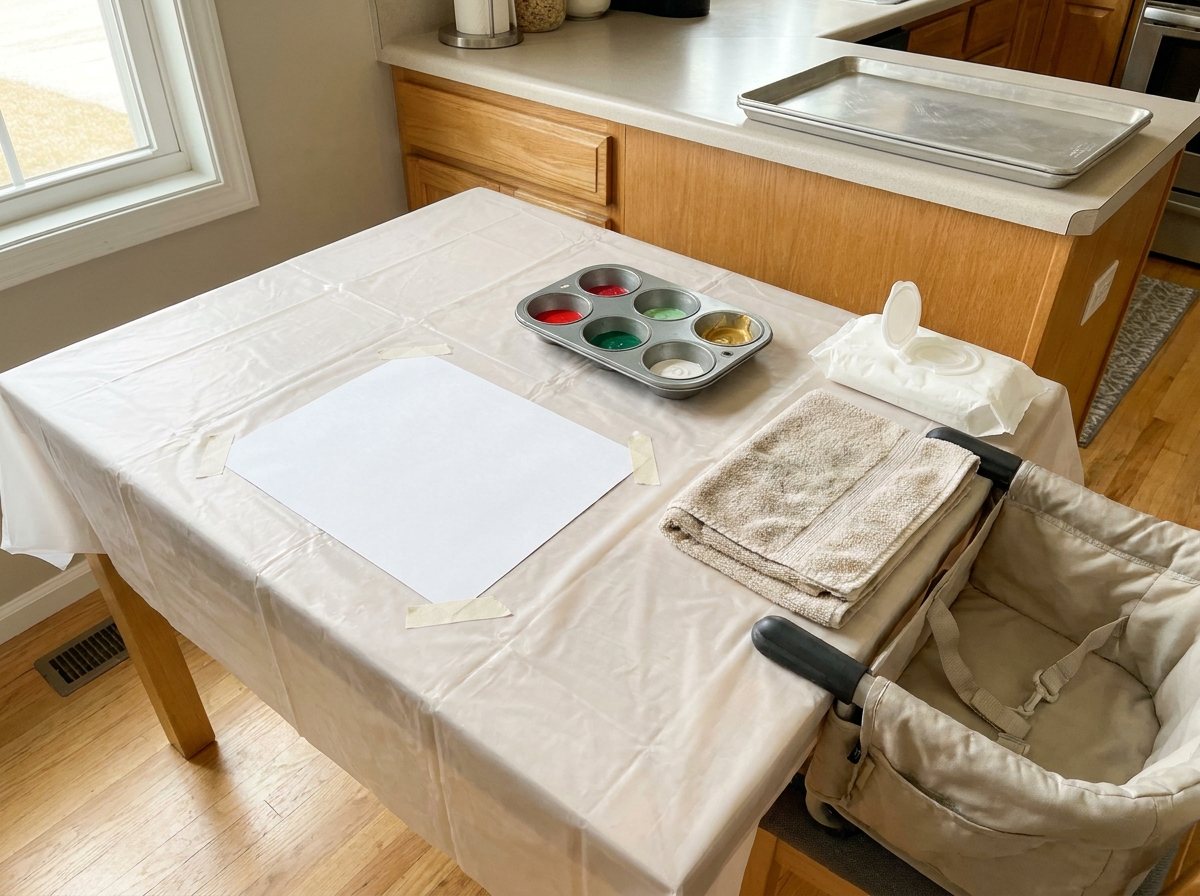
- Cover the surface. Tape a cheap plastic tablecloth, butcher paper, or an old shower curtain to the table. Taping matters: toddlers pull things.
- Dress for the mess. An old t-shirt, or no shirt at all if your house is warm enough. Christmas outfits and paint are not friends.
- Do ALL cutting first. Cut shapes, strips, and contact paper pieces in advance, and put them in a bowl or on a tray.
- Tape paper down. Masking tape on the corners of every sheet of paper. Otherwise it travels.
- Pour paint into shallow dishes. Muffin tins or lids work well. Pour small amounts; you can refill.
- Stage wipes and a damp towel within arm’s reach. Not across the room. Within reach.
- Have a drying spot ready. Counter, baking sheet, or a high shelf. Wet art needs somewhere to go immediately.
- Do the choke test. Anything that fits through a toilet paper tube stays out of the setup.
- Seat them in a high chair or booster. A seated toddler keeps the paint on the table instead of the walls.
Quick Prep Key
In the craft list below, I use these labels:
| Label | Meaning |
|---|---|
| PRE-DO | The adult does this before the toddler sits down |
| TODDLER DOES | The part that is genuinely theirs |
| ADULT HELPS | Sit beside them and assist during the activity |
| Mess level | 1 (basically clean) to 5 (bath required) |
Your Basic Supply Kit
Most of these crafts use the same handful of things, so buy once and use all month:
- Washable, non-toxic tempera or finger paint (red, green, white, gold)
- Washable, non-toxic glue (a glue stick for less mess, white glue for more sticking power)
- Clear contact paper (the secret weapon of toddler crafts)
- Masking tape
- Construction paper and cardstock in red, green, white, and brown
- Paper plates
- Crayons (the chunky kind)
- Giant pom-poms (2 inches or more, and too big to fit through a toilet paper tube even when squeezed)
- Baby wipes
- A plastic tablecloth
Safety firstRun the choke-tube test on everything: pom-poms and ornaments should be 2 inches or larger. Stay within arm’s reach, because toddlers mouth things. Keep ribbon under about 6 inches and add it only after the toddler is done. Never leave a child alone with paint, water, or dough.
If you want more ideas that use what’s already in your house, my list of 30 crafts for 2-year-olds to do at home pairs well with this one.
The Quick-Reference Table: All 15 Crafts at a Glance
Here’s the whole list in one place so you can pick based on how much energy you have today. All 15 are scissors-free for your toddler. The last column tells you which ones need a swap, close watching, or an older toddler if your child still puts things in their mouth.
| # | Craft | Adult prep time | Toddler time | Mess level | OK if they still mouth things? |
|---|---|---|---|---|---|
| 1 | Contact Paper Christmas Tree | 10 min | 5-10 min | 1 | Yes |
| 2 | Handprint Christmas Tree | 5 min | 5-10 min | 3 | Yes |
| 3 | Paper Plate Wreath | 10 min | 10 min | 2 | Yes |
| 4 | Sponge-Stamped Ornaments | 5 min | 10 min | 3 | Yes |
| 5 | Cotton Ball Snowman | 10 min | 10 min | 2 | Use the cotton pad swap |
| 6 | Puffy Paint Snowflakes | 10 min | 10 min | 3 | No (2.5+), or use the paint swap |
| 7 | Salt Dough Handprint Ornament | 15 min (plus baking) | 10 min | 3 | Close watch |
| 8 | Torn Paper Candy Canes | 10 min | 10 min | 2 | Yes |
| 9 | Painted Pinecone Trees | 5 min | 10 min | 3 | No (2.5+), or use the cardboard swap |
| 10 | Bubble Wrap Reindeer | 10 min | 10 min | 3 | No (2.5+) |
| 11 | Sticker Christmas Lights | 5 min | 5-10 min | 1 | Close watch |
| 12 | Tissue Paper Stained Glass | 10 min | 5-10 min | 1 | Yes |
| 13 | Footprint or Handprint Santa Card | 10 min | 5-10 min | 4 | Yes |
| 14 | Wrapping Paper Art | 5 min | 10 min | 3 | Yes |
| 15 | Cardboard Tube Gift Boxes | 10 min | 10 min | 2 | Close watch |
Crafts 1-5: Easy Christmas Crafts for Toddlers (Lowest Stress)
If you’re new to crafting with a two-year-old, start here. These have simple steps, forgiving results, and low mess.
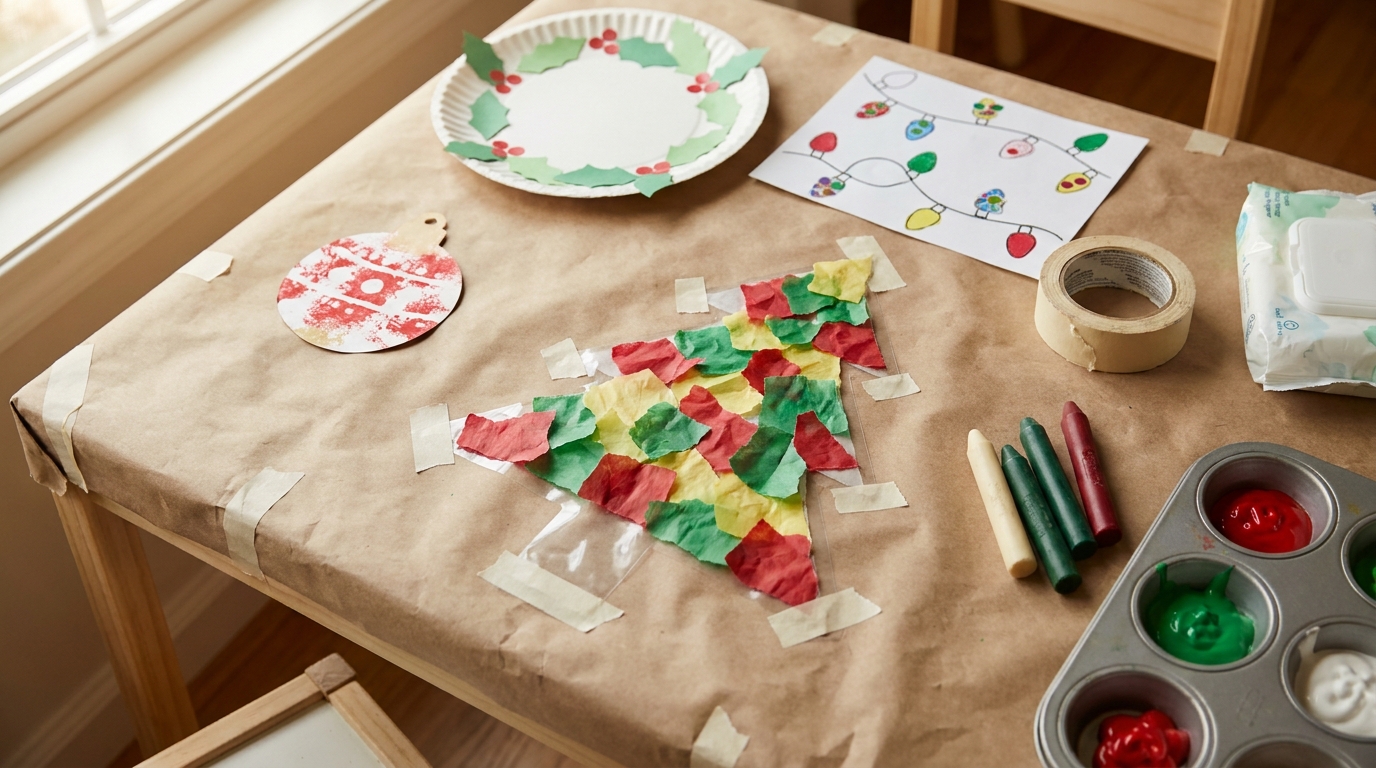
1. Contact Paper Christmas Tree
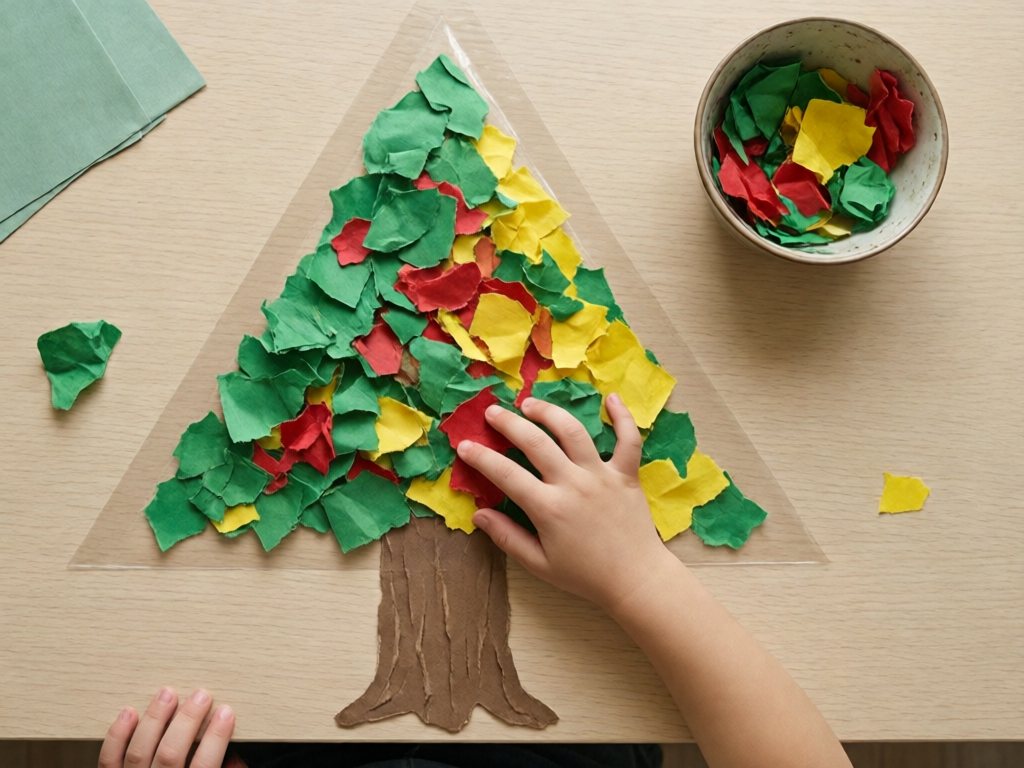
This is the craft I recommend to every parent who says “my toddler hates getting messy.” There’s no glue, no paint, and almost no cleanup, because the contact paper does the sticking.
You’ll need: Clear contact paper, green, red, and yellow tissue paper, masking tape, brown paper.
PRE-DO:
- Cut a piece of contact paper into a tree shape (a big triangle works). Leave the backing on until you’re ready.
- Tape it sticky side up on the table, or sticky side out on a window, with all four edges taped. Peel the backing off just before your child sits down.
- Tear or cut tissue paper into 1-2 inch pieces and put them in a bowl.
- Cut a small brown paper rectangle for the trunk and press it onto the sticky tree yourself, so your toddler starts with a trunk in place.
TODDLER DOES: Press tissue paper pieces onto the sticky tree. That’s it. They can put them anywhere. A tree with all the yellow on one side is still a tree.
ADULT HELPS: Sit nearby and narrate (“You put red on the tree! Now yellow!”). Peel off any pieces that end up on fingers.
Mess level: 1. The only mess is tissue paper on the floor.
Age notes: Even 18-month-olds do well with this one. For a 3-year-old, add a second color step: “Can you find all the green pieces?”
If you love this kind of low-mess activity, you’ll find more in mess-free art activities for toddlers. It’s full of projects that use the same sticky-surface trick.
2. Handprint Christmas Tree
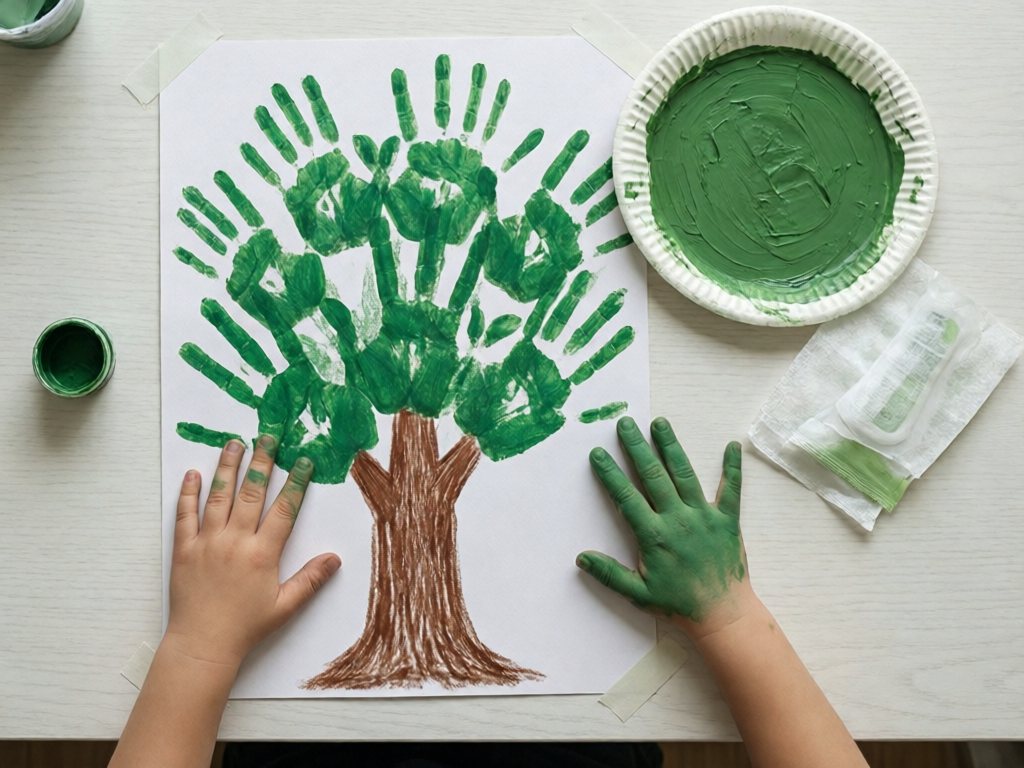
This version uses the whole hand as a tree and turns the fingers into branches, so the result still looks like a tree even if your toddler wiggles.
You’ll need: Washable green paint, white or light-colored cardstock, a paper plate for the paint, baby wipes, a brown crayon.
PRE-DO:
- Tape the cardstock to the table.
- Squirt a thin layer of green paint onto a paper plate and spread it flat. A thin layer prints better than a thick glob.
- Draw a brown trunk at the bottom of the page with a crayon so the toddler isn’t asked to do it.
- Stage wipes and a damp towel right next to the plate.
TODDLER DOES: Press a hand into the paint, then press it on the paper with the fingers pointing up, or flip it so the fingers point down and the palm is the tree top. Do it a few times to fill the page.
ADULT HELPS: Hold the paper steady and guide the hand down. Wipe the hand right away.
Mess level: 3. Hand-painting is always a bit chaotic, but it’s over fast.
TipHave the sink ready before the toddler touches the paint. Chasing a green-handed two-year-old across the house is a bad time.
3. Paper Plate Wreath
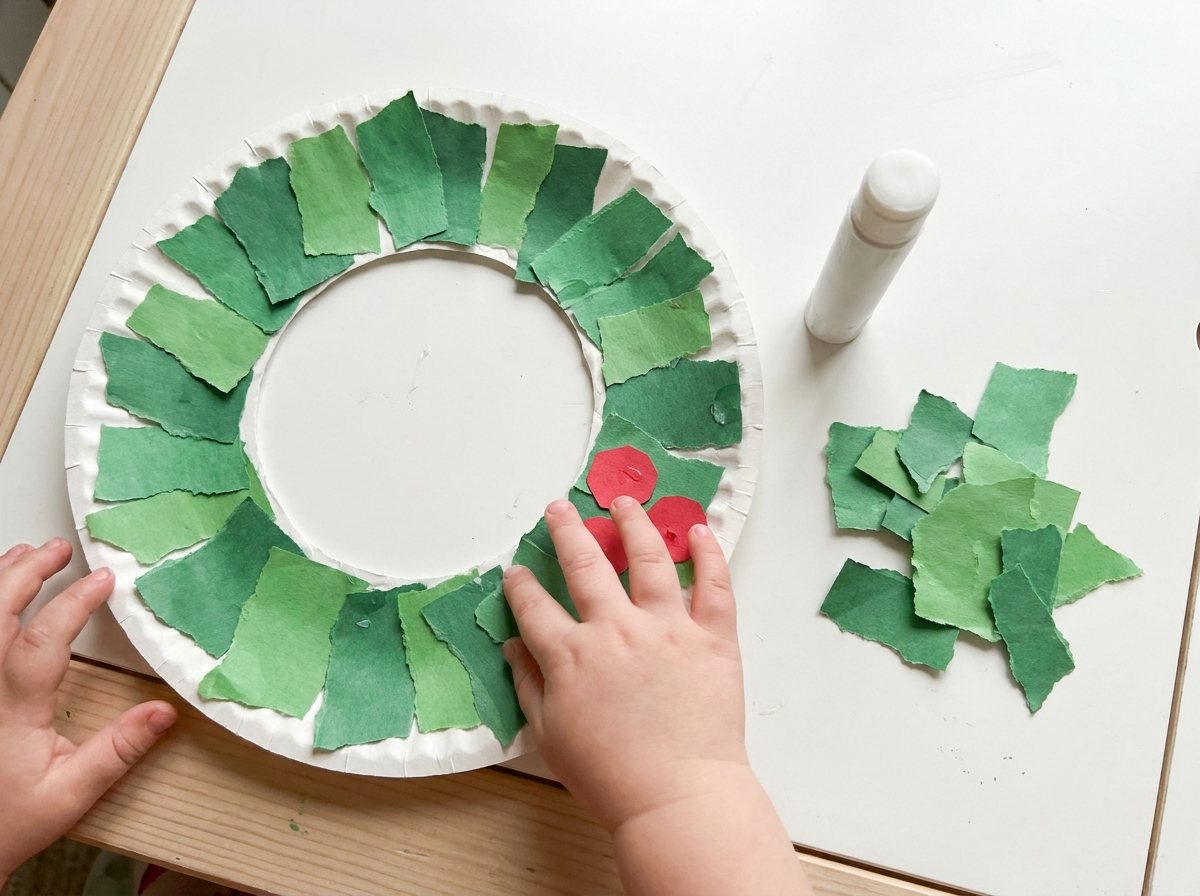
My daughter and I made this one last year after the sequin incident, and the redo went much better.
You’ll need: A paper plate, green construction paper, a giant red pom-pom (2 inches or more) or red paper circles, washable glue, a short ribbon or yarn for hanging.
PRE-DO:
- Cut the center out of the paper plate to make a ring. (This is the scissors step. It’s yours.)
- Tear or cut green paper into leaf shapes or strips, about 15-20 pieces.
- Put a dot of glue on the plate yourself in a few places, OR pour a small puddle of glue onto a paper plate and give the toddler a glue stick or a brush.
- Cut a few red paper circles for “berries” (skip tiny beads or buttons).
TODDLER DOES: Stick green paper pieces onto the ring, in any direction, over any amount of glue. Add red circles at the end.
ADULT HELPS: Hold the plate steady. Tape the ribbon on the back after it’s dry.
Mess level: 2.
Safety firstUse giant pom-poms only (2 inches or more, too big to fit through a toilet paper tube even when squeezed). Keep them in your hands until the glue step. Add the hanging ribbon yourself after the toddler is done, and keep it short.
4. Sponge-Stamped Ornaments
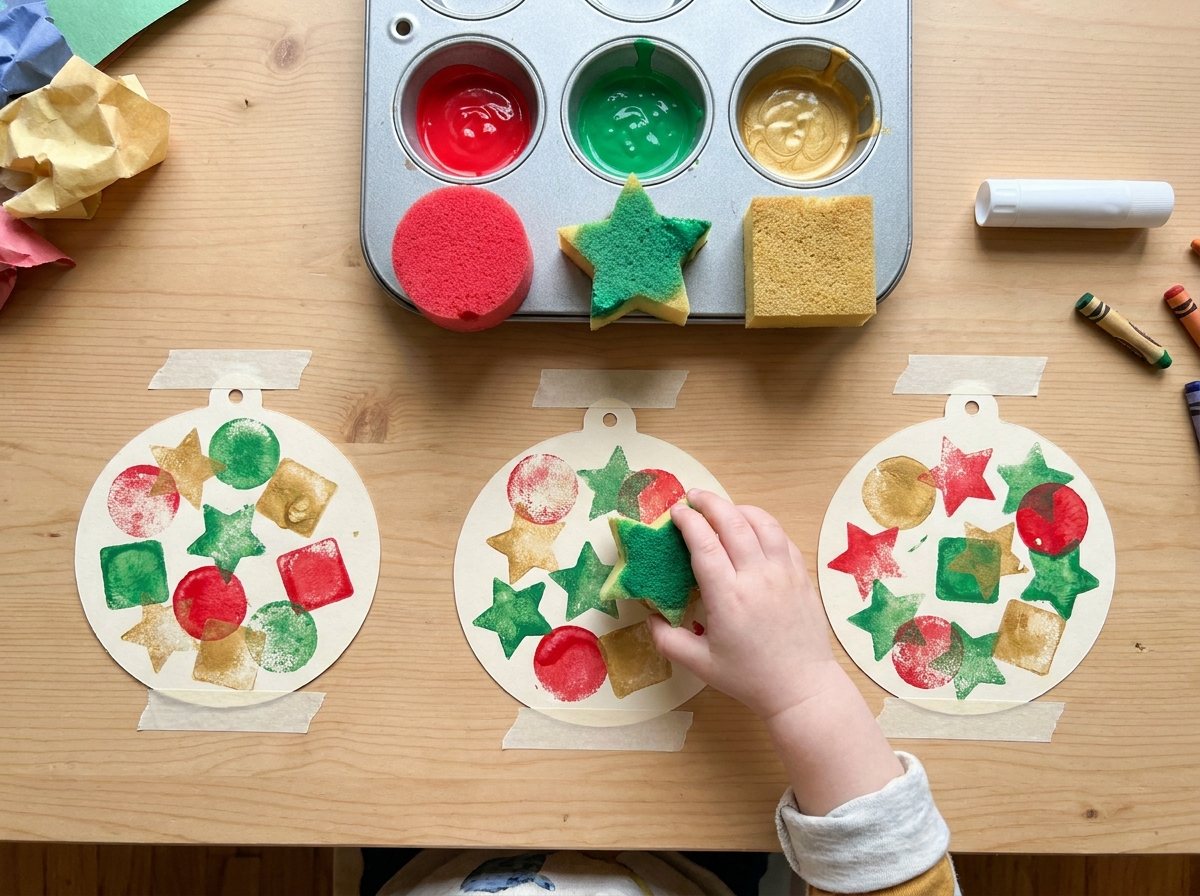
Stamping is an excellent toddler skill because it uses a big arm movement and gives instant results. No fine control needed.
You’ll need: Kitchen sponges, washable paint in two or three colors, cardstock, a muffin tin or shallow dishes, masking tape.
PRE-DO:
- Cut sponges into big shapes: circles, stars, or squares, each about 2 inches. Chunky is better.
- Cut ornament shapes from cardstock (circles with a little tab on top) or just use plain circles. Tape them to the table.
- Pour paint into the muffin tin, a different color in each cup.
- Pair each sponge with one color so colors don’t muddy.
TODDLER DOES: Dip the sponge, stamp it on the ornament. Repeat until the ornament is covered or the toddler loses interest, whichever comes first.
ADULT HELPS: Hold the sponge for a younger toddler (under 2). Offer a new sponge when the colors start to blend.
Mess level: 3.
For more about why open-ended stamping and painting is great for this age, check out process art for toddlers, which explains why the process matters more than the result.
5. Cotton Ball Snowman
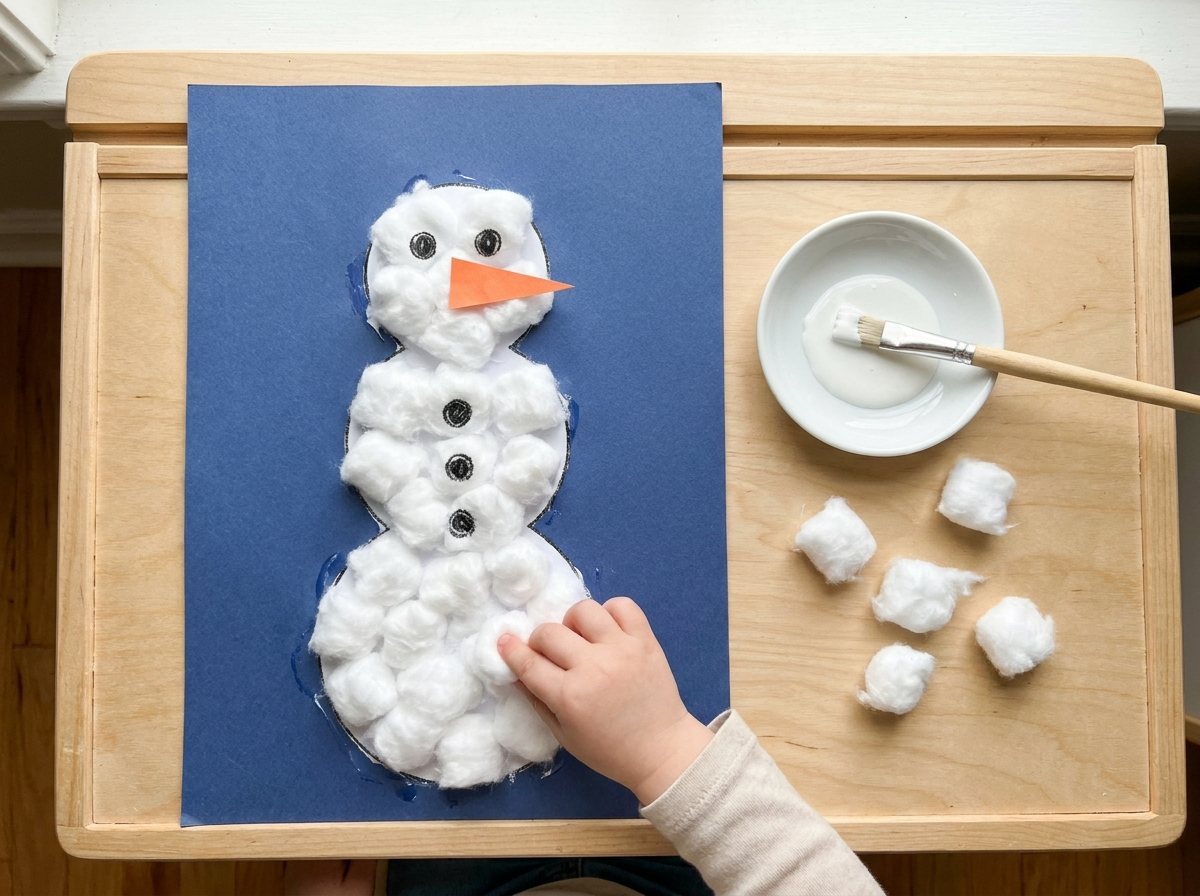
Cotton balls are soft and fun to squish, but they compress and can be mouthed, so stay close. They’re one of the best “glue-it-and-go” materials for this age.
You’ll need: Blue or black construction paper, large cotton balls (or cotton pads torn apart), washable white glue, an orange paper triangle, a white crayon, and a black crayon.
PRE-DO:
- Draw a snowman outline on the dark paper with a white crayon: three circles stacked. Or draw nothing and let the toddler make a “snow pile.”
- Cut an orange triangle for a carrot nose.
- Pour glue into a shallow dish and give the toddler a paintbrush, or dab glue onto the snowman outline yourself.
- Pull cotton balls apart slightly so they’re fluffier and easier to stick.
TODDLER DOES: Press cotton balls into the glue. They can also squish them flat, which is satisfying.
ADULT HELPS: Place the nose. Add drawn eyes and buttons with the black crayon.
Mess level: 2. Expect cotton fluff on the floor and possibly in hair.
Safety firstCotton balls are a mouthing hazard for the youngest toddlers. For 18-24 month olds, use torn cotton pads or pre-glue the balls yourself. Stay within arm’s reach and keep the craft brief.
Crafts 6-10: Sensory Christmas Crafts for Toddlers
These add a little more sensory fun, and a bit more mess. Puffy paint, pinecones, and bubble wrap (crafts 6, 9, and 10) are only for kids who no longer mouth things, usually around 2.5 and up. Each one has a swap or a note for younger toddlers.
6. Puffy Paint Snowflakes
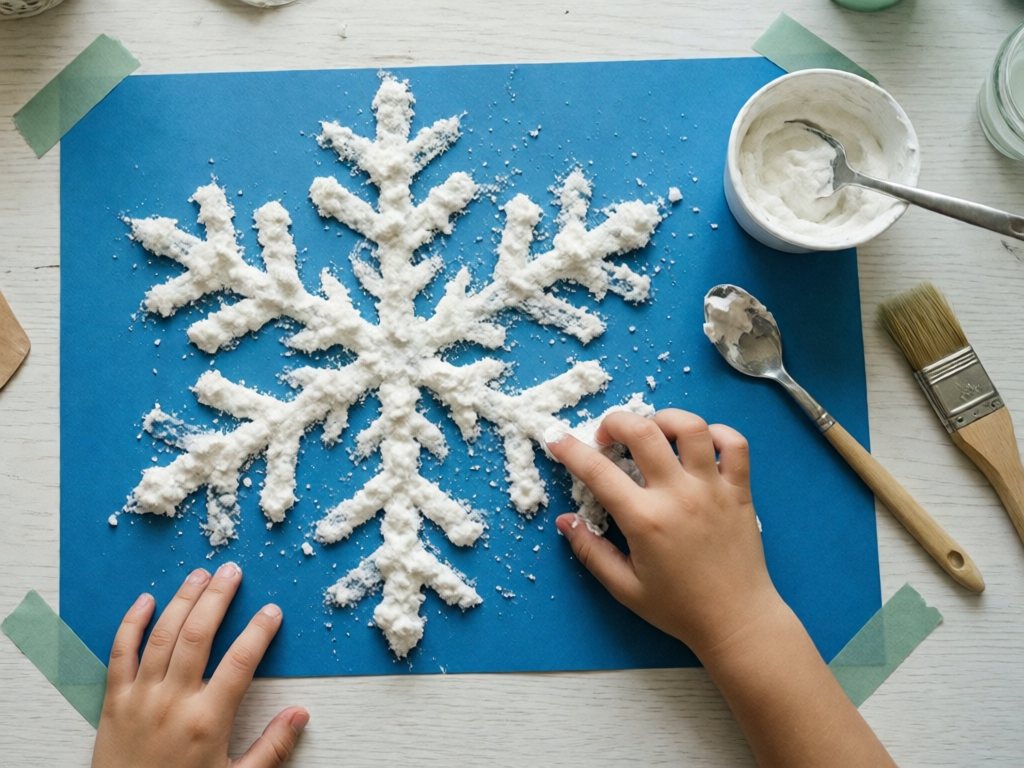
Puffy paint is the thing that looks magical to a toddler: it’s squishy, it dries raised, and it feels like snow. The trick is that you make it ahead.
You’ll need: Plain, unscented foam shaving cream, white school glue, blue cardstock, a spoon. For a safer swap, use white washable paint dabbed on with cotton pads.
PRE-DO (no-cook version):
- Mix equal parts plain, unscented foam shaving cream (no gel, menthol, or scented kinds) and white glue in a bowl. Stir until fluffy.
- Tape blue cardstock to the table.
- Draw a big snowflake with a white crayon so the toddler has a guide, or skip it and let them freestyle.
TODDLER DOES: Dab, spread, and smear the puffy paint with a spoon, a paintbrush, or fingers.
ADULT HELPS: Keep the paint away from eyes and mouths. Dry flat for 24 hours.
Mess level: 3. Wipes work fine.
Safety firstPuffy paint is not taste-safe. This one is only for kids who no longer mouth materials (usually 2.5 and up), and it needs constant adult supervision. If it gets in eyes, rinse right away. If your toddler still mouths everything, use the white paint and cotton pad swap.
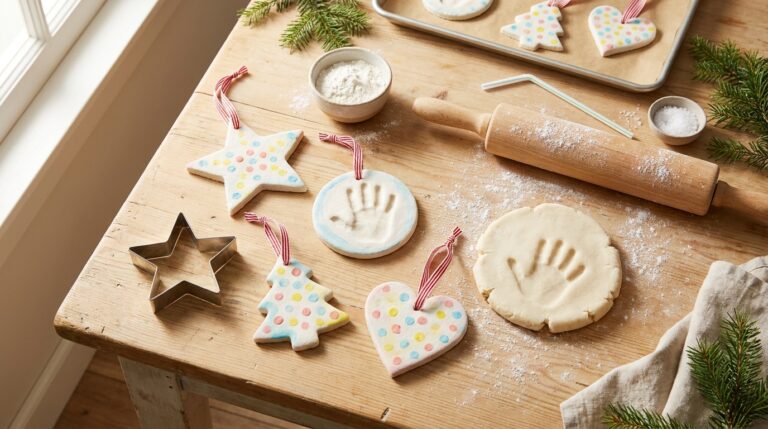
7. Salt Dough Handprint Ornament
Safety firstDo not let anyone eat the dough, raw or baked. It is very salty and contains raw flour. If a child or pet eats a noticeable amount, or shows vomiting, extreme thirst, or lethargy, call Poison Control (1-800-222-1222), a doctor, or a vet. Keep scraps and finished ornaments away from pets and toddlers, and bin any ornament that cracks into small pieces.
This is the keepsake craft of the list. It takes an adult to make the dough and bake the ornaments, but the toddler’s part (pressing a hand into dough) is the best part.
You’ll need: 1 cup flour, 1/2 cup salt, 1/2 cup water, rolling pin, cookie cutter, straw, oven, washable paint. Makes about 6-8 ornaments (fewer if you cut handprint-sized circles).
PRE-DO:
- Mix the dough and knead it until smooth.
- Roll it out to about 1/4 inch thick. Thicker dough takes much longer to bake hard.
- Cut circles or use a cookie cutter.
- Use a straw to poke a hole at the top for hanging.
- Keep the dough covered with a damp towel until you’re ready.
TODDLER DOES: Press a hand or foot into the dough. Squish it. Poke it with a finger. Wash hands right after, since the dough has raw flour in it.
ADULT HELPS: Bake 1/4-inch ornaments at 250°F for 2-3 hours (3-4 hours if thicker) until hard all the way through. Paint after cooling. Seal with a brush-on non-toxic sealer such as Mod Podge, or spray outdoors away from children and pets and let it dry fully before the toddler touches it. Hang finished ornaments out of reach of pets and toddlers.
Mess level: 3. Flour dust gets everywhere.
We have a full walkthrough of this one in salt dough ornament crafts for toddlers, including tips for avoiding cracks.
8. Torn Paper Candy Canes
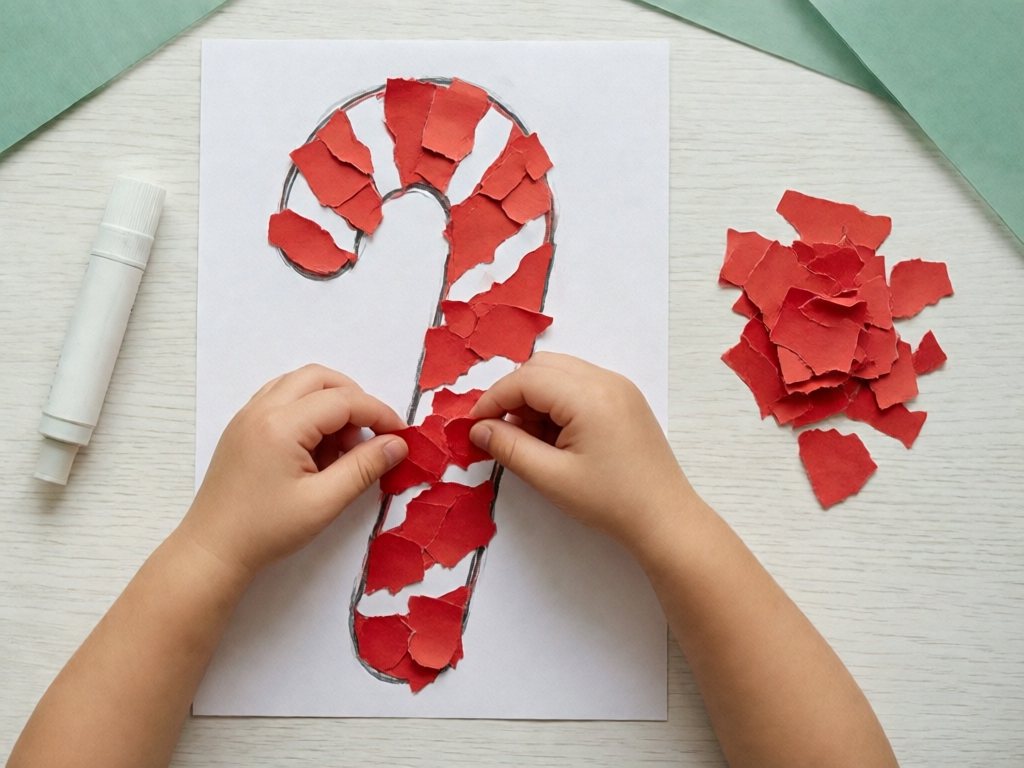
Tearing paper is a real fine motor skill, and a surprisingly satisfying one. It’s also the best stand-in for scissors at this age.
You’ll need: White cardstock, red construction paper, glue stick, a pencil.
PRE-DO:
- Draw a big candy cane shape on the cardstock.
- Tear one or two small strips of red paper as a demo, to show the motion.
- Give the toddler a stack of red paper to tear on their own.
TODDLER DOES: Tear red paper into pieces (any size), then stick pieces onto the candy cane with a glue stick.
ADULT HELPS: Show the “pinch and pull” tearing motion. Add white stripes by leaving gaps.
Mess level: 2. Paper scraps everywhere.
This one is a direct fine-motor workout. If you want to build on those skills, fine motor activities for toddlers has a whole set of simple ideas.
9. Painted Pinecone Trees
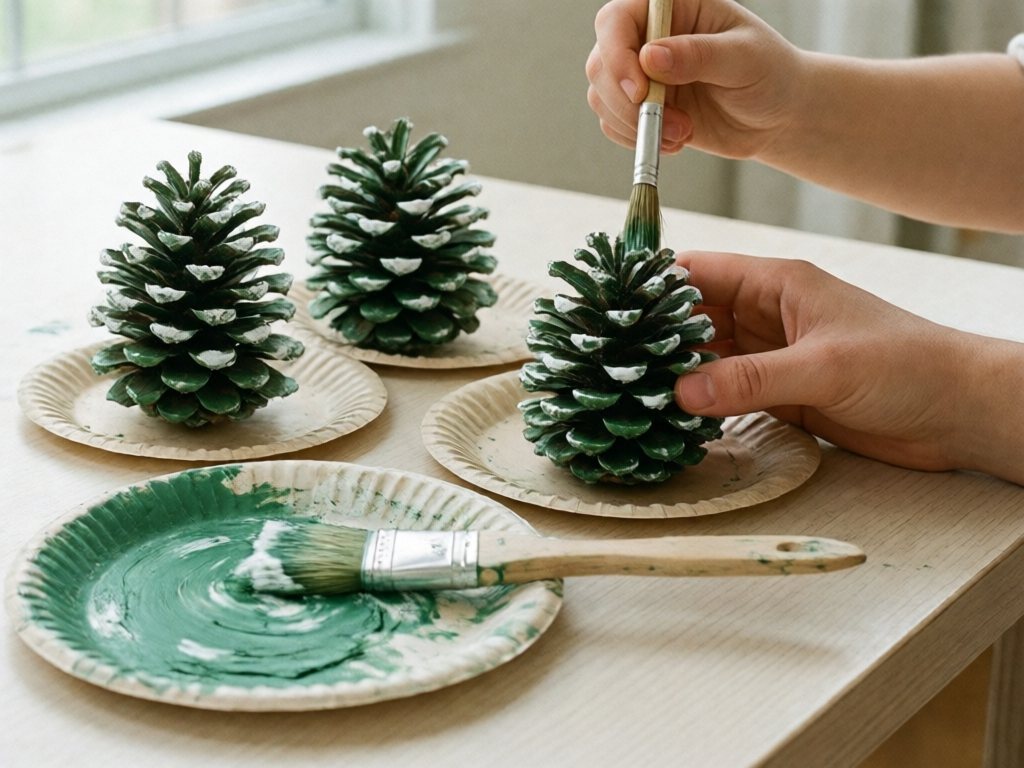
If you have a yard with pinecones, this is nearly free. It takes a little foraging, which makes it a good excuse for a walk.
You’ll need: Medium to large pinecones, green and white washable paint, paper plates, paintbrushes or sponges.
PRE-DO:
- Collect pinecones and shake out bugs. Bake at 200°F for 30 minutes on a foil- or parchment-lined sheet to kill bugs and open them (adult step; watch the oven, since sap can drip).
- Let them cool fully. Over a bin, pick off any loose scales (they are small parts) and throw them away. Skip any cone that is still sticky with sap or looks moldy.
- Sweep or wipe the table before your toddler sits down, so no stray scales are left in reach.
- Set each pinecone on a paper plate so the plate is the work surface.
- Put paint on a second plate.
TODDLER DOES: Dab or paint the pinecone with green paint. Add “snow” with white paint on top.
ADULT HELPS: Hold the pinecone steady. Let it dry.
Mess level: 3. Pinecones are scratchy, so sturdy hands help.
Safety firstSupervise closely. Pinecones are scratchy and not for mouthing, so use only fully cooled, dry, sap-free cones. This one is for kids who no longer mouth things (usually 2.5 and up). For younger toddlers, swap in a smooth cardboard cut-out tree to paint instead.
If you enjoy the pinecone angle, the fall sensory bin with acorns and pinecones is a nice companion activity for collecting and sorting.
10. Bubble Wrap Reindeer
Printing with bubble wrap gives a texture that looks like fur, and toddlers love the pop-and-press feeling.
Safety firstAdult-supervised only, and only for kids who no longer mouth things (usually 2.5 and up). Tape the bubble wrap securely to a tube or cardboard, bin any torn or popped pieces, and never leave plastic sheeting within reach.
You’ll need: Bubble wrap, brown washable paint, white cardstock, a brown crayon, and a red paper circle for the nose.
PRE-DO:
- Wrap bubble wrap around a cardboard tube, or tape a piece to a block or a flat piece of cardboard for easy grip.
- Draw a reindeer head shape (a rounded diamond with antlers) on the cardstock.
- Pour brown paint onto a plate.
- Cut out a red circle for the nose.
TODDLER DOES: Press the bubble wrap in the paint, then stamp it all over the reindeer shape.
ADULT HELPS: Go over the antlers with crayon once the paint dries. Glue the paper nose on yourself.
Mess level: 3.
Crafts 11-15: Christmas Card and Gift Crafts for Toddlers
The last five are great for cards, decorations, and gifts. They also tend to be the ones grandparents love most.
11. Sticker Christmas Lights
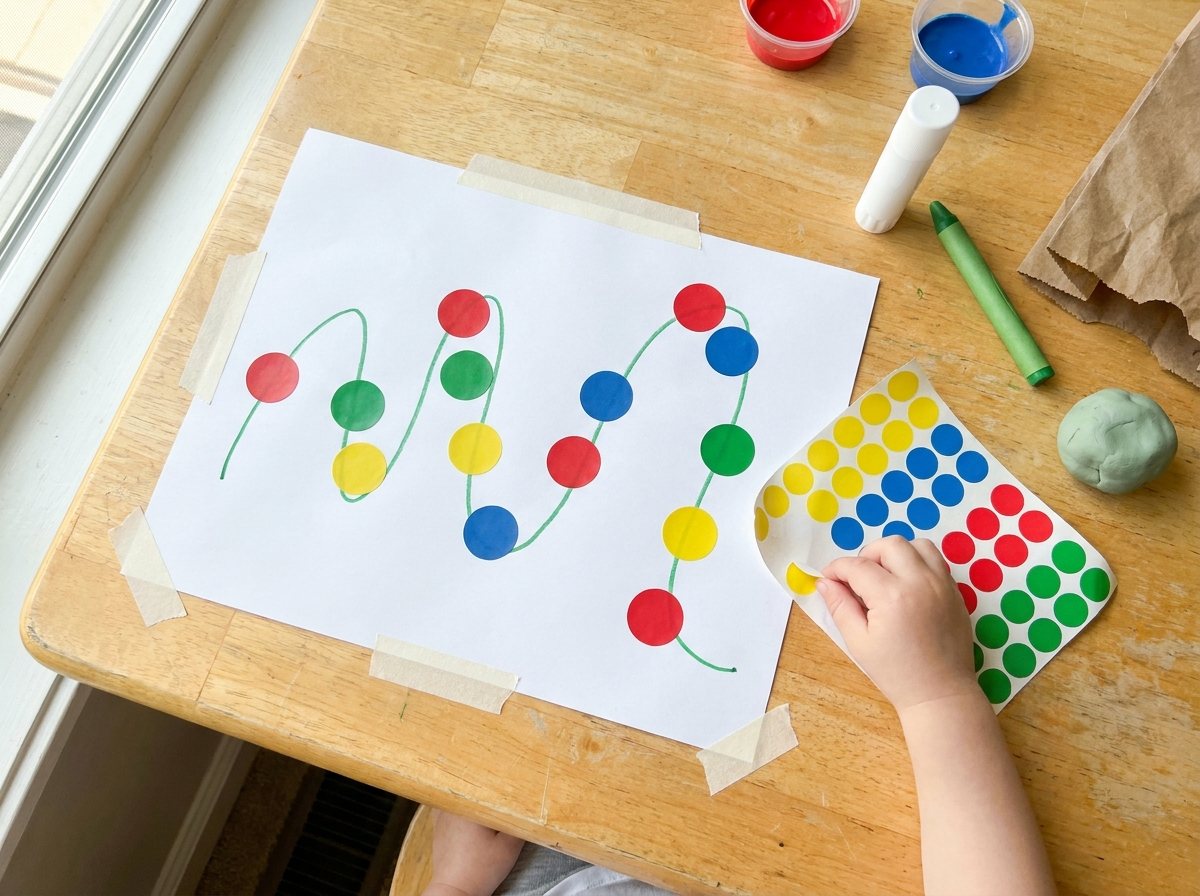
Stickers are one of the best toddler tools there is. Peeling is hard, so this is also a fine-motor exercise in disguise.
You’ll need: The largest round dot stickers you can find (1.5 inches or more) in red, green, yellow, and blue. White paper. A green crayon or marker.
PRE-DO:
- Draw a long wavy “string” across the paper with a green marker or crayon.
- Loosen the sticker sheet edges so the stickers are easy to lift. (This is the step that makes or breaks the craft.)
- Tape the paper down.
TODDLER DOES: Peel stickers and stick them along the string. Perfect placement is not the goal.
ADULT HELPS: Lift the first corner of each sticker if needed.
Mess level: 1. The cleanest craft on the list.
Safety firstStickers are the one flat item on this list that can be mouthed, so use the largest dots, stay close, and throw away any sticker that comes off the paper or ends up in a mouth.
12. Tissue Paper Stained Glass
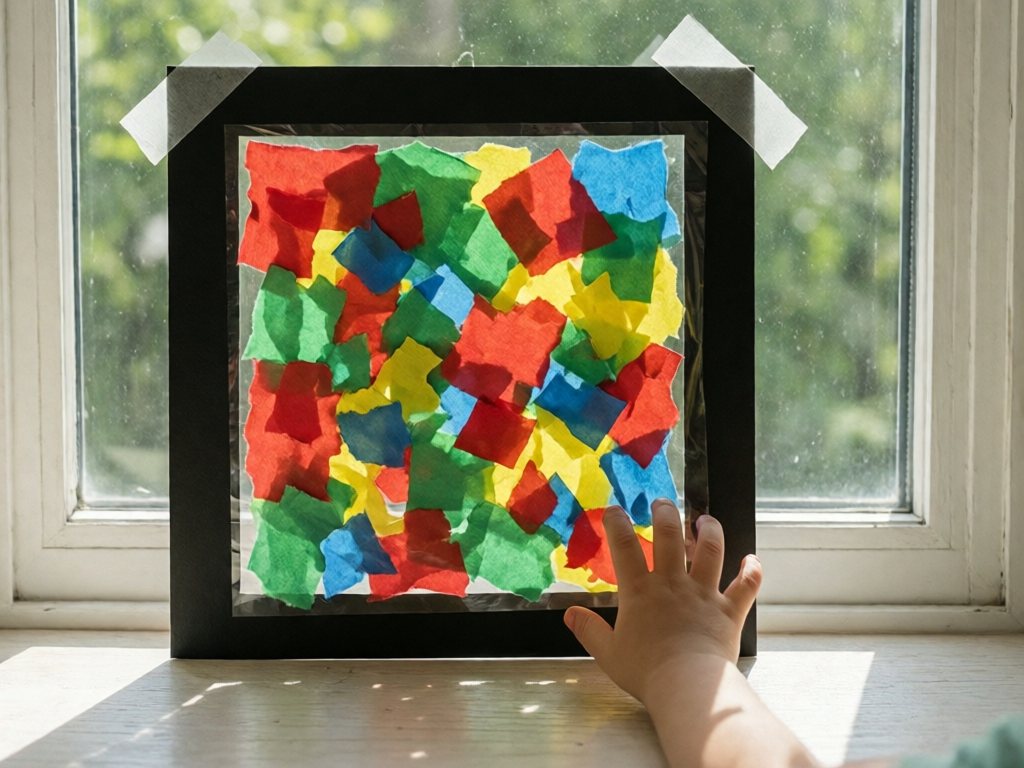
This one looks stunning in a window and takes almost no skill.
You’ll need: Contact paper, tissue paper in Christmas colors, a black cardstock frame, tape.
PRE-DO:
- Cut a frame from black cardstock (a square or circle with the middle cut out).
- Peel the backing off a piece of contact paper and tape it sticky side up.
- Tear tissue into small pieces.
TODDLER DOES: Press tissue pieces onto the sticky surface.
ADULT HELPS: When finished, cover with a second piece of contact paper, sandwich the frame around it, and hang in a window.
Mess level: 1.
13. Footprint or Handprint Santa Card
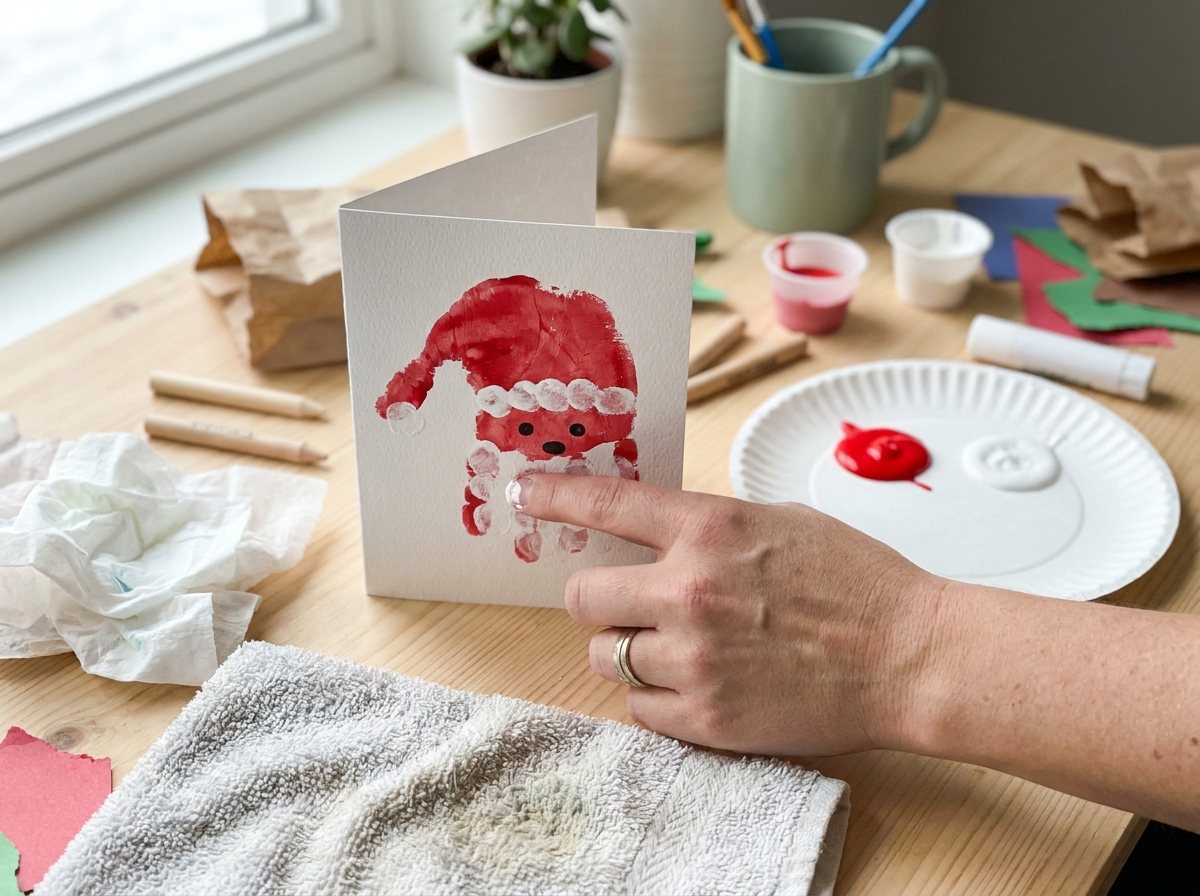
This is the grandparent special. It’s messy, and it’s worth it.
You’ll need: Red and white washable paint, cardstock, a paper plate, baby wipes, a black marker.
PRE-DO:
- Fold the cardstock into a card.
- Paint the toddler’s foot or palm red (adult step) for the hat and body, or do this with a brush.
- Keep wipes and a towel ready. Skip the water tub unless you really need it (see the safety note below).
- Pre-draw the face details.
TODDLER DOES: Press the painted foot or hand onto the card. That’s the hat.
ADULT HELPS: Add a white beard with fingerprints and draw the eyes and nose.
Mess level: 4. Do this one near a sink or bathtub.
Safety firstIf you use a tub of water for cleanup, keep it to an inch or less, stay within arm’s reach the whole time, test the temperature on your wrist, and empty it right after. Wipes and a quick trip to the sink work just as well.
If your toddler is also in the “I want to tell Santa what I want” stage, the letter to Santa template for kids who can’t write yet is a nice follow-up.
14. Wrapping Paper Art
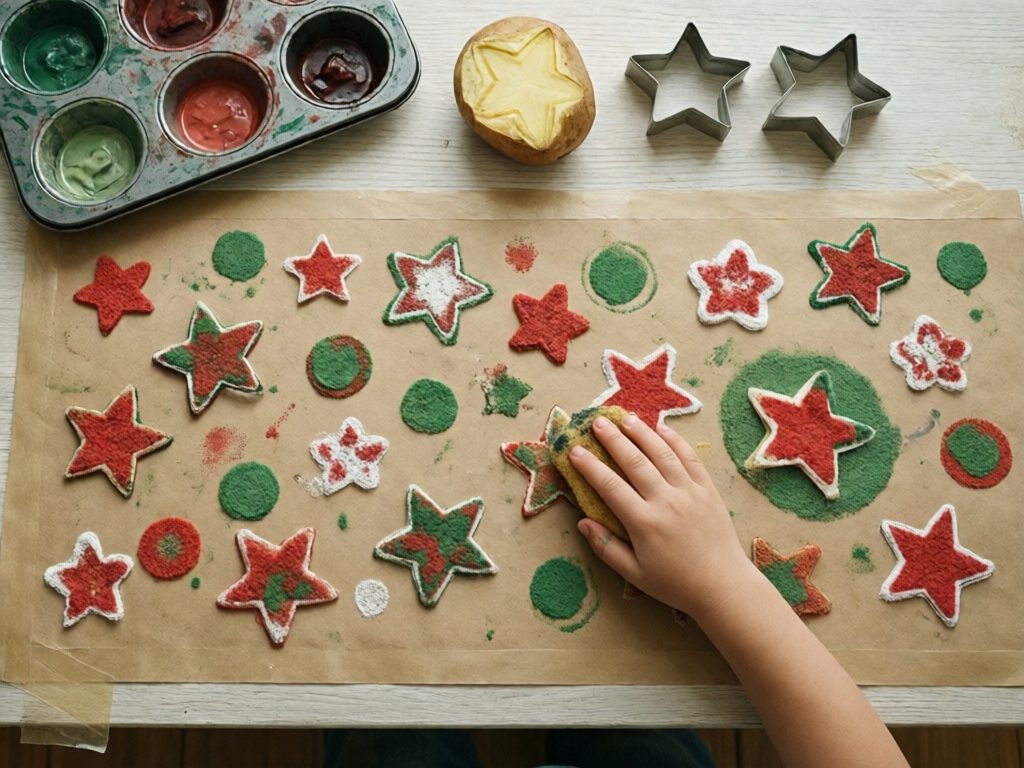
Make your own wrapping paper while your toddler thinks they’re just painting. The gift will be personal, and you’ll save on paper.
You’ll need: Plain brown kraft paper or white butcher paper, washable paint, sponges, large potato halves or cookie cutters, a muffin tin.
PRE-DO:
- Roll out and tape a long sheet of paper to the floor or table.
- Cut a potato in half and carve out a simple star or circle shape (adult step), or use cookie cutters as stamps. Keep the potato halves whole and large, and throw away any carved-out scraps so raw bits stay out of mouths.
- Pour paint into the muffin tin.
TODDLER DOES: Stamp, dab, and smear paint all over the paper.
ADULT HELPS: Keep sleeves rolled up and drying space clear.
Mess level: 3.
15. Cardboard Tube Gift Boxes
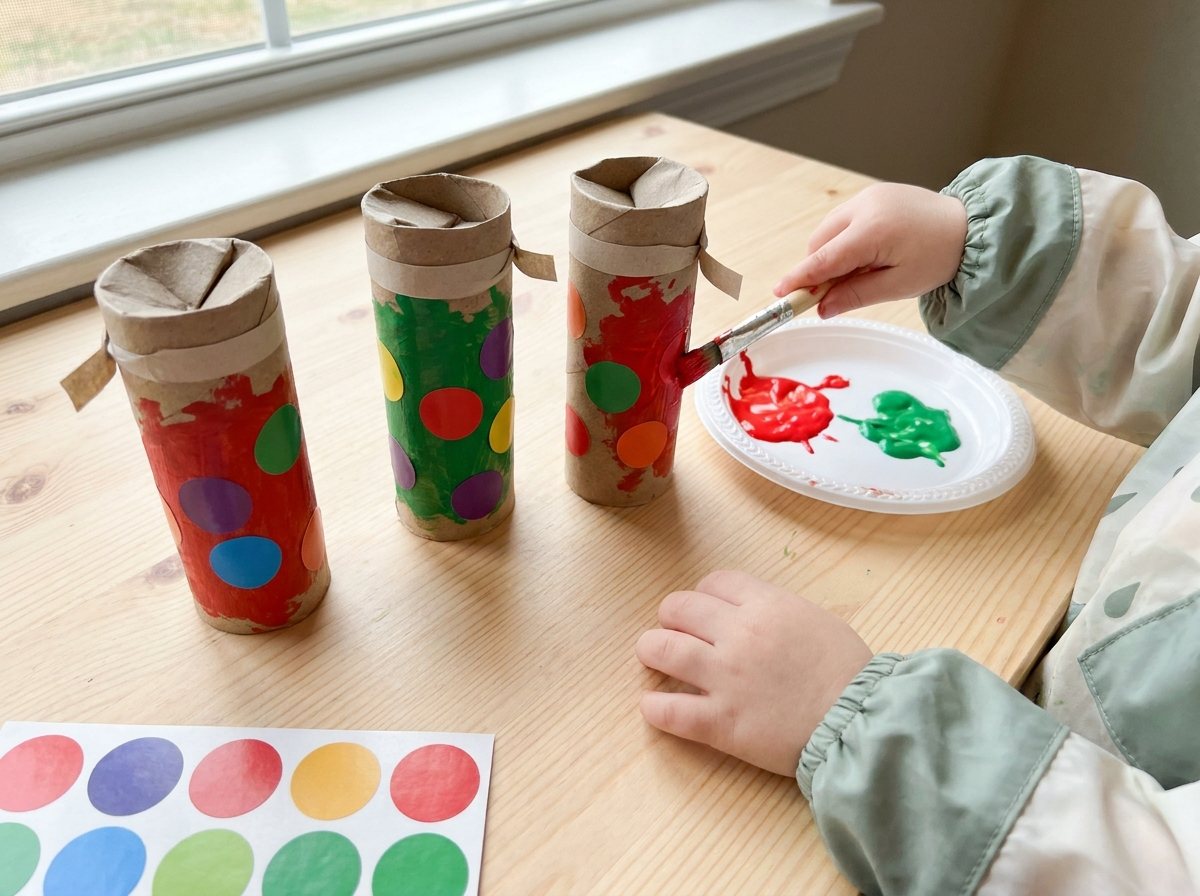
A last craft that doubles as a present. The toddler decorates, you finish.
You’ll need: Cardboard tubes (toilet paper or paper towel), tissue paper, washable paint, large stickers, ribbon.
PRE-DO:
- Flatten one end of the tube and fold it closed (or tape it) so it can hold a small treat.
- Pour paint and set out stickers.
TODDLER DOES: Paint the tube and cover it in large stickers.
ADULT HELPS: Fill with a treat bigger than the choke tube, twist the ends, and tie on a ribbon under 6 inches once the paint is dry. This box is a gift for grandparents or older siblings, not a toy for your toddler.
Safety firstRibbon is a strangulation risk. Keep it under about 6 inches and tie it on only after the toddler is done. Give ribboned boxes to grandparents, older siblings, or other adults, and use a taped-on paper strip instead if a toddler will carry the box.
Mess level: 2.
If you’re looking for what to put inside, stocking stuffers for toddlers that aren’t junk has ideas for ages 1 to 3.
How to Adjust Crafts for Different Ages
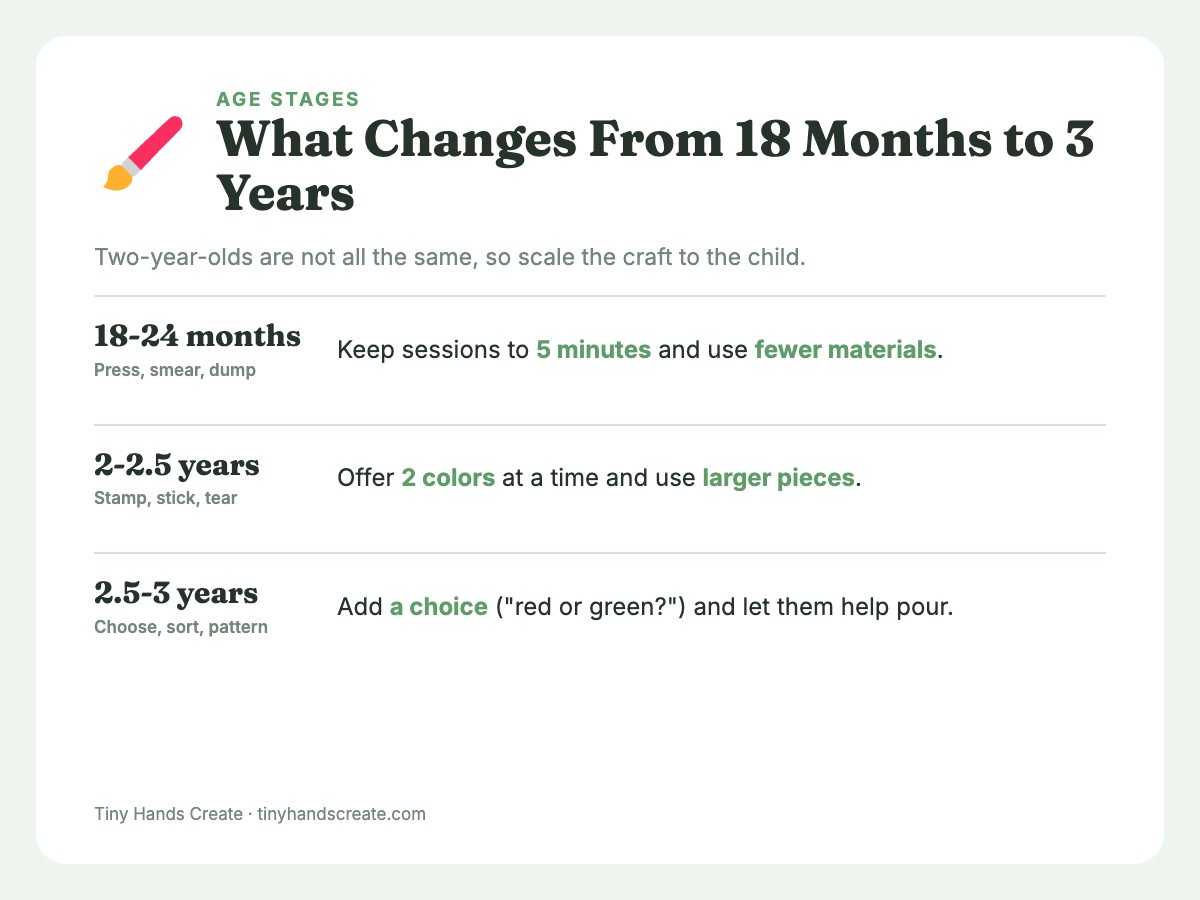
Two-year-olds are not all the same. Some are wild builders, others barely want to touch glue. Here’s how to scale.
| Age | What they can do | What to adjust |
|---|---|---|
| 18-24 months | Pressing, smearing, dumping | Keep sessions to 5 minutes. Use fewer materials. |
| 2-2.5 years | Stamping, sticking, tearing | Offer 2 colors at a time. Use larger pieces. |
| 2.5-3 years | Choosing, sorting, simple pattern play | Add a choice (“red or green?”). Let them help pour. |
Toddler Craft Safety: What to Skip and What to Watch
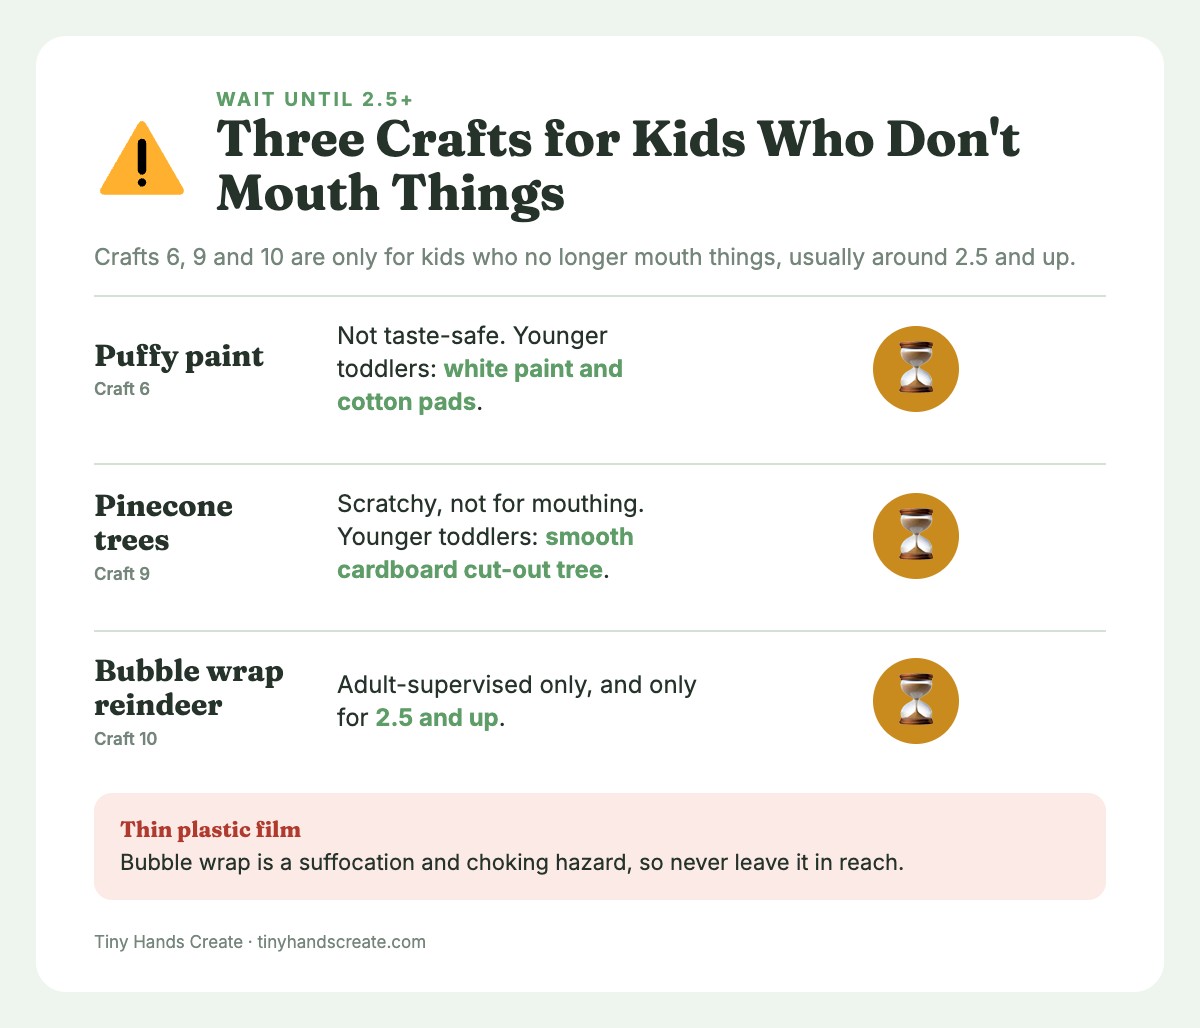
Safe Christmas crafts for toddlers come down to size, supervision, and what you leave within reach.
- Skip: sequins, googly eyes, small beads, buttons, and loose glitter.
- Watch: plastic tablecloths, shower curtains, and bubble wrap. Thin plastic film is a suffocation and choking hazard, so never leave it in reach.
- Watch: ribbon, yarn, water tubs, and anything edible-looking, like salt dough or puffy paint foam. Salt dough is very salty and has raw flour in it, so wash hands right after.
- Match the craft to the child: if your toddler still mouths things, skip puffy paint, pinecones, and bubble wrap, or use the swap listed in each craft.
Mess Control Tips That Actually Help
I’ll be honest: no toddler craft is mess-free. But you can control where the mess goes.
- Work on the floor over a drop cloth if your table is nice.
- Use trays. A baking sheet or large tray keeps materials contained.
- Pre-wet a washcloth and keep it in a bowl next to the table.
- Keep paint in shallow, wide containers that don’t tip easily.
- Set a timer. When the timer ends, the craft ends. Predictability helps tantrums.
- Hand-wash right after. Before they touch anything else.
- Take everything outside if weather allows. Washable paint plus a hose is a reasonable cleanup plan.
Christmas Activities for Toddlers Beyond Crafting
Not every day needs a full craft. On busy days, try one of these low-prep Christmas activities for toddlers instead:
- Ornament sort: Give your toddler a basket of unbreakable ornaments larger than 2 inches, with no hooks, wires, or removable caps, and a few bowls to sort by color. Supervise.
- Jingle bell shaker: Put bells in a bottle and glue the lid shut or seal it with strong tape. Check the seal before every use and supervise. Bells must be bigger than the choke tube or fully sealed.
- Wrapping station: Give them tape, a box, and scrap paper. Wrapping practice is great hand training.
- Cookie cutter play-dough: Add red and green dough, rolling pins, and Christmas cookie cutters.
- Tree decorating with felt: Tape a felt tree to the wall and let them stick on felt ornaments. For a related idea, no-sew felt crafts for toddlers has plenty of glue-only options.
A Realistic Weekly Plan for December
If you’re like me, you want to do something every week but don’t want to burn out. Here’s a pace that works.
| Week | Craft | Why |
|---|---|---|
| Week 1 | Contact paper tree | Easy win, low mess |
| Week 2 | Salt dough ornaments | Keepsake, takes planning |
| Week 3 | Handprint Santa card | Grandparent gift |
| Week 4 | Wrapping paper art | Wraps the gifts you already have |
Frequently Asked Questions
What are the best Christmas crafts for 2 year olds?
The best ones are simple, low-prep, and focused on sticking, stamping, or tearing. Contact paper trees, sponge stamping, and sticker lights are great starters because they require no fine motor precision and give quick results. Handprint crafts are also reliable favorites.
How long should a toddler Christmas craft take?
Plan for 5 to 10 minutes of actual crafting. Many two-year-olds finish in less. Prep ahead so you aren’t searching for supplies while the attention window is open, and treat anything beyond 10 minutes as a bonus.
Are scissors safe for two-year-olds?
Most two-year-olds don’t have the hand strength or control to cut paper. Safety scissors are better saved for around age 3. Until then, replace cutting with tearing, and do any cutting yourself before the toddler arrives.
What craft materials are unsafe for toddlers?
Avoid anything that fits through a toilet paper tube: sequins, small beads, googly eyes, buttons, and loose glitter. Also skip craft items that are not labeled non-toxic. Even non-toxic paint and glue are not meant to be eaten, so stay within arm’s reach.
How do I keep Christmas crafts from becoming a huge mess?
Cover the table, tape the paper down, use shallow containers, and keep wipes within reach. Choose lower-mess crafts like stickers and contact paper on busy days. Accept that some mess is part of the process.
What if my toddler won’t sit still for crafts?
That’s completely normal. Try crafting standing up at a low table, on the floor, or even taped to a window. Shorten the activity and let them leave and return. Many toddlers engage more when they can move around.
What are easy Christmas crafts for toddlers who don’t like getting messy?
Stickers and contact paper are the cleanest options. The craft sticks to the surface instead of to your child. Tissue paper trees and sticker lights may suit some kids who dislike wet or messy textures. Sticky contact paper bothers some children, so offer a brush or tongs for placing the tissue pieces.
Make It Merry, Not Perfect
Your toddler’s Christmas craft doesn’t have to look like the picture. The lopsided tree with all the red tissue paper on one side will be the one you pull out of the box in twenty years and get a little teary over. Do the prep, protect the table, keep your expectations soft, and enjoy the five minutes they give you. Happy crafting.