Nano Tape Crafts for Kids: How to Make Squishies, Bubble Pets, and Bag Charms
You'll learn how to make popular nano tape crafts like squishies and bubble pets, understanding what nano tape is and where to buy quality tape for successful projects.
- Discover nano tape's unique properties: clear, stretchy, reusable, and blowable.
- Learn how kids use nano tape to create squishies, bubble pets, and charms.
- Find out where to purchase nano tape, including online and retail options.
- Prioritize thicker, transparent nano tape for successful, durable bubble crafts.
Let me set the scene. It’s a random Wednesday evening. I’m unloading the dishwasher and half-listening to my nine-year-old talk about her day when she says, casually, “Mom, can you buy me nano tape? Everyone at school has it and they’re making squishy bubble things at recess.”
I nodded the way you do when you have no idea what your child just said. Nano tape? Like… duct tape? Electrical tape? Some new tape I missed while I was busy being a functioning adult?
Twenty minutes later, after going down a rabbit hole of YouTube shorts and TikTok videos, I understood. And honestly? I was hooked too.
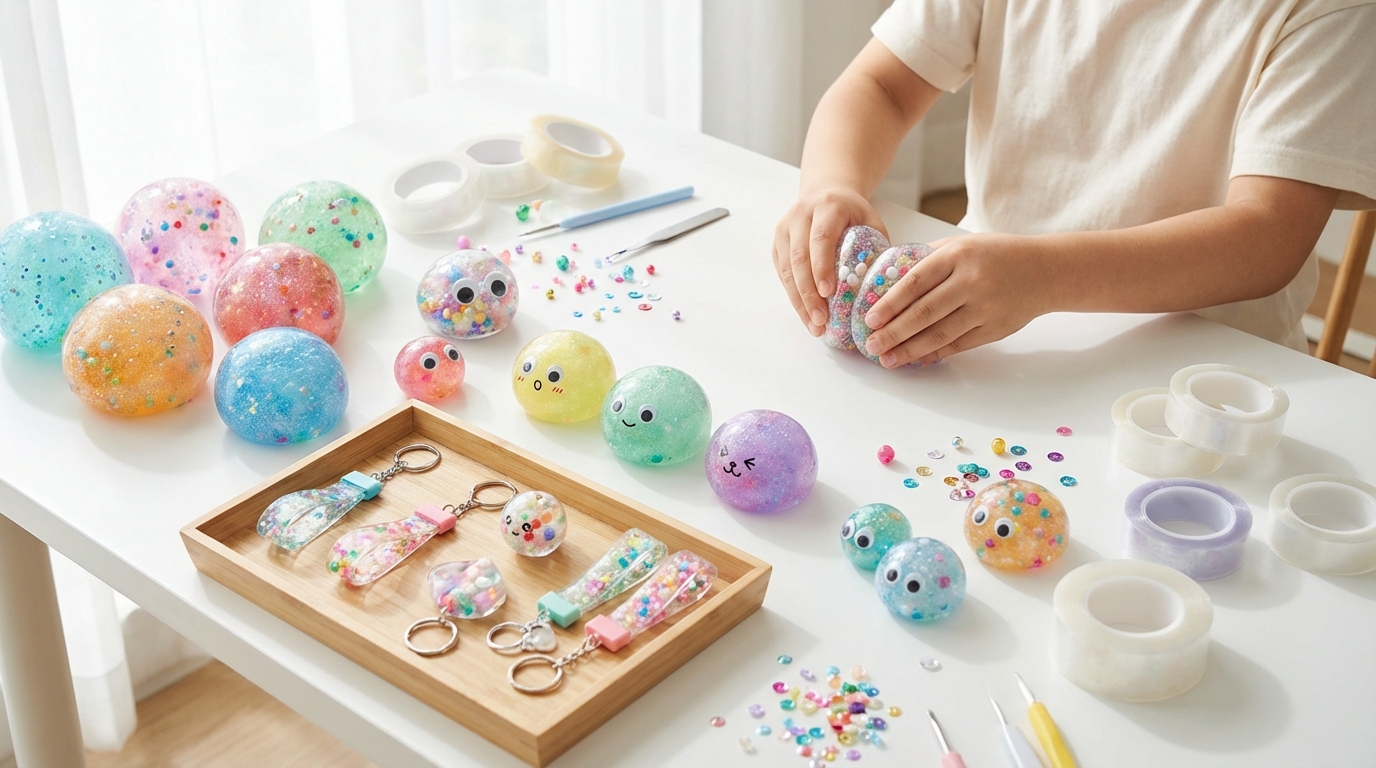
Nano tape — that weird, clear, stretchy, double-sided tape that sticks to everything and peels off cleanly — has become the craft supply of 2026. Kids are blowing it into bubbles, filling those bubbles with glitter and beads to make squishies, adding googly eyes to create “bubble pets,” and turning them into keychains, phone grips, and stickers. It’s the perfect storm of satisfying sensory play, creative expression, and the kind of low-key magic that makes kids feel like they’ve discovered something secret and special.
And the best part? It’s genuinely easy. This isn’t one of those viral craft trends that looks amazing on video and is impossible in real life (looking at you, resin art). Nano tape crafts are accessible, affordable, low-mess, and endlessly customizable.
I’ve now spent several weekends making nano tape creations with all three of my kids, and I’ve learned every trick, shortcut, and pitfall along the way. Here’s everything you need to know to bring this trend into your home without losing your mind.
What Is Nano Tape and Why Are Kids Obsessed?
Nano tape is a type of double-sided adhesive tape made from a gel-like material — usually acrylic gel or nano-suction technology. Unlike regular tape, it’s:
- Transparent and stretchy — you can pull it off the roll and stretch it without it snapping
- Reusable — it sticks to smooth surfaces (glass, metal, plastic) and peels off cleanly without leaving residue
- Blowable — and this is the key to the whole craze. When you pull off a piece and blow air into it (using a straw or just your mouth), it inflates into a bubble that holds its shape
The science behind it is pretty cool, actually. The tape is gel-based and slightly elastic, so when air is trapped inside a folded piece, the material stretches to contain it, creating a sealed, squishy bubble. It’s like making a balloon out of tape. My kids think it’s basically magic, and I don’t entirely disagree.
Where did this trend come from?
Nano tape crafts exploded on TikTok and YouTube Shorts starting in late 2025, driven by kid crafters sharing their creations. By early 2026, it was everywhere — school playgrounds, after-school programs, birthday party activities. It has the same addictive quality that slime had a few years ago, but with significantly less mess and no borax-related parenting anxiety.
Where to buy nano tape:
Not all nano tape is created equal, and this matters a lot for crafting success. Here’s what I’ve learned through trial and error:
- Amazon: Search for “nano tape” or “nano tape bubbles.” Look for tape that’s specifically marketed for crafts or bubbles, usually 2-3 cm wide. Brands vary wildly in quality. I’ve had the best luck with rolls that are slightly thicker (about 2mm) and very transparent.
- Dollar Tree / Five Below: Some locations carry nano tape in the craft section. Quality is hit-or-miss but the price is right for experimenting.
- Craft stores (Michaels, JOANN): These have started stocking nano tape craft kits. They’re pricier but often include accessories like beads, glitter, and googly eyes.
- Walmart / Target: Check the toy or craft aisle. Nano tape craft kits have been popping up alongside other trending craft supplies.
A note on quality: Cheap, thin nano tape doesn’t hold bubbles well — it tears or deflates. If your first attempt fails, it might be the tape, not your technique. I went through three rolls before finding one that worked consistently. Spending a few extra dollars on a good roll saves frustration.
Safety considerations:
Nano tape is generally safe, but a few things to know:
- It is NOT edible. Seems obvious, but when your five-year-old is blowing bubbles with tape near their mouth, the reminder matters.
- Very young children (under 4-5) should not use nano tape without close supervision. Small pieces can be a choking hazard.
- The tape is extremely sticky. It will stick to hair, fabric, carpet, and itself. Getting it tangled in long hair is no fun. Ask me how I know.
- Some cheaper tapes may have a slight chemical smell. Use in a ventilated area and avoid direct skin contact for prolonged periods if irritation occurs.
Essential Nano Tape Craft Supplies
Before we dive into projects, here’s your master supply list. You don’t need everything — start with the basics and add specialty items as your kids get deeper into the nano tape universe (and they will).
| Supply | What It’s For | Where to Find | Approximate Cost |
|---|---|---|---|
| Nano tape (2-3 cm wide, thick) | The star of the show | Amazon, craft stores | $5-10 per roll |
| Straws | Blowing bubbles | Kitchen drawer | Free |
| Scissors | Cutting tape to size | Craft drawer | Free |
| Small beads (pony beads, foam beads) | Filling squishies | Dollar Tree, craft stores | $1-3 |
| Glitter | Filling squishies and decorating | Dollar Tree | $1-2 |
| Googly eyes (assorted sizes) | Making bubble pets | Dollar Tree, craft stores | $1-2 |
| Mini pom-poms | Features for bubble pets | Dollar Tree | $1 |
| Permanent markers (fine tip) | Drawing on bubbles | Craft drawer | Free |
| Keychain rings and lobster clasps | Making bag charms | Amazon, craft stores | $3-5 per pack |
| Jump rings | Connecting charms to chains | Amazon, craft stores | $2-3 per pack |
| Ribbon or cord | Bag charm and keychain loops | Dollar Tree | $1-2 |
| Small foam stickers | Decorating flat tape crafts | Dollar Tree | $1 |
| Washi tape | Borders and accents | Dollar Tree, craft stores | $1-3 |
| Confetti or sequins | Filling squishies | Dollar Tree | $1 |
| Small plastic figurines or charms | Encasing in bubbles | Dollar Tree | $1-2 |
Pro tip: I keep a dedicated “nano tape station” in a plastic bin on our craft shelf. Everything goes back in the bin when we’re done. It makes cleanup instant and prevents the “WHERE IS THE GLITTER?” meltdown during the next crafting session.
The Projects
1. Classic Nano Tape Bubbles (The Gateway Project)
Start here. This is the fundamental technique that everything else builds on, and the first time your kid successfully inflates a nano tape bubble, they’re going to lose their mind with joy. My seven-year-old screamed. Like, actually screamed. The neighbors probably thought something was wrong.
Materials needed:
- Nano tape
- Straw (optional but helpful)
- Scissors
Difficulty: Easy
Step-by-step:
- Pull off a piece of nano tape about 6-8 inches long. The exact length doesn’t matter much — you’re experimenting.
- Fold the tape in half, sticky side to sticky side, leaving a small opening at one end. Press the edges together firmly on three sides, creating a little pouch.
- Insert a straw into the open end and blow gently. You should see the tape inflate into a bubble. Keep blowing until the bubble is the size you want.
- Quickly pinch the opening shut while removing the straw. Press the edges together firmly to seal the air inside.
- You now have a nano tape bubble! Squeeze it. It’s satisfyingly squishy. Toss it gently — it bounces. Poke it — it springs back (usually).
Troubleshooting:
- Bubble won’t inflate: The edges aren’t sealed well enough. Press harder on the three sealed sides. Make sure the sticky sides are fully adhered to each other with no gaps or wrinkles.
- Bubble deflates immediately: There’s a leak. Check all the edges for gaps. You can reinforce by pressing a thin strip of extra tape over the sealed edges.
- Tape keeps sticking to itself before you’re ready: Work slowly. If the tape folds over on itself, gently peel it apart. If it’s hopelessly stuck, cut that piece off and start fresh.
- Can’t blow hard enough: This is common with younger kids. Use a straw — it concentrates the airflow and requires less lung power.
Tips for success:
The temperature matters. Nano tape is slightly more pliable and stretchy in warm conditions. If you’re crafting in a cold room, warm the tape between your hands for a minute before starting. Also, the thicker the tape, the sturdier the bubble. Thin tape makes fragile bubbles that pop easily; thick tape makes durable ones that last for days.
2. Nano Tape Squishies (Filled with Beads, Glitter, or Slime)
Once your kids master the basic bubble, they’ll immediately want to put stuff inside it. This is where the real creativity starts. Filled nano tape squishies are tactile, visual, and endlessly customizable. My kids have made probably fifty of these by now, each one slightly different.
Materials needed:
- Nano tape
- Straw
- Filling materials: pony beads, foam beads, glitter, confetti, sequins, tiny pom-poms, or a small amount of slime
- Scissors
- Small funnel (optional, for pouring tiny fillings)
Difficulty: Easy to Medium
Step-by-step:
- Cut a piece of nano tape about 8-10 inches long. Slightly longer than for a basic bubble, because the filling adds weight and you want a sturdier structure.
- Fold the tape in half, sticky sides together. Seal TWO sides firmly, leaving one short side and the straw-insertion side open.
- Through the open side, add your filling materials. This is the fiddly part. For beads and larger items, just drop them in. For glitter and small items, a tiny funnel made from a rolled piece of paper helps enormously. Don’t overfill — leave room for the filling to move around (that’s what makes it squishy and satisfying).
- Seal the filling side closed by pressing the edges together.
- Insert the straw into the remaining opening and blow to inflate the bubble around the filling.
- Pinch the last opening shut and seal firmly.
- Squeeze, shake, and admire. The filling should shift and move inside the inflated bubble.
Filling ideas that work great:
- Water beads (pre-hydrated, obviously) — these look magical and feel incredible to squish
- Pony beads — colorful, clacky, satisfying sound
- Glitter + confetti mix — like a snow globe you can squeeze
- Tiny foam balls — lightweight, great for younger kids who don’t need the heavy squish
- A small amount of slime — this creates the ultimate squishy, but getting slime inside without making a mess requires patience and possibly divine intervention
What could go wrong:
Too much filling prevents the bubble from inflating properly. Start with a small amount — you can always make another with more. Sharp or pointy fillings (think tiny plastic stars or crystal beads with edges) can puncture the tape from the inside. Stick to smooth, rounded fillings. And the first time my son tried to put slime inside, he ended up with slime on the tape, the table, his shirt, his hair, and somehow the ceiling. Use a very small amount and put it in before inflating.
3. Bubble Pets (Adding Googly Eyes and Features)
This is the project that made my six-year-old declare nano tape her “favorite thing in the whole world, even more than ice cream.” Bubble pets are exactly what they sound like: nano tape bubbles transformed into adorable little creatures with googly eyes, drawn-on features, and tiny accessories.
Materials needed:
- Nano tape
- Straw
- Googly eyes (assorted sizes — the self-adhesive kind is easiest)
- Permanent markers (fine tip)
- Mini pom-poms (optional, for noses or ears)
- Pipe cleaners (optional, for legs or antennae)
- Small foam stickers (optional, for accessories)
- Scissors
- Hot glue gun or super glue (parent use only, for non-adhesive accessories)
Difficulty: Easy
Step-by-step:
- Make a basic nano tape bubble (follow the steps from Project 1). For bubble pets, I recommend a medium-sized bubble — about the size of a golf ball or slightly larger.
- Stick googly eyes onto the outside of the bubble. Self-adhesive googly eyes stick directly to nano tape beautifully. This is the moment the bubble transforms from “tape thing” to “creature,” and kids go absolutely bonkers.
- Use permanent markers to draw features: a mouth, eyebrows, spots, stripes, whiskers, or blush marks. Permanent markers work on nano tape; regular markers smudge.
- Add accessories if desired:
- Pipe cleaner legs: cut short pieces and press the ends into the tape at the bottom
- Pom-pom nose: attach with a dab of hot glue or super glue (parent job)
- Foam sticker accessories: hats, bows, hearts
- Name the pet. This is a crucial step, according to every child I’ve ever met. My kids have created “Bubblina,” “Sir Squish,” “Gloopy,” and “Princess Sparkle-Eyes.”
Creature ideas:
- Caterpillar: Make several small bubbles in a row, connected by tape, with eyes on the first one
- Octopus: One big bubble with pipe cleaner tentacles
- Frog: Green-tinted bubble (put a piece of green tissue paper inside before inflating) with big googly eyes on top
- Monster: The wilder, the better — multiple eyes, jagged marker teeth, pom-pom horns
- Fish: Oval-shaped bubble with a tail cut from extra tape
What could go wrong:
Permanent marker can smear if the surface is dusty or oily — wipe the bubble with a dry cloth before drawing. Googly eyes sometimes fall off after a day or two if the tape surface isn’t perfectly smooth — a tiny dot of super glue under each eye (parent job) makes them permanent. If you’re connecting multiple bubbles for a caterpillar or other multi-bubble creature, the connection points are weak. Reinforce with extra tape wrapped around the joints.
This is wonderful open-ended play territory — put out a tray of supplies and let kids create whatever creatures their imagination conjures. No instructions needed, no right or wrong. That’s the beauty of it.
4. Nano Tape Stickers (Flat Designs)
Not everything has to be 3D. Flat nano tape stickers are a fantastic project for kids who want to decorate notebooks, water bottles, phone cases, and every other surface in your home. The beauty of nano tape stickers is that they’re removable and repositionable — they stick firmly but peel off without residue.
Materials needed:
- Nano tape
- Permanent markers (various colors)
- Stickers, washi tape, or printed images (optional, for layering)
- Scissors
- Parchment paper or wax paper (for a work surface)
Difficulty: Easy
Step-by-step:
- Cut a piece of nano tape to the size you want your sticker to be. Work on parchment or wax paper — it prevents the tape from sticking to your table while you work.
- Fold the tape in half, sticky sides together, pressing out any air bubbles. You now have a flat, clear piece of double-layered tape. Smooth it with your fingers or a credit card edge.
- Draw your design directly on the tape surface with permanent markers. Simple designs work best: hearts, stars, initials, smiley faces, flowers, lightning bolts.
- Cut around the design with scissors, leaving a small border.
- Peel the sticker off the parchment paper and apply it to any smooth surface. It sticks immediately and can be repositioned multiple times.
Advanced techniques:
- Layered stickers: Place a small printed image, tiny sticker, or piece of washi tape between the two layers of tape before pressing them together. This encases the design inside the tape and looks incredibly polished.
- Glitter stickers: Sprinkle fine glitter between the two layers before sealing. Shake off excess. The glitter is trapped inside, so it sparkles without making a mess.
- Photo stickers: Print tiny photos on regular paper, cut them out, and encase them between the tape layers. My daughter made one with her best friend’s school picture and stuck it on her water bottle.
What could go wrong:
Air bubbles are the main enemy. Press from the center outward when sealing the two layers. If you get a bubble, peel the layers apart (gently!) and re-press. Permanent markers can smear on the glossy tape surface if you touch the design before it dries — give it 30 seconds. Regular markers will NOT work; they bead up and smear. Permanent markers only.
5. Bag Charms and Keychains
When my daughter’s school bag started coming home covered in nano tape creations dangling from the zipper pulls, I realized this was the natural evolution. Nano tape bag charms are the 2026 equivalent of friendship bracelets, and kids are trading them at school like currency.
Materials needed:
- Nano tape
- Straw
- Keychain rings or lobster clasps
- Jump rings
- Thin ribbon, cord, or embroidery floss
- Filling materials (beads, glitter, small charms)
- Googly eyes, permanent markers (for decorated versions)
- Scissors
- Pliers (for opening/closing jump rings — parent job)
Difficulty: Medium
Step-by-step:
- Make a small nano tape bubble or squishy — about 1-1.5 inches in diameter. Smaller is better for bag charms; they need to be lightweight.
- Before sealing the bubble completely, insert a loop of ribbon or cord into the opening. The loop should stick out about 1 inch. Seal the tape around the ribbon/cord, pressing firmly so it’s secure.
- Decorate the bubble: add googly eyes for a pet charm, draw designs with permanent markers, or leave it clear to show off glitter or bead filling.
- Thread a jump ring through the ribbon loop (use pliers to open and close the jump ring — definitely a parent task).
- Attach the jump ring to a keychain ring or lobster clasp.
- Clip onto a backpack, pencil case, or jacket zipper.
Theme ideas for bag charms:
- Galaxy charm: Fill with blue and purple glitter, add tiny silver star confetti
- Pet charm: Add googly eyes and draw a face
- Initial charm: Encase a small foam letter sticker inside
- BFF charms: Make two matching ones, keep one, give one to a friend
- Holiday charms: Themed filling for different holidays — red and green for winter, orange and black for Halloween
What could go wrong:
The biggest failure point is the ribbon/cord attachment. If the tape doesn’t seal well around it, the charm will fall off the first time it gets tugged (and it will get tugged — it’s on a backpack being thrown around by a child). Double up the tape around the attachment point. Wrap an extra strip of tape around the sealed area for reinforcement. My daughter lost two charms before we figured out this reinforcement technique. Also, if the charm is too heavy, it pulls on the zipper. Keep them small and light.
6. Nano Tape Phone Grips
For the older kids in the 10-12 range who have phones or tablets, this project is wildly popular. A nano tape phone grip is basically a DIY PopSocket that costs almost nothing and can be customized infinitely.
Materials needed:
- Nano tape
- Small fillings (glitter, tiny beads, confetti)
- Permanent markers
- Scissors
- Optional: small circular object to trace (bottle cap, coin) for a uniform shape
Difficulty: Easy to Medium
Step-by-step:
- Cut two circular pieces of nano tape, about 2-2.5 inches in diameter. Trace around a bottle cap or small cup for a clean circle, or freehand it — imperfect circles have charm.
- Place filling materials on one circle (a pinch of glitter, a few tiny beads, a small sticker or image).
- Place the second circle on top, sticky sides facing inward, pressing the edges together to seal. Leave a small opening.
- Blow through a thin straw to inflate it slightly — you want it puffy enough to grip but not so inflated that it’s a full bubble. Think “cushion” not “balloon.”
- Seal the opening.
- Decorate the outside with permanent markers if desired.
- Stick directly to the back of a phone case (not the phone itself — in case it needs to be removed). Nano tape adheres to most phone case materials and peels off cleanly.
What could go wrong:
If you over-inflate, it won’t lay flat against the phone. It should be a gentle dome, not a sphere. The grip may slide on silicone phone cases — it works best on hard plastic or glass. If your kid’s phone case is textured or fabric-covered, the grip won’t stick. Clean the phone case surface first for best adhesion.
7. Sensory Fidget Toys
This is where nano tape crafts and calm-down activities intersect beautifully. Nano tape squishies are inherently sensory — they’re squishy, they make satisfying sounds when filled with beads, they’re visually interesting, and the tactile experience of squeezing them is genuinely calming. Several occupational therapists I follow have started recommending them as fidget tools.
Materials needed:
- Nano tape
- Straw
- Sensory-specific fillings:
- Water beads (visual + squishy)
- Rice (sound + texture)
- Fine sand (weight + texture)
- Foam balls (light + squishy)
- Sequins and beads (visual + sound)
- Scissors
Difficulty: Easy
Step-by-step:
- Decide on the sensory experience you’re targeting:
- Visual fidget: Use clear tape with colorful water beads or glitter suspended in a small amount of clear hair gel
- Tactile fidget: Fill with foam balls or rice for different squeeze textures
- Auditory fidget: Fill with small beads or rice that make a satisfying sound when shaken
- Weighted fidget: Fill with fine sand for a heavier, grounding feel (great for kids who benefit from deep pressure input)
- Make a medium-sized nano tape squishy using the technique from Project 2, with your chosen filling.
- For a longer-lasting fidget, reinforce all edges with an extra layer of tape. Fidgets get squeezed HARD and OFTEN. Standard construction won’t survive a week in a kid’s pocket.
- Make it pocket-sized — about 2 inches across. Too big and it won’t be portable; too small and it’s not satisfying to squeeze.
Sensory combinations that work well:
- Calm-down fidget: Water beads in clear gel — slow-moving, mesmerizing to watch, gentle to squeeze
- Focus fidget: Rice or small beads — subtle sound, good squeeze resistance, not visually distracting (great for school, if the teacher allows fidgets)
- Stimulation fidget: Glitter, sequins, and foam beads together — visual, auditory, and tactile input simultaneously
What could go wrong:
The connection to balloon science experiments is real here: just like balloons, nano tape fidgets can pop under pressure. And they will eventually pop if squeezed aggressively. Warn kids that these are “gentle squeeze” toys, not stress balls. If using water beads, they can dry out over time as moisture escapes through the tape. Adding a tiny amount of water when filling extends their lifespan. Sand can be very heavy — don’t overfill or the tape may not hold.
8. Nano Tape Flower Bouquet
This is the project that made me realize nano tape crafts aren’t just a trend — they’re a legitimate creative medium. When my eleven-year-old brought me a bouquet of nano tape flowers for Mother’s Day last year, I was genuinely moved. They were sparkly, translucent, and absolutely beautiful in a way I didn’t expect from sticky tape.
Materials needed:
- Nano tape
- Green pipe cleaners (for stems)
- Permanent markers (greens for leaves, various colors for petals)
- Glitter (optional, for filling petals)
- Small beads (optional, for flower centers)
- Scissors
- Green floral tape (optional, for wrapping stems)
- Small vase or jar (for display)
Difficulty: Medium
Step-by-step:
- Make the petals: Cut 5-6 small pieces of nano tape (about 2-3 inches each). Fold each piece in half, sticky sides together, creating flat petal shapes. Cut into petal shapes — rounded for roses, pointed for tulips, long and thin for daisies.
- Color the petals: Use permanent markers to color the petals. The tape is translucent, so the marker creates a stained-glass effect that’s really beautiful. For extra sparkle, before sealing the petal, sprinkle fine glitter between the layers.
- Assemble the flower: Gather 5-6 petals around the end of a green pipe cleaner, arranging them in a circle. Wrap the base of the petals tightly with a small strip of nano tape or floral tape to hold them in place.
- Add a center: Press a small bead or pom-pom into the center of the petals, or draw a center with permanent marker.
- Make leaves: Cut small leaf shapes from nano tape, color them green with permanent marker, and attach to the pipe cleaner stem by pressing the sticky base of the leaf around the stem.
- Repeat to make a full bouquet — 5-7 flowers looks great in a small vase.
Flower variations:
- Rose: Layer petals in a spiral pattern, slightly overlapping, curving the edges outward
- Daisy: Flat, evenly spaced petals radiating from a yellow center
- Tulip: Three petals cupped upward around the stem
- Sunflower: Many small petals around a large brown/dark center (use a small pom-pom)
- Fantasy flower: Who says it has to look like a real flower? Mix colors, add glitter, make something entirely new
What could go wrong:
Petals tend to droop if they’re too large or too heavy (especially if filled with glitter). Keep petals small — 1-2 inches is ideal. The attachment point where petals meet the stem is fragile. Use plenty of tape to secure it, and consider a dot of hot glue (parent job) for permanence. Pipe cleaners are bendy, which is great for posing but means stems can flop in a vase. Cut them to the right length for your vase so the flower head is supported.
Troubleshooting Common Nano Tape Problems
After weeks of nano tape crafting with three kids of different ages, I’ve encountered pretty much every problem possible. Here’s my troubleshooting guide so you don’t have to learn the hard way like I did.
“The tape won’t stick to itself.”
Your tape might be dusty or there might be a film on the surface. Wipe it with a slightly damp cloth and let it dry. If it still won’t stick, the tape may be too old or too cheap. Nano tape loses adhesion over time, especially if exposed to air for extended periods. Buy a fresh roll.
“The tape is TOO sticky — it sticks to everything and tangles.”
This is actually a sign of good-quality tape. Work more slowly and deliberately. If a piece gets hopelessly tangled on itself, cut it off and start with a fresh piece. Don’t try to untangle it — you’ll just make it worse and frustrate everyone. Keep long hair tied back and sleeves pushed up while crafting.
“My bubbles keep popping.”
You’re probably over-inflating. Stop blowing before the tape feels taut. A good bubble should be squishy, not tight like a balloon about to pop. Also check that your edges are sealed completely — even a tiny gap will let air escape.
“The bubbles deflate overnight.”
Some air loss is normal, especially in the first 24 hours. If your bubble completely deflates, the seal wasn’t airtight. You can re-inflate through the same spot (poke the straw in gently) and re-seal. For longer-lasting bubbles, double up the tape at every seal point.
“Permanent marker won’t write on the tape.”
The surface might be oily. Clean it with rubbing alcohol on a cotton ball (parent task) and let it dry. Use fine-tip Sharpie-brand markers for best results. Some off-brand permanent markers don’t adhere well to the glossy tape surface.
“I can’t get the filling inside the bubble.”
Make a larger opening and use a small funnel. For stubborn fillings like water beads, try using tweezers to place them inside one at a time. For glitter, tap it off a folded piece of paper to direct the flow. Patience is the key ingredient here.
“My kid is frustrated and wants to quit.”
Totally normal. The first few attempts are the hardest because the tape is unfamiliar. I suggest starting with the absolute simplest project — just making a basic bubble — and celebrating that success before moving on. My youngest was ready to give up after two failed bubbles, and then the third one worked and she was unstoppable.
Nano Tape Safety Guide for Parents
I want to talk about safety because every time a new craft trend takes off with kids, parents (rightfully) have questions. Here’s the honest rundown.
Age recommendations:
- Under 5: Not recommended without very close, hands-on adult supervision. Small pieces of tape can be a choking hazard, and the stickiness can cause hair tangles and tears (the crying kind).
- Ages 5-7: Good to go with adult supervision. You’ll likely need to help with sealing, filling, and inflating. Let them handle the creative parts — choosing colors, decorating, naming their creations.
- Ages 8-10: Can work fairly independently once they learn the basic techniques. Check in periodically but don’t hover.
- Ages 11-12: Fully independent. They’ll probably teach YOU new techniques they learned from TikTok. Ask them to make you something. They secretly love being the expert.
Supervision needs:
- Always supervise straw use with younger kids to prevent choking on small straw pieces
- Monitor filling materials — small beads and sequins are choking hazards for young children
- Be present for any project involving scissors (obviously) and especially hot glue
- If kids are making nano tape crafts with friends, do a quick supply check afterward — nano tape sticks to carpet, upholstery, and clothing and can be hard to spot
Cleanup:
This is genuinely one of the easiest craft trends to clean up. Nano tape residue can be removed from most surfaces by:
- Rubbing it with your finger (it balls up and peels off)
- Using rubbing alcohol on a cloth for stubborn residue
- A damp magic eraser for surfaces like desks or countertops
Tape scraps go in the trash. Any spilled beads or glitter can be vacuumed. Total cleanup time is usually under 5 minutes, which is why this has become our favorite afternoon activity. Compare that to the great slime disaster of 2024 that still haunts my kitchen table.
Storage:
Store nano tape rolls in a sealed plastic bag or container. Exposure to air, heat, and dust degrades the adhesive over time. Finished projects can be stored in a shoebox or zip-top bag. Squishies may slowly deflate over weeks — this is normal and they can be re-inflated.
Beyond Nano Tape: What Comes Next
One of the things I love about nano tape crafts is how they connect to broader creative skills. If your kid gets deep into the nano tape universe, here are some natural next steps:
Polymer clay miniatures: Kids who love making nano tape creatures often gravitate toward polymer clay, where they can sculpt permanent versions of their favorite designs. The creative muscle is the same — making small, detailed, character-driven art.
Resin crafts (ages 12+, with supervision): For older kids ready for the next level, resin crafts offer a similar “filling and encasing” satisfaction but with permanent, glass-like results. This is definitely an advanced and supervised activity.
Jewelry making: The skills from making bag charms and keychains — working with jump rings, clasps, and small components — transfer directly to beaded jewelry making. If your nano tape crafter is interested, a basic jewelry kit is a great next step.
Science exploration: The way nano tape works — adhesion, air pressure, material science — is genuinely fascinating. If you have a curious kid who wants to understand WHY nano tape makes bubbles, check out our activity finder quiz to find more STEM-meets-craft projects.
Process art and open-ended creation: If the freeform creativity of nano tape crafts is what your kid loves most — the making without instructions, the experimentation, the “I wonder what happens if…” — lean into that. Set up process art stations with varied materials and let them explore. The maker mindset they’re building with nano tape applies to every creative endeavor.
Frequently Asked Questions
Is nano tape the same as double-sided tape?
No, though they’re related. Standard double-sided tape has a paper or film backing and a traditional adhesive. Nano tape is made from a gel-based material (usually acrylic gel) that’s stretchy, transparent, washable, and reusable. It’s the stretchiness and air-holding properties that make it work for bubble crafts. Regular double-sided tape can’t be inflated into bubbles — it’s too rigid and tears easily.
How long do nano tape creations last?
It depends on the project. Flat stickers can last weeks or months. Inflated bubbles and squishies will gradually deflate over 1-3 weeks as small amounts of air escape through the material. You can re-inflate them, but over time the tape loses elasticity. Heavily used fidgets might last a week before needing replacement. Think of nano tape crafts as semi-permanent — they’re fun to make, enjoy for a while, and then make new ones. That’s part of the appeal.
Can I wash nano tape? What if it gets dirty?
Yes! Nano tape is washable. Gently rinse finished creations under cool running water and let them air dry. The adhesive reactivates once dry. You can also wipe the surface with a damp cloth. Avoid hot water, which can warp the tape and weaken the seal. For tape rolls that have gotten dusty, wipe the surface with a slightly damp cloth before using.
What’s the best nano tape brand for kids’ crafts?
I’ve tried at least eight brands and here’s my honest take: the brand matters less than the thickness and width. Look for tape that’s at least 2mm thick and 2-3cm wide. Thicker tape makes sturdier bubbles and squishies. Very thin, cheap tape (often sold in huge rolls for very low prices) tears easily and doesn’t hold air well. I’ve had consistently good results with tapes marketed specifically for “nano tape crafts” or “nano tape bubbles” rather than general-purpose nano adhesive tape. Read reviews that specifically mention craft or bubble use.
My kid’s school banned nano tape. What can I do?
Some schools have started restricting nano tape because kids trade creations during class time or leave tape residue on school furniture. Respect the school’s rules (even if your kid protests dramatically). Make nano tape an at-home activity. If your child wants to bring finished creations to school for show-and-tell or gifts, ask the teacher first. And have a conversation with your kid about why rules exist and how to enjoy hobbies within boundaries. This is actually a great life skills moment hiding inside a craft trend.
Is nano tape safe for kids with latex allergies?
Most nano tape is made from acrylic gel, not latex, and should be safe for children with latex allergies. However, formulations vary by manufacturer, and many rolls don’t include detailed ingredient lists. If your child has a severe latex allergy, check the product listing carefully or contact the manufacturer directly before purchasing. When in doubt, have your child do a small skin patch test — apply a tiny piece of tape to their forearm for 10 minutes and check for any reaction.
Can adults do nano tape crafts too, or is it just for kids?
Oh, it is absolutely for adults too. I started making nano tape crafts “to test them for the blog” and now I have a collection of glitter squishies on my desk that I squeeze during stressful conference calls. No shame. The meditative quality of making these — the careful folding, the gentle inflation, the decorating — is genuinely relaxing for grown-ups. Several mom friends have confessed to making them after the kids go to bed. You’re among friends here.
There you have it — your complete guide to the craft trend that has taken over playgrounds, classrooms, and (if your house is anything like mine) every flat surface in your home. Nano tape crafts are the rare combination of genuinely easy, endlessly creative, surprisingly satisfying, and refreshingly low-mess. In a world of elaborate Pinterest crafts that require seventeen specialty supplies and a degree in fine arts, nano tape hands kids a single roll of stretchy tape and says “go make something amazing.”
And they do. Every single time.
Now go buy some nano tape. Your kids will thank you. Your craft drawer will barely notice the addition. And you’ll probably end up making a few squishies yourself when nobody’s looking.
Happy crafting, friends. May your bubbles stay inflated and your tape never tangle.
Have your kids tried nano tape crafts? What’s their favorite creation? Share your photos and stories with us — especially the spectacular failures, because honestly those are the best part of crafting with kids.