Leaf Sun Print Science Activity for Preschoolers
Turn a leaf walk into a light-and-shadow science experiment with your preschooler using sun-sensitive paper. You'll learn supplies, steps, and kid-friendly explanations for creating leaf sun prints.
- Gather sun print paper, fresh leaves, and water for a light-and-shadow experiment.
- Teach your child about 'light,' 'shadow,' 'block,' and 'change' during the activity.
- Observe cause and effect as sunlight changes the paper, creating leaf prints.
- Conduct mini-experiments by testing different leaves or sun exposure times.
This post contains affiliate links. As an Amazon Associate I earn from qualifying purchases.
This leaf sun print activity for preschoolers turns a leaf walk into a real light-and-shadow experiment, with about 30 minutes of hands-on time and a mostly-water mess. Inside: supplies, steps with timing, a kid-friendly why-it-works card, 5 mini experiments, and fixes for faint prints.
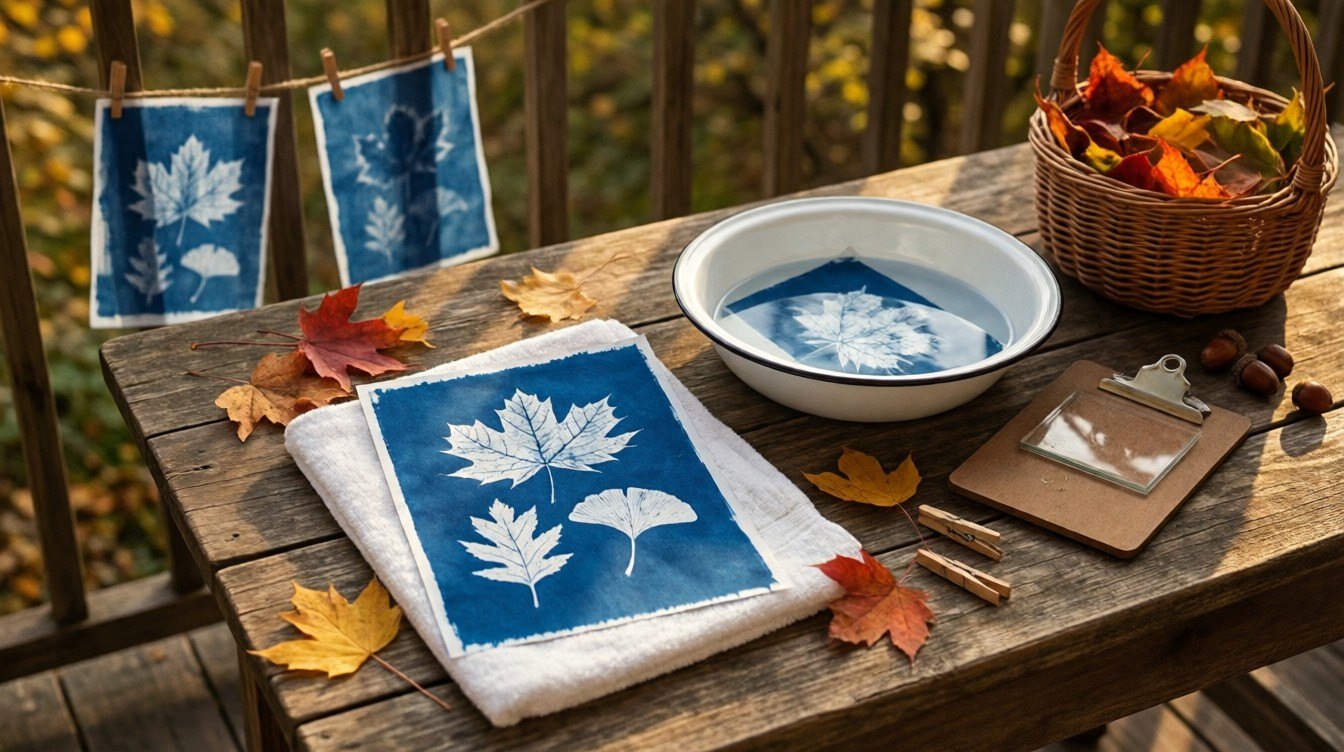
Last October my preschooler looked at our glued-down leaves and asked, “But what do they do?” So we laid leaves on sun-sensitive paper, set it on the porch rail, and rinsed it in a dishpan. The leaf shapes popped out snow white on deep blue. My kid gasped, then asked, “Who did that?”
“The sun did,” I said. And right there, in a puddle of porch water and wet sleeves, we were doing real science.
In this article (16 sections)
- What a Sun Print Actually Is (and Why It Counts as Science)
- What You’ll Need
- Leaf Walk: Collect and Ask Questions
- Set Up Your Sun Print Station
- How to Make a Leaf Sun Print
- The Explainer Card: Why Did the Paper Change Color?
- How to Talk About It at Each Age
- Mini Experiments: Turn One Print Into Five
- No Sun Paper? Two Backup Versions
- Troubleshooting: When the Print Doesn’t Cooperate
- Mess, Safety, and the Honest Stuff
- Making the Prints Last (and Look Good)
- Pairing the Activity with Other Fall Play
- A Quick Note on Using This With a Group
- Frequently Asked Questions
- Final Tips for Leaf Sun Prints with Preschoolers
What a Sun Print Actually Is (and Why It Counts as Science)
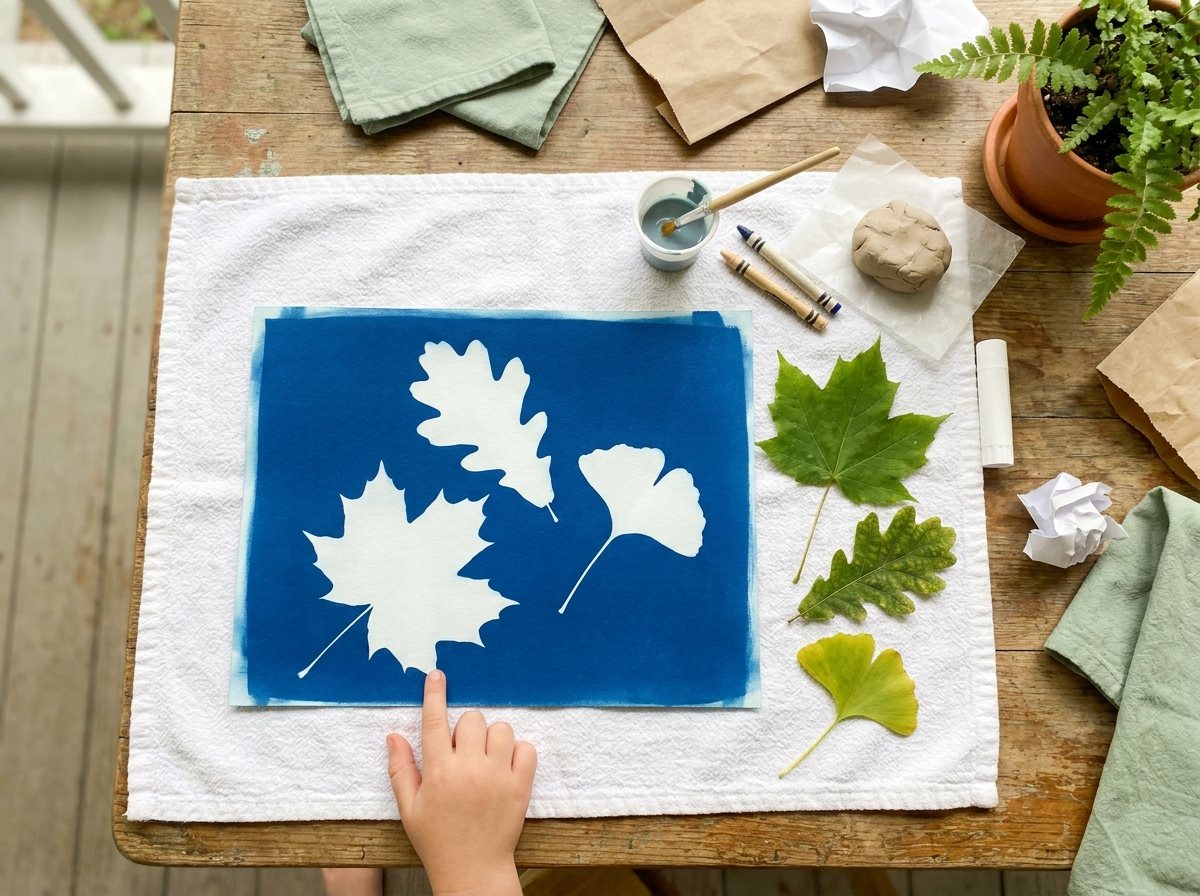
A sun print is a picture made by light instead of paint. You put an object, like a leaf, on special paper that reacts to sunlight. The sun changes the paper everywhere the light touches it. Wherever the leaf blocks the light, the paper stays unchanged. After a rinse in water, you’re left with a crisp white “shadow” of the leaf on a deep blue background.
The paper is sold as sun print paper, solar paper, or cyanotype paper. Most kits include a stack of pre-coated sheets in a light-blocking bag, and they cost a few dollars for a pack. The coating is made of light-sensitive iron compounds. You don’t need to explain iron compounds to a four-year-old, and I promise you won’t have to.
Here’s why I call it science rather than just a craft:
- There’s a cause and an effect. Light touches paper, paper changes. Kids can see it happen in real time.
- There’s something to predict. “What do you think will happen to the paper under the leaf?” is a real hypothesis question, even if the answer is “it turns purple.”
- There’s something to test. Thick leaf or thin leaf? Sun or shade? Five minutes or ten? Preschoolers can run tiny fair tests without knowing that’s what they’re doing.
- The result is visible and surprising. The blue deepening in the rinse water is genuinely magical, and that “wait, what?” feeling is where curiosity starts.
If you’ve done the fall leaf crafts we love around here, think of this as the quieter, smarter cousin. Same leaves, same walk, but now the leaf is the tool instead of the decoration.
The science words your preschooler can actually use
You don’t need vocabulary drills, but kids love a big word they get to own. These four are plenty:
| Word | Kid-friendly meaning |
|---|---|
| Light | The bright stuff from the sun that helps us see |
| Shadow | The dark shape you get when something blocks the light |
| Block | To stand in the way so light can’t get through |
| Change | When something looks different than it did before |
Say them naturally while you work. “Look, the leaf is blocking the light. What do you think the paper under it will do?” By the third print, my kid was announcing, “That’s a shadow-block!” which is not the official term but is close enough for me.
What You’ll Need
You probably have most of this already, apart from the paper.
| Supply | Notes | Where to find it |
|---|---|---|
| Sun print paper (solar or cyanotype paper) | One pack usually has 8 to 15 sheets, enough for a whole family or small group | Craft stores, science toy shops, online |
| Fresh flat leaves | Aim for 8 to 12 different shapes | Your yard, a park, the sidewalk |
| A clear acrylic sheet or a clip frame with acrylic (optional) | Presses leaves flat so edges stay crisp. Skip loose glass; if you use any, an adult handles it and the edges are taped | Craft store, dollar store |
| A dishpan or baking dish of water | Shallow, about 2 inches deep | Kitchen |
| A flat board or clipboard | To carry the paper outside without it peeking at light | Anywhere |
| A dark folder or the kit’s bag | Keeps unused paper in the dark | Comes with most kits |
| A towel or paper towels | For hands and wet-sleeve emergencies | Kitchen |
| Paper bag or basket | For the leaf walk | Pantry |
| A timer | Your phone is fine | |
| Clothes pins or binder clips (optional) | Hold leaves in place on breezy days | Laundry room |
A note on the paper: buy it ahead of time if you can, and don’t open the bag until you’re ready outside. The coating reacts to light, including bright indoor light, so unopened is happy.
Leaves that print well
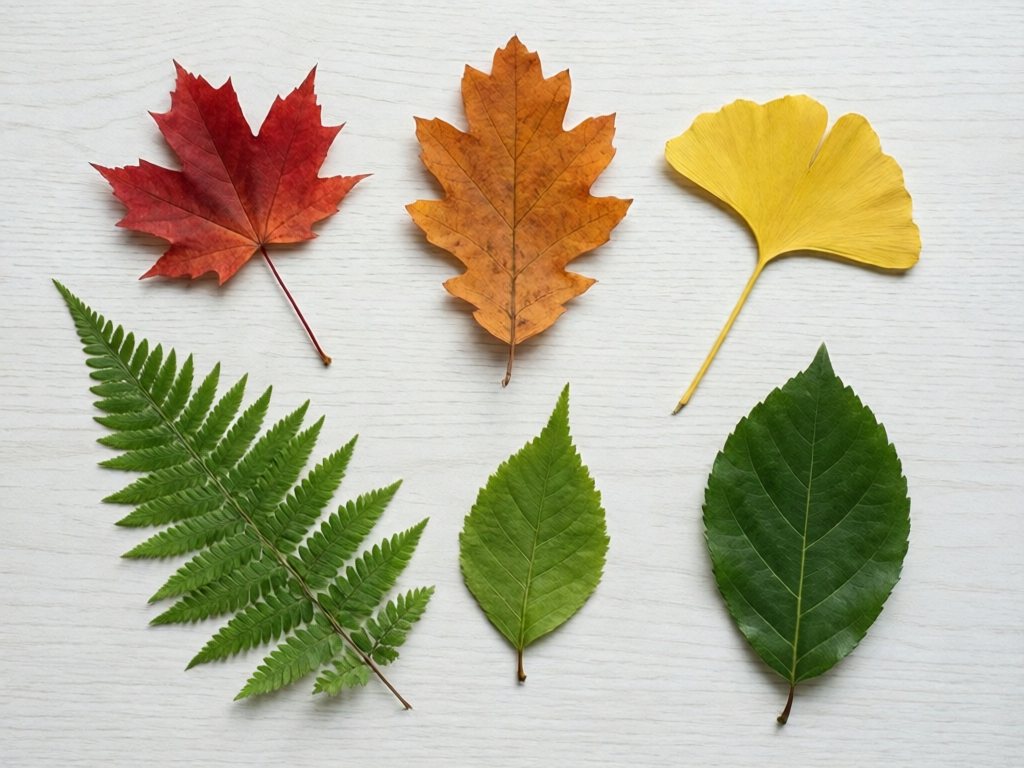
Not every leaf is a star. Here’s what I’ve noticed after more rainy-day experiments than I care to admit:
| Leaf type | Print result | Good for |
|---|---|---|
| Maple | Sharp, dramatic outline | The classic first print |
| Oak | Wavy edges that look great in white | Talking about shapes and edges |
| Ginkgo | Fan shape, beautiful against blue | Comparing shapes |
| Fern or feathery leaves | Delicate, lacy detail | Older preschoolers who like detail |
| Thin, small leaves | Light can sneak through, so the print can look ghostly | A great “why is this one fainter?” test |
| Thick, leathery leaves | Very solid white shape | Showing that thick things block more light |
| Dried crunchy leaves | Often curl and leave blurry edges | Troubleshooting lessons |
Fresh leaves that are still a little bendy work best because they lie flat. If you grab crispy ones, press them under a heavy book for an hour first.
Leaf Walk: Collect and Ask Questions
The walk is half the lesson. Before you ever open the paper, you can plant the “light and shadow” idea with a few easy questions while you’re out there. This is where I lean on ideas from our outdoor nature activities list: slow down, notice, and ask instead of tell.
Safety firstLearn what poison ivy, oak and sumac look like where you live, and pick only leaves an adult has OK’d. Don’t taste berries or mushrooms, and wash hands after the walk.
Try a few of these on your walk:
- “Where is the sunniest spot?” Let your child stand in the sun, then in the shade, and say which one feels warmer.
- “Where’s your shadow?” Stand together, point at the ground, and notice that your shadow is on the opposite side from the sun.
- “Can you see light through this leaf?” Hold a leaf up toward a bright sky, never at the sun itself. Some glow green or gold. Some block almost everything. Let your child compare two.
- “Which leaf do you think is the best shadow-maker?” This is the question that sets up the whole experiment. Let them pick a favorite and say why, even if the reason is “it’s pointy.”
A quick leaf-collecting game
Give each child a small bag and a mission card (you can draw this in about 30 seconds):
- One leaf that’s bigger than your hand
- One leaf that’s smaller than your thumb
- One leaf with pointy edges
- One leaf with smooth edges
- One leaf you can almost see through
Five leaves, five different light-blocking powers. You’ve basically just stocked your lab.
If your three-year-old gets distracted by a puddle at leaf number two (mine did), let the puddle win. The leaves will still be there.
Set Up Your Sun Print Station
Do this in the shade or inside a dim room, before you uncover the paper. Setting up is the part where little hands get impatient, so keep it quick.
- Lay out your leaves on a plate or tray where kids can see them all.
- Fill the rinse tub with about two inches of cool tap water. Keep it low and stable, because a three-year-old will absolutely try to climb into it.
- Plan your sunny spot. A porch rail, a picnic table, a driveway, or a sunny windowsill all work. A flat spot with no wind is ideal.
- Tuck your paper in a dark folder or the kit bag until it’s go time.
- Pull the timer up so it’s ready.
Safety firstStay within arm’s reach of the rinse tub with children under 5, and empty it as soon as you finish. Keep paper and rinse water away from mouths. Use acrylic, not loose glass. Small objects like keys and paper clips are for ages 4+ only.
My favorite setup trick is a “sun station” tray: put your clipboard, leaves, acrylic sheet, and clothes pins on one tray. Carry the tray outside, and you only make one trip.
How to Make a Leaf Sun Print
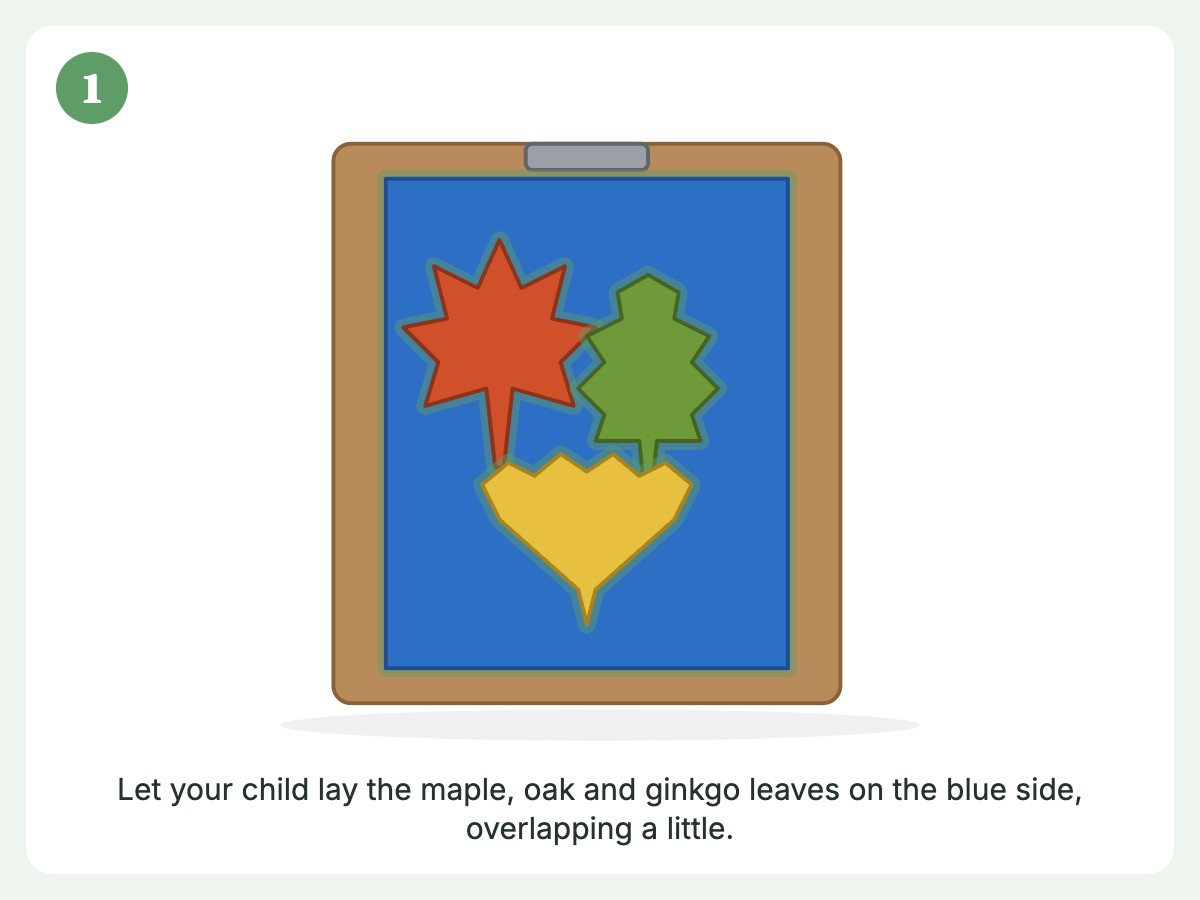
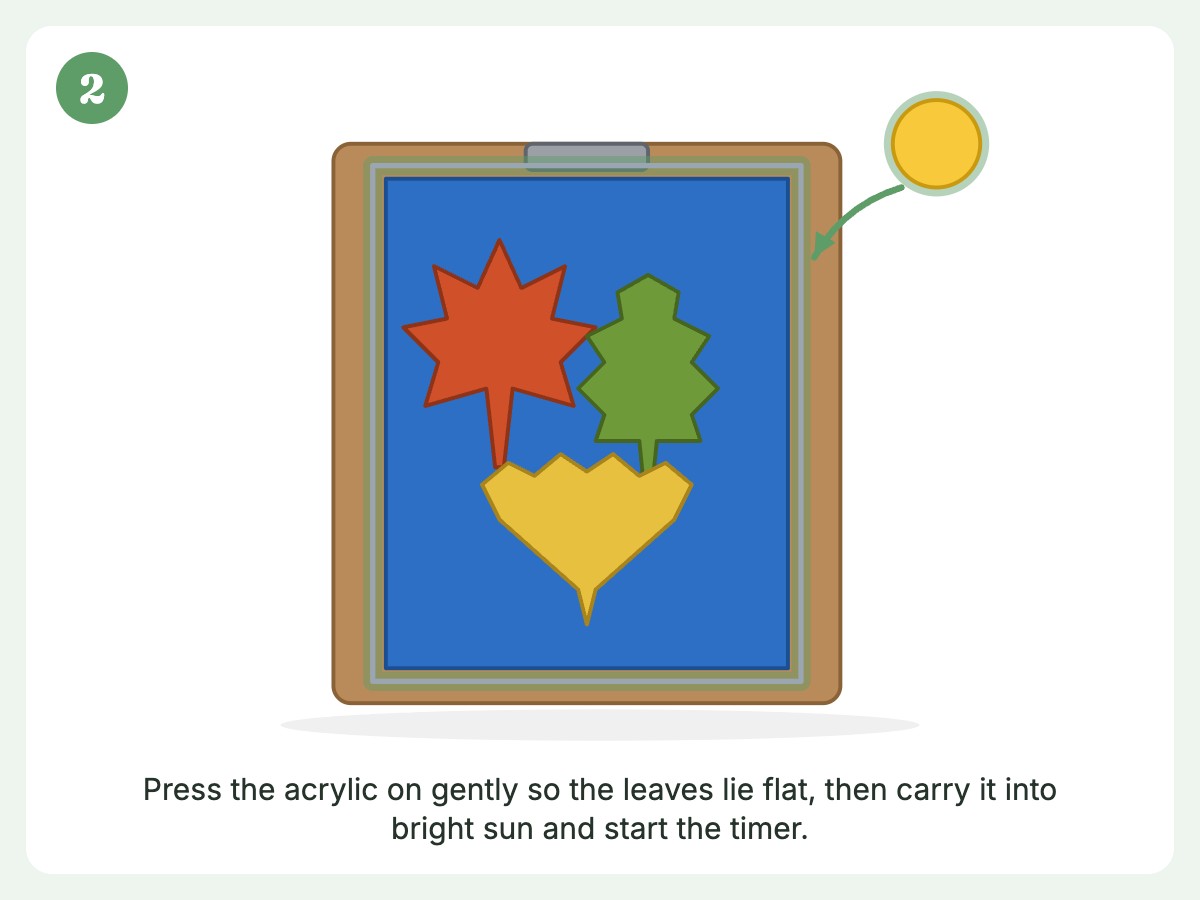
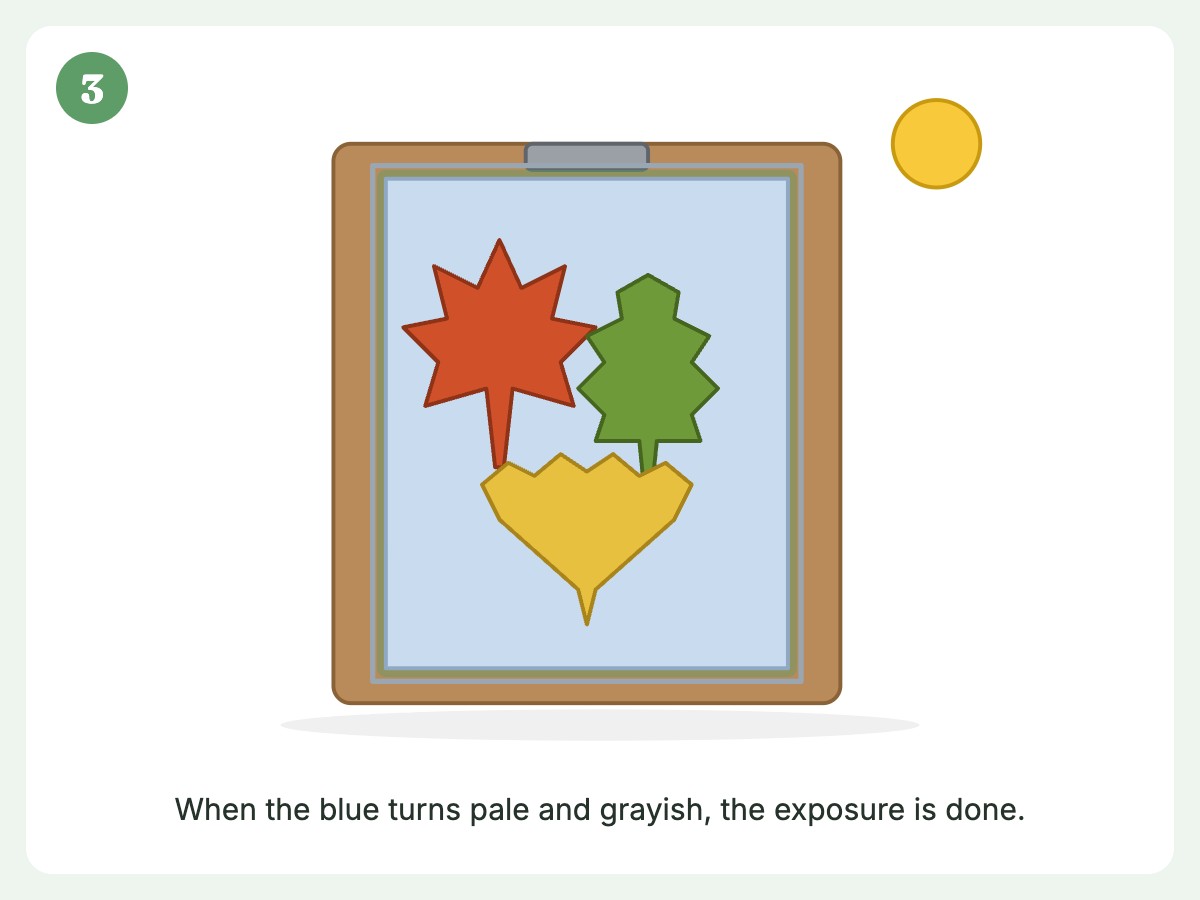
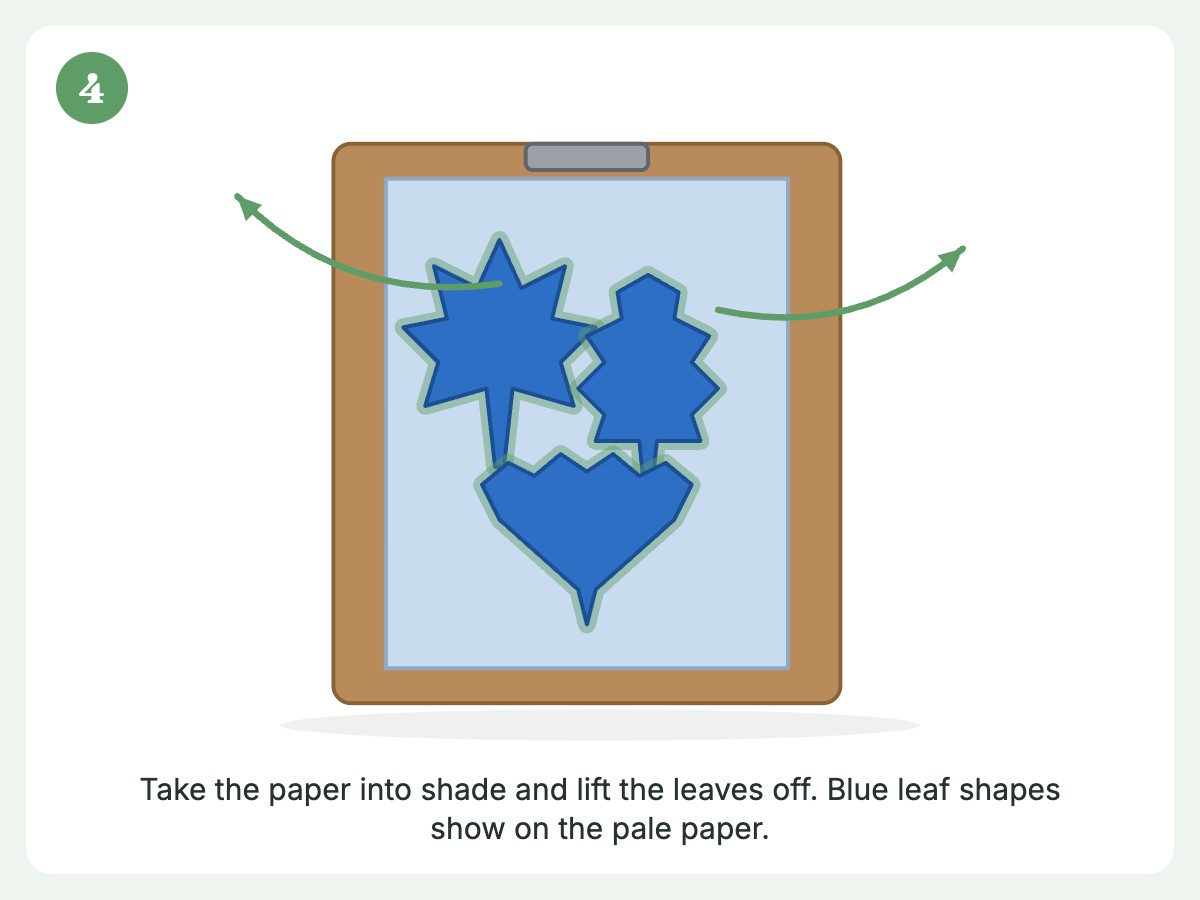
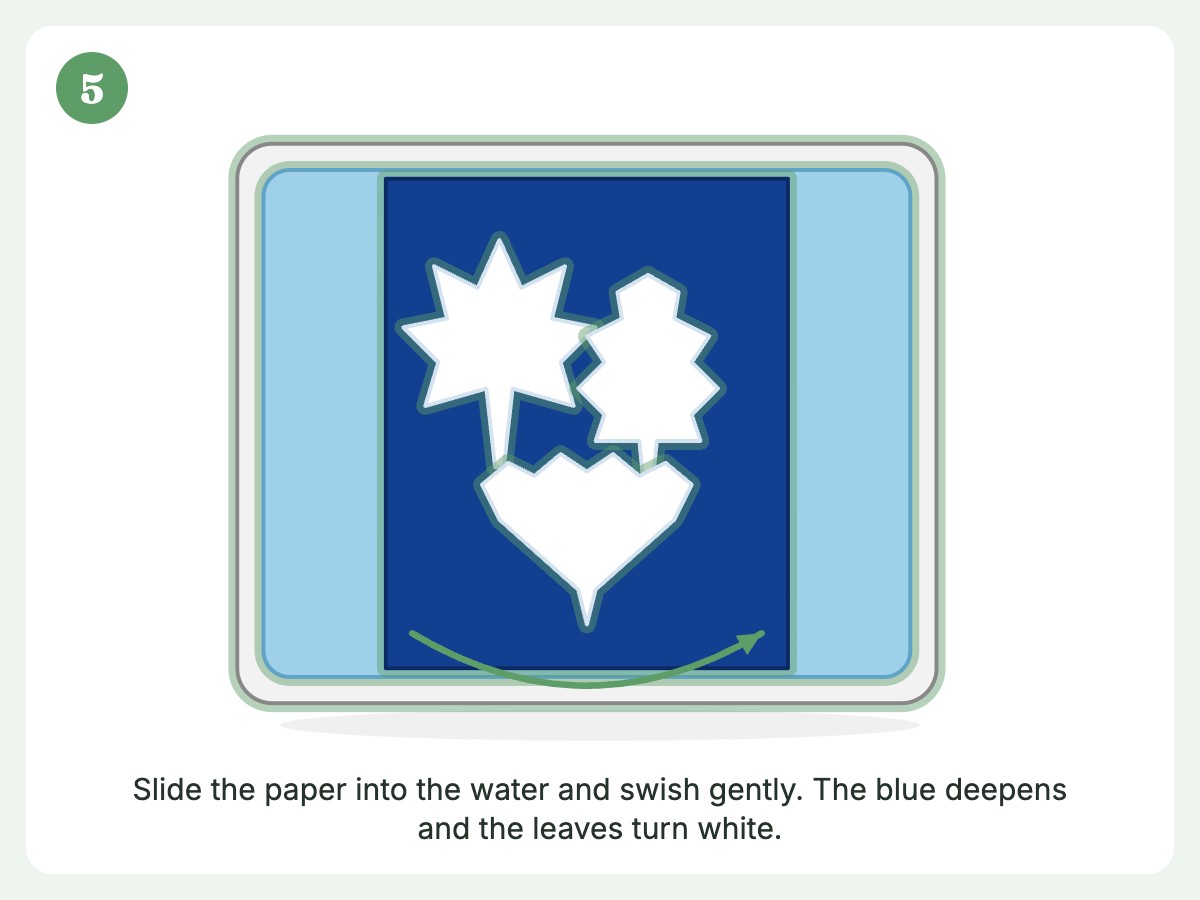
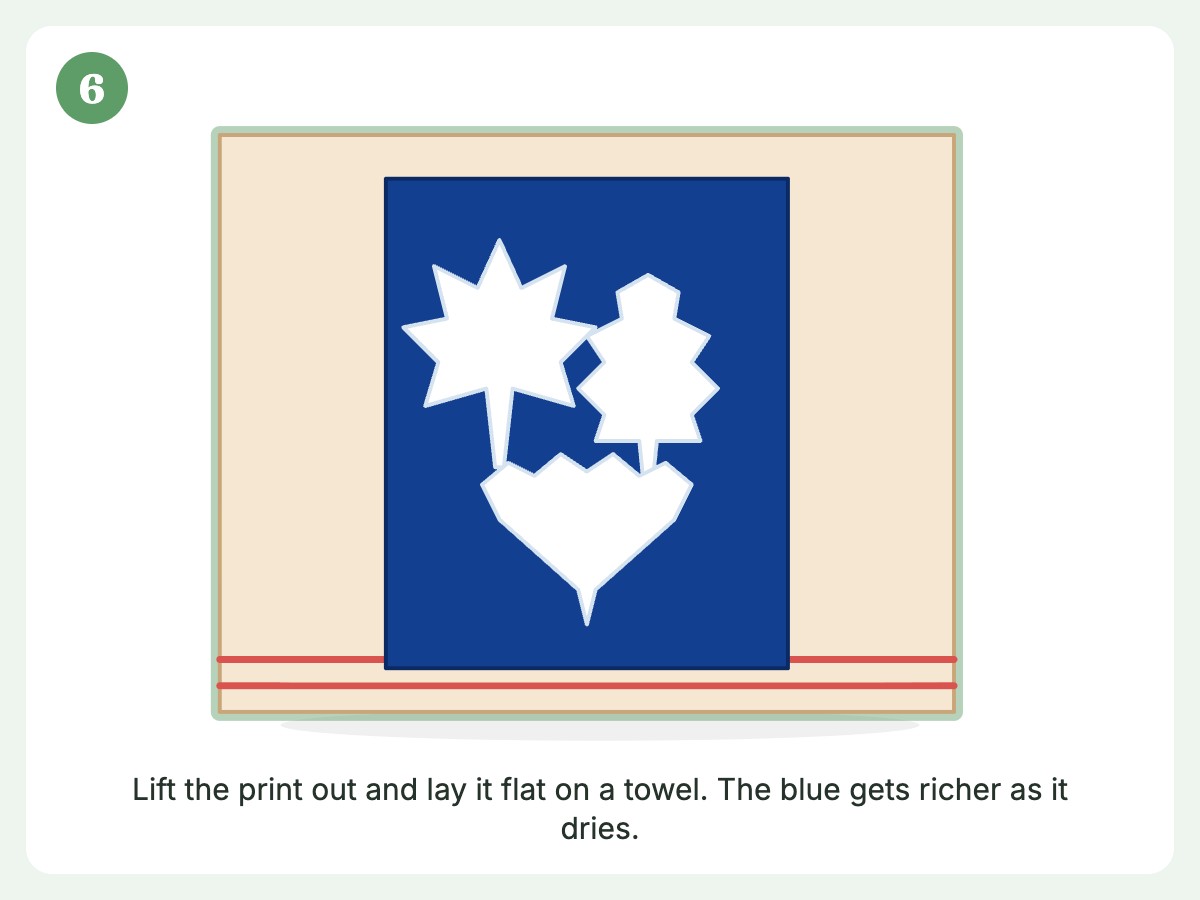
This is the fun part, and it moves fast.
- Take one sheet of sun paper out of the bag and slide the rest back in right away. The paper looks sky blue at this point.
- Place it on your clipboard blue side up.
- Let your child arrange leaves on the blue side. Encourage them to overlap, tuck, and create. The parts the leaves cover will become the white shapes.
- Cover with the acrylic sheet if you have one. Press gently so the leaves lie flat. If you don’t, a few clothes pins at the edges help.
- Carry it into the sun and start the timer. Most papers need 2 to 5 minutes in bright direct sunlight. On a cloudy day or in weak fall sun, give it 10 to 15 minutes. Follow your kit’s directions as your final word.
- Watch the color change. The paper goes from bright blue to a pale, almost grayish-white blue. That’s your signal.
- Take it back to the shade and carefully remove the leaves. Don’t leave the paper in the sun after you lift them. The spot the leaf covered would be exposed too, and the shape would rinse out muddy instead of white.
- Rinse right away. Slide the paper into the tub of water and swish gently for about a minute. Watch the blue deepen and the leaf shapes turn bright white.
- Lay it flat to dry on a towel or hang it on a clothesline. As it dries, the blue gets even richer.
TipPause when you lift the leaves. Your child will see a leaf-shaped patch of blue on paler paper. Ask, “What’s different where the leaf was?” Then rinse and watch that shape turn white.
A realistic timeline
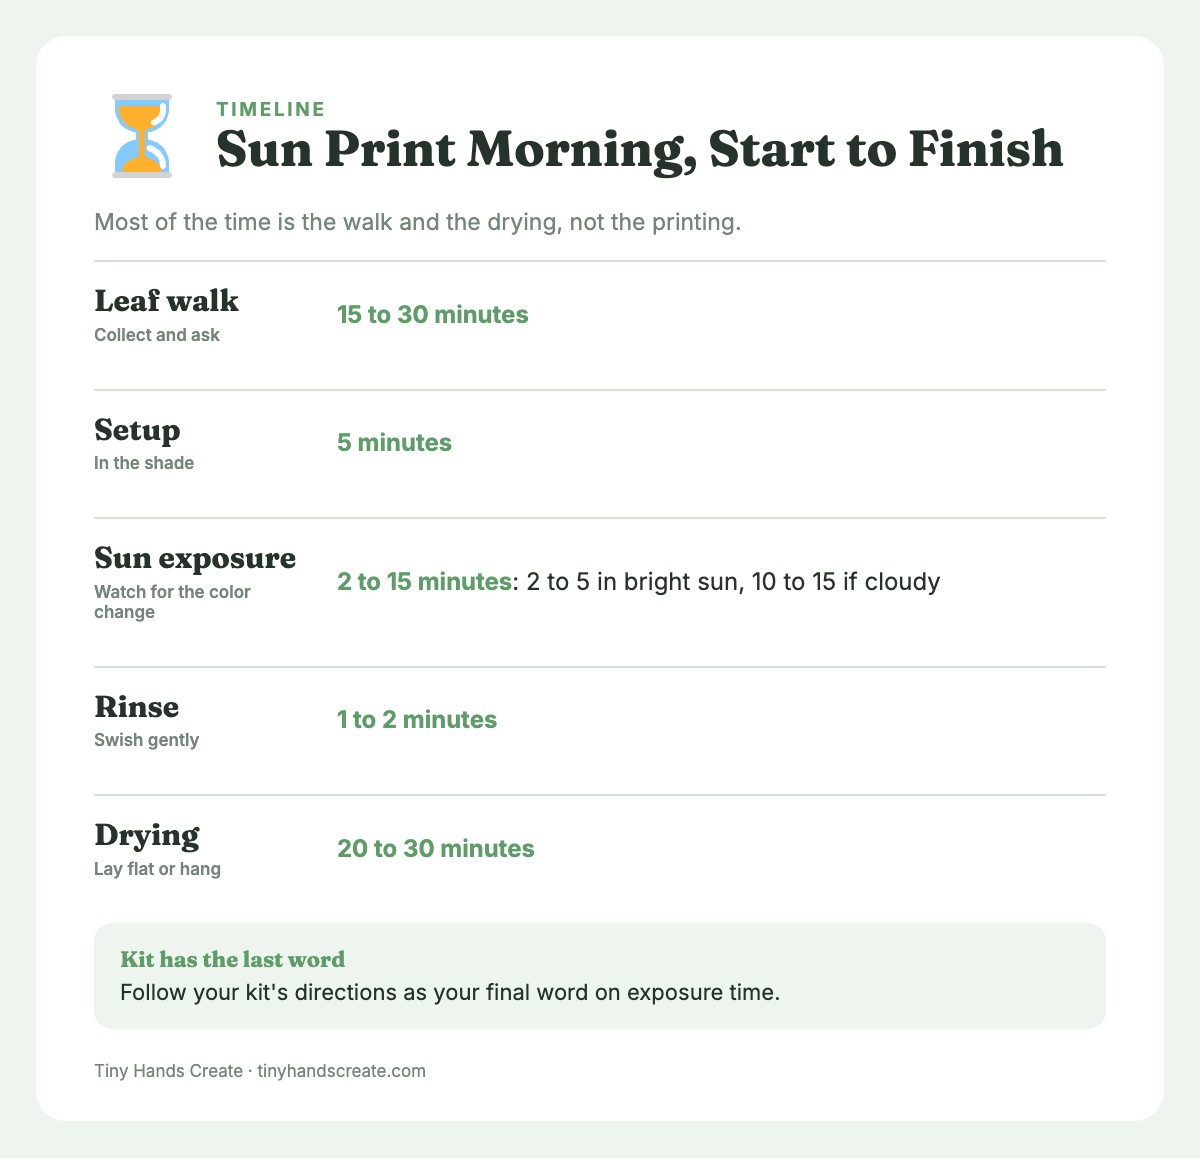
| Step | Time |
|---|---|
| Leaf walk | 15 to 30 minutes |
| Setup | 5 minutes |
| Arranging leaves | 3 to 5 minutes |
| Sun exposure | 2 to 15 minutes |
| Rinse | 1 to 2 minutes |
| Drying | 20 to 30 minutes |
The whole thing fits in a morning, and the hands-on part is shorter than a cartoon episode.
The Explainer Card: Why Did the Paper Change Color?
Here’s the page I wish someone had handed me that first day. Read it out loud, or print it and tape it near the drying line. It’s written to a preschooler’s level on purpose.
🌞 Why Did the Paper Change Color?
The paper is special. It has a secret coating that likes sunshine. Regular paper doesn’t have it.
The sun has invisible helper light. You can’t see it, but it tickles the special paper, and the paper changes color.
The leaf is a light-blocker. The helper light can’t get through the leaf, so the paper underneath stays the same.
That’s why you see a shadow! The leaf’s shadow is the part of the paper the light couldn’t reach.
The water is a cleaning bath. Before the rinse, the paper looks pale. The water is what brings out the deep blue where the sun touched it, while the part the leaf covered washes white.
So the picture is really a shadow you can keep.
Things to try asking:
- What do you think will happen if I put a thick leaf on the paper?
- What if I put the paper in the shade?
- What if I use two leaves on top of each other?
Big idea: Light can change things. Things that block light make shadows.
A few notes on that card, mom to mom:
- “Invisible helper light” is my stand-in for ultraviolet light. Older kids can learn the real name later. For now, “light we can’t see” is true, simple, and doesn’t need unpacking.
- “Tickles” isn’t exactly a chemistry term, but it communicates that something is touching the paper and making it react, and my kid ran with it.
- The blocking idea is the core concept. If a child walks away understanding that “the leaf blocked the light so the paper stayed white,” that’s a win.
- If your child asks, “But how does the paper know?” you can say honestly, “That’s what scientists figured out! The paper has a special ingredient that changes when light hits it. We can read more about that when you’re bigger.” Then change the subject to snacks. It works every time.
How to Talk About It at Each Age
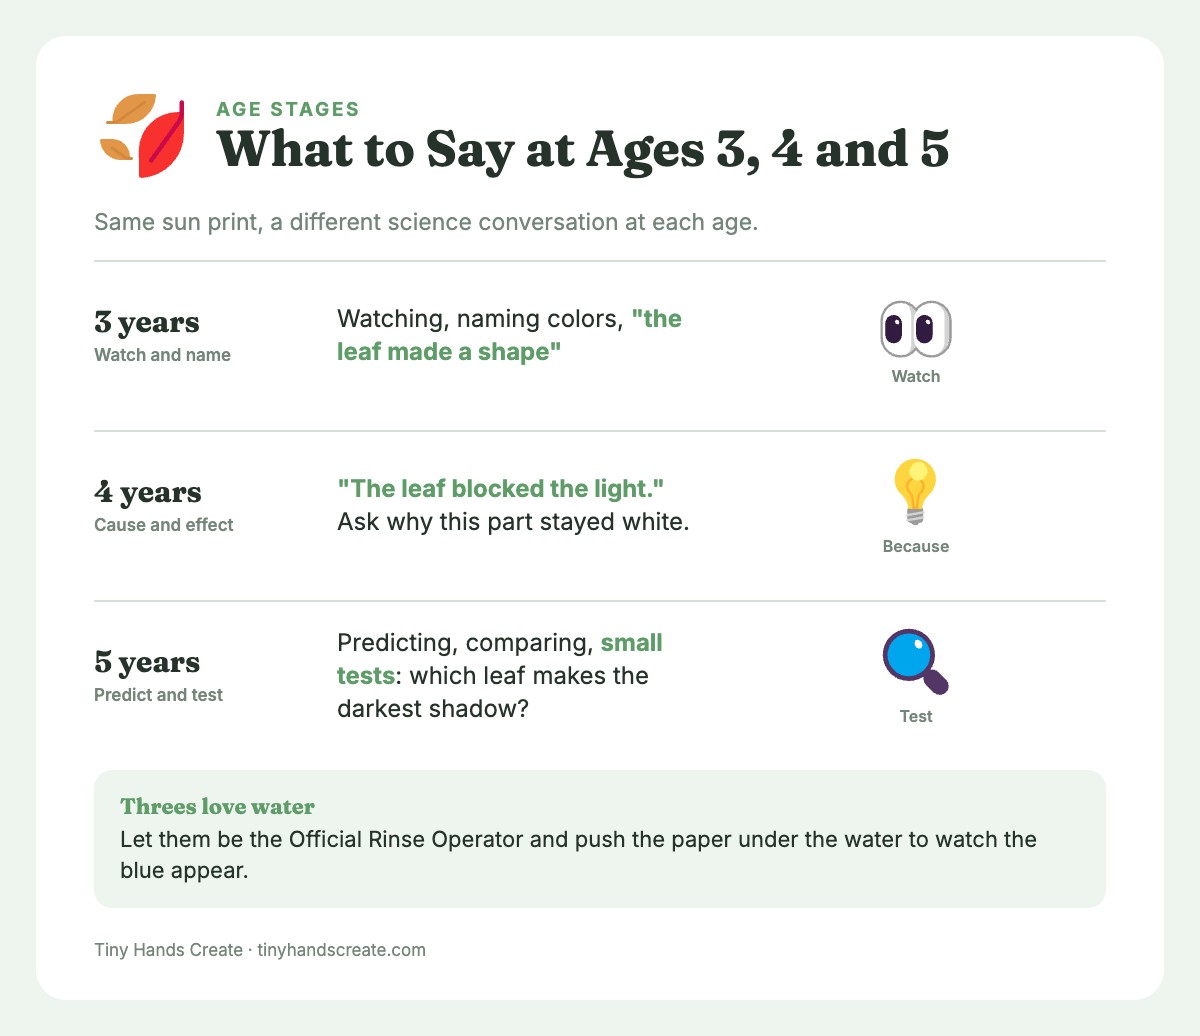
A three-year-old and a five-year-old are very different science partners. Here’s how I adjust the conversation without changing the activity.
| Age | What to emphasize | Sample question |
|---|---|---|
| 3 years | Watching, naming colors, “the leaf made a shape” | “Where did the leaf go? Can you see its shape?” |
| 4 years | Cause and effect, “the leaf blocked the light” | “Why do you think this part stayed white?” |
| 5 years | Predicting, comparing, small tests | “Which leaf do you think will make the darkest shadow?” |
For threes: keep it sensory
Threes mostly care about the water. Let them be the Official Rinse Operator. Their job is to push the paper under the water and watch the blue appear. Bring a towel. Bring two towels.
They don’t need to understand the chemistry to learn from the experience; they’re learning that actions have visible results, and that’s the foundation of science.
For fours: add the “because”
Fours love “because.” Prompt them to finish the sentence: “The paper stayed white because…” Don’t correct creative answers right away. “Because the leaf is magic” is a fine first draft. After a couple of prints, nudge: “I wonder if it’s because the leaf was in the way of the sun?” They’ll usually adopt the idea within a few tries.
For fives: let them run the experiment
Fives can handle a simple prediction chart. Draw two columns, “I think” and “What happened,” and let them draw or point. They can also be in charge of the timer, which is thrilling for them and gives you ten seconds of peace.
Mini Experiments: Turn One Print Into Five
Once your kid has done the first print, you can change one thing at a time and see what happens. This is real scientific thinking, and preschoolers love it. The trick is to change only one thing per print, which you can phrase as “Let’s see what happens if…”
Experiment 1: Thick leaf vs. thin leaf
Lay a thick leaf and a thin leaf side by side on the same sheet. After the rinse, compare the whites. The thin leaf will often look a little less white, because some light snuck through it. This is your simplest, most satisfying experiment.
What to say: “Look, this leaf let a little light through. See how it’s not as white?”
Experiment 2: Sun vs. shade
Make two prints at once on two sheets: one in full sun, one in a shady spot. Use the same time. Compare after rinsing. The shady one will usually be paler or less contrasty.
What to say: “The sun was stronger here. The paper changed more.”
Experiment 3: How long?
Use the same leaf arrangement on three sheets and expose them for different times, like 1 minute, 3 minutes, and 6 minutes. Label the back with a pencil. The shortest one may look washed out; the longer ones should be deeper until the paper has fully changed, so check your kit’s time and stop at the color change.
What to say: “More time, more change, until the paper has fully changed.”
Experiment 4: Stack the shadows
Put one leaf on the paper, then lay a second leaf over part of it. With thin leaves, the overlap can look a bit whiter than the single-layer area, because two layers block more light. Kids love spotting the “extra white” patch.
Experiment 5: Non-leaf blockers
Gather a few household objects: a key, a plastic toy, a feather, a paper clip, a piece of lace, a slice of cardboard. For children under 4, use only objects bigger than a toilet paper tube (large leaves, a big cookie cutter, a large toy). Keep keys, paper clips and small toys for ages 4+ with an adult nearby. Print them all on one sheet. Ask which ones made the sharpest shadow. Ask which ones let light sneak through. A plastic cup will do something very different from a metal key.
| Object | What to expect |
|---|---|
| Metal key | Crisp, bright white shape |
| Feather | Soft, wispy edges |
| Lace | Detailed pattern |
| Clear plastic | Faint, almost no shadow |
| Cardboard | Solid white block |
Experiment 5 is the one my kid still asks for. There’s something about seeing a toy dinosaur turn into a white silhouette that never gets old.
No Sun Paper? Two Backup Versions
I want this to work even if you don’t have a kit on hand or the sun isn’t cooperating. Both of these use things you likely own.
Backup 1: The construction paper fade test
Sunlight slowly fades some colored paper. It takes days, not minutes, so this is a long-game experiment, but it needs zero special supplies.
- Choose a sheet of dark construction paper (blue, purple, red, or green tend to fade noticeably).
- Place leaves, cutouts, or flat objects on it.
- Tape the corners down or weigh them with small stones.
- Set the paper in a sunny window and leave it for 3 to 7 days. Take a peek each day.
- Lift the objects and look for a darker “shadow” where the paper was protected.
It’s slower, and the results are subtler, but it teaches patience and shows that sunlight changes things over time. Take a photo each day and put them in order. Your preschooler will find it hilarious that the paper is “growing a shadow.”
Backup 2: Chalk shadow tracing
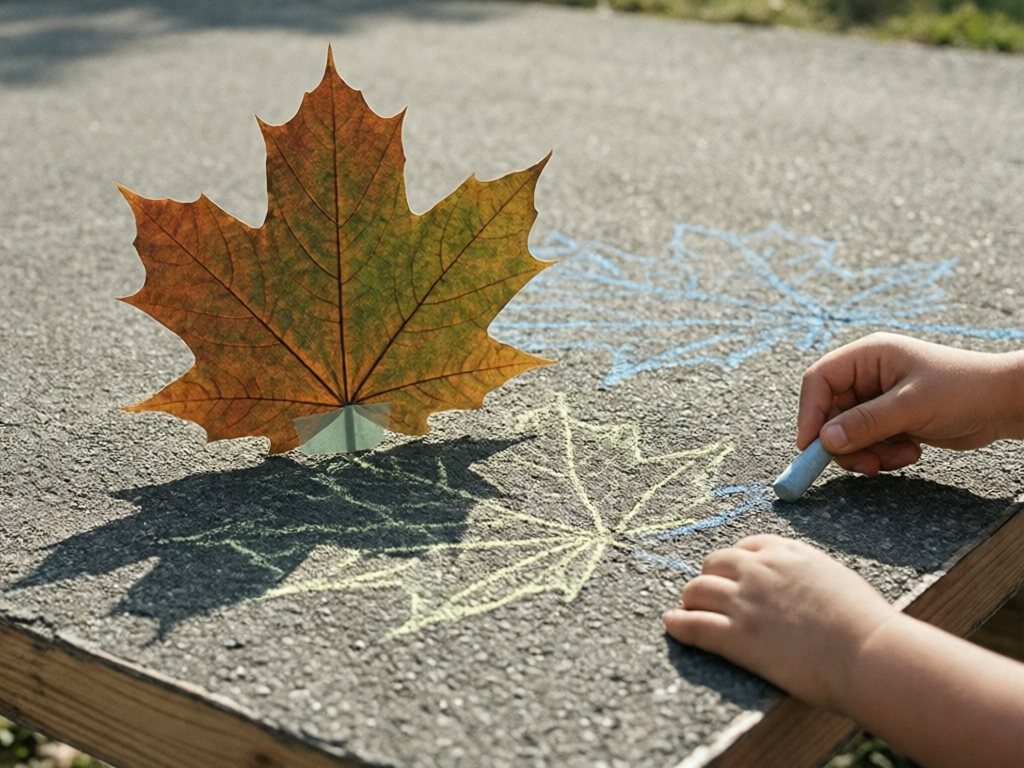
No paper required at all, and it’s perfect for a clear day.
- Take your leaves outside to a sunny sidewalk or driveway.
- Hold a leaf or a toy up so its shadow lands on the ground, or prop a small object in place with tape.
- Trace the shadow with chalk.
- Come back in an hour. The shadow has moved. Trace it again in a different color.
Kids see, with their own eyes, that shadows change as the sun moves. If you like the idea of a messy but joyful science afternoon, our kitchen science experiments post has a whole round of follow-ups for the next rainy day.
Troubleshooting: When the Print Doesn’t Cooperate
Something will go sideways. It’s part of the deal, and honestly it’s often where the best science talk happens. Here are the common hiccups.
| Problem | Likely cause | Fix |
|---|---|---|
| The whole sheet turned white | The paper got light before you were ready (bag opened indoors, left in a bright spot, or over-exposed) | Keep paper in the bag until you’re outside, work quickly, and grab a fresh sheet |
| The print is faint or gray | Not enough sun time, or a cloudy day | Expose longer, or try again in direct sunlight |
| Leaf edges are blurry | Leaf wasn’t lying flat, or it moved in the wind | Press with acrylic, or use clothes pins |
| Blue looks pale after drying | Rinse was short, or the print dried too fast | Rinse a bit longer next time, and dry flat in a shady spot |
| White shapes look muddy | Paper stayed in the sun after you removed the leaves | Move to shade right away, then rinse immediately |
| Paper curled up | Normal drying behavior | Press under a heavy book once it’s dry |
| Water turned yellow-green | Often normal: it’s usually just the coating washing off (check your kit’s notes) | Dump it in the sink and rinse the tub |
What to say when it “fails”
I never call a faint print a mistake. I call it a clue. “Oh interesting, this one’s pale. What do you think happened? Was the sun hiding?” Kids are often more comfortable with a result that surprises them than we expect, especially if we treat the surprise as the point.
Then, do a second round with one change. That’s the scientific method, and you never had to say those words.
Mess, Safety, and the Honest Stuff
The mess level
This is a low-to-medium mess, and almost all of it is water.
- The rinse tub will splash. Put a towel under it.
- Damp sleeves are a certainty. Roll them up first, or wear a smock.
- Blue stains: the coating can leave faint blue marks on hands or fabric. In my experience it washes out of skin with soap and water, but treat the paper and rinse water like you would a marker spill on a favorite shirt, which is to say, don’t wear the favorite shirt.
- Wet leaves on the porch are slippery. Sweep them up afterward.
If you’re mess-averse, our mess-free art activities for toddlers post has quieter options for the days you can’t face a dishpan.
Safety notes
Good to knowCheck the age guidance and handling instructions on your kit’s label. Brands vary slightly, and the label has the final word.
- Sun print paper is not food. Keep sheets and rinse water away from mouths. Little ones who still taste everything should have a close grown-up helper.
- Wash hands after the rinse, especially before snack.
- Skip staring at the sun. Remind kids that we look at the paper, not the sky.
- Sun protection counts. If you’re outside for a while on a bright day, hat and sunscreen are still a good idea, even in October.
- Dispose of rinse water down the drain, not on the garden, unless your kit says otherwise.
Making the Prints Last (and Look Good)
Your prints are pretty on their own, but a little finishing makes them something to keep.
- Press them flat. Once dry, stack under a heavy book overnight.
- Frame a favorite. A deep blue sheet with a white maple leaf looks great in an inexpensive frame.
- Make a leaf journal. Staple several prints into a book, and have your child dictate a sentence about each one for you to write underneath: “This one let the sun through.”
- Turn them into cards. Cut a print in half, fold a blank card, and glue it on. Grandparents love these.
- Create a classroom or playgroup wall. Hang a line of prints along a wall or in a shaded spot. A sunny window is for short-term display only.
- Match each print to its leaf. Tape the original leaf next to its print on a poster. It’s a lovely “this is the leaf, this is its shadow” display.
One caution: light-sensitive prints can fade or shift over many months if displayed in strong direct sun. Hang them where they get softer light, or just enjoy them for the season and make new ones next year.
Pairing the Activity with Other Fall Play
A sun print morning pairs nicely with a few other low-key fall ideas, especially if you’re building a mini “light and shadow” week.
| Day | Activity | Why it fits |
|---|---|---|
| Monday | Leaf walk and collecting | Gathers materials, starts the “shadow” conversation |
| Tuesday | Sun prints with leaves | The main event |
| Wednesday | Chalk shadow tracing | Shows how shadows move |
| Thursday | Flashlight shadow puppets at dusk | Same idea, indoors |
| Friday | Fall leaf crafts with the leftover leaves | Uses up the collection |
If your kid loves the water-and-wonder side of the experiment, you might also try a few of the ideas in balloon science experiments for kids, another simple “what happens if” set that needs almost no setup.
For the youngest crowd, big leaves also work as a sensory activity: a basket of large leaves and big pinecones makes a simple fall sensory bin. Leave the acorns out of it, and keep an adult with the toddlers while someone else runs the paper.
Safety firstChildren under 4, or anyone who mouths objects, need hands-on adult supervision with any sensory bin. Acorns and caps are choking hazards, so this isn’t a “while you wait” activity.
A Quick Note on Using This With a Group
If you’re running this for a preschool class, co-op, or a playdate of four, a few tweaks help.
- Pre-cut the paper into halves or quarters so you can stretch a pack further. Smaller prints dry faster, too.
- Assign jobs. One kid is the Timer Keeper, one is the Leaf Placer, one is the Rinse Operator. Rotate for the next sheet.
- Set up two rinse tubs to avoid a water traffic jam.
- Label prints on the back with names in pencil before they go in the sun.
- Have a “waiting song.” We sing the same silly sun song for the whole timer: “Sun, sun, do your job, make a shadow, shine, shine, shine.” It makes two minutes feel like thirty seconds.
- Plan for the drying line. A string and clothes pins turn a boring puddle of wet paper into a gallery.
Groups bring out the best “why” questions. Write a few of them on a sticky note and save them. They make surprisingly good conversation starters at pickup.
Frequently Asked Questions
What age is the leaf sun print activity best for?
This activity works well for ages 3 to 5, with grown-up help for the paper handling. Three-year-olds enjoy the watching and rinsing, four-year-olds start connecting the leaf to the shadow, and five-year-olds can run small tests like comparing sun and shade. Younger toddlers can watch and help rinse with close adult help, but keep the paper and rinse water out of their mouths, and save small objects for ages 4+. Always check the age guidance on your specific kit.
Do I have to buy sun print paper?
For the classic white-on-blue print, yes. Sun print (cyanotype) paper has a special light-sensitive coating that regular paper lacks. It’s inexpensive and one pack goes a long way. If you don’t want to buy it, try the construction paper fade test or the chalk shadow tracing described above. Both teach the same big idea, that light changes things and objects make shadows, with supplies you already have.
How do I explain why the paper changed color to a preschooler?
Keep it short and concrete: “The paper has a special coating that changes when sunlight touches it. The leaf stood in the way and blocked the light, so the paper under it stayed the same. When we washed it with water, the part that changed turned deep blue and the part that didn’t change turned white.” Our explainer card above puts this in kid-friendly language you can read aloud. You don’t need to name the chemistry at this age. The takeaway is that light can change things and blocking light makes a shadow.
Can I do this on a cloudy day or in the winter?
Yes, but it takes longer. Clouds still let some of the light through, so try 10 to 15 minutes instead of 2 to 5, and keep an eye on the color change. In winter, the sun is weaker, so a south-facing window or outdoor spot with direct light helps. If the sky is very dark or the print stays faint, save the paper for a brighter day. Cloudy-day prints also make a fun comparison experiment alongside a sunny-day print.
Why are my prints coming out blurry or ghostly?
Blurry edges almost always mean the leaf wasn’t lying flat, so light slipped underneath. Press the leaf down with a piece of acrylic, or use clothes pins at the edges, and try fresh bendy leaves rather than dried-out curly ones. Ghostly or faint shapes can mean the leaf was thin and let light through, or the print didn’t get enough sun time. Both make good teaching moments: “This leaf let some light sneak through!”
Is sun print paper safe for kids?
Most sun print kits are made for children, but the paper and rinse water are not food and shouldn’t go in mouths. Supervise closely, have kids wash their hands afterward, and follow the instructions and age rating on your kit’s packaging. The coating can temporarily stain skin or clothing blue, so wear play clothes and keep a towel nearby. If anyone has sensitive skin or if you’re unsure about a specific product, check the manufacturer’s safety information before you start.
What else can we print besides leaves?
Almost anything flat or semi-flat that blocks light: keys, feathers, lace, paper clips, plastic toys, flowers, small cutout shapes, or even a hand. Solid objects make crisp white shapes, while thin or see-through ones make fainter shadows, which makes a great comparison experiment. Let your child predict which objects will make the strongest shadow, then see how the prints turn out.
Final Tips for Leaf Sun Prints with Preschoolers
The best part of this activity isn’t the finished print. It’s the moment your kid lifts a leaf off the paper, sees a perfect white shape, and looks up at you like you’ve performed actual magic. You get to say, “The sun did that,” and you get to be right.
So grab a bag, take a slow walk, collect a few leaves, and let the light do the work. Expect damp sleeves, a few faint prints, and at least one “can we do it again?” Those are all signs it worked.