Back-to-School Crafts for Kids: DIY Backpack Tags, Pencil Toppers, and Locker Decor
Discover how DIY back-to-school crafts like backpack tags and locker decor can personalize your child's supplies, preventing mix-ups and fostering ownership. You'll learn practical projects that also reduce anxiety and build fine motor skills.
- Personalize supplies: Make unique backpack tags and locker decor to prevent mix-ups.
- Boost ownership: Kids care more for supplies they've helped create and personalize.
- Reduce back-to-school anxiety: Crafting together offers a calm outlet for jitters.
- Develop skills: Craft projects enhance your child's fine motor and executive functions.
- Craft affordably: Use dollar-store finds and existing craft supplies for budget-friendly projects.
Last August, my son came home from the first day of second grade with someone else’s backpack. Same navy blue, same brand, same everything — except this one had a stranger’s inhaler in the front pocket and a lunchbox covered in trucks instead of dinosaurs. It took two phone calls and an awkward parking-lot swap the next morning to sort it out, and the whole time I kept thinking: we could have avoided this with a five-minute craft.
That’s the moment DIY backpack tags stopped being a “cute Pinterest idea” in my house and became a non-negotiable part of our back-to-school routine. But somewhere along the way, what started as a practical fix turned into something my kids genuinely look forward to every August — an hour or two at the kitchen table with glue sticks, scraps of felt, and a pile of wooden shapes, turning plain school supplies into things that are unmistakably theirs.
That’s really the heart of back-to-school crafting: it’s not about making Instagram-worthy supplies. It’s about handing your kid a marker and letting them decide what “first day of school” looks like this year. A pencil topper they picked the colors for. A locker magnet with their own drawing on it. A backpack tag that says, in their own messy handwriting, exactly who they are. Kids who feel ownership over their stuff tend to take better care of it — and they walk into that first morning with something to be a little proud of, which matters more than any color-coded folder system.
This guide walks through nine kinds of back-to-school crafts, from durable backpack tags to locker decor that actually survives a school year, plus realistic guidance on mess, timing, and which projects work for which ages. Grab your glue gun (or your washable glue stick, if you’ve got a three-year-old underfoot) and let’s get into it.
Why DIY Back-to-School Crafts Matter (Beyond Just Being Cute)
Before we get into the projects, it’s worth talking about why this is worth an afternoon of your time when you could just order matching labels online in ten minutes.
Lost-and-found insurance. School lost-and-found bins are a special kind of chaos — usually a rolling cart full of nearly identical black jackets and gray water bottles. A backpack tag your kid made themselves is one-of-a-kind by definition. Nobody else has a laminated tag shaped like a dinosaur wearing sunglasses that their four-year-old drew freehand.
Ownership reduces meltdowns. Kids who help choose and personalize their supplies are more invested in keeping track of them. I’ve watched this play out directly — the backpack my daughter decorated herself gets hung on its hook without a reminder. The plain one from two years ago still ends up on the floor.
It’s a built-in anxiety outlet. For a lot of kids, back-to-school jitters show up as reluctance, crankiness, or that vague “I don’t want to talk about it” energy in the last week of summer. Sitting down to make something together gives you side-by-side time to talk without the pressure of a face-to-face conversation — and it gives your kid a small, controllable project when a lot of what’s coming (new teacher, new classroom, new kids) feels out of their hands.
Fine motor and executive function practice. Cutting tags into shape, threading a hole punch cord, spelling their name in stickers — these are all quiet reps of the same skills they’ll use holding a pencil, packing a folder, and following multi-step directions in the classroom.
It’s genuinely cheap. Every project in this guide can be built almost entirely from craft-box leftovers, dollar-store finds, and things already in your recycling bin. This is not a $60 Target run.
DIY Backpack Tags Kids Can Actually Make
This is the project I’d tell you to start with if you only have time for one. Backpack tags solve a real problem (identical bags, identical lunchboxes, identical everything), and they’re fast enough to knock out in a single sitting.
What Makes a Backpack Tag Actually Survive a School Year
Cute is easy. Durable is the part people skip. A tag that dissolves in the rain during week two isn’t doing its job. Before you pick a project, keep these three rules in mind:
- Laminate or seal anything paper-based. A $20 laminator pays for itself the first year. No laminator? Clear packing tape wrapped tightly around a paper tag works almost as well in a pinch.
- Use a metal or heavy-duty plastic connector, not just a loop of ribbon. Ribbon frays and unties itself inside of a month. A small carabiner clip or a key ring from the hardware store holds up all year.
- Write the info somewhere hidden, not just decoratively. Full name and one parent phone number, tucked on the back or under a laminate layer, not scrawled across the front for anyone to see.
Project: Shrink Plastic Name Tags
Shrink plastic (sold as Shrinky Dinks or generic “shrink film”) is one of those materials that feels like magic to kids — they draw something the size of a postcard, it goes in the oven, and it comes out as a hard, glossy, quarter-sized version of exactly what they drew.
What you need:
- Shrink plastic sheets (the frosted kind takes colored pencil and marker best)
- Permanent markers or colored pencils
- Hole punch
- Baking sheet + parchment paper
- Key ring or small carabiner
How to make it:
- Have your child draw their design directly on the shrink plastic — their name, a self-portrait, an animal, whatever they want. Remind them to draw it about 3x bigger than they want the final size, since it shrinks to roughly a third.
- Punch a hole near one edge before baking — it’s nearly impossible to punch cleanly afterward.
- Cut out the shape, leaving a small border.
- Bake according to the package directions (usually 1-3 minutes at 325-350°F). It will curl dramatically and then flatten back out — don’t panic and don’t open the oven early.
- Let it cool completely before handling; it’s flexible and hot straight out of the oven.
- Attach to the backpack zipper with a key ring.
This is a great one to pair with our Activity Finder Quiz if you’ve got multiple kids with different attention spans — shrink plastic tends to work well for ages 5 and up, but younger siblings might do better with a simpler project from the list below.
Project: Wood Slice Tags
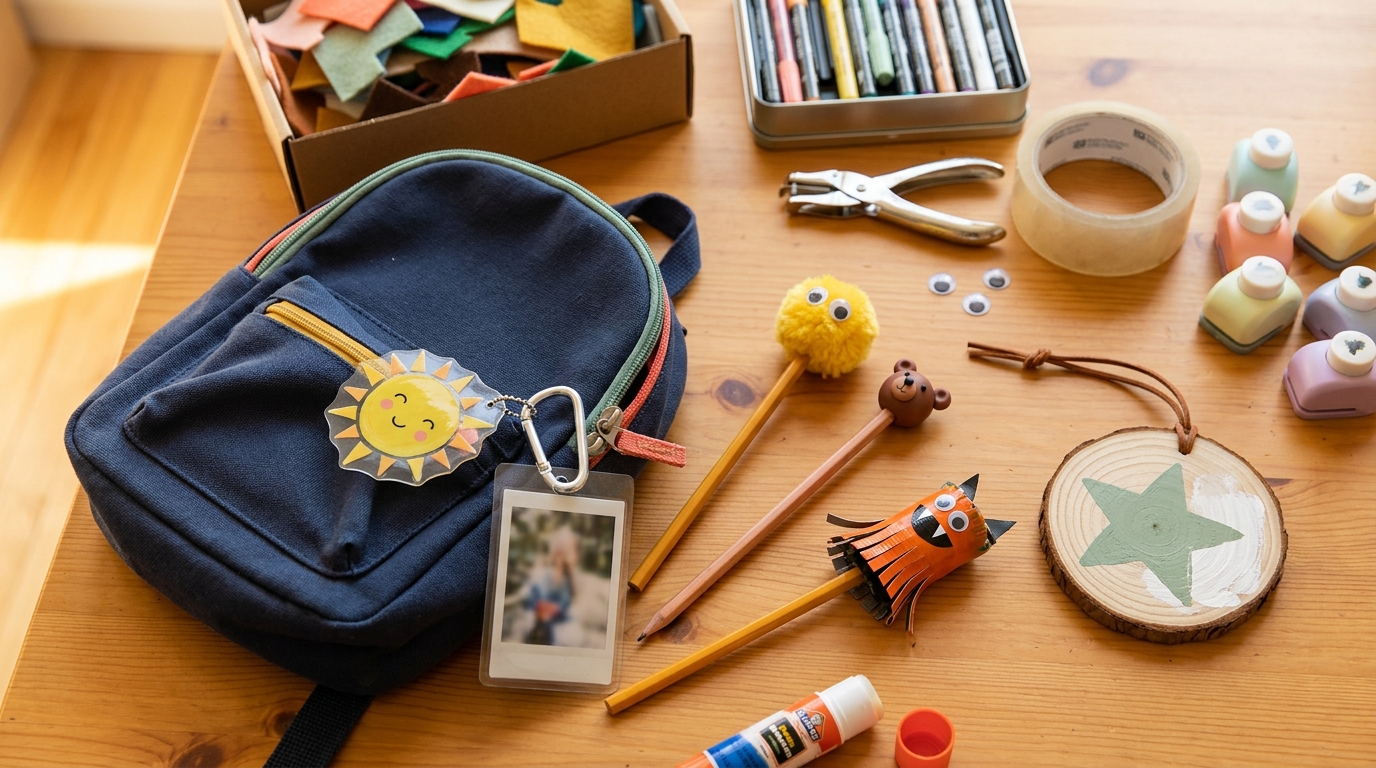
If you’ve got a wood slice or two left over from another craft (or a bag of pre-cut ones from the craft store), these make sturdier, more rustic tags that hold up better outdoors than paper ever will.
What you need:
- Thin wood slices (1.5-2 inches), pre-drilled or drilled at home
- Paint pens or acrylic paint + a fine brush
- Mod Podge or clear sealant
- Leather cord or a small carabiner
How to make it: Paint the name and a small design directly on the wood, let dry, seal with two thin coats of Mod Podge (let each dry fully), then thread cord through the drilled hole. These take longer to dry than other tags — plan for a project that spans an afternoon, not a single sitting.
Project: Laminated Photo Tags
The fastest option on this list, and a favorite for kids who get overwhelmed by too many art choices.
What you need:
- A printed photo of your child (or a photo + their handwritten name)
- Laminating pouches or clear packing tape
- Hole punch
- Ribbon or a carabiner
How to make it: Print a small photo (roughly 2×2 inches), have your child write or trace their name and one emergency phone number on the back, laminate both sides together, punch a hole, attach. Ten minutes, start to finish, and genuinely useful for teachers who are learning twenty new faces at once.
Project: Bag Charms from Leftover Nano Tape
If your house went through a nano tape phase last summer — you know, the squishy, endlessly-reusable clear tape that turns into bubbles and blobs — there’s a good chance you’ve still got some stuck to a table somewhere. It doubles beautifully as a backpack charm base. Our Nano Tape Crafts for Kids guide walks through building squishies and bag charms step-by-step, and a nano tape charm clipped next to a laminated name tag gives your kid two ways to spot their bag across a crowded hallway.
Pencil Toppers That Survive the Backpack (Not Just the Craft Table)
Pencil toppers have a reputation problem: they’re adorable on the kitchen table and destroyed by 10 a.m. on day one, crushed under a math book or lost somewhere between the cubby and the classroom. The projects below are picked specifically because they hold up to real backpack conditions.
Project: Pom-Pom Pencil Pals
The classic for a reason — fast, forgiving, and genuinely durable if you glue it right.
- Hot glue a large pom-pom to the eraser end of a pencil (an adult’s job, or supervise closely).
- Glue on wiggle eyes.
- Add felt scraps for ears, a nose, or little feet using craft glue.
- Let dry flat for at least an hour before tossing it in a pencil case.
Mess note: hot glue strings get everywhere. Keep a damp rag nearby and expect to find glue strings on the floor for a week no matter how careful you are.
Project: Polymer Clay Toppers
These take more patience but produce something sturdy enough to survive an entire school year, not just September.
What you need:
- Polymer clay (Sculpey or similar) in a few colors
- A pencil for shaping/texture (not the one it’ll go on)
- Access to a home oven
How to make it: Kids sculpt a small bead or shape (animal head, fruit, initial letter) around the eraser end of an unsharpened pencil so it has the right-sized hole, then slide it off, bake per the clay package instructions, and glue it back onto the pencil once cool. This is a great project to combine with Process Art for Toddlers-style thinking for younger siblings — let them squish and shape without worrying about the end result, while older kids aim for a specific design.
Project: Duct Tape Monster Toppers
For kids who want something a little weirder and love texture. Cut small duct tape strips into fringe, wrap around the eraser end, add wiggle eyes. Takes minutes, costs almost nothing, and the fringe holds up surprisingly well to backpack abuse because duct tape doesn’t fray the way fabric or paper does.
A Quick Durability Comparison
| Topper Type | Time to Make | Survives a Full Day | Best Age |
|---|---|---|---|
| Pom-pom pal | 10 min | Moderate (needs re-gluing sometimes) | 4-8 |
| Polymer clay | 45 min + bake time | High | 6+ |
| Duct tape monster | 10 min | High | 5+ |
| Felt wrap | 15 min | Low-moderate | 4-7 |
Locker & Cubby Decor for Personality and Organization
By the time kids hit a locker or an assigned cubby, they’re usually old enough to care a lot about making that little rectangle of space feel like theirs. This is also where craft projects can quietly double as organization tools.
Project: Magnetic Photo Strip
What you need: small magnetic strips (adhesive-backed), printed photos or kid artwork cut to size, laminating sheets or packing tape.
How to make it: Laminate a small strip of 3-4 photos or drawings, stick magnetic tape to the back, and it’s ready to hang inside a metal locker door. Swap the photos out each season — first-day photo in fall, a winter break drawing after the holidays.
Project: Mini Dry-Erase Nameplate
What you need: a small piece of cardstock or thin cardboard, clear packing tape (the laminating trick again), a dry-erase marker, magnetic strip.
How to make it: Decorate the cardstock with the child’s name and a border design, cover completely in packing tape so it becomes writable-and-wipeable, attach a magnet strip to the back. Kids can leave themselves little notes (“library day!” or “picture day!”) all year, which makes this one of the few crafts that stays useful past week one.
Project: Cubby Tag from Cardboard Scraps
If you’re a household that saves cereal boxes and Amazon packaging out of habit (no judgment, we all do it), locker and cubby decor is a perfect use for it. Cut a shape — a star, a rocket, an initial letter — from sturdy cardboard, let your kid paint and decorate it, punch a hole and hang it with string, or add a magnet for metal lockers. Our Cardboard Box Crafts for Kids guide has 25 more ways to turn box scraps into something a kid is proud to display, which is a good rabbit hole for a rainy afternoon later in the school year when the initial back-to-school excitement has worn off but the cardboard supply hasn’t.
Project: “All About Me” Mini Poster
For younger kids especially, teachers often love a small personalized poster for the cubby area — favorite color, favorite animal, family members, what they’re excited about this year. Keep it simple: a folded piece of cardstock, a few drawn or collaged sections, laminated if it’ll live somewhere little hands will touch it daily.
Materials & Supply List (Recycling Bin + Craft Box Staples)
One of the best things about back-to-school crafting is that you almost certainly already own most of what you need. Here’s a realistic breakdown of what to gather before you start, split into “probably already have it” and “worth a quick store run.”
| Category | Probably Already Have | Worth Buying |
|---|---|---|
| Base materials | Cardboard, cereal boxes, cardstock scraps | Wood slices, shrink plastic sheets |
| Adhesives | White glue, glue sticks | Hot glue gun + sticks, Mod Podge |
| Color | Crayons, markers | Paint pens, acrylic paint |
| Hardware | — | Hole punch, key rings, small carabiners |
| Sealant | Clear packing tape | Laminating pouches or a mini laminator |
| Extras | Felt scraps, buttons, wiggle eyes | Polymer clay, duct tape (patterned) |
If your recycling bin is your first stop, you’re in good company — we’ve built entire craft series around exactly this idea. St. Patrick’s Day Crafts from Your Recycling Bin and the Cardboard Box Crafts guide linked above both work from the same principle: cereal boxes, toilet paper tubes, bottle caps, and juice pouches are legitimate craft supplies, not just trash waiting to go out.
A note on the laminator debate. If you make more than a handful of tags a year across multiple kids, a cheap laminator (usually $15-25) earns its keep fast. If it’s a once-a-year project, clear packing tape wrapped snugly around cardstock does nearly the same job — it’s just fussier to apply evenly.
Age-by-Age Guidance: What Works for Which Kid
Not every project in this guide is right for every age, and trying to force a fine-motor-heavy project on a three-year-old is a fast track to frustration for both of you. Here’s how I’d sort these by age.
| Age Range | Best Fit Projects | What to Skip or Modify |
|---|---|---|
| 2-3 years | Pom-pom toppers (adult glues), photo tags, sticker-decorated cardboard cubby tags | Anything requiring an oven, small parts, or precise cutting — do those steps yourself while narrating |
| 4-5 years | Duct tape monsters, laminated drawings, simple cardboard shapes | Shrink plastic (drawing detail is tricky at this age but not impossible with big, bold designs) |
| 6-8 years | Shrink plastic tags, wood slice tags, magnetic photo strips, dry-erase nameplates | Fine detail polymer clay sculpting may still need help |
| 9-12 years | Full independence on all projects, including polymer clay and multi-step wood tags | Let them run the whole project start to finish — this age group often prefers minimal parent involvement |
A good rule of thumb borrowed from our Process Art for Toddlers philosophy: for the youngest crafters, the process matters more than the product. A toddler’s backpack tag doesn’t need to look “good” — it needs to have been made by them, scribbles and all. Resist the urge to touch it up after they walk away.
Turning It Into a First-Day-of-School Ritual
Once you’ve done this a year or two, it’s worth turning the crafting session itself into a tradition rather than a one-off errand squeezed in the weekend before school starts.
Pick a set night. The Sunday two weeks before school starts tends to work well — early enough that you’re not laminating tags at 9 p.m. the night before, late enough that summer projects don’t get lost or outgrown before the first bell.
Make it a whole-family thing, even for kids who don’t need new tags. Older siblings who’ve aged out of backpack tags can help younger ones, or work on their own locker decor and pencil toppers alongside them. It keeps the evening from feeling like a chore reserved for the youngest kid.
Snap a “craft table” photo before cleanup, not just the finished product. Half the charm of these projects, looking back, is the chaos of the table mid-project — markers everywhere, someone’s sock covered in glitter.
Combine it with a first-day-jitters conversation. For kids who get more anxious than excited about a new grade or new school, crafting side-by-side is a much lower-pressure way to talk than sitting across a table asking “how are you feeling about school?” If anxiety runs a little high in your house this time of year, pairing the craft session with a few ideas from our Calm Down Activities for Kids guide gives those bigger feelings somewhere productive to go once the glue sticks come out.
Stack it with teacher gifts. While everyone’s already got the craft supplies out and the mood is productive, it’s an efficient time to also knock out a first-week teacher gift. Our 10 Heartfelt DIY Teacher Gifts Kids Can Actually Make Themselves guide has options that fit the same skill level as most of the projects here, so you’re not pulling out a completely different set of supplies a week later.
Troubleshooting Common Mess and Mishaps
I promised realistic mess expectations up front, so let’s talk about what actually goes wrong with these projects, because something always does.
“The shrink plastic curled into a taco and stuck to itself.” This happens more than you’d think, especially with thicker designs. Pull it out and let it sit — most pieces will flatten back out on their own within the baking time listed. If it’s genuinely fused to itself, it’s usually not salvageable; keep a couple of spare sheets on hand for do-overs.
“Hot glue strings are stuck to the table, the floor, and my kid’s hair.” Lay down a silicone mat or a few layers of parchment paper before you start, and keep a pair of old scissors nearby just for snipping strings as you go rather than after the fact.
“The laminate didn’t seal all the way around and water got in.” Trim laminated pieces with at least a quarter-inch border of sealed plastic all the way around the paper — cutting too close to the edge is the number one reason laminate peels or lets moisture in within the first month.
“My kid wants to make six tags and I only have supplies for one.” This is genuinely common, especially with younger kids who get attached to the process itself. Keep a stash of the cheapest materials (cardstock, tape, markers) specifically for “extra” rounds, and save the nicer materials (wood slices, polymer clay) for the “real” version that actually goes on the backpack.
“Paint isn’t dry and we need to leave for school shopping in ten minutes.” Build in a full day of buffer between crafting and needing the finished product, especially for anything painted or Mod Podge–sealed. These dry to the touch fast but stay tacky underneath for hours.
“The carabiner clip came loose and the tag is gone by day three.” Test the clip closure yourself before attaching it, and consider a zip tie as a backup anchor point threaded through the tag’s hole in addition to the clip — belt and suspenders, but it works.
Storage and Keepsake Ideas for Year-End
Here’s something that catches a lot of parents off guard: what do you do with all this stuff at the end of the year? A pencil topper that gets tossed with a stub of a pencil in June is one thing, but a hand-decorated backpack tag or locker nameplate often feels like something worth keeping.
- A labeled shoebox per school year works better than trying to save everything permanently — kids can revisit it later, and it doesn’t pile up indefinitely.
- Photograph the locker or cubby decor in place before taking it down at year-end, especially anything too fragile to survive storage (like duct tape monsters, which flatten and lose their fringe shape over time).
- Reuse the hardware. Carabiners, key rings, and magnetic strips can be popped off an old tag and reused on next year’s version — no need to buy new every August.
- Let your kid decide what gets kept. Not everything needs to be precious. A quick “keep or toss” sort with your child at the end of the year is also a nice, low-key way to talk about how much they’ve grown since the last first day.
Frequently Asked Questions
What age can kids start making their own backpack tags?
Most kids can participate in some form starting around age 3, especially with photo tags or pre-cut shapes they decorate with stickers or crayon. True independent crafting — cutting, drawing detailed designs, using a hole punch — usually clicks around age 5-6. For toddlers, focus on letting them add color and stickers to a base an adult has prepped, rather than expecting full independence.
How do I make backpack tags waterproof for outdoor pickup lines and rainy walks to the bus stop?
Lamination is the most reliable method — a home laminator or laminating pouches from an office supply store seal paper and cardstock completely. If you don’t have a laminator, wrap the tag tightly in clear packing tape, overlapping each layer by about a quarter inch, and trim close to the edge (but not so close you cut through the seal). Wood and shrink plastic tags are naturally more water-resistant and just need a coat of Mod Podge or clear sealant.
What’s the cheapest way to do this if I don’t want to buy new craft supplies?
Cardboard from cereal boxes or shipping packages, paper grocery bags, bottle caps, and clean food containers cover a surprising number of these projects. Combine cardstock scraps with crayons or markers you already own, and clear packing tape stands in for laminate. The only projects that really need a specific purchased material are shrink plastic tags and polymer clay toppers — everything else can be built almost entirely from what’s already in the house.
My child gets frustrated easily with crafts — how do I set this up for success?
Start with the fastest, most forgiving project on the list (laminated photo tags or duct tape monster toppers), not the most ambitious one. Prep any steps that involve heat, sharp scissors, or hot glue yourself, and let your child handle the decorating and design choices, which is usually the part they care about most anyway. Keeping the session under 20-30 minutes for younger or easily frustrated kids also helps — you can always do a second project another day.
How far in advance of school starting should we do this?
About two weeks out tends to hit the sweet spot — early enough that everything has time to fully dry, cure, or set, but close enough that the excitement carries into the first day rather than fading. Anything involving baking (shrink plastic, polymer clay) or multiple coats of sealant benefits from that extra buffer time.
Can these crafts double as gifts for classmates or a first-week icebreaker?
Yes — pencil toppers especially work well as a simple, low-cost way for a child to make a few extras to share with new classmates or a desk neighbor during the first week. Keep the design simple (pom-pom pals or duct tape monsters) so making four or five doesn’t turn into an all-day project.
What if my kid loses interest halfway through a project?
Completely normal, especially with multi-step projects like polymer clay toppers that involve a bake-and-cool wait. Break the project across two short sessions instead of expecting one long sitting — sculpt one day, glue onto the pencil the next. It also helps to let attention span, not the project list, set the pace: if a kid is only up for ten minutes, pick the fastest project rather than pushing through a longer one.
One Last Thing Before the Bell Rings
Back-to-school season moves fast, and it’s easy to let the crafting part slide in favor of just buying labels and calling it done. But there’s something genuinely worth protecting in an hour spent at the table together before the routines and homework and early alarms take over — a small, low-stakes project where the only goal is making something that feels like theirs. Pick one project from this list, clear off a corner of the table, and let the glue sticks do the rest. The first day will go a little smoother because of it, and so, probably, will you.