Pinecone Owl Craft for Preschoolers (No Glue Gun Needed)
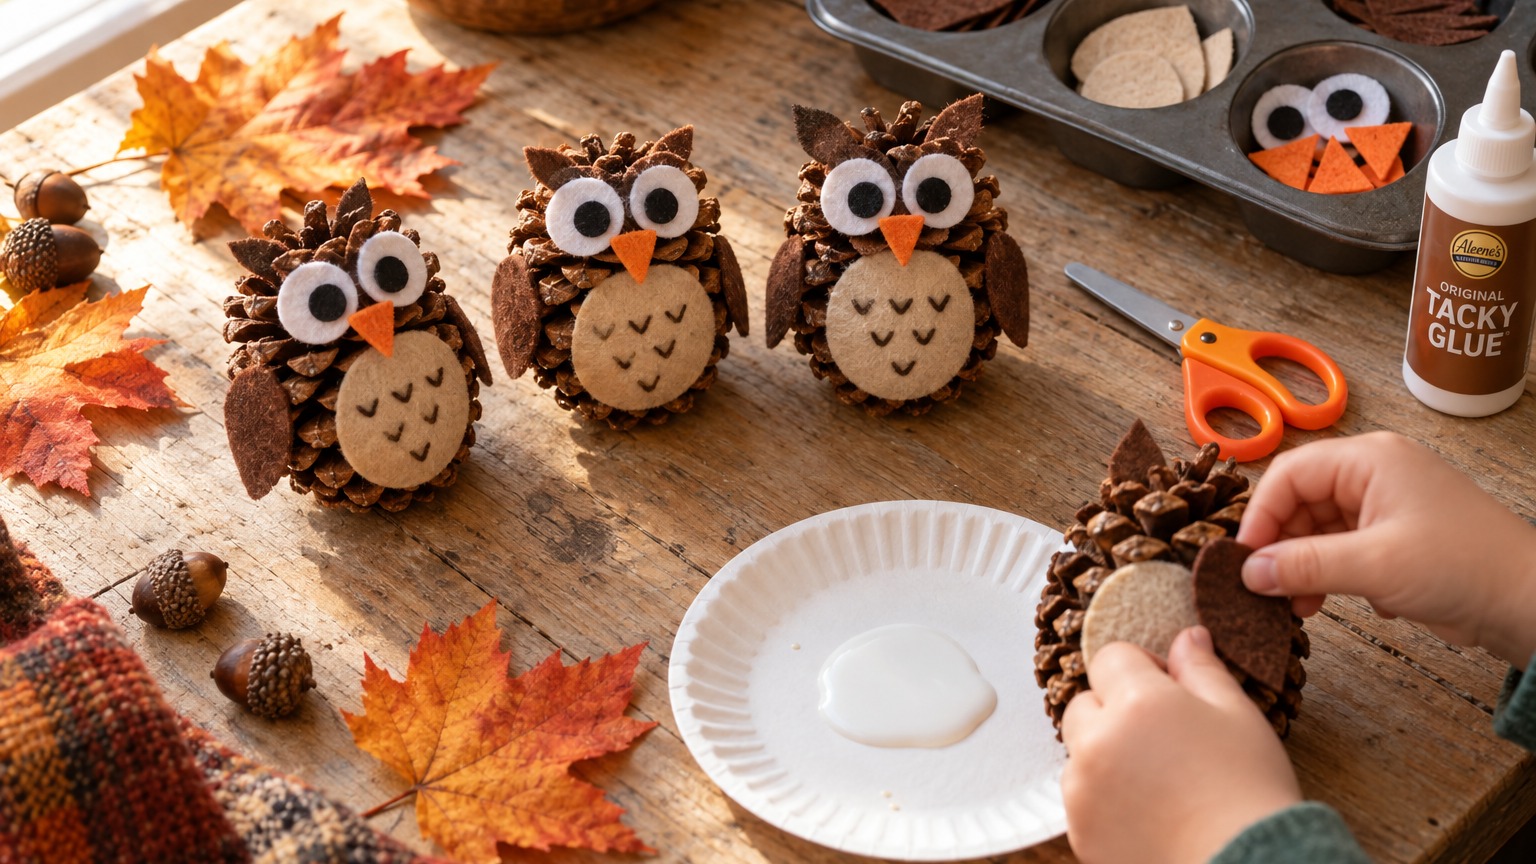
You'll learn how to help your preschooler make a pinecone owl using tacky glue and felt scraps instead of a hot glue gun.
- Swap hot glue for tacky glue so your preschooler can craft independently and safely.
- Prep materials ahead by cutting felt shapes and tapping out loose pinecone debris.
- Use thicker tacky glue instead of regular school glue so pieces stay put without sliding.
- Embrace lopsided results as great fine-motor pincer practice for ages 3 to 5.
This post contains affiliate links. As an Amazon Associate I earn from qualifying purchases.
Last October my four-year-old crouched on the porch with a pinecone in each fist and announced that both were named Hoot. She wanted owls, right then, and she wanted to make them herself.
This is a no-hot-glue pinecone owl craft for ages 3 to 5, built on tacky glue and felt. Below you’ll find the supply list, felt template sizes, six steps, troubleshooting, and variations. Expect one giant eye, one tiny eye, and pinecone scales on your rug.
Safety firstGoogly eyes, felt pupils, felt scraps, and loose pinecone scales are choking hazards for children under 4. Keep an adult within arm’s reach, count and collect the small pieces afterward, and keep younger siblings away from the table. Glue is for the owl, not for tasting.
Every tutorial I found started with “heat up your hot glue gun.” This version skips the heat, so a 3 to 5 year old can make an owl mostly on their own while you stay close. Your job is to set up the table and cut the felt ahead of time.
In this article (15 sections)
- Why Pinecone Owls Work So Well for Preschoolers
- Supplies for a No-Glue-Gun Pinecone Owl
- Prep the Pinecones Before Craft Time
- The Felt Template: Sized for Standard Pinecones
- Step-by-Step: Building the Owl
- Timing and Setup
- Managing the Mess (Realistic Edition)
- Troubleshooting Common Owl Problems
- Fun Variations to Try
- Turn It Into a Whole Fall Afternoon
- Learning Opportunities Hiding in This Craft
- Safety Notes for Little Crafters
- Displaying and Keeping Your Owls
- Frequently Asked Questions
- Pinecone Owl Craft: Final Tips
Why Pinecone Owls Work So Well for Preschoolers
Pinecones are almost made for this. The scales already look like feathers, the shape is already owl-ish (round on the bottom, slightly pointed on top), and the rough texture gives small hands something to grip. A pinecone sits on its own base, so there’s no propping or holding while glue dries.
Two big reasons this craft suits ages 3 to 5:
- Open-ended results. There’s no wrong owl. A lopsided beak still reads as an owl to a four-year-old.
- Real fine-motor practice. Pressing felt into glue, peeling felt pieces apart, and tucking pieces between scales all build pincer strength.
If your kids love collecting things on walks, this slots right in with other nature crafts for kids, and it pairs well with the fall leaf crafts for preschoolers you may already have going.
Supplies for a No-Glue-Gun Pinecone Owl
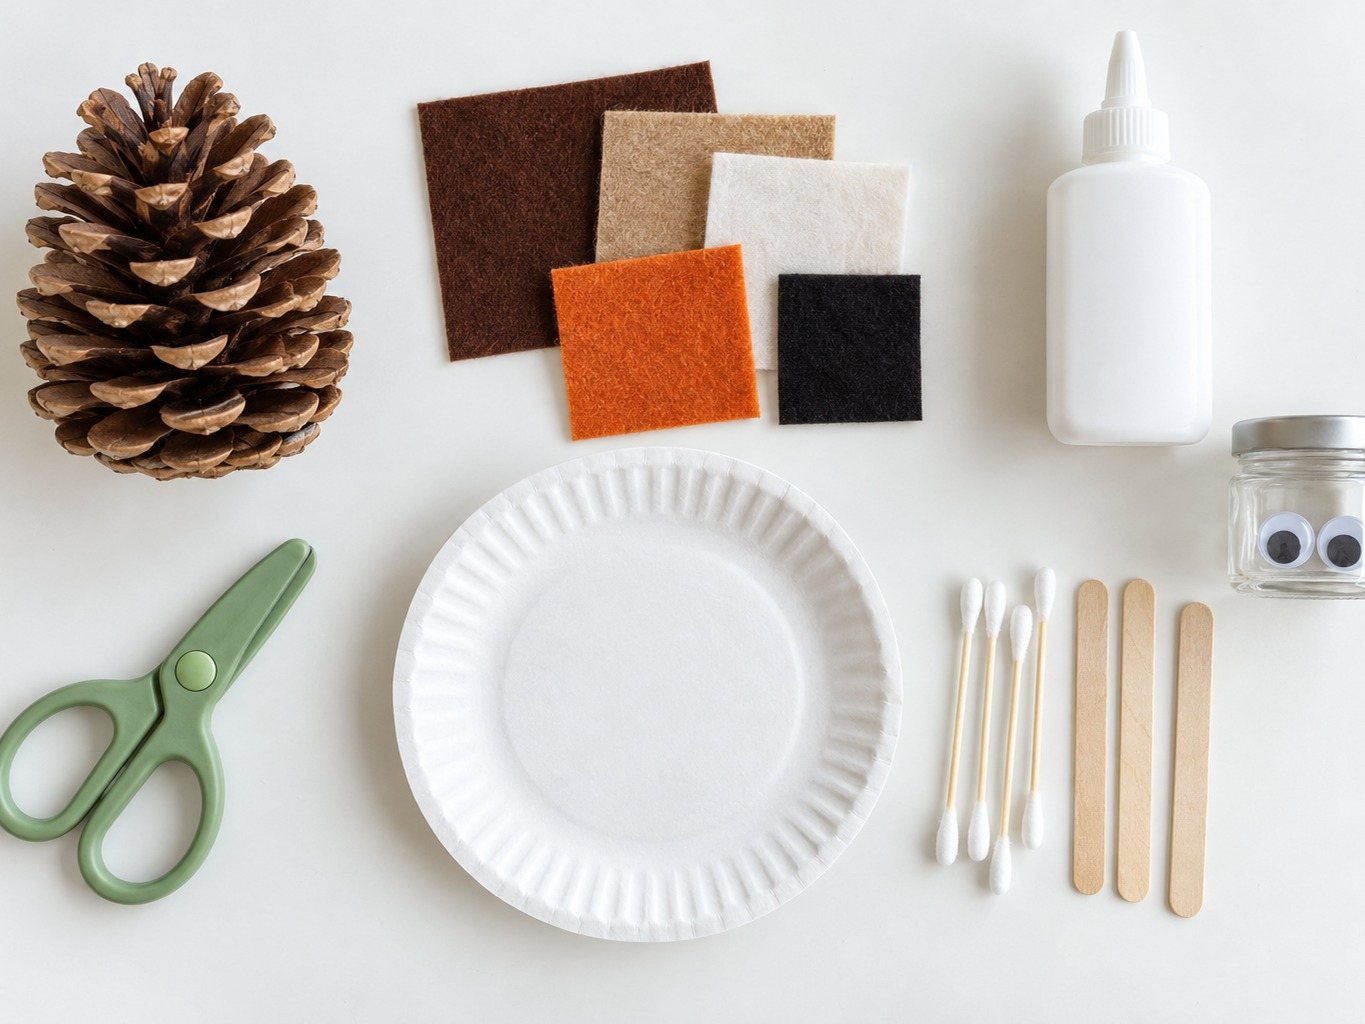
| Item | How Many (per owl) | Notes |
|---|---|---|
| Pinecone, about 3 to 5 inches tall | 1 | Closed or mostly closed works best |
| Felt sheet, brown or tan | 1 small piece | For the belly patch and wings |
| Felt sheet, white | 1 small piece | For the eye circles |
| Felt sheet, orange or yellow | 1 small piece | For the beak and feet |
| Felt sheet, black | 1 small piece | For the pupils |
| Kid-safe tacky glue | 1 bottle, shared | Look for “washable” plus the AP seal or ASTM D-4236 on the label |
| Child-safe scissors | 1 pair per kid | Only if your child will cut their own pieces |
| Paper plate or tray | 1 per child | Glue station and mess containment |
| Cotton swabs or craft sticks | 2 to 3 | For dabbing glue into tight spots |
| Googly eyes (optional) | 2 | A shortcut that skips the white and black felt |
What You Can Skip
- Hot glue gun. That’s the whole point. Not needed.
- Paint. Great if you want it, but it adds drying time and a bigger mess.
- Fancy felt. Cheap craft-store felt sheets are fine. Even a felt scrap bag works.
- Special pinecone prep. You don’t need to bake them (more on that below) unless they came from outside and look buggy or sappy.
A Note on Glue
This is the single most important supply decision. Regular school glue is too runny and slides right off the pinecone. Tacky glue is thicker and grabs felt on contact. Look for a washable version with the AP seal or an ASTM D-4236 statement on the label. It takes a few minutes to set enough that a piece stays put, and a few hours to cure fully. That brief tackiness is actually perfect for preschoolers, because it gives them time to reposition a crooked eye before it commits.
Prep the Pinecones Before Craft Time
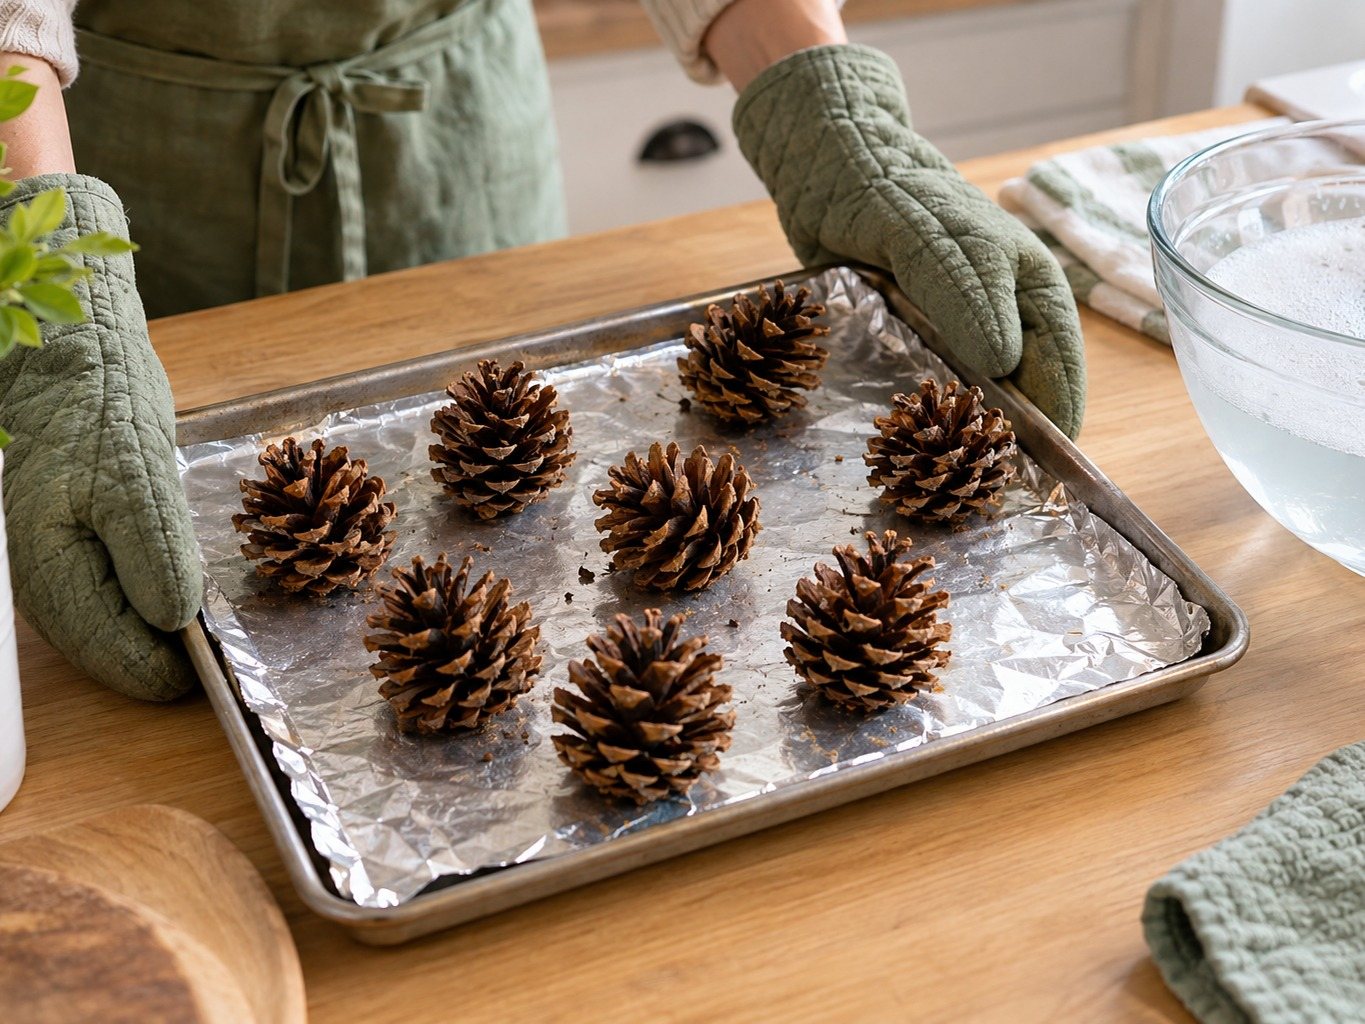
If you’re using pinecones from the yard or a park, do a quick prep so you’re not battling sap or surprise bugs.
- Shake them out. Tap each pinecone against the ground or inside a bucket to dislodge debris, dirt, and the occasional spider.
- Rinse and dry (optional). A quick dunk in a bowl of water with a splash of dish soap handles most grime. Then let the cones air-dry completely, a day or more, before they go anywhere near an oven.
- Bake if sappy or buggy. Cones must be completely air-dried first (see the rinse step), because sap is flammable. An adult lines a baking sheet with foil, spreads out the cones, and bakes at no more than 200°F for about 30 minutes, never leaving the oven unattended. This melts surface sap and evicts hitchhikers. Cool the tray completely before kids touch it.
- Open them up (or don’t). Baking often makes the scales spread out. Wet pinecones close up, dry ones open. For this craft, a partly open pinecone has more crevices for tucking felt into. A tightly closed one gives a smoother surface to glue onto. Either works.
TipBake only sappy or buggy cones, only with an adult present, cones fully dry, 200°F max, never unattended. Store-bought cones skip this step.
Craft stores sell bags of clean pinecones too, if you’d rather skip prep entirely. That’s a perfectly good move on a Tuesday afternoon when everyone is cranky.
Sorting Pinecones With Your Kid
Before you start, let your child pick their own pinecone. Line up a few and ask, “Which one looks the most like an owl?” Preschoolers examine them very seriously, and picking their own cuts down on “I want the BIG one” negotiations later.
The Felt Template: Sized for Standard Pinecones
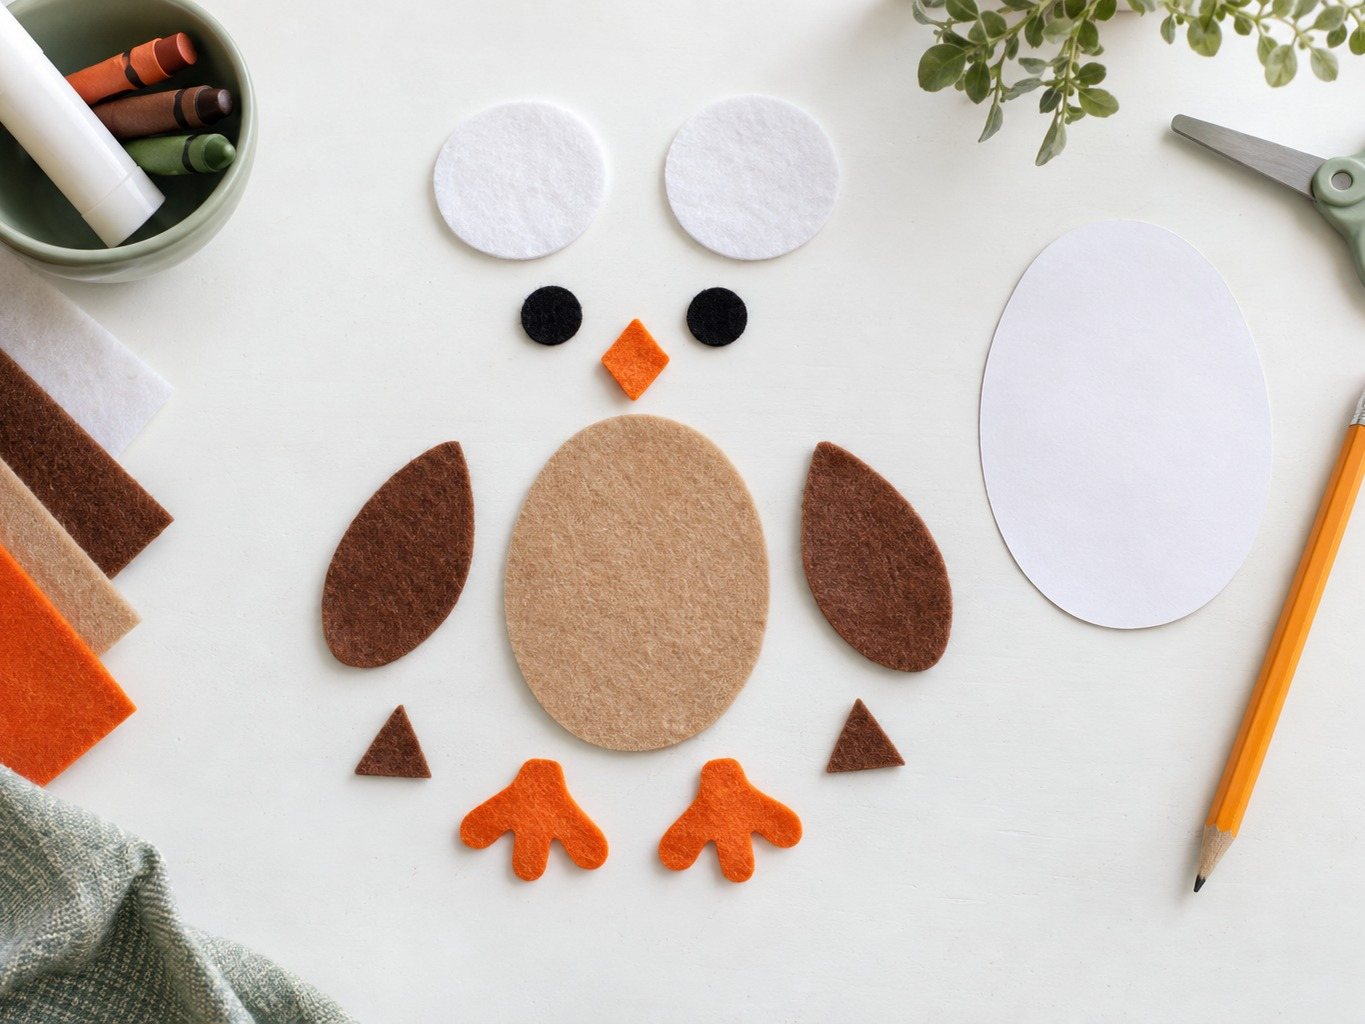
Good to knowOur printable Pinecone Owl Template + Craft Card has actual-size shapes to trace and cut, in large and small cone versions, plus a one-page picture card of the six steps. No printer or ruler handy? The measurement table below works as a backup.
Use a ruler and a pencil to trace the shapes onto felt, or let your child trace around everyday round objects.
These sizes fit cones about 4 to 5 inches tall and 2.5 inches or wider. Cone width matters more than height.
| Piece | Shape | Size | Color | Quantity |
|---|---|---|---|---|
| Eye circle (outer) | Circle | 1.5 inches wide | White | 2 |
| Pupil | Circle | 0.75 inches wide | Black | 2 |
| Beak | Small diamond or triangle | 0.75 inches wide, 1 inch tall | Orange or yellow | 1 |
| Belly patch | Oval | 2 inches wide, 2.5 inches tall | Tan or light brown | 1 |
| Wing | Teardrop | 1 inch wide, 2 inches tall | Brown | 2 |
| Foot | Three-toed shape or small oval | 1 inch wide | Orange or yellow | 2 |
| Ear tuft (optional) | Small triangle | 0.75 inches wide, 1 inch tall | Brown | 2 |
No-Ruler Tracing Shortcuts
Don’t want to measure? Trace these household items instead:
- Eye circle: a large bottle cap or a jar lid from a spice jar
- Pupil: the end of a pencil eraser, or a coin (adult traces it)
- Belly oval: the bottom of an egg, traced sideways
- Wings: trace your child’s thumb and add a rounded tip
For a 3-inch cone, use roughly 1-inch eyes and a 1.5 by 2 inch belly. For a big one (over 5 inches), bump the eye circles up to 2 inches and the belly to 2.5 by 3.
Who Cuts What
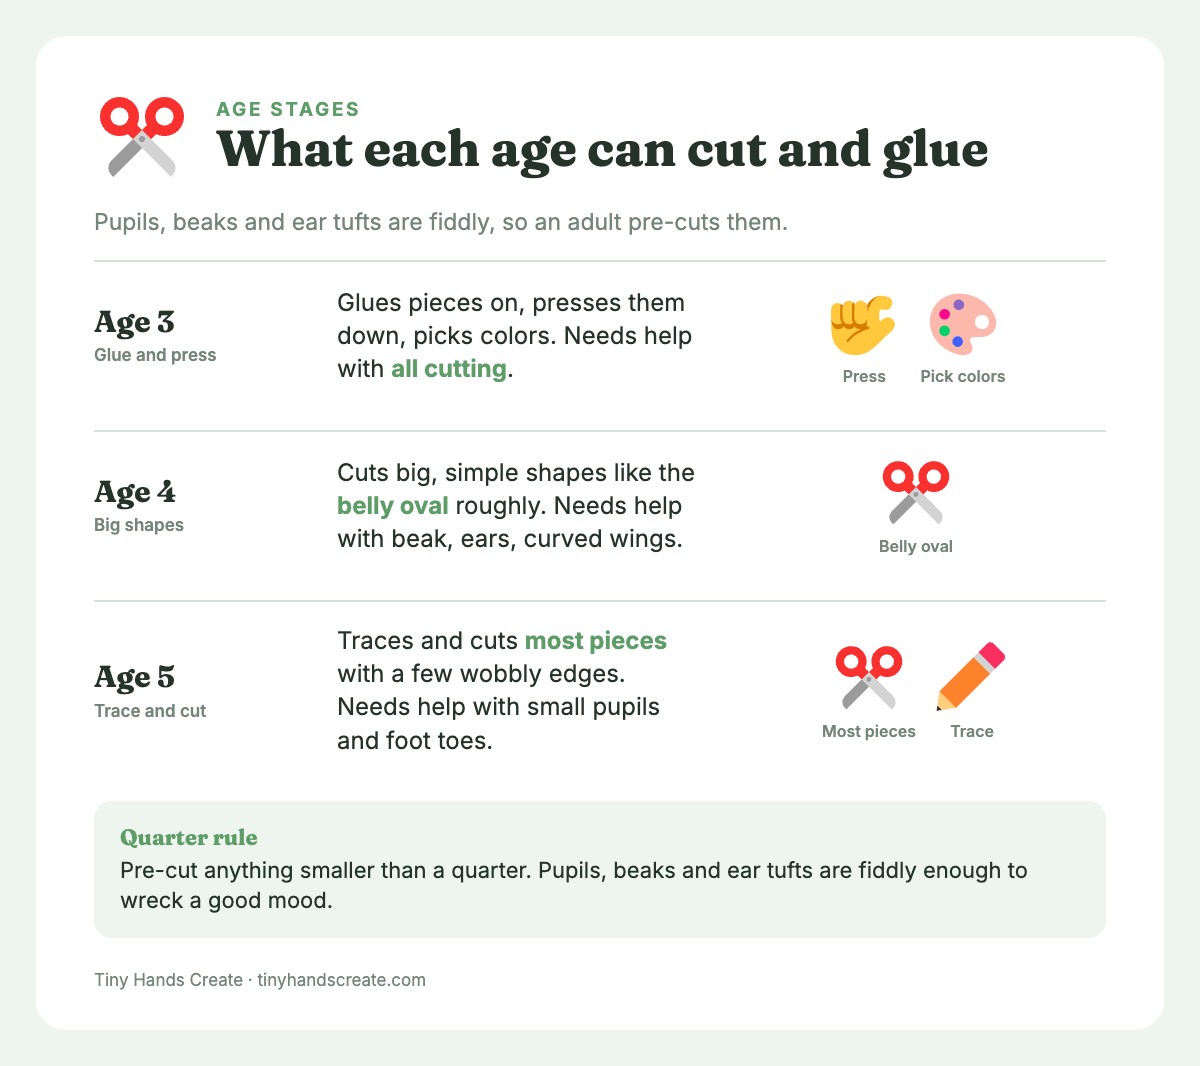
Age matters here. Here’s what’s realistic:
| Age | Can Do | Needs Help With |
|---|---|---|
| 3 | Glue pieces on, press them down, pick colors | All cutting, especially tiny pieces |
| 4 | Cut big, simple shapes like the belly oval roughly | Beak, ears, curved wings |
| 5 | Trace and cut most pieces with a few wobbly edges | Small pupils and the foot toes |
My rule: I pre-cut anything smaller than a quarter. The pupils, beaks, and ear tufts are fiddly enough to wreck a good mood. Big shapes, the belly and wings, are great practice for kids who want to cut.
With a stack of cut felt ready, preschoolers can be mostly independent. I stay in the room and keep watching, usually folding laundry within arm’s reach.
Step-by-Step: Building the Owl
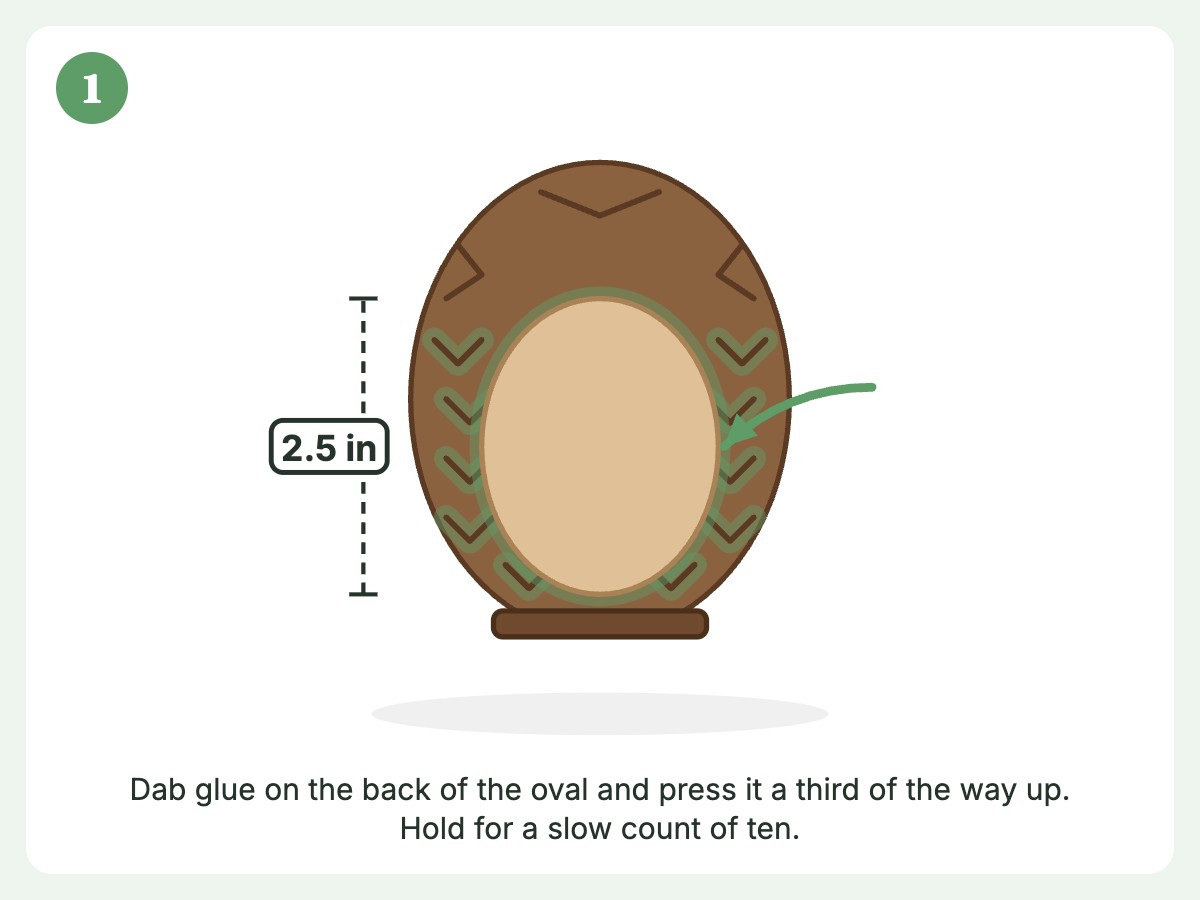
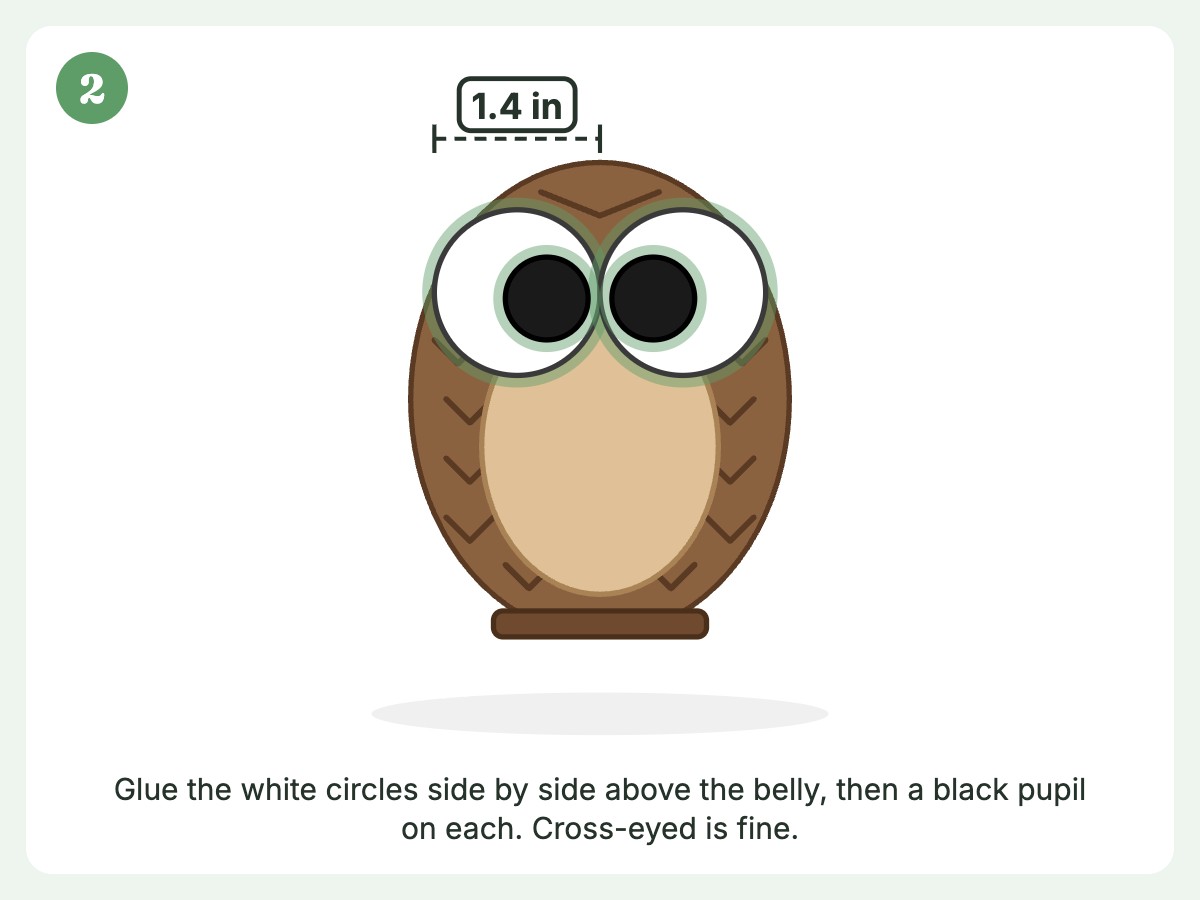
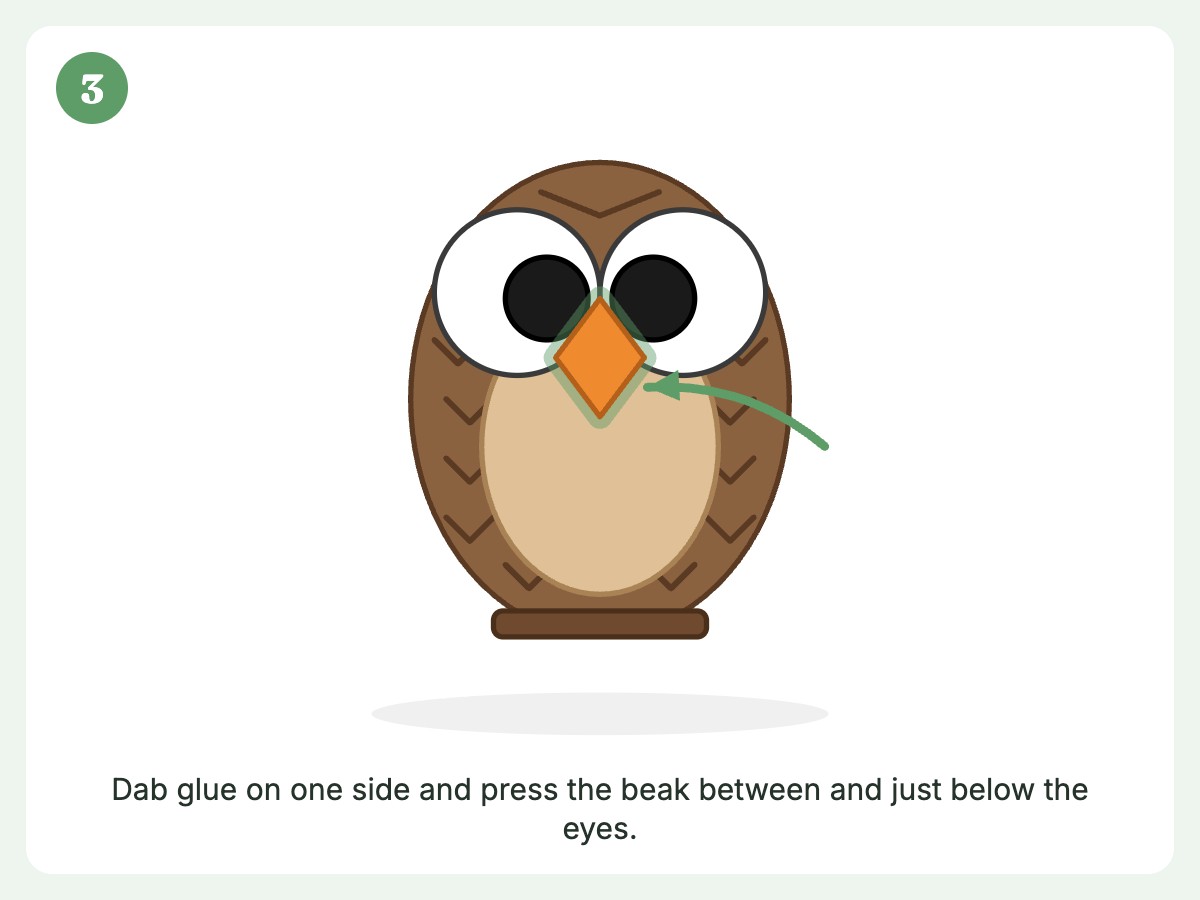
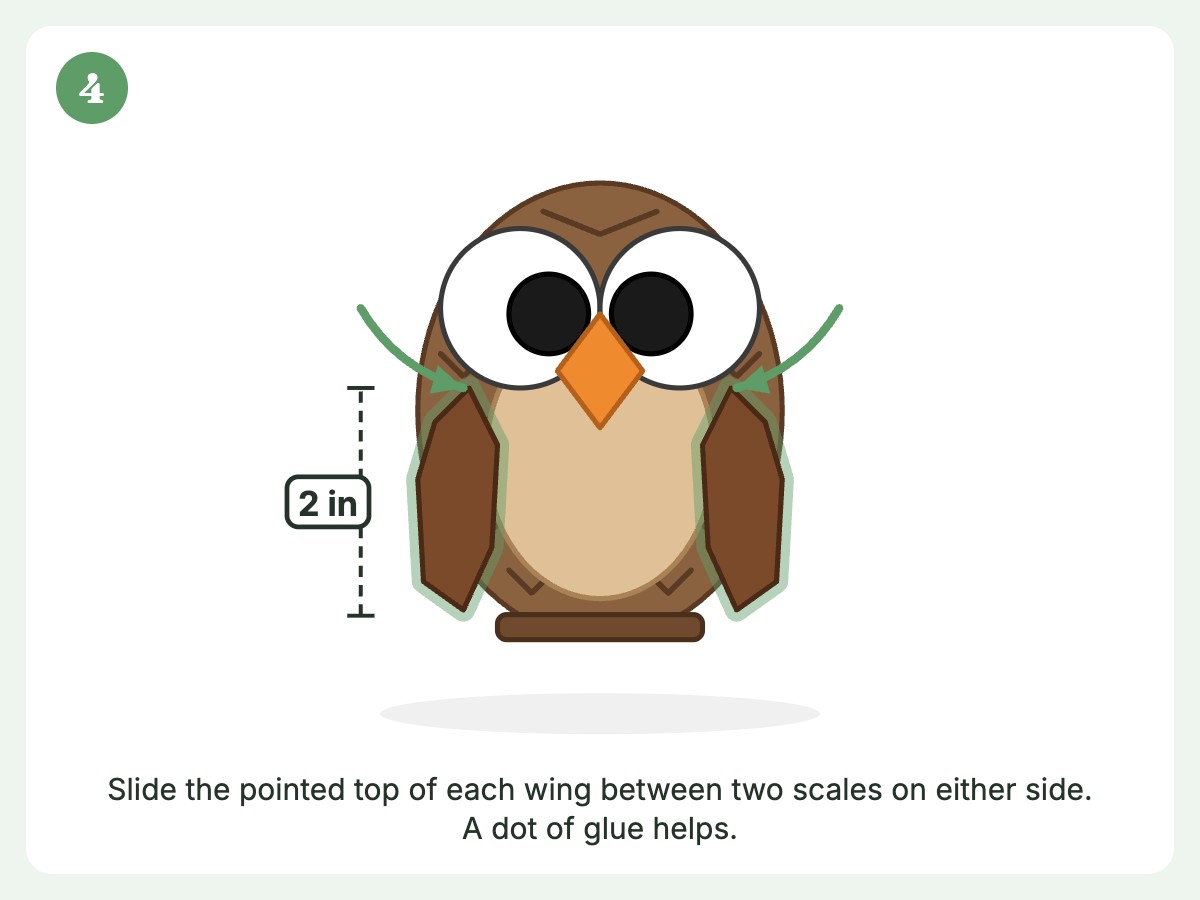
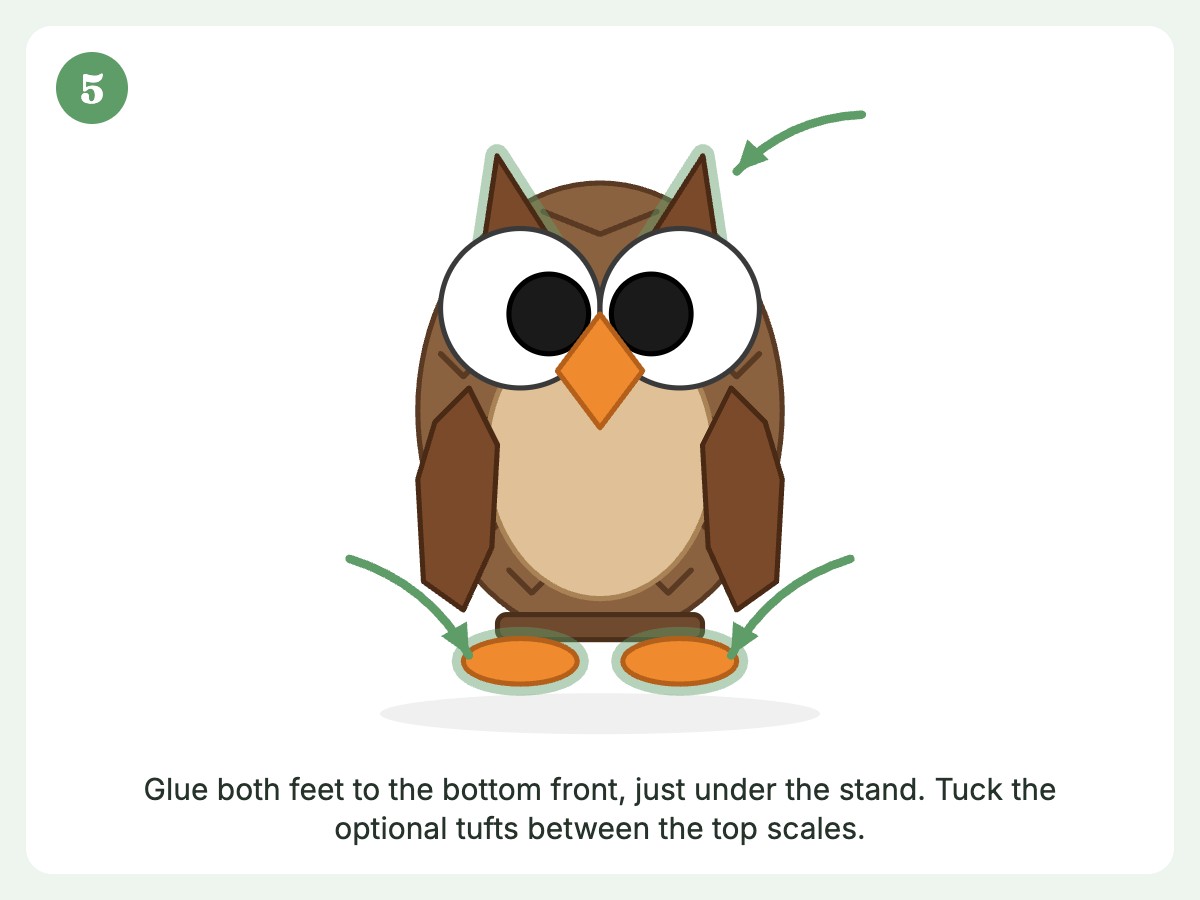
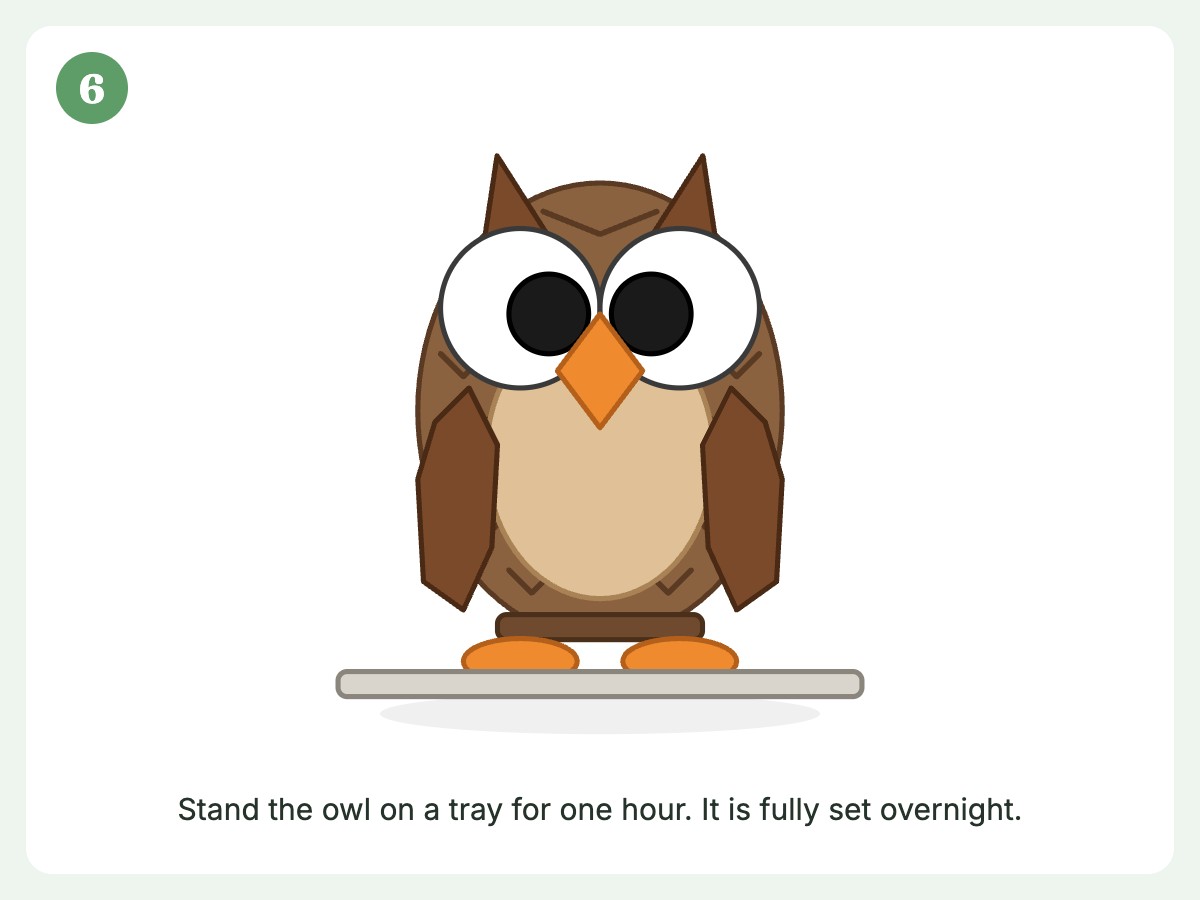
Set each child up with a paper plate holding their cut felt pieces, a pinecone, and a small puddle of glue. A puddle on the plate beats the bottle itself, because it stops the great glue flood of squeeze-and-regret.
TipA slow count of ten is the single move that keeps felt on. Keep a damp cotton swab handy to fix glue smears.
Step 1: Glue the Belly Patch
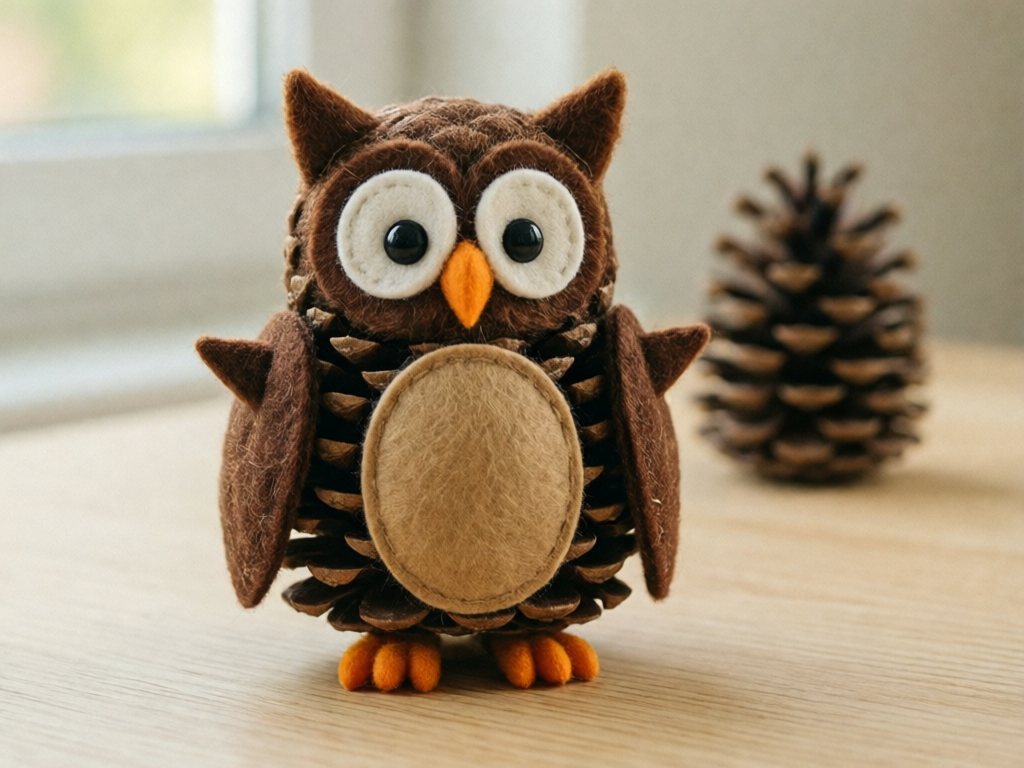
Dab glue on the back of the tan felt oval. Press it onto the front of the pinecone, about a third of the way up from the base. Hold it for a slow count of ten. The pinecone’s scales poke up, so the felt will sit a bit bumpy. That’s good. It looks like fluffy chest feathers.
Step 2: Add the Eyes
Glue the white circles side by side near the top of the pinecone, above the belly patch. Then glue a black pupil onto each. Let your child decide where the pupils look. Cross-eyed owls are funnier than straight-ahead ones.
Shortcut: Use googly eyes and skip the white and black felt. An adult places them, or stays within arm’s reach, because they are small. Stick them on with tacky glue and hold for a slow count of ten.
Step 3: Place the Beak
The beak goes right between and just below the eyes. Dab glue on one side of the diamond and press it on. Some kids fold the beak in half to make it pop out, which looks great.
Step 4: Tuck in the Wings
Here’s where the pinecone shines. Instead of gluing wings flat, slide the pointed top of each teardrop between two scales on either side of the body. A dot of glue helps, but the scales grip the felt on their own. This is also a great fine-motor challenge.
Step 5: Finish With Feet and Ear Tufts
Glue the two feet to the bottom front of the pinecone so the owl looks like it’s perching. Tuck the optional ear tufts between the top scales. Done.
Step 6: Let It Dry
Stand the owl upright on a tray and leave it for an hour before anyone handles it. It’s fully set overnight. Tell your child it needs to “sleep.” This works some of the time, which is pretty good for a preschooler.
Timing and Setup
| Task | Time |
|---|---|
| Gathering and prepping pinecones | 10 minutes (plus 30 if baking) |
| Cutting felt pieces ahead of time | 15 to 20 minutes for 4 owls |
| Kid building time | 20 to 40 minutes |
| Drying | Handle after 1 hour; fully set overnight |
| Cleanup | 10 minutes |
For a group of three or four kids, prep one tray per child with pre-cut pieces in small cups or a muffin tin. A muffin tin is the secret weapon: each cup holds one color, and nothing rolls off the table.
Managing the Mess (Realistic Edition)
This craft is moderate on the mess scale. Not paint-everywhere, but not nothing.
- Cover the table with a vinyl tablecloth, a roll of kraft paper, or even an old cereal box flattened out.
- Give each child a plate as their personal glue zone.
- Keep a damp washcloth within reach. Tacky glue wipes off hands easily while wet and peels off once dry.
- Expect shedding. Pinecone scales may flake off. A handheld vacuum or a quick sweep fixes it.
- Wear a smock or an old t-shirt. Glue and felt fuzz love to follow kids around.
If you want a lower-cleanup option, our mess-free art activities for toddlers have lots of ideas for the younger set.
Troubleshooting Common Owl Problems
Every group of preschoolers hits the same few snags. Here’s how I handle them.
| Problem | Why It Happens | Quick Fix |
|---|---|---|
| Felt won’t stick | Too little glue, or glue was on the wrong side | Add a thicker dab and hold for 10 seconds |
| Eyes slide down | Pinecone surface is too bumpy or the glue was runny | Use a medium glue dot (not a flood) and press longer. On a bumpy spot, glue the white circle first, then the pupil, and prop the owl face-up while it sets |
| Owl tips over | Base is uneven | Break off a few bottom scales to flatten, or prop it in a small cup to dry |
| Glue soaks through the felt | Too much glue | Blot with a paper towel, then re-press |
| Child gets frustrated | Pieces are too small | Switch to googly eyes and bigger shapes |
| Scales snap off | Pinecone is old and brittle | Use a fresher one, or glue the scale back on |
When Your Preschooler Wants to “Do It Different”
Let them. A kid in my craft group made a pinecone owl with six eyes and no beak. Another gave hers a felt hat. The goal here is process, not perfection. If you want to explore that mindset further, check out our guide on process art for toddlers.
Fun Variations to Try
Once your kids master the basic owl, there are plenty of ways to remix.
Easy Pinecone Animal Crafts (Same Method, New Creature)
The same felt-and-tacky-glue approach works for other animals. Same small-parts rules apply: an adult places cotton balls and tiny eyes for ages under 4.
- Hedgehog: Use a brown felt face on the narrow end and tiny black dot eyes. The scales already look like spines.
- Turkey: Glue bright felt feathers (red, orange, yellow) into the back scales and add a red wattle.
- Bunny: Add long felt ears and a cotton ball tail.
- Fox: Orange felt face and ears with a white chest patch.
Owl Family
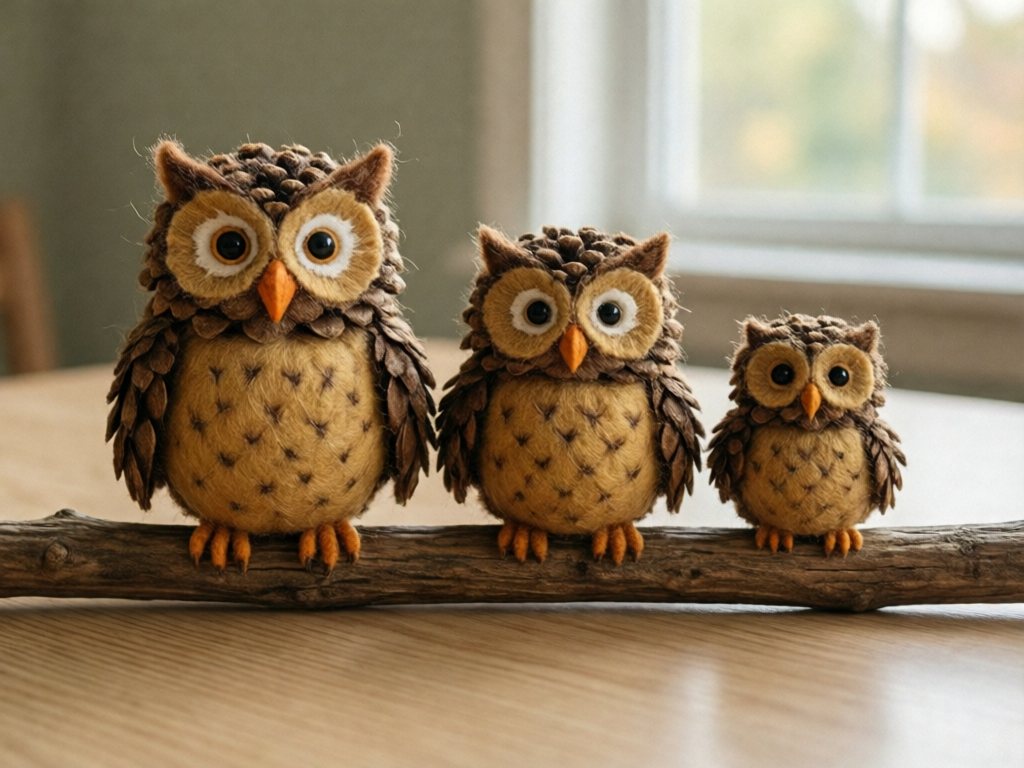
Make a big pinecone for Mama, a medium one for Papa, and tiny ones for babies. Kids love lining them up on a branch.
Owl Ornaments
An adult ties a short loop of twine around the top scales so the owl can hang from a tree branch or a window. Hang it out of reach, and never near a crib, a sleeping area, or blind cords. This is a display piece for adults to hang, not a toy for young children. Come December, they become charming ornaments. If you’d like more felt-and-glue ideas, take a look at these no-sew felt crafts for toddlers.
Painted Pinecone Owls
For a messier, more colorful option, let kids paint the pinecone first with washable paint and dry it before adding felt. This adds about an hour of waiting but gives you rainbow owls.
Turn It Into a Whole Fall Afternoon
The craft is only half the fun. Here’s a way to build a full afternoon around it.
- Start outside. Take a walk to collect pinecones, acorns, and leaves. Bring a paper bag for each kid.
- Sort and count. Back at the table, have your child sort treasures by size or type.
- Make the owls. Follow the steps above.
- Story time. Read an owl picture book while the glue dries.
- Go outside again. Step out at dusk and listen for owls, then browse our list of outdoor nature activities for kids for more ideas to extend the learning.
If you also have a basket of pinecones left over, a fall sensory bin with acorns and pinecones is a great second use for them. Keep the bin for ages 3 and up with an adult sitting beside them, and skip it for any child who still mouths objects. Acorns are not for eating, and everyone washes hands afterward.
Learning Opportunities Hiding in This Craft
You can sneak in plenty of learning without making it feel like school.
| Skill | How It Shows Up |
|---|---|
| Fine motor | Pressing felt, tucking wings, peeling pieces apart |
| Math | Counting two eyes, two wings, two feet; comparing big and small pinecones |
| Science | Why do pinecones open and close? What do owls eat? |
| Language | Naming parts of the owl, inventing a name and story |
| Following directions | Building in order, step by step |
| Independence | Choosing colors and placing pieces without being told where each one goes |
A fun conversation starter: ask, “Why do you think owls have such big eyes?” (Because they hunt at night and need to see in the dark.)
Preschoolers also love that owls can turn their heads almost all the way around.
Safety Notes for Little Crafters
- Small parts. Googly eyes, pupils, felt scraps, and loose pinecone scales are choking hazards for children under 4. Keep an adult within arm’s reach of 3-year-olds, count and collect small pieces afterward, and keep younger siblings away from the table.
- Pinecone allergies. Rare, but some kids react to pine resin or dust. If your child gets itchy hands or a runny nose, wash up and switch to a different material.
- Glue. Even non-toxic glue shouldn’t be eaten. Remind kids that glue is for the owl, not for tasting.
- Scissors. Use blunt-tip child scissors and stay close for cutting.
- Outdoor pinecones. Shake them out and inspect them before bringing them inside, and bake them if they’re sappy or buggy.
Displaying and Keeping Your Owls
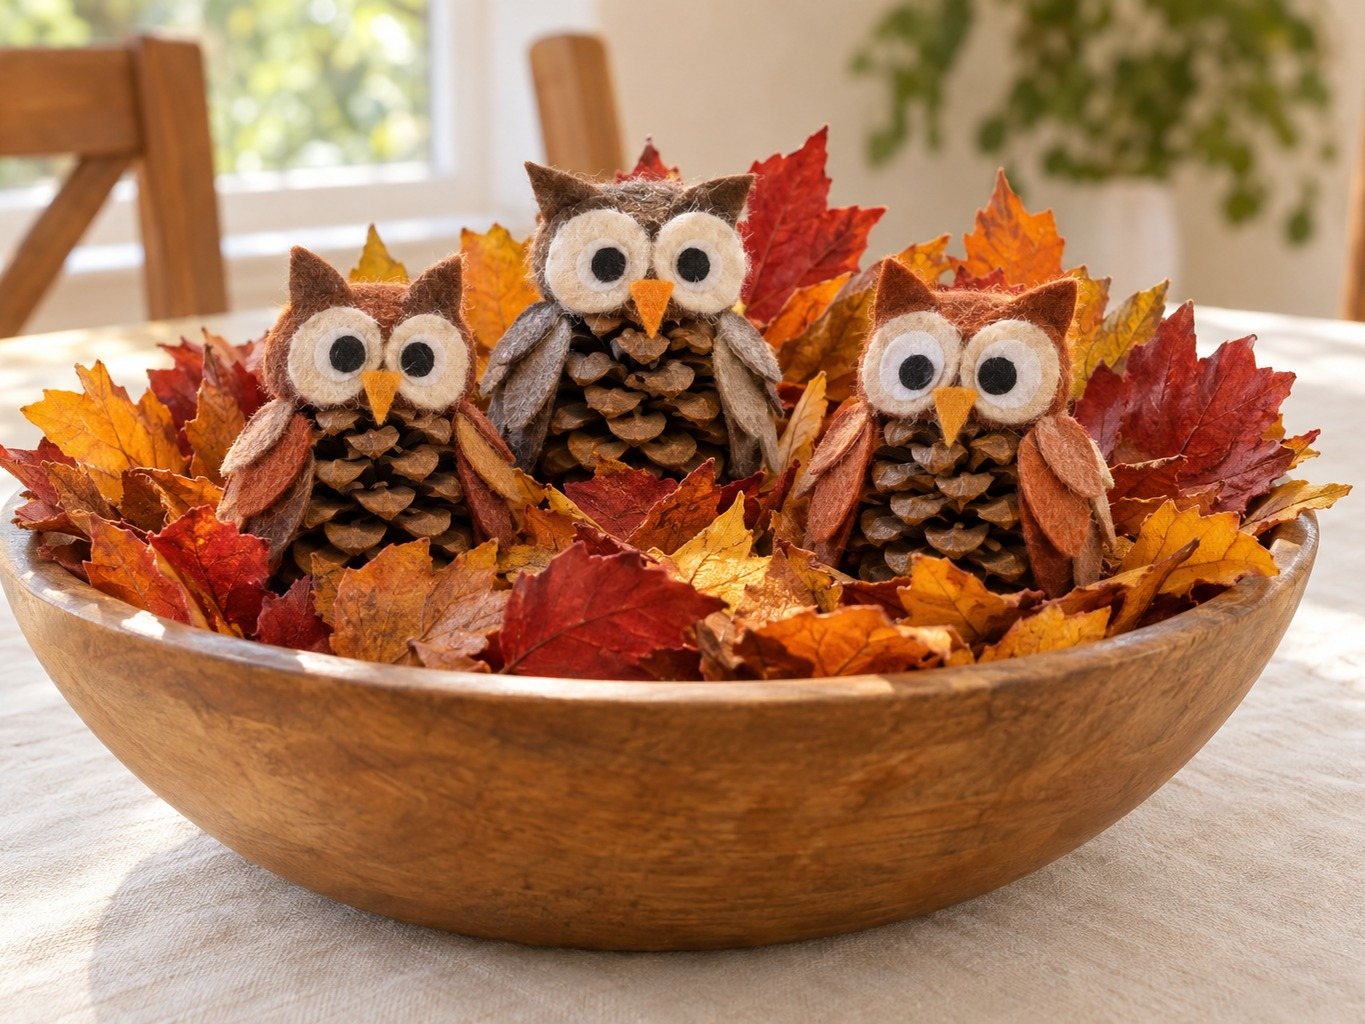
Once dry, those little owls need a home.
- Line them up on a windowsill.
- Make a centerpiece in a wooden bowl with leaves and acorns.
- Set them on a fall nature table.
- Use them as place cards for a family dinner by tucking a name card between the scales.
- Gift them to grandparents with a short note from your child.
For the Thanksgiving table, an owl at each seat makes a sweet kid-made decoration, and it pairs nicely with a handprint turkey craft.
If an owl gets dusty over time, use a soft brush, or an adult can use a hair dryer on the cool setting. Keep them out of damp rooms, since felt can get musty.
Frequently Asked Questions
Can preschoolers really make a pinecone owl without a hot glue gun?
Yes. Thick, washable tacky glue holds felt to pinecone scales well, especially when you press and count to ten. It dries slower than hot glue, so pieces may slide a little at first. Let the finished owl rest for an hour before handling, and overnight to fully set.
What age is this pinecone owl craft best for?
Ages 3 to 5 do best. Three-year-olds can glue pre-cut pieces, four-year-olds can cut big shapes, and five-year-olds can trace and cut most pieces themselves. This craft suits ages 3 to 5 with an adult close by. It isn’t recommended for children under 3, so try our mess-free art activities for toddlers instead.
Do I need to bake the pinecones first?
Only if they came from outdoors. Baking at 200°F for about 30 minutes melts sap and removes bugs. Store-bought pinecones from a craft shop are usually already cleaned and can go straight to the table.
What if I don’t have felt?
Construction paper, cardstock, or even fabric scraps work. Paper is a little harder to tuck between scales, so glue it on flat. Felt is easier because it bends and grips.
How do I stop the owl from tipping over?
Look at the base of the pinecone and snap off a few scales so it sits flat. You can also let the glue dry with the owl propped in a small cup or a ring of rolled-up paper towel.
Can I make this craft for a classroom or party?
Definitely. Pre-cut all the felt pieces and sort them into muffin tin cups or small cups, one set per child. Plan 20 to 40 minutes for building and have an adult handle the wet-glue cleanup. Let owls dry overnight before sending them home.
How do I get the felt pieces to stay on if the pinecone is tightly closed?
Closed pinecones have a rougher outer surface, so use a bigger blob of glue and press for a full ten seconds. For wings, switch to flat-gluing instead of tucking. You can also gently pry a few scales apart with a craft stick to make slots.
Pinecone Owl Craft: Final Tips
The best pinecone owl is the one your child made, wonky eye and all. You’ll end up with a handful of small, slightly crooked owls watching you from the windowsill, and honestly, they’ll be some of the best fall decorations you own. Gather some pinecones, cut a little felt, and let your kid take the lead. The glue gun can stay in the drawer.