How to Draw Rolling Hills (Easy Step by Step)
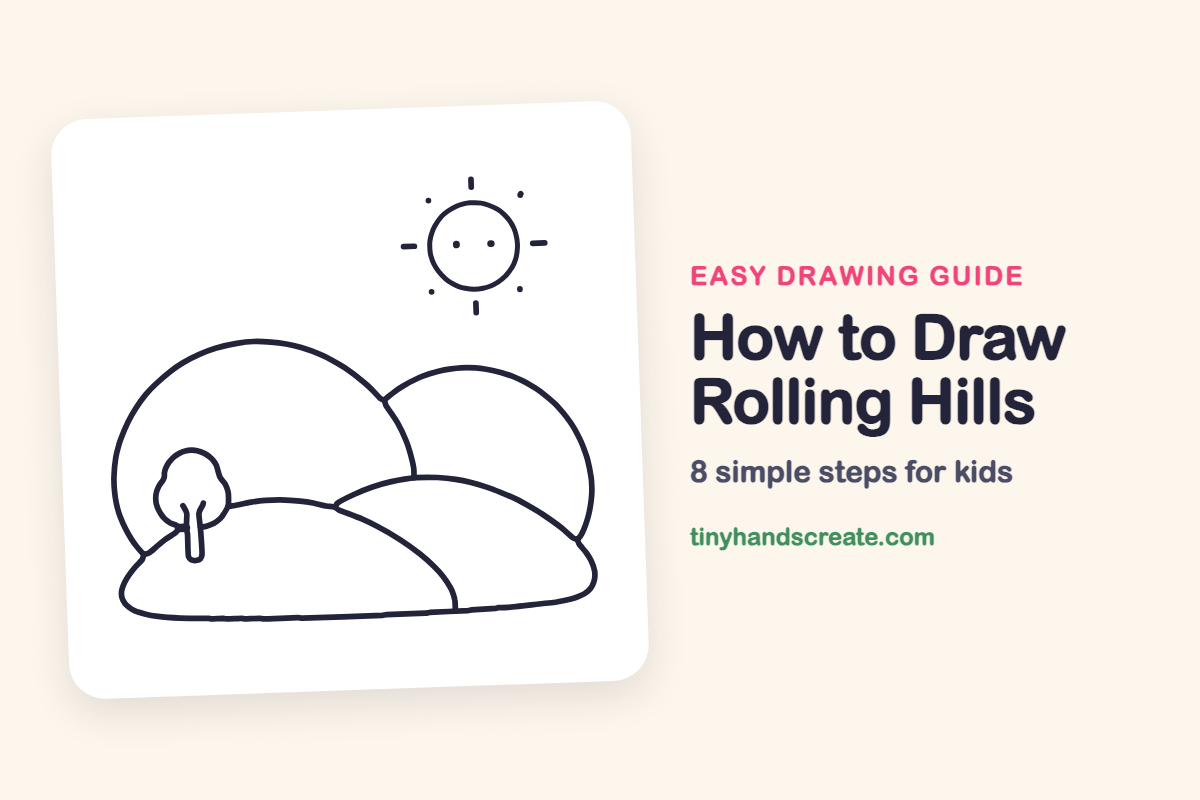
Learn to draw a calm, cheerful scene of rolling hills using only curved lines. You'll start with domes and bumps, then add a tiny tree and a friendly sun to complete your easy nature drawing.
- Use only big curved lines; no straight edges are needed for your hills.
- Begin your drawing by creating domes and bumps for the hill shapes.
- Enhance your scene by adding a tiny tree to the landscape.
- Finish your drawing with a friendly sun, including a circle, lines, and dot eyes.
This post contains affiliate links. As an Amazon Associate I earn from qualifying purchases.
Rolling hills are a calm, cheerful scene made from big curved lines, and you do not need to draw a single straight edge. This drawing starts with domes and bumps, adds a tiny tree, and finishes with a friendly sun made from a circle, a few short lines, and two dot eyes.
- Easy
- 10 minutes
- 8 steps
You need: paper, a pencil, an eraser, and crayons or markers for coloring.
Start drawing
In this article (7 sections)
How to draw rolling hills step by step
How to Draw Rolling Hills · tinyhandscreate.com
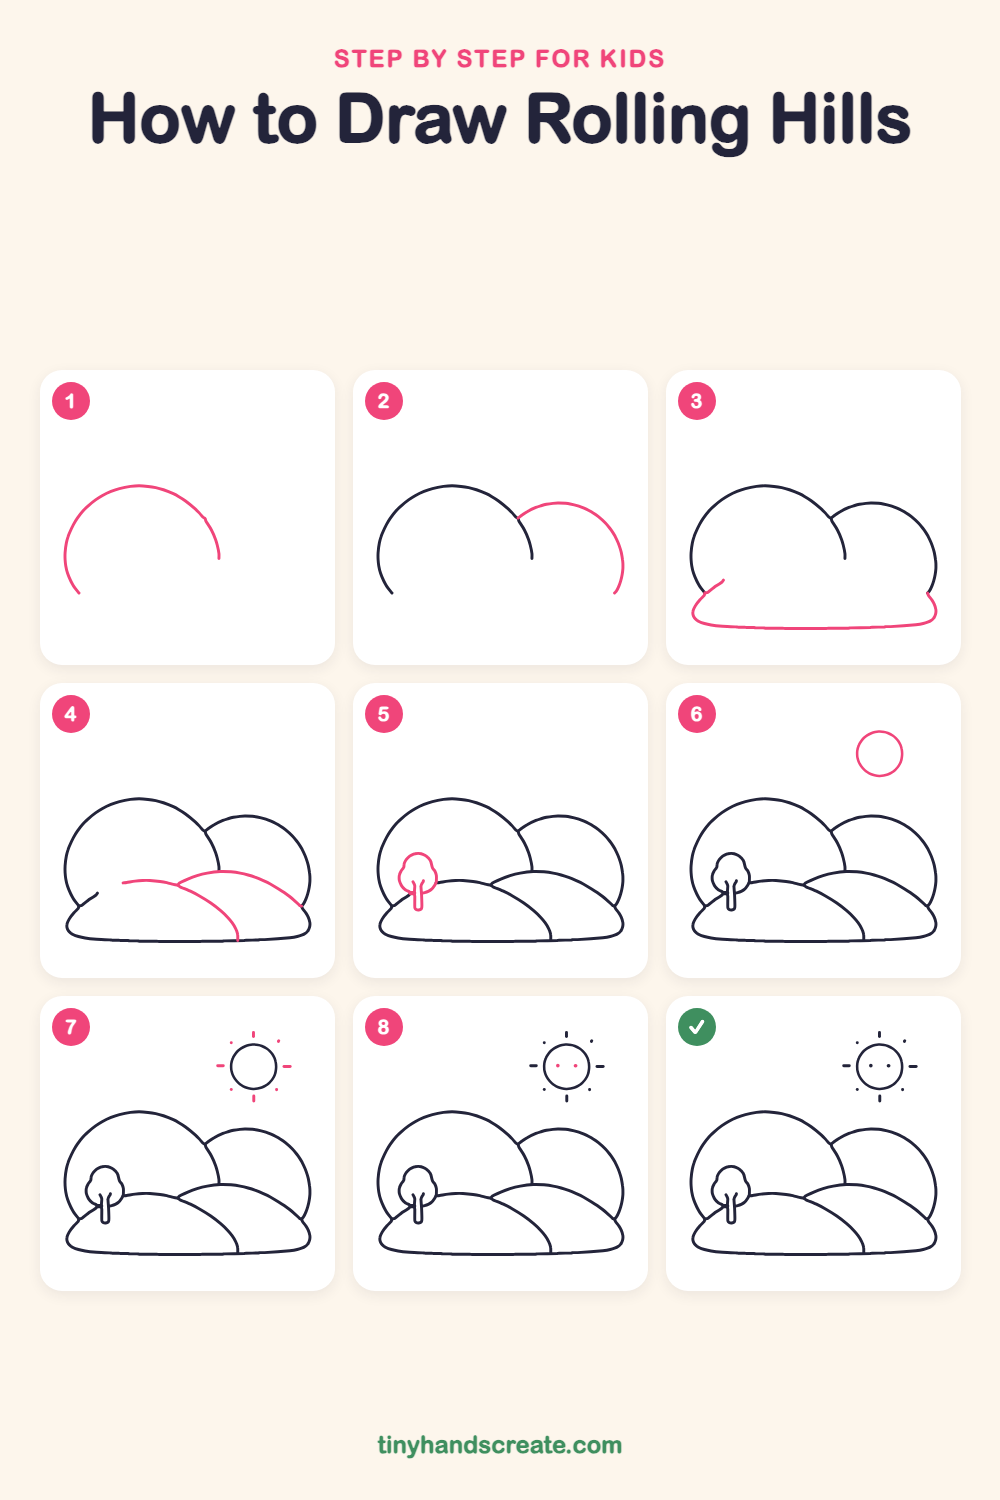
Step 1: The big hill
Start on the left side of your paper and draw a big dome, like the top of a giant ball. Draw up and over, then stop when the curve comes down on the right side, and leave the bottom open.
Step 2: The back hill
Tuck a second, smaller dome behind the big hill on the right. Start where it touches the big hill, bump up and over, and curve down toward the bottom right corner.
Step 3: The ground
Draw a long, wide bowl shape across the bottom of the page, like a squished smile. Let its left end curve up and meet the bottom of the big hill with a short slanted line, and let its right end curve up to meet the back hill.
Step 4: The front hills
Draw a gentle bump in the middle, then keep going in a curve that slides down to the bottom line. Next, draw a long, low curve on the right that rises and then slopes down to the right edge.
Step 5: The little tree
On the left front hill, draw a small puffy cloud shape for the leaves. Then add a skinny trunk, like a tall U, that starts inside the leaves and goes down to the hill.
Step 6: The sun
Up in the sky on the right, draw a nice round circle. Take your time and go slowly around, and it will close up like a coin.
Step 7: Sun rays
Add short lines around the sun, like a clock. Draw one at the top, bottom, left, and right, then put a tiny dot in each of the four corners.
Step 8: Sun eyes
Put two small dots inside the sun, side by side, for its eyes. Press your pencil down for a second to make each dot round.
All done!
Go over your lines with a marker, then color it in.
Finished your rolling hills? Keep the pencils out and learn how to draw a mushroom or how to draw a sunflower next.
Tips for drawing rolling hills
- Draw the big hill first and the smaller hills after it, so each new curve can start where an older one ends.
- When two hills overlap, stop your line at the edge of the hill in front instead of drawing through it.
- Keep the sun's rays short and about the same length, so the sun looks even and friendly.
Free rolling hills coloring page
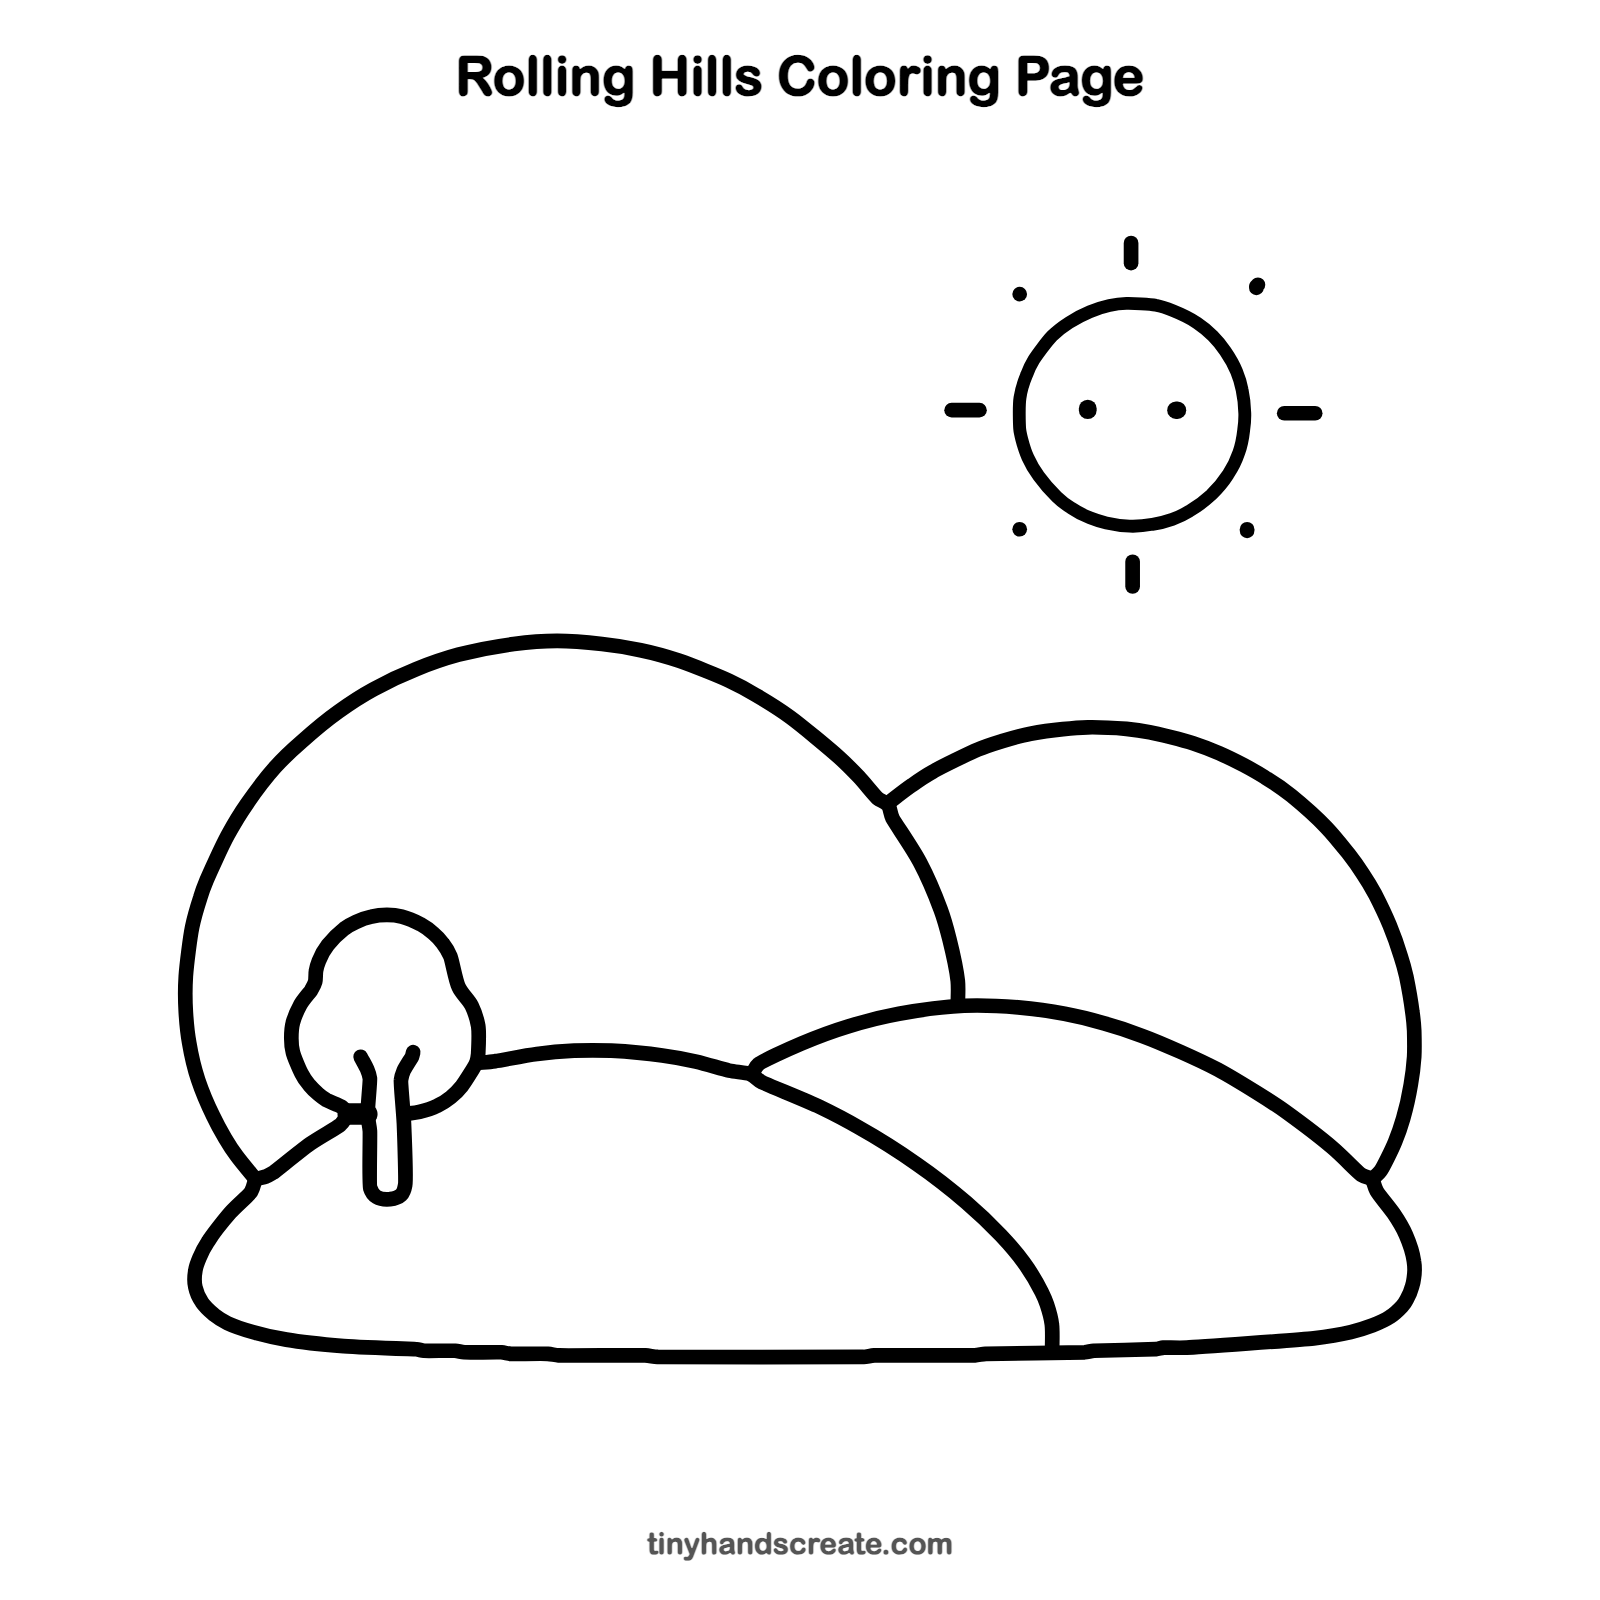
Want to go straight to coloring? Open this rolling hills coloring page at full size and print it. It is the same drawing you just learned, with clean lines ready for crayons or markers.
How to color your rolling hills drawing
Try bright green for the hills with a lighter yellow-green for the ones in the back, a brown trunk, and a sunny yellow sun. For a twist, color the hills in stripes, like a patchwork quilt of farm fields.
Rolling hills fun fact for kids
Wind, rain, and ice wear rock away very slowly, which is why many old hills have smooth, rounded tops.
Questions about drawing rolling hills
What shapes do I need to draw rolling hills?
You mostly need half circles and long, gentle curves. The tree is a puffy cloud shape on a thin U, and the sun is a circle with short lines and dots.
How do I make my hills look like they are behind each other?
Start the back hill where it touches the big hill, and stop your line there instead of drawing through. Hills that are partly hidden look farther away.
How can I make my sun look cuter?
Add two small dot eyes inside the circle. Make the rays short and even, like the marks on a clock.