How to Draw an Iced Coffee (Easy Step by Step)
An iced coffee cup is a friendly drawing made from simple shapes: a tapered bucket, a flat pill, a dome, and a few rounded squares. Adding a tiny smiling face turns an everyday drink into a cute character. Once you know the steps, you can draw it again with a new face each time.
- Easy
- 12 minutes
- 10 steps
You need: paper, a pencil, an eraser, and crayons or markers for coloring.
Start drawingIn this article (7 sections)
How to draw an iced coffee step by step
How to Draw an Iced Coffee · tinyhandscreate.com
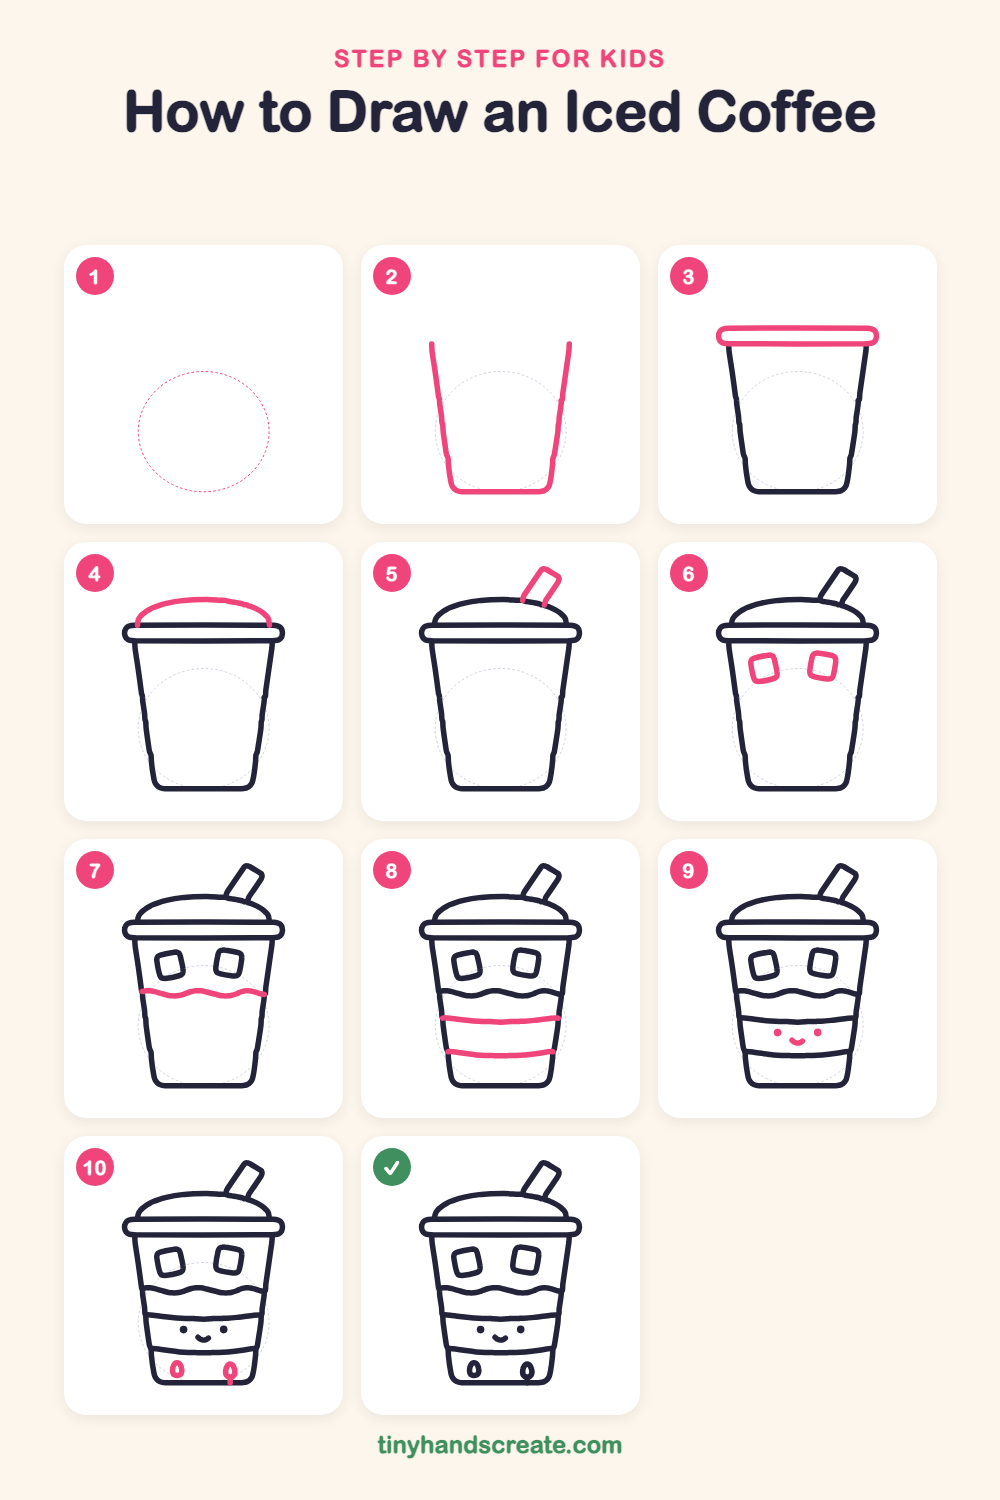
Step 1: Guide shapes
Lightly sketch this oval. It only shows where the big parts go, so press softly. You will erase it at the end.
Step 2: The cup
Draw two slanted lines that get closer together as they go down, like a tall bucket. Join the bottoms with a flat line and round off the two corners.
Step 3: The wide rim
Across the top of the cup, draw a long, flat shape with round ends, like a stretched-out pill. It should stick out a little past both sides of the cup.
Step 4: The dome lid
On top of the rim, draw a gentle curved hill that starts at one side of the rim and ends at the other.
Step 5: The straw
Draw a short, thin rectangle tilted to the right, poking out of the top of the dome. Start its bottom edge on the curve of the lid.
Step 6: Two ice cubes
Inside the top of the cup, just under the rim, draw two rounded squares, one on the left and one on the right. Tilt them a little so they look like they are floating.
Step 7: The coffee wave
Below the ice cubes, draw a wiggly line that goes from one side of the cup to the other, like gentle ocean waves.
Step 8: The cup sleeve
Below the wave, draw two gently curved lines going across the cup, with a space between them. This is the cozy band that wraps around the cup.
Step 9: A happy face
Between the two bands, draw two small round dots for eyes. Add a little curved smile in the middle, just below them.
Step 10: Little drops
Near the bottom of the cup, below the lower band, draw two small drops, one on each side. Make each one like a tiny egg shape with a pointy top.
All done!
Erase the guide shapes, go over your lines, then color it in.
Finished your iced coffee? Keep the pencils out and learn how to draw a pomegranate or how to draw a baker next.
Tips for drawing an iced coffee
- Draw the two side lines of the cup so they lean inward toward the bottom. If they are too straight, the cup will look like a box.
- Make the rim wider than the cup so the lid looks like it sits on top. A long, flat pill shape works well.
- Draw the ice cubes as squares with round corners, and tilt them a little so they look like they are floating.
- Keep the straw short and start it right on the curve of the dome so it looks like it pokes out of the lid.
Free iced coffee coloring page
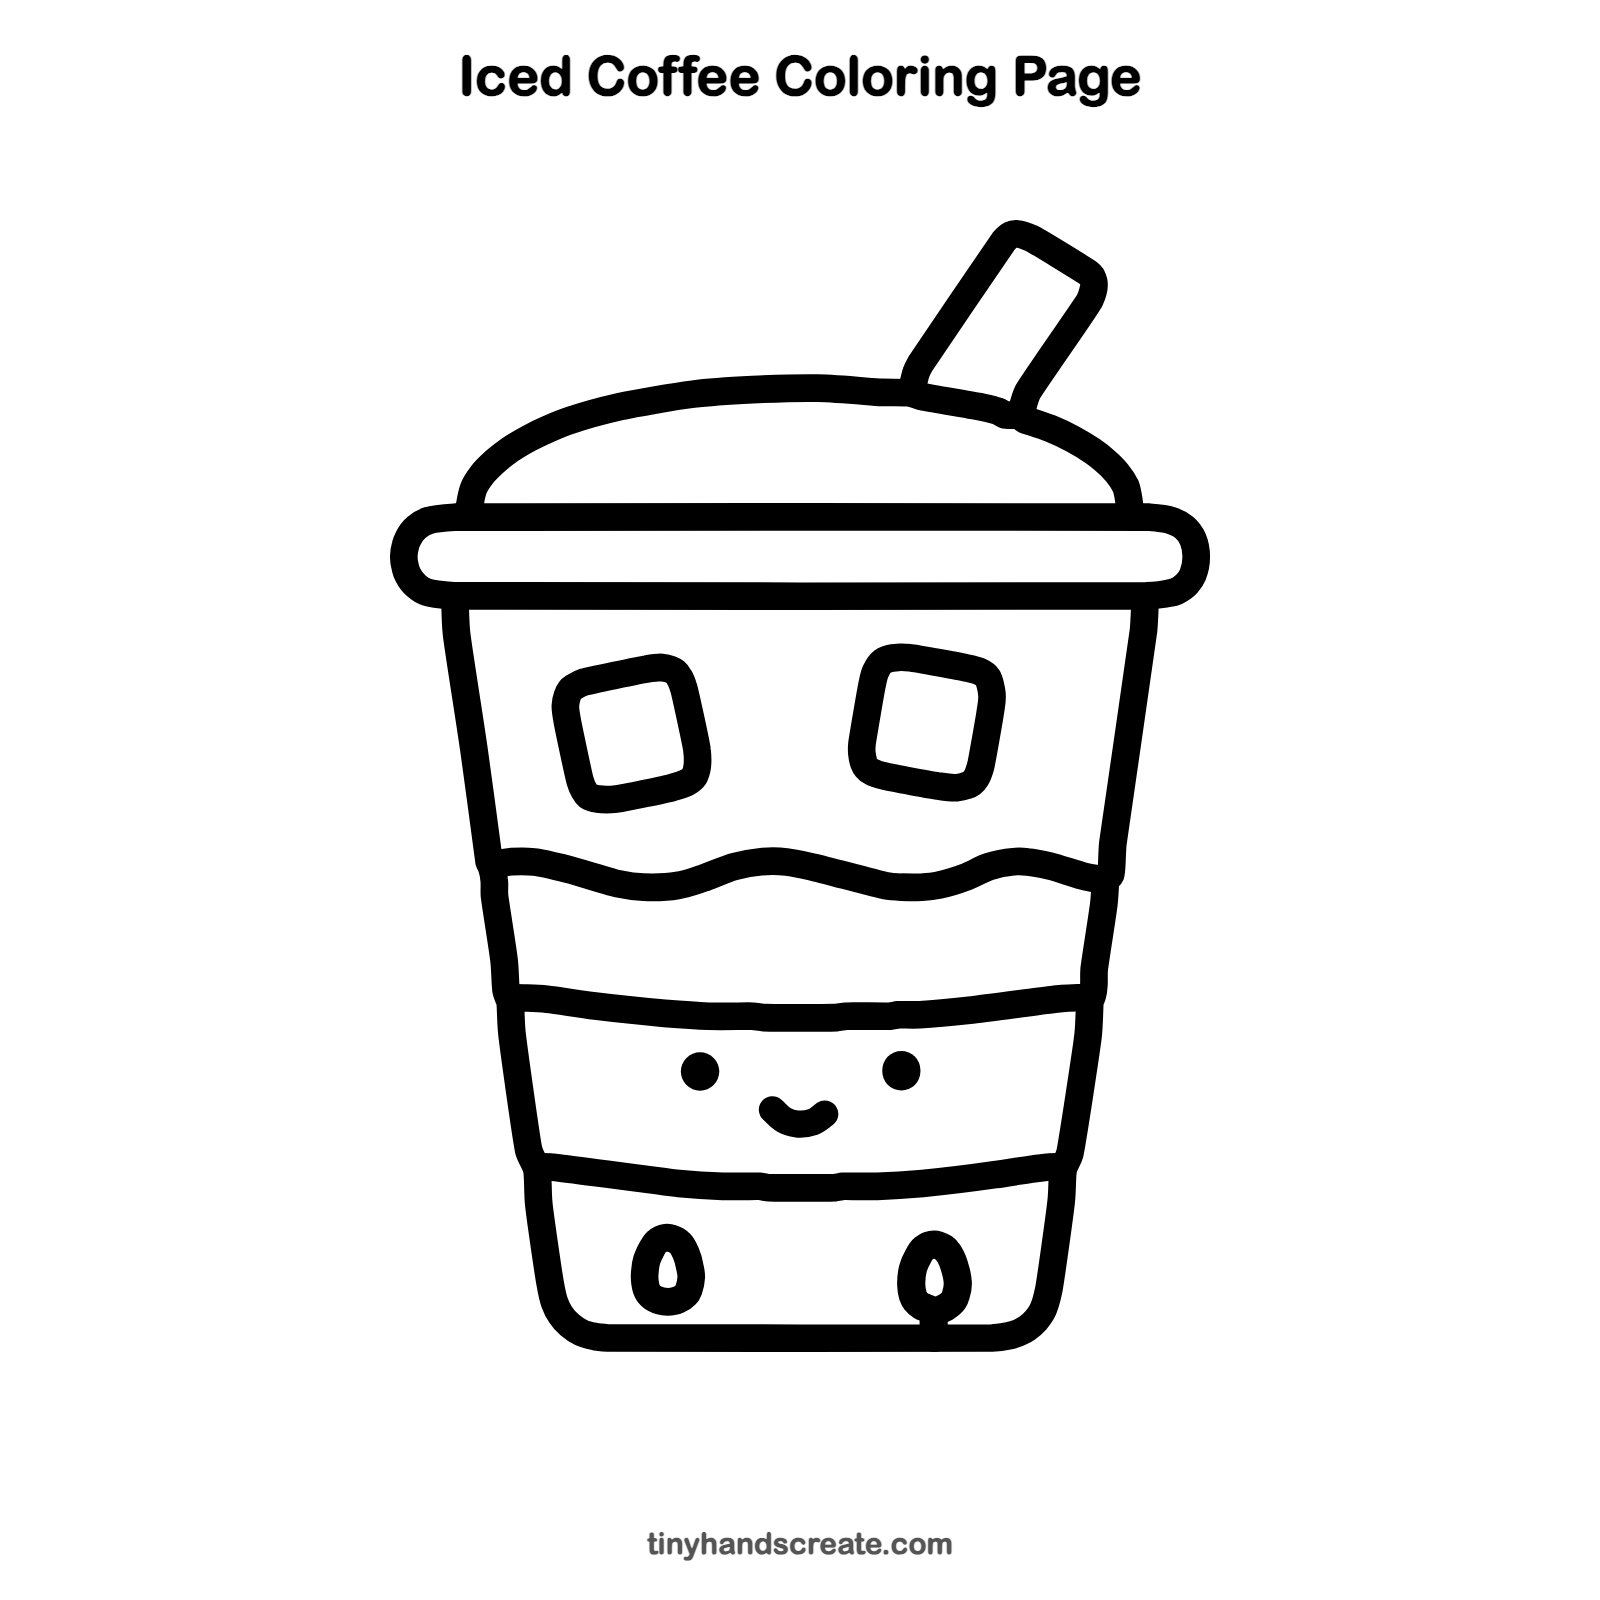
Want to go straight to coloring? Open this iced coffee coloring page at full size and print it. It is the same drawing you just learned, with clean lines ready for crayons or markers.
How to color your iced coffee drawing
Try warm browns and creamy tans for the coffee, light blue for the ice cubes, and a bright color for the straw. For a creative twist, make the sleeve a rainbow of stripes.
Iced coffee fun fact for kids
Ice cubes float because water takes up more space when it freezes, so ice is less dense than the liquid around it.
Questions about drawing an iced coffee
What shapes do I need to draw an iced coffee?
You need a tapered bucket shape for the cup, a long pill shape for the rim, a curved hill for the dome, and a short thin rectangle for the straw. Two rounded squares make the ice cubes.
How do I make my iced coffee look cuter?
Add a face with two round dots for eyes and a small curved smile. Place the face between the two sleeve lines, and keep the eyes a little apart.
How do I draw ice cubes that look real?
Start with a square, then round off each corner. Tilt the cubes a little in different directions so they look like they are floating in the drink.