How to Draw a Rainbow Cake Slice (Easy Step by Step)
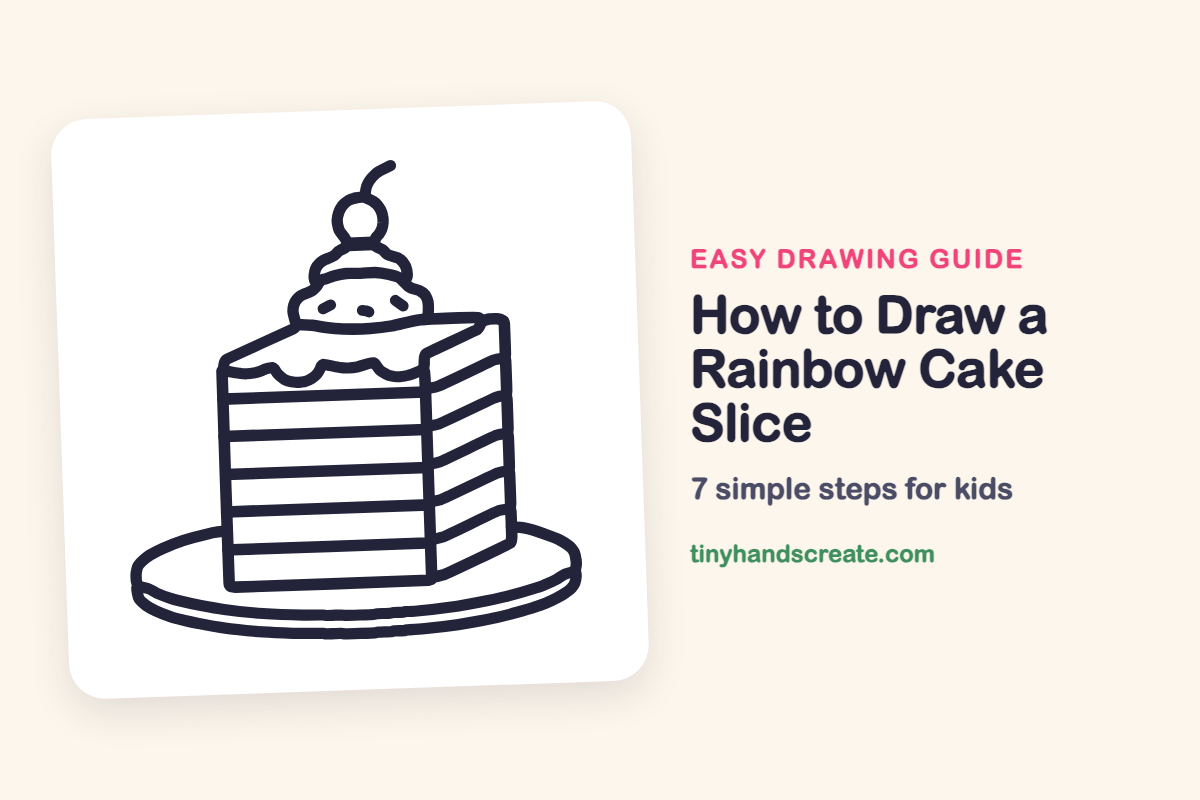
A rainbow cake slice is a sweet drawing built from a box, straight lines and a few round shapes. The stripes make it feel like a real treat, and the cherry on top is the perfect finishing touch. If you can draw a rectangle and a circle, you can draw this cake.
- Easy
- 12 minutes
- 7 steps
You need: paper, a pencil, an eraser, and crayons or markers for coloring.
Start drawing

In this article (7 sections)
How to draw a rainbow cake slice step by step
How to Draw a Rainbow Cake Slice · tinyhandscreate.com
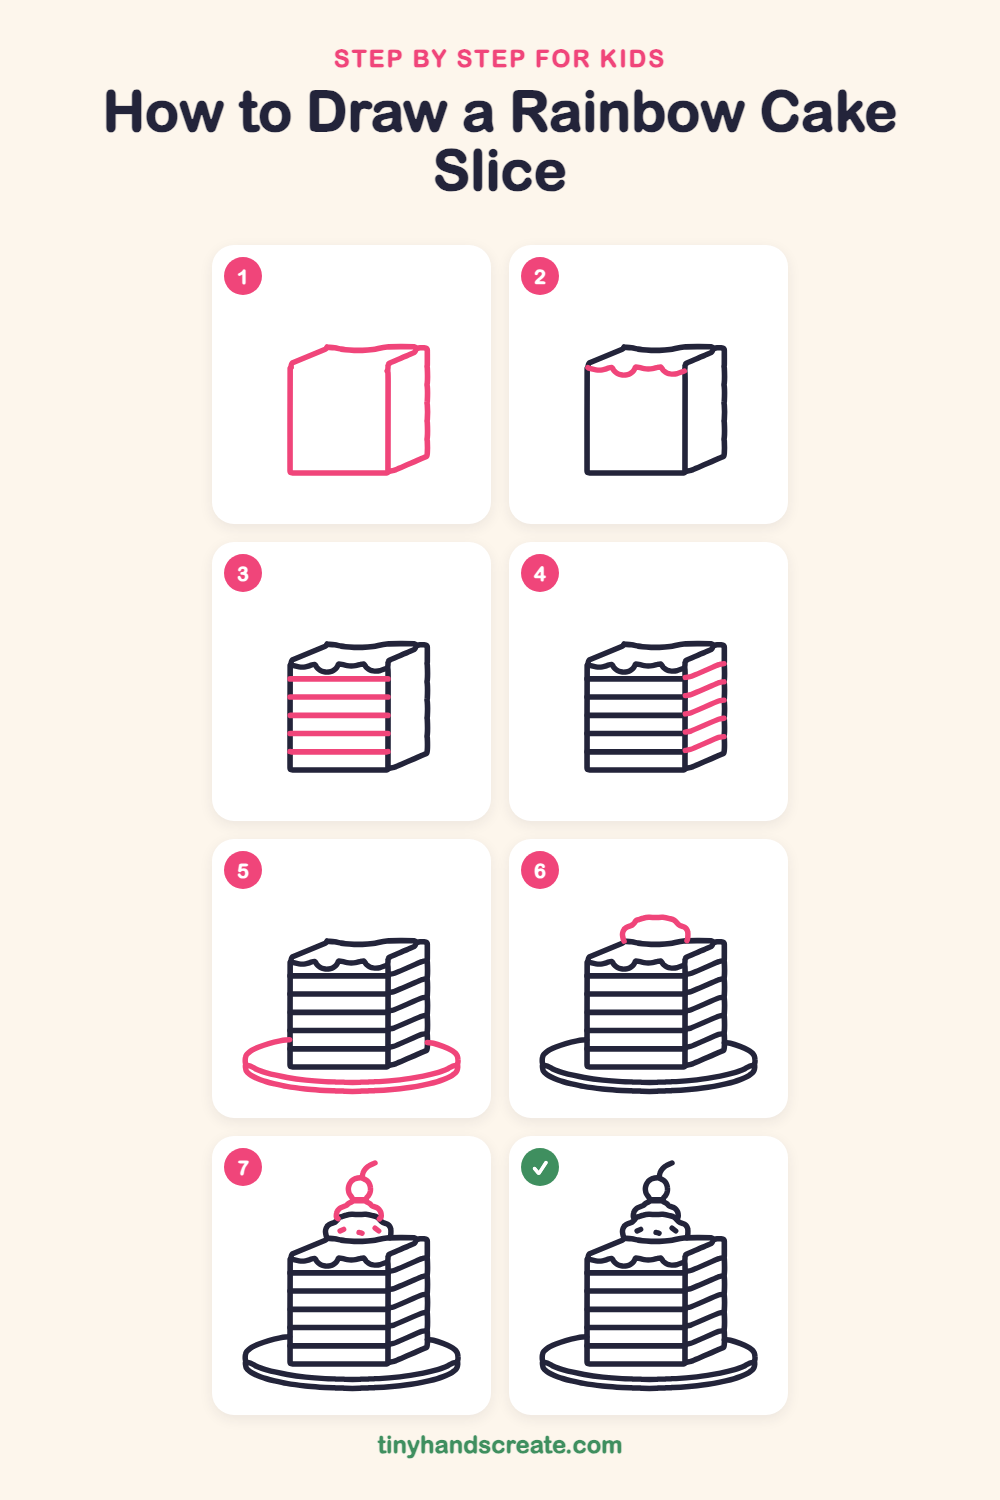
Step 1: The cake block
Draw a tall rectangle for the front of the slice. Then add a narrower slanted side on the right and a top that leans back, so it looks like a box.
Step 2: Wavy icing
Along the top of the front, draw a wavy line made of little round bumps, like a scalloped edge. It looks like icing dripping over the side.
Step 3: Front layer lines
Draw straight lines across the front, from the left edge to the right edge, to split the cake into stripes. Space them evenly, like stair steps.
Step 4: Side layer lines
Now draw slanted lines on the side. Start each one at the end of a front line and slope it up to the right edge, so the stripes turn the corner.
Step 5: The plate
Around the bottom of the cake, draw a wide flat oval for the plate. Let the cake hide the middle part, then add a second curved line below it to give the plate a thick rim.
Step 6: Cream on top
On top of the cake, draw a puffy cloud shape with a bumpy top, like a little hill of cream. Its two ends touch the top of the cake.
Step 7: Cherry and sprinkles
Draw a small circle for the cherry on top of the cream, with a curly stem coming from its top. Add a little curved cap under the cherry and a few short dashes on the cream for sprinkles.
All done!
Go over your lines with a marker, then color it in.
Finished your rainbow cake slice? Keep the pencils out and learn how to draw a snow cone or how to draw a pickle next.
Tips for drawing a rainbow cake slice
- Draw the front rectangle first and keep the side narrow. A wide side makes the cake look flat.
- Make the stripe lines on the side slope up to the right, the same way the top edge of the side does, so they all point in one direction.
- Draw the cream as a puffy hill with a few soft bumps. Put the cherry right on top so it looks like it is sitting there.
Free rainbow cake slice coloring page
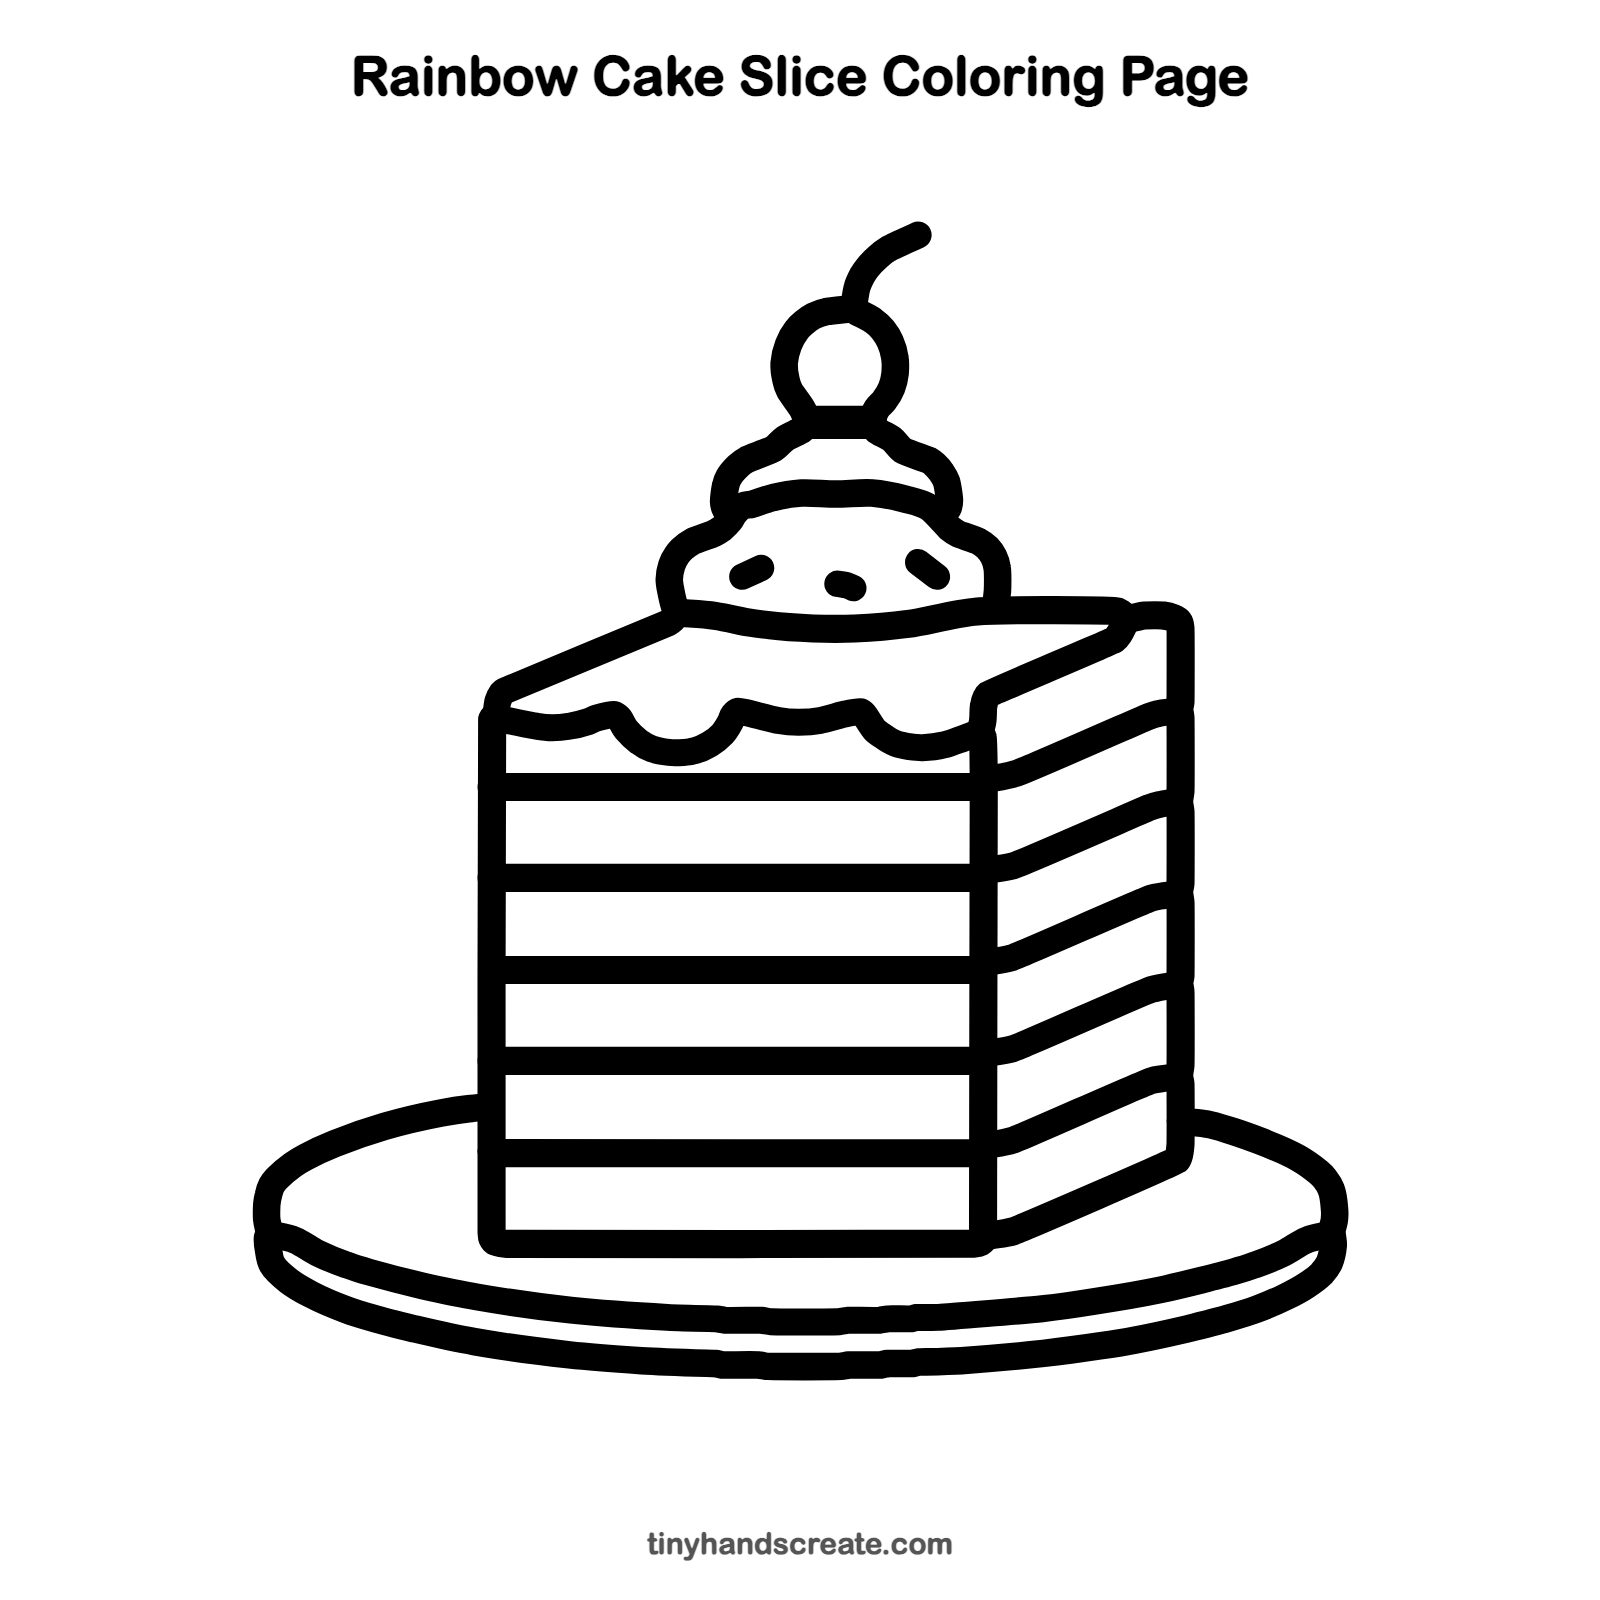
Want to go straight to coloring? Open this rainbow cake slice coloring page at full size and print it. It is the same drawing you just learned, with clean lines ready for crayons or markers.
How to color your rainbow cake slice drawing
Color the stripes in rainbow order from top to bottom, such as red, yellow, green, blue and purple. For a twist, give each stripe a different pattern like dots or zigzags.
Rainbow cake slice fun fact for kids
Rainbow cakes are made by splitting the batter into portions, tinting each portion a different color, and stacking the baked layers so a cut slice shows every stripe.
Questions about drawing a rainbow cake slice
What shapes do I need to draw a rainbow cake slice?
You need a rectangle for the front, a narrow slanted shape for the side, ovals for the plate and a circle for the cherry. The cream is just a puffy cloud shape with a few round bumps.
How do I make the layers look even?
Mark small dots down the left edge at equal spaces first, then draw a line across from each dot. Using a ruler for the first try is fine.
How do I make my cake look more yummy?
Add extra sprinkles on the cream and make the icing bumps a little bigger. Bright rainbow colors make it look even tastier.