How to Draw a Griffin (Easy Step by Step)
This post contains affiliate links. As an Amazon Associate I earn from qualifying purchases.
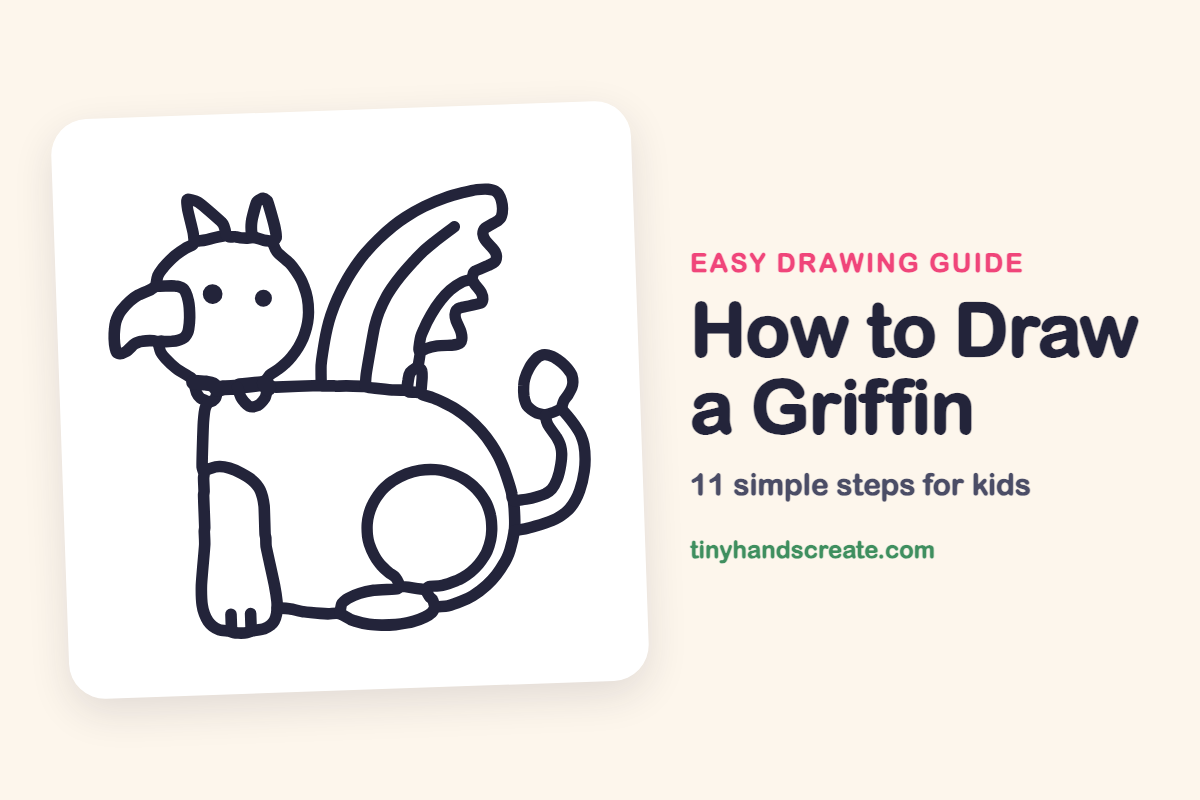
A griffin is part bird and part lion, which makes it a fun mix of shapes to draw. You will build it from a circle, a hooked beak, a tall wing, and a big curved body. Each piece is simple, and together they make a creature from old stories.
- Medium
- 20 minutes
- 11 steps
You need: paper, a pencil, an eraser, and crayons or markers for coloring.
Start drawing
In this article (7 sections)
How to draw a griffin step by step
How to Draw a Griffin · tinyhandscreate.com
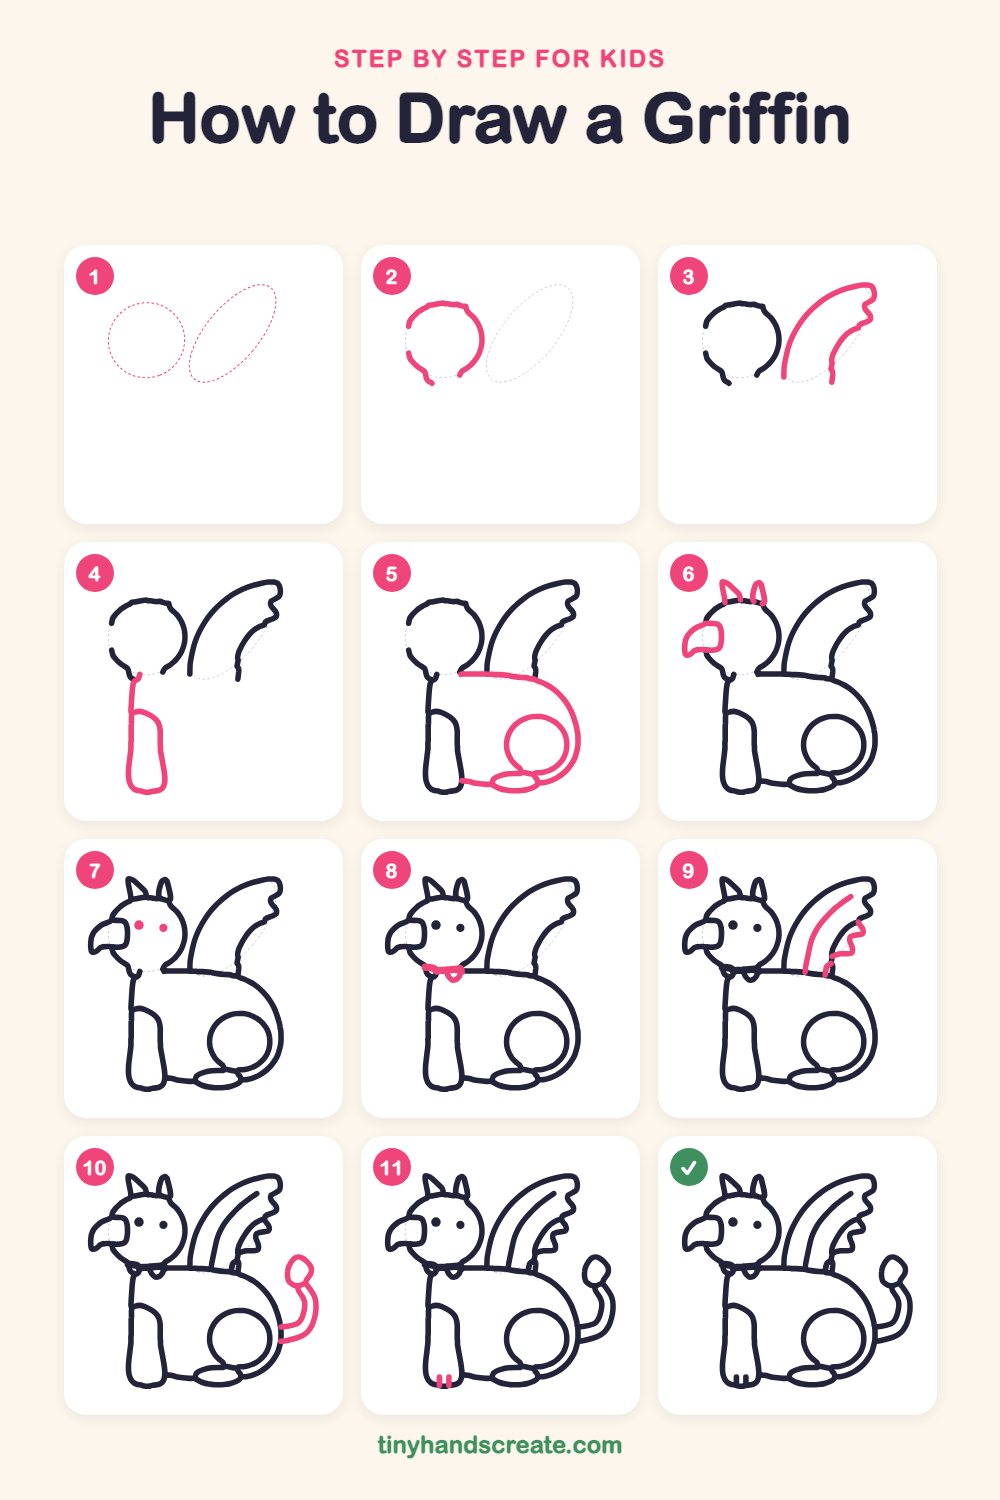
Step 1: Guide shapes
Lightly sketch these 2 ovals. They only show where the big parts go, so press softly. You will erase them at the end.
Step 2: The round head
Draw a big circle for the head, but leave a small gap at the bottom. Start near the bottom left, go up and around, and stop at the bottom right.
Step 3: The tall wing
To the right of the head, draw a tall curved wing that rises up and ends in a bumpy edge at the top. Then draw a second curve down the far side of the wing so it looks like a big feather shape.
Step 4: The front leg
Start at the bottom of the head and draw a line straight down. Then draw a tall, narrow leg with a rounded top and a flat, rounded foot at the bottom.
Step 5: Back, haunch and foot
Draw a long curved line from the wing across the back and down around the rump. Add a circle inside it for the back leg, then a small oval foot at the bottom and a line joining it to the front foot.
Step 6: Beak and ears
Draw a hooked beak on the left side of the head, curving down like a little hook. Add two small pointy ears on top of the head.
Step 7: The eyes
Add two small dots for eyes on the head, just above and behind the beak.
Step 8: The collar
Draw a short curved line where the head meets the body. Add a tiny rounded point hanging below it for a collar.
Step 9: Wing feathers
Draw a long curved line inside the wing, following its shape. Then add a short bumpy zigzag line near the bottom edge of the wing for feathers.
Step 10: The tail
Start at the back of the body and draw a curved tail that swoops up and over. Finish the top with a small round puff, like a lion's tail tuft.
Step 11: Claws
Draw two short straight lines at the bottom of the front foot to make the claws.
All done!
Erase the guide shapes, go over your lines, then color it in.
Finished your griffin? Keep the pencils out and learn how to draw a Pegasus or how to draw a kraken next.
Tips for drawing a griffin
- Draw the head circle first and leave room on the left for the hooked beak, so it does not run off the page.
- The wing is the trickiest part. Draw the tall curved outline first, then add the feather lines inside it one at a time.
- For the back leg, draw the big circle first and tuck the small oval foot under it so they touch.
Free griffin coloring page
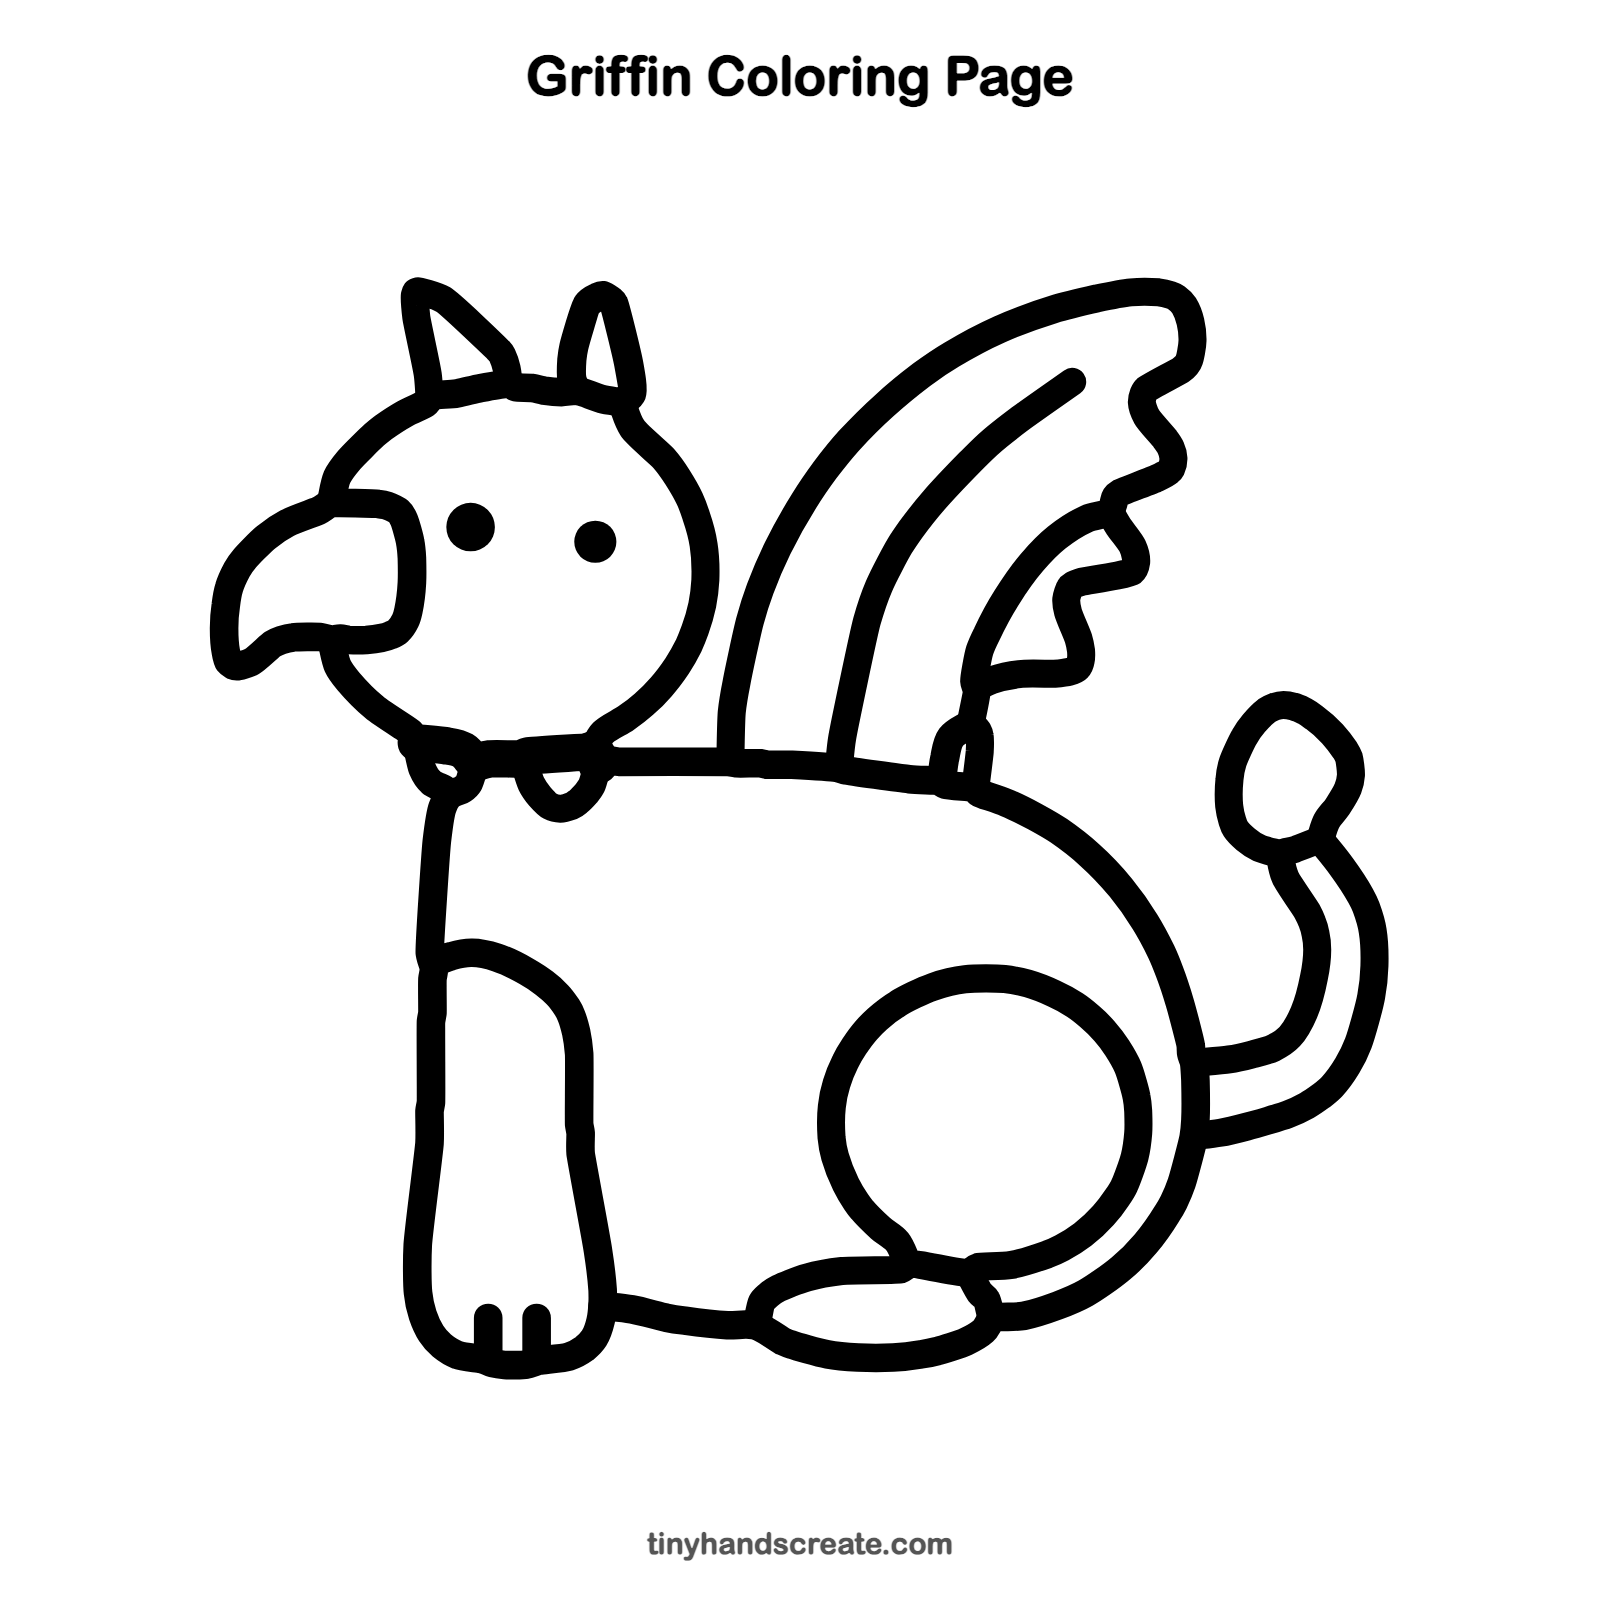
Want to go straight to coloring? Open this griffin coloring page at full size and print it. It is the same drawing you just learned, with clean lines ready for crayons or markers.
How to color your griffin drawing
Try golden brown for the lion body and a bright yellow beak, with white or cream wings. For a creative twist, color the wing a different shade in each section, like a rainbow wing.
Griffin fun fact for kids
The word griffin comes from an old Greek word, gryps, which means hooked or curved. That fits the griffin's curved beak.
Questions about drawing a griffin
What shapes do I need to draw a griffin?
You need a circle for the head, a long curved line for the back, a circle and an oval for the back leg and foot, and small triangles for the ears. The beak, wing and tail are curved shapes you add along the way.
How do I make my griffin look cuter?
Keep the eyes as small round dots and the beak short and curvy. A fluffy tail tip and a small collar also add charm.
What is a griffin?
A griffin is a made-up creature with the head and wings of an eagle and the body of a lion. It comes from very old myths and stories.