How to Draw a Fire Hydrant (Easy Step by Step)
A fire hydrant is a fun first object to draw because it is made almost entirely of simple shapes: rectangles, circles, and one big half circle for the dome. Each part sits on top of or beside the one before it, so you can build it up one shape at a time. When you finish, you have a sturdy little street character with side arms and a round face on its belly.
- Medium
- 12 minutes
- 9 steps
You need: paper, a pencil, an eraser, and crayons or markers for coloring.
Start drawingIn this article (7 sections)
How to draw a fire hydrant step by step
How to Draw a Fire Hydrant · tinyhandscreate.com
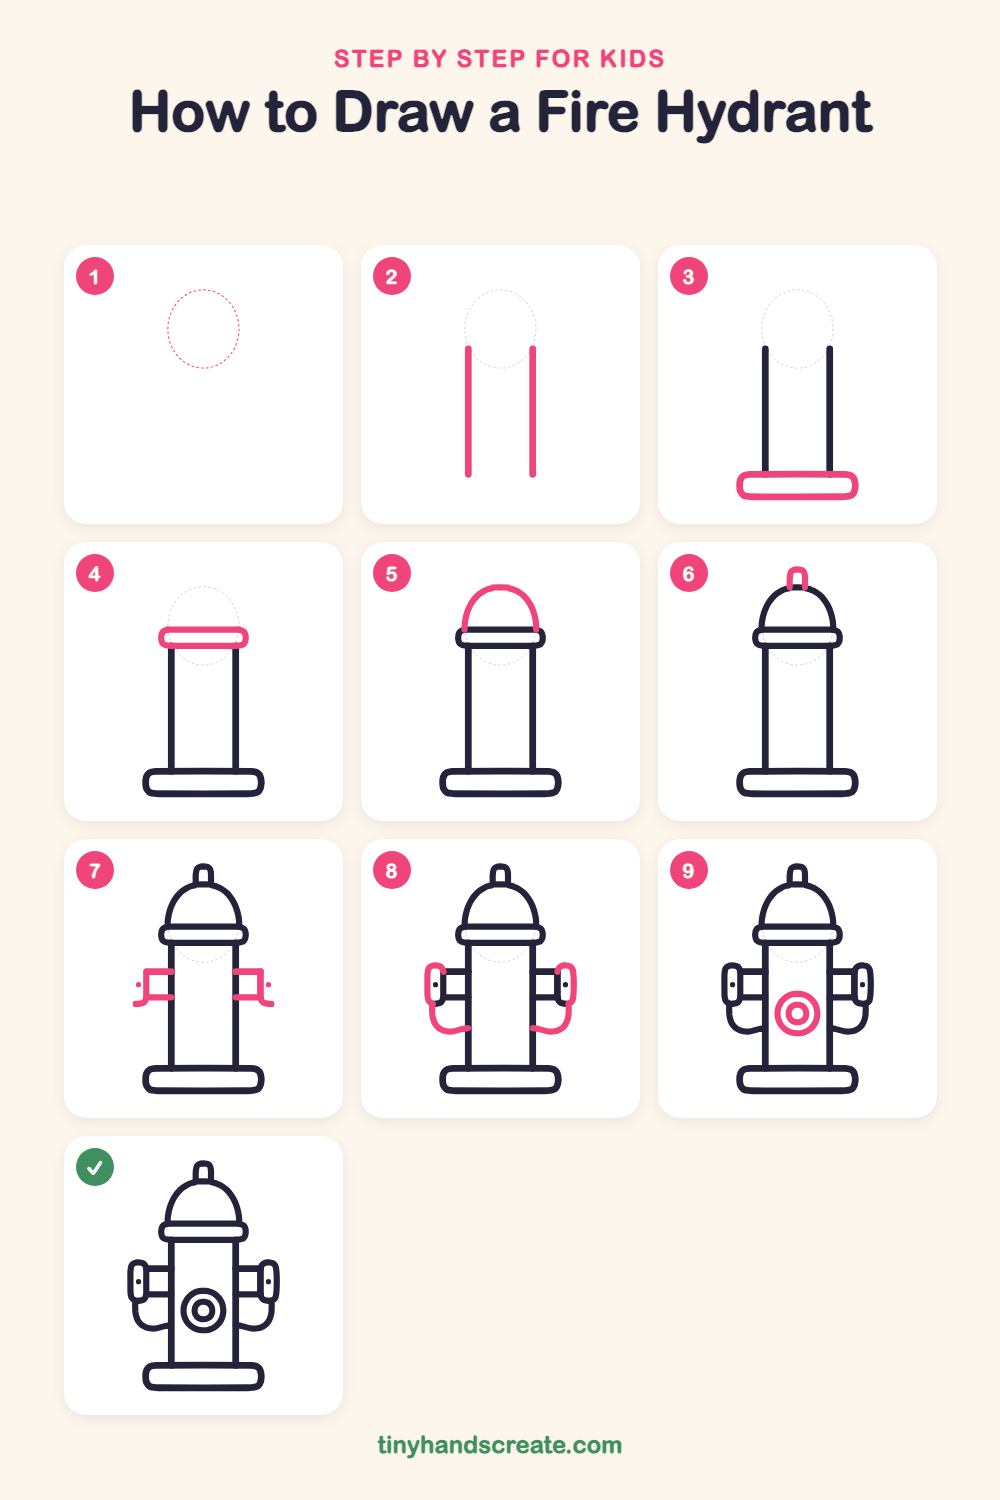
Step 1: Guide shapes
Lightly sketch this oval. It only shows where the big parts go, so press softly. You will erase it at the end.
Step 2: The tall body
Draw two straight lines going up, side by side, like the sides of a tall can. Leave the top and bottom open for now.
Step 3: The wide base
At the bottom of the body, draw a long, flat rectangle with rounded corners. It is wider than the body, like a little step the hydrant stands on.
Step 4: The collar
At the top of the body, draw a short, wide rounded rectangle that sticks out past both sides, like a ring around the top.
Step 5: The dome
On top of the collar, draw a big half circle like a bowl turned upside down. Start and end the curve at the collar.
Step 6: The top cap
Draw a small rounded bump, like a little tunnel shape, on the very top of the dome.
Step 7: The side pipes
On each side of the body, draw a short straight line sticking out, then a short line going down, then another short line back to the body. This makes a small boxy pipe on each side.
Step 8: Caps and hoses
At the end of each pipe, draw a tall rounded cap shaped like a pill, then add a small dot in the middle of it. Under each cap, draw a curvy U-shaped hose that swings back to the body.
Step 9: The round port
In the middle of the body, draw a big circle. Inside it, draw a smaller circle.
All done!
Erase the guide shapes, go over your lines, then color it in.
Finished your fire hydrant? Keep the pencils out and learn how to draw a mailbox or how to draw a street lamp next.
Tips for drawing a fire hydrant
- Draw the two body lines first and keep them parallel. If they lean, the whole hydrant will look wobbly, so use the edge of a piece of paper or a ruler to guide the first one.
- The side pipes are the trickiest part. Make both pipes the same height as each other, and line up the caps so the hydrant looks balanced.
- For the round port, start with the big circle, then draw the smaller circle inside it. Aim to keep them centered, like a target.
Free fire hydrant coloring page
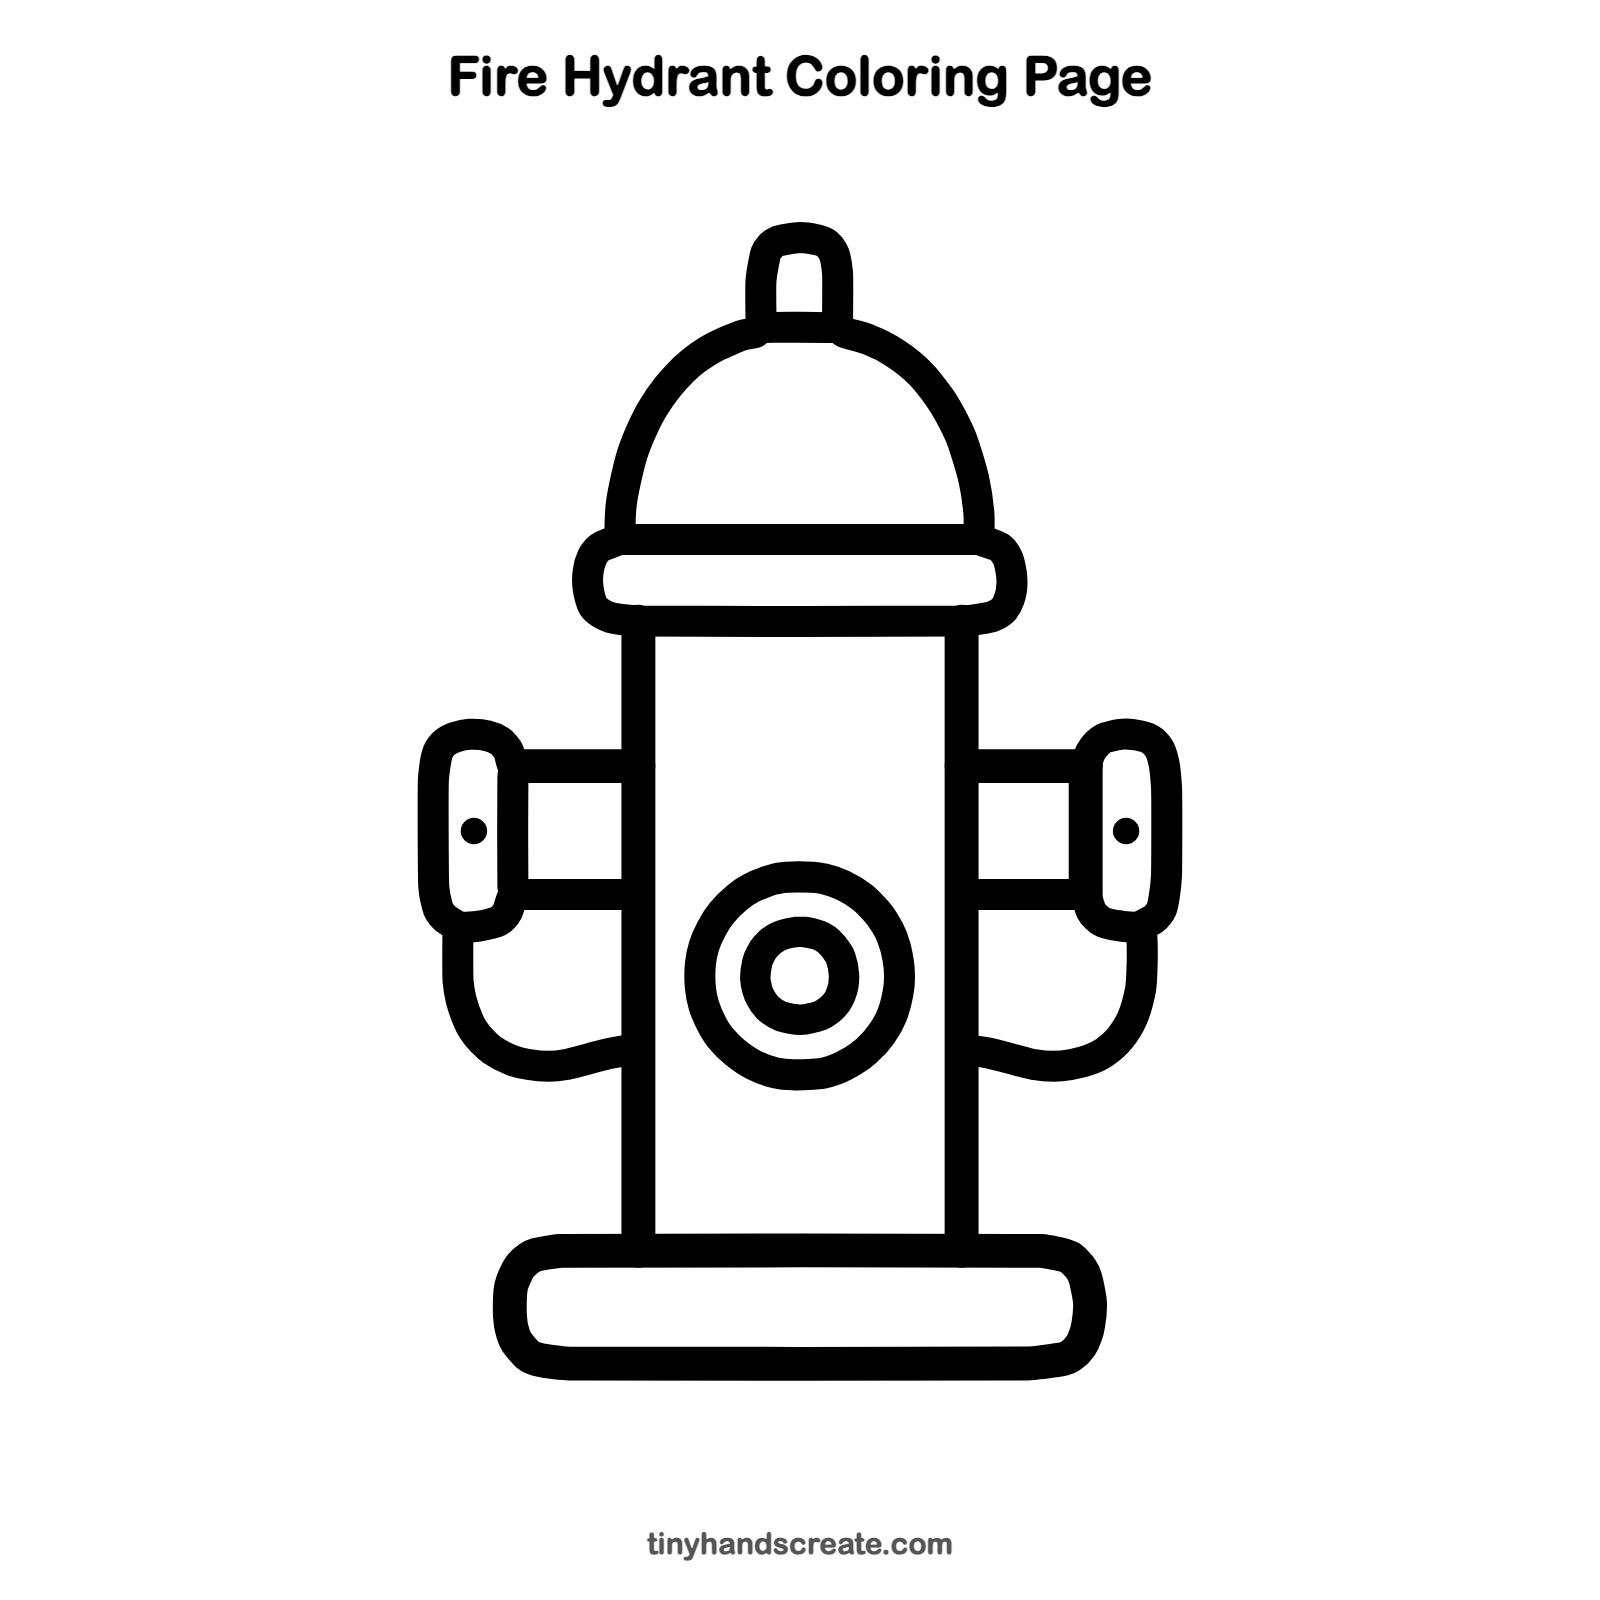
Want to go straight to coloring? Open this fire hydrant coloring page at full size and print it. It is the same drawing you just learned, with clean lines ready for crayons or markers.
How to color your fire hydrant drawing
Red or yellow are the classic hydrant colors, with silver or gray for the caps and port. For a creative twist, paint your hydrant in rainbow stripes, or draw a puppy standing beside it.
Fire hydrant fun fact for kids
Fire hydrants are usually painted bright colors, often red or yellow, so firefighters can spot them quickly, even in snow. Some cities use different colors to show how much water a hydrant can supply.
Questions about drawing a fire hydrant
What shapes do I need to draw a fire hydrant?
You need rectangles for the body, base, and collar, a half circle for the dome, and circles for the round port. Rounded corners on the rectangles make it look just right.
How do I make my fire hydrant look more balanced?
Draw a light line down the middle first and keep both sides the same. Match the pipes, caps, and hoses on the left and right, and the hydrant will look neat.
How long does it take to draw a fire hydrant?
Most kids finish in about 10 to 15 minutes. Take your time with the side pipes and the circles, since those are the parts that take the most care.